

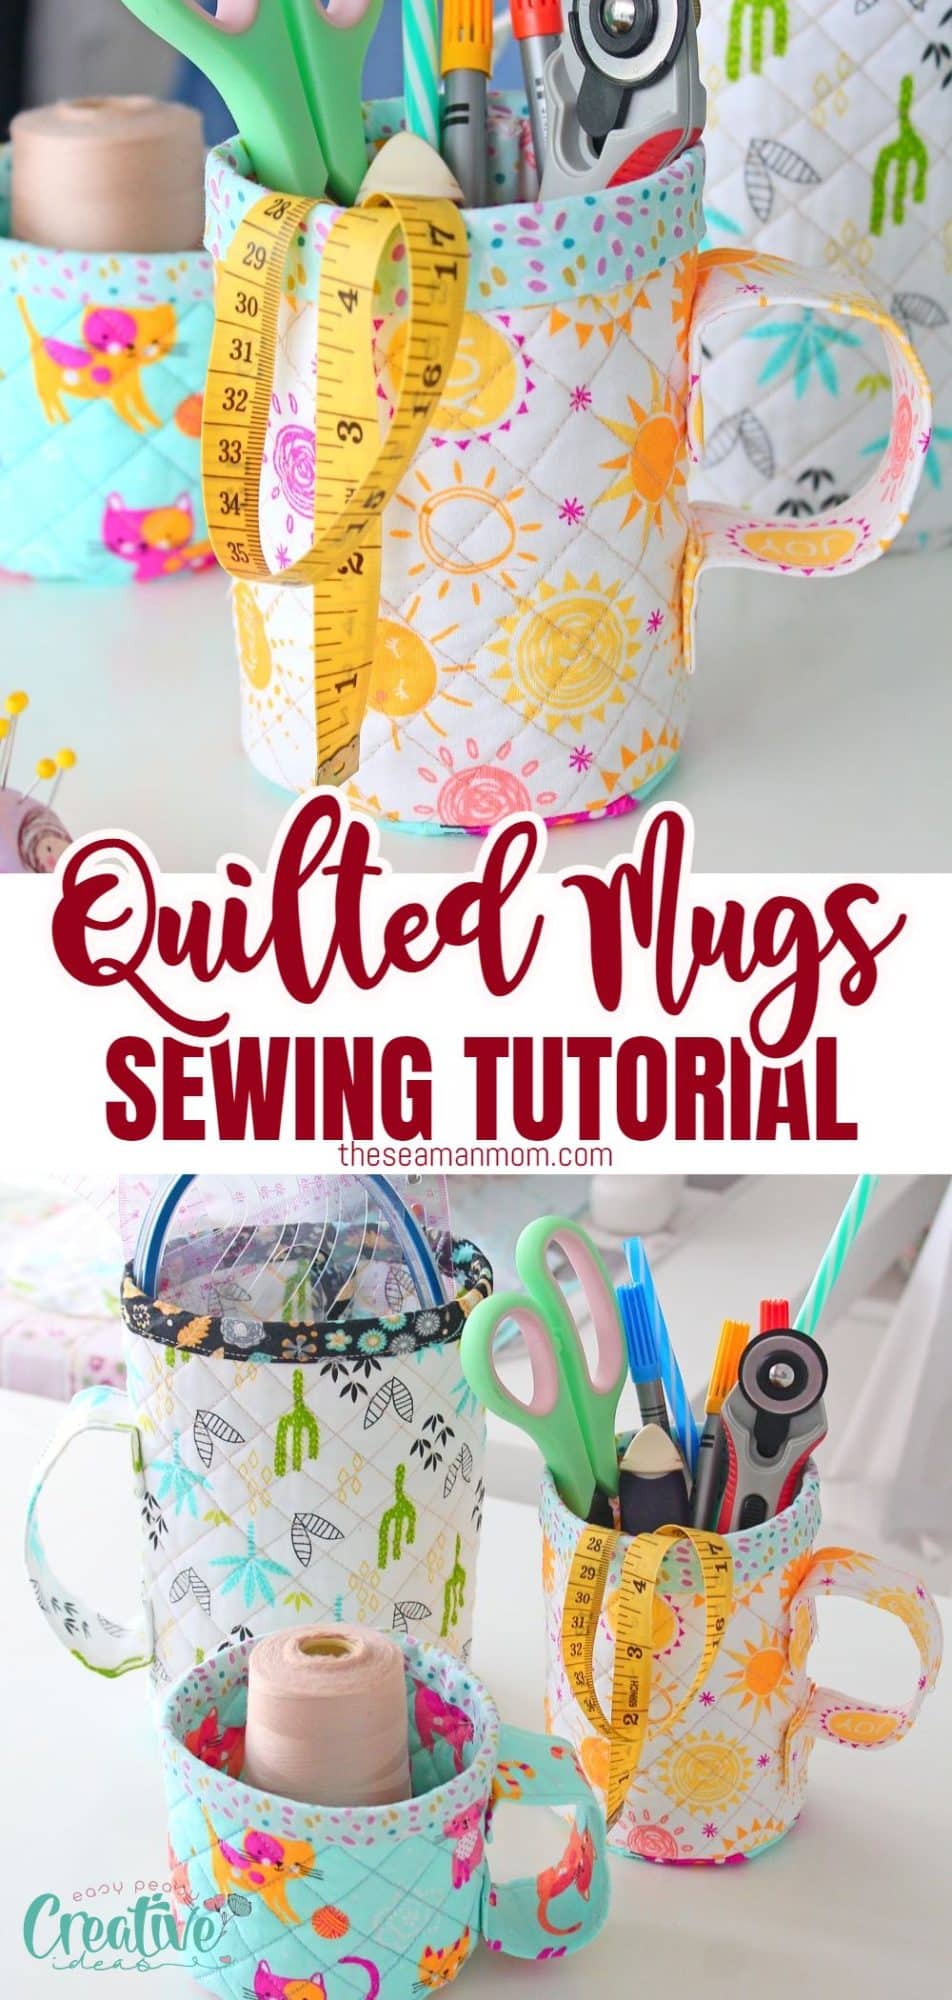
Quilted mug shaped fabric containers
Making your own quilted fabric containers is a great way to store small items in a stylish and practical manner. This type of container uses fabric to create a unique, quilted mug look that is both decorative and functional. With easy-to-follow steps, you can quickly create beautiful quilted storage containers that will add an extra bit of flair to any room.
Quilted mug shaped fabric containers
Learn how to sew some cute fabric containers with this easy step-by-step tutorial. Sturdy enough for everyday use, and beautiful enough for gift-giving, these quilted storage containers can be used to store just about anything. In this simple guide, you will learn the basics of this fun craft project so you can sew your own adorable quilted storage for anything you need!
This article has been converted to a PDF file, available to purchase here! However this tutorial is free to read on the website.
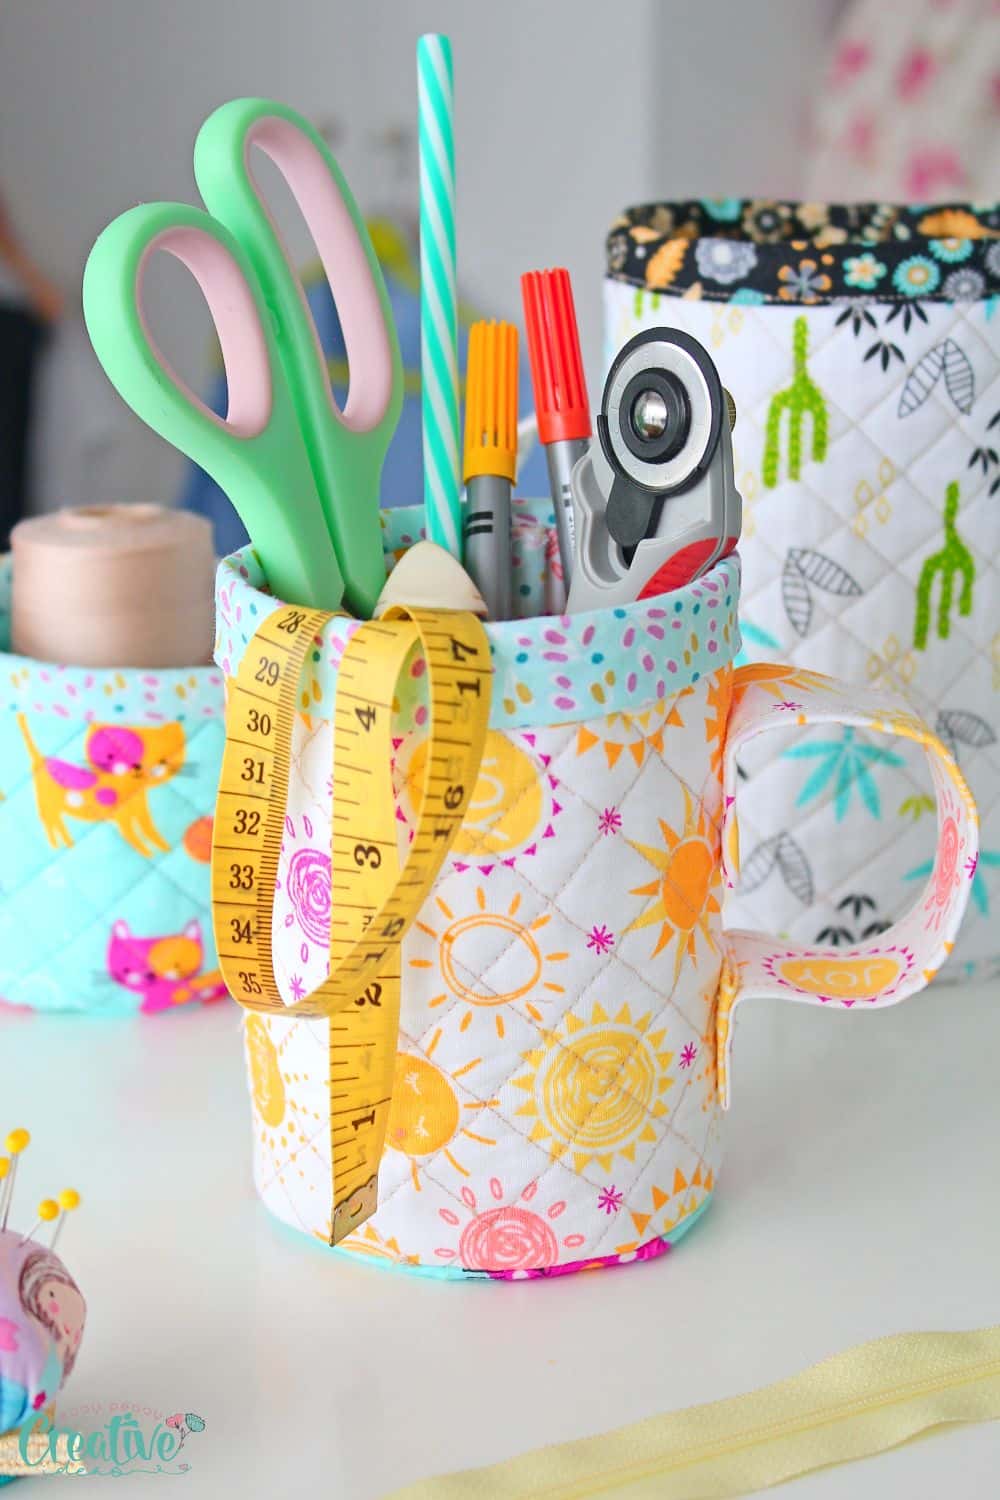
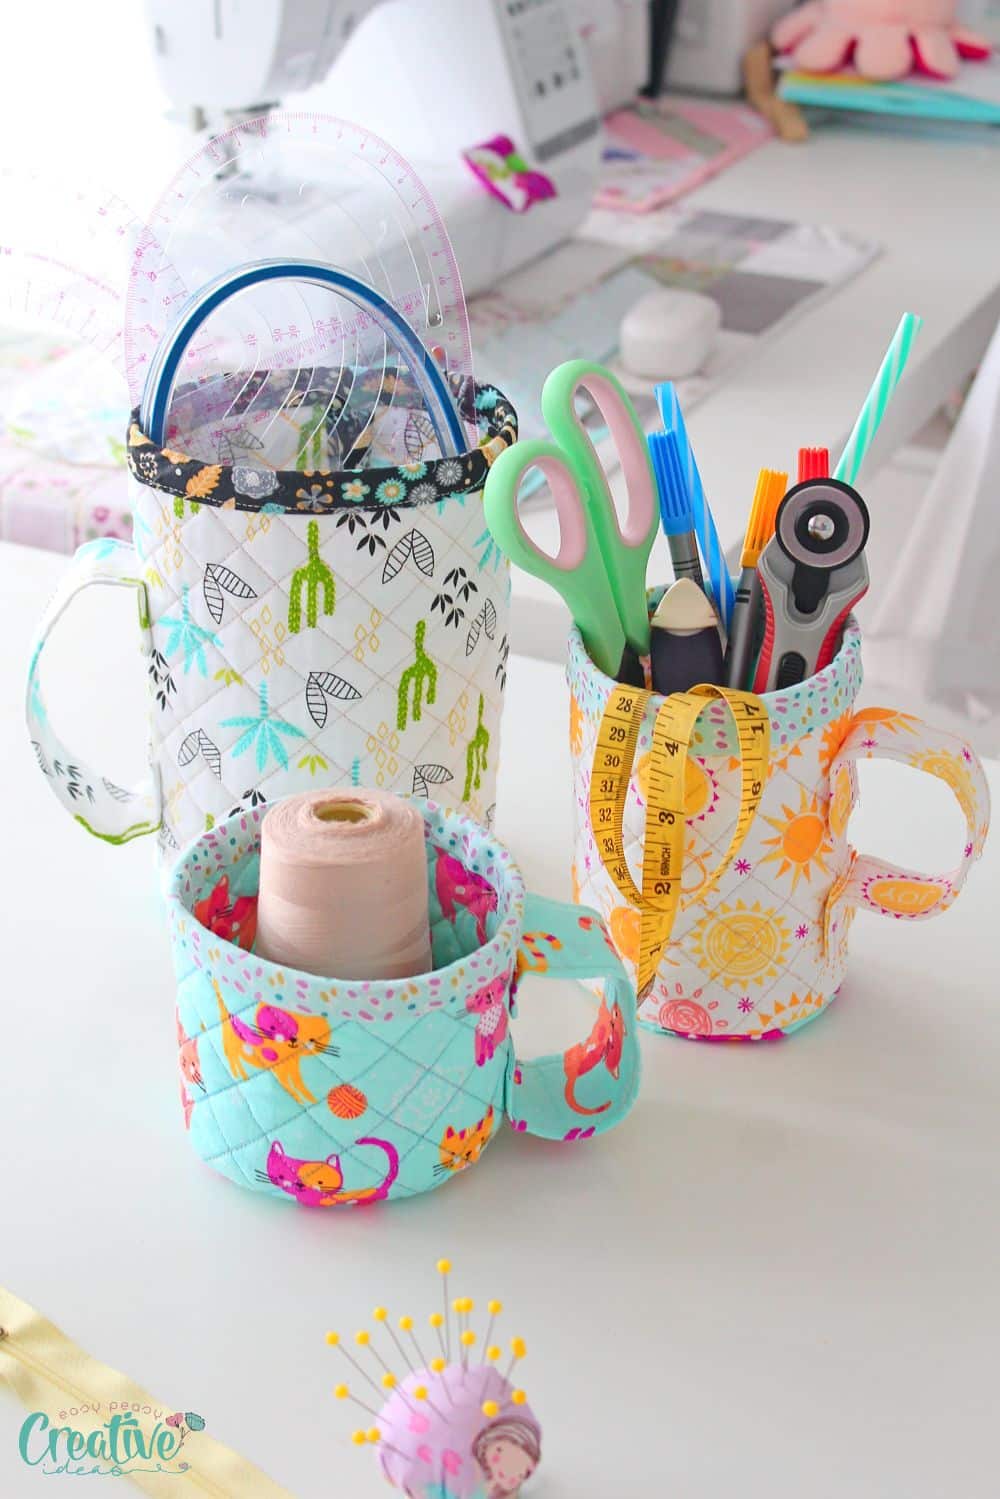
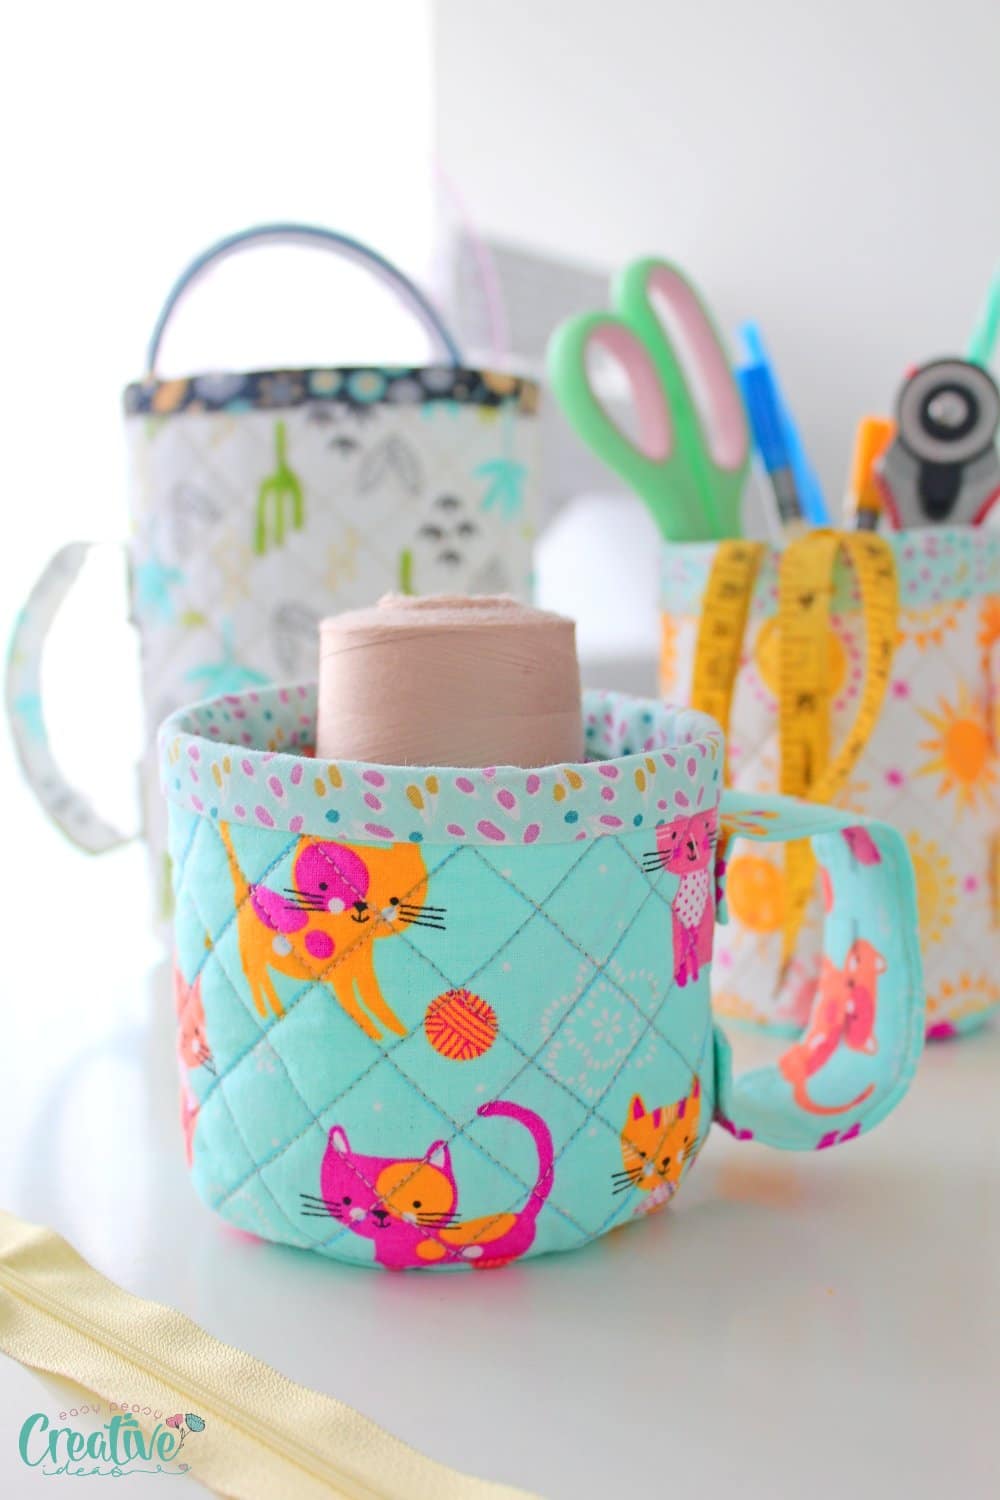
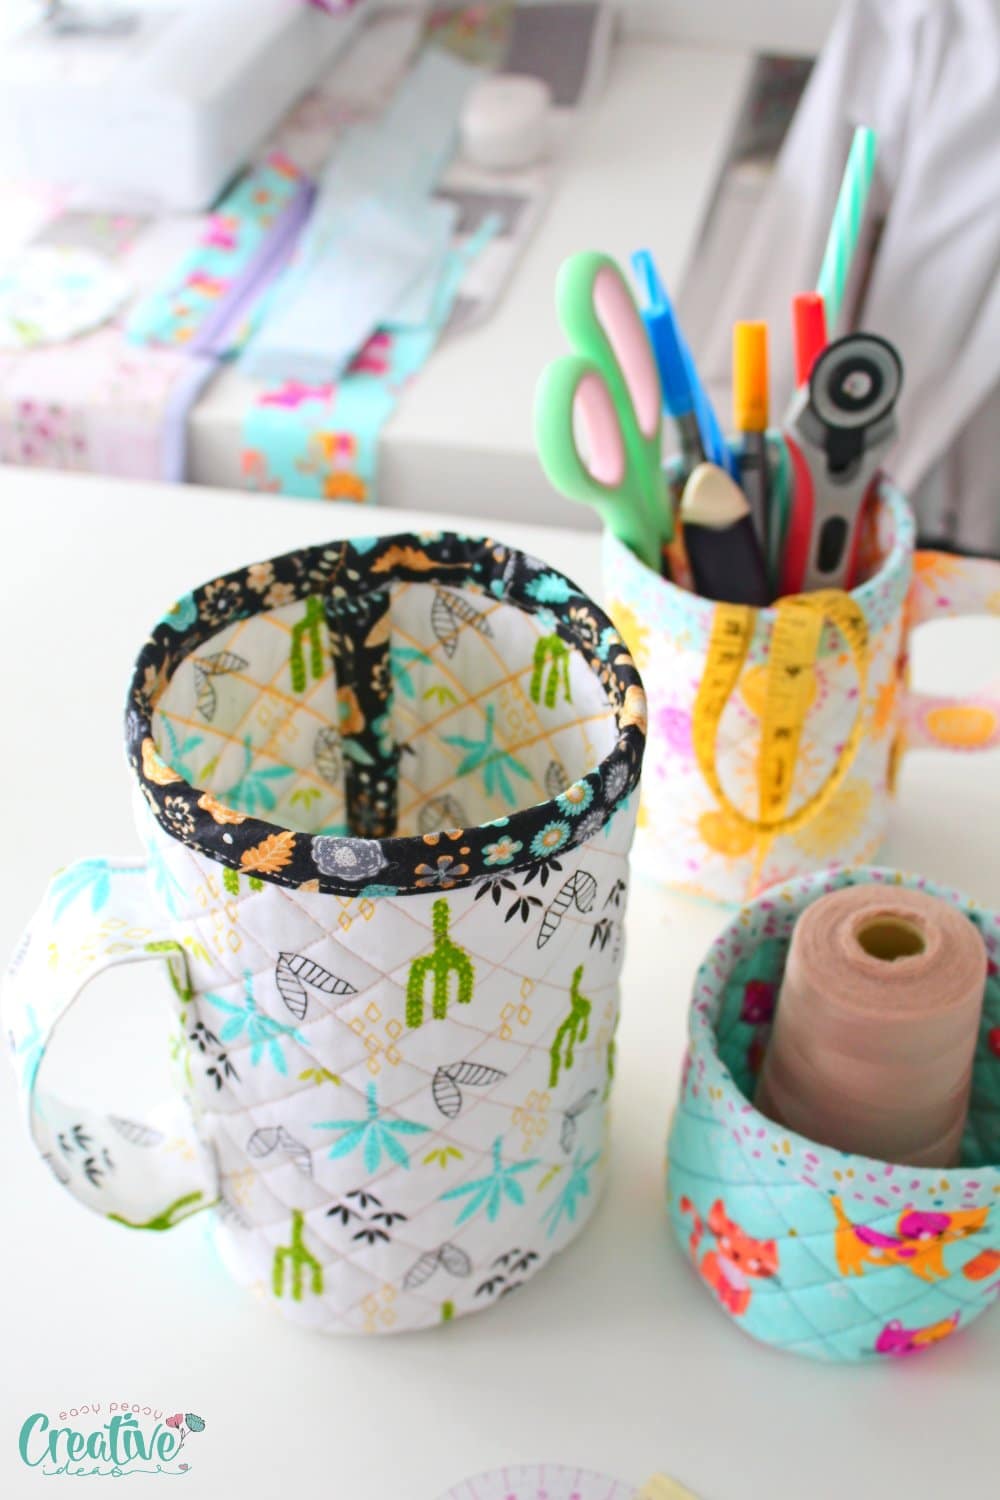
Mug shaped fabric containers are the perfect way to add a pop of color and style to your home. Not only are they cute, but they also offer practical storage solutions. With quilted stitching and an easy-to-use shape, these containers can be used for everything from kitchen supplies to office supplies or even craft materials! All you need is a few basic materials and a bit of time to make your own beautiful, custom-made quilted fabric cups. So get ready for some creative fun – you can create something truly unique that will last for years!
More quilting ideas you will love:
- French braid mini quilt
- Oval pocket potholders
- Quilted handbag
- Toiletry bag with selvage fabric
- Easy quilted potholders
- Quilted zipper pouch
- Quilted phone charger holder
What is the best fabric to use for these fabric containers?
Cotton fabrics such as quilting cotton and muslin are the best fabrics to use for these quilted storage containers. They offer a sturdy but lightweight base that will hold its shape even if it’s filled with heavier items. Other fabrics such as canvas or denim can also be used, depending on the desired look and feel of your container and your level of expertise. Feel free to experiment with different colors and patterns of fabric to find the perfect look for your quilted mugs!
I would recommend using fabric scraps for these mugs, especially for smaller ones and the handle. Instead of creating more scraps, you can put those scraps already hiding in your closet to a good use, right?
What are some other uses for these mugs?
These mugs can be used to store kitchen utensils (or even cookies), office supplies, craft materials in craft rooms, as a bin for toys in kids’ room and more! They also make great gifts for any occasion or holiday. You can also use them to decorate an empty shelf or make one in a larger size and use as a fabric bin in your sewing room, as a container for your blankets, or baskets for laundry rooms, storage containers in the closets and much more. The possibilities are endless and with these cute quilted mugs, keeping the clutter away has never been easier!
How can I make my mug extra special?
You can add details like fabric appliques, beads, buttons, or ribbons to the outside of your mug for a unique and personalized look! Get creative and have fun with it!
How can I keep my mug looking its best?
Spot cleaning is recommended for your mugs, as machine washing may cause them to lose their shape or damage the quilting. Use a mild detergent and warm water and dab at any dirt spots with a damp cloth. Allow it to air dry and press when done to keep it looking its best. When spot cleaning is not an option, hand washing is the best way to clean your mugs without damaging them.
How long should my mug last?
With proper care and cleaning, your quilted mugs should have a long life! The fabric and batting used for the mugs are strong and durable, so they should be able to withstand everyday use. However, if they ever start to look worn or deteriorate, you may want to consider replacing them. Quilting another set of these cuties is always a fun option too!
How long does it take to make a mug?
Depending on your skill level and the complexity and size of the design, making a quilted mug can take you anywhere from 1-3 hours. Once you’ve practiced a few times, the process will become easier quicker.
Are there any special techniques I should know when making a quilted mug?
Yes. Here are a few skills you need to master for sewing these fabric containers:
- You need to be comfortable with sewing different shapes (convex and concave) and here is a tutorial to help you start with that.
- You’ll also need to have some experience in adding bias tape or binding to round shapes that are small and thick. Finishing the bottom and the top of the mugs with bias tend to cause troubles to those without experience. These were the areas I spent most of my time when quilting these fabric containers.
- When sewing the handles, if your mug is small, you’ll have some difficulties in attaching them to the mug. If you struggle with this step, hand sewing them is a great option.
Is this project beginner friendly?
No, this is not recommended for beginners. As mentioned earlier, you will need to have some experience in quilting, sewing different shapes together and attaching bias tape to thick round areas before attempting this project. However, if you are willing to put in the effort, practicing and mastering the techniques required for making these mugs can be a great learning experience!
I still want to sew these quilted mugs! How do I make this project beginner friendly?
If you are a beginner but want to give these fabric mugs a try, there are a few things you can do to modify this project a little and make sewing it easier:
How to sew the mugs easier
- Start by making your mugs in a larger size (not necessarily taller but wider). This will allow you better control over sewing those round shapes and the handles.
- Hand stitch the bottom to the body of the mugs using a basting stitch. This helps with keeping the pieces together in the next step.
- Sew slow or slower than you are used to. Remove the basting stitches once done.
Tips for the bias tape
- Use double fold bias tape that is a little wider than the seam to finish the round bottom and the seam in the back of the mug. Making your own bias tape in the size you need is recommended. If you’re not familiar with how to make your own bias, here is a set of tutorials to help you get started:
- How to make continuous bias binding
- How to make bias tape without a bias maker
- Bias maker usage tips
- How to sew single fold bias tape
- How to sew double fold bias tape
- Bias calculator, formula and cheat sheet
- How to join bias tape ends
Tips for the finishing touches
- If you’re having troubles covering the bottom seam in bias tape, consider creating lining pieces for your mugs. Cut and sew the lining as you would the mug. Then place the lining wrong side out. Slide it inside the mug so the wrong sides of the lining and the mug are matching. Pin the tops and sew with 1/4″ allowance. Cover the top in double fold bias tape.
- If you’re struggling with sewing the handles on your sewing machine, hand sewing them is a great option.
- And finally but most importantly, don’t stress! If you’re not able to finish these in one go, that’s totally ok. Continue working on them a bit at a time every day until they’re ready. Remember, Rome wasn’t built in a day!
With these modifications in place, your quilted mugs should be beginner friendly and ready to be used in no time. With a little bit of patience, you’ll be able to make beautiful quilted mugs in no time. So don’t hesitate and start sewing your own today! So let’s get started!

What materials do I need to make these quilted mugs?
You will need some basic tools and notions:
- fat quarter fabric
- batting or fusible fleece
- light or medium weight double sided interfacing
- regular medium weight interfacing
- double fold bias tape
- matching thread
- measuring tape
- yardstick
- quilting ruler
- fabric marker
- scissors
- rotary cutter
- iron
- silicone finger protectors
- pins or quilting clips
- sewing machine
- optional – walking foot to help with the quilting.
Instructions for how to quilt and sew the fabric mugs
I made 3 mugs in different sizes, if you want to follow my measurements:
- for the large mug: rectangle is 16″ by 8″, circle diameter is 5 1/2″
- for the medium mug: rectangle is 13″ by 6″, circle diameter is 4 1/4″
- for the small mug: rectangle is 14″ by 4 1/2″, circle diameter is 4 1/2″
The handle is the same size for all: 9″ by 5 1/2″ with interfacing 7 1/2″ by 1 1/2″.
Cut the fabrics and interfacings
To make the body you need to cut:
- 2 pieces of fabric
- 2 pieces of double sided interfacing
- 1 piece of batting
For the round bottom you need to cut:
- 2 pieces of fabric
- 1 piece of double sided interfacing
For the handle you need to cut:
- 1 fabric strip
- 1 regular heat and bond interfacing
Make the body of the mug
- Place 1 fabric wrong side up
- Top with 1 double sided fusible interfacing.
- Top with batting. Press to adhere.
- Top with the 2nd piece of interfacing.
- Then top with the 2nd fabric piece, right side up. Press to adhere.
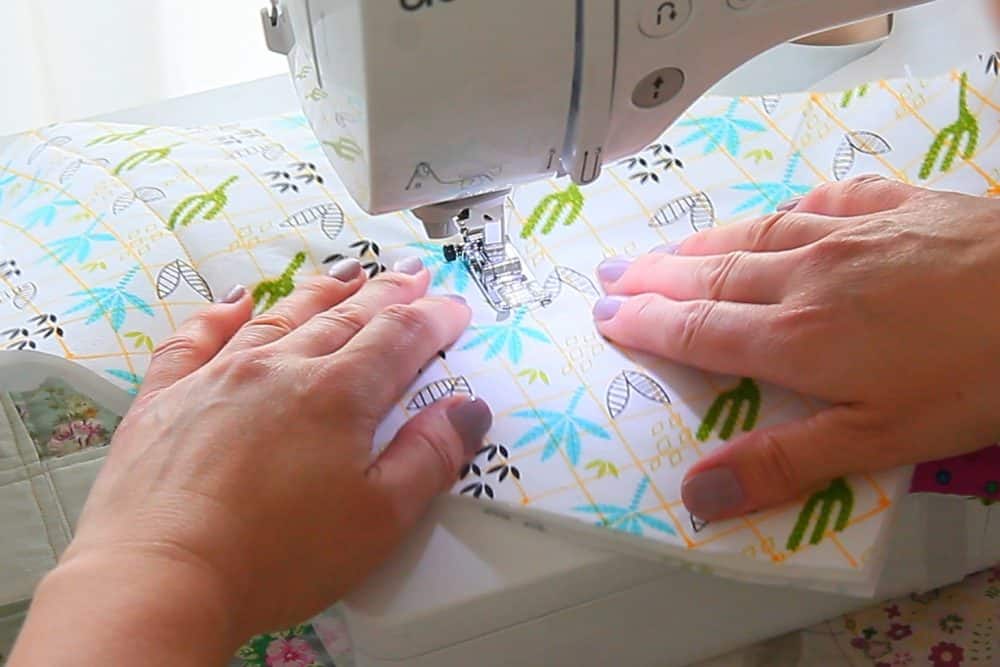
- Using your yardstick or quilting ruler and the fabric marker, trace lines onto the fabric in one direction, 1″ apart. Trace another set of lines in the opposite direction to create rhombus shapes onto the fabric.
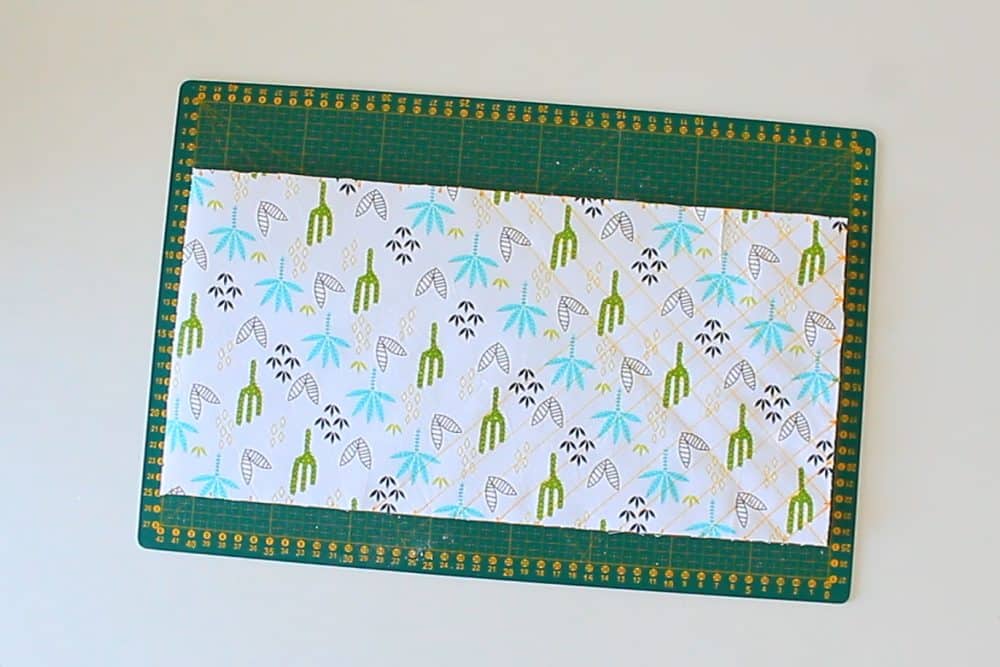
- Sew over the traced lines, starting with a couple of stitching lines from the center out, in different directions. This is to prevent the layers from moving and distorting while sewing.
- When done quilting, trim the edges to square the quilted panel.
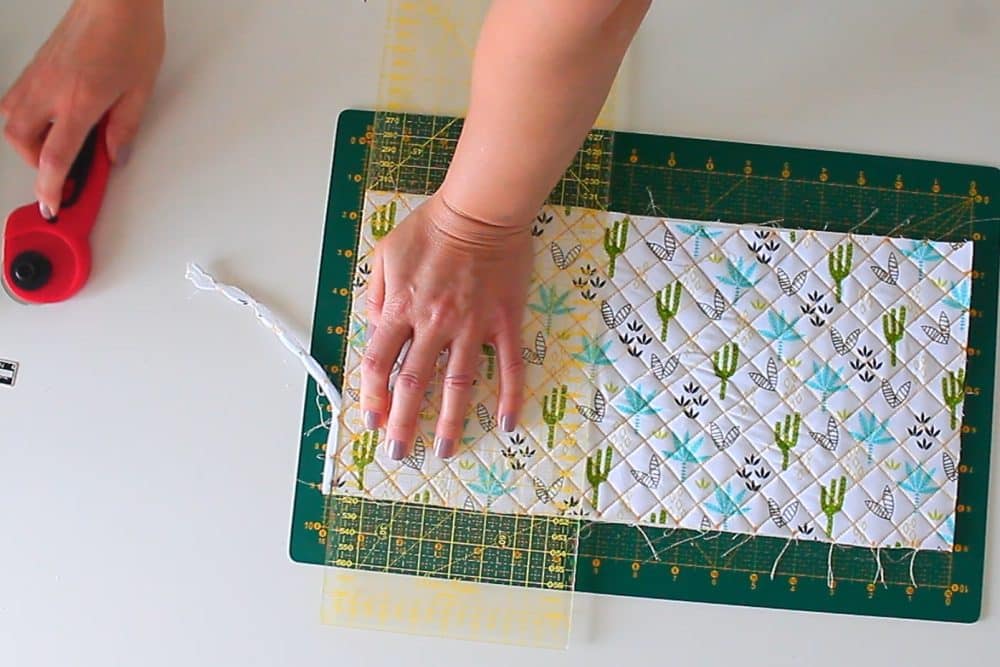
- Give it a good press with the steam on.
To make the bottom
- Place one fabric wrong side up.
- Top with the double sided interfacing
- Top with the 2nd fabric and press to adhere.
- Quilt in the same manner as above.
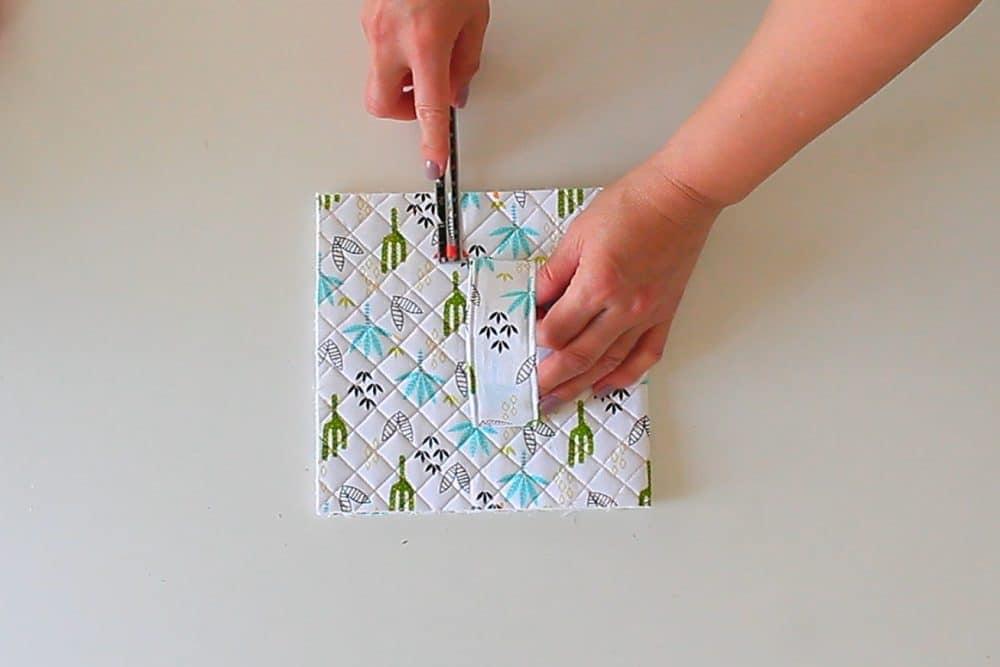
To make the handle
- Place the fabric wrong side up.
- Center the interfacing.
- Press to adhere.
- Fold the short sides in 1/4″ and press
- Fold the long edges in 1/4″ and press.
- Fold one side towards the opposite side until it reaches the edge of the interfacing and press
- Fold the opposite side and press.
- Top stitch all 4 sides.
Assemble the pieces
- Place the handle onto the quilted panel and sew.
- Fold the panel so the handle is inside and sew the seam with 1/2 inch seam allowance.
- Finish the seam with double fold bias tape.
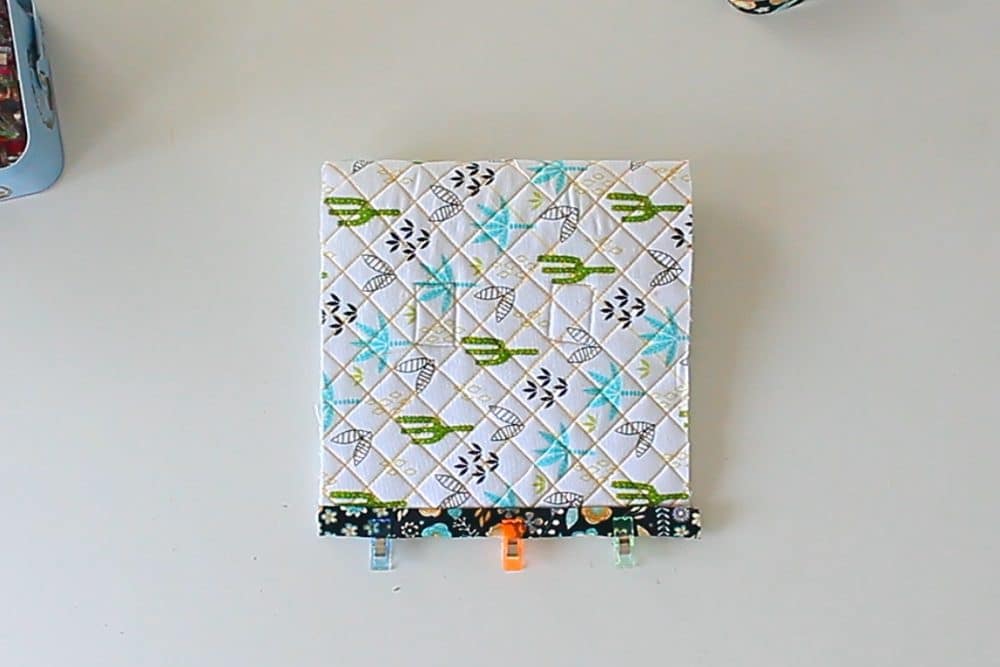
- Pin or clip the bottom to the raw end of the cylinder.
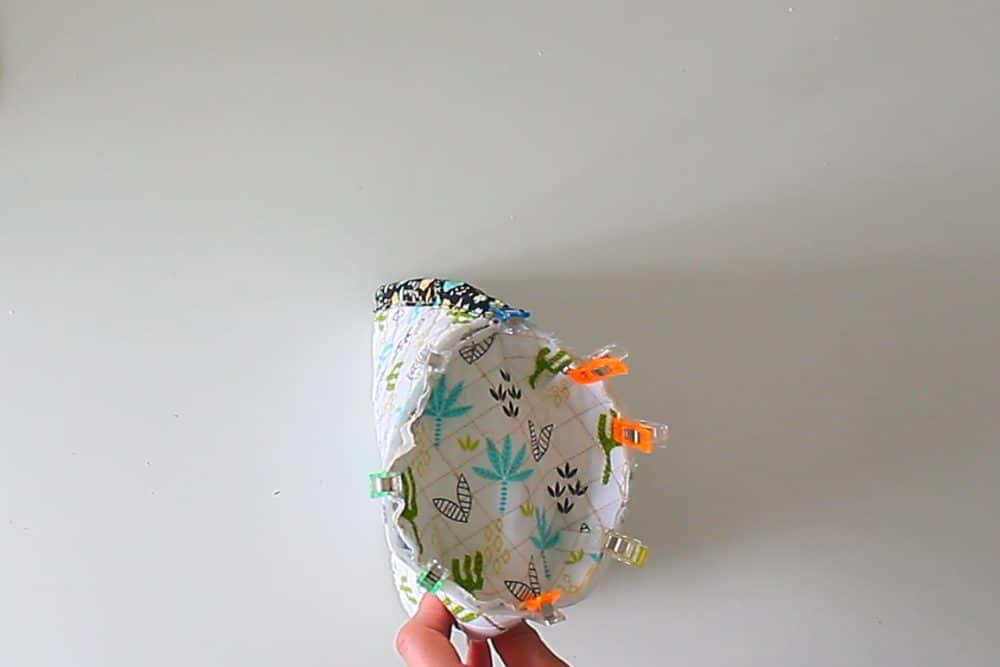
- Sew with 1/2″ seam allowance.
- Finish the seam with double fold bias tape.
- Finish the top of the mug with double fold bias tape.
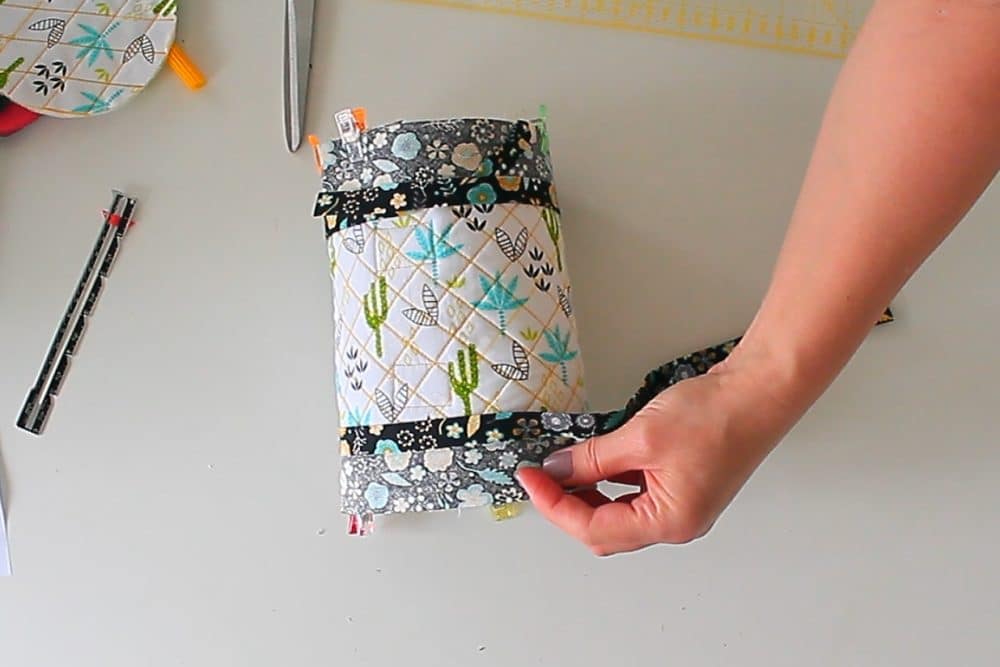
- Turn the mug right side out and press the bottom seam.
And you’re done! Your quilted mug is ready to use and will certainly be the highlight of your home. Enjoy!
So there you have it – everything you need to know about how to sew quilted mugs. With a little patience and attention to detail, you’ll be able to make beautiful fabric containers that can store anything from sewing supplies or office supplies to snacks and more. Have fun creating your own beautiful fabric storage baskets, you’ll be glad you did. Let me know how it turns out!
Happy sewing!
Pin to save for later
Most popular sewing projects:
- Tips for sewing a round hem
- Corded bag handles
- Flutter sleeve dress pattern
- How to laminate cotton fabric


Article may contain Amazon & affiliate links. As an Amazon Associate I earn from qualifying purchases at no additional cost to you.

Can you please share the fabric line used to make these mugs? I especially love the Suns. Thank you!
Hi Erin. I got them all from a local store and sadly, I wasn’t able to find them anywhere else when they went out of stock. There are many similar options out there but none exactly like these.
Too bad! Thanks for replying!
I am definitely going to have to try this out! Thanks for idea.
Hi, Rochelle! Have fun making these mugs, I’m sure you’ll love them!