

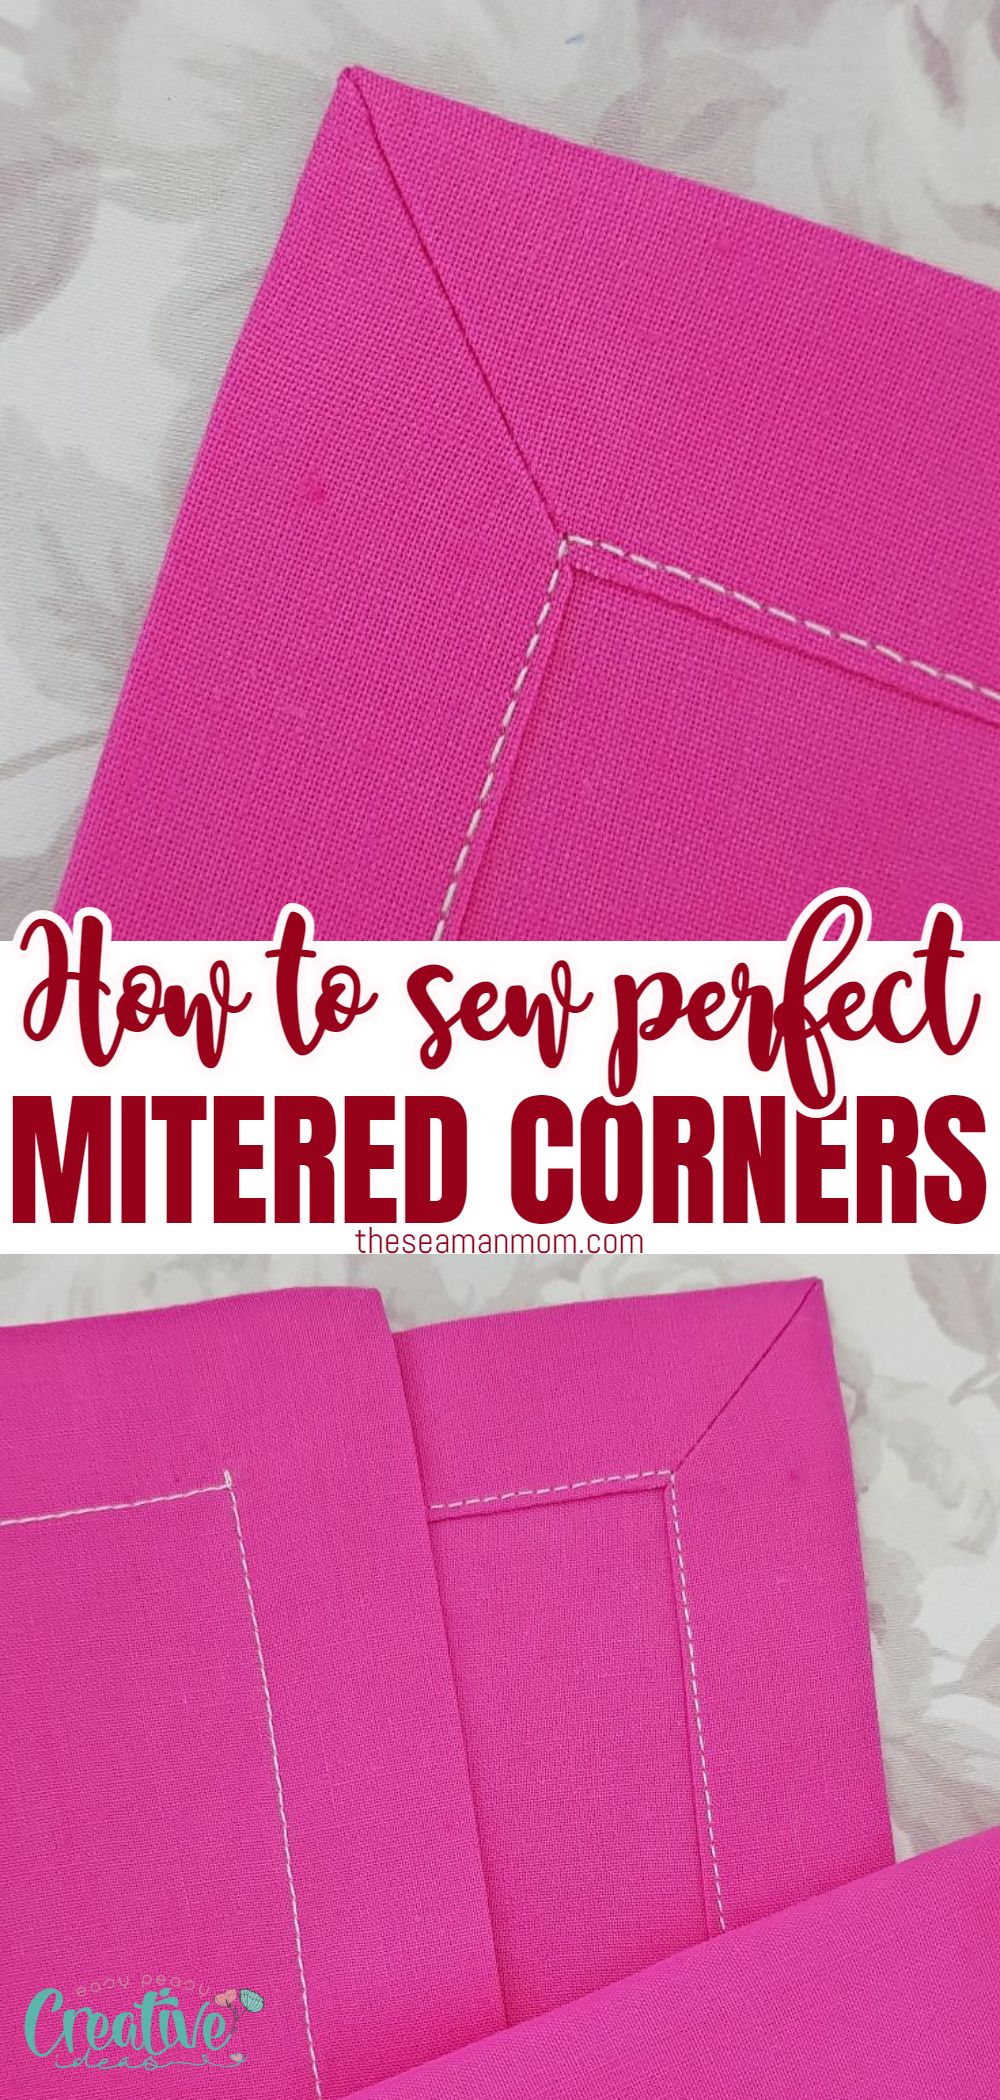
How to sew mitered corners – method #2
If you have ever wanted to learn how to create beautiful, neat, and sharp corners with ease every time, then you need to learn how to miter corners with this simple technique! Mitering your corners will no longer be intimidating but instead a fun exercise when it comes to sewing napkins, blankets, quilts, or burp cloths. Make sure every project you work on looks professional by mastering this miter corner technique today!
How to miter corners
Hey, guys! Remember the tutorial where I showed you how to sew mitered corners? As promised, today I’m going to show you how to miter corners with another easy peasy method! You might even consider this method an upgrade from the first technique and you also might end up loving this method more (a lot of people do, so chances are high!).
Mitered corners help to hide raw fabric edges in quilts and sewing projects. Mitered corners are just as they sound – corners that are mitered instead of being cut off at right angle. This simple and easy tutorial will show you how to sew mitered corners using a no fail method with perfect results every time! A clean and professional looking corner every time!
You can easily achieve perfect mitered corners for your pillows, cushions, quilts and napkins every single time. Learn this simple technique for mitering corners, that requires no math, no calculator, no point turner and no other expensive tools. Even a beginner sewer can easily master this mitered corner technique!
And I personally find this method to be the easiest way to finish a quilt in such a neat way. No more headaches struggling to sew the perfect border strips, bias binding or bias tape! Just a simple folded edge and corners, some ironing and a simple stitching line is all it takes!
More sewing tips you will love:
- Tips for sewing vinyl fabric
- How to square up fabric
- How to turn fabric tunes right side out without a tube turner
- Elastic join tip to reduce bulk
- Easy spaghetti straps
- Sewing binding on quilt corners
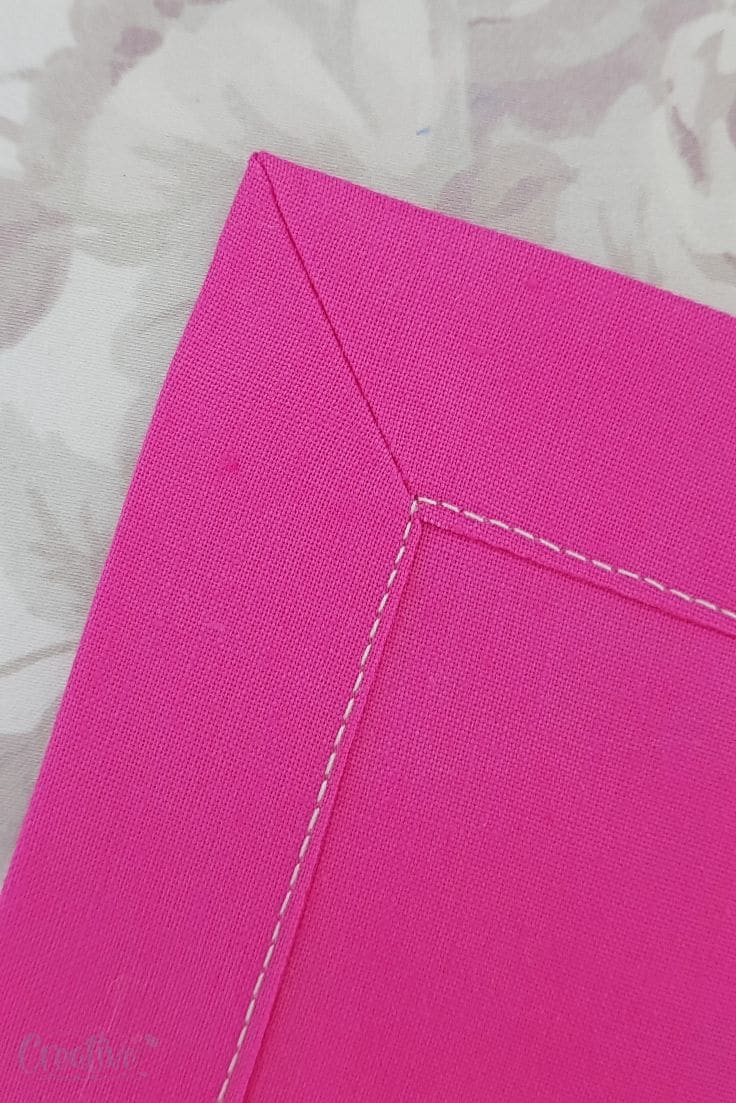
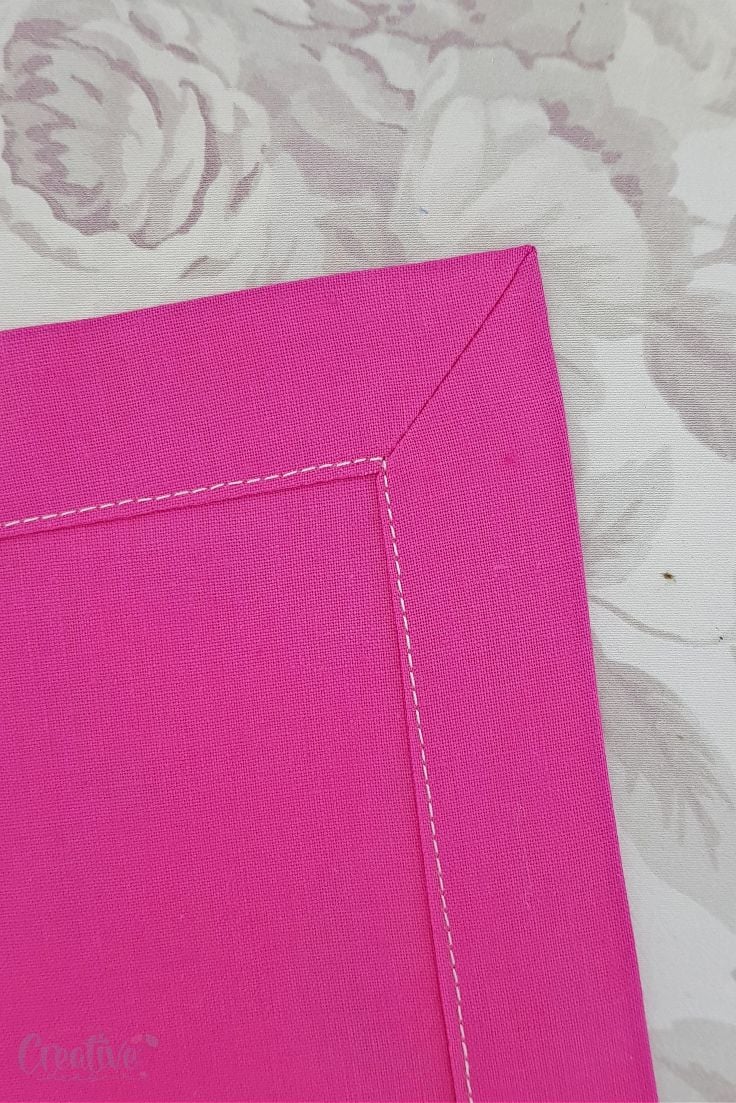
This second method of sewing a mitered corner gives you perfect corners that are also more secure than the first method. In fact the only difference between these two is the additional stitch that makes the corner more secure (and sometimes a little neater). This little seam also helps the finished product look professional and clean! And these are the reasons this is the preferred method for a lot of people instead of the first method, when finishing corners on napkins, table cloths, table runners, quilts and more.
In case you missed that tutorial, there’s also a third method for sewing mitered corners, using bias tape. You can check out the tutorial here! With all methods, I advise you practice on a strip of scrap fabric before applying the technique to a sewing project.
Why do we miter corners?
Mitered corners are used to finish the edges of quilts, napkins, and other sewing projects in a neat and sharp way. The purpose of mitered corners is to hide raw edges while creating a nice finished look. It’s also an easy way to soften the pointy corners that can be created when sewing angled pieces together.
Mitered corners are often used in quilting to create blocks, borders, and bindings as well as on napkins, blankets, and other sewing projects. The miter corner technique is not only a great way to finish off the edges of your project but it also helps give your project a professional look that will last for years to come.
What is a mitered corner used for?
Mitered corners can be used to create neat and professional-looking corners on quilts, blankets, napkins or burp cloths. The mitered corner technique helps hide raw fabric edges, creating a much more beautiful finished product. This technique is also very useful for sewing projects that require perfect angles such as pillows, cushions, and tablecloths. The mitered corner technique gives you control over how much of the fabric is exposed while still giving an attractive and neat finished product that looks professional. With practice, you can achieve perfectly mitered corners every time!
What angle is a mitered corner?
A mitered corner is typically 45 degrees. Depending on how wide the mitered corner is, you may need to adjust the angle slightly in order to achieve the desired outcome. Keep in mind that it’s important to use a consistent angle when sewing mitered corners in order to get a neat and professional-looking result.
How do you finish a quilt with mitered corners?
Finishing a quilt with mitered corners is an easy and satisfying task. All you need is to fold your fabric edges as indicated in the tutorial below, iron them in place for a crisp finish and then stitch it together along the folded edge. Make sure you leave enough allowance in your backing fabric for the mitered corner technique.
No fail mitered corners
Materials:
- Square or rectangular fabric
- Fabric marker or chalk
- Quilting ruler
- Cutting mat
- Rotary cutter
- Pressing iron
- Scissors
- Quilting clips
- Sewing machine
- Matching thread
- Sewing needle matching the fabric
How do you make a perfect mitered corner?
The first steps of this tutorial are pretty much the same as the other method for mitering corners.
Prepare the fabric
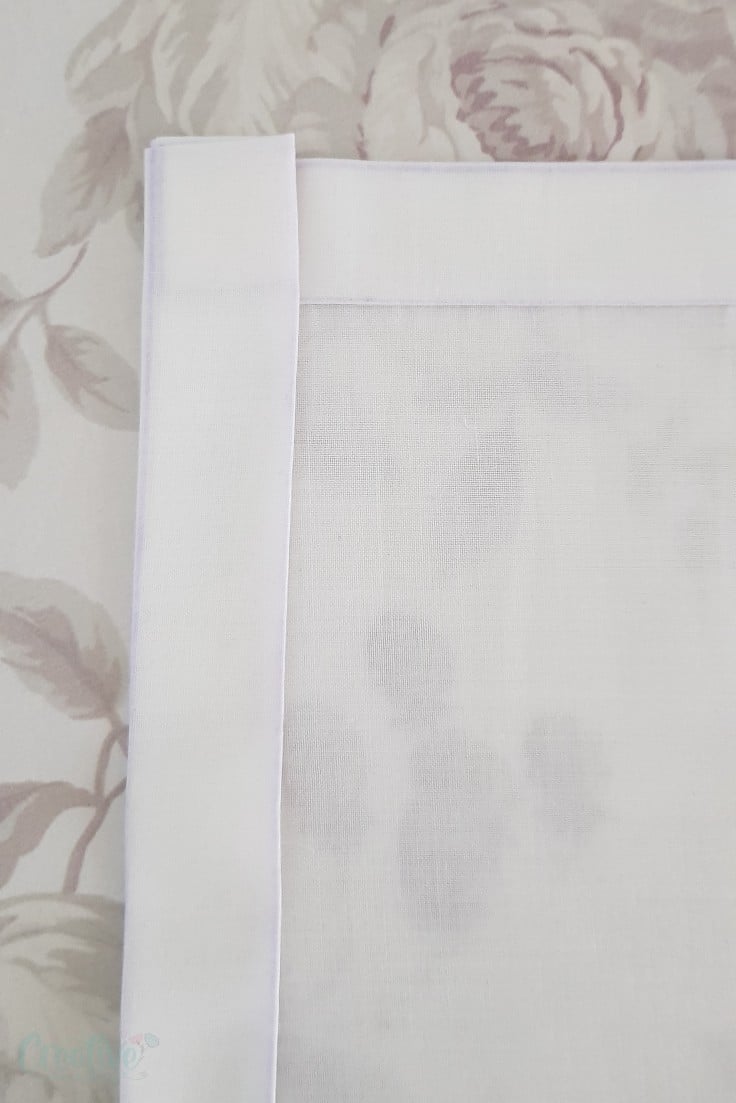
1. With your iron on steam, give the fabric a nice press.
2. Square up the fabric with the help of a cutting mat, a rotary cutter and a quilting ruler. You need precise edges for this project so the fabrics match perfectly in the corners when folded and pressed.
Trace lines & fold
3. Decide the width of your border and using a fabric marker or chalk and the quilting ruler, trace two lines parallel with the edges, in the width of your final border (for example, for my napkin, I wanted a 1″ border so I traced 2 lines: one of them 1″ away from the edge and the other one 1″ away from the first line).
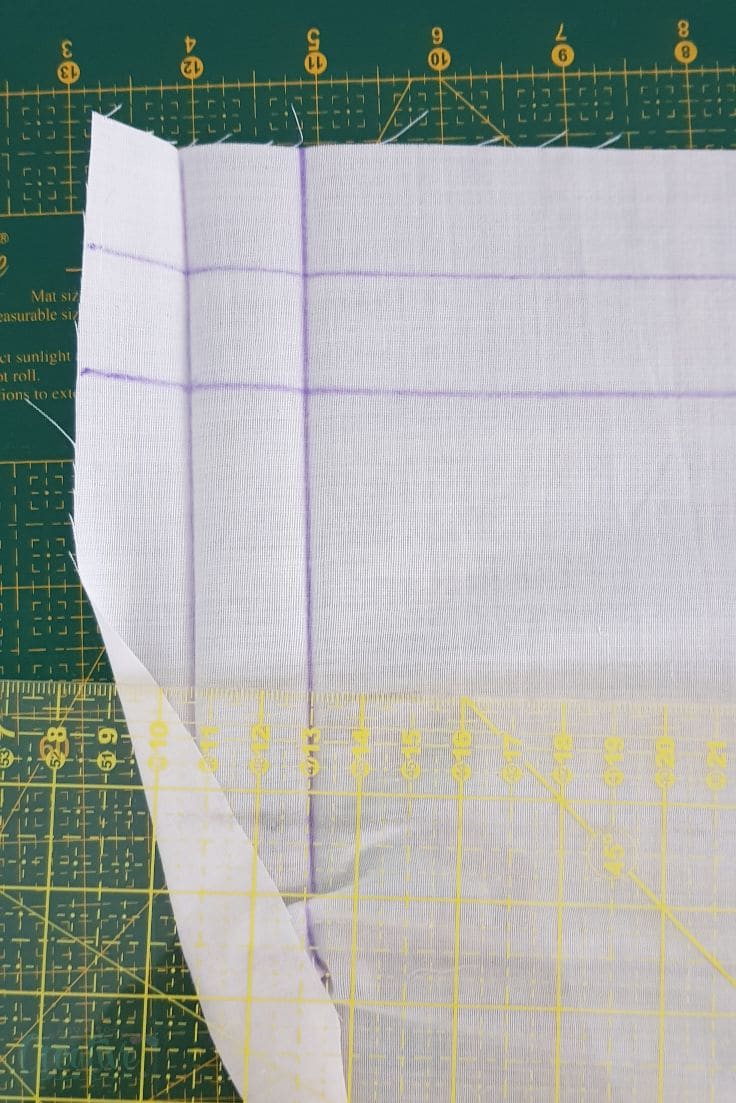
4. Repeat for all sides of the fabric.
5. Bring the fabric to the ironing board and with your iron on high steam, press the edges in, using the lines traced on the fabric as guides. Start with the first line, then the second line. Give the fabric a nice press on each line.
6. Open the folds partially (only the first set of folds).
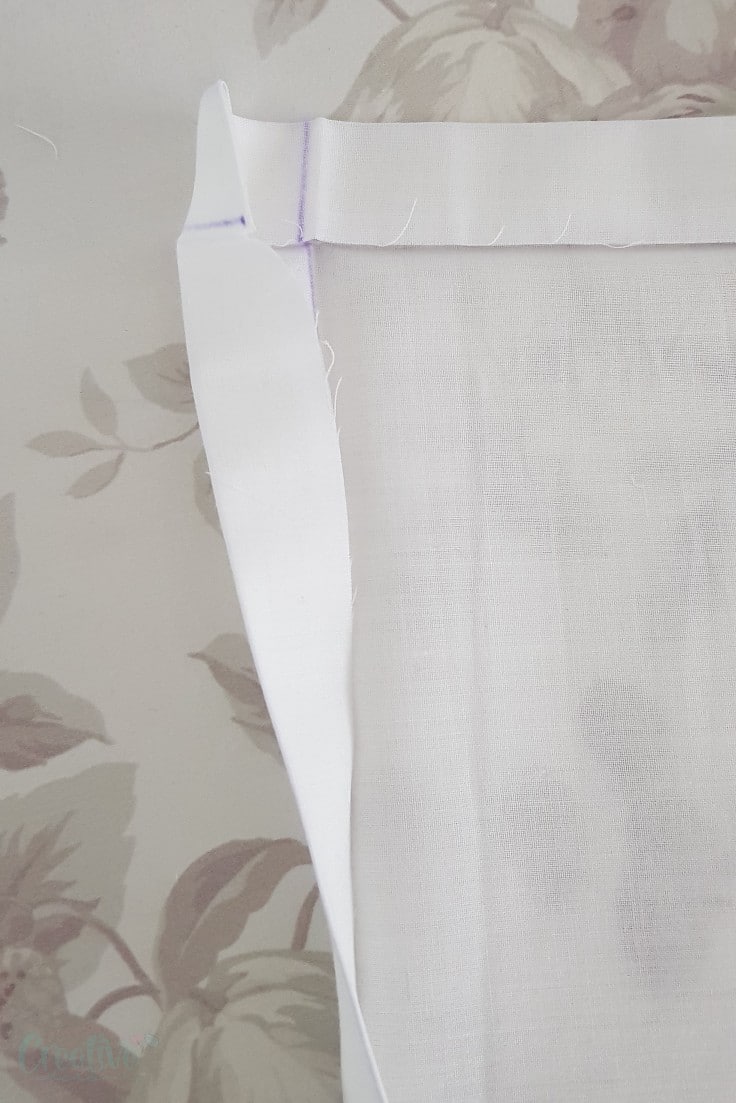
Trace & fold the corner
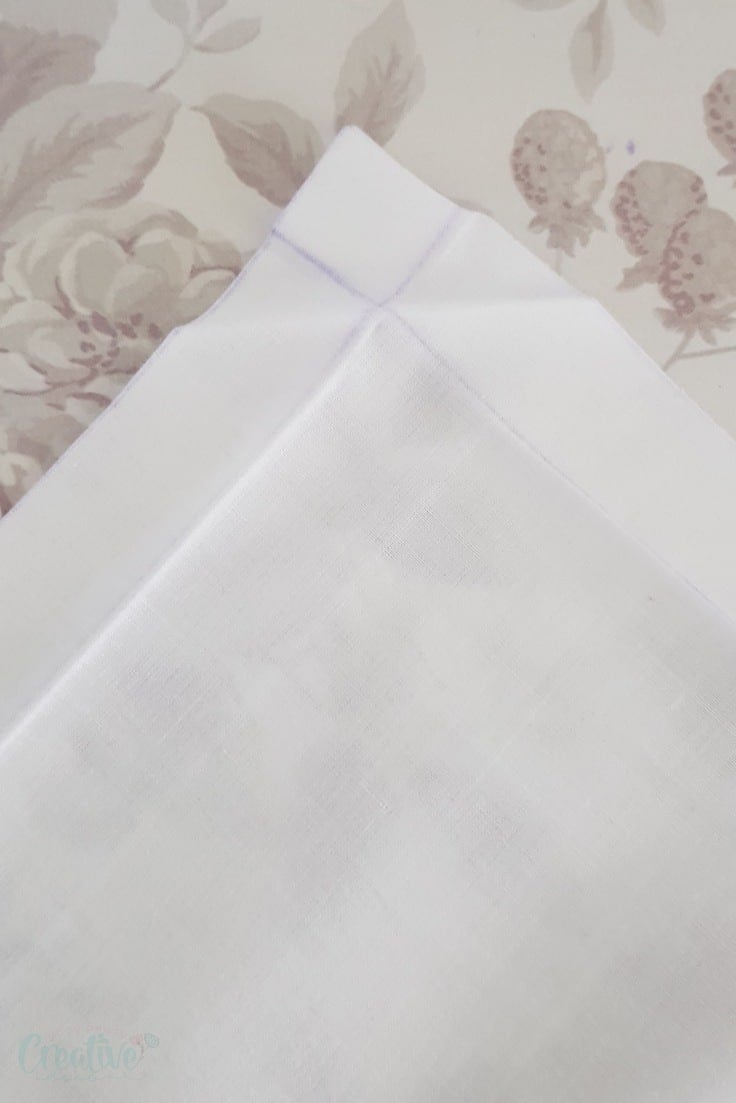
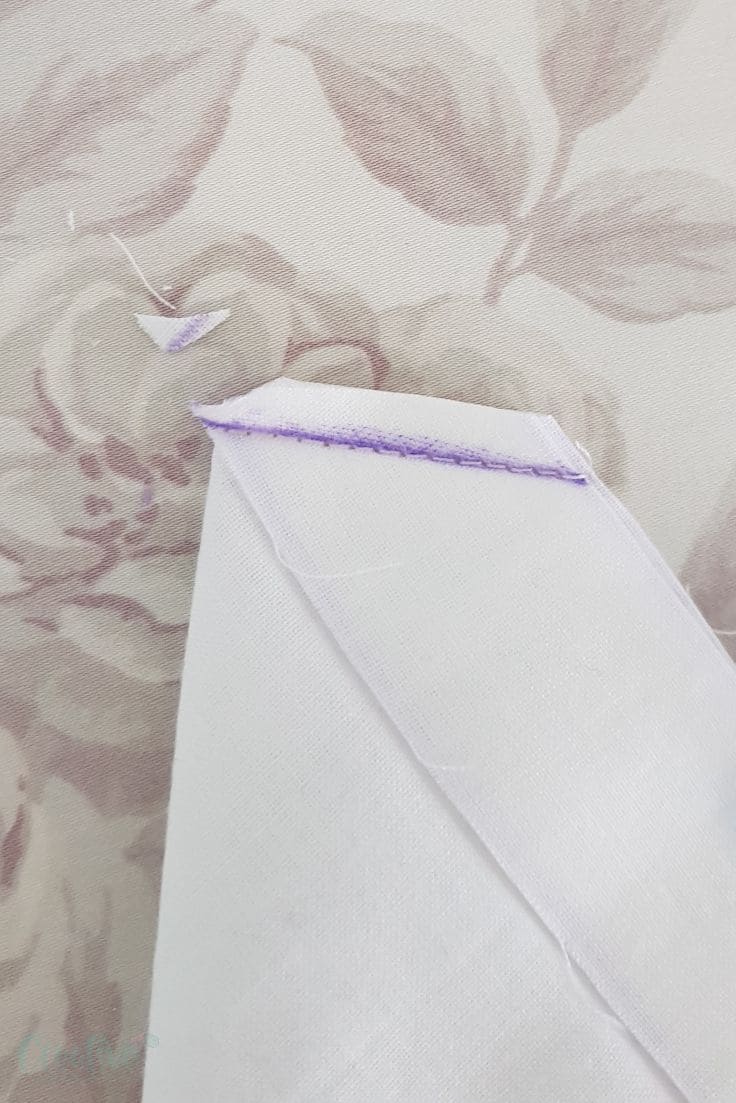
7. Trace a line through the bottom of the corner rhombus.
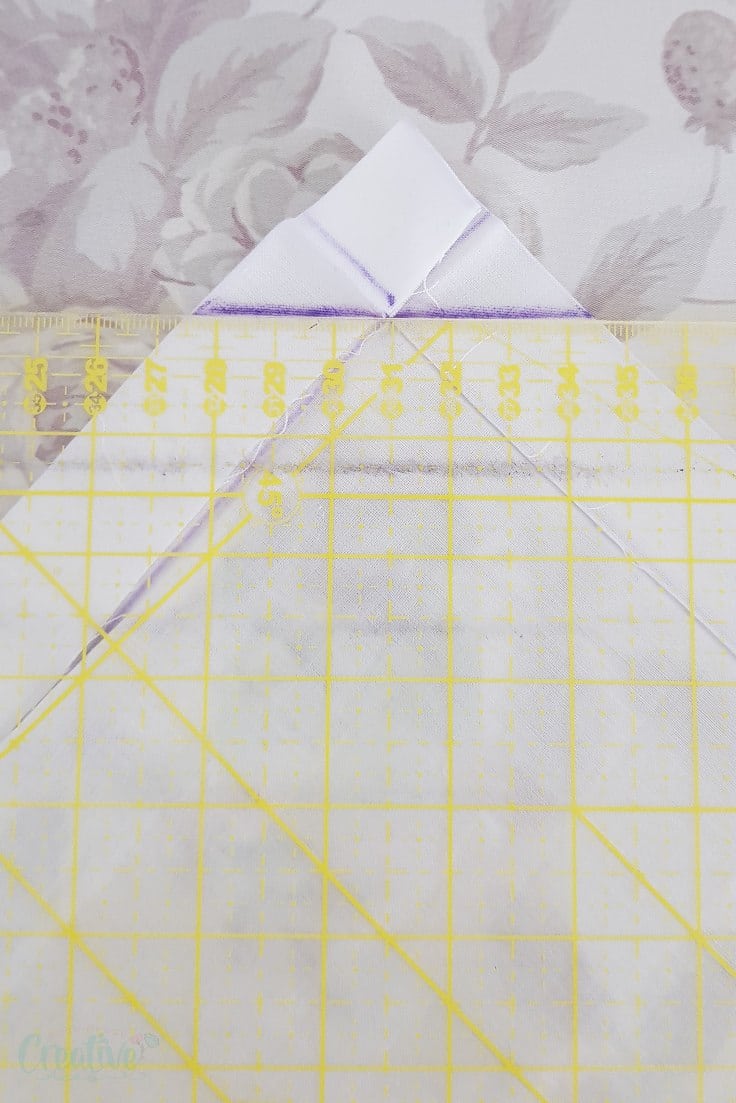
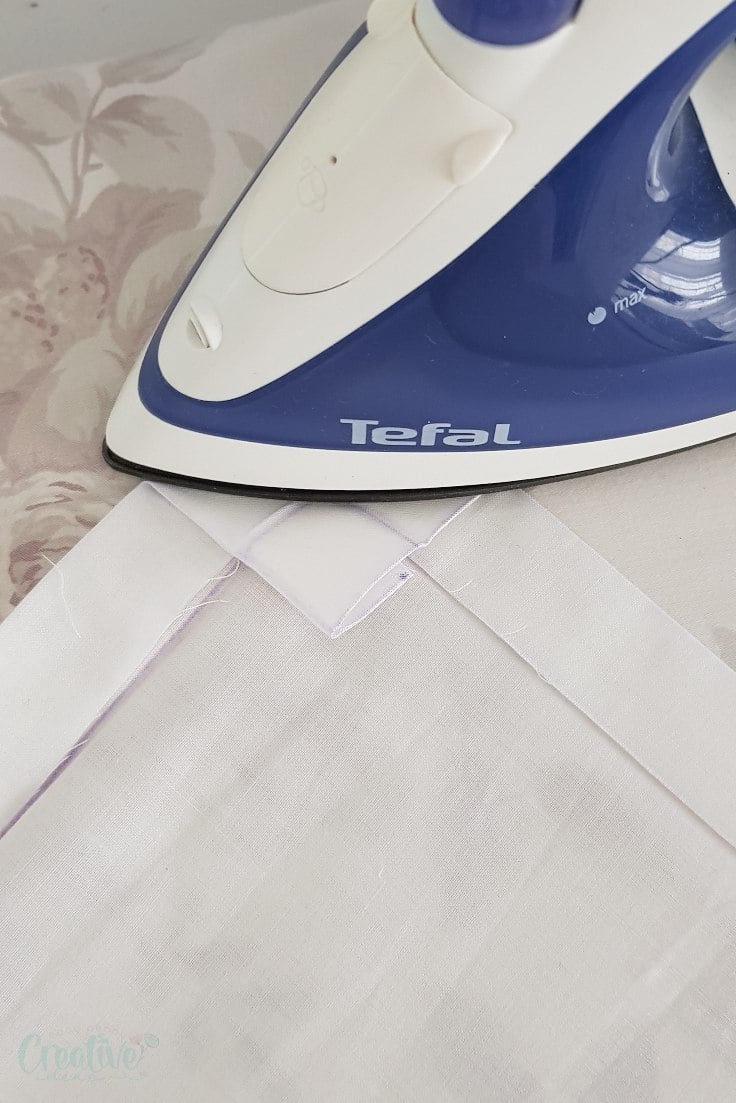
8. Fold the corner over that line and press with the iron on steam.
Secure the corner
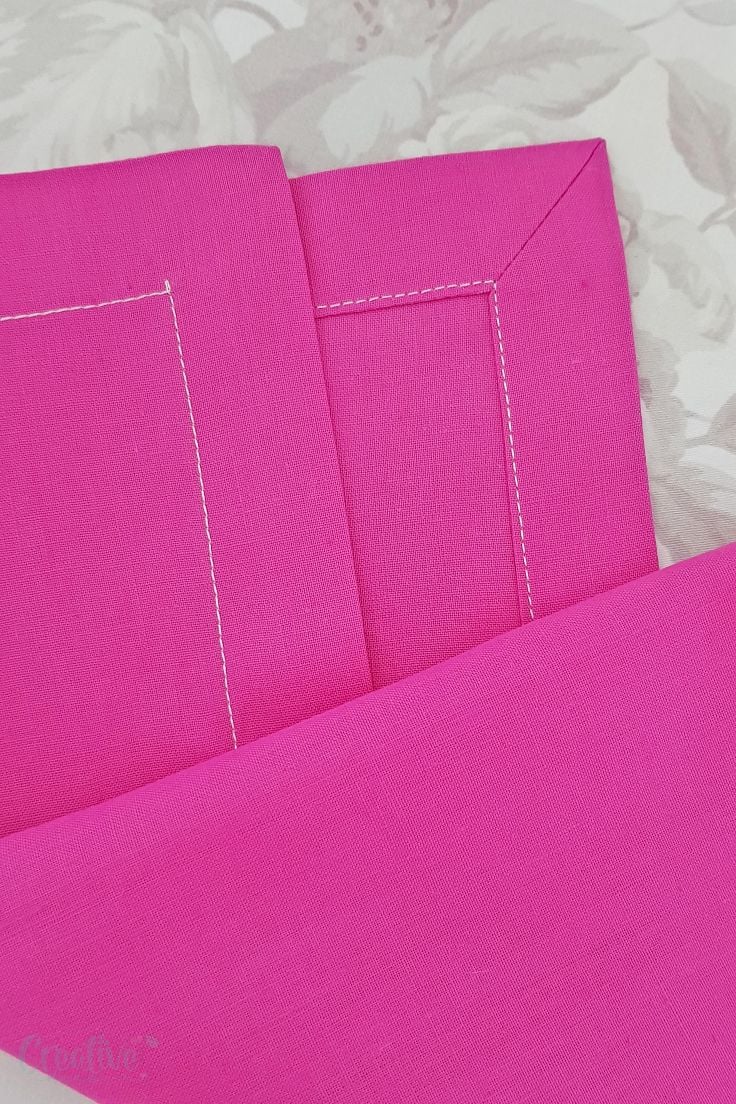
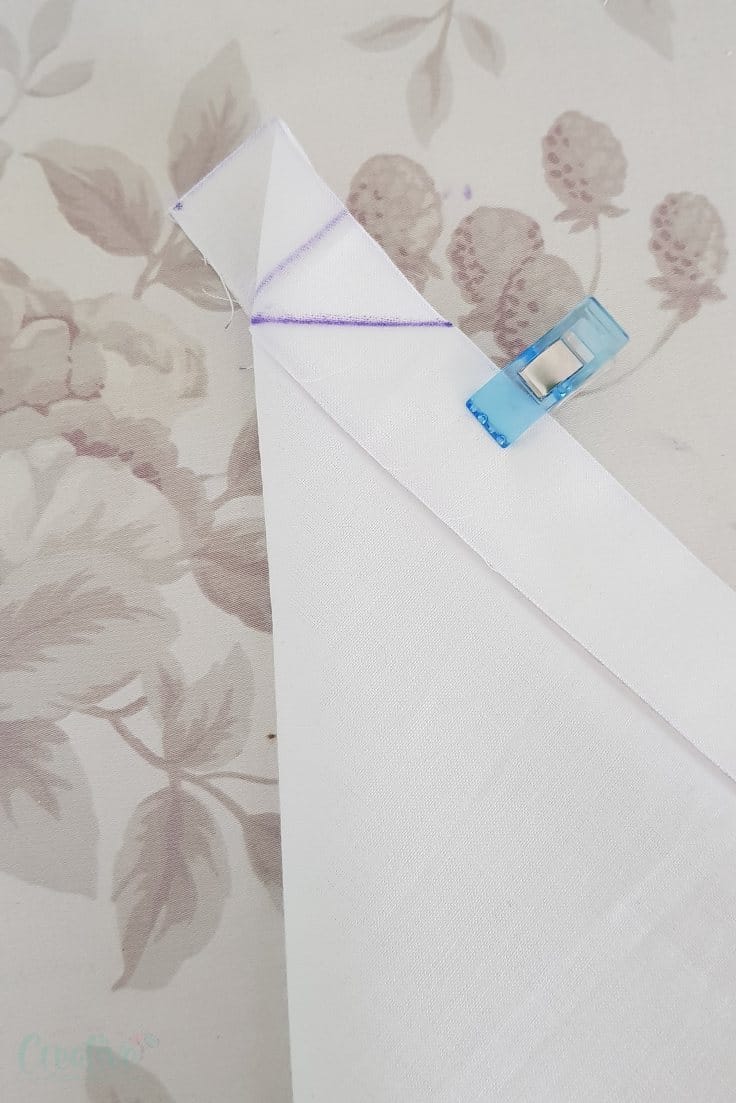
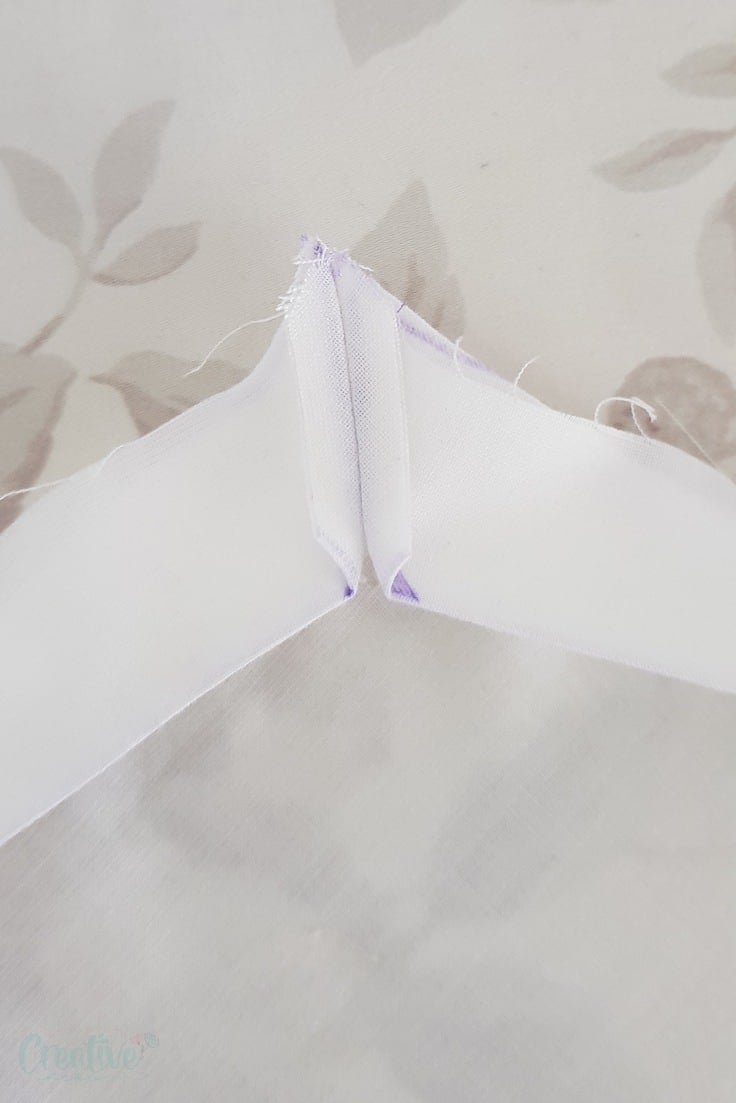
9. Flip fabric to the right side.
10. Fold the fabric until the sides meet and clip the sides together.
11. Sew the corner right through the line traced in step 7, back stitching start and end.
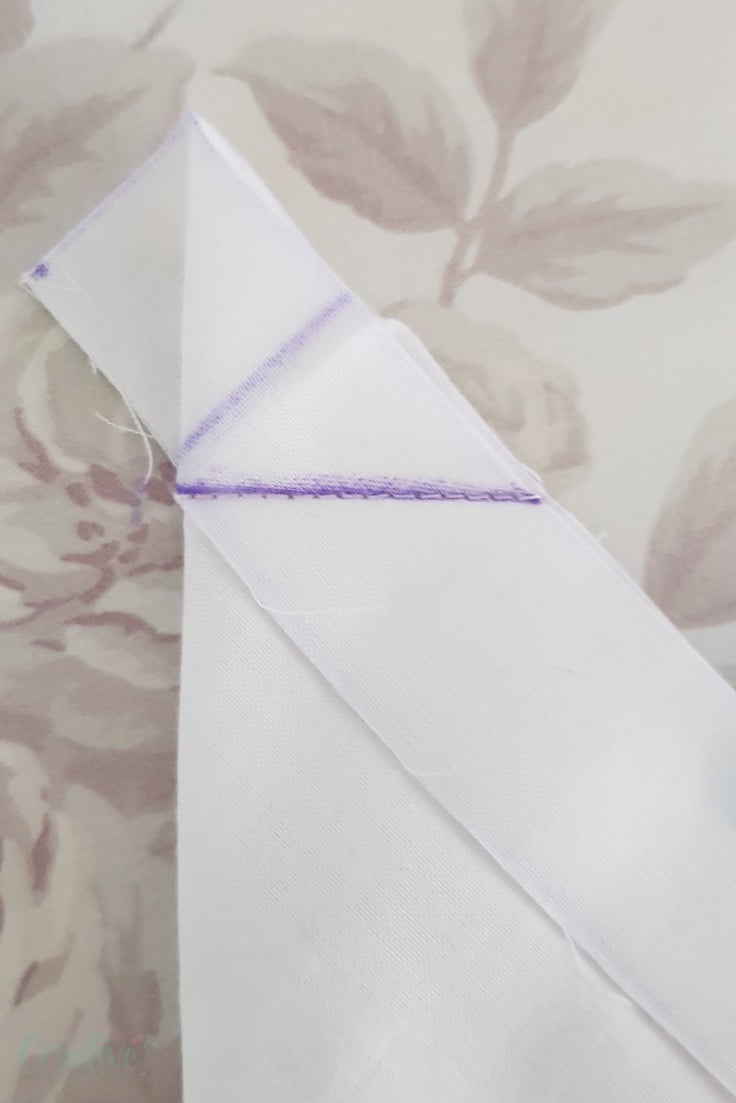
12. Trim the seam allowance to 1/8″.
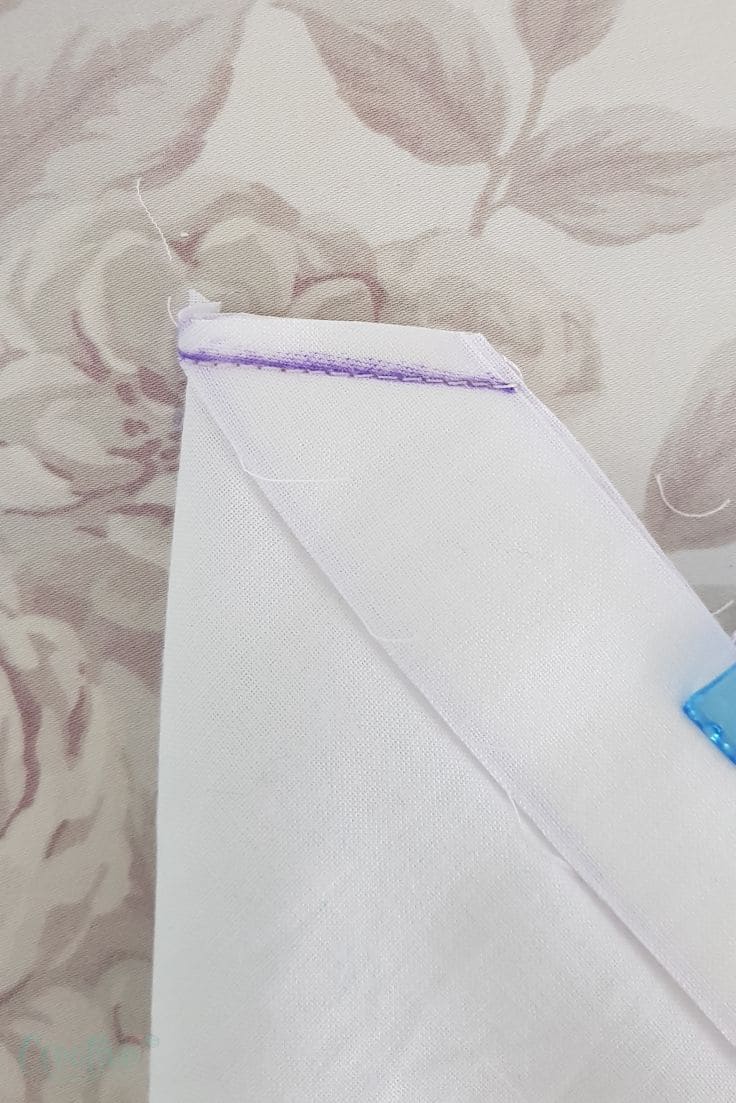
13. Trim the pointy corner a little more.
14. Press the seam open with your iron on steam.
15. Push the corner right side out, using a blunt tool.
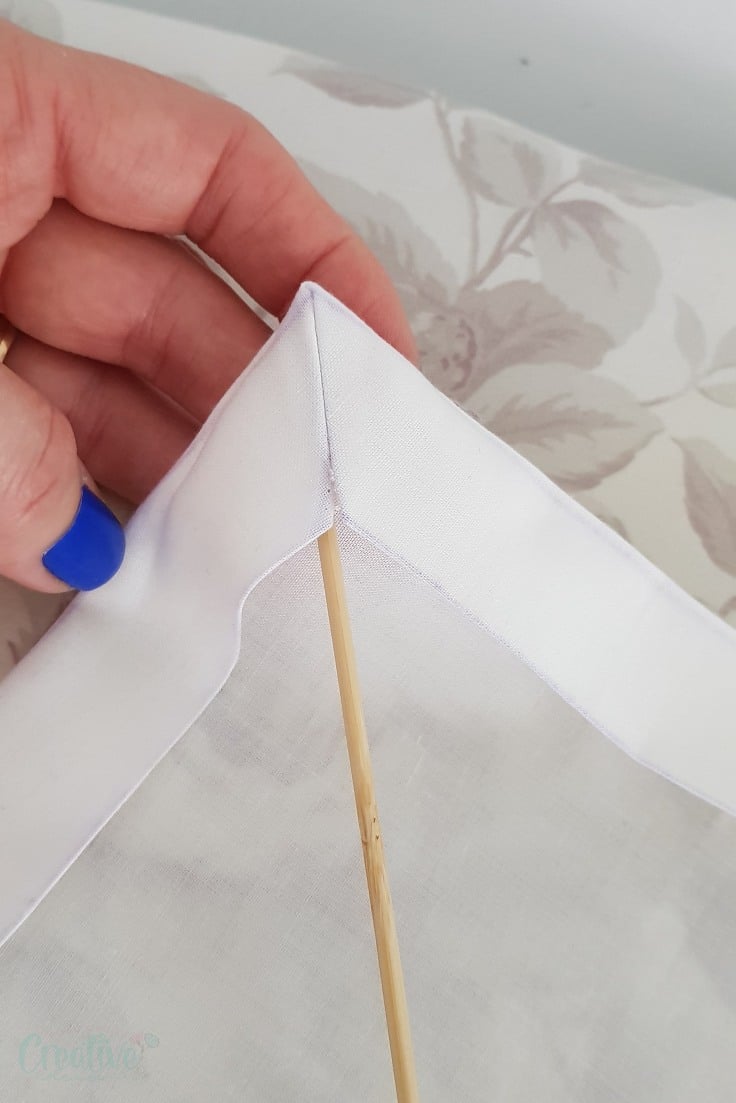
16. Press well and edge stitch the border, pivoting when you get to the corner.
Now that you’ve learned three ways to miter corners, which is your favorite technique for creating sharp edges? Let me know in the comments below – I’d love to hear what works best for you! Thanks so much!
Pin to save for later
Most popular sewing projects:
- Tips for sewing a round hem
- Corded bag handles
- Flutter sleeve dress pattern
- How to laminate cotton fabric


Article may contain Amazon & affiliate links. As an Amazon Associate I earn from qualifying purchases at no additional cost to you.

I notice you still have a raw edge. For making a finished edge, do you hem that raw edge first and then do the miter corner or do you leave a quarter inch instituted so you can turn under the raw edge and then top stitch it on a quilt?
Hi, MJ. All seams are raw, no need to finish them as they’ll be all enclosed and sewn inside de side seams and the mitered corner.
I loved this post from Easy Peasy Creative Ideas! It was very informative, a good mix between article, videos, and advertisements. The ads were not so many to be bothersome.
I loved the videos! Looking forward to more, Gina Ramsey
Thanks so much, Gina! I appreciate all your support and kind message! xoxo