

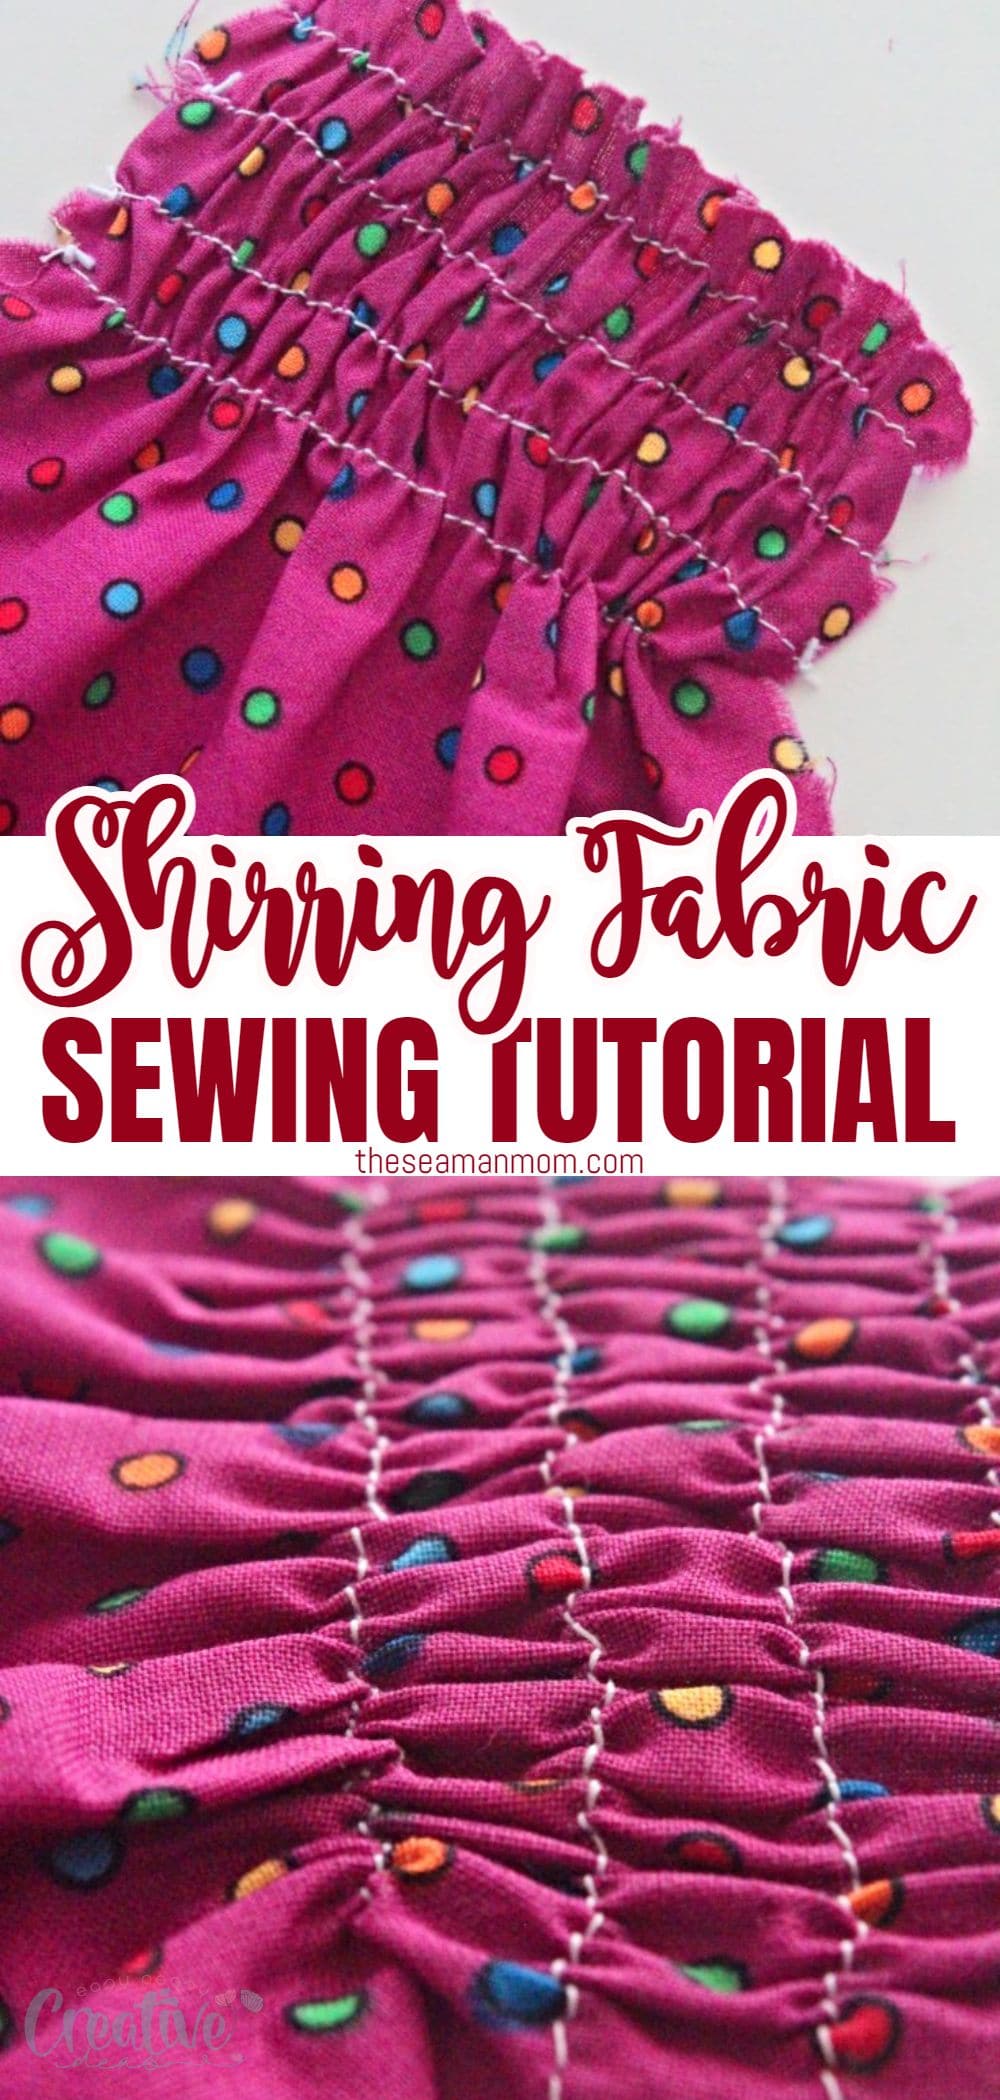
Easy tips for shirring fabric with a home sewing machine
Shirred fabric looks so pretty and a little fancy and in spite of the bad reputation, shirring fabric is easy and fun! In this tutorial you’ll learn how to shirr fabric with an easy, simple, and fast method!
Shirring fabric with a home sewing machine
While shirring has been around for ages, I don’t see that many items done using this cool technique! And I think it’s because people don’t realize shirring fabric is crazy easy, so easy that anyone can do it, even an absolute beginner! In this short tutorial I’ll show you how to shirr fabric in just a few simple and quick steps, using your home sewing machine!
More amazing sewing tips you will love:
- Proper use of seam ripper
- How to match stripes perfectly
- Easy way to make spaghetti straps
- How to clip and notch seams
- Easiest way to turn a tube right side out
- Sewing sharp corners
- Elastic join tip to reduce bulk
What does shirring mean?
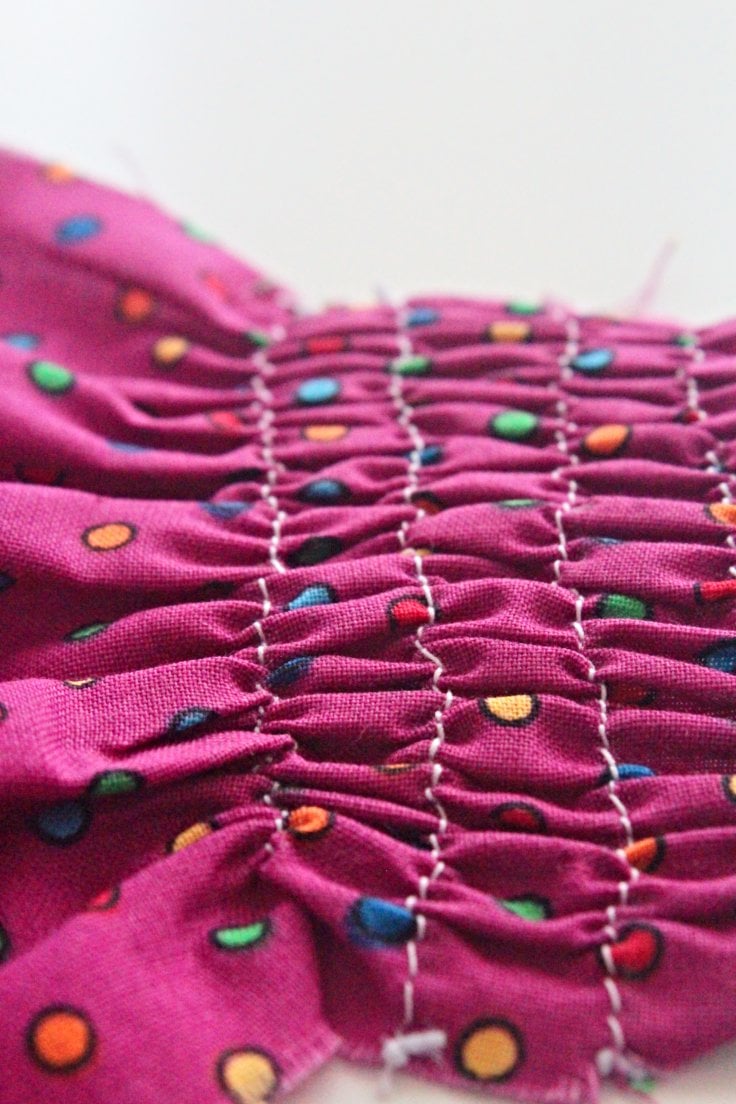
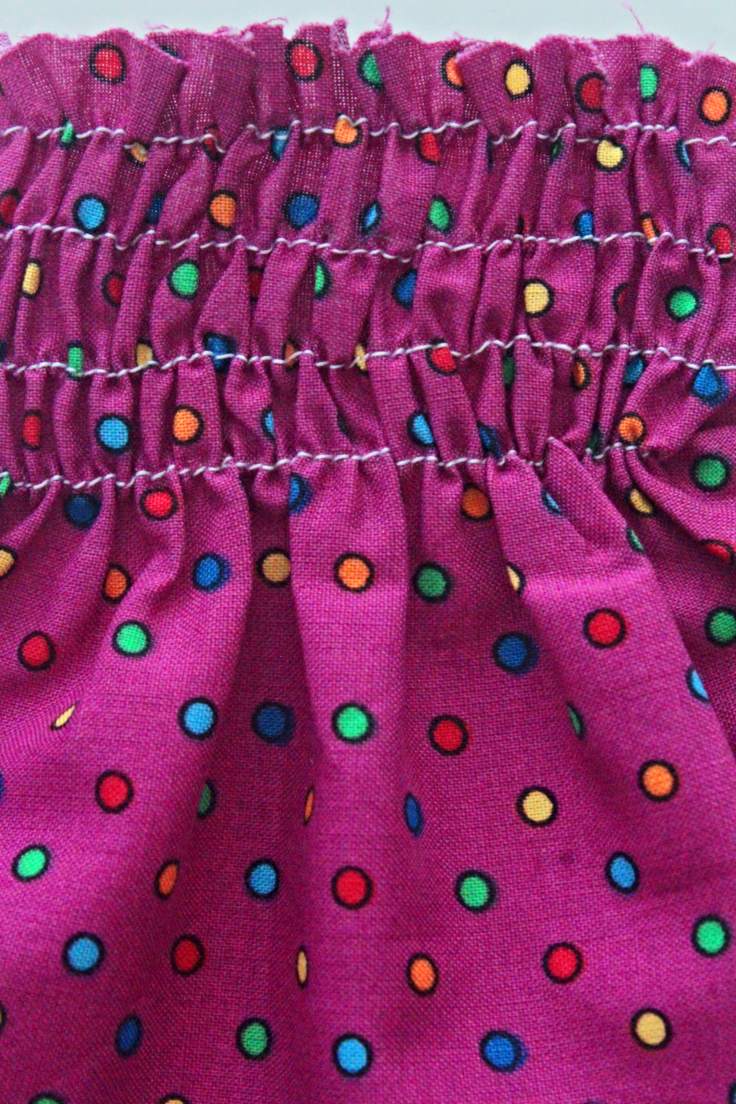
Shirring is a technique that gathers the fabric and makes it stretched, using shirring elastic and regular thread at the same time. Sewing with elastic thread is not as scary as it may seem like as long as you keep in mind a few little tricks I’ll be mentioning below.
Shirring is basically a decorative gathering but also has a very practical purpose as wearing a shirred clothing item like a skirt or a dress is super comfortable! It’s a great technique used as a waist band on skirts, bodices on dresses or hems on shirts. I’ve seen shirred cuffs on shirts or a shirred bust or back on dresses and skirts and even shirred table runners and pot holders. The possibilities are endless and once you learn how to shirr fabric, you’ll kind of develop an addiction and want to explore ways to incorporate this wonderful technique into many of your sewing projects.
For this tutorial I’ve resorted to a piece of scrap fabric but an actual project is in the making and will be available soon. So you can see how this beautiful technique looks like on a real project.
What is the difference between smocking and shirring?
Smocking is a technique similar to shirring but in smocking, the stitches are formed by hand and don’t require elastic thread. Shirring is done with an elastic thread while regular sewing machine thread holds it all together.
Smocking is usually done on a large scale and requires a lot of patience while shirring can be done quickly even with home sewing machines.
What is shirring most commonly used for?
Shirring is most commonly used as a waistband in dresses, skirts, and blouses. It’s also a great technique to gather the bodice of dresses or shirts, but can also be used for cuffs on sleeves or hems on garments. The decorative effect shirring creates makes it a very popular technique used in quilt blocks and even table runners.
What fabric is best for shirring?
Shirring looks great in lightweight fabrics to mediumweight fabrics like voile, silk, cotton, quilting cotton, muslin and other light woven fabrics. It’s important to use a fabric that is light enough for the elastic thread to be able to pull it in and create that beautiful gathered effect. Avoid using heavy weight fabrics as they will not gather properly with shirring elastic thread.
What kind of thread do you need for shirring?
For shirring you’ll need a special type of thread called shirring elastic or gathering thread which is much thicker than regular sewing threads but thinner than regular elastic bands. The size of the thread should be 3/16 inch or 1/4 inch wide and can be found at most craft stores. If you are having trouble finding it, you can also order it online here.
How much fabric for shirring?
The amount of fabric you’ll need for shirring will depend on the amount of shirring you intend to make, how much gathering you want to achieve. If the shirring is going to be used as a waistband or hem, you should use at least 2 times the amount of fabric from what you measure for the circumference of your finished project. This way when the garment is worn, it gathers nicely and looks beautiful!
Can you shirr on a regular sewing machine?
Yes, you can shirr fabric easily on a regular sewing machine. You’ll just need to make sure that your sewing machine is compatible with the type of thread that you are using for shirring. If it’s not, you may have to upgrade your machine or purchase an additional part like an elastic presser foot which will allow your machine to sew with thicker threads like elastic and shirring thread.
Can I use elastic thread in normal sewing machine?
Yes, you can use elastic thread in a regular sewing machine. All you have to do is make sure that your sewing machine is compatible with thicker threads like elastic or shirring thread and then set up the machine correctly before getting started.
What tension should I use for shirring?
When shirring with elastic thread, the key is to use a tension that will allow the fabric to gather evenly and not too tight. Too much tension can cause the thread to break or create an uneven gather in your fabric. I recommend starting out with a regular upper tension tension setting and then adjusting as needed when you are sewing.
As for the bobbin tension you should set it looser than normal so it doesn’t pull in the elastic thread too much and cause it to break.
What stitch length should I use for shirring?
When shirring with elastic thread, you should use a longer stitch length to allow the thread to move freely and create an even gather in your fabric. I recommend using the longest straight stitch your machine accommodates to create nice gathers without slowing down your sewing machine too much.
Do you need a special foot for shirring?
Some sewing machines have a presser foot that is designed to accommodate thicker threads like shirring elastic. If your machine doesn’t have one, you may need to purchase an additional elastic presser foot in order for it to sew with shirring thread correctly.
Otherwise, if your machine does not have a special foot that is made for shirring, then you can just use the standard presser foot. Just remember to adjust your stitch length and tension as needed in order to get the desired effect.
Why is my shirring not tight?
If your shirring is not as tight as you would like it to be, there are a few things you can try. First, make sure your upper tension is set correctly and that the bobbin tension is loose enough for the elastic thread to move freely.
You may also need to adjust the stitch length or use a special presser foot if you are having trouble getting your shirring to gather evenly.
Lastly, make sure that the elastic thread is not too thin or old as this can cause it to break easily.
Why is my shirring too tight?
If your shirring is too tight, make sure to check the tension settings on your sewing machine. It may be set too high which is causing the fabric to gather too much.
Also, make sure that you are not using an elastic thread that is too thick for your project.
Lastly, the rows of shirring stitches should not be too close together, so make sure to space them out evenly.
A few tips on shirring:
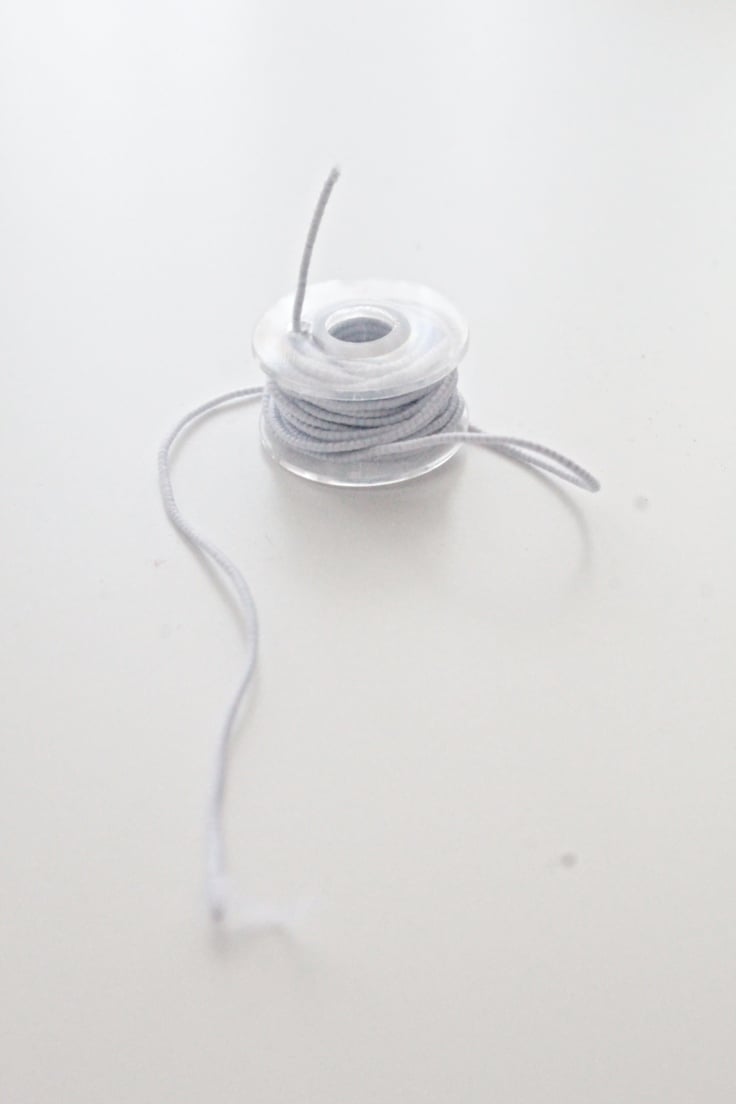
For the thread
- Choosing a thin elastic thread over thick elastic thread helps you sew faster and easier. Thick elastic will take up a lot of space on your bobbin forcing you to change the bobbin very often. Thick elastic will also run less smooth through the plates of your sewing machine and it may even brake during sewing.
- Use a backstitch at beginning and end of a shirred row so the elastic won’t slip out. But go super slow and use the wheel of your sewing machine. This will prevent the elastic thread from breaking.
Tips for bobbin
- Wind your bobbin by hand. It may seem faster to use your machine but when it comes to elastic thread, hand-winding is in fact faster and less tricky. Just make sure you don’t pull the elastic as this will create tension.
- If you’re shirring a lot of rows, make sure you have a few bobbins pre-threaded with elastic thread. It saves a lot of time not to have to wind your bobbins when making your project.
Tips for sewing
- Prepare your fabric by drawing the lines where you’ll run the shirring. Not having to guesstimate will save you time and make the project run smoother and faster. Or use an adjustable guiding foot as I do.
- Set your machine to the longest stitch while keeping a normal tension.
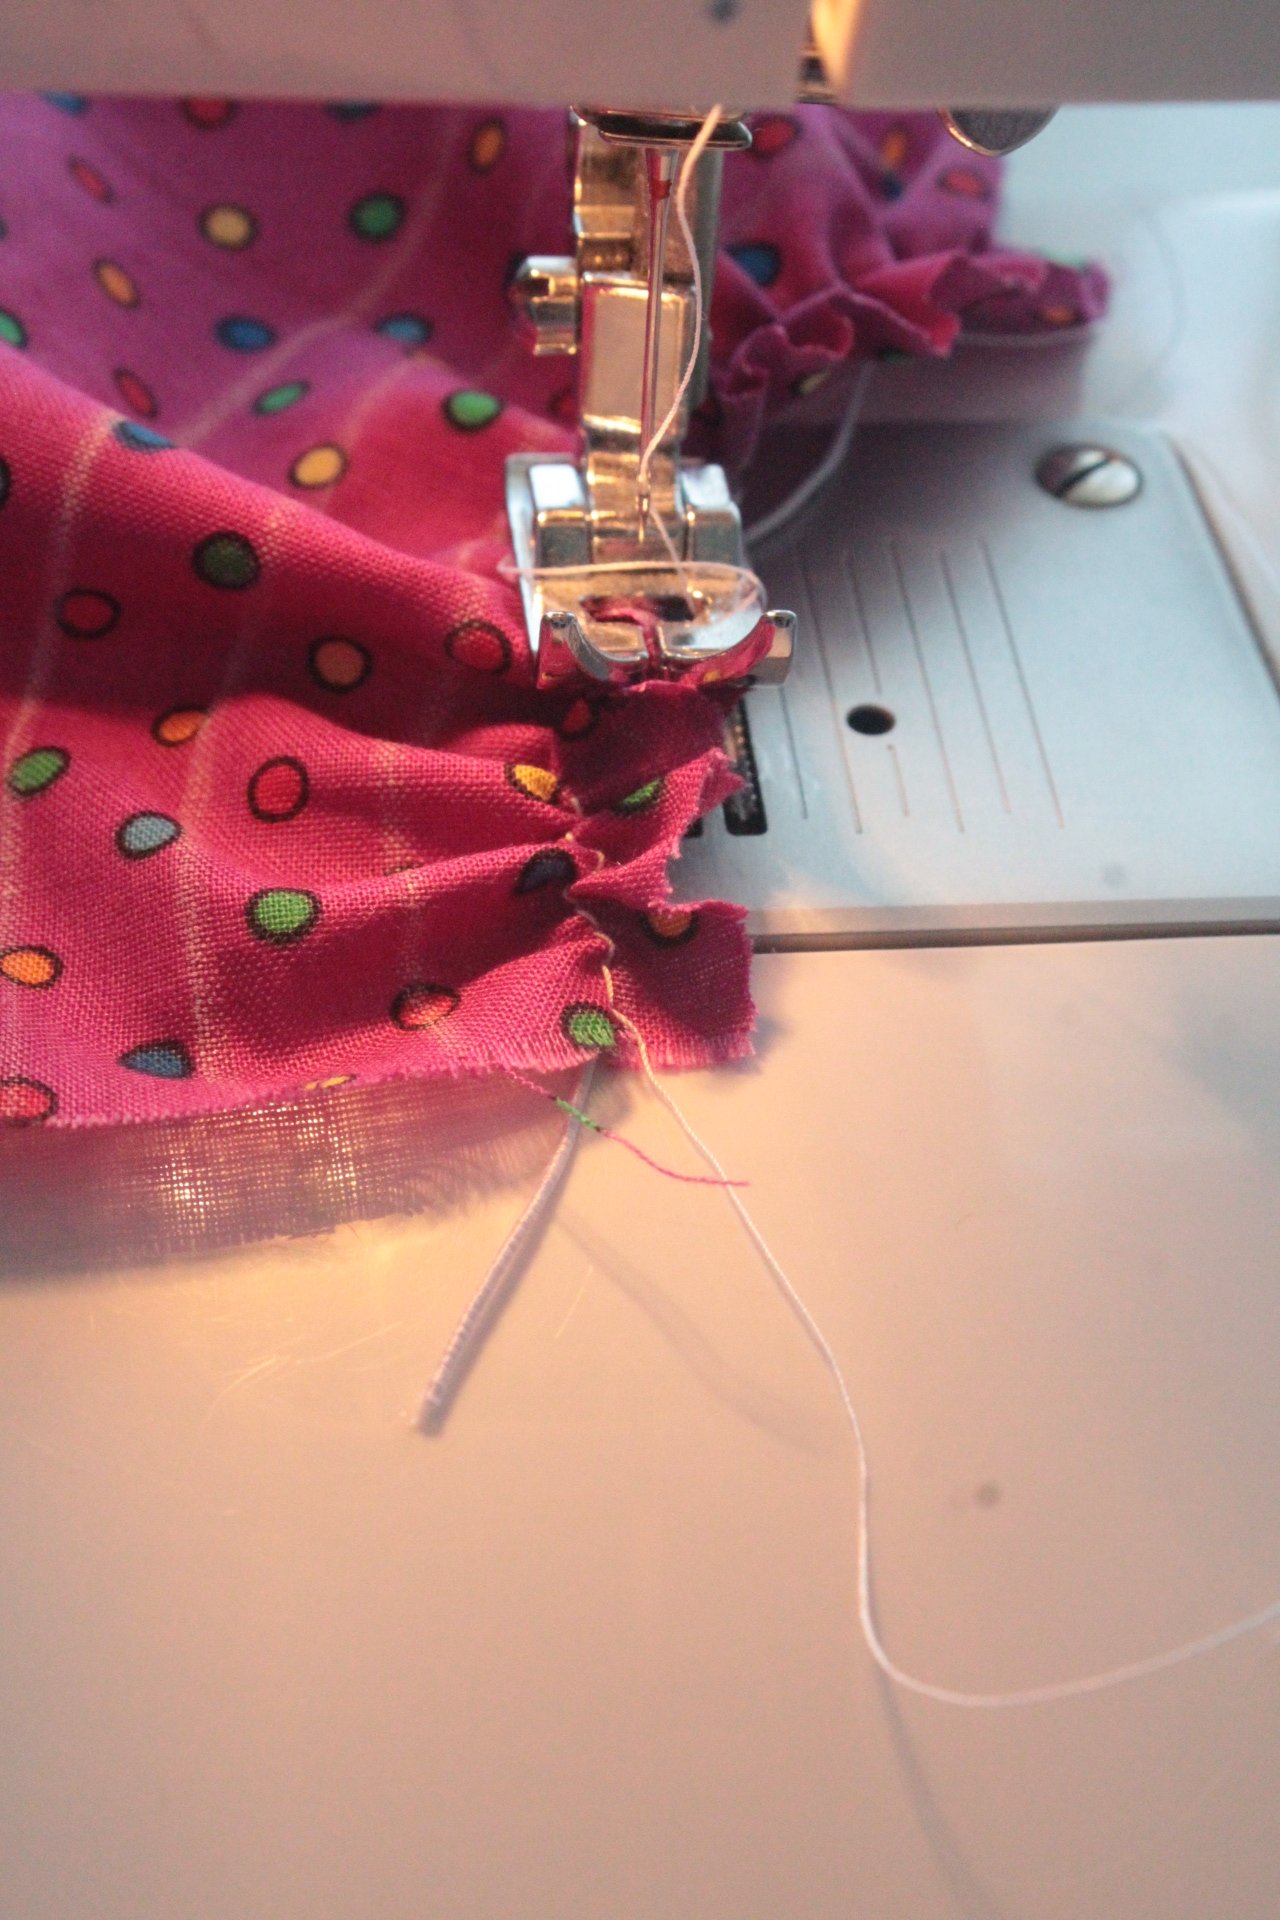
- When starting and finishing a row of stitches, leave a tail of elastic. Use these tails to tie the elastic to the next tail so the elastic won’t slip when you’re wearing the item. This is in addition to backstitching.
- After the initial row of shirring, pull the fabric in front and behind the needle when sewing the next rows. This will prevent the fabric from gathering under your needle and will make sewing a lot smoother.
Are there any other tips I should keep in mind when shirring?
Yes! Before sewing, make sure to test on a scrap piece of fabric for how much gathering your fabric stretches so you can adjust how tight or how loose the thread should be before starting.
Also make sure to use an appropriate needle size as this will affect how well the fabric is gathered.
Sewing with elastic thread step by step tutorial
Materials:
- elastic thread
- regular thread
- marking pen, chalk or chalk pen
- ruler or measuring tape
- fabric
- scissors
- sewing machine
- pressing iron
How to shirr fabric:
Prepare the bobbin
- Wind your bobbin with elastic thread.
- Insert the bobbin in the bobbin case, making sure you pull the elastic thread through the little hook on the bobbin case. Don’t be afraid to pull the elastic tread if it gets stubborn.
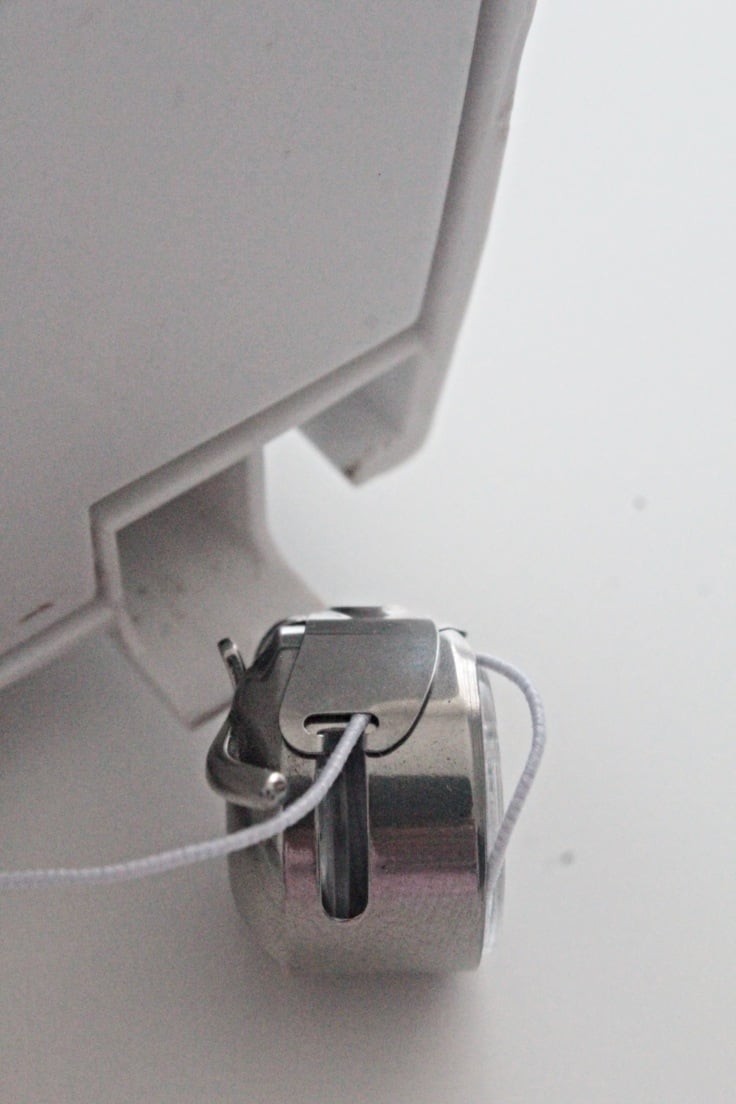
- You may need to adjust the bobbin tension on your bobbin case. The elastic thread being thicker than regular thread might have a hard time passing through the bobbin case in which case you need to loosen up the bobbin a bit from the little screw located on the side of the bobbin case.
Sew the fabric
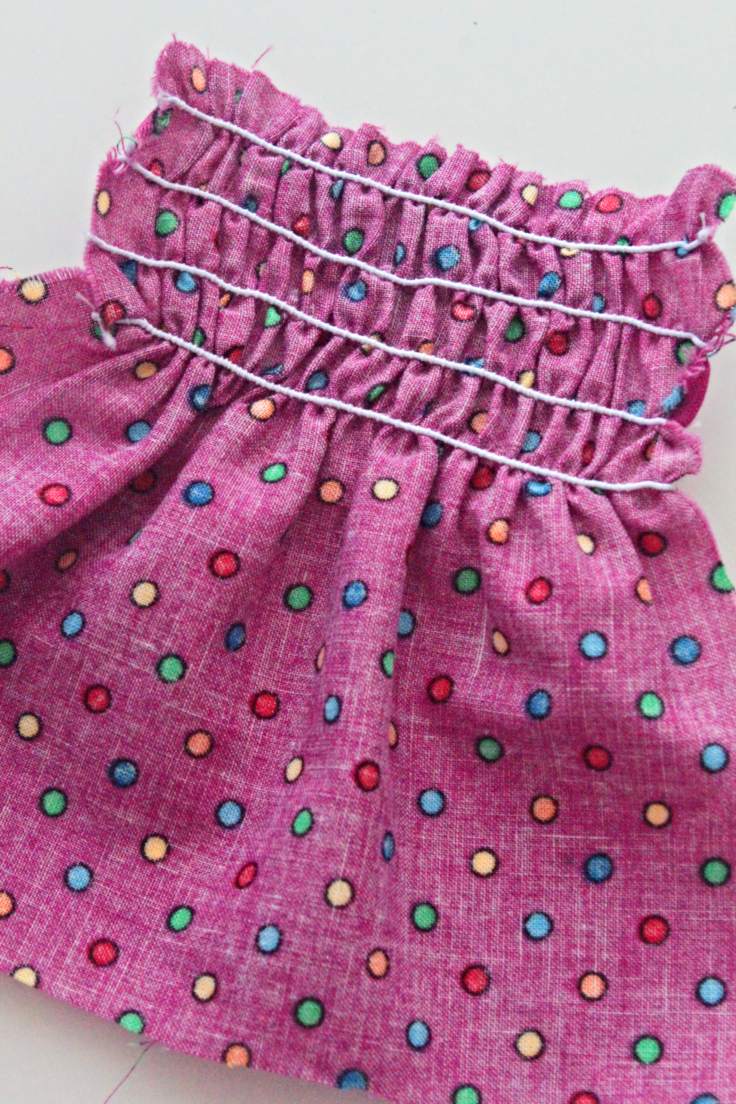
- Mark your shirring lines on your fabric using chalk or a marking pen and a ruler. I like to leave a gap of 1/2″ to 1″ between the lines. The smaller the distance between these lines the tighter the shirring. Vice versa, the wider the distance the looser the shirring.
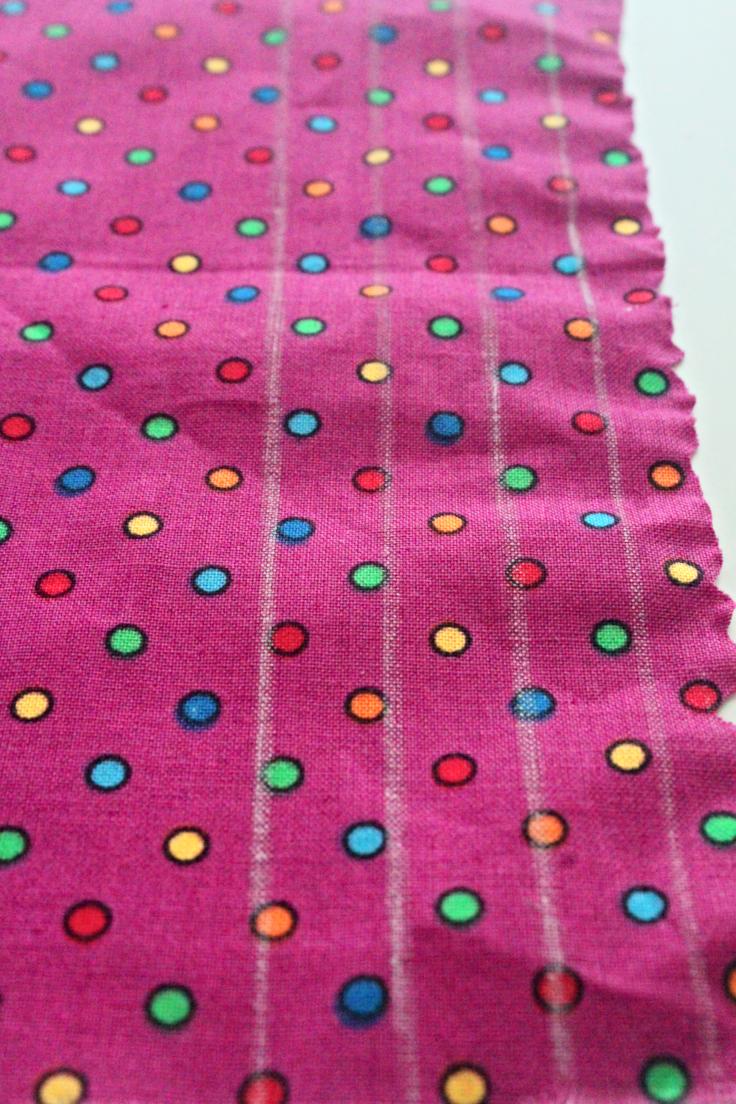
- Start sewing your first line along these markings. You will probably be able to hear a weak noise, sort of like squeaking when sewing, due to the elastic passing through the plates of your machine. Nothing to worry about, this is normal so keep going.
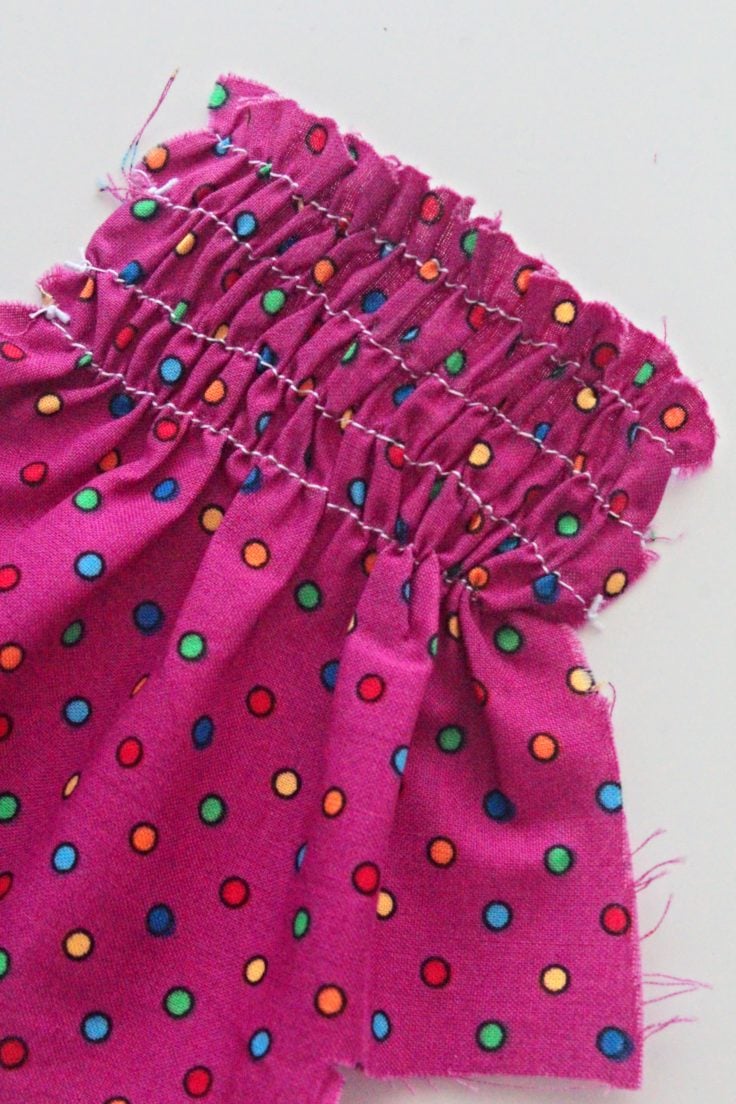
- If your parallel rows of stitches are close you’ll be able to notice the shirring effect with the second row. if your lines are apart, the shirring effect will gradually appear as you keep adding more rows.
- Stop sewing rows when you’re happy with how the gathering looks like.
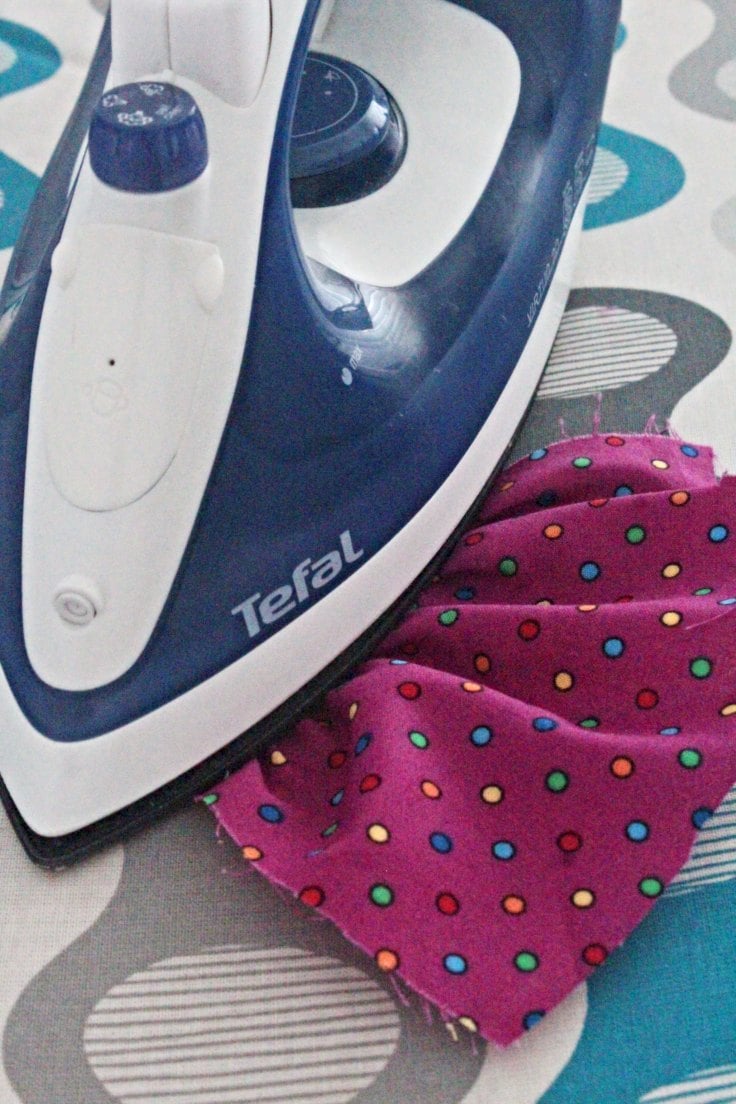
Finish the shirring
- When finished sewing all shirred stitches, press the gathering but don’t run the iron straight over the elastic but rather do it on the right side of the fabric. Running the iron over the elastic thread might melt it or make it loose.
- And that’s pretty much it, this is how to shirr fabric with a sewing machine! Now go make yourself a nice pretty shirred dress like this one I made for myself. Perfect for hot summer days!
I hope that you found this tutorial useful and that it helped you learn how to shirr fabric. If you have any doubts or questions, don’t hesitate to leave a comment below. I’d be more than happy to help! If you have any other tips for shirring, please share them in the comments below! Good luck and Happy Sewing!
Pin to save for later
Most popular sewing projects:
- How to sew a round hem
- Corded bag handles
- Flutter sleeve dress pattern
- How to laminate cotton fabric


Article may contain Amazon & affiliate links. As an Amazon Associate I earn from qualifying purchases at no additional cost to you.

Thank you for the tutorial. I would like to make a simple crop top for my granddaughter
Thank you so much for the tutorial it has helped a lot. Would love the dress tutorial.
This is so cool! I will share this article with my sister! She loves sewing so much!
What a cute dress. I am not very crafty, but I might have to try this, you make it look so simple
great tutorial and your dress turned out really cute. I would like to make a sundress for my 11 mo old granddaughter. I want to shirr the top and have the top and skirt one piece of fabric as it appears you have done. One question, is there any way to figure out how wide to cut the fabric before i start? In other words, how much smaller will it be after shirring?
Thank you, Sandy! The tutorial for the dress is linked in the post.
i had no clue what shirring was until now. great resource for sewing!
I don’t have much knowledge about sewing so it’s somehow refreshing for me to read about this new information.
My first grandchild was born this year and I want to make her a dress out of some vintage fabric from my gram. This stitching technique will definitely come in handy!
You’ve got some really good tips here. I have not sewed in so long. I really miss sewing. I need to get back in to that.
Sewing is one of my hobbies. I am glad that I’ve read this article and get some techniques from it.
That’s a really cute dress you made, I will surely try this if I have a sawing machine.
This is such a great tutorial, especially for me who loves trying to make my own dress and accessories sometimes.
I have always wanted to learn to sew. I am excited to start!
I am not really fan of sewing, that’s for sure! But learning some techniques is really nice. I never thought there is so much about Shirring.
This will come in handy for my next sewing project. You make it look so easy.
Nice! I admit I don’t know much about this since I don’t sew. I might have to try it one day.
Very informative and educative, thank you
Thanks, Mima! :)