

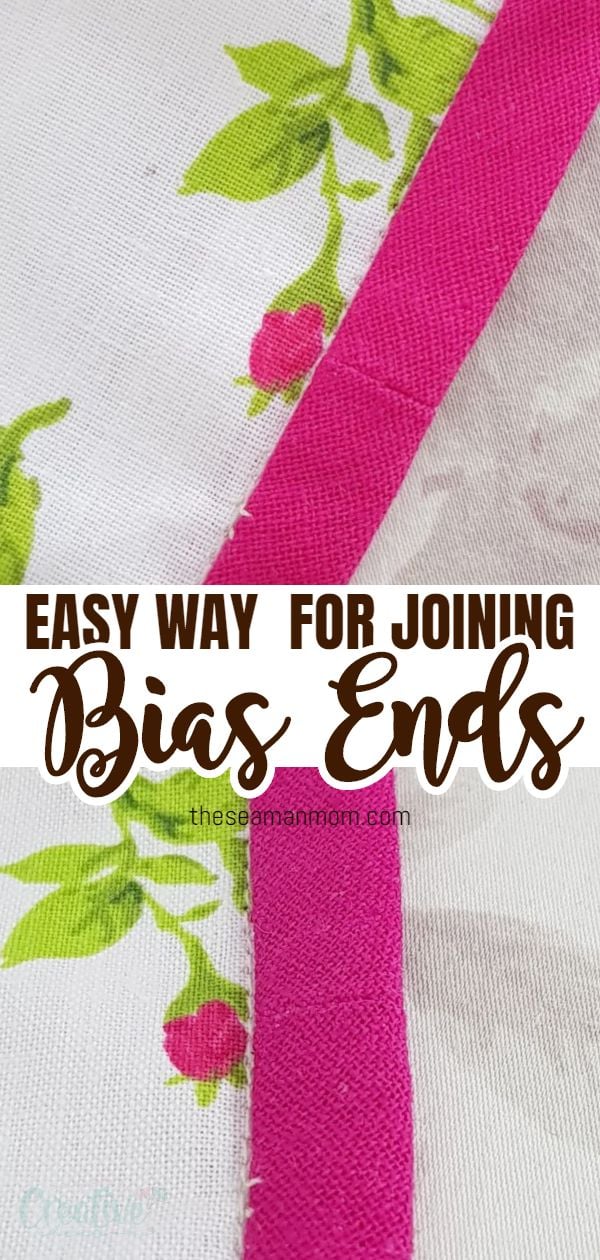
How to join bias binding ends
Struggling to get the perfect fit when joining bias binding ends? No need to stress anymore as I’ve got the perfect method for you! This technique is crazy easy and simple and will give you a beautiful, almost invisible finish!
Joining bias binding ends
Joining bias binding ends has never been a pet peeve for me! I am probably one of those lucky people that find finishing off bias ends is something super easy and quite natural.
Not to brag or anything and I honestly have no idea how it came to me, but this method felt like second nature when I started sewing bias tape. There are various methods out there, everyone has a favorite and I tried some myself. But to me this one is the easiest, fastest, most fuss free method! And I love that the spot where the ends of the bias tape are joined looks neat and smooth, almost invisible (at least to my old, tired eyes lol)
Bias binding series:
- Continuous bias binding tutorial
- How to make bias tape without a bias maker
- How to make bias tape using a bias maker
- Bias tape calculator, formula and cheat sheet
- How to sew single fold bias tape
- How to sew double fold bias tape
- Mitered corners with bias tape
And because it’s always seemed so easy to me, I wrongly assumed is just as easy to others too so I never showed this method for joining bias binding strips in any of my bias tape tutorials! And they were a few! When a reader pointed it out in a comment I realized it’s about time to share my way of joining bias ends and because it seems like an important issue, a separate tutorial sounded like the best idea!
Some people prefer a diagonal seam to join their bias binding ends, some people like overlapping the ends. I personally like a straight seam as it’s easier, straightforward and super simple to figure out even for a novice. It’s less bulky than the overlapping method and more accurate than the diagonal seam. Not to mention the joining seam is smaller.
This great method is valid for joining bias tape ends as well as joining bias strips! In fact this technique is great to apply to quilt binding too and works exactly the same for both single fold and double fold bias tapes.
How do you sew bias binding ends?
As always I will be going through the step by step tutorial below but in a gist, you’ll have to fold the bias ends at the meeting point, add allowance, sew along the meeting point and trim the ends. Then continue sewing the tape as you normally do for the rest of the bias.
How do you finish double fold bias tape?
Finishing off the ends of bias tape is exactly the same for both single fold and double fold bias tape. As mentioned above the process can be transferred to sewing quilt binding too! This method is that easy and versatile!
How do you join two pieces of bias tape?
As with joining bias tape ends, sewing two pieces of bias tape together is a matter of preference, everyone has a favorite method. For me, this method for joining bias binding ends works just as great for joining two different pieces of bias too.
When would you need to join two different bias tapes? Well, you normally shouldn’t need to, you should be able to figure out how much bias you need in a project so you don’t run out of bias in the middle of the project. But accidents happen and you might find yourself short of bias just as you approach the end of your project. If such incidents occur, just apply this method to attach another piece of bias strip to your existing bias.
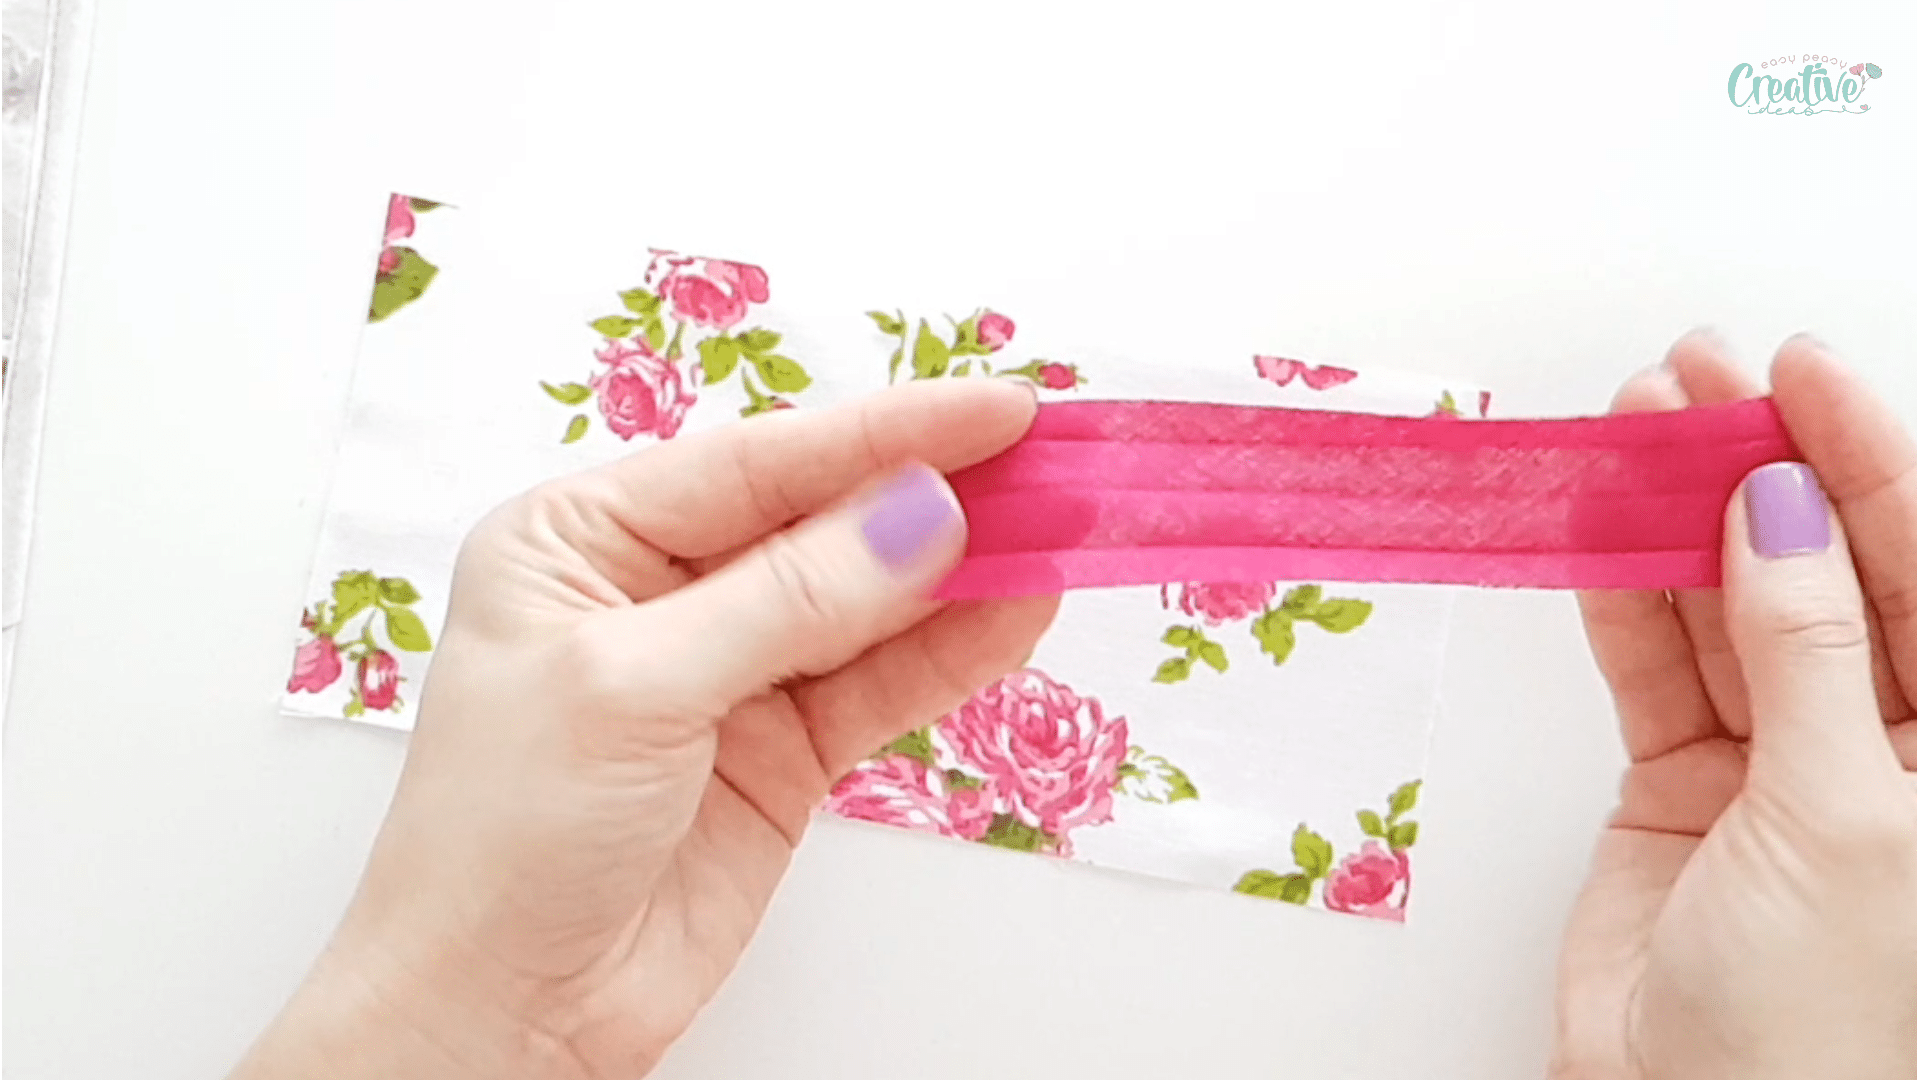
Now let’s see the step by step for my easy method of joining bias binding ends! For this tutorial I used double fold bias tape and if you’re a beginner, you might want to check out this tutorial first to learn how to attach double fold bias. This way this tutorial will make sense to you otherwise it would probably add up to the confusion.
How to finish bias tape ends
Materials:
- a piece of garment
- double fold bias tape
- pins
- marker or chalk
- scissors
- seam gauge
- matching thread
- sewing machine
- pressing iron
Directions:
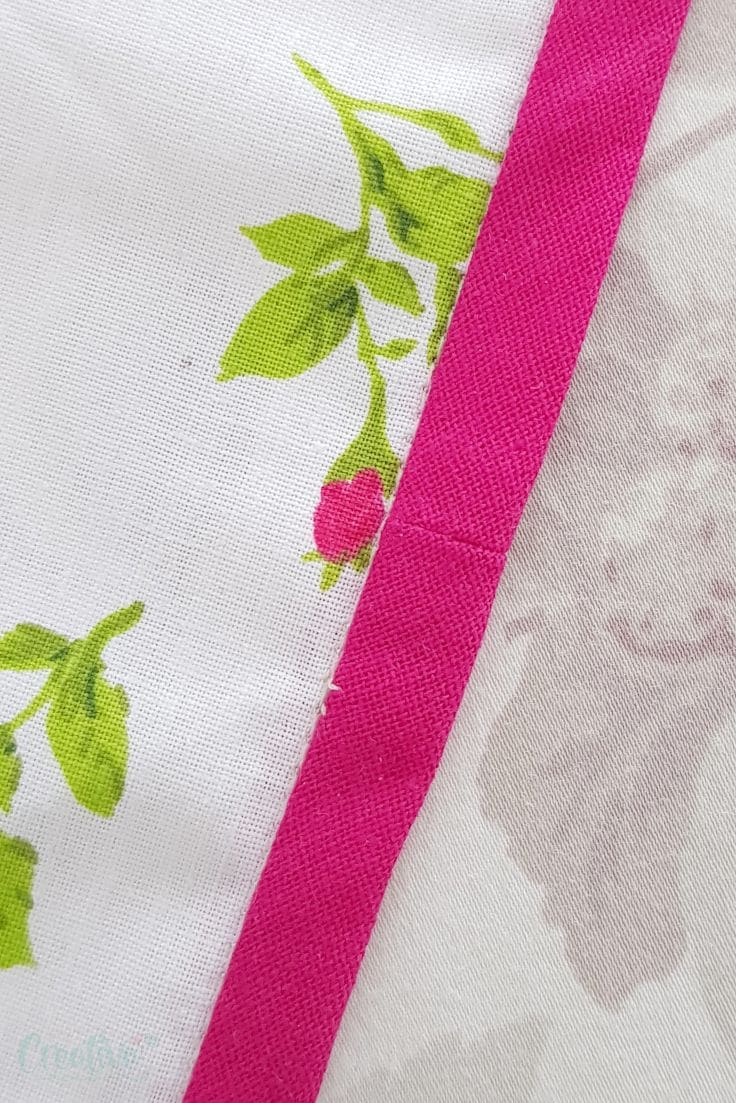
- Open the double fold bias tape completely.
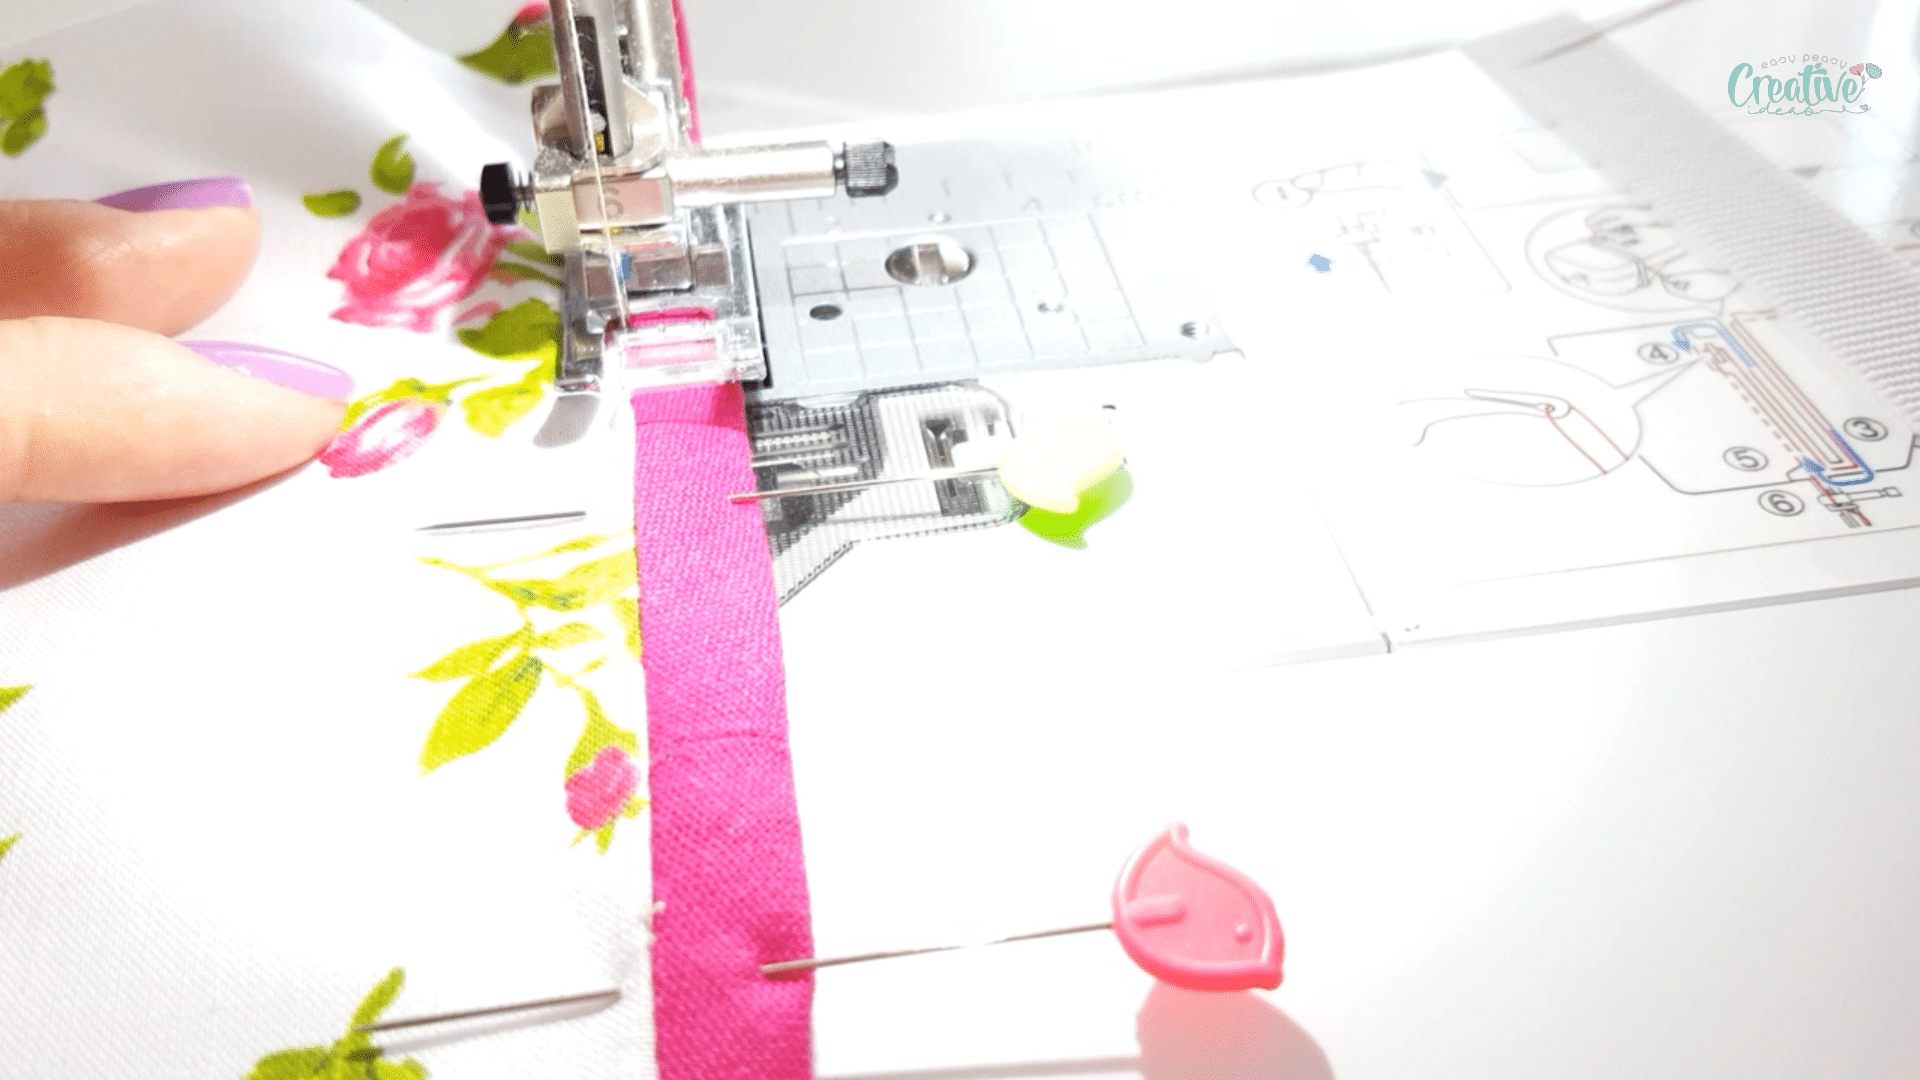
- Place one end of the bias over the garment, raw edges matching and pin. Place the first pin about 1″ away from the end of the bias strip.
- Start sewing on the fold, right before the first pin, carefully removing the pins as you approach them with the sewing machine needle. In other words, leave about 1″- 1 1/2″of the bias tape loose.
- Continue sewing in the fold until you are about 2″ away from the starting point.
- Remove the garment then fold both ends of the bias tape until they meet.
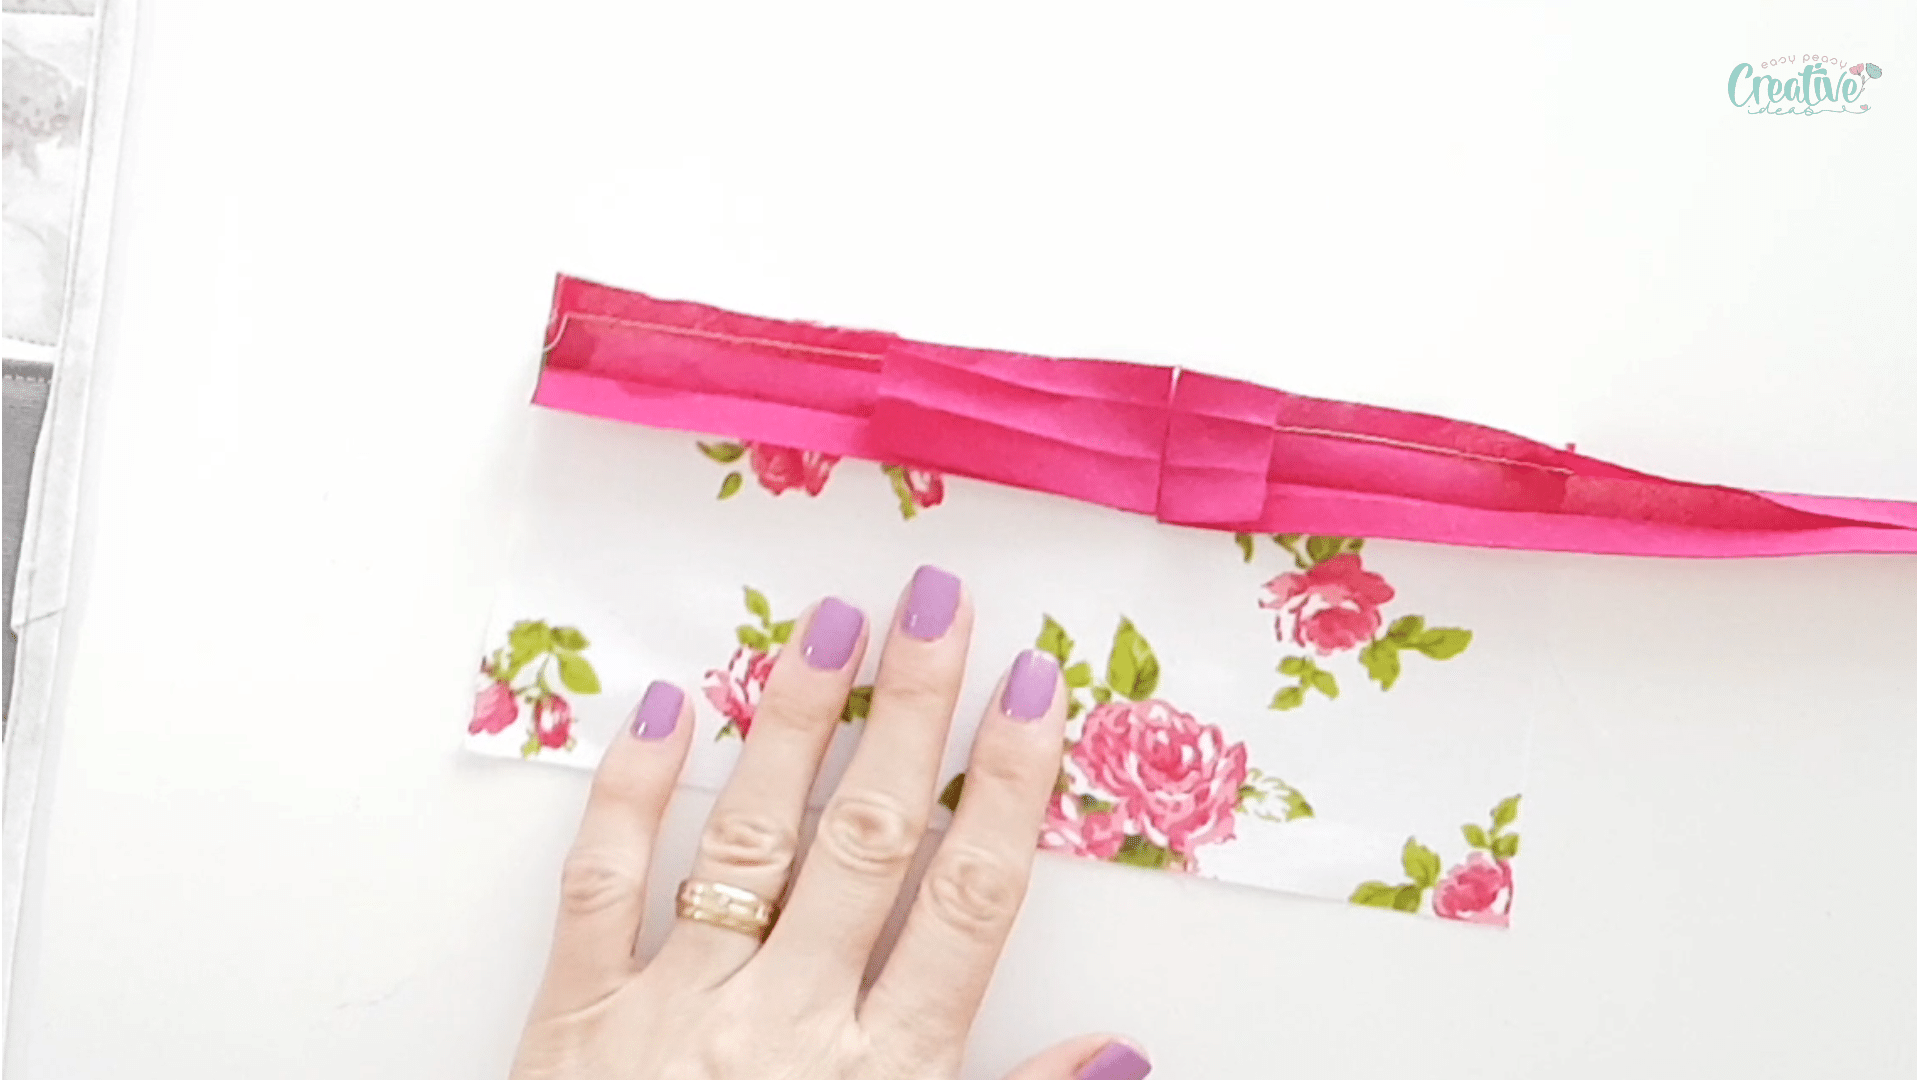
- Finger press then take the garment to the ironing board and iron press the folds.
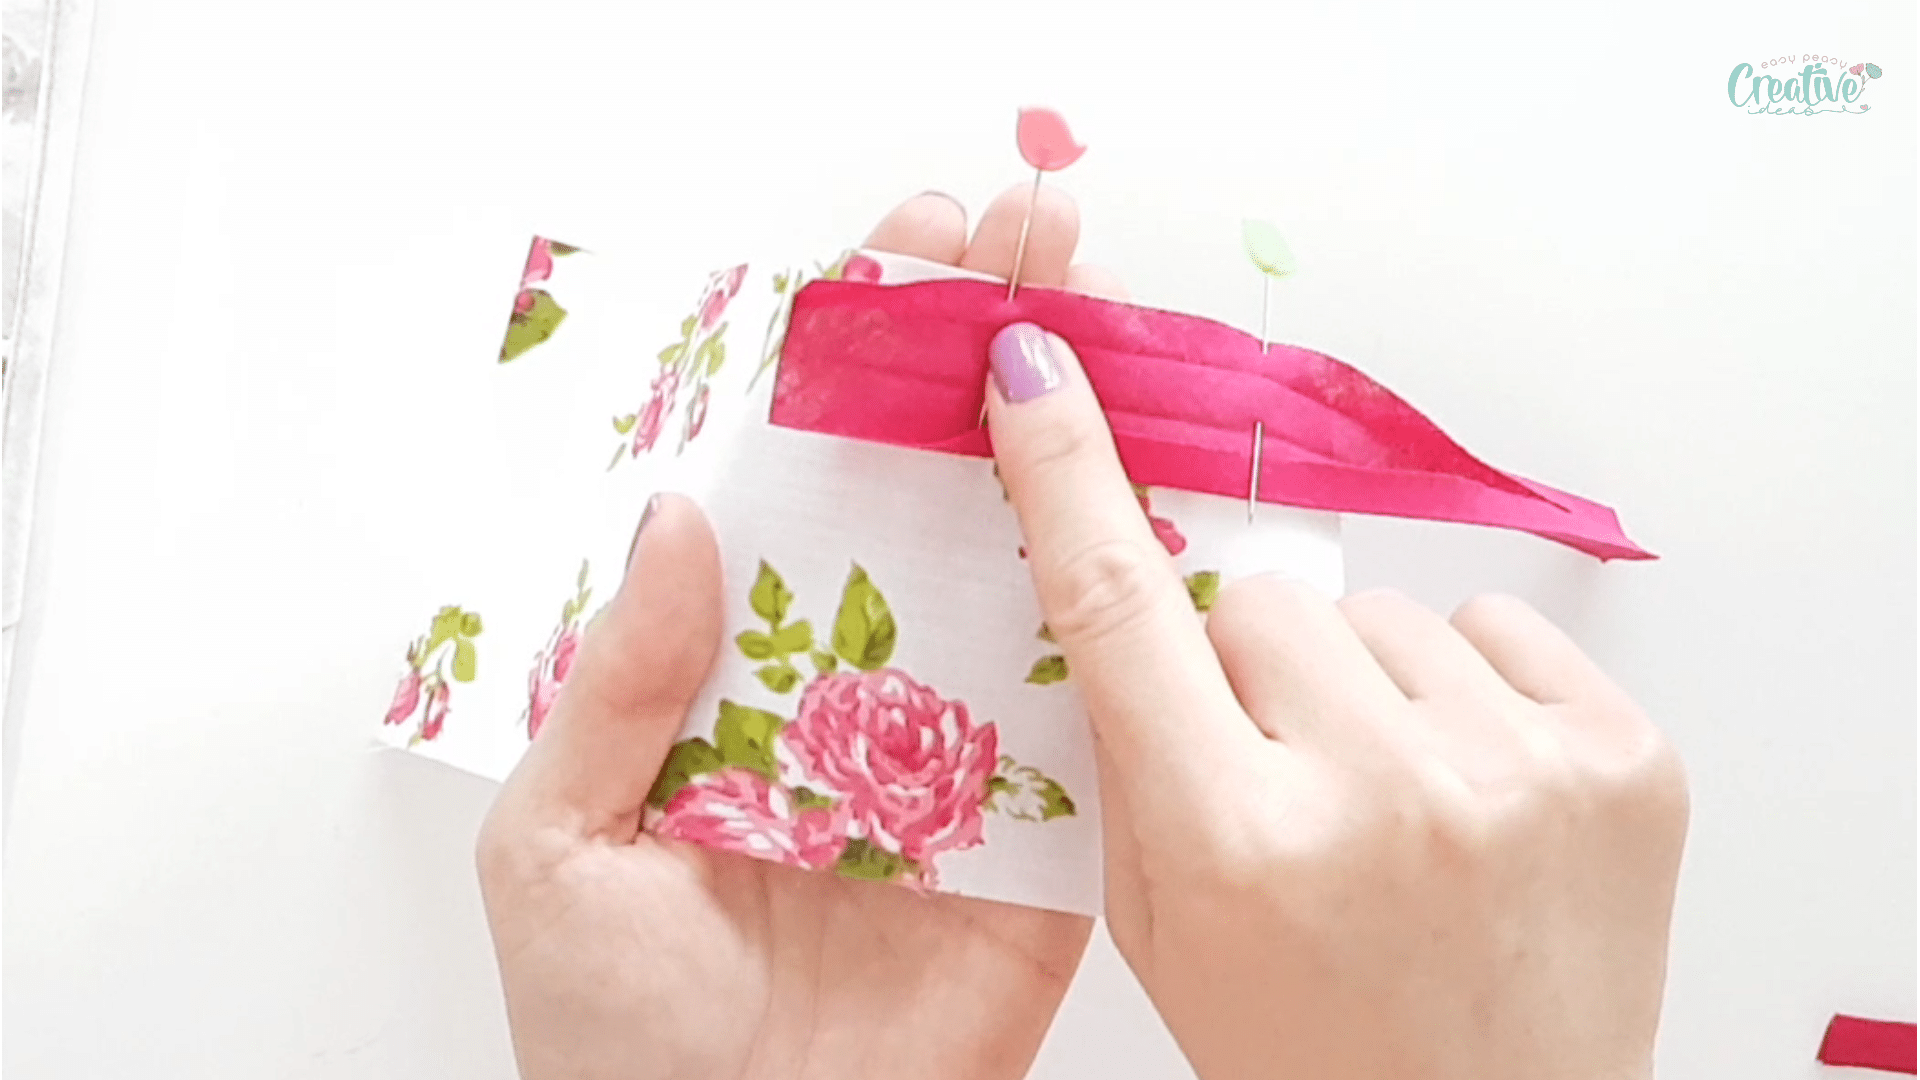
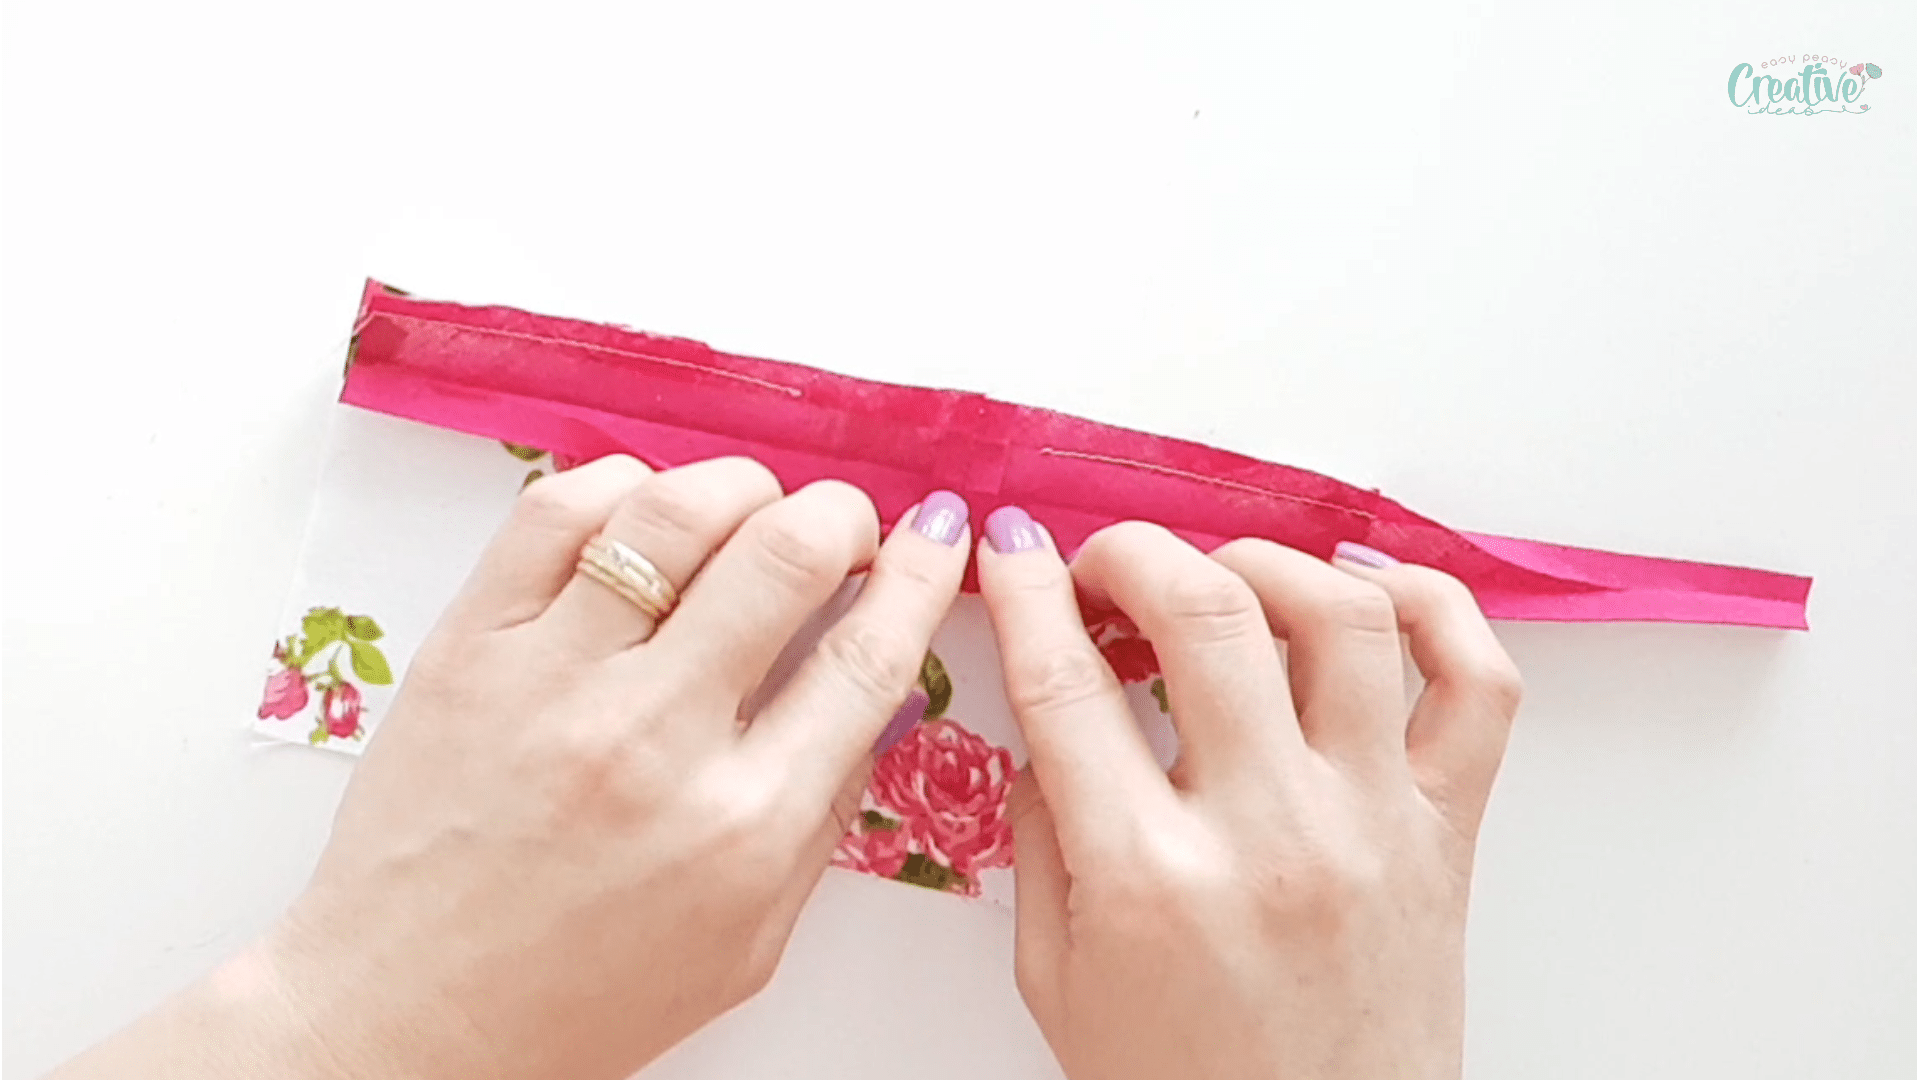
- Mark the folds with a marker or chalk, on the wrong side of the bias tape, for both ends of the bias.
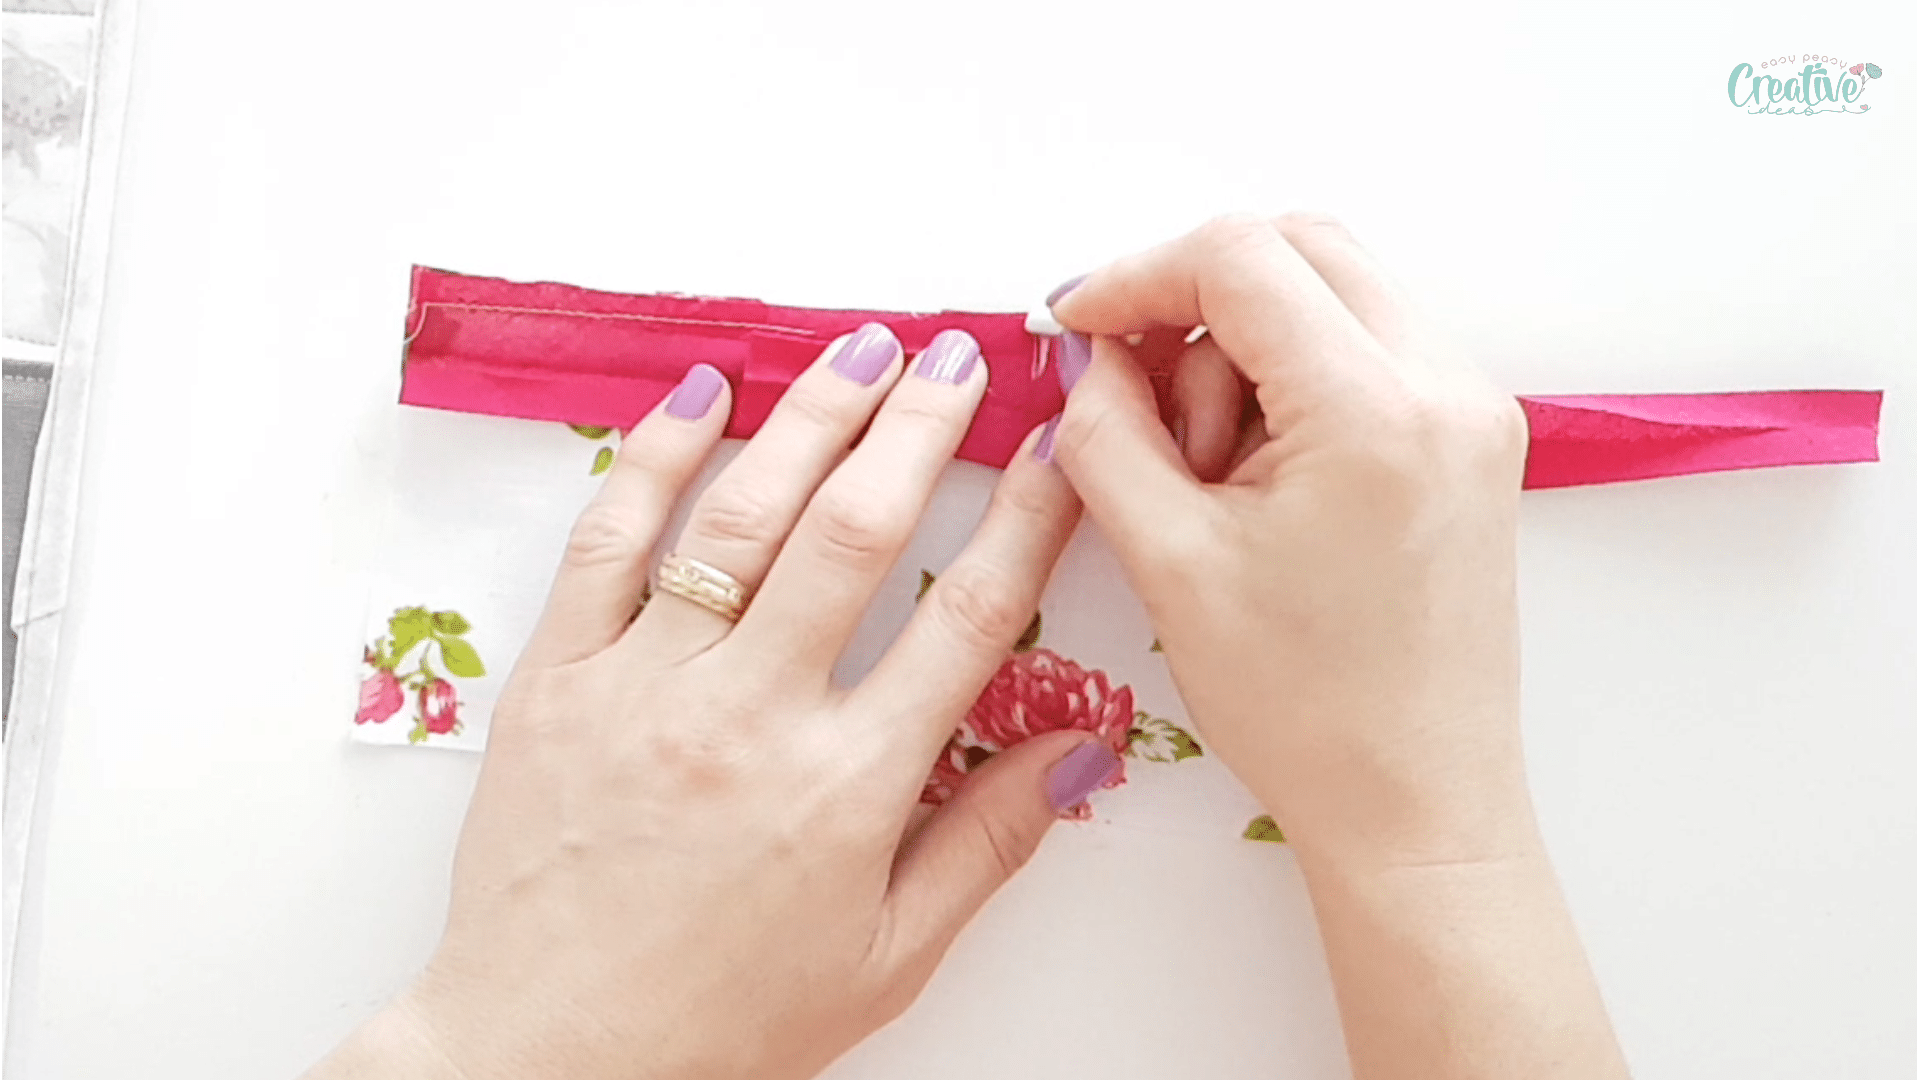
- Using a seam gauge, measure 1/4″ away from these marks and do a second set of marks.

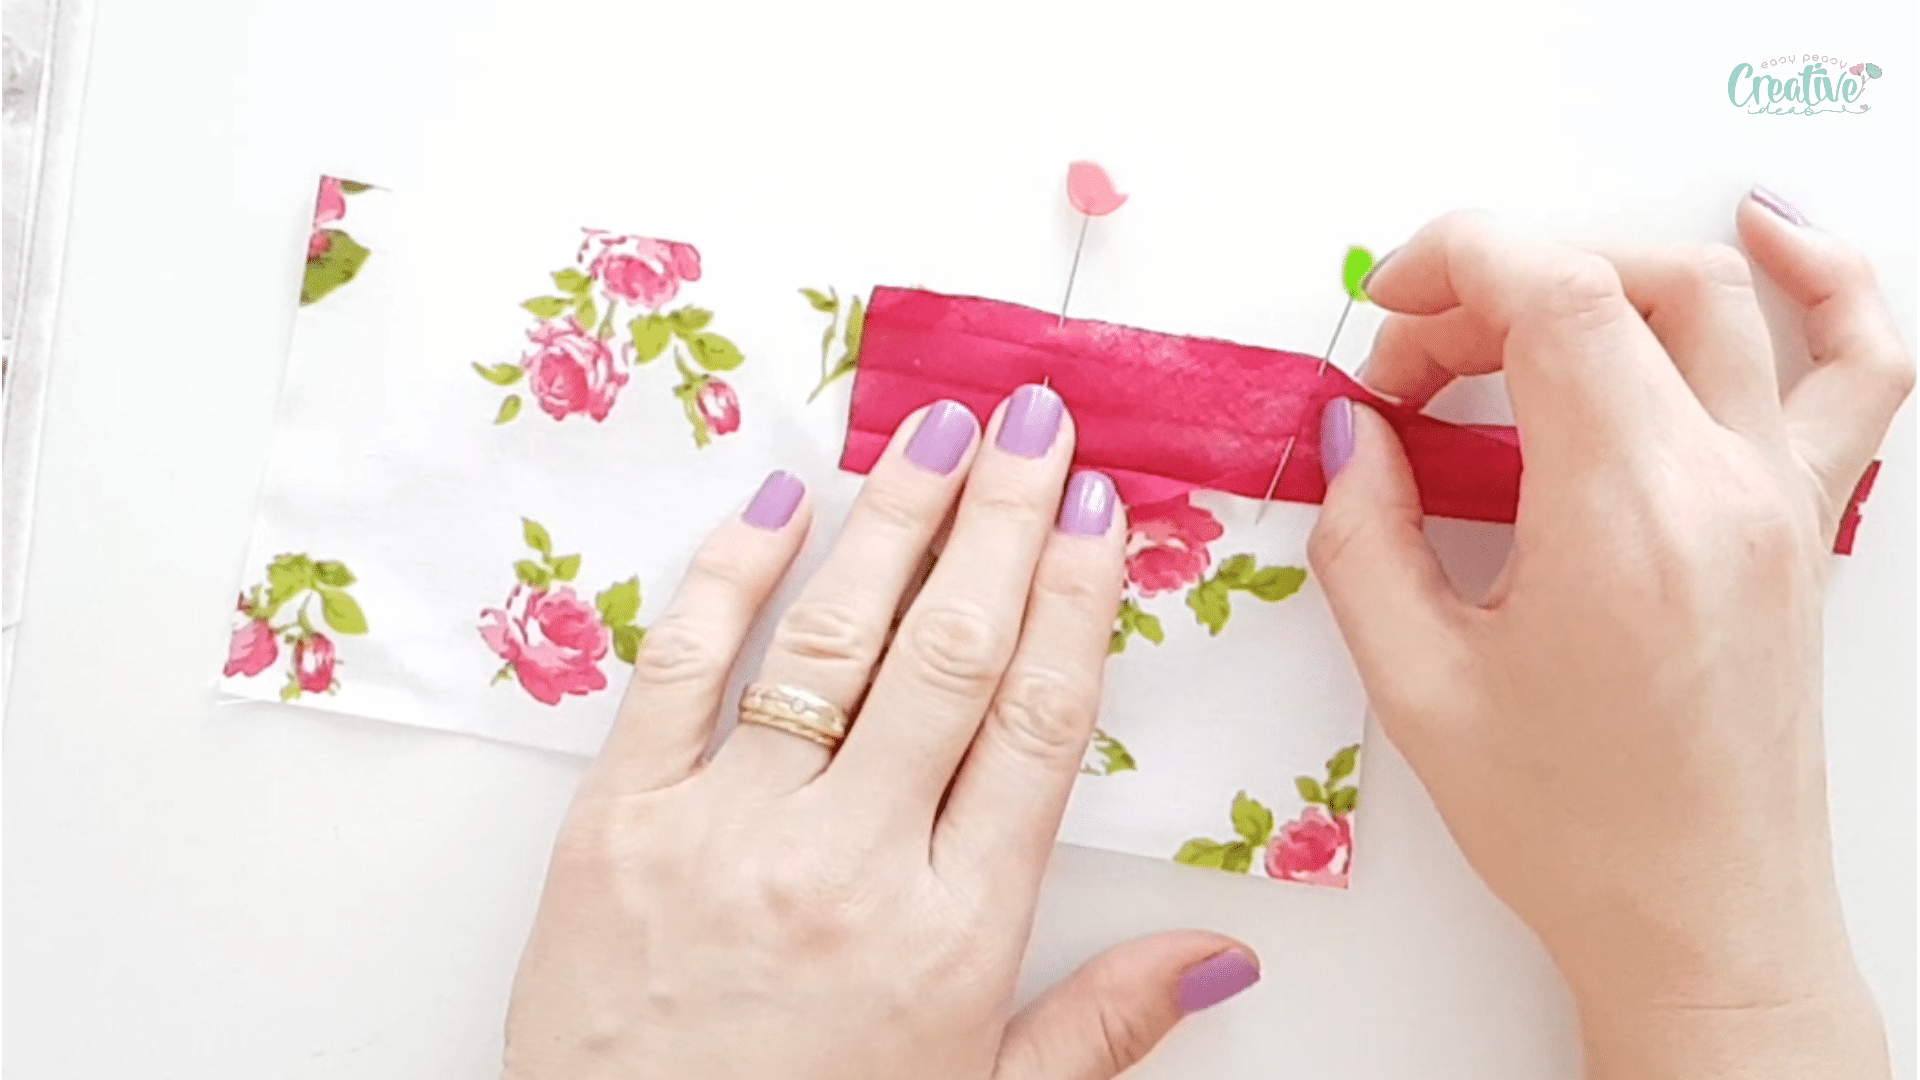
- Pin the bias ends, making sure the first set of marks are matching perfectly.
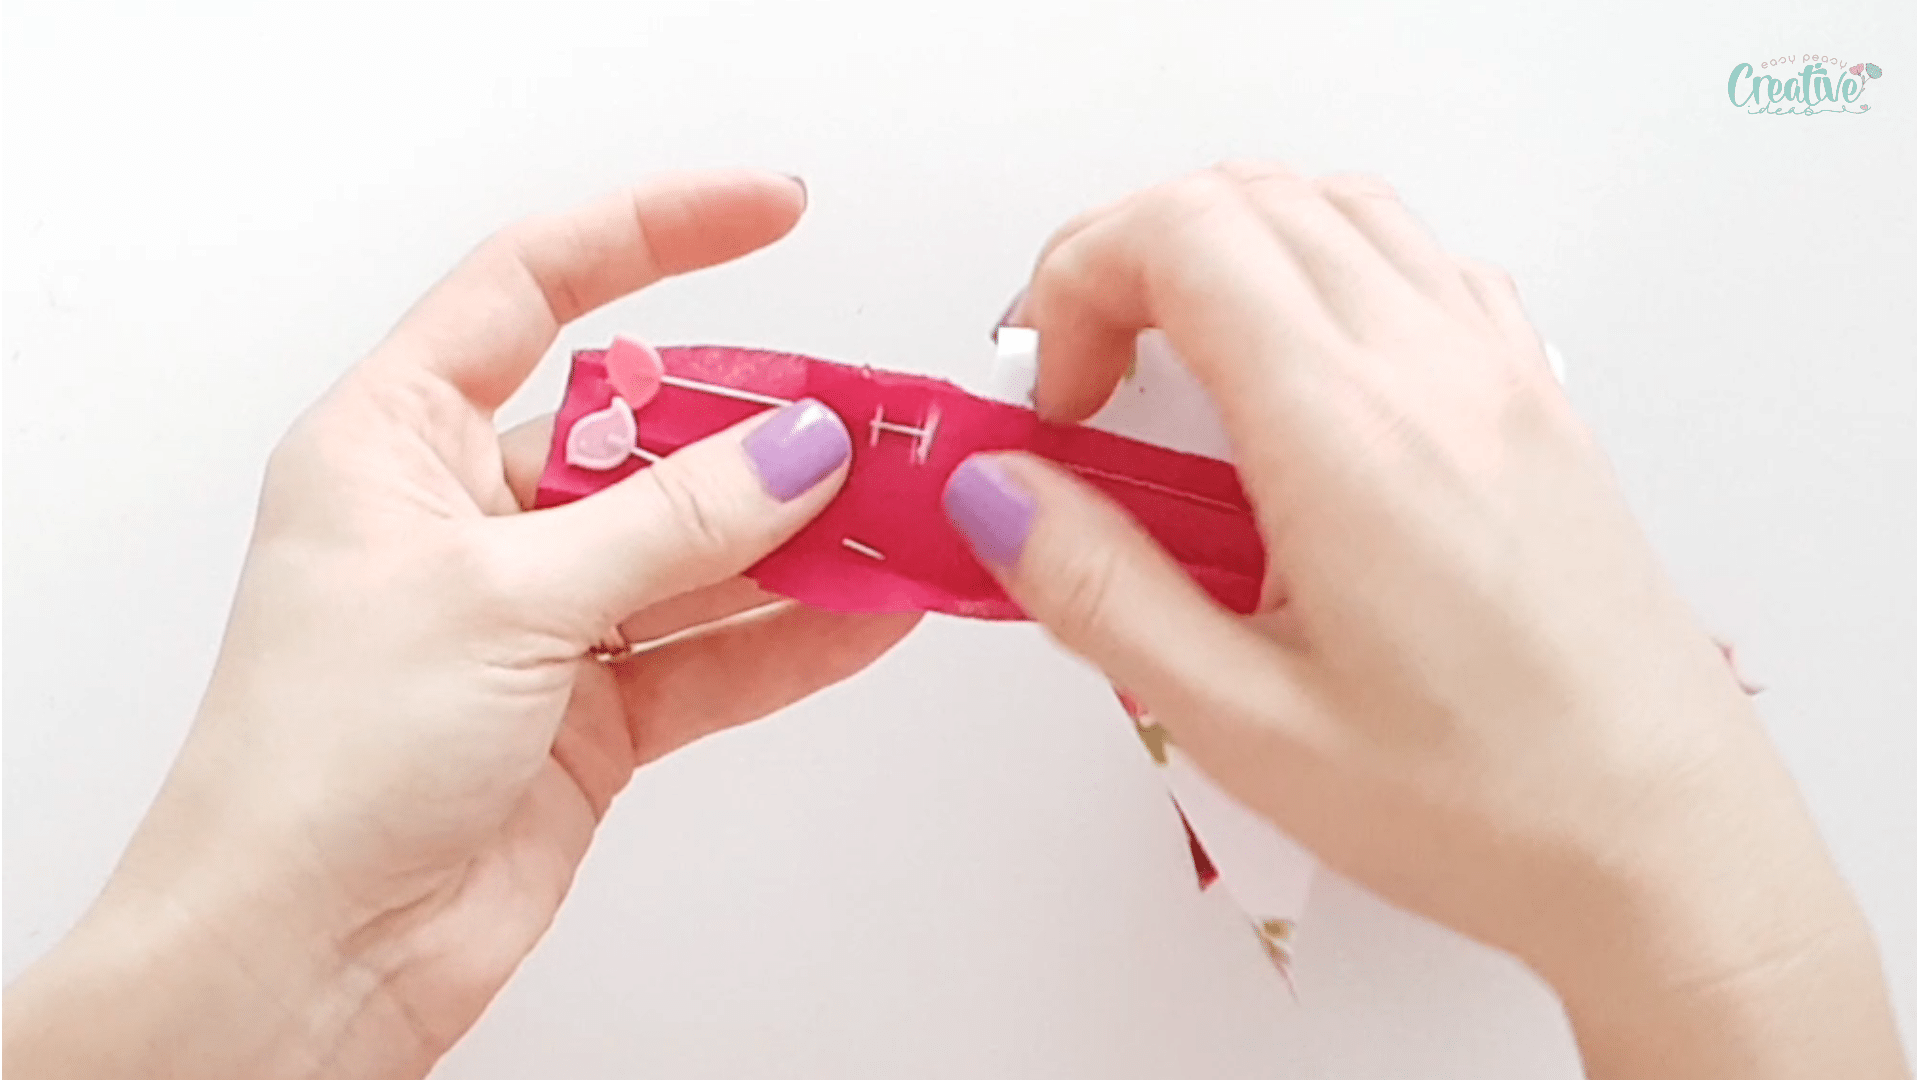
- Take the garment back to the sewing machine.
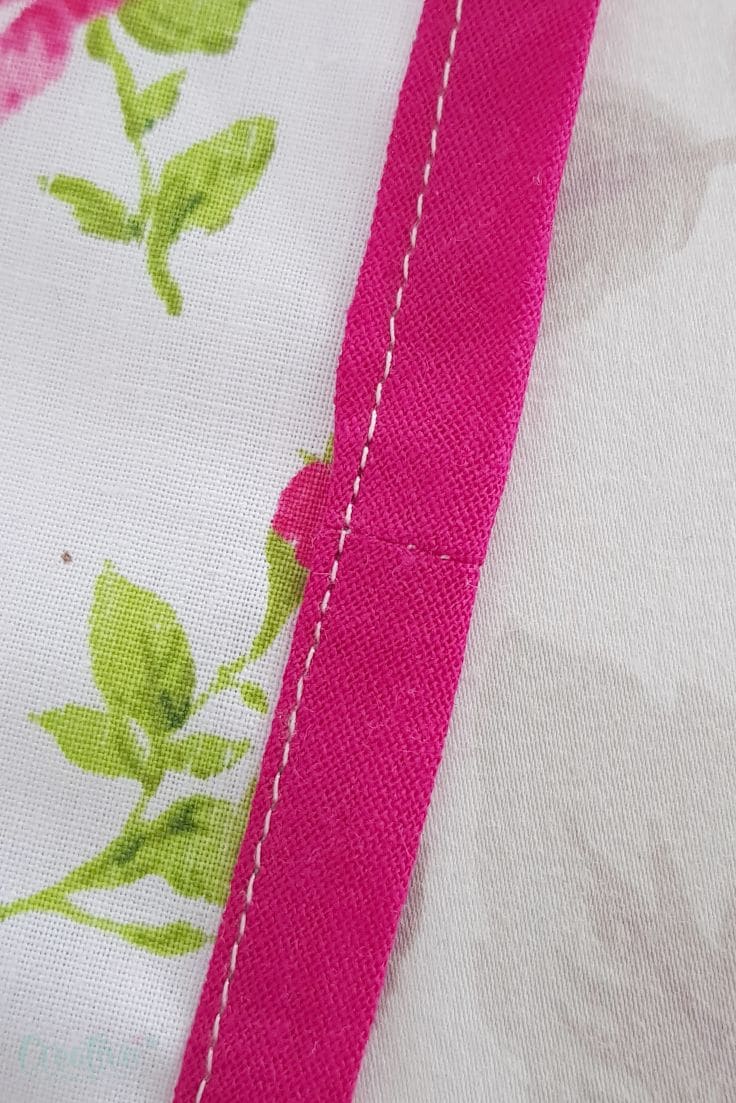
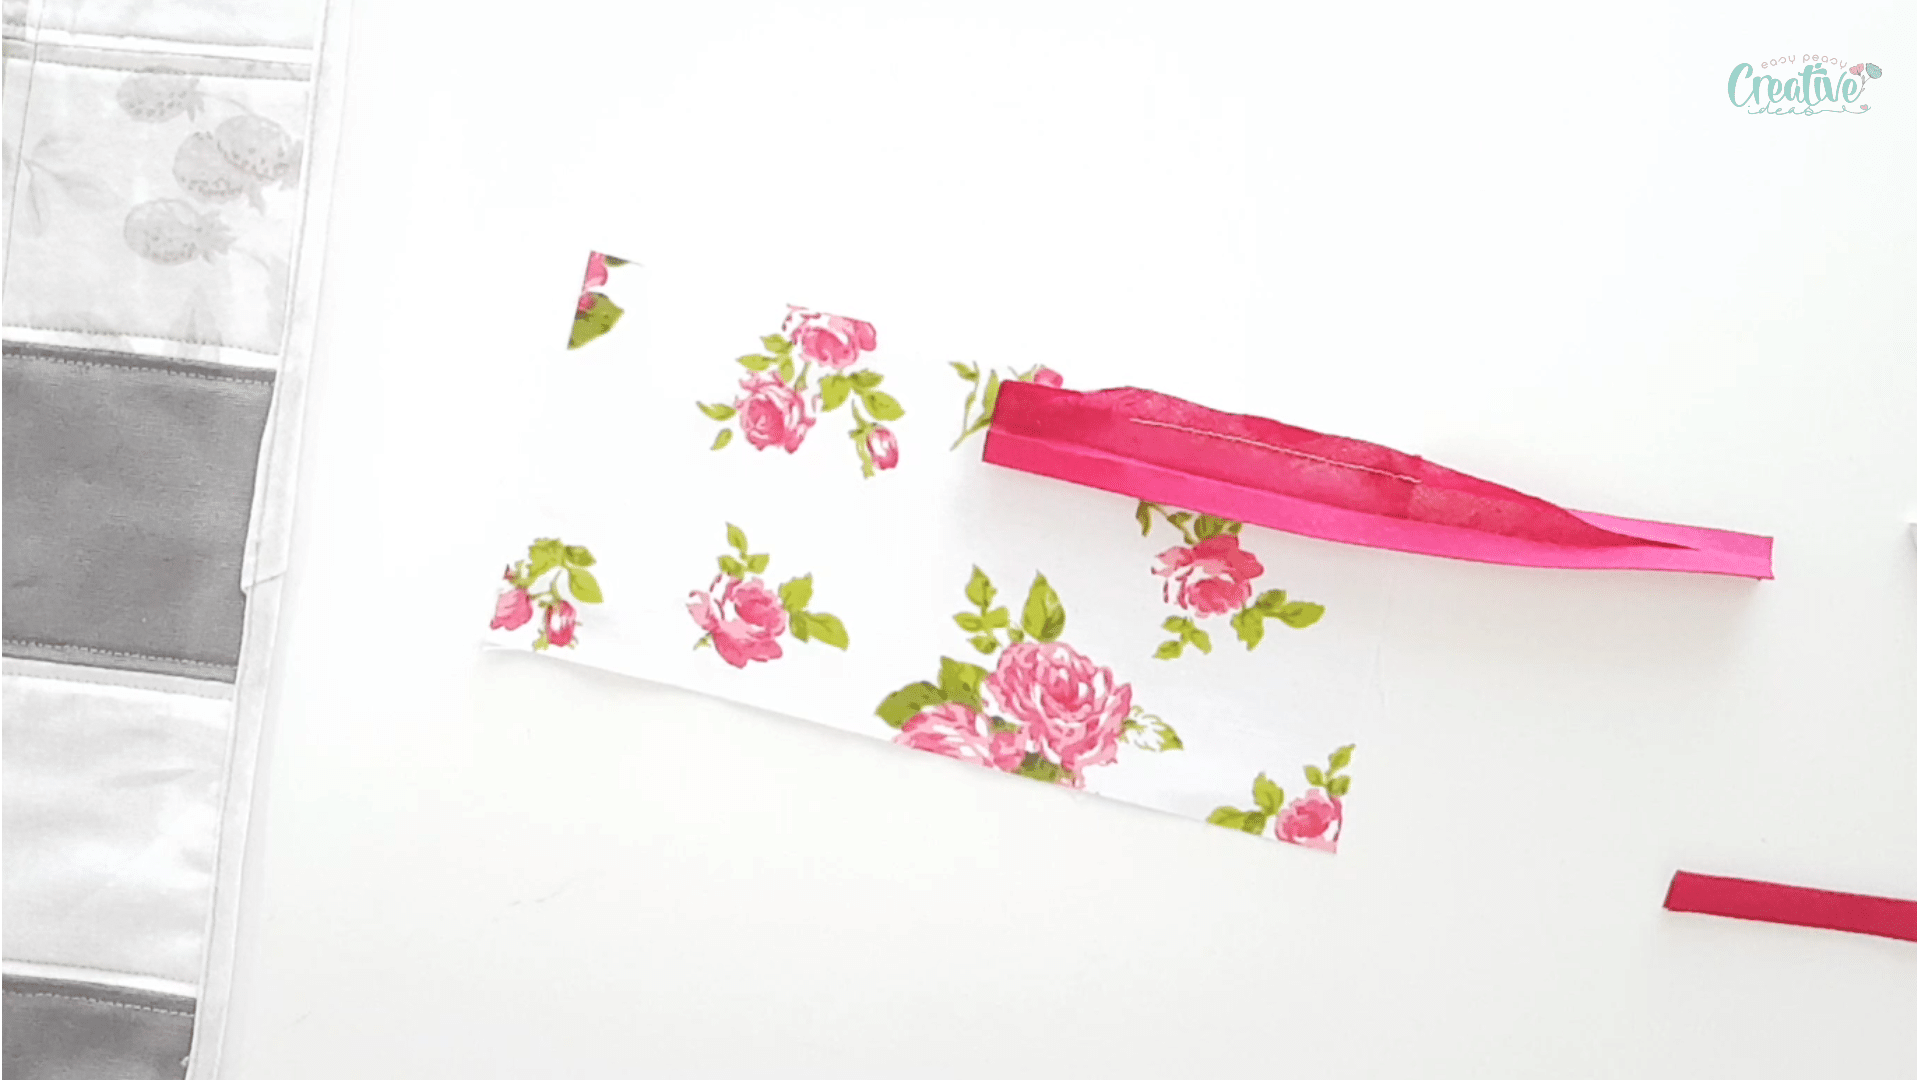
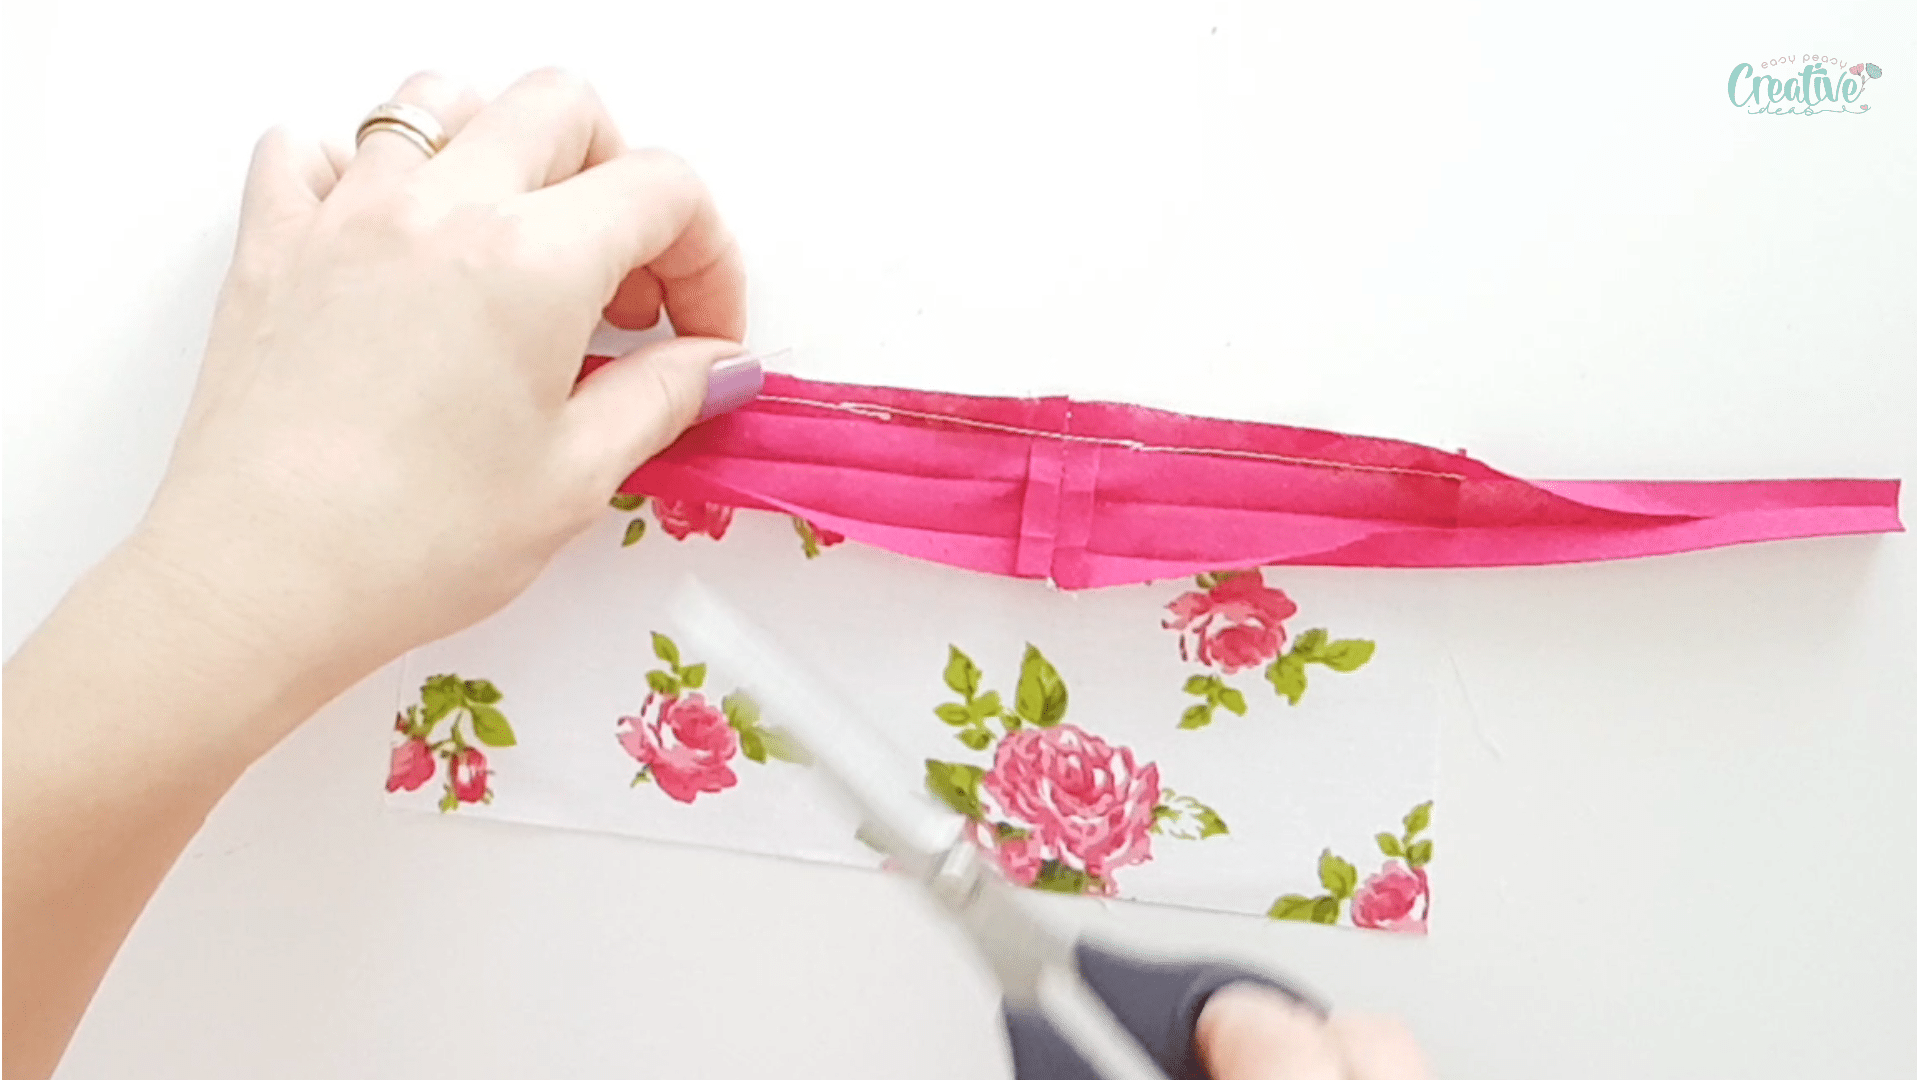
- Sew along the first set of marks.

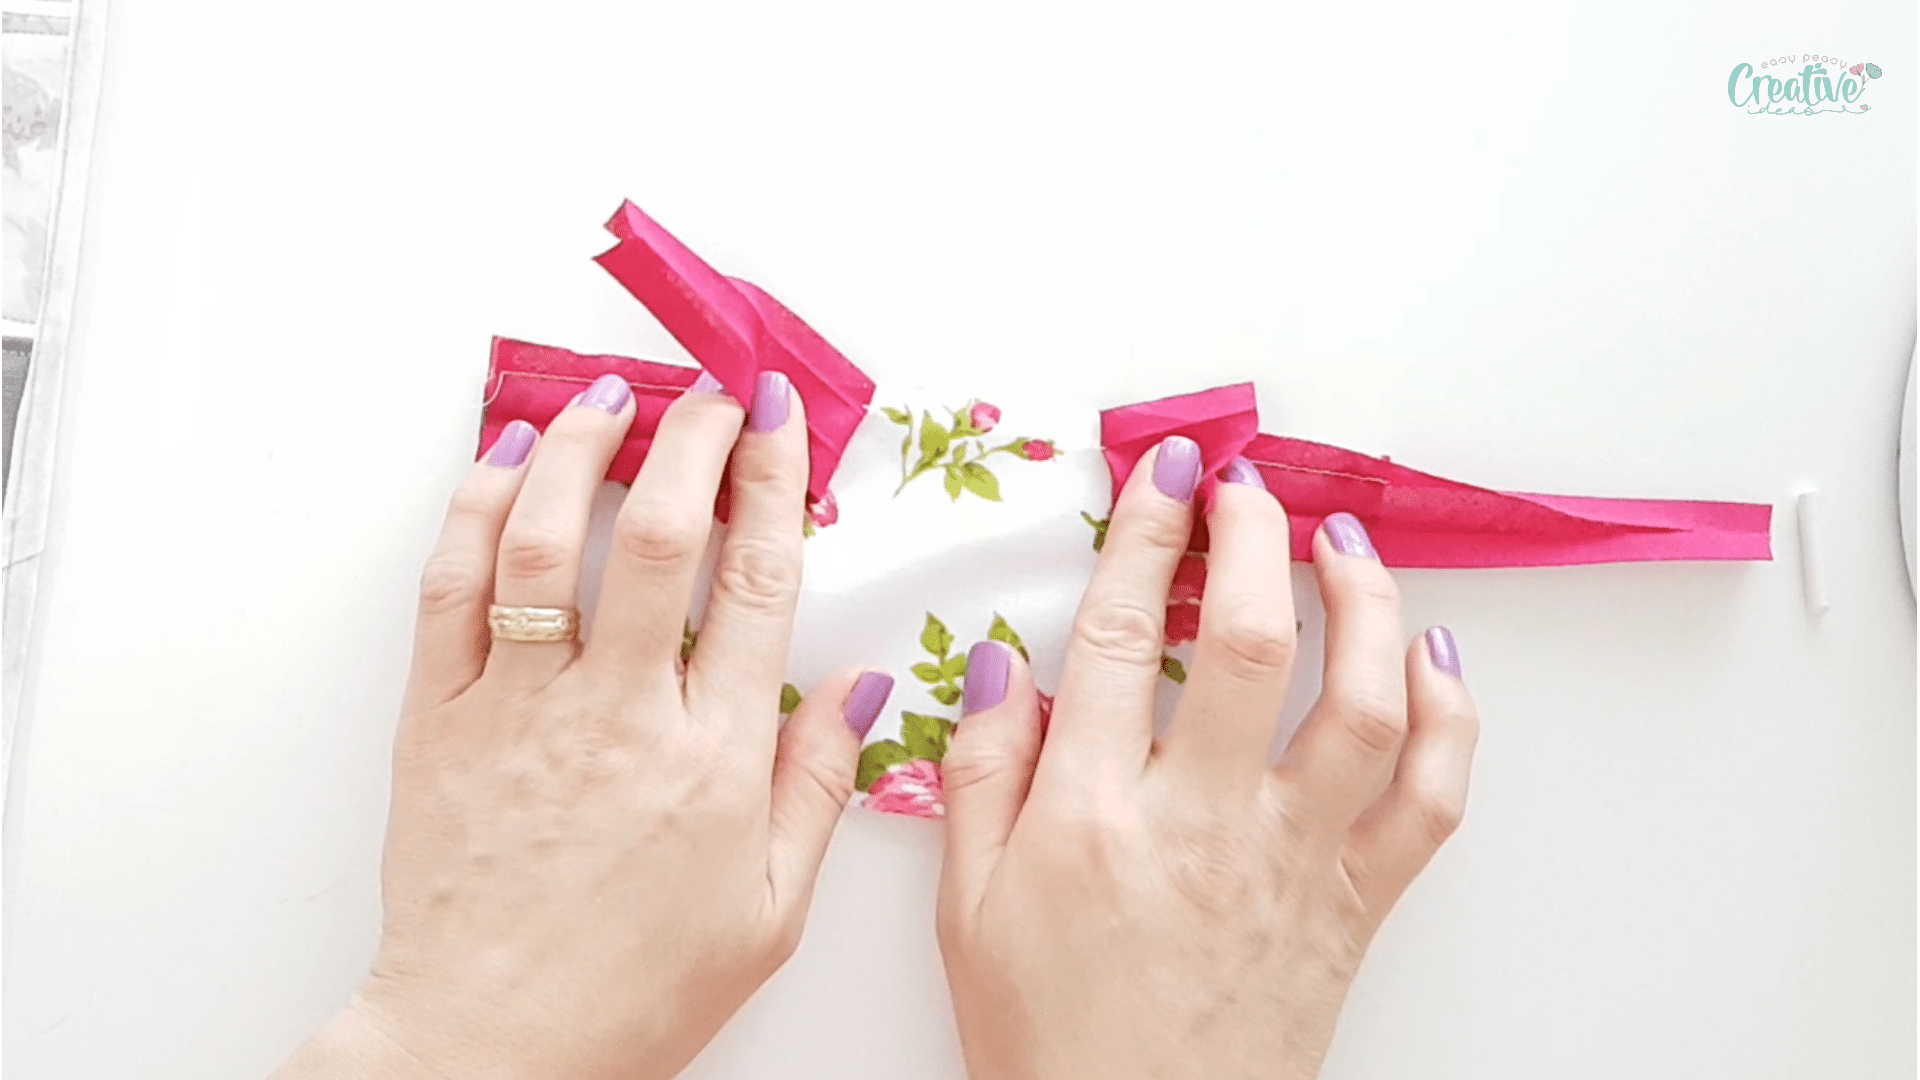
- Use your scissors to trim the bias ends along the second set of marks.
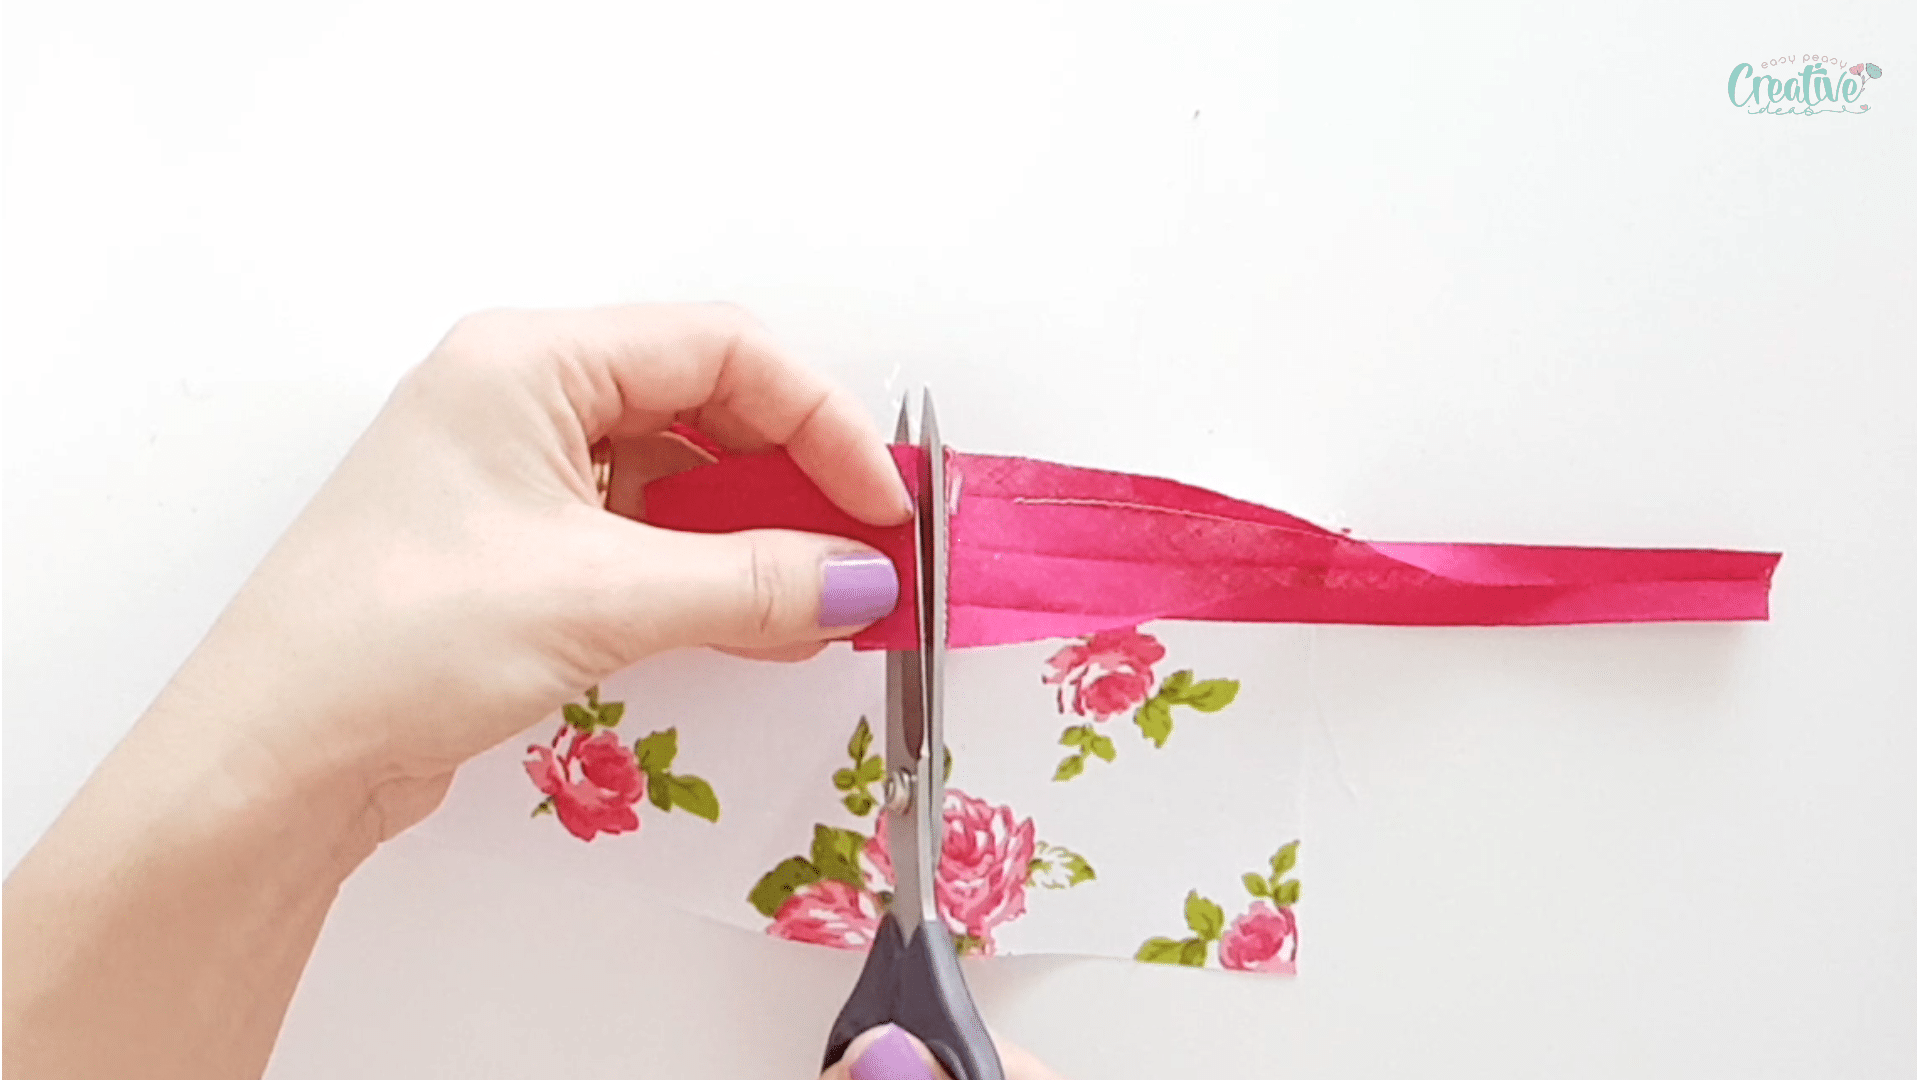
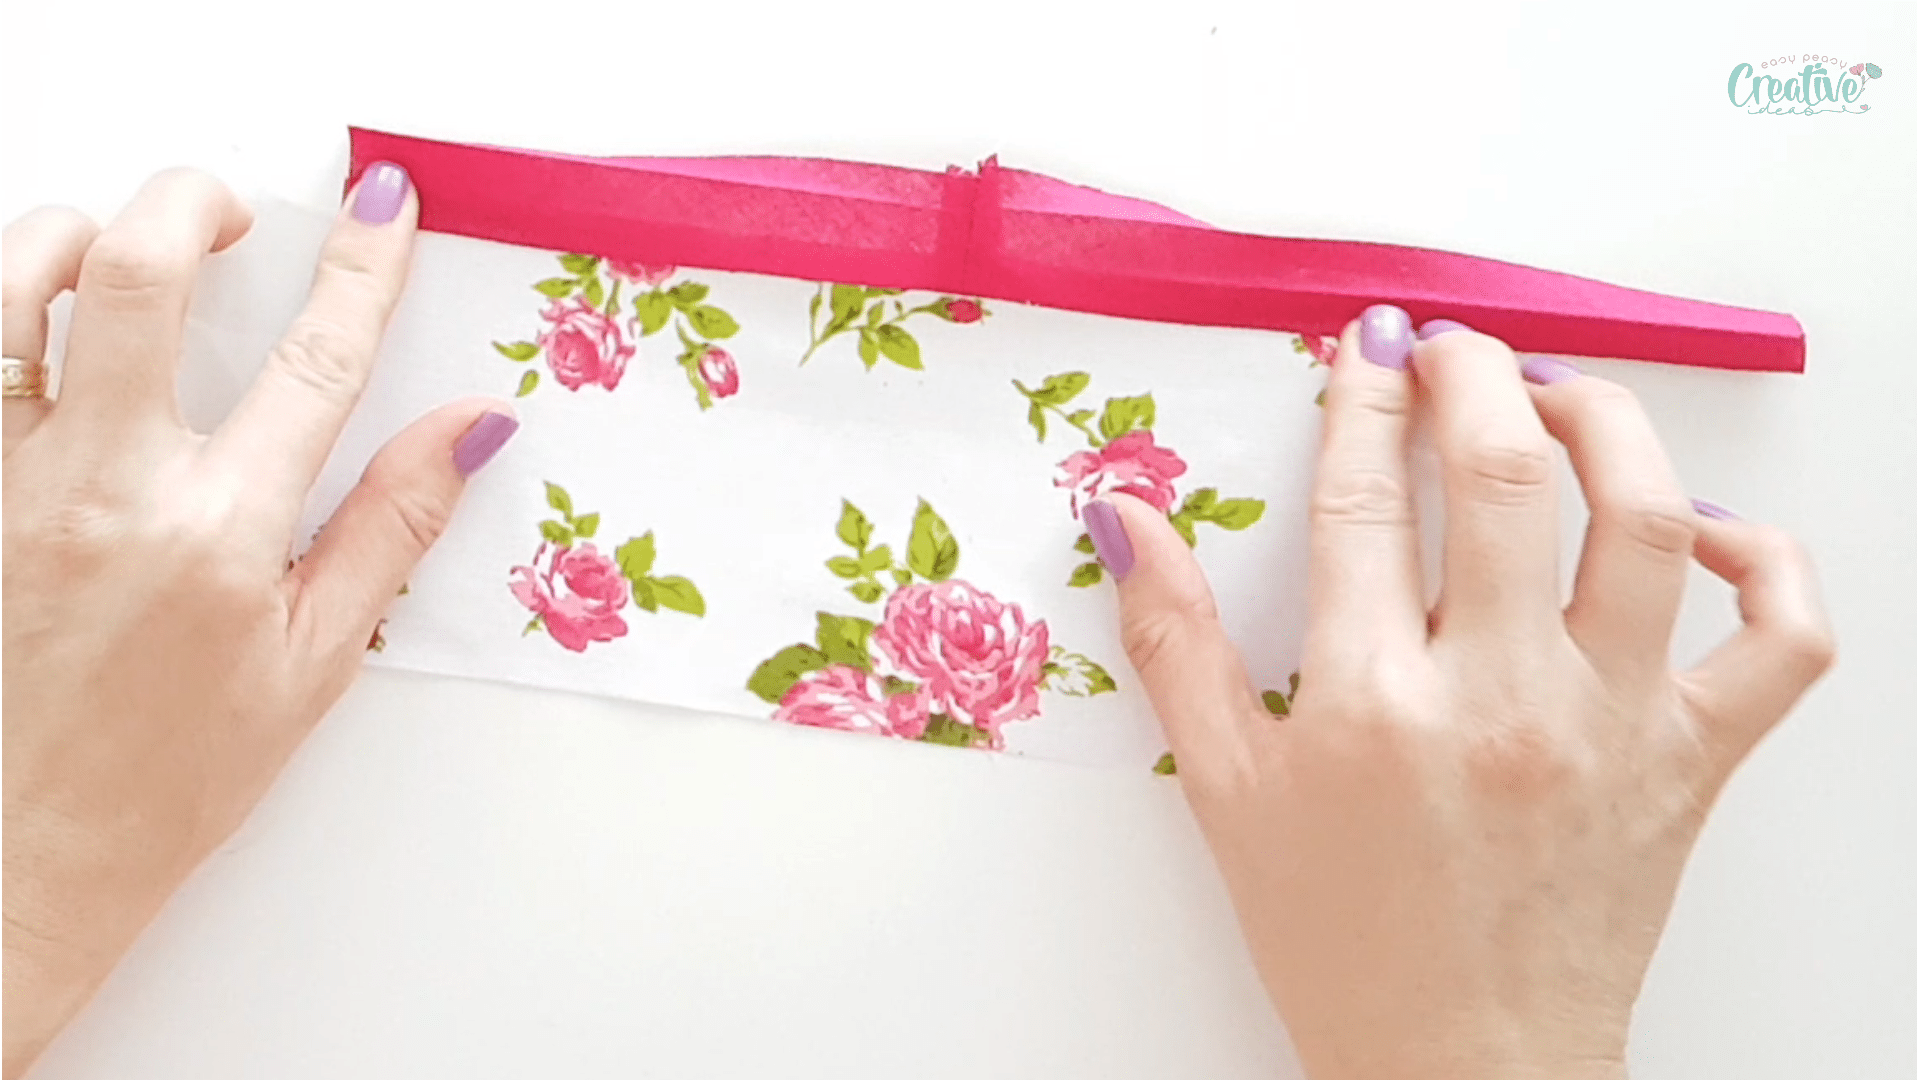
- Press the seam open.
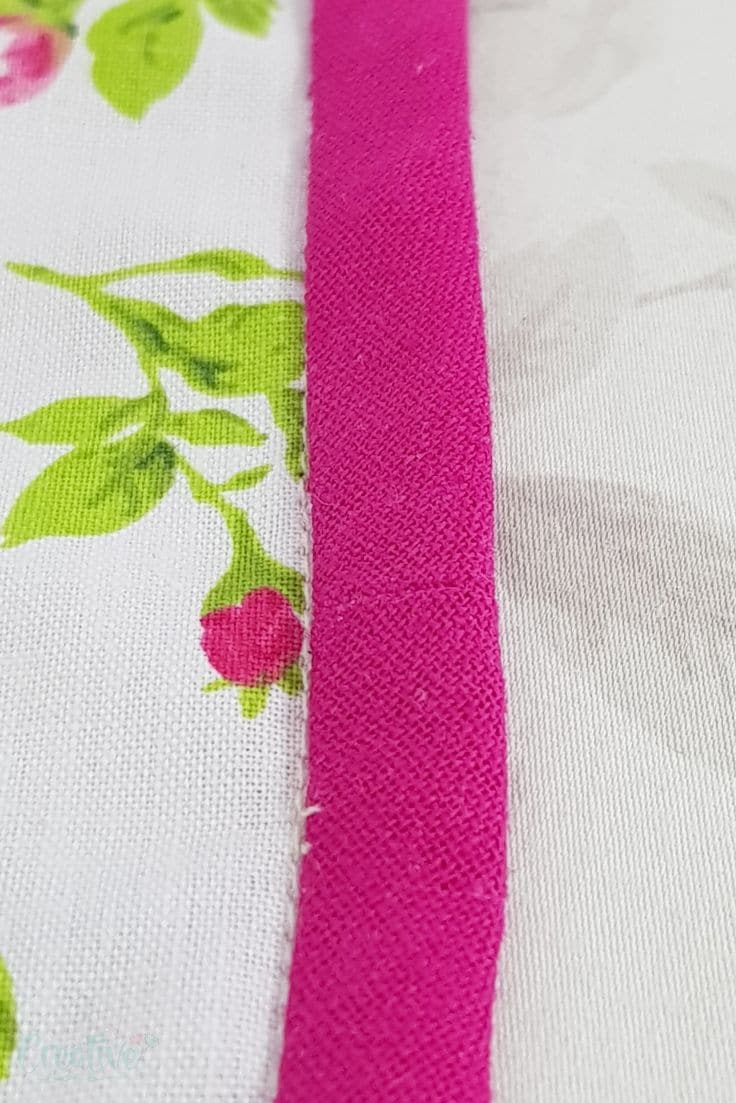
- Continue sewing the bias tape in the fold, starting where you left off to the beginning of the bias tape, until the gap is closed.
- Then fold the bias to the other side.
- Pin or clip.
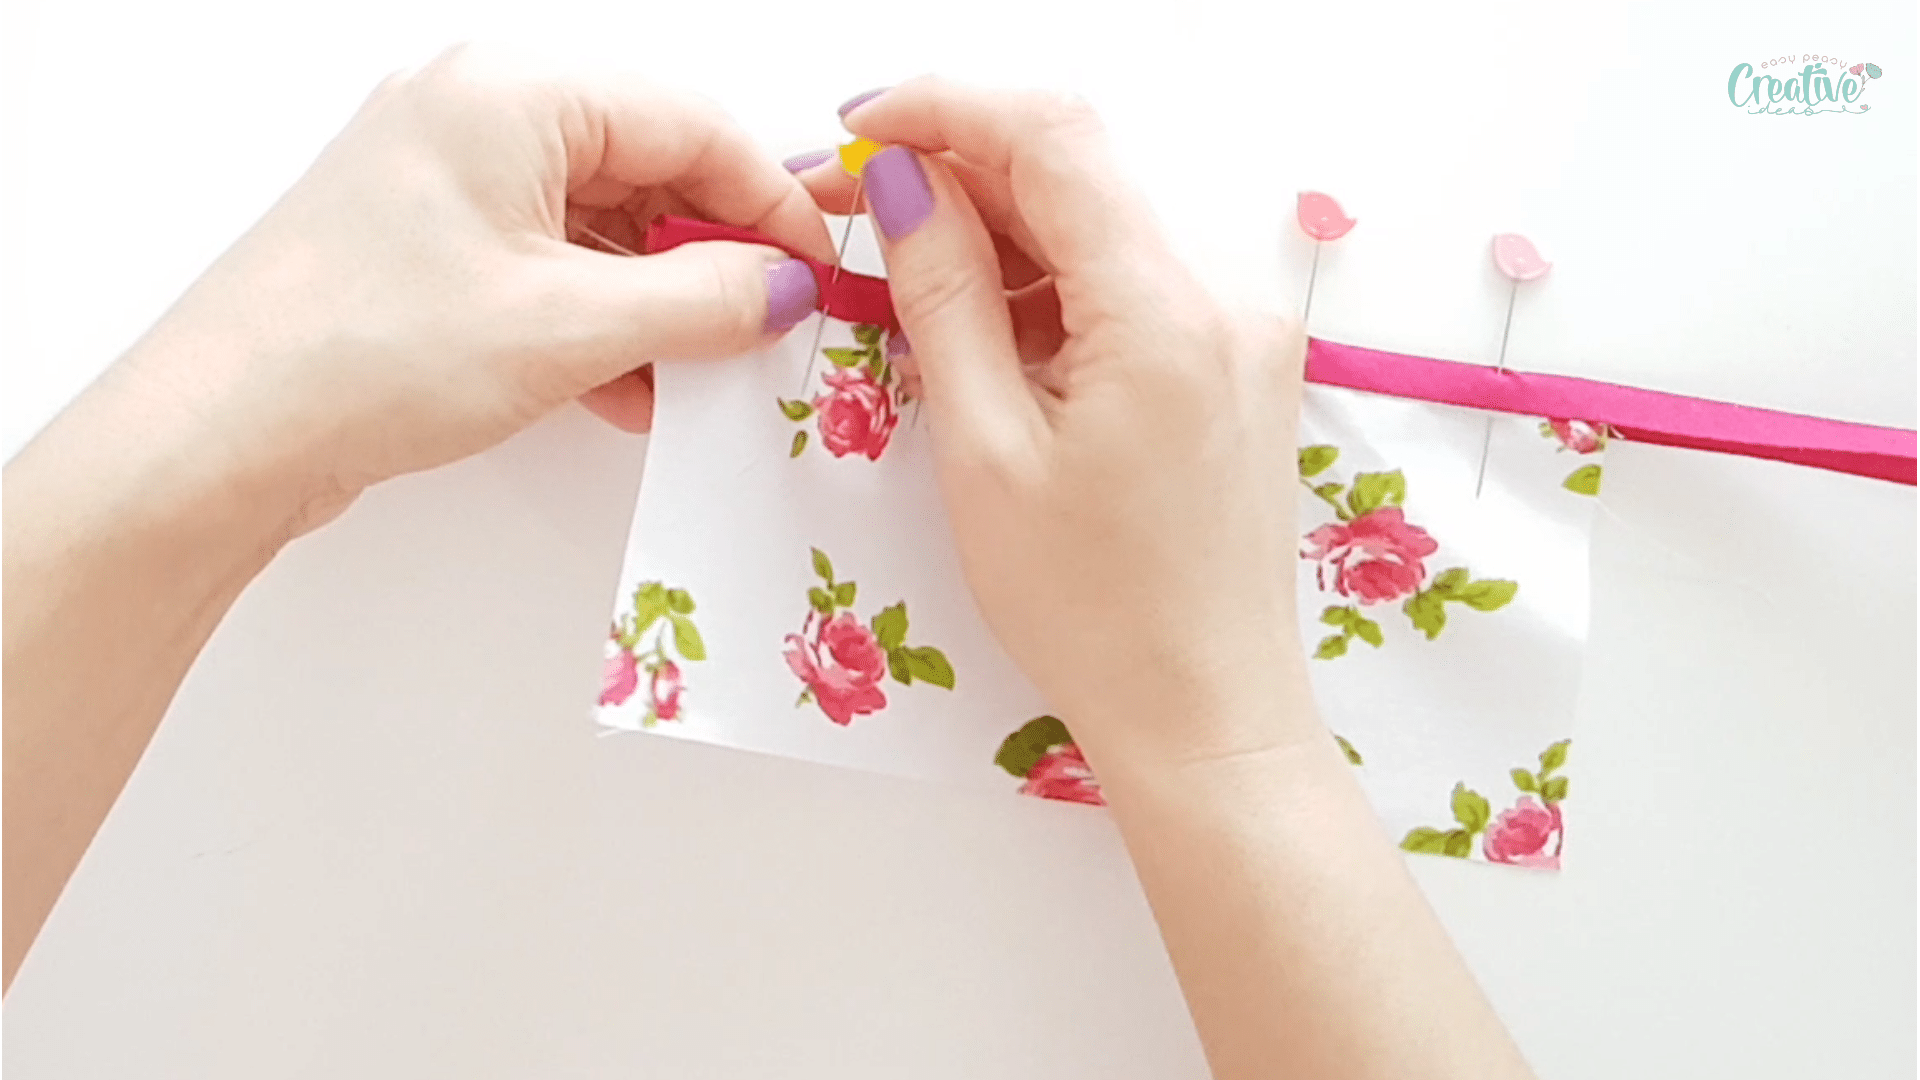
- Then stitch in the ditch or do an edge stitch to finish sewing the bias tape to the garment.
And that’s pretty much it! Joining bias binding ends is so easy peasy, am I right? Let me know your thoughts or questions in the comments below and please don’t forget to rate this tutorial! Thanks!
Pin to save for later
Most popular sewing projects:
Article may contain Amazon & affiliate links. As an Amazon Associate I earn from qualifying purchases at no additional cost to you.

You’re a rock star!! I cannot believe that I have never tried this before. Ridiculously easy and so smooth. I’ve been working on patriotic potholders for the 4th of July, and since the batting/Insul-Bright is already really bulky this should definitely make the join less noticeable. Thank you Petro. :)
Hi, Julie! Thanks so much for your lovely comment, it made my day :) I’m happy that you found my tutorial easy and helpful! Happy sewing! xoxo
Thanks so much for this tutorial! I looked at several others and they were not as clear or helpful.
Thanks for your lovely feedback, Kim! It’s nice to learn my tutorials are helpful and easy to follow. xoxo