

How to use single fold bias tape
Single fold bias tape binds both straight and curved edges, adds color accents to garments or finish off quilts, skirts or dresses! Sky is the limit when it comes to using bias tape to finish edges! Here’s an easy, quick and simple tutorial on how to sew single fold bias tape!
How to sew bias tape
Bias tape is a necessary and useful supply to have in your sewing arsenal and it helps you finish up many things beautifully. Sewing bias tape is slightly different for single fold binding and double fold tape but the final purpose of both is basically the same: finishing raw edges, both straight and curves, to look clean and professional. In this tutorial I’ll show you how to sew single fold bias tape.
When it comes to bias tape you can choose to purchase ready made bias which comes in various sizes and colors or you can opt to make your own, in the size, fabric color and pattern that are the perfect match to your sewing projects. You can make your own bias with or without a bias tape maker and I got these covered in these tutorials below, plus a few more ideas you might find interesting and helpful:
- Making bias tape without a bias maker
- How to use a bias tape maker
- How to make continuous bias binding
- Bias calculator, formula and cheat sheet
- How to sew double fold bias tape
- How to sew double fold bias tape around corners
In spite of its bad reputation, sewing bias binding is easy and fun. And once you get to see how amazing your finished product looks like, you’ll be hooked and will want to use bias binding in all of your sewing projects. In this tutorial you’ll learn how to sew single fold bias binding for armscye but the same principle works for any curved or straight edge. The only difference is that a round/curved edge is slightly harder to sew so you’ll need to use lots of pins to attach your single fold bias tape and sew slower than you would for a straight edge.
A few commonly Q&A about bias tape
What does bias tape do?
Bias tape is used in finishing almost any raw edges (as facing for necklines, to finish armholes, quilt edges, place mats or snack bags as I did in this reusable snack bags post), for binding seams (like I did on this ruffled apron or for finishing the waist seams on this paper bag skirt) or as decorative accents to garments like hems on skirts and dresses or sleeves and neckline as I did in this peasant top tutorial. You can press bias tape to the inside of a garment if you want it hidden, or you can press it to the outside if you want is as a contrasting element.
Bias tape is also great for covering cording for pillows or make decorative piping for a lot of projects. Seriously, you can’t imagine the difference piping would make.
You can also fold bias in half and sew to itself then use it as straps for a children’s dress, as drawstring for drawstring bags, as a loop for buttons or a zipper pull. The possibilities are endless once you get to master how to sew single fold bias tape and double fold bias.
What does bias mean?
Bias is the 45 degree angle across the weave of the fabric. Basically, the diagonal of the weave. Fabric cut this way is more elastic and is great for covering curved edges thanks to its stretch. It has less stretch than a knit, but enough to cover a curved hem. A straight-grain tape won’t curve as well and will have kinks and warping.
What is a bias tape maker?
There is, though, a tool designed to make bias tape, and it’s called a bias tape maker. This is a small metal tool that you can run your fabric strips through. While being pulled manually through it, it folds over. All you need to do is iron it flat and you’re done. While making your own bias tape is fun and easy, it ca take a lot of time making it manually for large projects. This tool saves a lot of time if you need more tape.
There are also automatic devices that fold and iron your tape, but this is also a thing for huge projects.
What is the difference between bias tape and bias binding?
Bias tape and bias binding are basically the same! You might also find that some people use the term bias trim which is also the exact same thing. Also you might hear the term “quilt binding” which is also the same as bias tape and bias binding but in its wider version.
Do I need a special foot or equipment to sew bias tape?
The answer is no to both! All you need is a bit of practice, patience, pinning a lot and sewing slow.
Is it best to baste or not baste first?
Theoretically, you can easily apply the bias tape to the fabric edge without basting. The downside of it, like I also experienced, was that many times I couldn’t exactly catch its back side while stitching from the front. So, I discovered that , in the early days of my sewing experience, basting the tape to the fabric made this process so much easier and precise, so that I don’t need to rip out the stitches and start all over.
Materials:
- strip of fabric to practice onto
- single fold bias binding
- scissors
- matching or contrast thread
- sewing machine
- pins
- pressing iron
How to use single fold bias tape
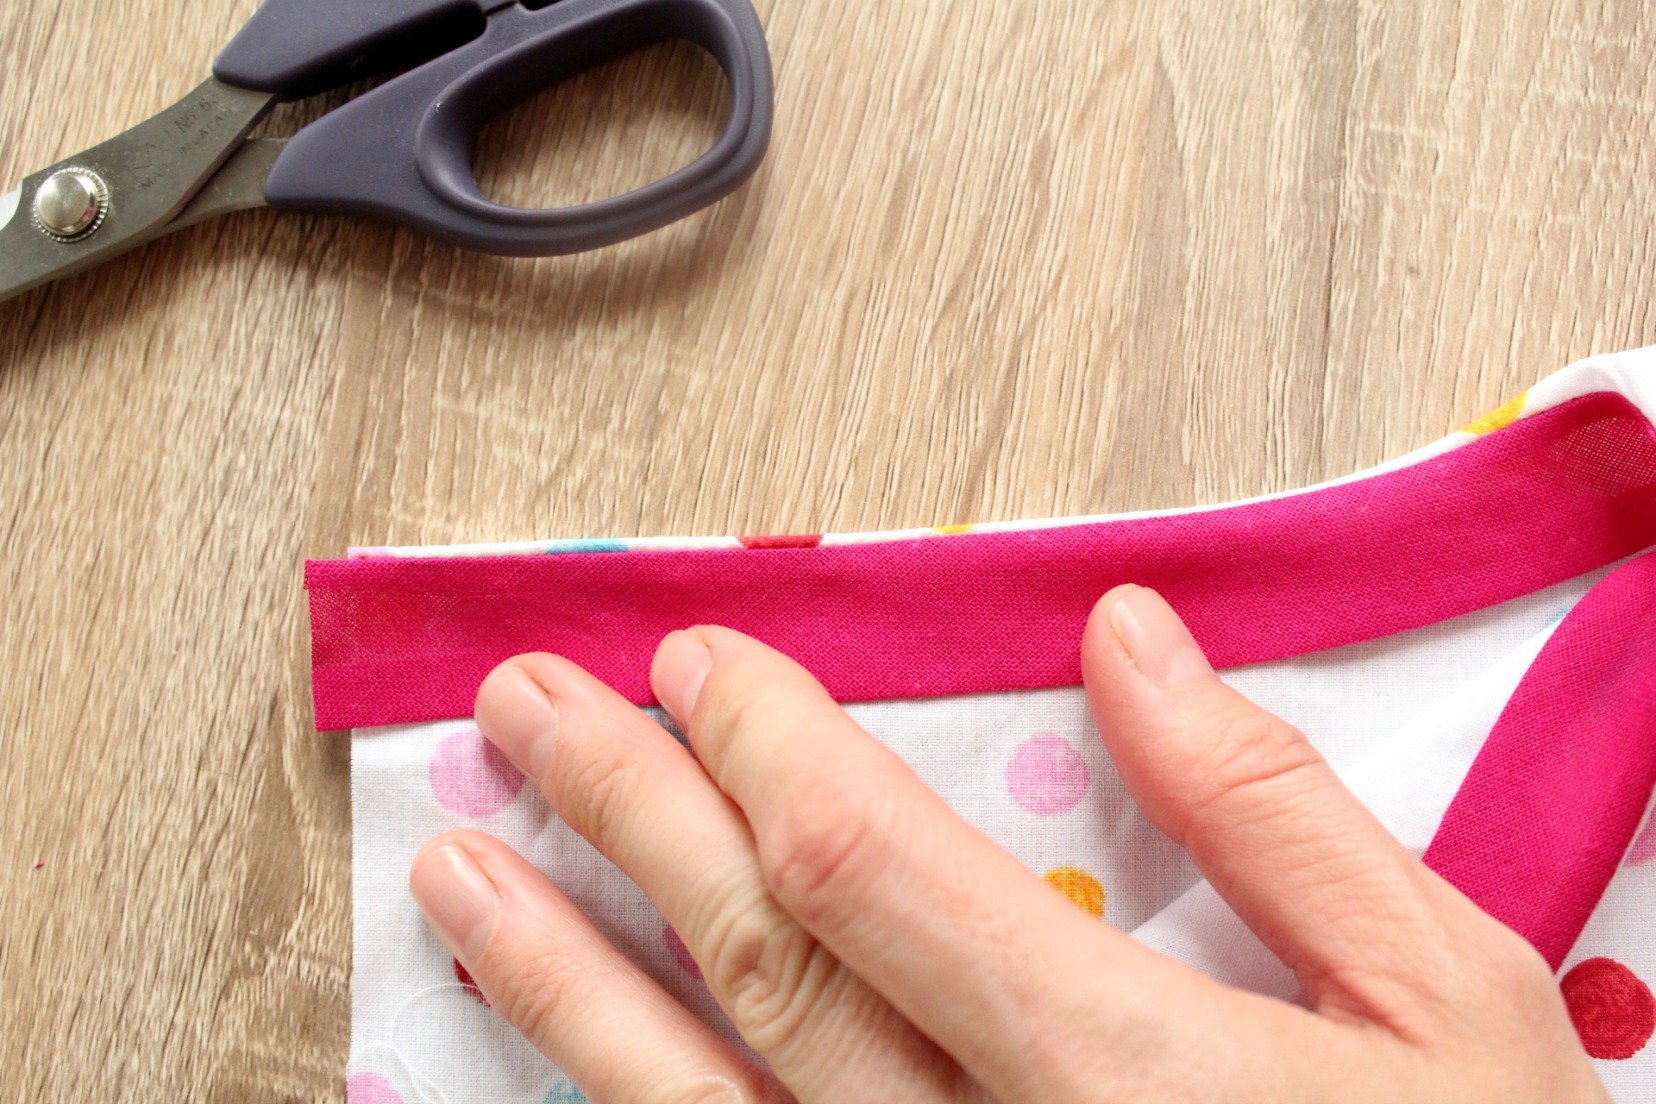
- In this tutorial I chose to use an armhole for sewing single fold bias tape. The principles are the same for any kind of project using single fold bias tape.
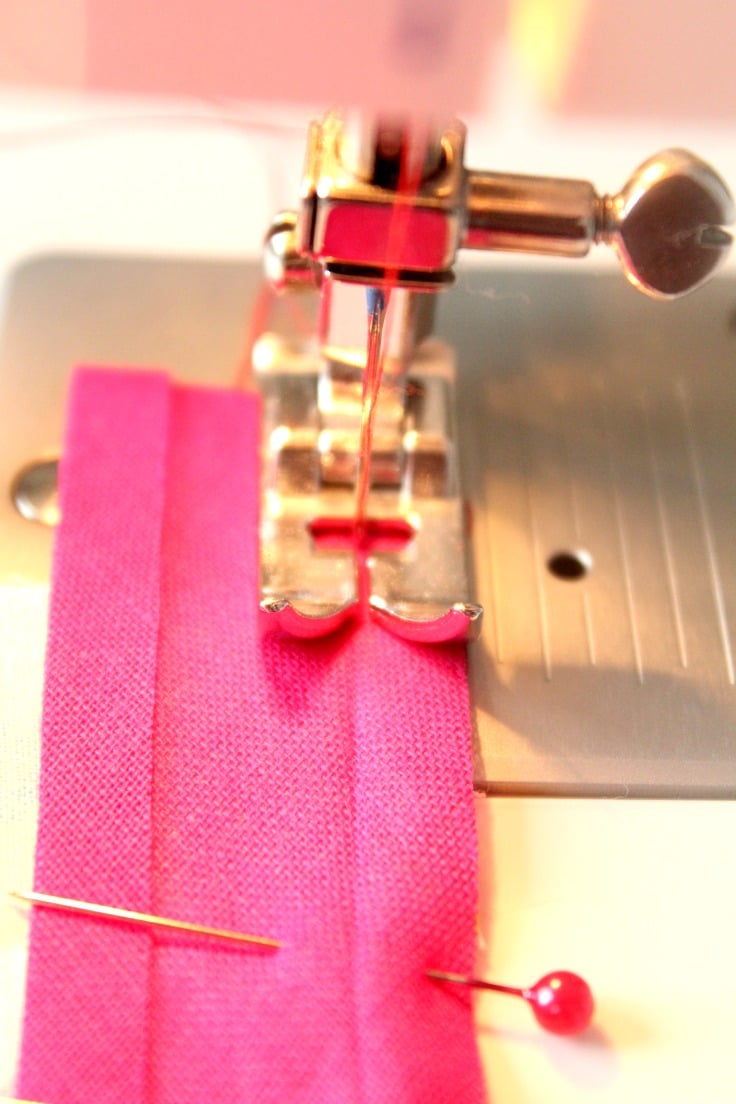
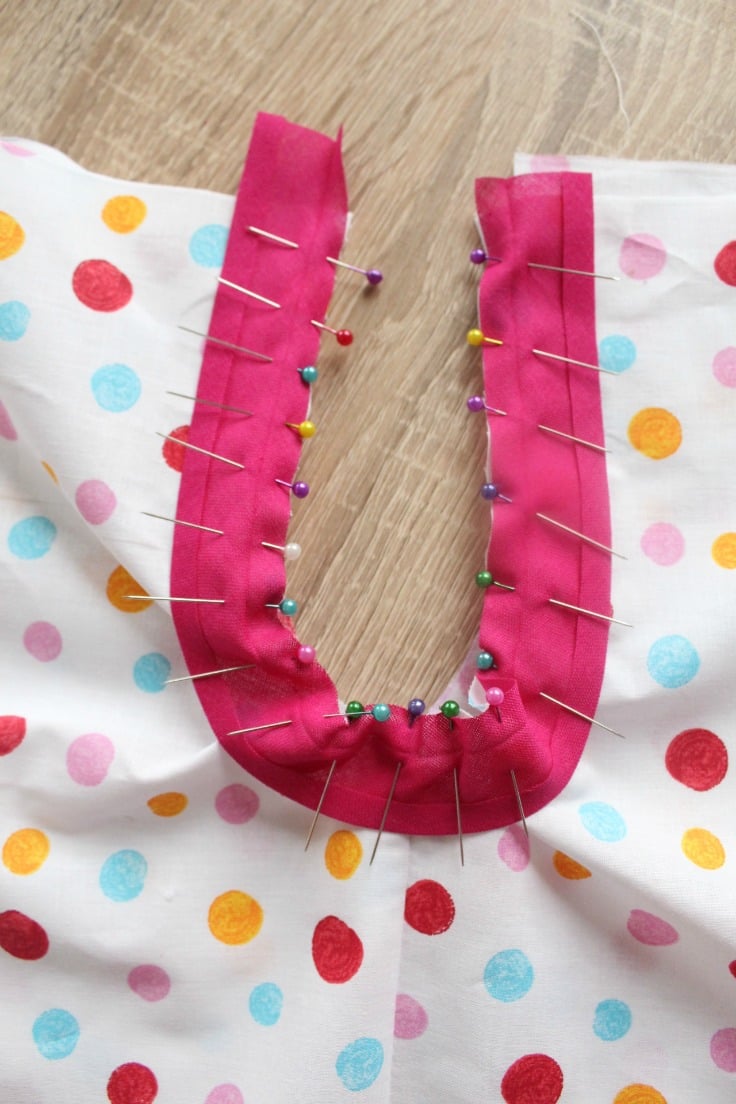
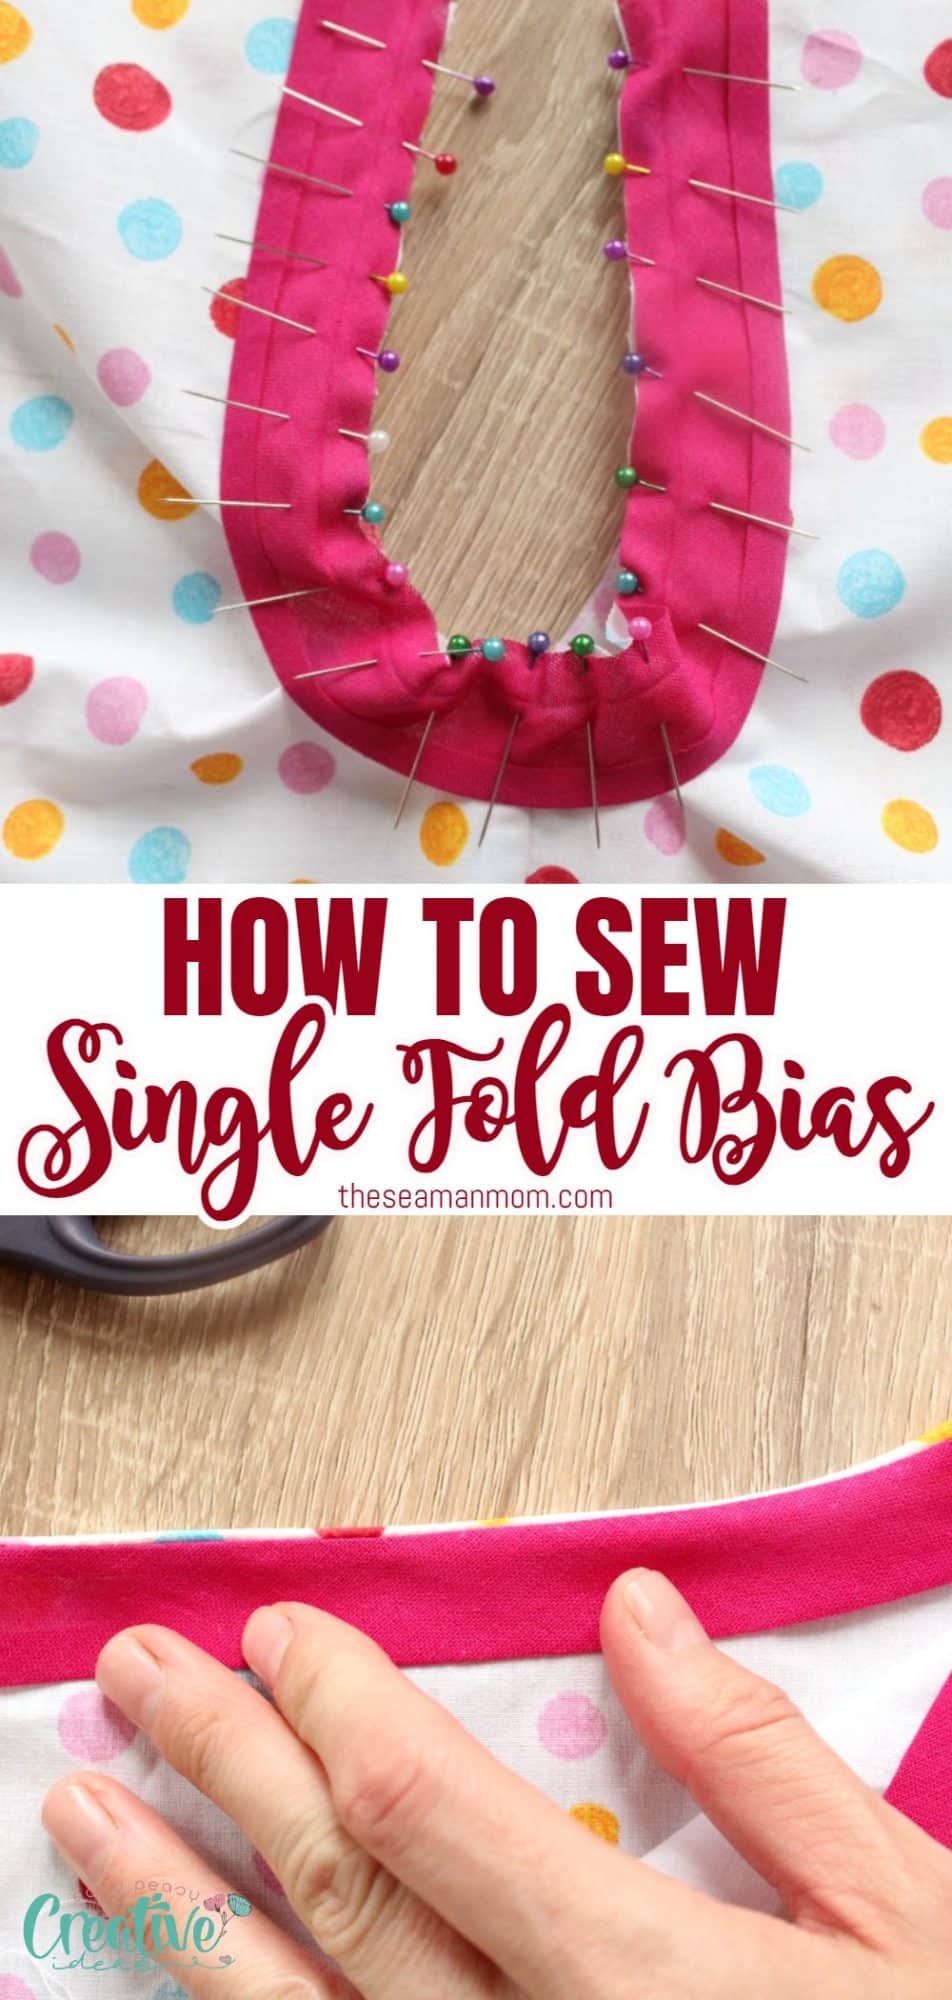
- Line up one edge of the bias with the edge of the fabric, right sides together. Pin carefully, especially around the curve, to avoid puckering and pleating in the fabric. To do that, try and pull the curve into a straight line as much as possible and then pin bias tape. If you’re a beginner you might find this step pretty challenging so be patient if this is your first time sewing bias tape for arm holes.
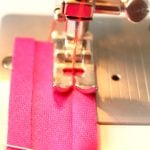
- Sew down the fold line in the bias binding. Backstitch both at the beginning and the end. Seam allowance is typically 1/4″.
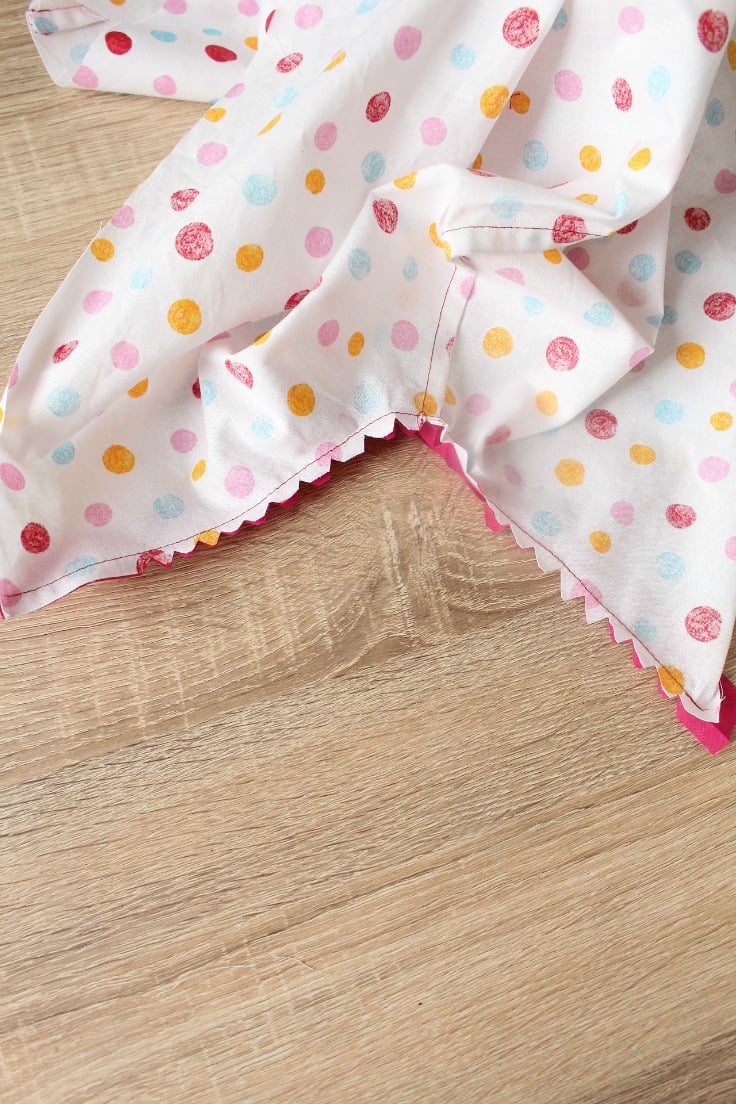
- Clip the seam and fold bias to the wrong side of the fabric (towards inside). Clipping will make sewing around the armhole a lot easier as the fabric won’t be pleating that much and the seam will also become more flexible.
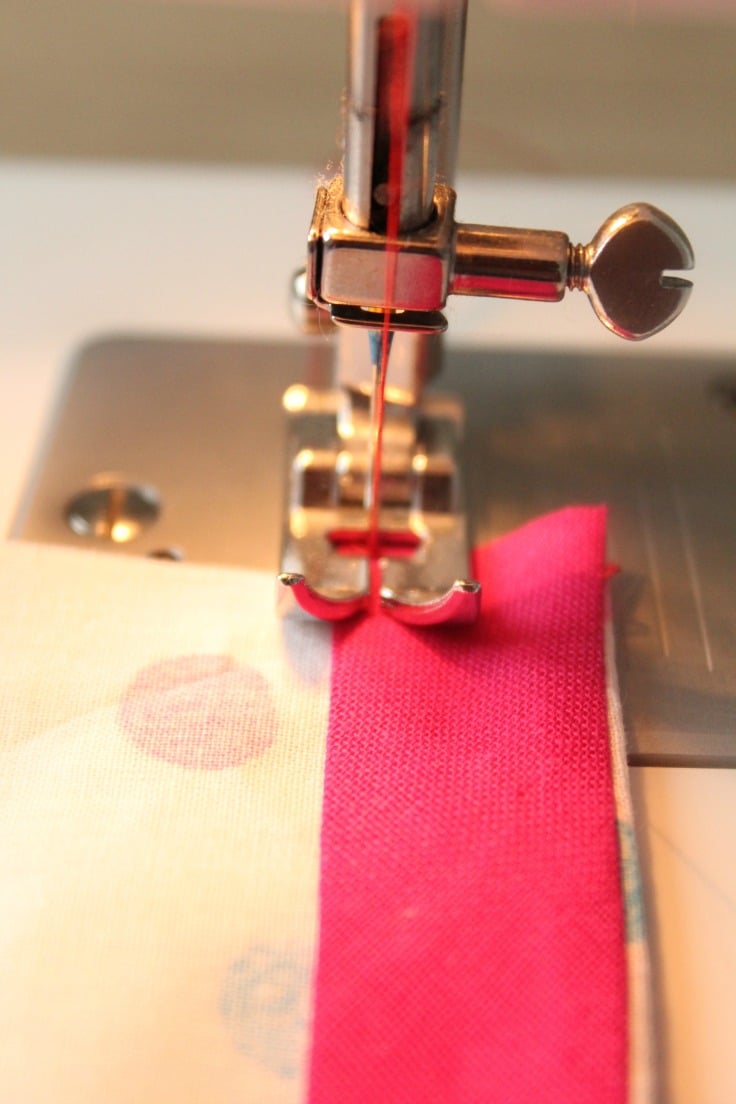
- Press and pin the bias again. At this point there shouldn’t be any raw edges visible as they are encased in the binding.
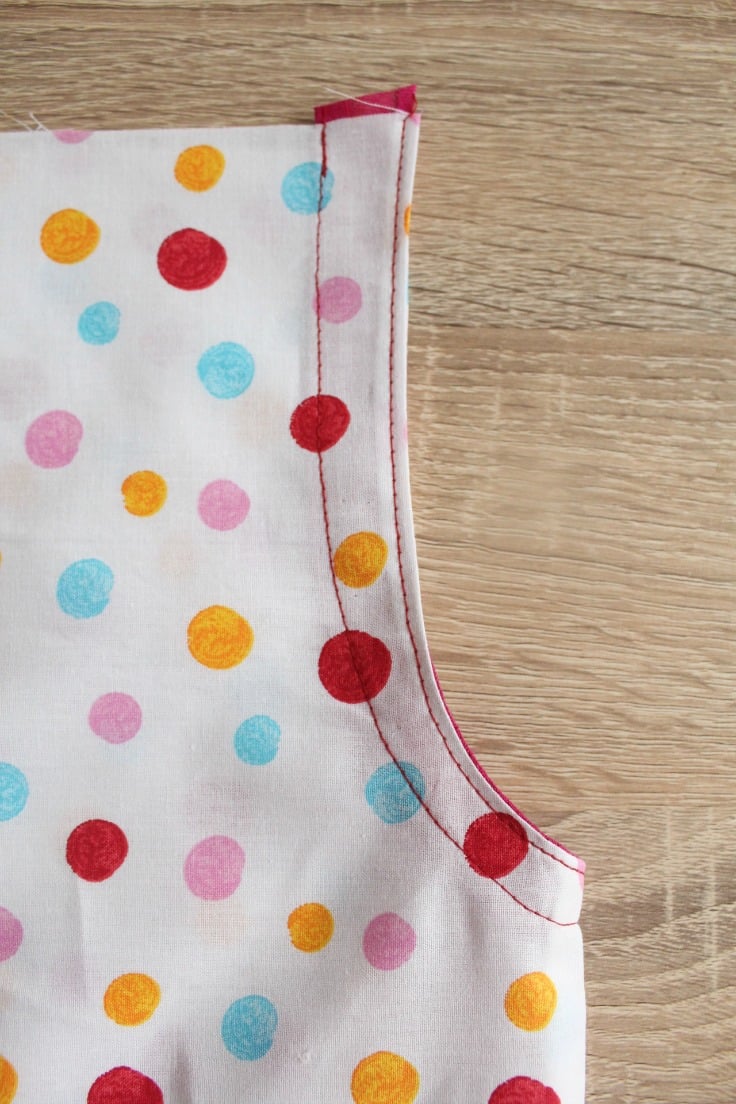
- Starting at the underarm seam, sew the binding to the inside of the armhole all the way around. Backstitch at the beginning and the end.
- To the right side of the fabric, edgestitch around the armhole for and extra decorative touch and for helping the bias lay flat against the fabric
- And you’re done! Repeat these steps for every project where you’ll use single fold bias tape.
Pin to save for later
Print the craft card
How to sew single fold bias tape
Materials
- fabric strip
- single fold bias binding
- matching or contrast thread
Tools
- scissors
- pressing iron
Instructions
- In this tutorial I chose to use an armhole for sewing single fold bias tape. The principles are the same for any kind of project using single fold bias tape.
- Line up one edge of the bias with the edge of the fabric, right sides together. Pin carefully, especially around the curve, to avoid puckering and pleating in the fabric. To do that, try and pull the curve into a straight line as much as possible and then pin bias tape. If you're a beginner you might find this step pretty challenging so be patient if this is your first time sewing bias tape for arm holes.
- Sew down the fold line in the bias binding. Backstitch both at the beginning and the end.
- Clip the seam and fold bias to the wrong side of the fabric (towards inside). Clipping will make sewing around the armhole a lot easier as the fabric won’t be pleating that much and the seam will also become more flexible.
- Press and pin the bias again. At this point there shouldn't be any raw edges visible as they are encased in the binding.
- Starting at the underarm seam, sew the binding to the inside of the armhole all the way around. Backstitch at the beginning and the end.
- To the right side of the fabric, edgestitch around the armhole for and extra decorative touch and for helping the bias lay flat against the fabric
Most popular sewing projects:
- Tips for sewing a round hem
- Corded bag handles
- Flutter sleeve dress pattern
- How to laminate cotton fabric


Article may contain Amazon & affiliate links. As an Amazon Associate I earn from qualifying purchases at no additional cost to you.

This worked exactly as written, thanks!