

Learn How To Clean A Frying Pan The Easy Peasy Way
Tired of spending too much time scrubbing your pots and pans? This natural way for cleaning pans and pots is not only easy and enjoyable but it will extend the life of your pans and pots too. Here’s how to clean frying pan the easy way!
How to clean frying pan
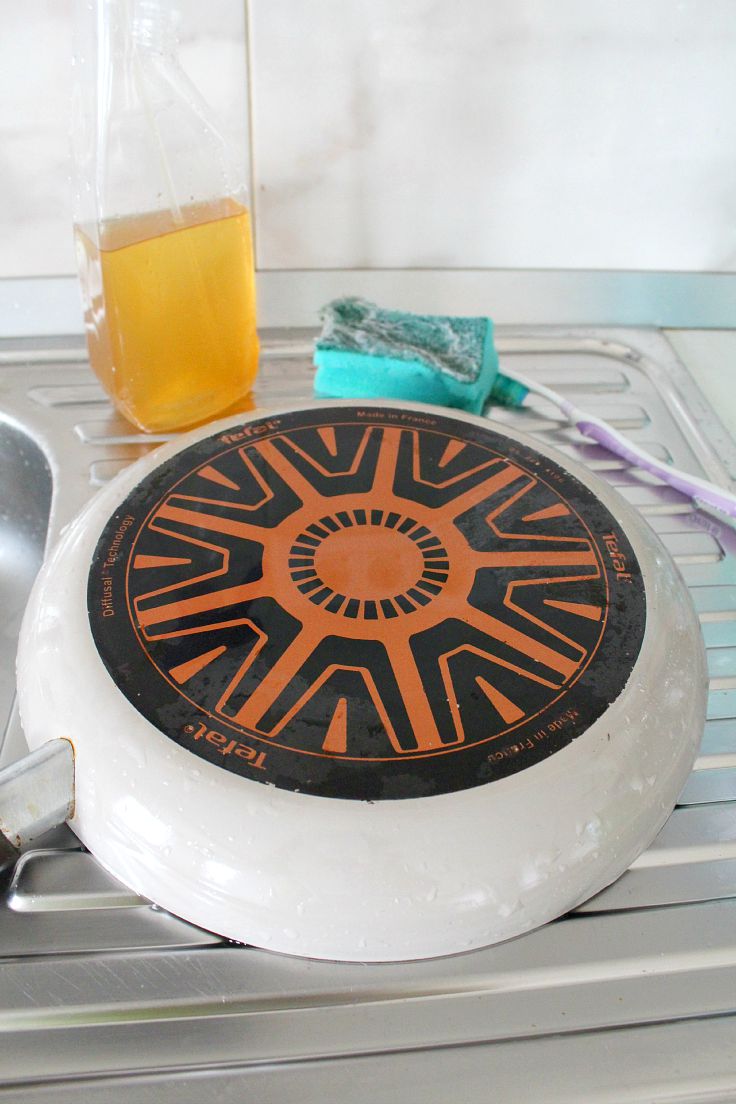
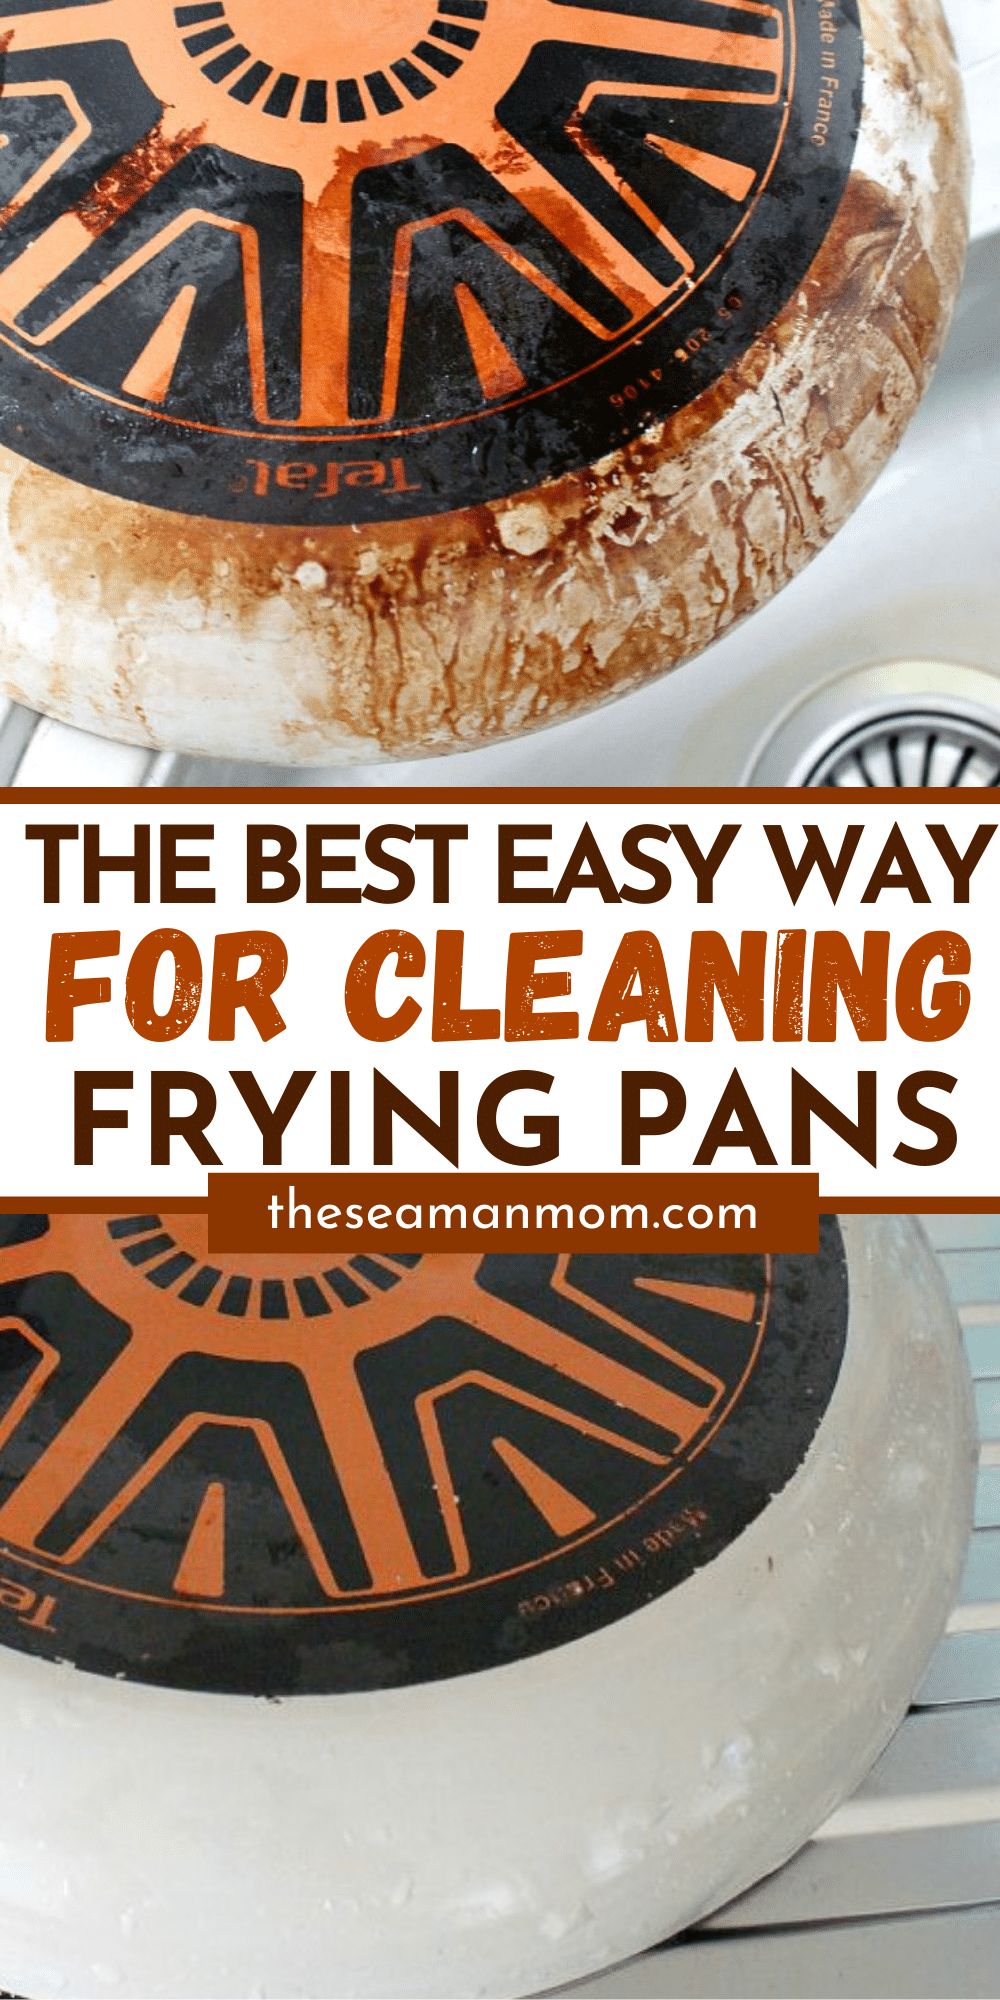
I’ve had this super duper T-fal pan for a few good months now and I simply love it! I use it for cooking almost anything so it’s had its share of “abusing”; maybe that’s why I found it really hard to clean it properly. But once I discovered this little homemade trick, my life changed completely! Read along to find out how to clean frying pan in just a few minutes!
Similar posts you will love:
- Lemon disinfectant for home
- How to clean kitchen sponges
- 3 Homemade drain cleaning ideas
- Grapefruit toilet cleaner
- Best way to clean a microwave
- How to clean window tracks easily
I hate scrubbing as it may lead to scratches and eventually ruin my pots and pans; which already have a few scratches on the outside, from the stove grates. So I used to give them a gentle clean, not much scrubbing involved, using store bought cleaning products (I tried them all!). Nothing left my beloved pan the way I wanted it: spotless!
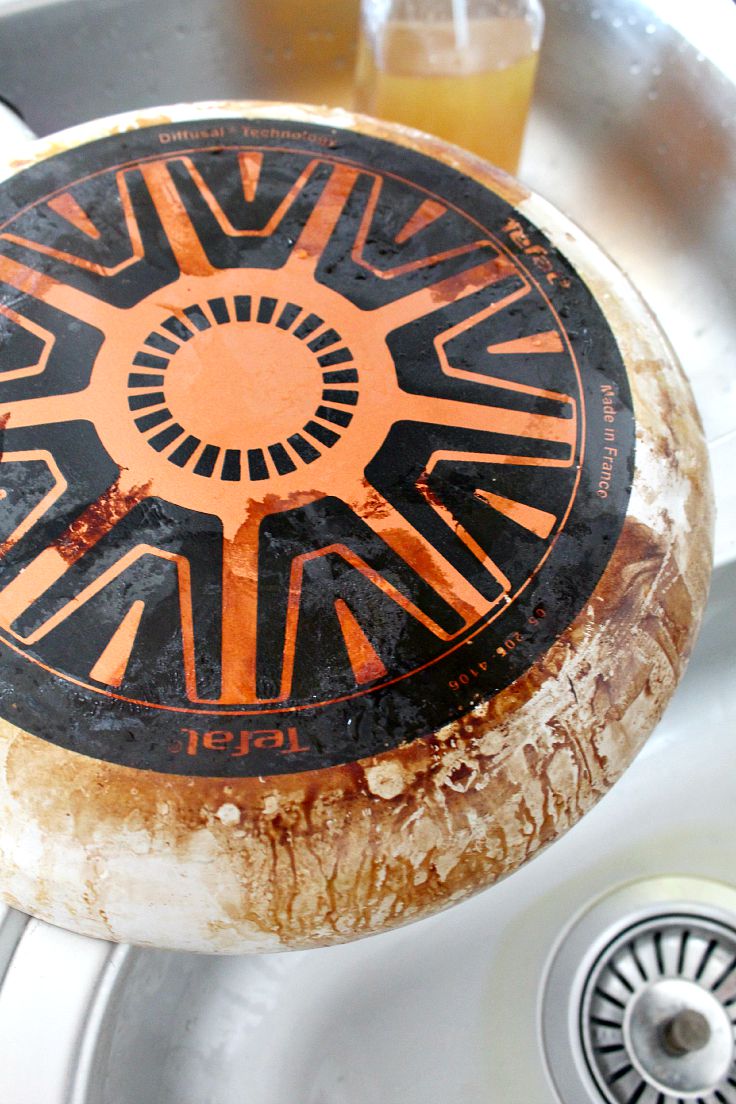
And the fumes from the chemicals used to give me such headaches, I just had to stop using them. So I’ve been washing my pans and pots with dish washing soap only. And that took a toll on my pans and pots as you could see from the pictures. They weren’t scorched just yet but if I wasn’t going to use this magical cleaning frying pan method, I guess they would’ve, pretty soon.
If you were wondering how to clean frying pan without using smelly, toxic chemicals, give this simple and inexpensive method a try. All you need is a few ingredients that you most likely have in your pantry and a few minutes to spare. And the best thing is, you can use this method on many types of pans and pots: copper, aluminium, stainless steel, cast iron etc. Plus you get to use an AMAZING homemade product: citrus vinegar cleaner!
How To Clean A Frying Pan
Materials:
- my Citrus Vinegar Cleaner pictured above (I love this stuff! I use it to clean so many things around the house). If you are anxious to clean your pans and can’t wait for the citrus vinegar cleaner to get ready, just use lemon and vinegar (it won’t be as effective though)
- baking soda
- an abrasive kitchen sponge
- an old toothbrush
Directions:
Spray the pan
- Spay the outside of the pan, handle included, with the citrus vinegar cleaner (avoid the teflon if you clean a teflon pan – I haven’t tried this method on the actual teflon!). If you don’t have the citrus vinegar cleaner, rub some lemon on the pan, leave to dry and then spray with white wine vinegar.
- Sprinkle baking soda generously over the areas you’ve just sprayed with the citrus vinegar cleaner; it will bubble a little which is fine, that’s the whole point of this method.
- Spray some more citrus vinegar cleaner, making sure the baking soda doesn’t become too wet and starts dripping on the sides. Again, it will bubble some.

Work the cleaner in
- Allow the mixture to sit for a minimum of 20 minutes, up to 30 (timing may change depending on how scorched your pans and pots are; you may need to experiment with your own pans and pots, that’s the time frame the worked on mine).
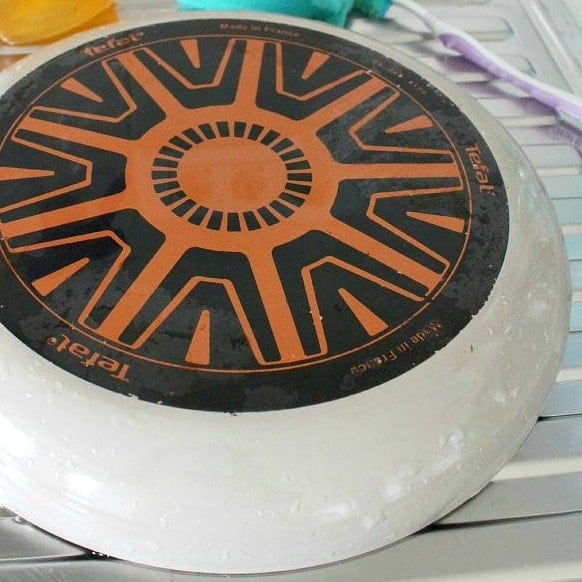
- Grab an abrasive kitchen sponge and gently start scrubbing, using the abrasive side not the soft one; you will find that you won’t need to scrub too hard, most of the scorched areas are cleaned already. Please note the scratches you see in these photos are not due to this cleaner, they’re old marks from the stove grates.
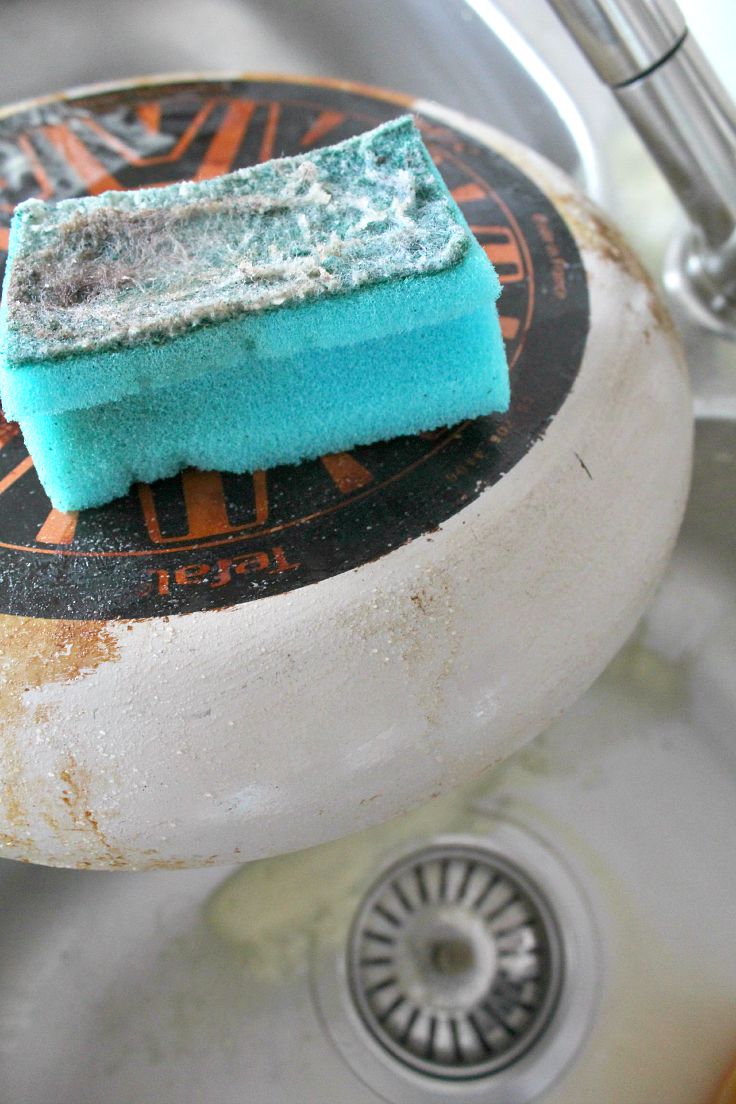
- Use the toothbrush for tiny areas such as the rim or around the handles.
- Give the pan a very thorough rinse. Run your fingers around the pan to make sure all baking soda has been removed; it tends to stick to the pans even after rinsing.
- Enjoy the new look of your beautiful, clean pans and pots!
Note: If your pans and pots are super scorched you may need to repeat the whole process. Use this method for cleaning pans and pots on a regular basis (i.e. after each use).
Most popular DIY’s:
Article may contain Amazon & affiliate links. As an Amazon Associate I earn from qualifying purchases at no additional cost to you.

This did absolutely nothing for my pan
I must be dense. I cannot find anywhere the recipe for the citrus cleaner. You talk about how to use it but not the combination of ingredients to use. HELP
Hello! There’s a link in the article to the citrus cleaner recipe. Here’s how to make the cleaner https://theseamanmom.com/diy-citrus-vinegar-cleaner/
Hi..can I use this method inside too?
You can use the ingredients listed here but without scrubbing if using on a Teflon pan.
hi, I followed all your links to the follow up pages that show how to make the citrus vinegar cleaner, but somehow I’ve missed how you use it to clean up your messy cooked on pans….
do I spray it on and leave it for a certain amount of time? do I have to scrub them? do I dilute the solution or use full strength.
sounds wonderful – our pans are a mess, so I’m eager to try this.
thanks.
Hi Jodi. The instructions are on page 2 here https://theseamanmom.com/natural-way-to-clean-pans-and-pots/2/
thanks for the quick response! so eager to try this… :0)
Hello Petro, I usually leave this mixture the whole day. I put the pans outside. I am so surprised that they could be clean only after few hours. I am going to try it next time. Thank you for sharing your article! Greets!
Hi Sonya. Thanks so much for stopping by and leaving a comment. I was surprised too, actually I was thrilled :) I guess it’s all thanks to the citrus vinegar cleaner, it had a higher percentage of citrus which probably helped speeding up the process. Have a wonderful day!