

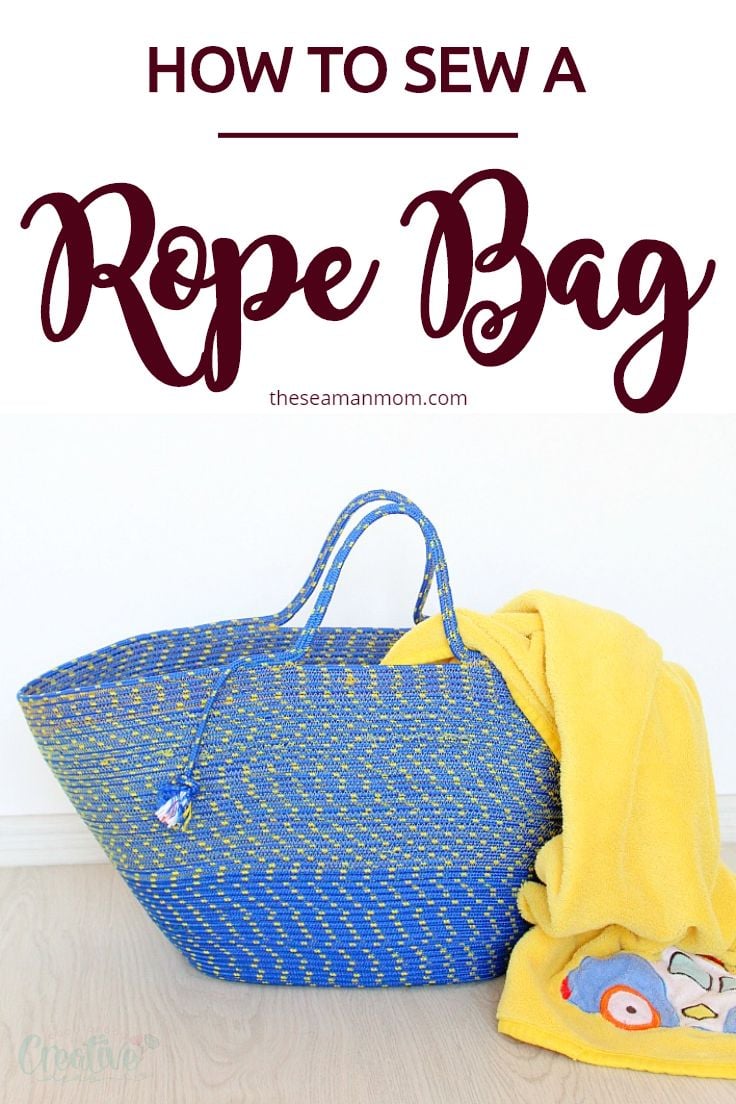
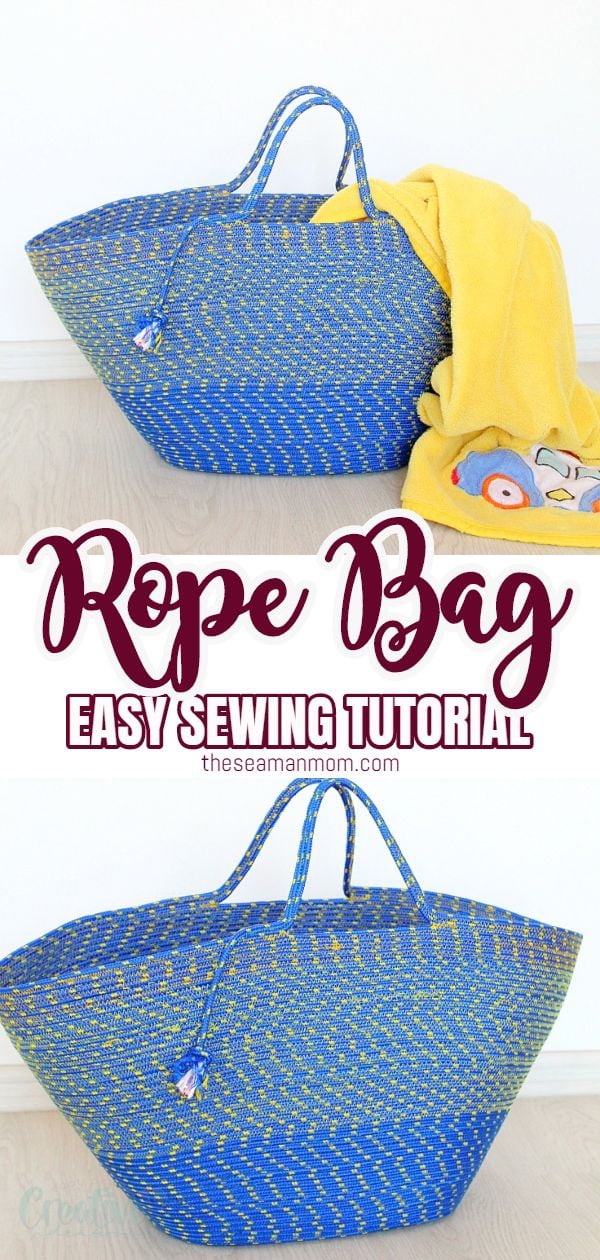
How To Sew A Rope Bag
Learn how to make a rope bag and build a fabulous rope tote, using your basic sewing skills and some humble rope. This cool rope bag is perfect for the beach, the market or for picnics!
Rope Bag
Have you ever wanted to learn how to make a rope bag but the thought of sewing over thick rope got you scared? This super cool rope bag is truly one of the easiest sewing tutorials for beginners! All you need are some basic skills and patience.
Need more rope sewing projects?
I’ve used rope before to make these cute and practical rope bowls but I never tried the technique on larger projects like this DIY rope bag. I was a bit scared myself because I thought it’s going to take a log time to finish such a project and it will be hard to handle once the bag starts getting bigger. Plus sewing thick fabrics has never been one of my strongest skills.
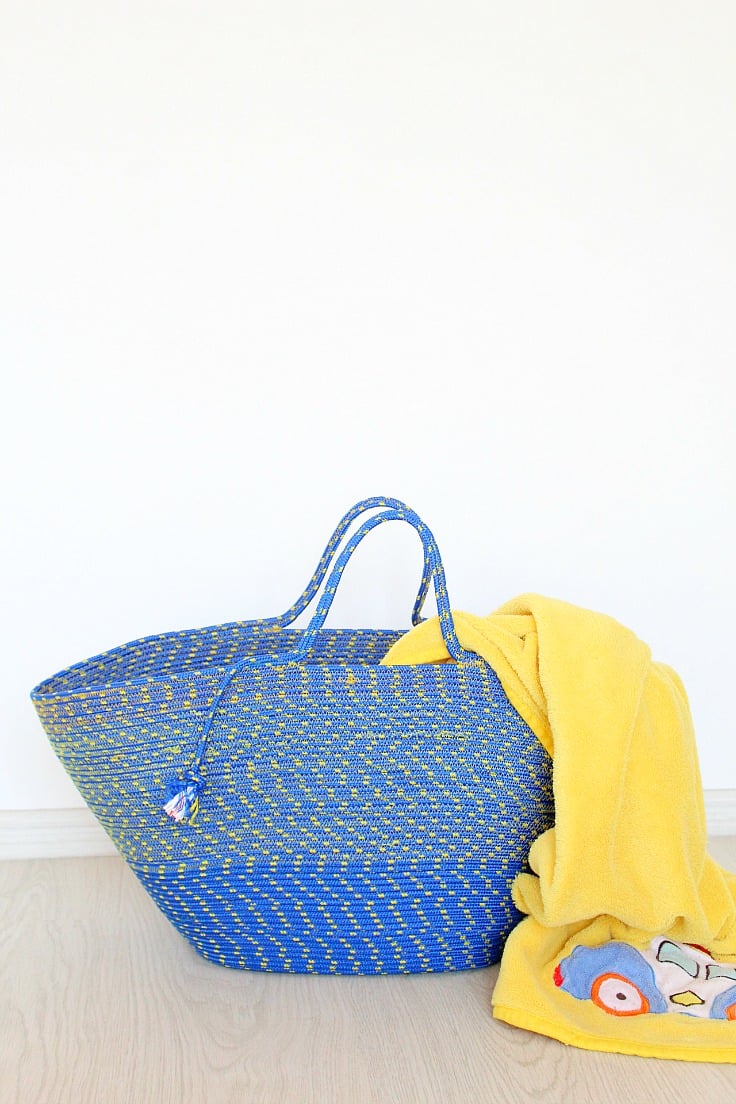
Turns out, I was wrong, I think I’ve just made the best rope bag ever! While it’s not a 15 minutes project, this rope bag pattern took about a couple of hours to complete which I think is not all that bad, considering the stunning result! I love how sturdy and practical this rope bag is, I can see myself toting it to all kinds of summer events, at the beach, for picnics and barbecues and even at the market, perfect to carry my bread and produce. It would make a great handmade gift too! You gotta love easy sewing tutorials for beginners like this one!

More bag projects you might like
- Corded bag handles with webbing
- Reusable vinyl grocery bag
- Color block tote bag
- Towel beach bag
- Rounded top canvas bag
- Placemat purse
I’ve chosen a blue and yellow rope because I wanted my rope bag to look bright and cheerful but any color would do. I used matching thread on the bottom part and 2 shades of yellow thread for the middle and top. Also I used a tighter zig zag stitch than in my rope bowls I mentioned above as I wanted the bag to be real sturdy and durable. I made short handles so the bag is practically a handbag but if you want to make a shoulder bag, make the handles longer.
Doesn’t this awesome rope bag totally inspire you to make one right now? So wonderful and doable, perfect project to bookmark to your sewing tutorials for beginners. Here’s how to make a rope bag. Have fun!
Rope Tote Bag
Materials:
- 200 feet (you can go up to 300 if you want a larger bag and longer handles) 1/4″ rope in color of choice
- sewing machine
- denim needle 90/14
- matching or contrast denim thread (or both)
- scissors
- measuring tape
- pins

Directions:
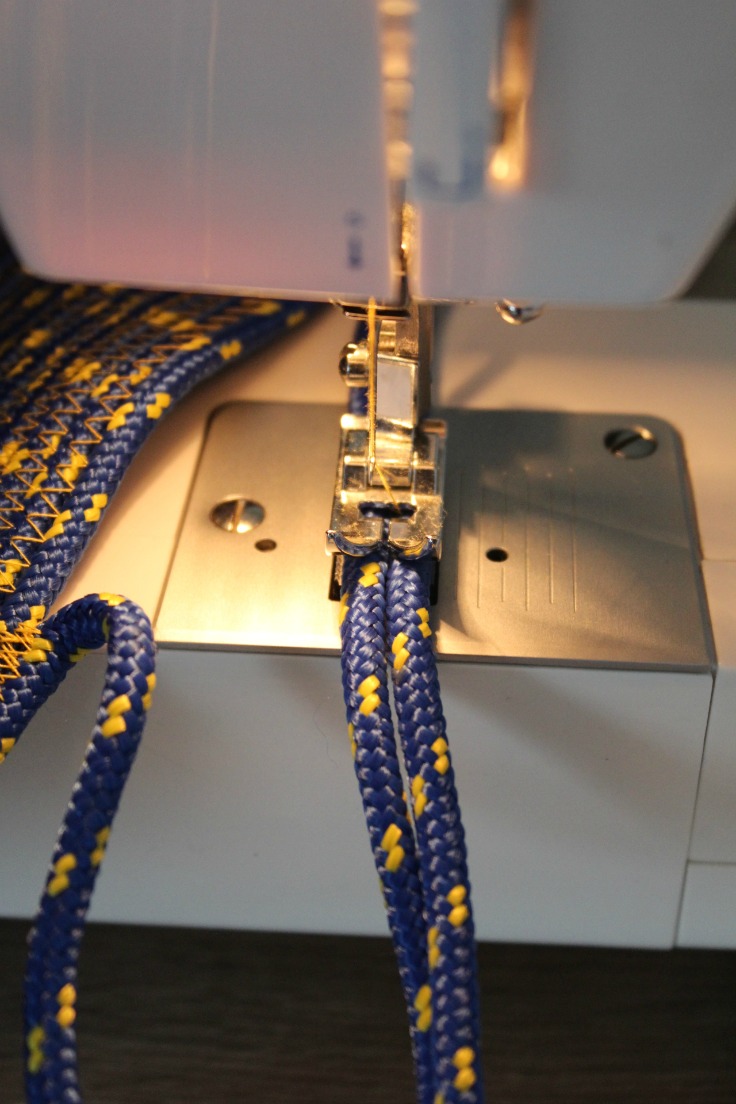
Make the base
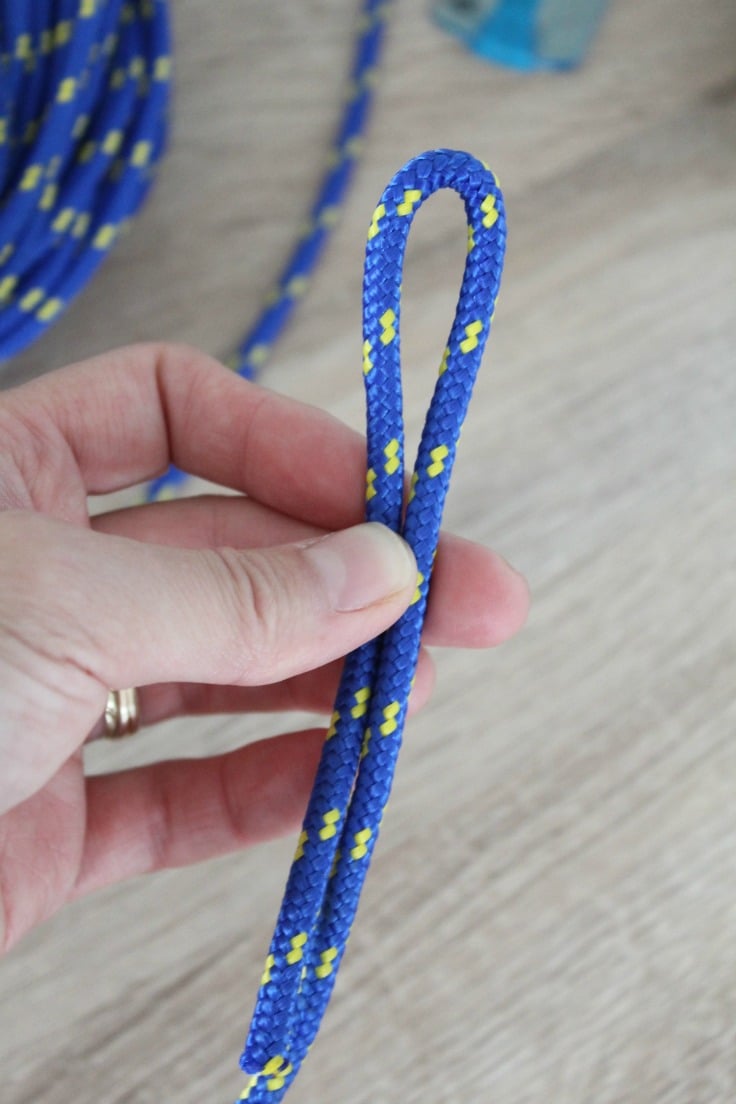
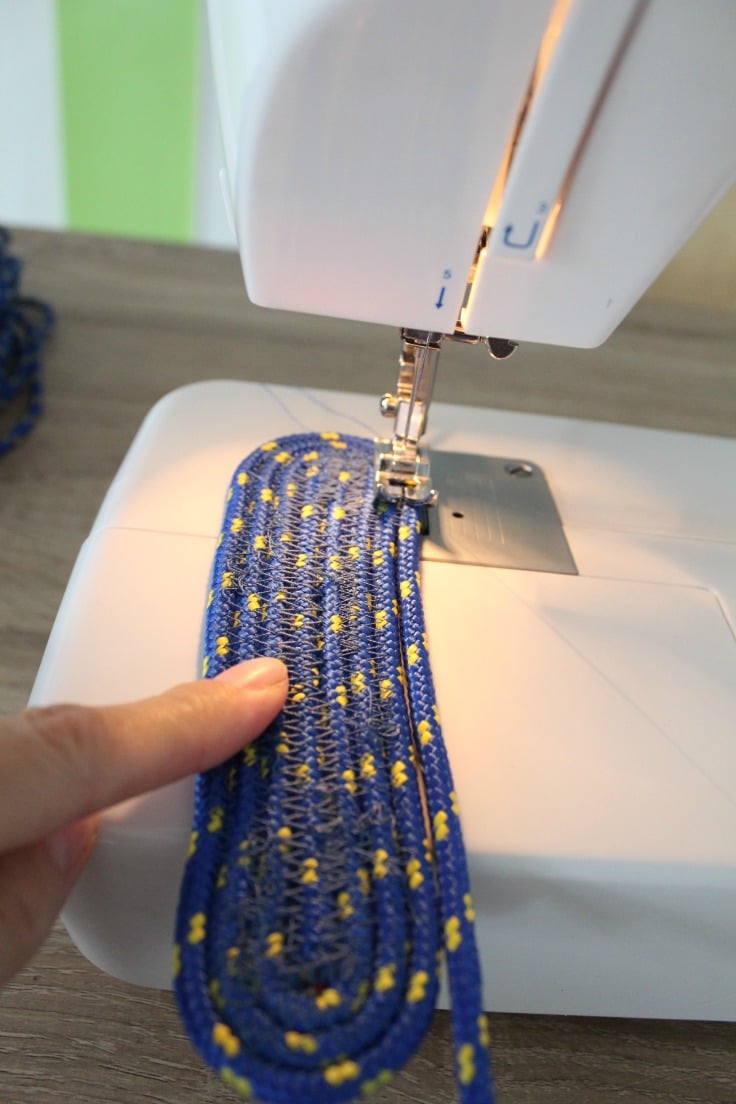
- Measure 12″ out of your rope and fold it in half into a 6″ piece.
- Place the fold under the presser foot of your machine, with the rope sitting on your lap (bag will start building on the left, rope is on the right – unlike the photo below lol).
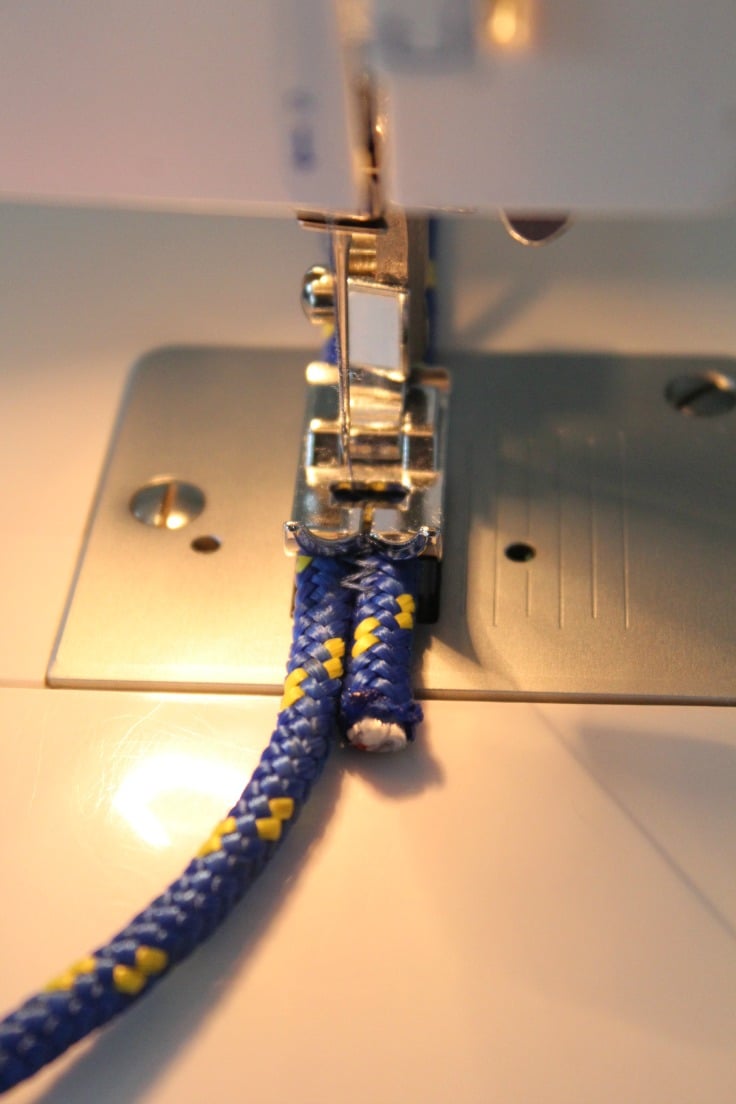
- Set the machine to a zig zag stitch that is wide enough to reach both ropes. I used the highest zig zag setting on my machine, a stitch length 2 and thread tension 2. Keep both pieces of rope as close together as possible and keep them centered under the needle. You may need to manually stitch the first inch to keep the pieces together.
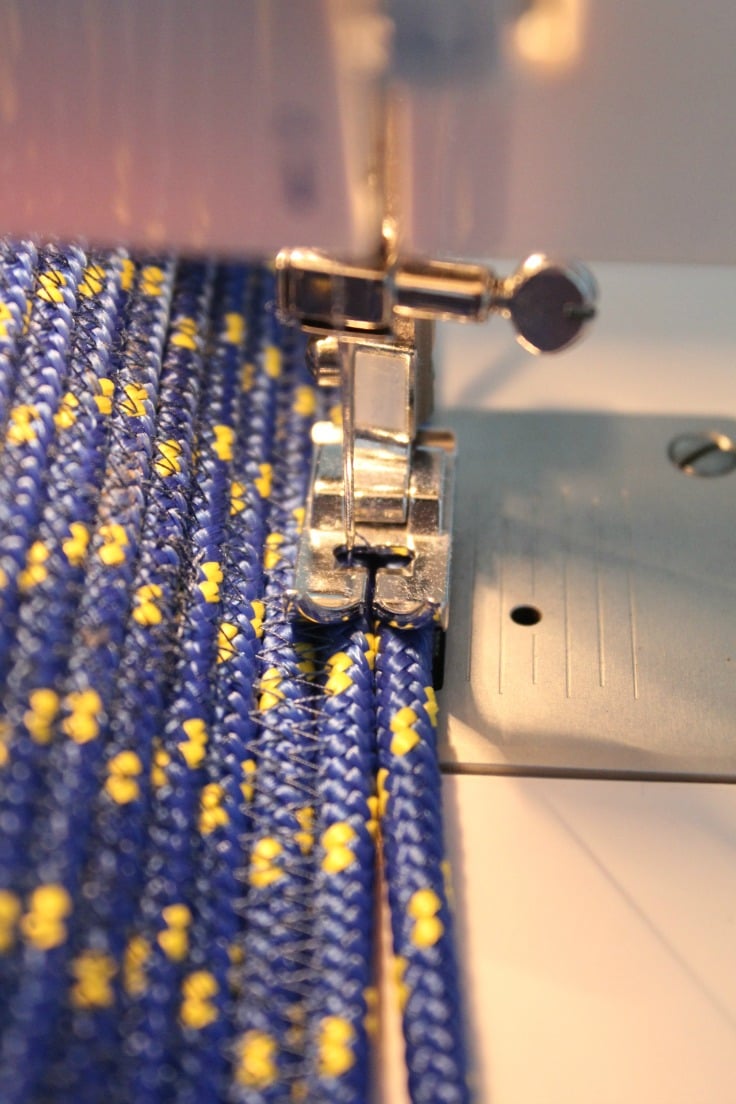
- Sew down towards the cut end and stop. With the needle in the down position, slowly rotate the sewed strip counter clockwise while using the zig zag stitch to stitch together the curve.

- Keep going and you’ll notice you’re slowly creating an oval! This is the base of your bag.
- You may end up with gaps, just patch up your sections.
- When you feel like your base is big enough, stop but leave the rope in tact. I did 24 rounds.
Sew the body
- Now you’re ready to start building up the body of the bag. Bring the bottom section upwards, hugging the side of the sewing machine. The rope will start attaching at a deep angle. The more perpendicular you hold the bottom of the bag to the sewing machine, the deeper the angle will be.
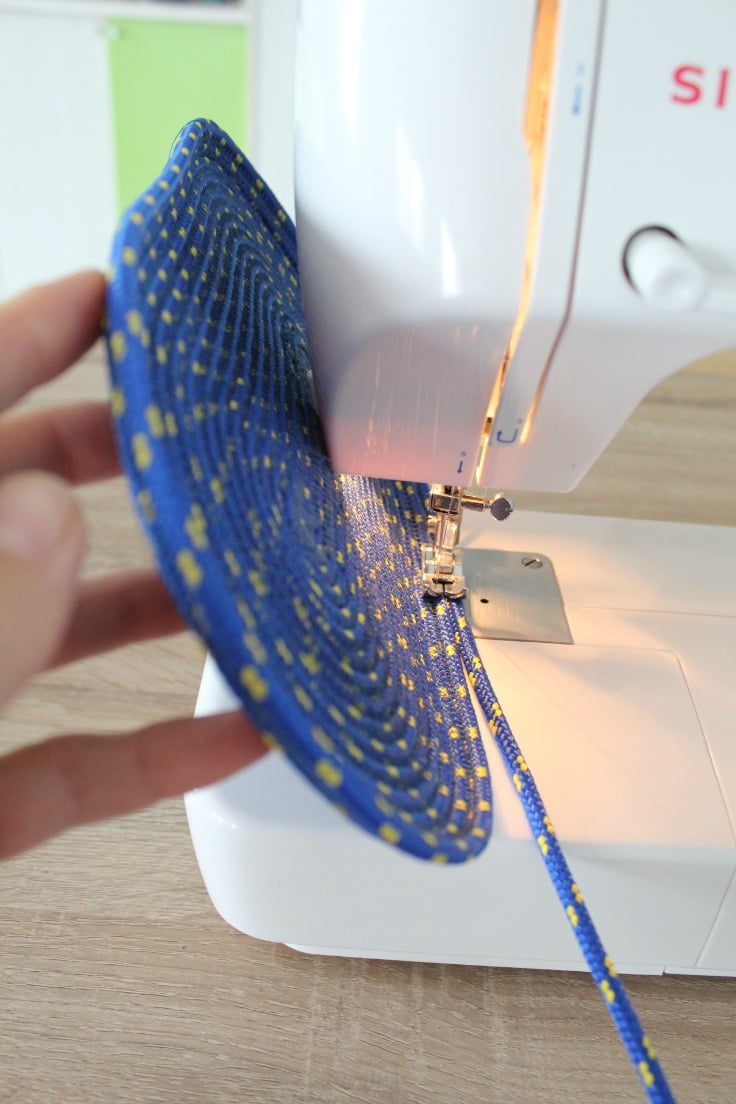
- Keep the bottom of the bag at a 90-ish degree angle while rotating and sewing if you want straighter sides. If you want the bag to get wider as mine, start holding it at a slighter angle.
- Continue sewing until you’ve reached your desired height. When you’re ready to stop, stop sewing at the curved section while keeping the rope attached!
Making the handles
- Pinch the bag in half and measure where you want your handles to fall. Mark with pins.
- Put the bag back into the sewing machine and continue the zig zag stitch until you’ve reached the pin. Give it a few backwards and forward stitches to reinforce the handles.
- Cut the thread, remove the bag and measure the handles for the desired length. Attach the end of the handle to the existing pin and start sewing again with a few backwards and forwards stitches, until you reach the other side.
- Repeat the steps measuring the same amount of inches on the opposing handle.
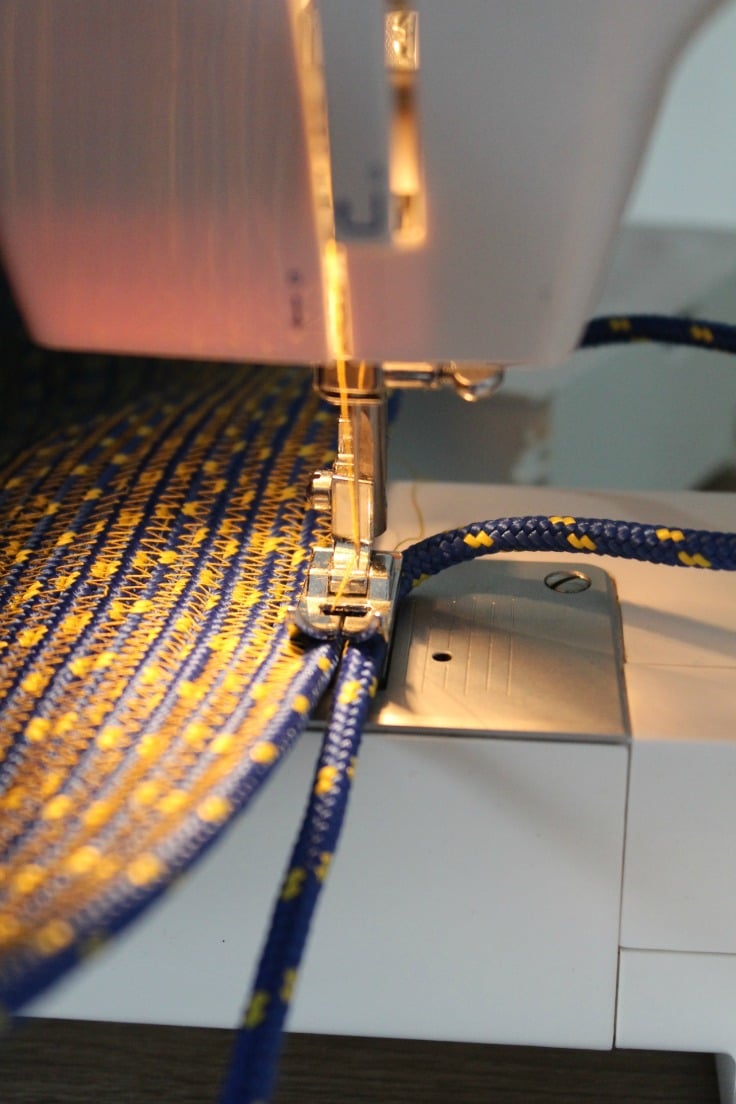
- Once you’ve made a full rotation and back at the first handle, keep sewing along the handle for as many times as you like, depending on how thick you want our handle.
- Once you passed the handles for the last time, stitch an inch or so more. Then cut the rope about 4″ away from the bag, make a double knot and unravel the rope end.
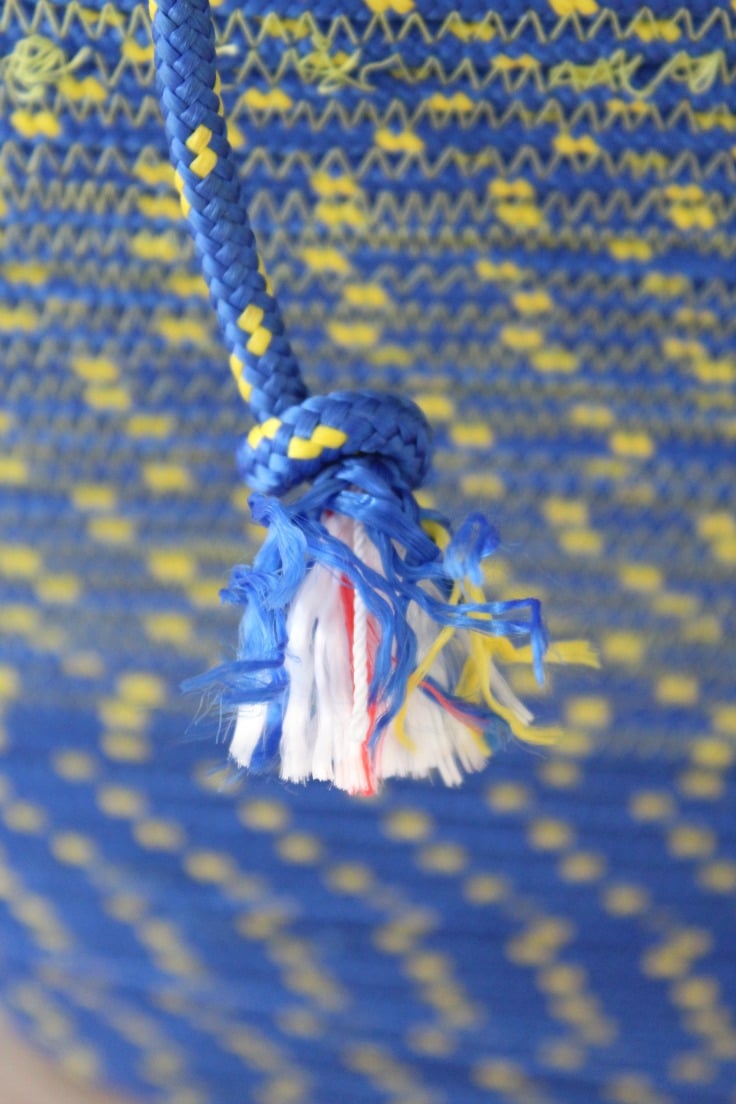
- And you’ve reached the end of this tutorial! Enjoy your new rope bag! Now that you know how to make a rope bag, go make a bunch for your friends and family too! They’re great gift ideas!
Pin to save for later
Most Popular Sewing projects
Article may contain Amazon & affiliate links. As an Amazon Associate I earn from qualifying purchases at no additional cost to you.

This is just great — exactly what I was searching for!!
I’ve made a couple of the bowls as well, but want a larger tote to carry a picnic quilt I made as a gift. Imagined this in my head, but just wanted some confirmation it actually could be done. Love your colored cording; for this first one, I’m planning to use natural rope, wrapped here & there with scraps of fabric from the quilt, as I’ve done before with the bowls. Thanks so much!
So happy you liked my idea and thanks for letting me know, Michele! I love natural rope but wasn’t able to find colored rope at that time. Enjoy!
Love the blue and yellow bag made with cording. Where can I buy the color cording?
Hi, Dorrie. I got it in my local hardware store. I’ve seen something similar on Amazon here https://amzn.to/46trIuw
This bag looks brilliant, very well made. At the minute I’m making toys on my sewing machine, though I’d like to make bags, and I made a drawstring bag for my smartphone as a test, using scraps of fabric sewn together, and wool for the ‘drawstring.’
I’m keen to have a go at making a bag like this, I have some questions, Could I change the colour of the rope, say, half way through making the bag? Would a nylon webbing strap work for the handles? What is the maximum thickness of rope that I could work with on a ‘standard’ sewing machine?
Thank you.
Hi, Sarah! Thanks for your lovely comment! To answer your questions, yes, you can change colors for rope but you need to make sure the ends of each color will join perfectly. Alternatively you can change the color of your upper thread & keep same rope. Cotton or polyester webbing make nice handles (you can see an example here https://theseamanmom.com/corded-bag-handles-with-webbing/). The thickest rope I’ve sewed with is 5/16″ jute rope for this rug tutorial but it was kind of a nightmare to sew with https://theseamanmom.com/coiled-rope-rug/.
What kind of rope and where to find it?
Thank you,
Dottie
Hi Dottie. Any rope will do as long as it’s not too thick. I used polyester like this one https://amzn.to/2vxflBq
I love your rope bag, Petro and have written a post to showcase it today…
http://www.threadingmyway.com/2016/10/showcasing-rope-basket-tutorial.html
Love these bags, only problem is they can get very pricey. Where do you find colored cording like that? Its beautiful
Hi Cynthia. Thanks so much! They do get a bit pricey sometimes, depending on how big your bag is and where you buy the rope. I was lucky to find this particular one in Europe, it wasn’t as cheap as I would’ve liked but I really loved the color, it’s pretty unusual and it’s great for this type of projects. I can see a similar one on Amazon here http://amzn.to/29A6yzl but it’s a 3/8″ and it comes in assorted colors, not sure if its a good deal. Hope you’ll find something similar and get to make your bag soon, you’ll love it!
Hello! Adorable purse! So the link you shared on Amazon for the rope, is the 5/8” too big to make this purse since you recommend 1/4”?
Thanks for your comment, Buzzy! I’m not sharing any link to such rope in this tutorial. Regardless, you can use any size you’re familiar with or it’s easy to work with. I recommend 1/4″ because the project is big and the rope is easier to handle. But you can use other sizes too, as long as you machine can handle the thickness.
I love this bag! I’ve got a Craft Gossip post scheduled for this evening that features your tutorial: http://sewing.craftgossip.com/?p=88592 –Anne
Your sharing is wonderful, thanks for sharing with us.
Great idea! I can see using this same technique to make placemats, coasters, rugs, etc. Thanks for sharing!
Thanks Debbie. Those are all wonderful ideas too!!
Thanks for sharing over at the DIY Crush Craft Party! I loved your tutorial so much that I’ve featured it on our Link party this week. Thanks for sharing and be sure to come back again to link up your other great tutorials!
Domenica