

Girls Peasant Blouse Pattern sizes 2T-10
Peasant tops and dresses are essential items in every girl’s wardrobe. They are easy to sew, especially for beginners, and look adorable on little ones. Here is a lovely and uncomplicated peasant blouse pattern that comes in sizes ranging from 2T to 10 years old.
Peasant Blouse pattern
I enjoy creating clothes for my daughter. It allows me to design them from scratch and pick unique fabrics and details. The peasant blouse pattern is one of my favorites because it was easy to draft and can also be used for a peasant dress in the future. I plan to make one for my daughter soon, as it looks very cute on her. For those who are just starting out with sewing, this peasant top pattern is a great addition to your collection of easy sewing patterns for beginners.
More little girls sewing projects you will love:
- Circle skirt with elastic waist
- 10 Minutes skirt
- Easy pleated skirt
- Easy girls’ gathered dress tutorial
- Easiest pillowcase dress
- Girls leggings pattern
What is a peasant top?
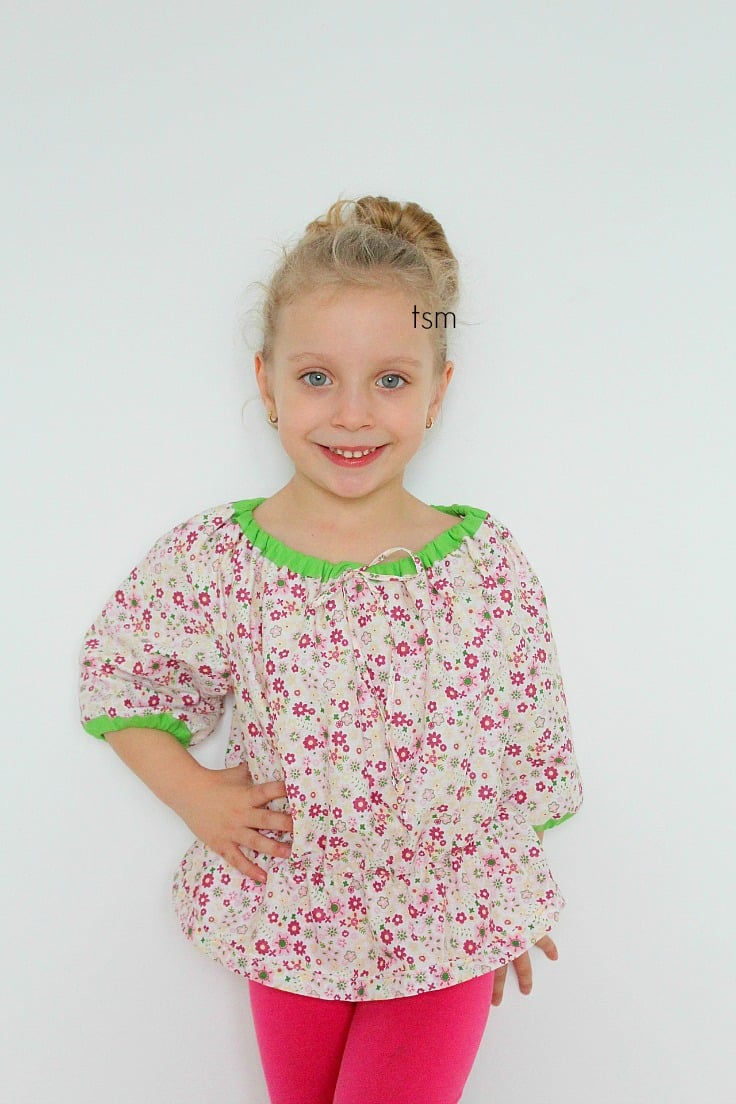
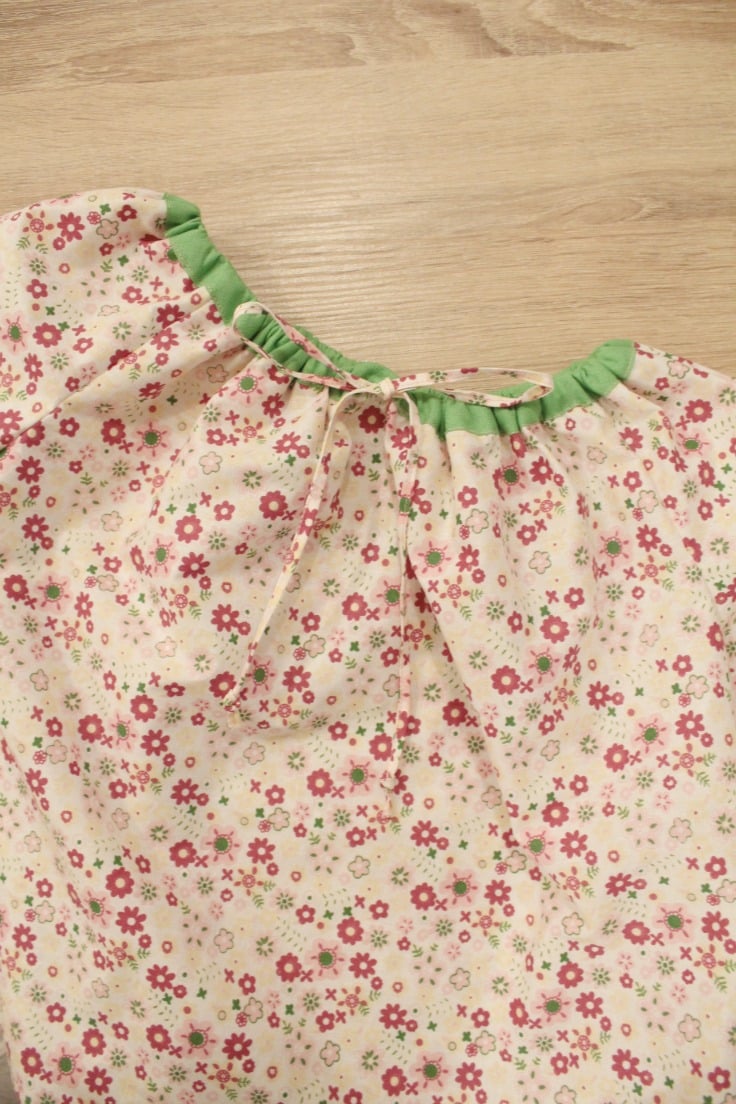
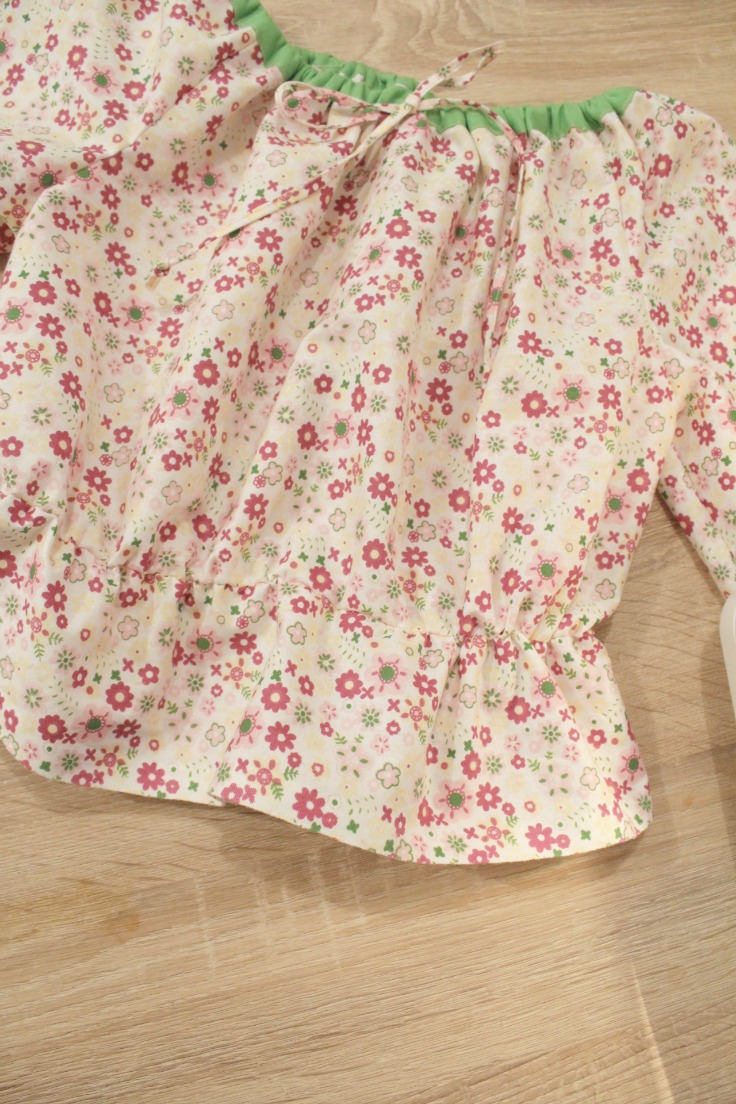
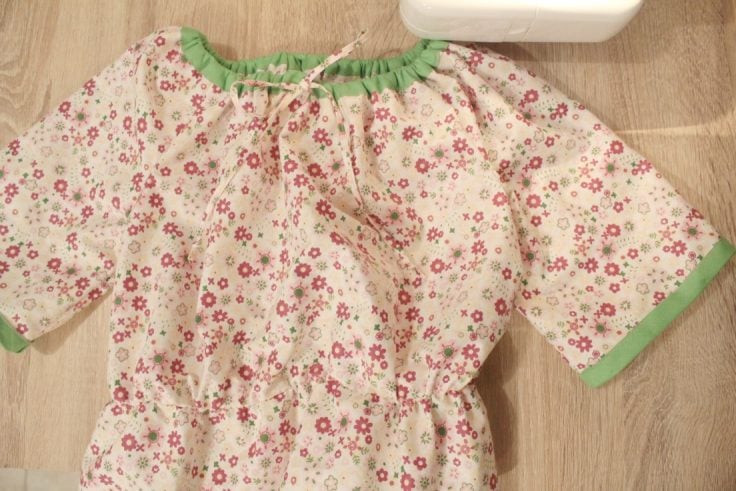
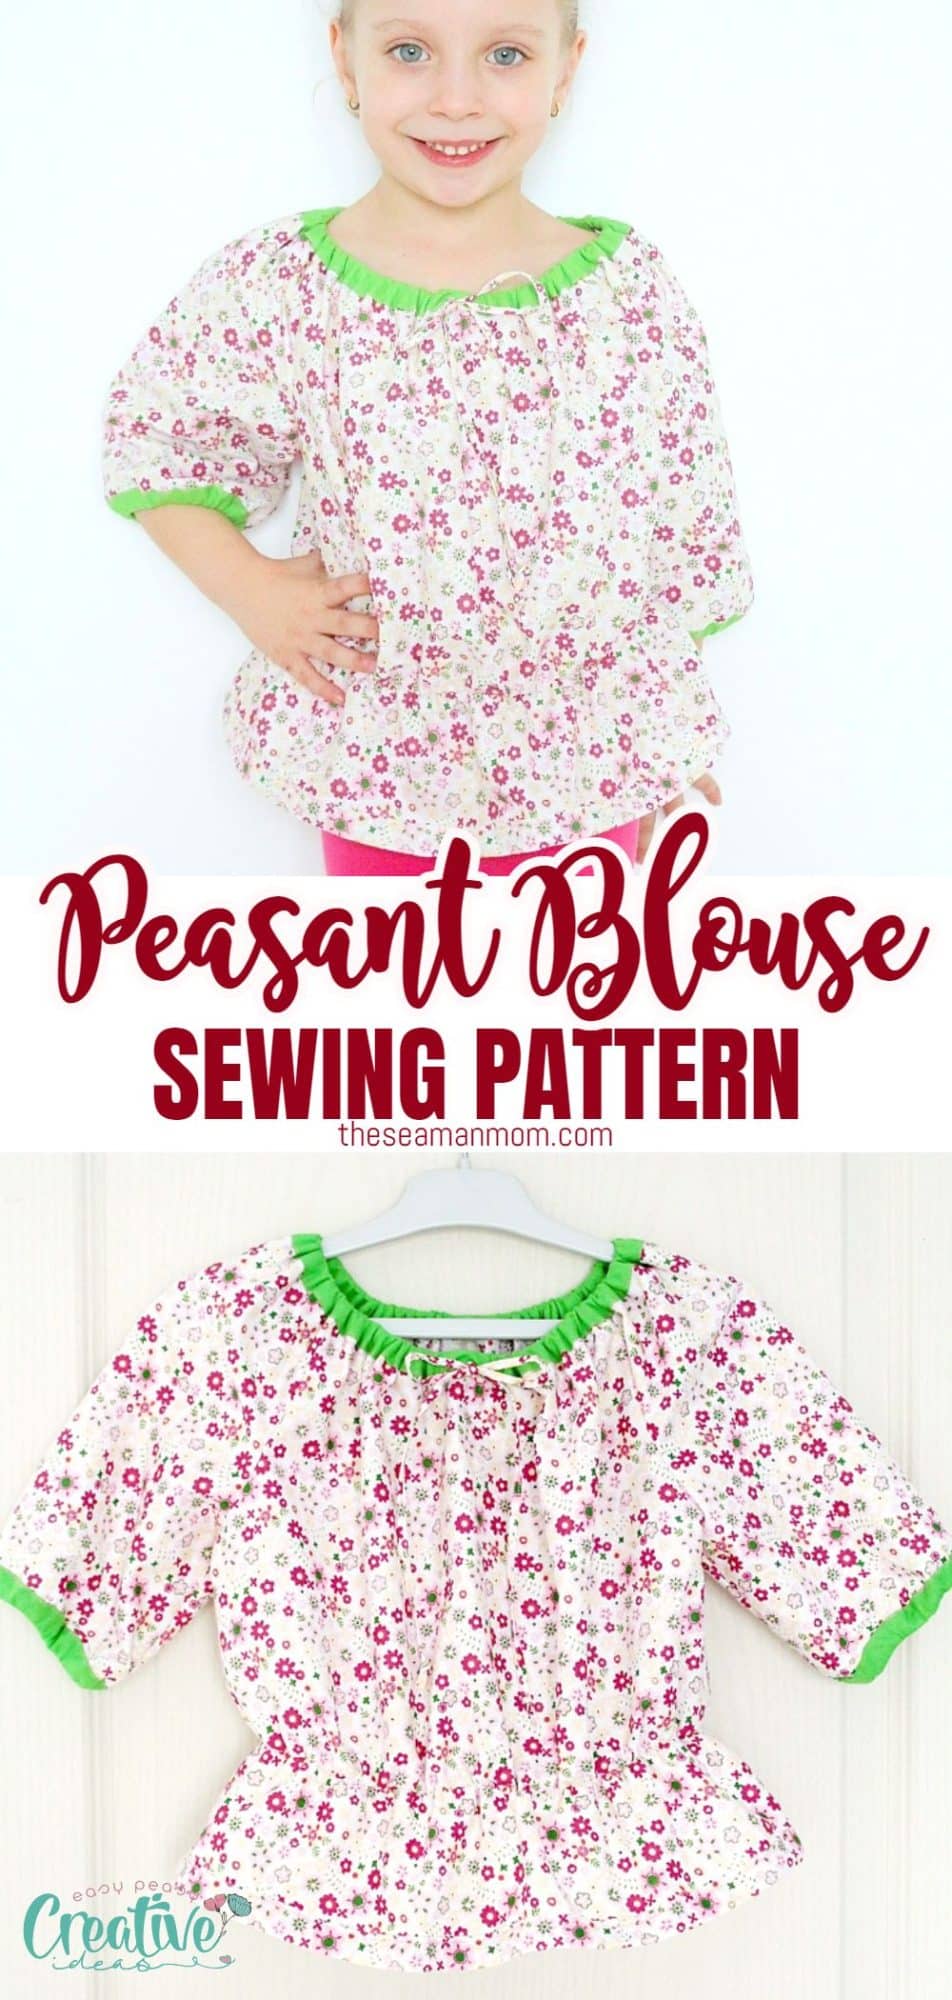
A peasant top is a traditional style of blouse that has a relaxed fit and is super comfortable, has an elastic waist, a gathered neckline and large balloon sleeves. The peasant blouse is comfortable to wear and easy to make and can also be used for a dress in the future. It usually features intricate embroidery or small ribbons as accents, making it a wardrobe staple for both adults and children.
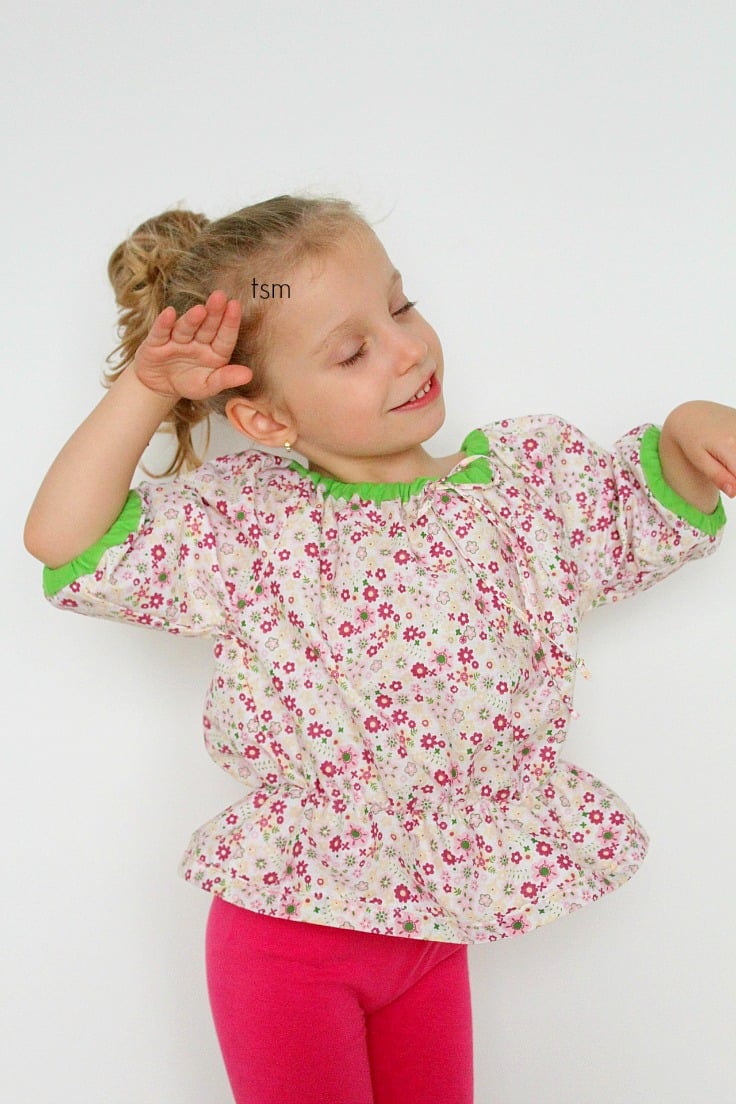
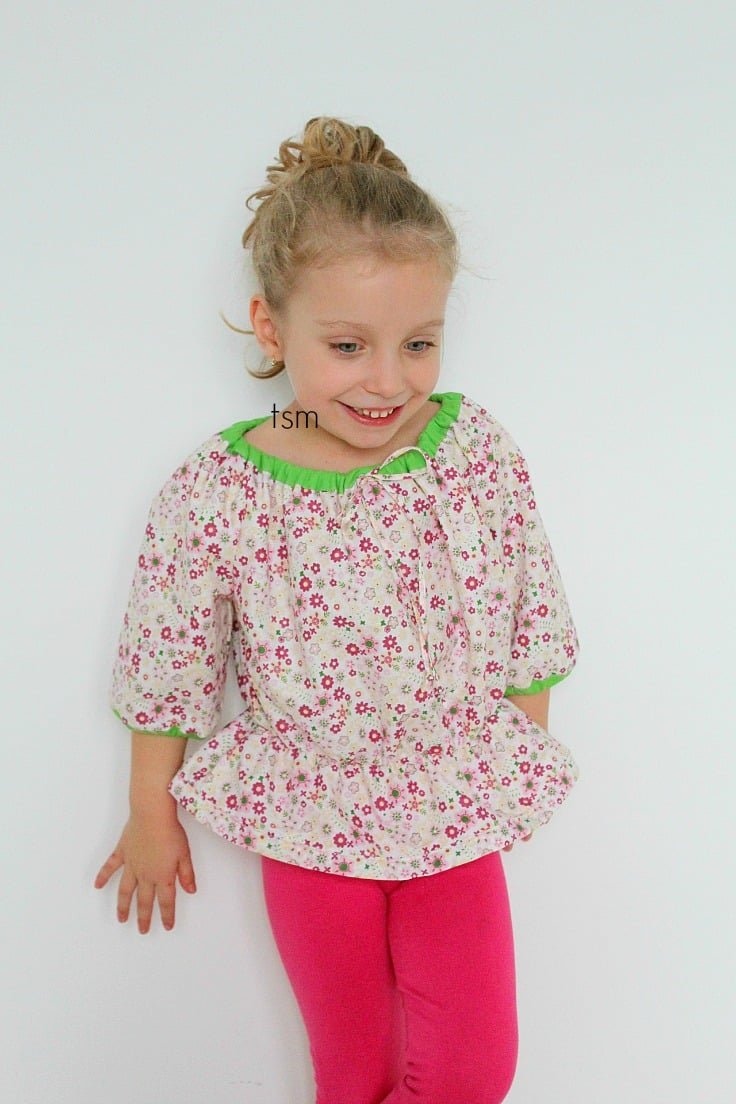
My girls peasant top is really comfy and because I made it loose, my little munchkin girl has plenty of room to move! She’s such a playful little monkey and she’s more than grateful that she’s able to wear comfortable clothes, made to fit her body, personality and needs. Or at least I hope, I haven’t heard a peep just yet, lol.
Ellie actually had a blast wearing this cute blouse and modeling for mommy, as you may have noticed, so I assume she really liked this peasant blouse for girls. Or maybe she just loves monkeying around which is also true, she does that a lot lol

This peasant blouse pattern is a quick and easy sew and I think every beginner sewist must give it a try! I made it with a 2/3 sleeve but can easily be made with short or long sleeves. I also didn’t want the waist too tight so I used an elastic only a smidge smaller than the top’s width, just enough to gather it a bit around the waist. Ellie likes to wear comfortable clothes (what kid doesn’t?).
Also I purchased bias tape to use around the neckline and to hem the sleeves but you can skip that part or use fabric scraps to make your own binding as indicated in this tutorial. Also the tie I used for the neckline can be replaced with ribbon if you’re looking for an easier tie version.
Easy sewing patterns for beginners could not get simpler with this project!

What fabric for a peasant blouse?
The fabric choice for a peasant blouse is really up to you. Any type of lightweight woven fabrics like cotton, linen, batiste and rayon challis are great choices. This top would be very cute in a floral print or gingham plaid. You can also use knit fabrics for the peasant style as long as it has just enough stretch to fit comfortably around the neckline and waist.
Also cotton voile and silk are great options for this pattern, but remember to use an appropriate lightweight interfacing for the neckline and make sure to finish all raw edges with the appropriate finishing technique for that particular fabric type. French seaming works best for lightweight projects in my opinion.

If you’re new to sewing, you’ll find this peasant blouse pattern to be ideal. It’s easy to sew and looks great on any age group. The relaxed fit, elastic waist, gathered neckline, and large balloon sleeves make this a comfortable and fun garment to wear, perfect for adults and children alike.
Have fun with this peasant blouse pattern and enjoy seeing your little one wearing it!
Sewing the peasant blouse
Materials needed:
- 39″ x 31″ 100% cotton fabric for the body (back and front)
- 27″ x 23″ 100% cotton fabric for the sleeves
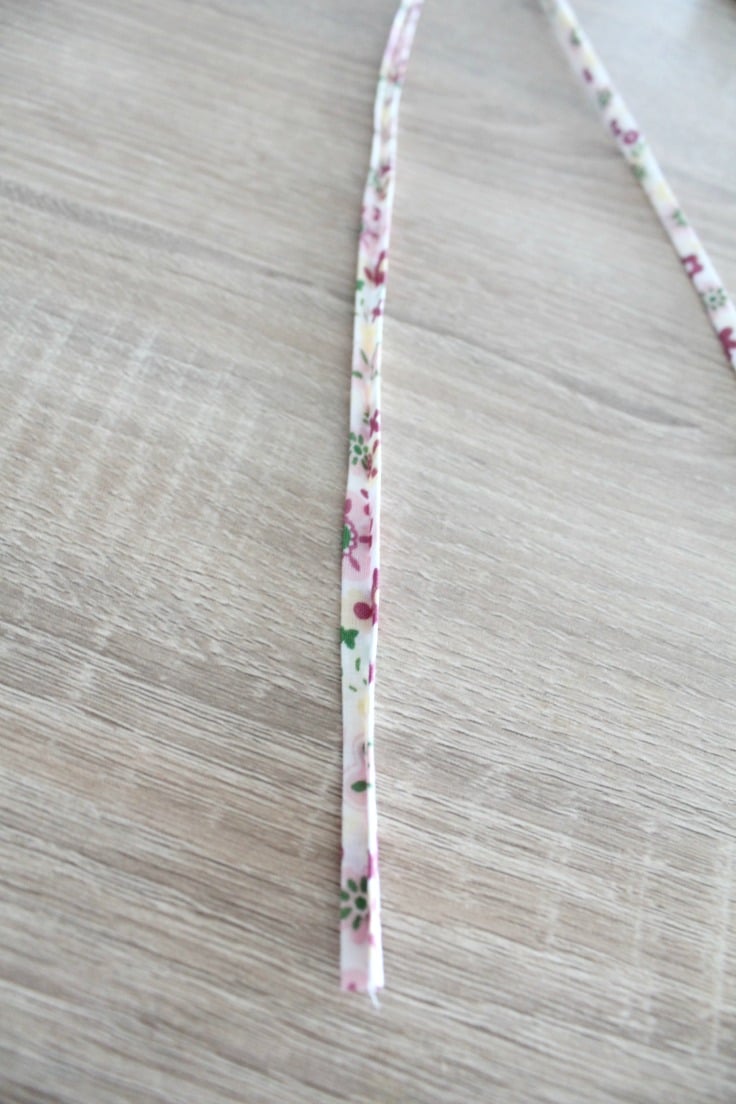
- 2″ x 31″ cotton fabric for the tie
- 3″ x 39″ cotton fabric to finish the hem on the blouse (optional; you can do a regular hem)
- peasant top pattern available here
- bias tape
- soft elastic
- matching thread
- scissors
- pinking sheers (optional, if you don’t have a serger and don’t like a zig zag finish)
How to sew the peasant blouse pattern:
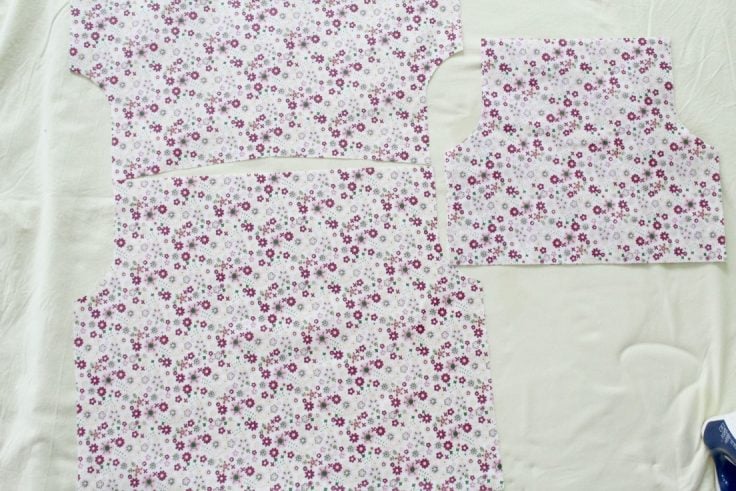
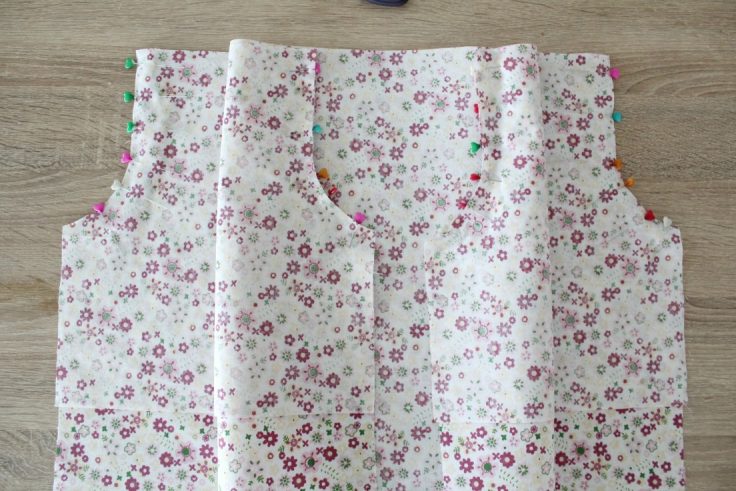
- Grab the peasant top pattern from here, available for sizes 2T to 10 years old. Use 1/4″ seam allowance when sewing. You should get these layouts when putting the pieces together
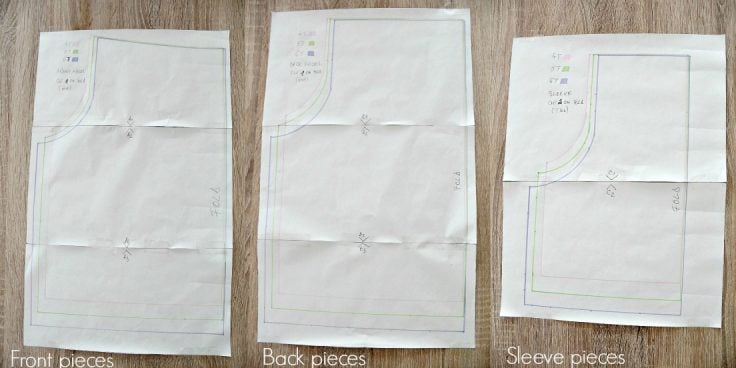
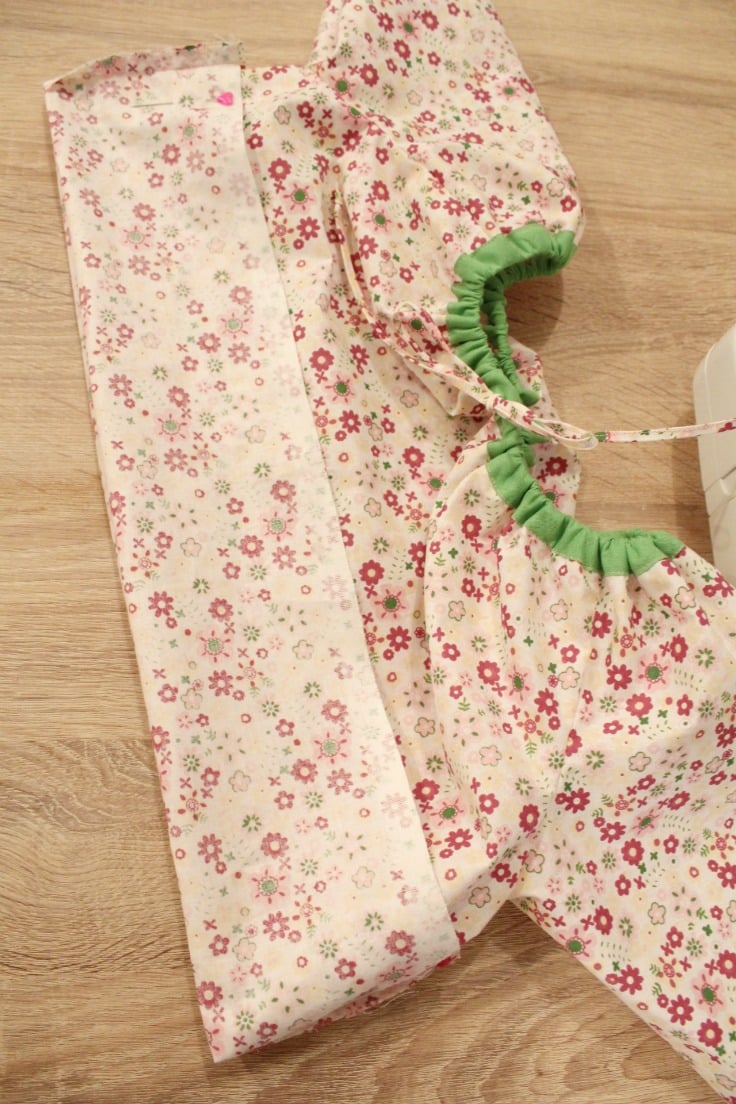
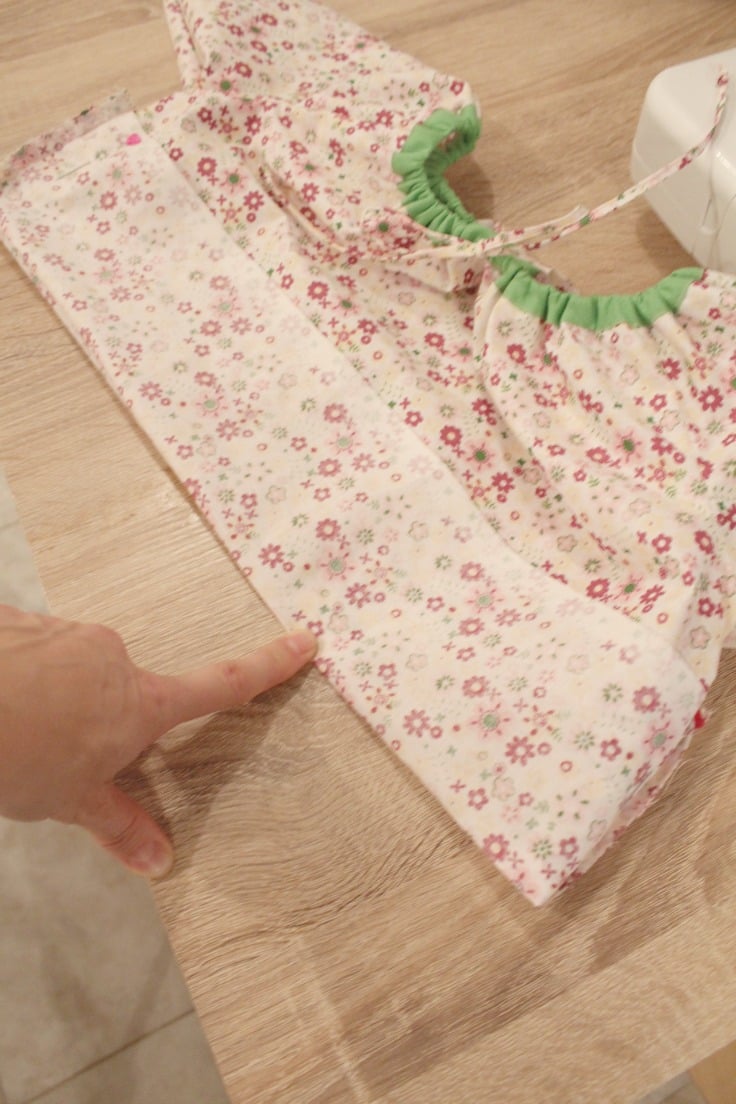
- Cut your fabric according to the pattern. You should cut on the fold and you’ll end up with 1 piece for the front of your blouse, 1 piece for the back and 2 sleeve pieces. Also cut the fabric for the tie and hem, if you decide to finish it the way I did.
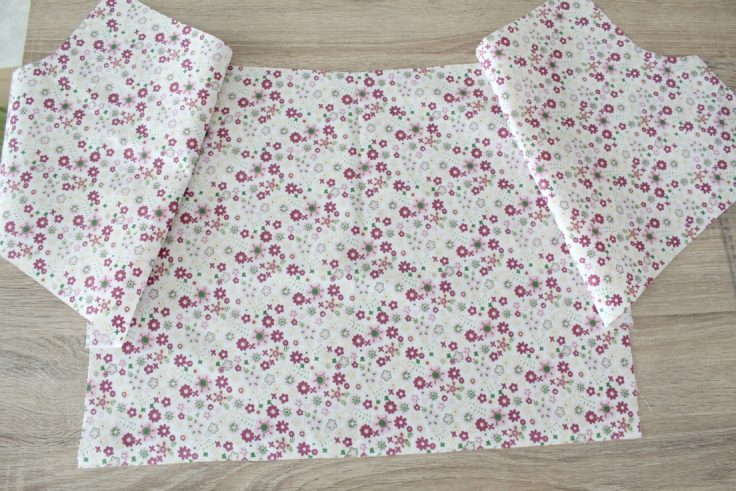
- Take the front of the top and one sleeve and put them right sides together, joining with pins at the armhole.

- Take the other sleeve and join it with the front of the top the same way.
- Fold the sleeves in half so that one half is right side out. Place the back of the top over it, wrong side out, so they are facing right sides together.
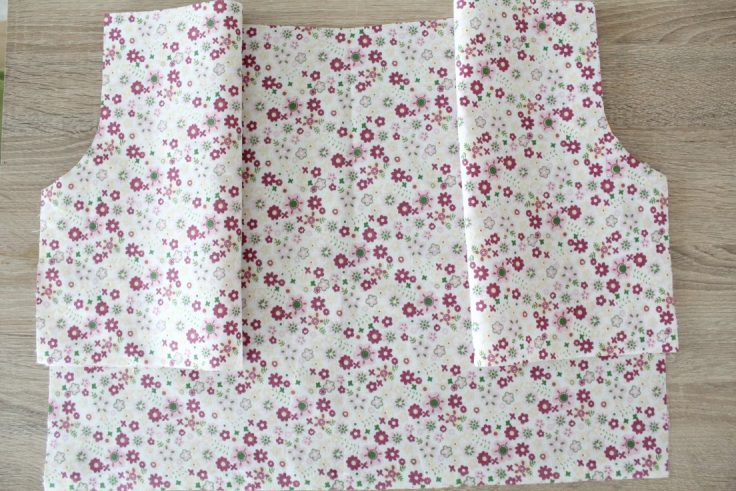
- Pin around the armhole then sew everywhere you pinned. Your sleeves should be now attached to the front and the back of the top at armholes.
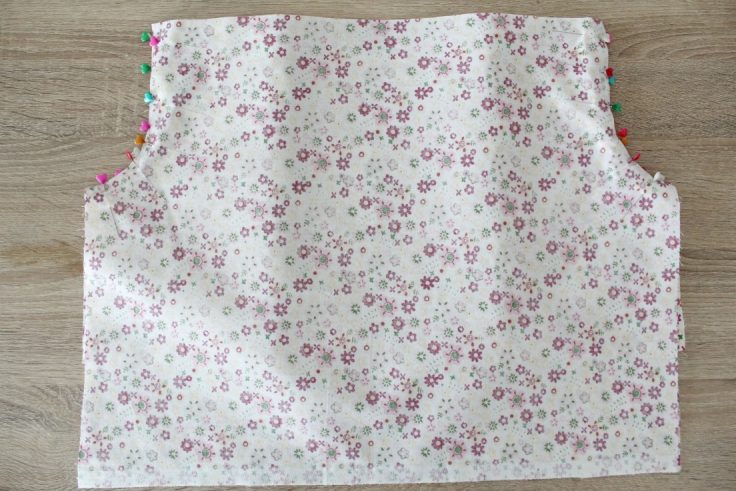
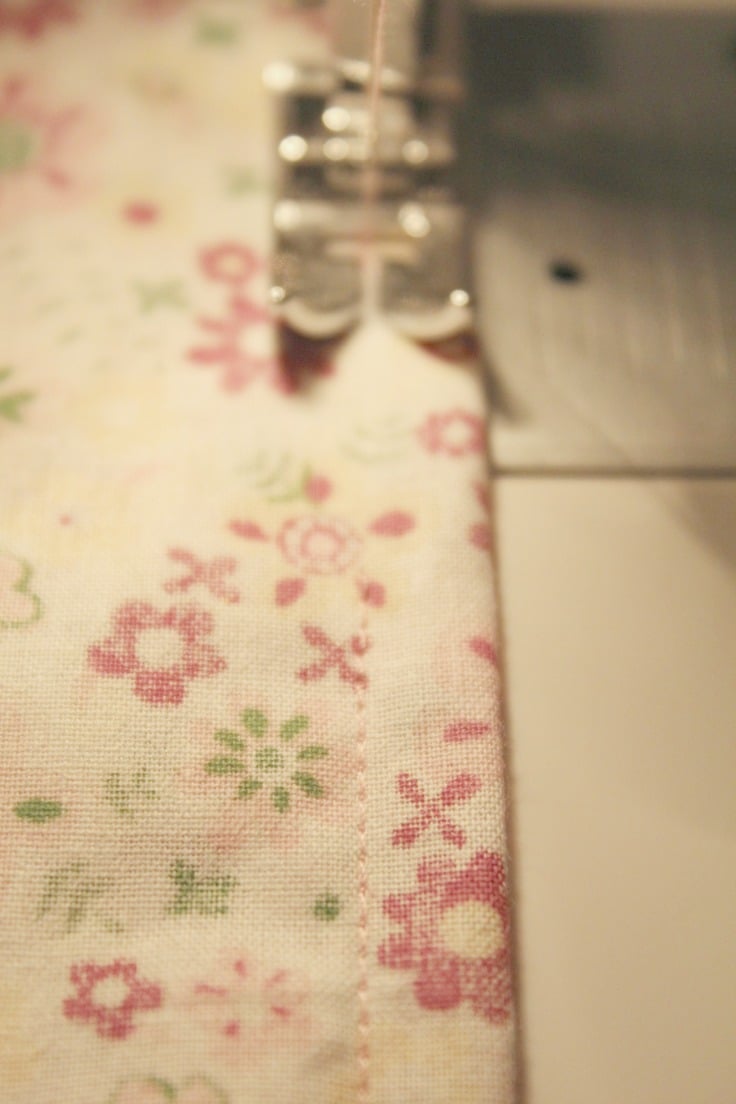
- Zig zag, serge or use your pinking sheers to finish the seams
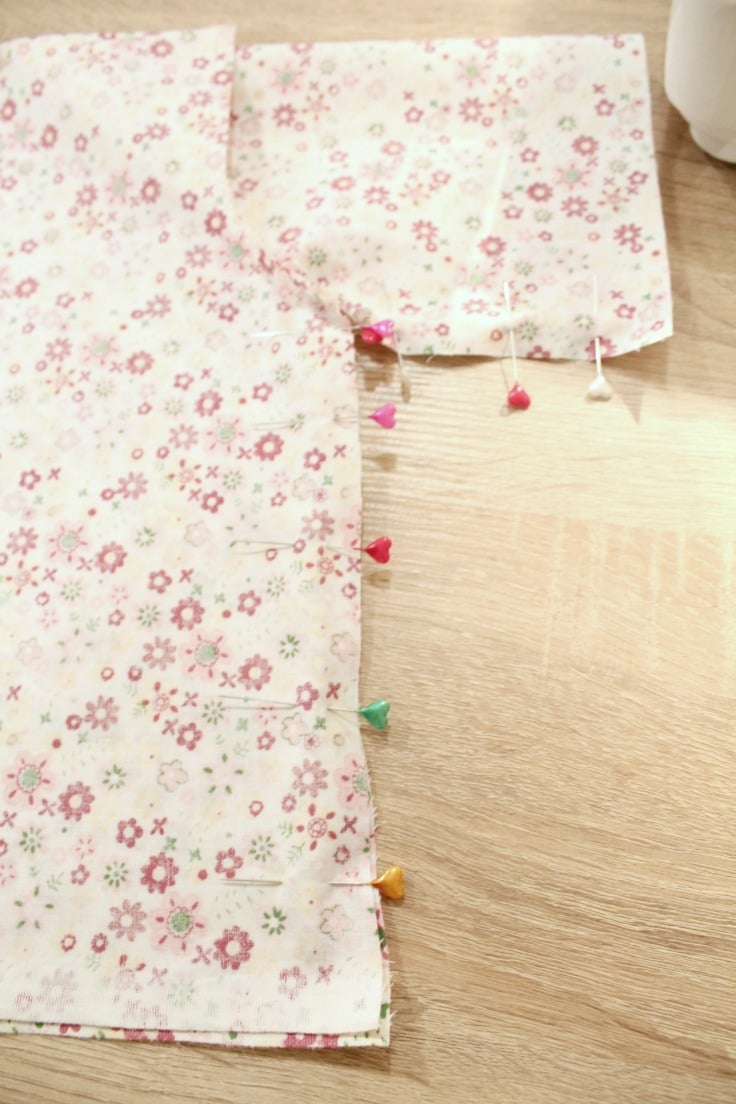
- Pin the sides and the sleeve then sew all around. Pivot when you get to where the sleeve meets the side of the top. Finish side seams with a serger, zig zag stitch, pinking sheers (or your favorite finishing method).
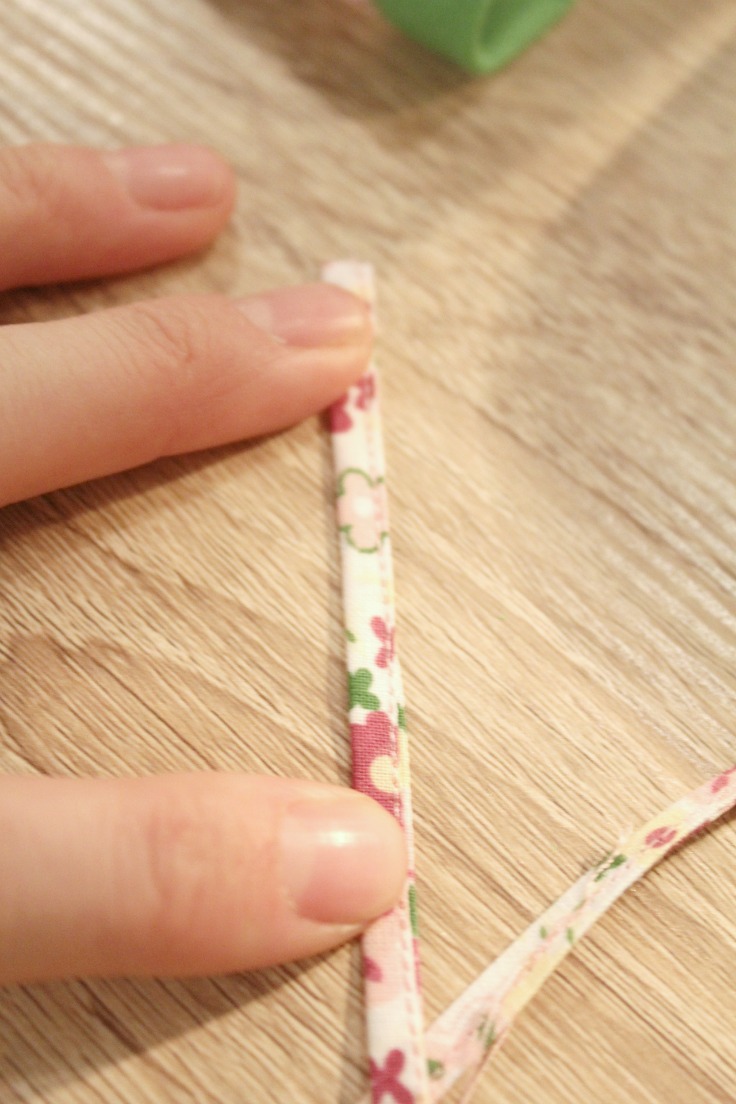
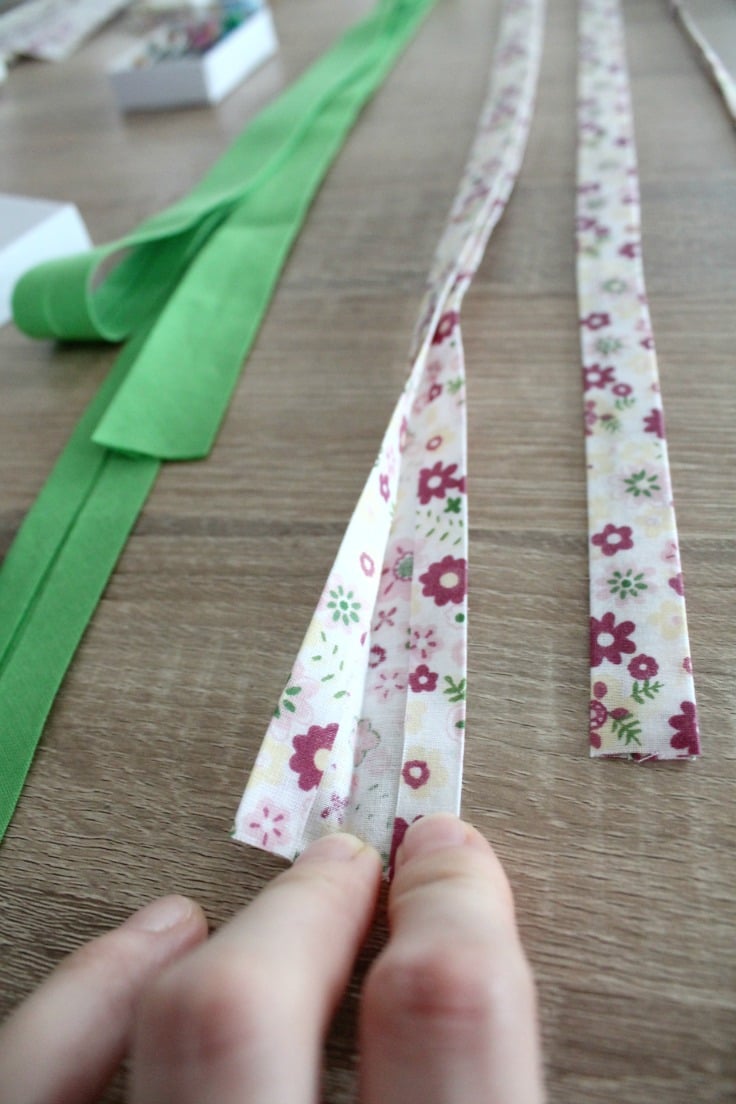
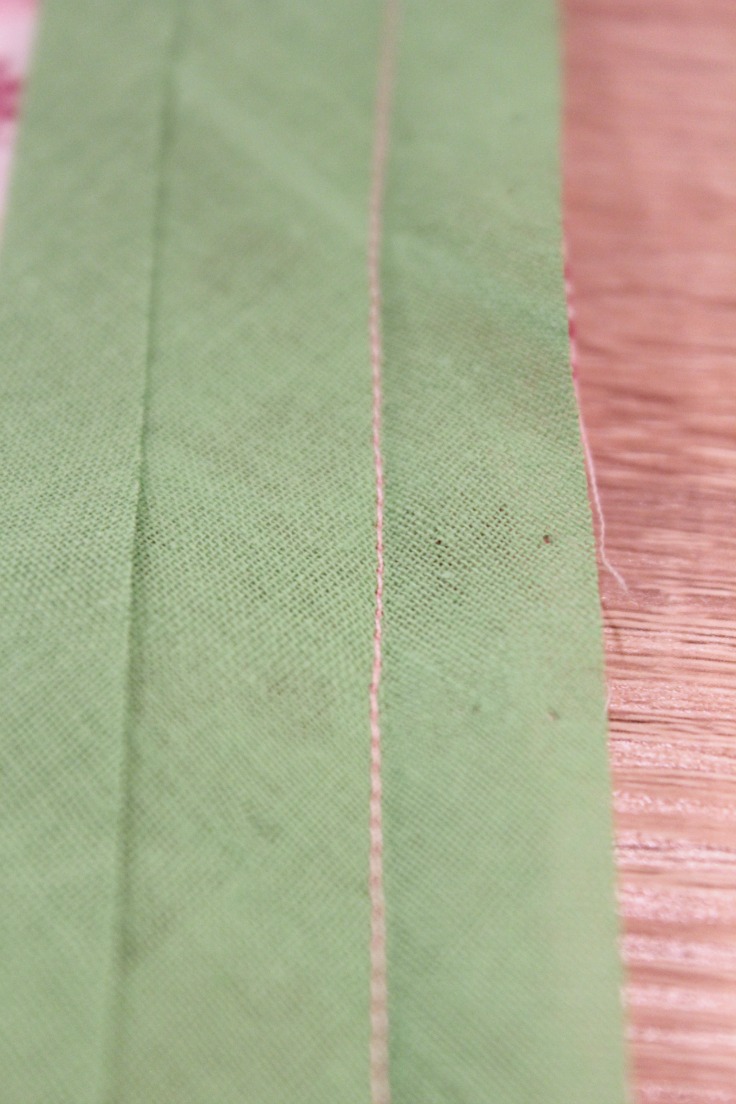
- Prepare both the tie and the hem binding this way: fold in half and iron. Fold each half again and iron. Close the strip on the initial fold and iron. For the hem edges, they will overlap when you attach the hem to the blouse and you’ll only need to fold in one of the edges. Only for the tie, stitch as close to the edge so you can close the strip and make a tie.
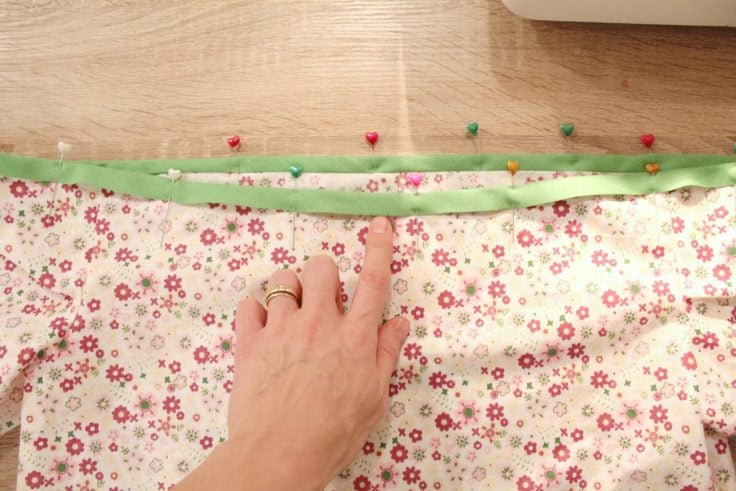
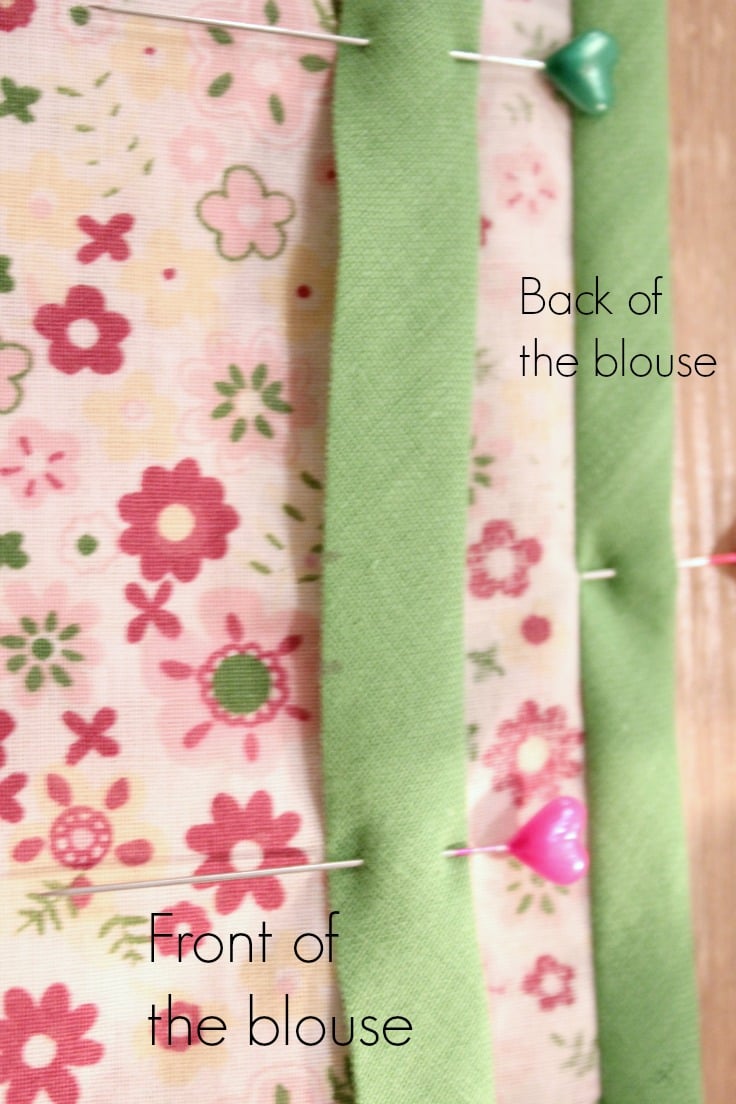
Attaching Bias Tape
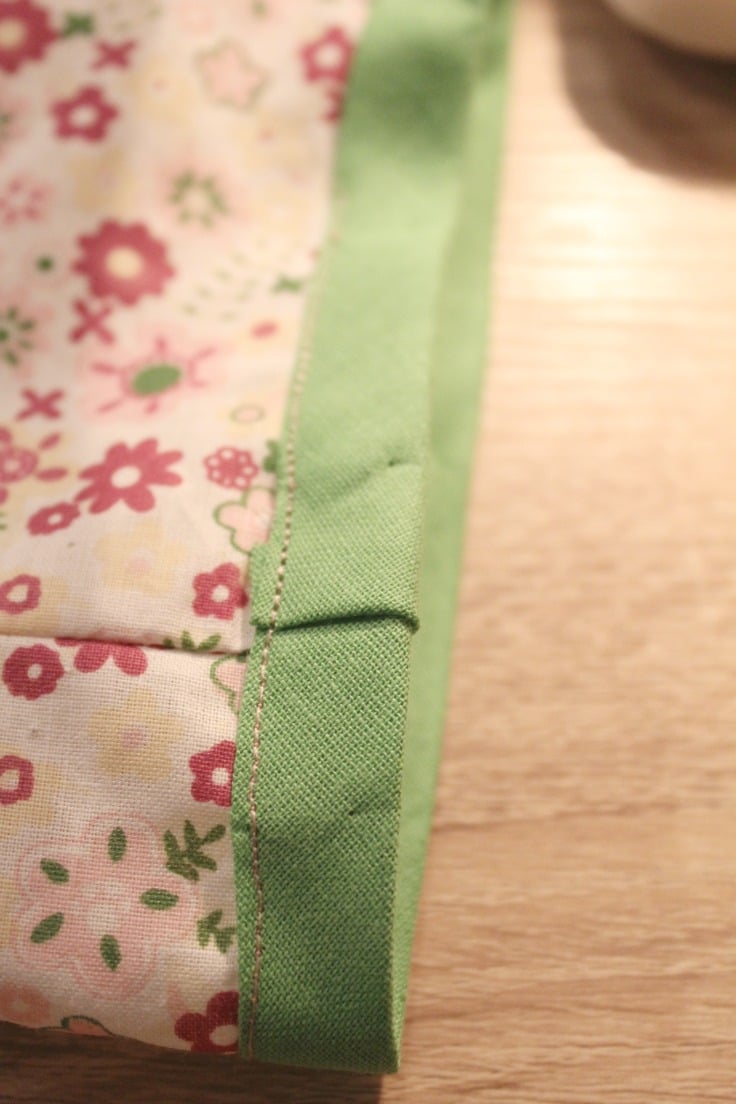
- Attach the bias tape to the neckline: Start somewhere less visible, like at the back, where the sleeve joins the top because when you finish sewing the bias tape, the edges will overlap and one of them will need to be turned in. Same goes for the sleeve if you decide to finish the hem with bias tape.
- Open the tape and pin it to the blouse on the wrong side.
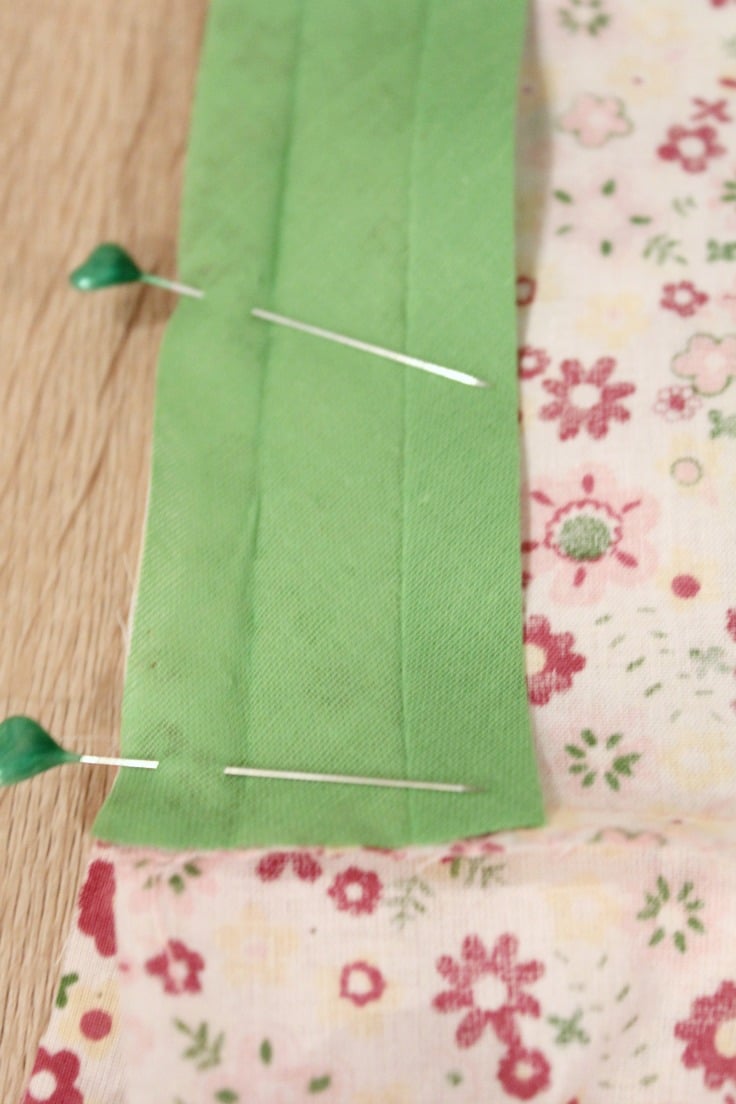
- Sew right on the fold.
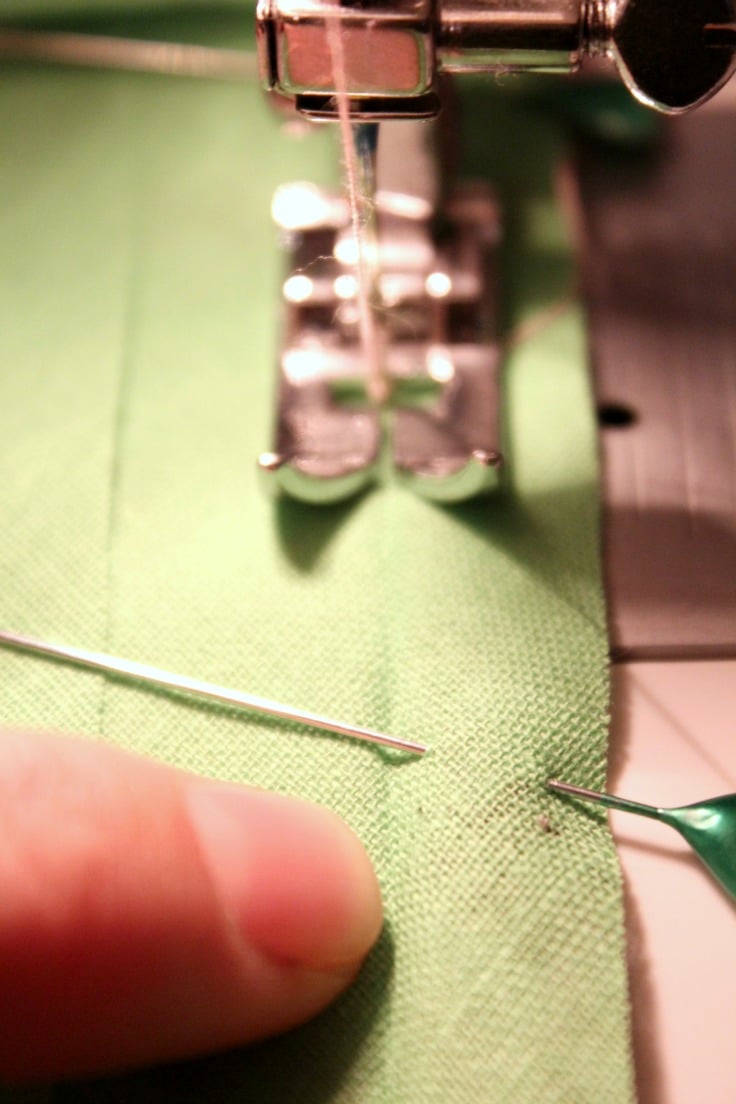
- Then fold the tape over to the right side of the top, so both bias tape and blouse are facing right sides together. Sew as close to the edge a you can, leaving an 1″ opening when you get to the starting point. You will need this opening to thread the tie through.
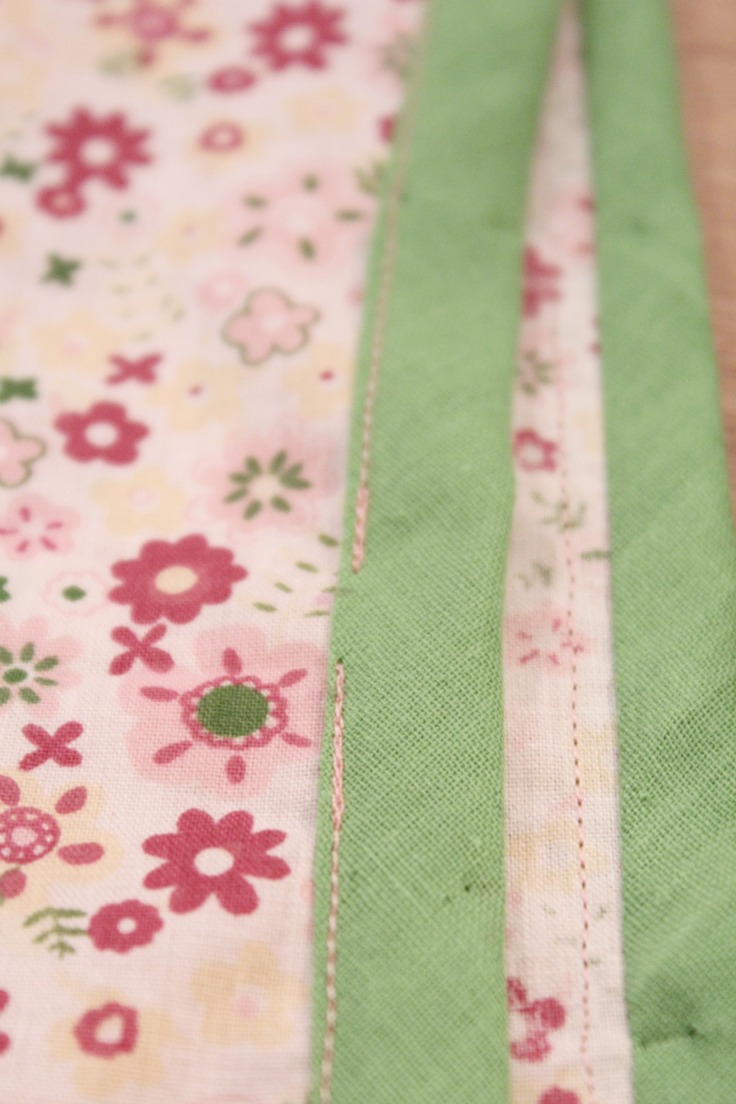
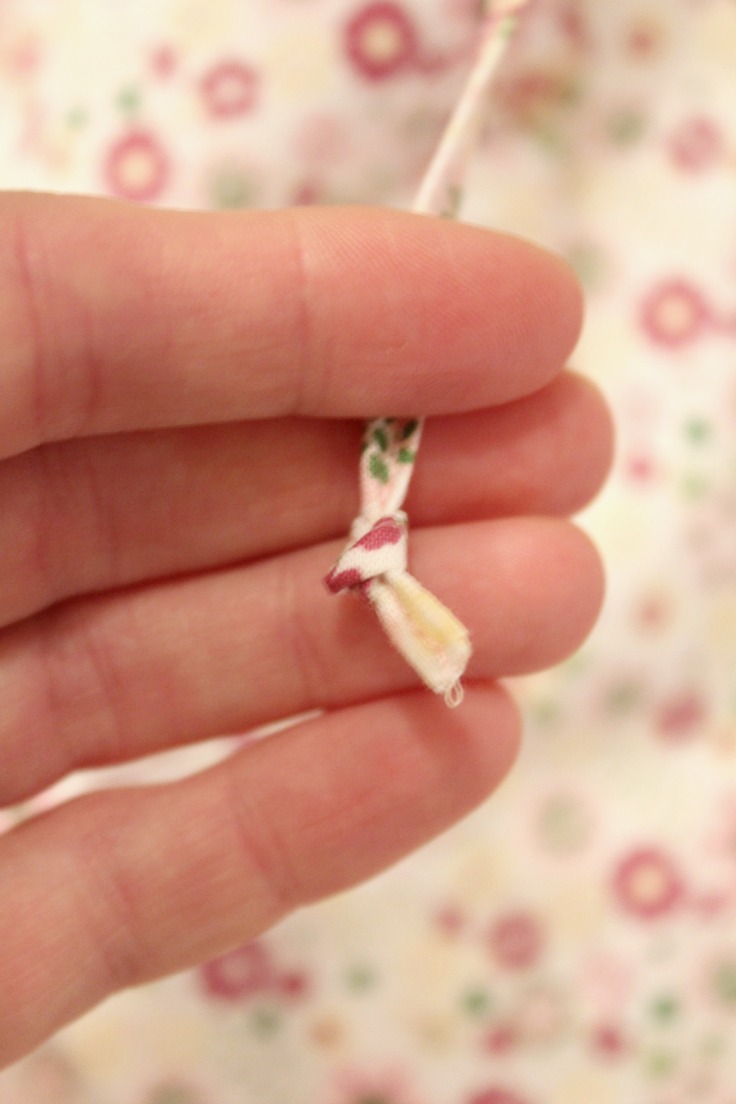
- Grab the tie and attach a safety pin to one end then thread through the bias tape casing you just made. Make a small knot at each end of the tie, when you’re done threading.
Inserting the elastic:
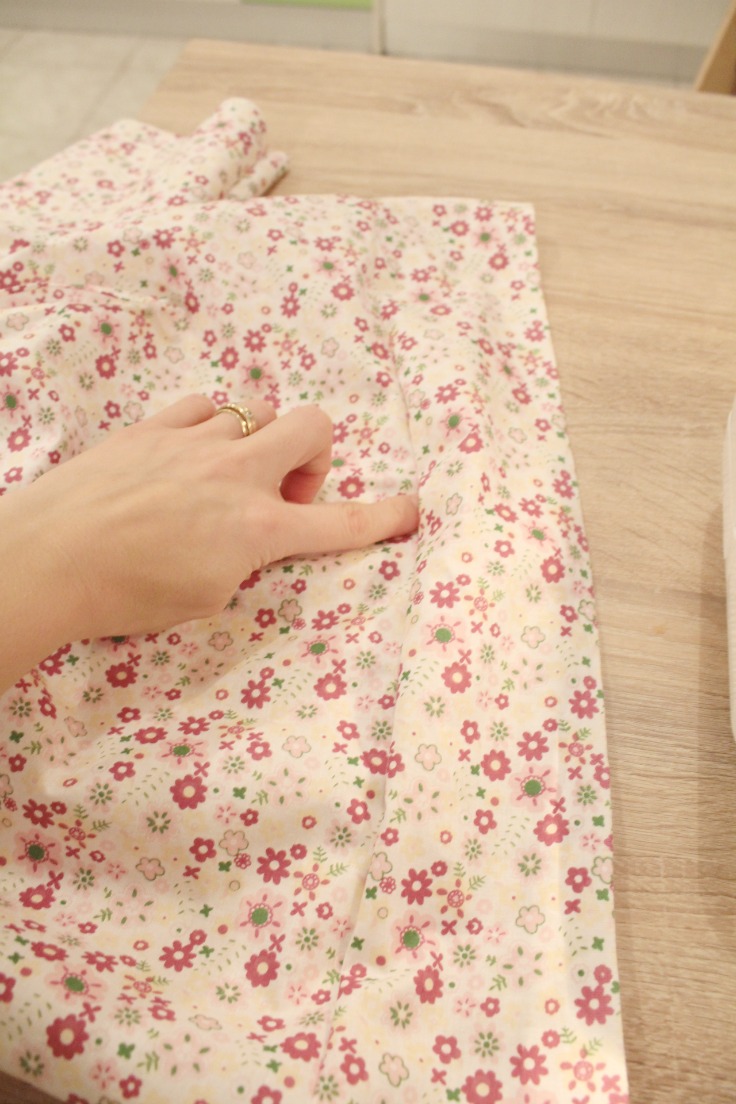
- Now you need to establish where you’d like the elastic to fall. I wanted the blouse to gather at the waist and didn’t want it too tight so I just cut my elastic just a smidge smaller than the blouse’s width.
- If you choose to do the same, with the blouse right side out, fold the blouse out and stop at about 5 cm = 2″ away from the underarms.
- Make sure the fabric is of the same width all around the waist then sew the bottom according to the width of your elastic (mine was 1/8″ so I sewed at 1/4″).
- Leave a small opening when you get to the starting point so you can thread the elastic in.
- Thread the elastic using a safety pin, sew the edges together, then close the opening.
- I chose to finish the sleeves with bias tape, same as I did at the neckline but you can just do a regular hem. If you do the same, make sure you leave a small opening so you can thread some elastic, then topstitch to close the opening. Or you can just leave the sleeve as is, a flared sleeve looks good too.
- I forgot to take photos but I also finished the hem on the blouse same way as I did with the bias tape at the neckline and sleeves, using the second strip of fabric I mentioned at the beginning of the tutorial.
- And that’s it! Wasn’t this peasant blouse pattern so easy peasy?
This peasant blouse pattern is an easy and fun way to make a beautiful top for your little one. With simple steps and minimal materials, you can easily sew up this gorgeous peasant top in no time. So why wait? Get your hands on the perfect peasant top sewing pattern today and start creating something special!
If you decide to use my pattern and make adorable blouses for your little ones, I’d love to see photos, so please tag me on social media. Happy sewing!
Most popular sewing projects:
- Tips for sewing a round hem
- Corded bag handles
- Flutter sleeve dress pattern
- How to laminate cotton fabric


Article may contain Amazon & affiliate links. As an Amazon Associate I earn from qualifying purchases at no additional cost to you.

This is too cute! Great instructions! Would love for you to submit this to my blog!
Thanks so much, Denise! I will stop by, thanks for the lovely invite. Hugs
A very pretty top with the contrasting neckline, Petro.
Aww, thanks so much, Pam! You are always so kind! xoxoxo