

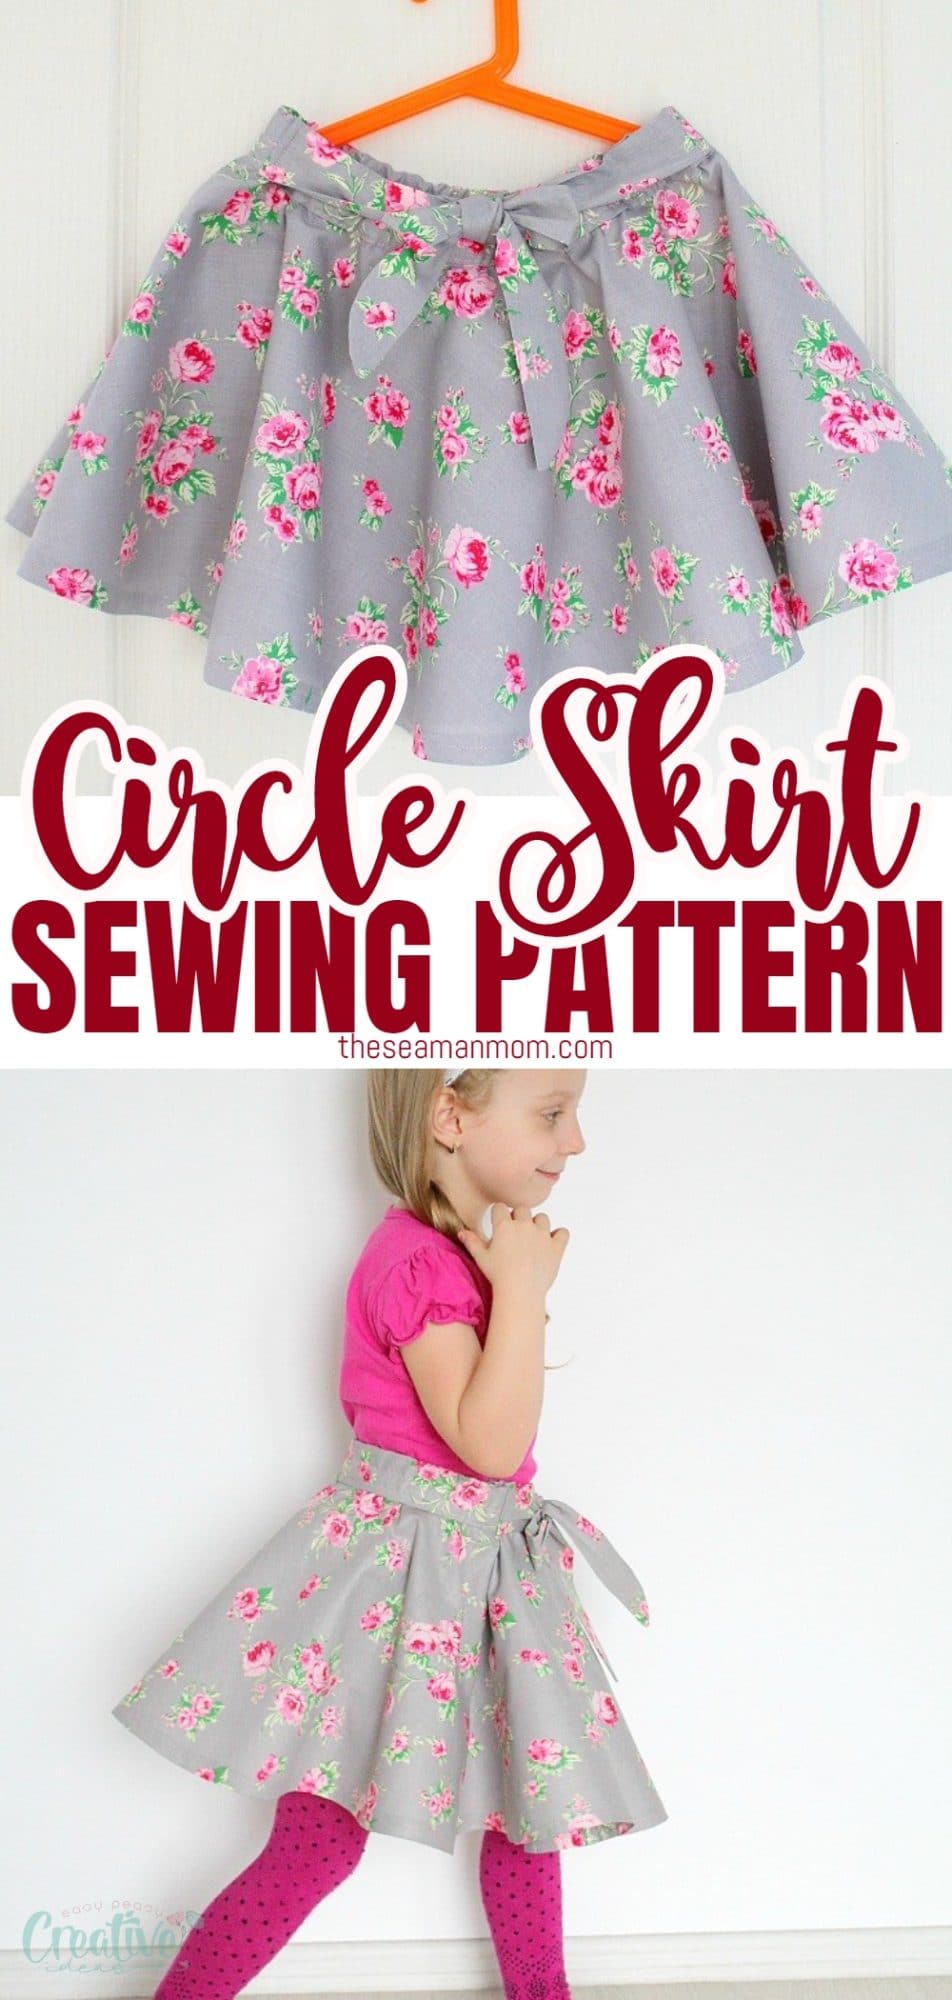
How to make a Circle Skirt With Elastic Waistband
A circle skirt is a timeless piece that can be dressed up or down, making it a versatile addition to any wardrobe. And while circle skirts can be purchased ready-made, they’re also relatively easy to make at home. All you need is a circle skirt pattern, some fabric, and an elastic waistband. Learn how to make your own with this easy to follow tutorial.
Circle skirt pattern

I absolutely love circle skirts! They don’t only look super cute but they’re also very comfy to wear too! I think a circle skirt makes any girl look simply stunning! And if you are a beginner, this circle skirt pattern is an excellent project to practice your skills on.
A circle skirt is a flattering and fun style that is perfect for all occasions, from a day at the office to a night on the town. And best of all, it’s easy to make your own circle skirt with just a few supplies. All you need is a circle skirt pattern, fabric of your choice, and some elastic. Simply cut out your fabric according to the step by step instructions below, attach the elastic to the waistband and sew the hem. That’s all there is to it! With a little time and effort, you can easily create a stylish and unique circle skirt that will be sure to turn heads.
This particular circle skirt with elastic waist is made for a little girl but the exact same instructions apply to a miss or lady skirt too, in any size and length you need it. I actually wanted to make a full circle skirt for myself too but as always I didn’t buy enough fabric for both of us so of course my little angel had to be the winner on this one!

Similar posts you might like:
- Paper bag skirt
- Reversible skirt sewing tutorial
- 10 minutes A line skirt
- Women’s Bubble Skirt tutorial
- 30 minutes skirt
- Tulle circle skirt for women
- Half circle skirt with lining
- Knit half circle skirt
- Girls A Line dress free pattern
- Box pleated skirt

This circle skirt pattern is a great project if you don’t have a lot of time on your hands and just need to whip up a skirt in a hurry. I made this full circle skirt pattern from a single piece of fabric, a continuous circle so there aren’t many seams to sew up in this project.
This circle skirt pattern can be made in a mini or midi length version. I personally prefer the midi version for ladies and mini for little girls, I’m just old fashion like that! You’ll learn how to make a circle skirt without a pattern but a little math will be involved in this circle skirt tutorial but don’t worry, it’s really no rocket science, anyone can do it.

Depending on your fabric choice when making a circle skirt, your skirt can be more twirly or more stiff, it can look casual or formal and it can have more volume or lay flatter. No matter your choice, this circle skirt pattern is sure to make you or your little one feel girly and simply stunning!
How much fabric do I need for a full circle skirt?
Depending on the size of your skirt, you need between 1 and 2 yards. For a child skirt you most likely need 1 yard while adults would probably be fine with 1 1/2 yards. Purchase a little more to be on the safe side.
What is the best fabric for a circle skirt?
Cottons are great for a lot of projects and the circle skirt is one of them. You could also use fabrics with more drape like silk or satin or fabrics with more body like tulle (check out this great tulle skirt tutorial!); but all these are hard to work with so you need to have a little more experience in sewing garments. You could do a great job at making a circle skirt from knit fabric or jersey too but cotton is by far the easiest and foolproof fabric to work with on this kind of garment.
What do you wear with a full circle skirt?
This skirt is such a versatile item and can be worn with a large variety of tops, coats and shoes. But because it has so much body, you need to keep everything else low key. Wear this skirt with a fitted turtle neck blouse (long, short or no sleeve all work great!), a simple t-shirt, tank top, a silky blouse with small sweet details. If you add a cardigan or a jacket, choose a snug one instead of a slouchy item. This kind of skirt looks best when worn with high heels but shorter circle skirts work great with flats too or even sneakers.
How do I calculate fabric for a circle skirt?
I’ve made a circle skirt calculator spreadsheet to help you find the final measurements for your circle skirt a lot easier. This calculator applies great to a regular circle skirt with zipper in the back but for this particular tutorial you’ll need to make a slight adjustment. Instead of using the waist measurements, you’ll use hip measurements. I’ll get into more details below, in the step by step tutorial.
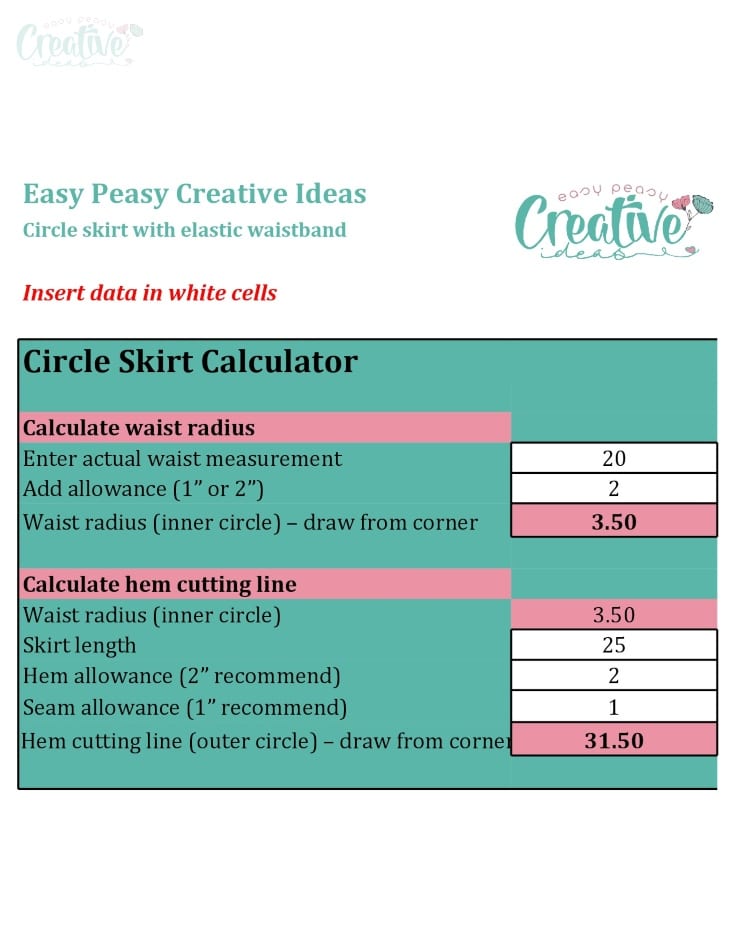
The circle skirt calculator to make the pattern is available to purchase here.
Circle skirt step-by-step

Materials:
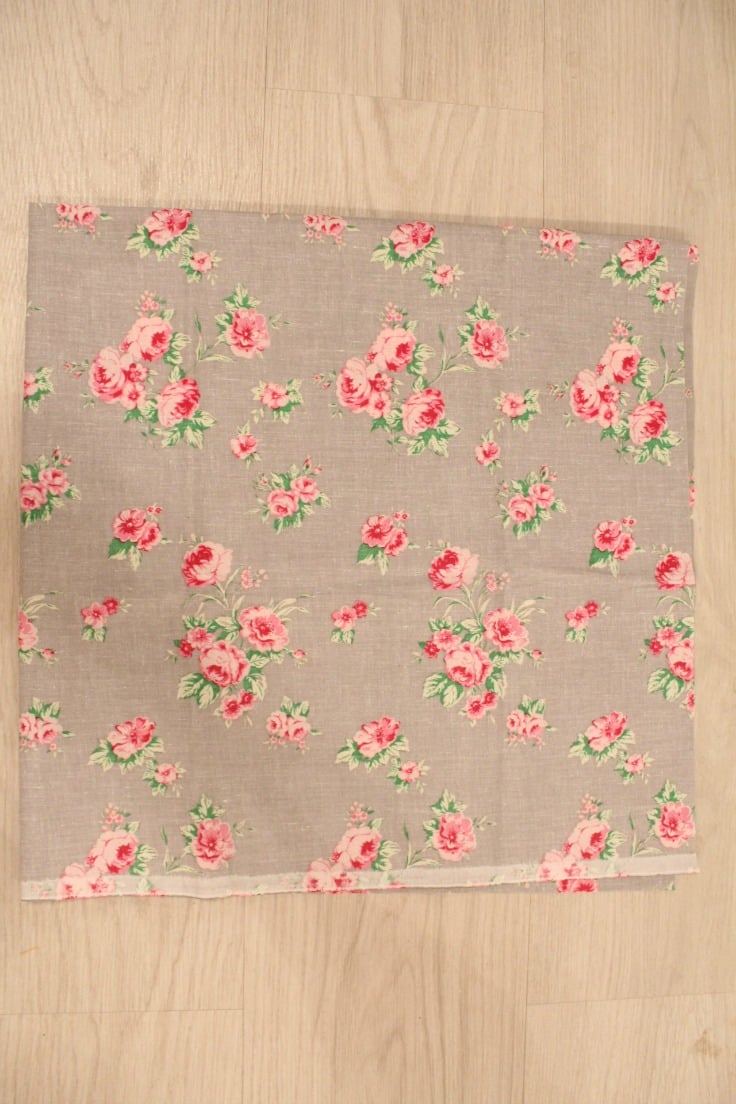
- 1 yard of fabric of choice (I used cotton with a roses print because I really, really love the flower print on this one!) – for adult size you may need about 2 yards.
- wide elastic
- measuring tape
- pins
- pressing iron
- sewing machine
- matching thread (or contrast if you’re feeling adventurous)
- scissors
How to make a circle skirt with elastic waist
Create the pattern
- You can use the calculator above to find the final measurements but don’t forget to use hip measurements instead of waist measurements. The reason is, this tutorial is for a skirt with elastic waistband instead of a zipper and needs a lot of room in the waist area so the wider areas such as the hips would have room to fit in the skirt when you pull it up.
- Take your waist measurement (this is used for the construction of the waistband).
- To make your circle skirt pattern, take your hips measurement, around the widest area, add 1″-2″ for allowance and divide the amount by 6.28 to calculate your circle’s radius (inner circle).
- Measure the skirt length (from waist down to where you want the skirt to fall) and add 2″ seam allowance.
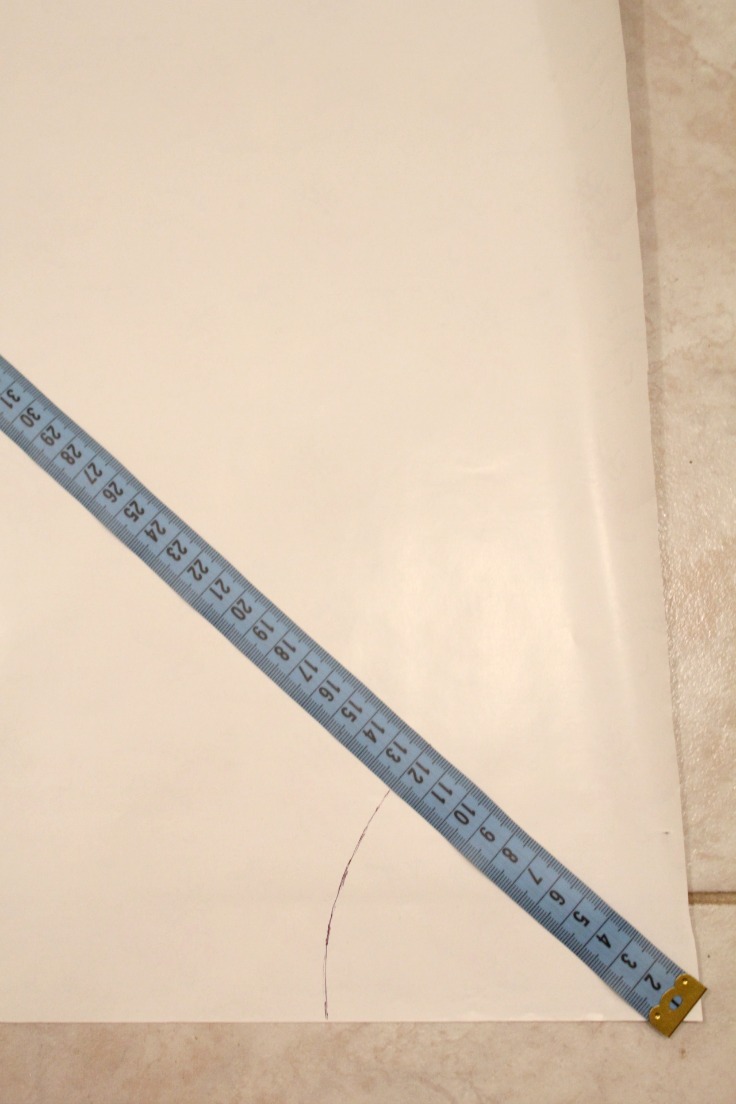
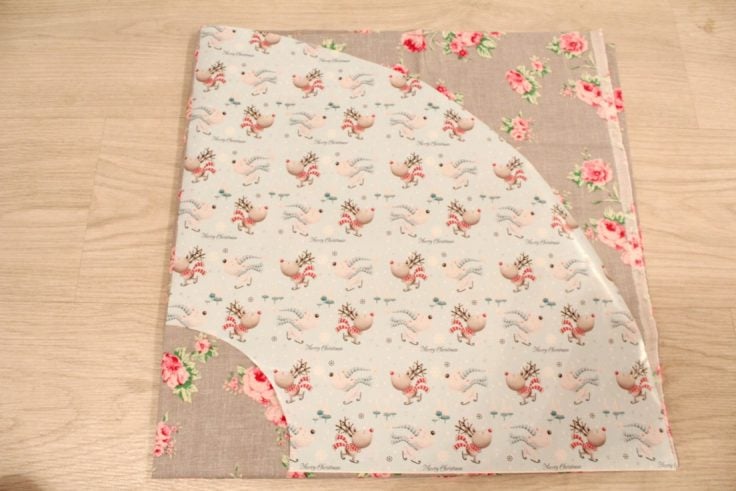
- Grab a big piece of paper (I used wrapping paper), and draw your inner circle as a quarter circle, away from the corner of your paper.
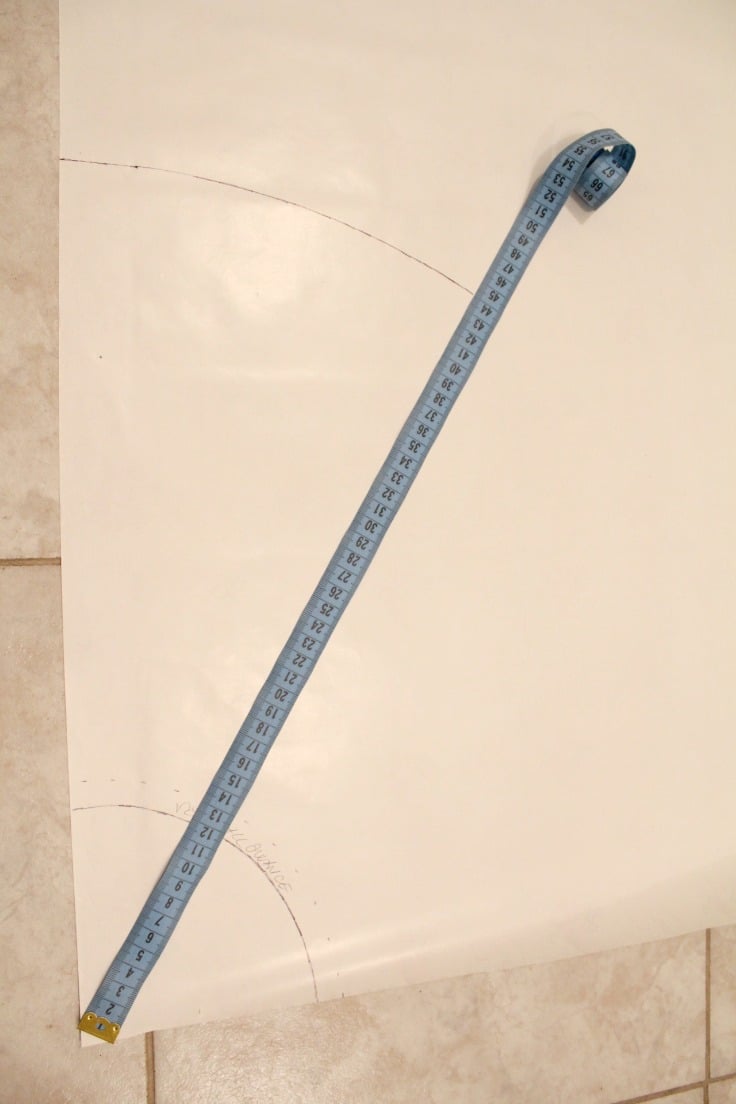
- Now do the same for the length. This will be your outer circle. Measure your desired length from the inner circle, not from the corner. Don’t forget to add seam allowance all around your inner circle.
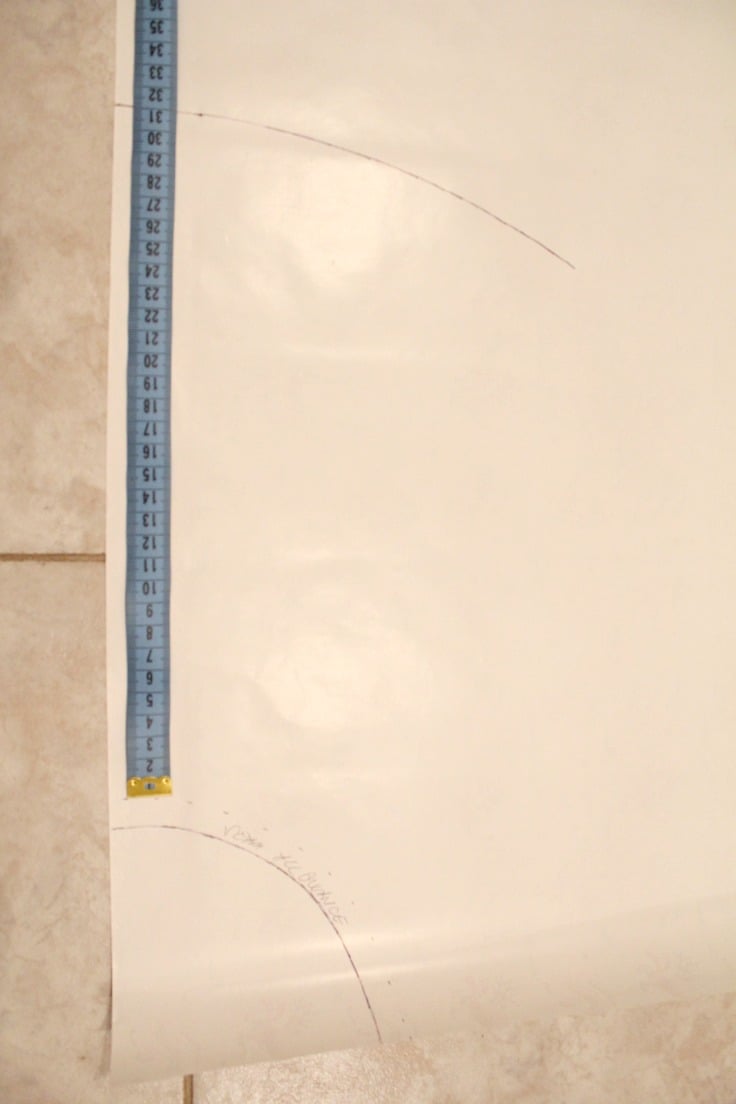
- Cut your pattern around the inner circle than around the outer circle. This will be 1/4 of a pattern.
How to cut a circle skirt
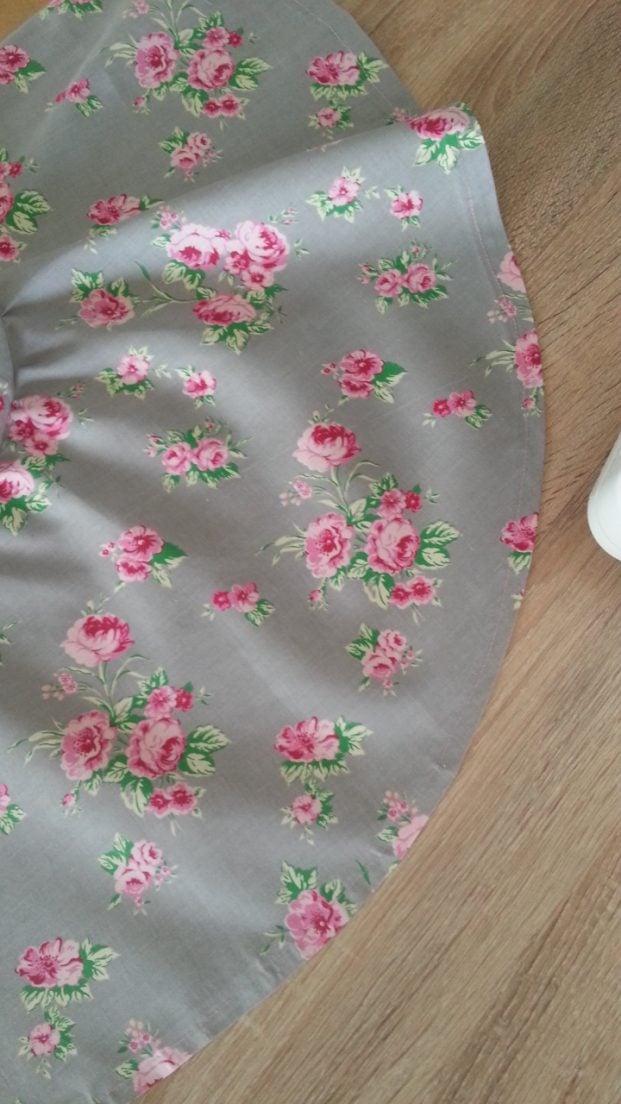
- Fold your fabric in half, right sides together, then fold again in half so the fabric is in quarters now.

- Place the inner circle of your pattern piece so that it matches up the folder corner of the fabric (the one with no raw edges) – Very Important!
- Pin your pattern in place, through all the layers and cut around the inner and outer circle, again through all the layers. You will get a continuous circle.

Making the waistband
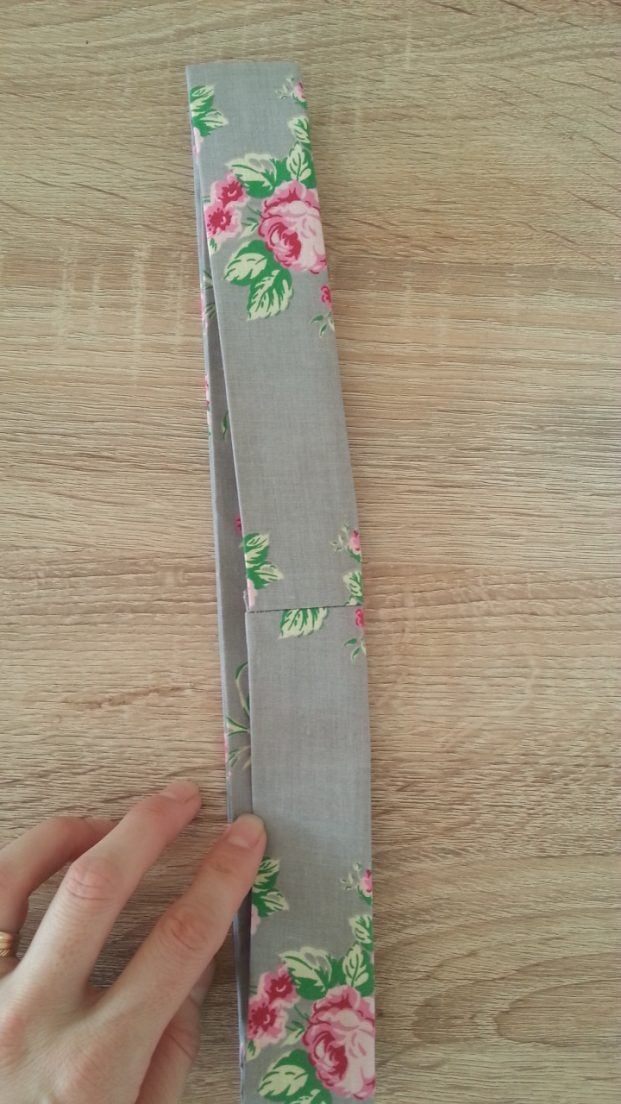
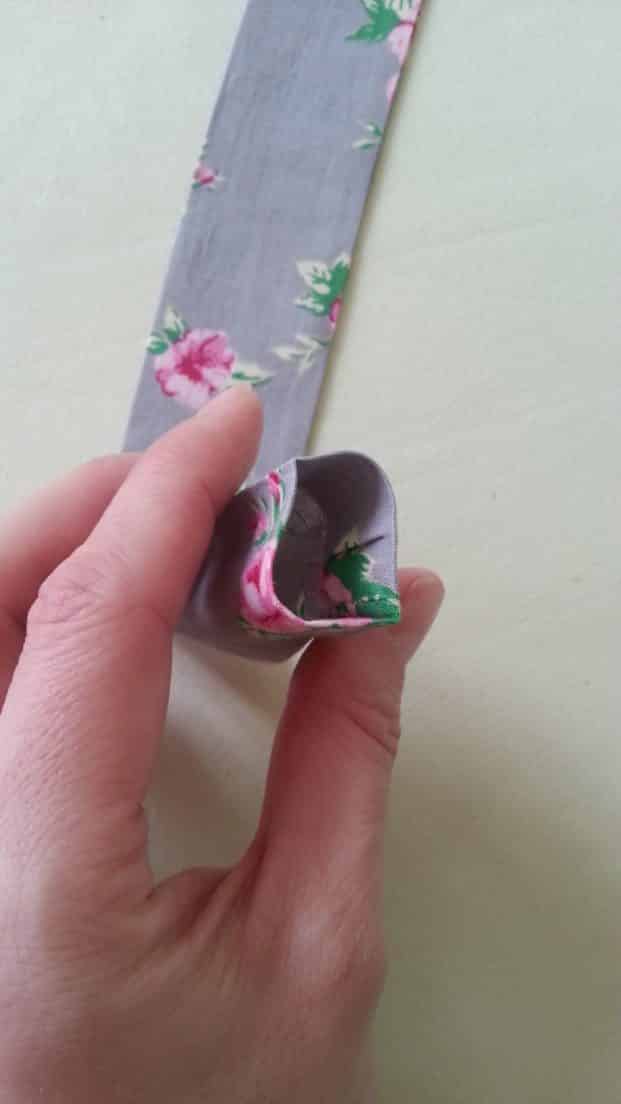
- Make your waistband. Cut a strip of fabric with the length of your hips measurement plus 2″ for seam allowance and with the desired width. I cut mine to be 6″ wide. Fold the fabric in half, lengthwise, iron then open the strip and fold each half again and iron.
- Fold on the initial fold again and iron. Open the whole strip wrong side out, pin the ends together and sew up with 1/4″ allowance.

- Open the seam and iron press. Turn the waistband right side out and iron.
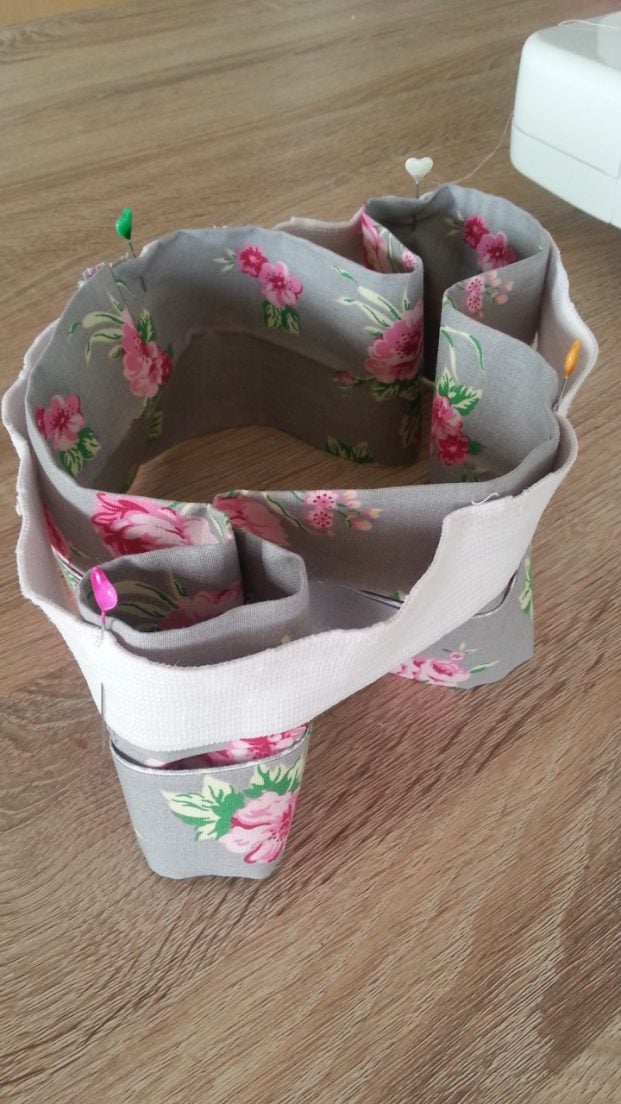
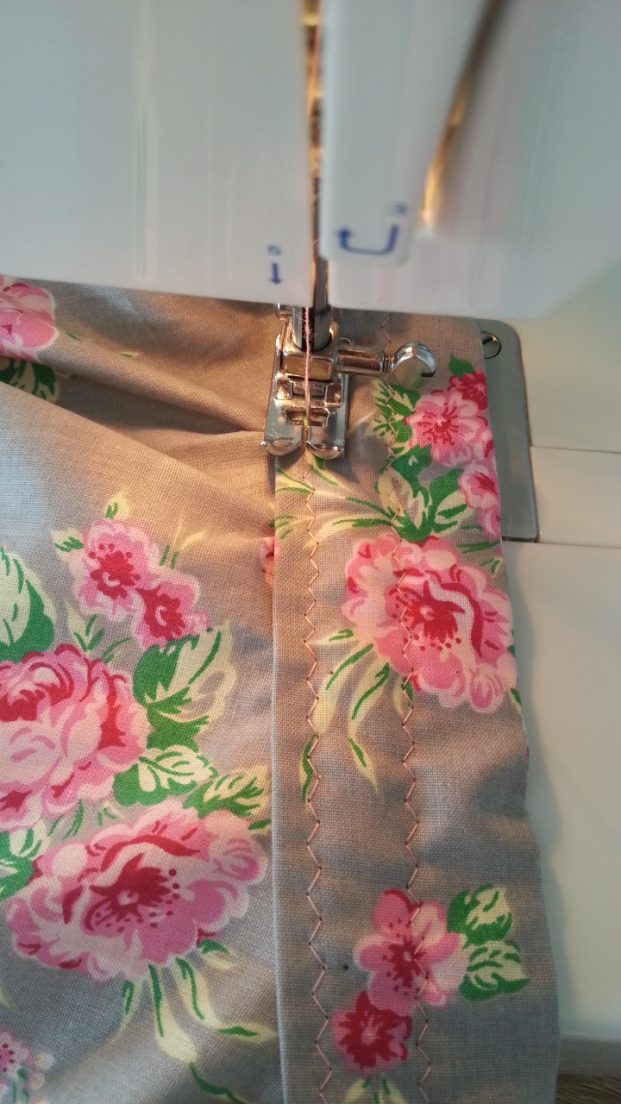
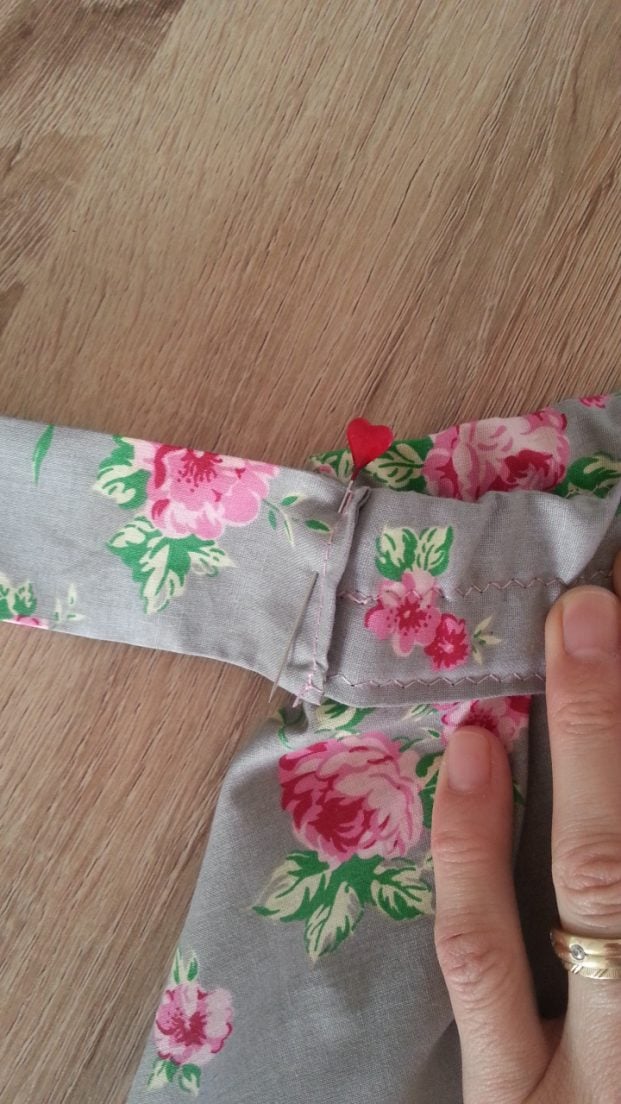
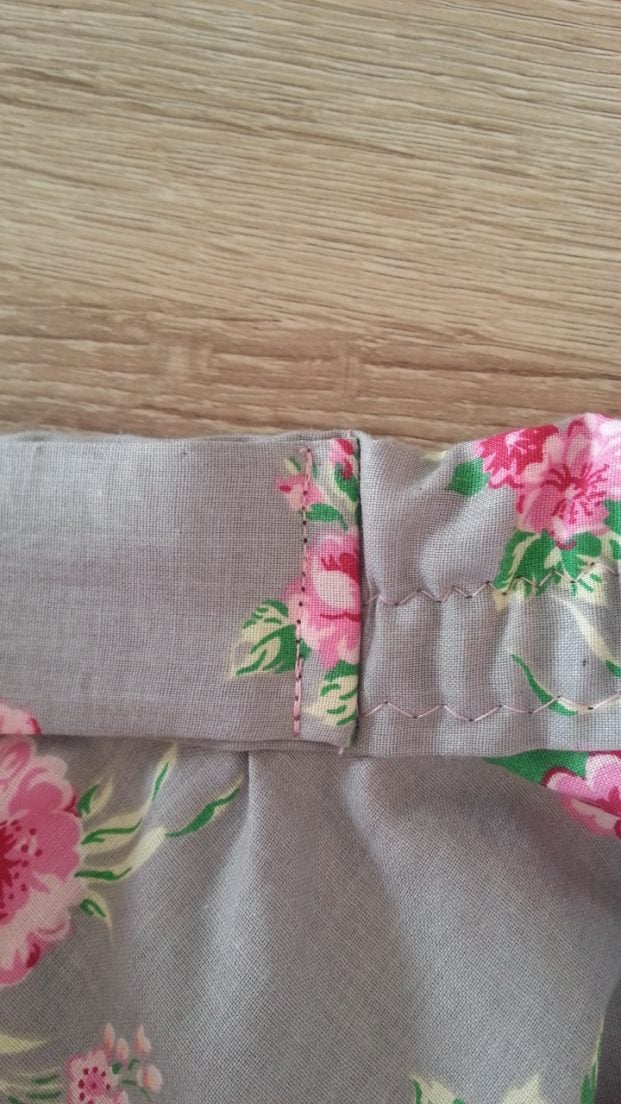
- Grab the elastic, cut it to match your waist measurement and join at the ends with a zig-zag stitch. Pin to one side of the strip, on the inside, close the strip and run a slight zig-zag stitch through the middle of the strip to sew the elastic in place. Slightly pull the elastic and the fabric in front and the back of the needle. The waistband will look gathered once you finish sewing.
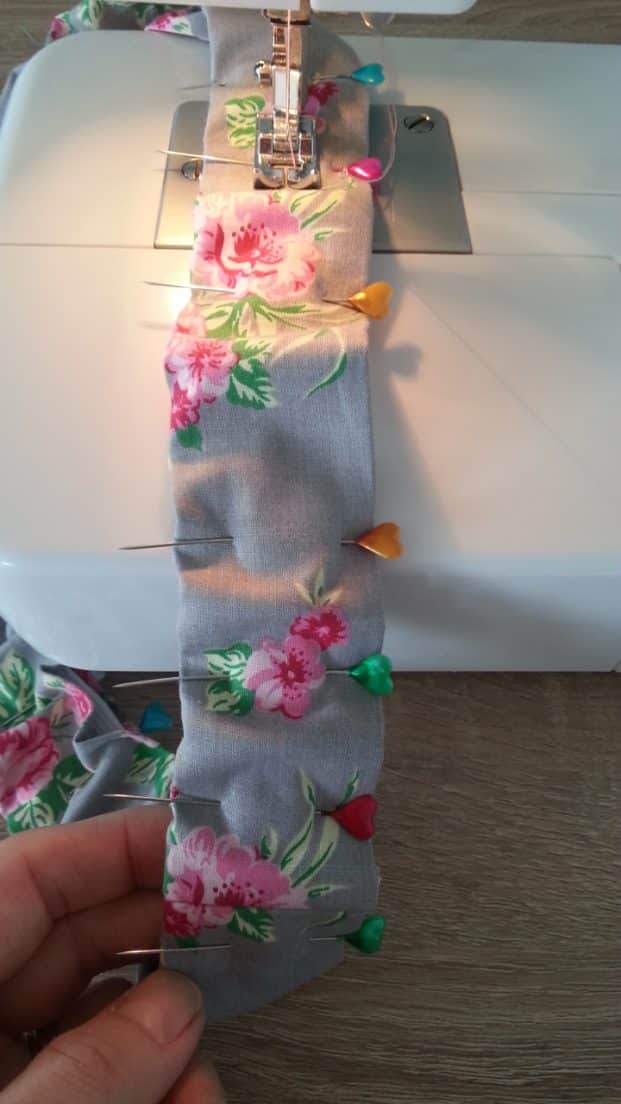
Attaching the waistband to the skirt
- Sandwich the top of the skirt in between the 2 halves of the waistband, pin in place and sew with a zigzag stitch, 1/2″ from the bottom of the waistband.

Making the hem
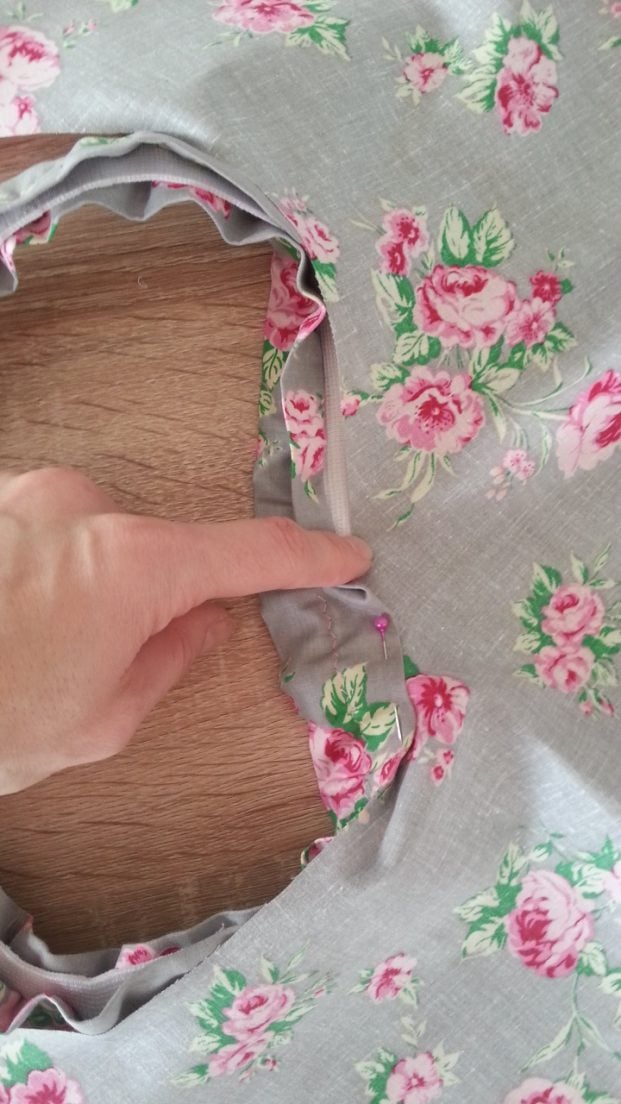
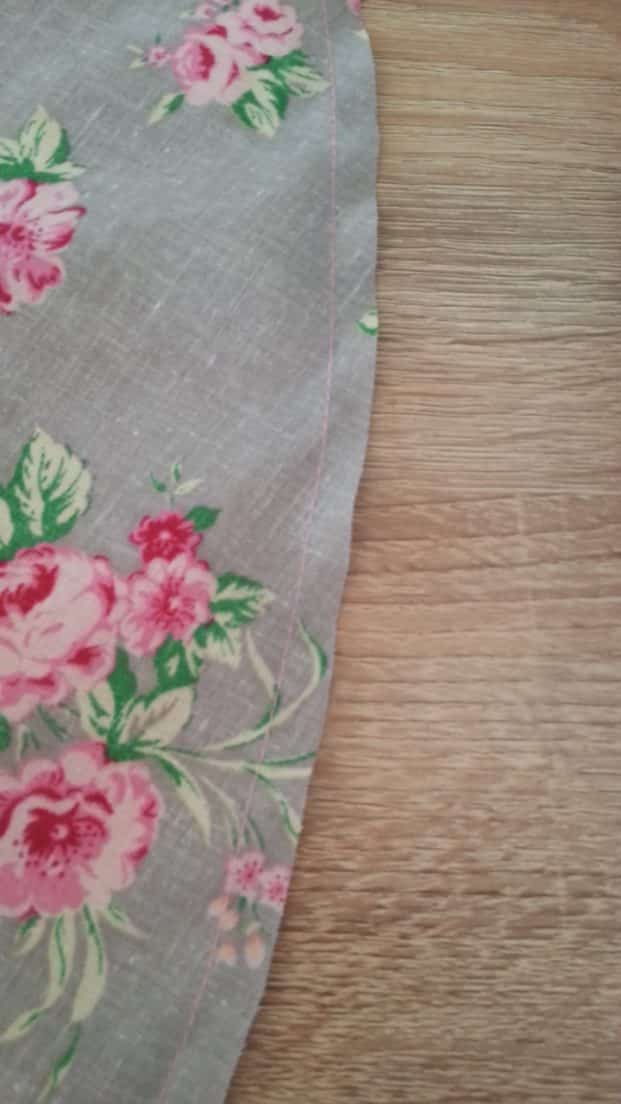
- Time to make the hem. To get a nice hemline on a circle skirt you need to follow these steps: stitch 1/4″ from the edge, all around the hem.
- Fold using this stitch as a guide and stitch 1/8″ around the hem (ignore my pins, they’re pinned the wrong way)
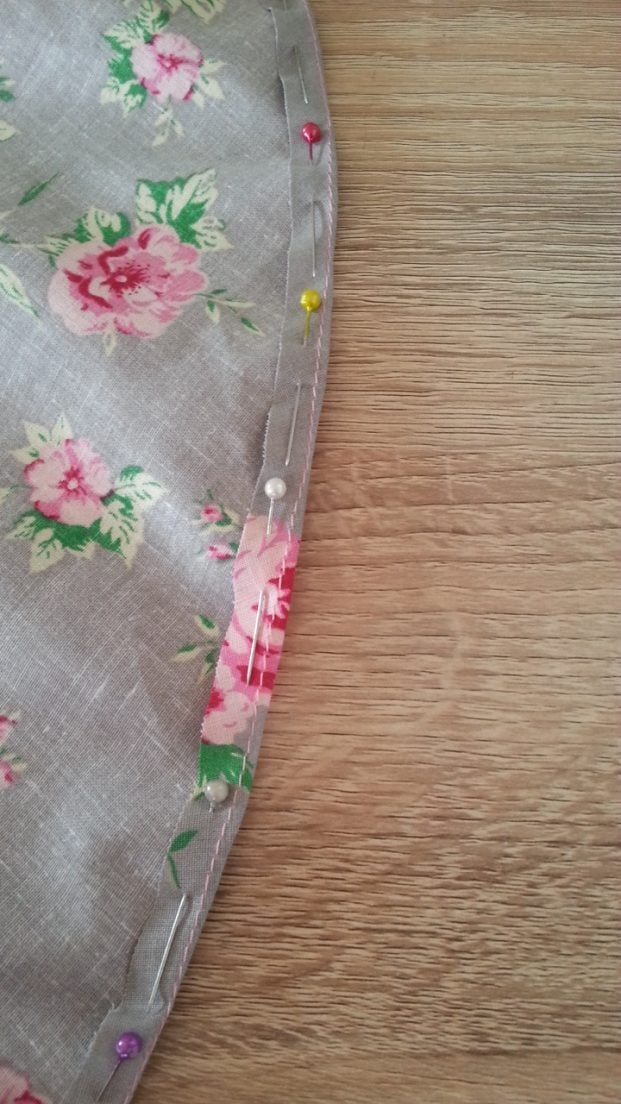
- Measure 1″ away from the hem on the interior of the skirt and mark. That is your guide for the double hem.
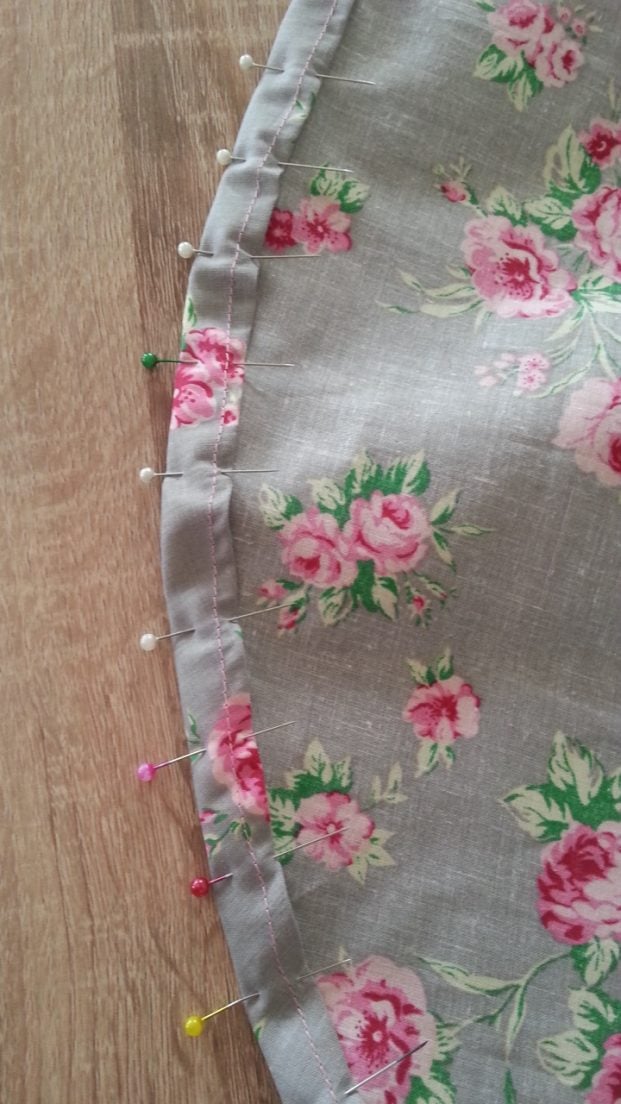
- Fold the edge up so it touches the line you just created.
- Place pins a few inches apart and add a couple more in between those.
- Sew as close to the edge as you can. Some puckering might occur but that’s ok. Guide the fabric under the needle using a pin, so sew down the hem as slow as you can.
- Press the hem and it should look free of puckering even with those tiny ones hidden in the back of your hem. If you use fine fabric you won’t notice the puckering at all.
Making the waist tie
- You’re done with the skirt at this point, the tie is an optional detail. I chose the tie as I made the skirt while my daughter wasn’t around to try it on and I wasn’t sure it will fit well at the waist. So I wanted to make sure that if it’s a bit large, the tie will keep it in place. And I took the right choice as the waistband was a bit too large. Plus the bow adds a dose of cuteness.
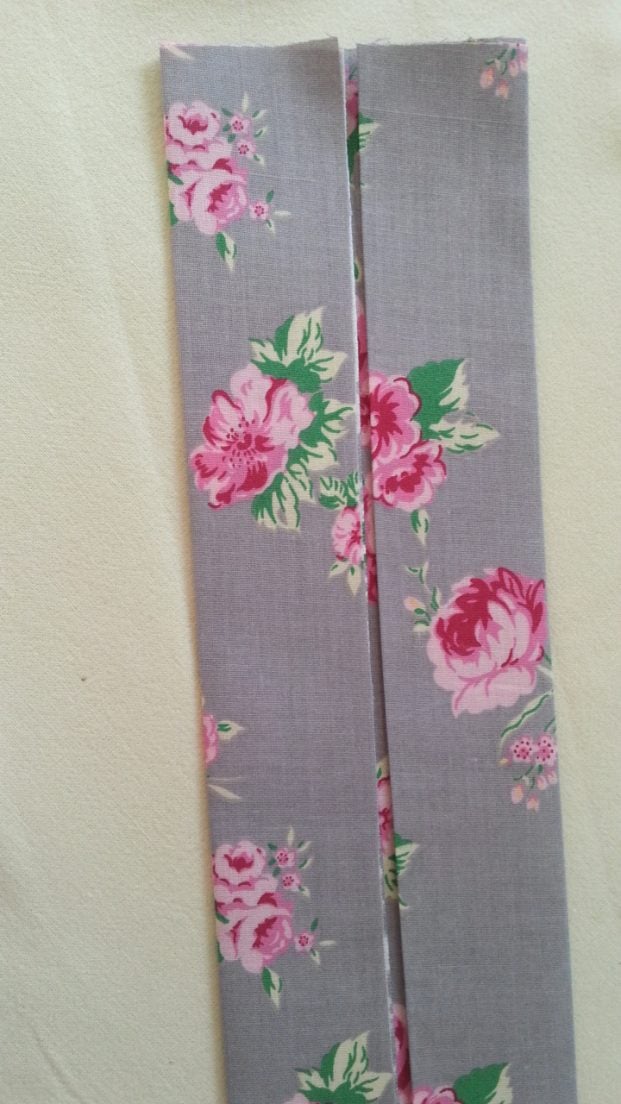
- I made my tie 20″ long each and as wide as the finished waistband which was 1 1/2″. The fabric for my tie was 21″ x 4″, seam allowance included.
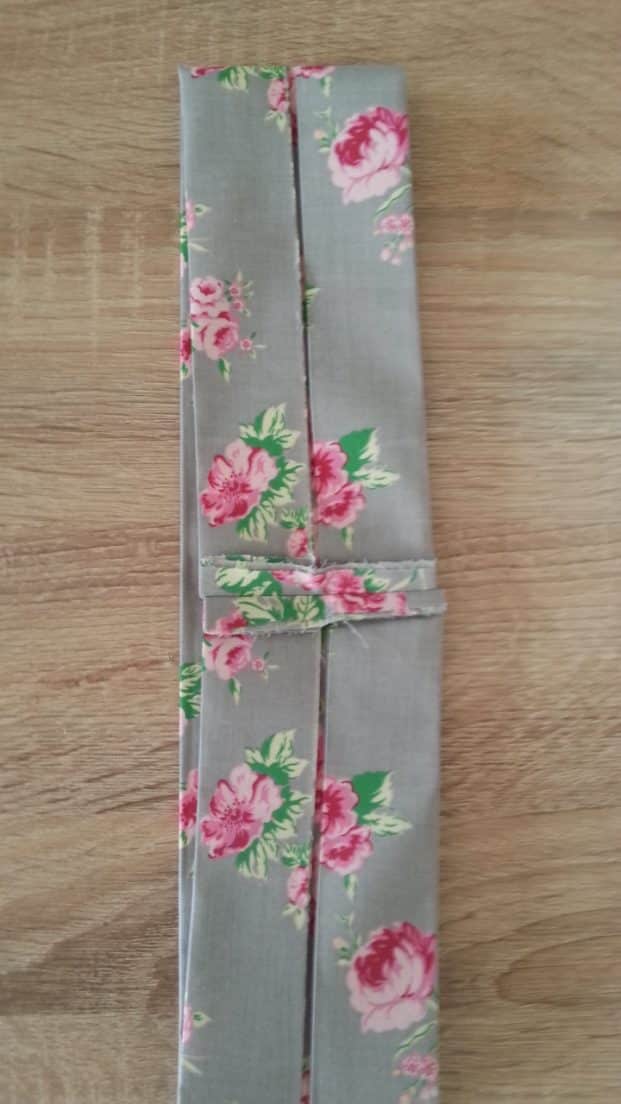
- Fold in half, wrong side out, and place a round object on one end. Cut the fabric around that object.
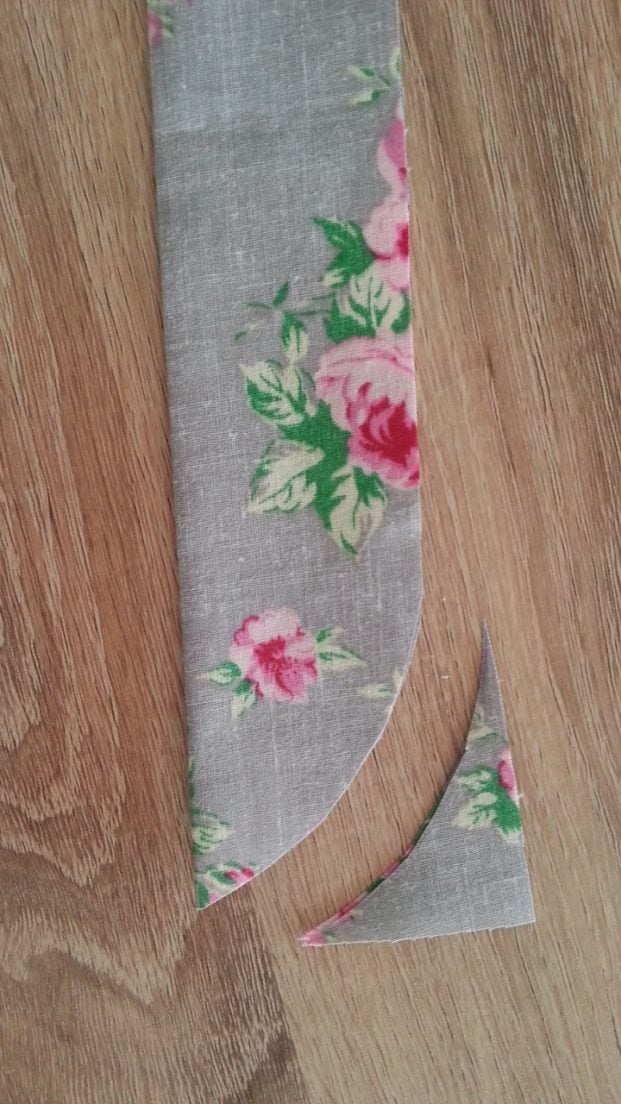
- Sew around the side. Turn the fabric right side out and use a skewer or a pencil to push the pointy corner out. Press and fold the raw edges in; press again and sew down as close to the edge as possible.
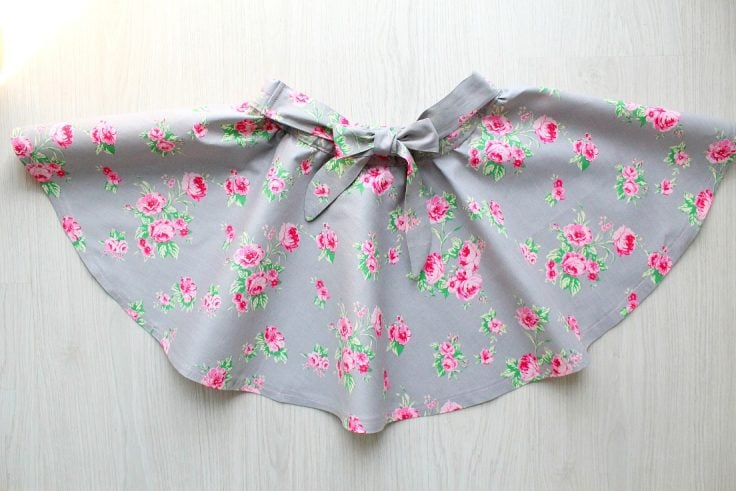
- Place the tie on the waistband, pointy end toward the back of the skirt and sew with 1/4″ allowance. Flip the tie towards the front of the skirt and sew again.
- Tie the ties and make a nice bow and you’re done!
So, there you have it! A simple and versatile circle skirt pattern that can easily be tailored to your own personal style. I hope you’ll give this tutorial a try – I think you’ll love the results.
What do you think of the circle skirt? Are there any variations or tweaks you would make to the pattern? Let me know in the comments below!
Pin to save for later
Most popular sewing projects:
- Tips for sewing a round hem
- Corded bag handles
- Flutter sleeve dress pattern
- How to laminate cotton fabric


Article may contain Amazon & affiliate links. As an Amazon Associate I earn from qualifying purchases at no additional cost to you.

Hi Petro, would this tutorial work with just a 2″ elastic waistband without the casing? Would I still need to measure at the hips for the inner circle radius?
Hi, Crystal. Yes, this project works with elastic waistband. You still need to measure at the hips to create an opening wide enough to fit the hips or the upper body when putting the skirt on. If you insert a closing with a zipper you don’t need to measure at the hips but your waistline.
I’m an email subscriber, but despite my best efforts I CAN NOT get the calculator worksheet to work! I ADORE circle skirts, especially in the heat of SE TX, so could really use this tool. Any advise would be appreciated!!!
Hi Lora! Thanks for being a long time subscriber :) Please download the file to your device. Go to File (top left), hover over the Download, then choose Excel or Open Document (.ods) to save to your computer. Then type your numbers in the white cells. Please let me know if this works.
When sewing the elastic into the waist band are sewing right into the elastic?
Or are you sewing below the elastic and the elastic is in the upper half of the waist band?
Thanks for your help
Hi Nicole. For this project I’ve sewn the elastic into the waist band to prevent moving.
hello! i am having a hard time understanding some of the pattern. i see what you did with the radius but when you make the circle your number is 12 and i was wondering how you got that number? my daughters waist measured at 30in and we are doing 20 in in length. any help would be great as i am making this skirt for christmas.
Hi Candice! Thanks for giving my tutorial a try and apologies for the confusion! I The measuring tape in the image is photographed on the centimeter side, not inches. Please use your own measurements and only follow the steps described in the written tutorial.
Hw can one get the skirt
Hi Destiny. Thanks for stopping by! You make it yourself with the instructions in this tutorial.
Hi Petro,
I am now working on the skirts for my 3 and 5 year old granddaughters. I used the measurements for their hips to cut the inner circle, according to your formula, cut the waistband hips + 2 inches, the elastic the waist measurement and proceeded according to the directions. When I got to the step of sewing the waistband on to the skirt, I found that there was a lot of excess fabric at the waistline of the skirt that I wasn’t expecting, and that you certainly don’t mention. I did not even unfold the pattern piece until I needed it, so I know that I didn’t stretch it.
do you have any idea what the problem could be?
Thank you,
Diane Anthony
Depending on the length of the skirt, when I fold my 45 inch fabric into quarters, the pattern extends beyond the edge of the fabric. Do I have to go to a wider width of fabric for larger sizes?
Hi, Diane. Yes, larger sizes need more/wider fabric.
Lovely pattern and loe the detailed instructions! If I want the elastic only at the back waistband and a flat front, what adjustments or changes should I make to the measurements of the waist band and skirt? Or do you already have such a pattern on your blog that I may refer to? Thank you!
Hi Jana. Thanks so much for your lovely comment and rating! I don’t have a pattern with your requirements and at the moment, I can’t figure out how to add an elastic piece to a circle skirt to the back only, without making the skirt gather too much in the back. Sorry for not being able to help!
HELP, please! I am working on the waistband. It says to sew a 1″ seam allowance but the picture with the seam allowance pressed open doesn’t look like one inch. Thank you!
Hi Denice! I’m sorry for the typo, it’s supposed to be 1/4″
wow! I can’t wait to make it for my grand daughter
Thanks, Patience! I’m happy you liked my tutorial and decided to give it a try! Happy sewing! xoxo
How do you fold fabric if fabric is 45 wide and circle skirt needs to be 30 inches long ?
Hi Sheila. Thanks for commenting and rating this tutorial! If you’re asking this question because you are looking at the photos of my measuring tape, please note the tape I used for this tutorial is marked in centimeters not inches. 1 yard of cotton fabric should suffice for a small skirt like this (5 T)
This is a great tutorial. I have included your tutorial in a roundup post of circle skirt tutorials for my site’s readers. I have linked it back to your site
Hope you will check it out -http://sewguide.com/how-to-stitch-circle-skirts/
Thank you so much, Sarina!
What a super little skirt! I can’t wait to make it. Thank you !!
Aww, thanks so much Deirdre! I’m sure the result will look fabulous :)
Circle skirts have the all important twirl factor. Very pretty skirt, Petro and a fab tutorial.
Thank you Pam. Big hug!
Featured today, Petro…