

How to remove Serger stitches easy and fast
How to remove serger stitches easily and quickly is something you can easily master! If you were wondering if there’s an easy way to remove serger stitches without damaging your fabric or spending hours unpicking, then you’re in luck! This tutorial will show you the simplest method to undo serger stitches, just as straightforward as removing standard machine stitches.
It’s important to know how to remove serger stitches especially when you’ve got to undo them quickly. With the right technique and tool, it can be quick and easy, whether you’re fixing a mistake or making some changes. Getting good at this is a must-have skill for any sewer and with this tutorial you’ll be able to do it like a pro!
Serger stitches can be daunting. For years, I opted for my sewing machine over a serger to finish edges. But once I started using a serger, I faced the challenge of removing its stitches. Initially, I tried using a seam ripper to remove the stitches one by one. After some frustration, I found a better way!
By studying my serger’s manual to understand how the stitches (needle threads and looper stitches) worked together, I learned that removing serger stitches can be as simple as removing regular ones. In this tutorial, which includes the video that I made for my Youtube channel, I’ll show you a quick and hassle-free method to do it without creating a mess or wasting thread. This technique is particularly effective for narrow stitches and knits on any garment.
Not convinced yet? Let’s get into the step by step details so you can see how super easy this method is! Here is the easiest and fastest way to remove serger stitches. It only takes a few seconds to do it.
How to remove serger stitches easy and fast
Materials:
- serged seam (sewn over the raw edge of the fabric)
- seam ripper
Directions:
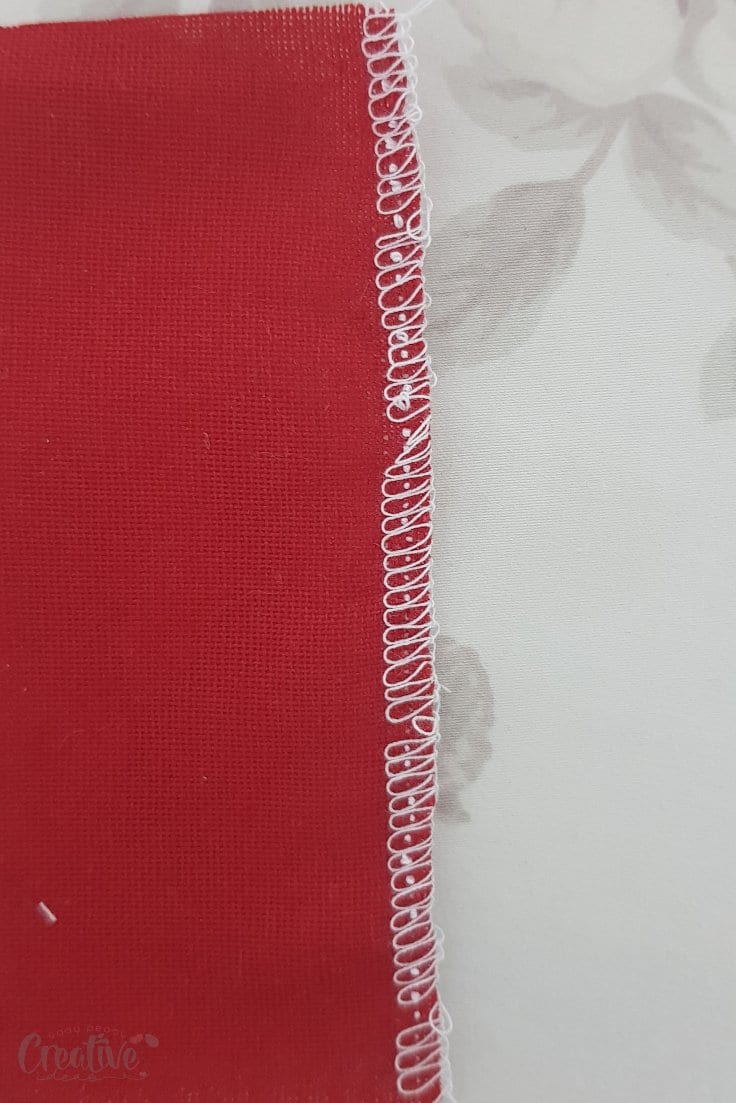
- Place the fabric right side up (that would be the right side of the fabric, the one that was facing your serger foot). Even if you can’t remember, it’s easy to recognize. Just look for the side where the two straight seams are obvious as opposed to the wrong side where the right seam comes out as spots that keep the loops together rather than a line of stitches.
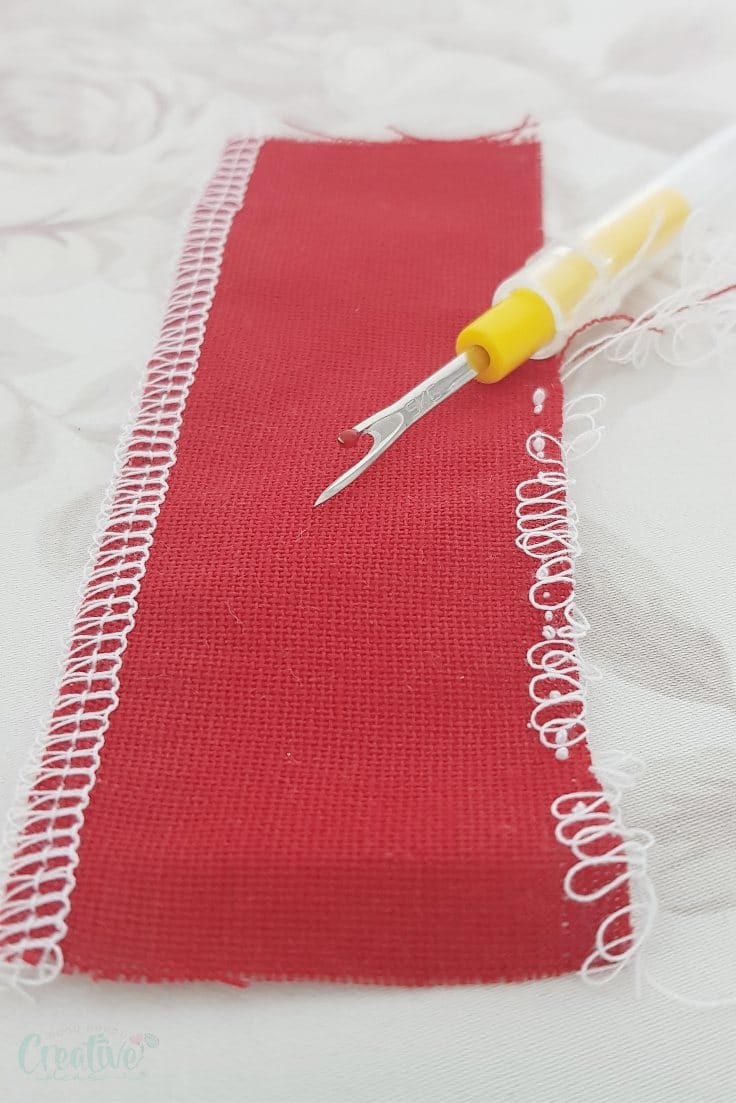
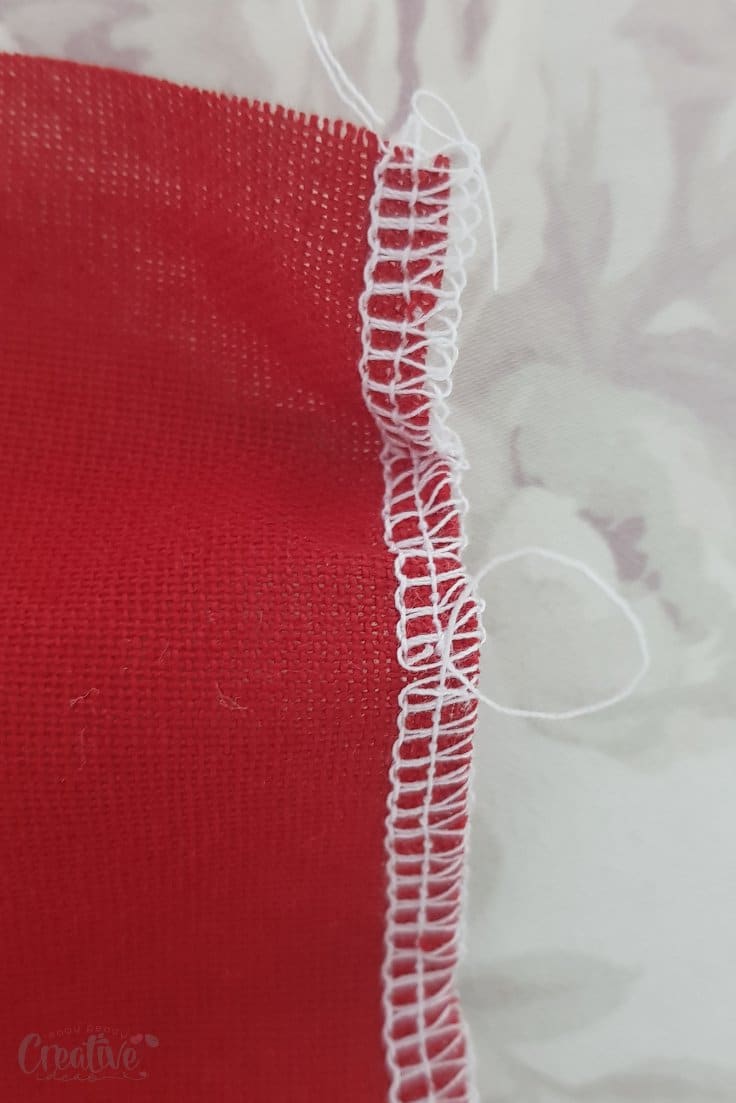
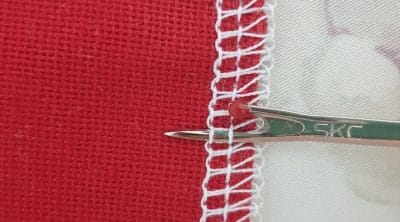
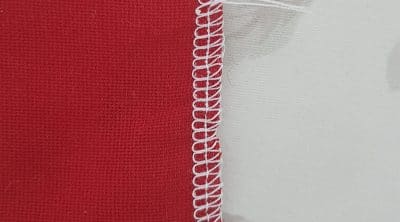
- Place the sharp tip of the seam ripper in between the loops, where they form a V (photo #1)
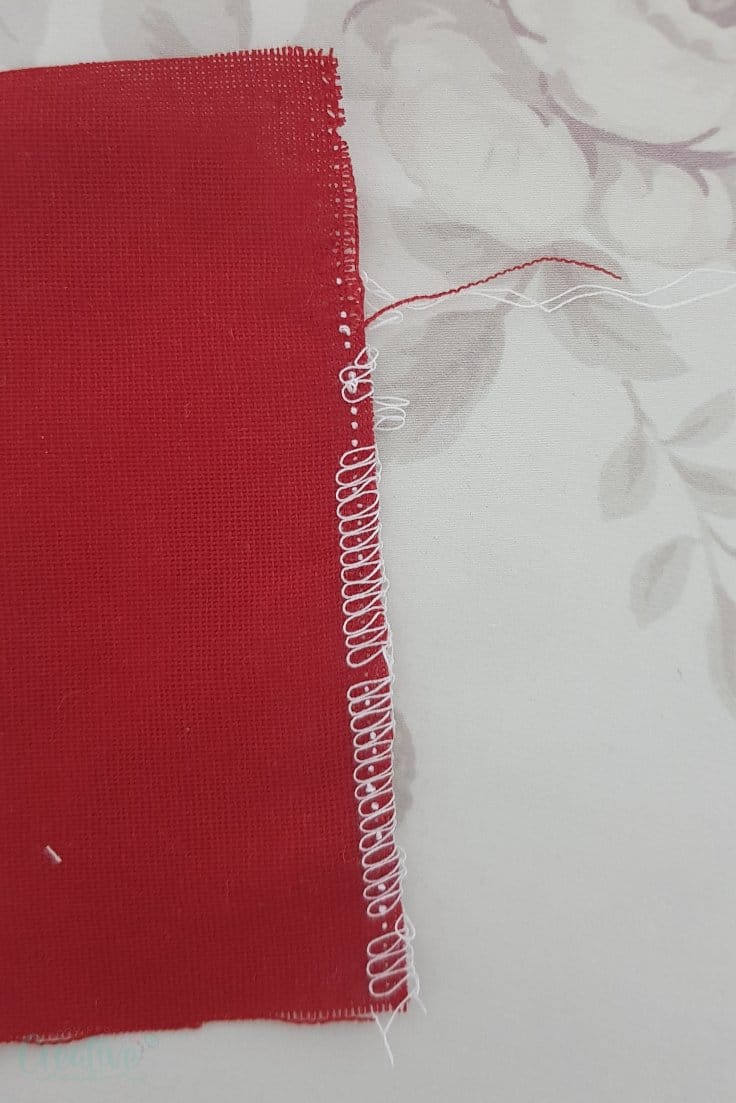
- Pass the seam ripper under the straight seams (left and right needle stitches). If you’re using a 3 thread overlocker instead of a 4-thread overlock, you’ll only have one of those. I found it that it’s easier for me to pick up both seams with my seam ripper but harder if I cut them at the same time. So I just pull both out but cut only the left stitch (photo #2)
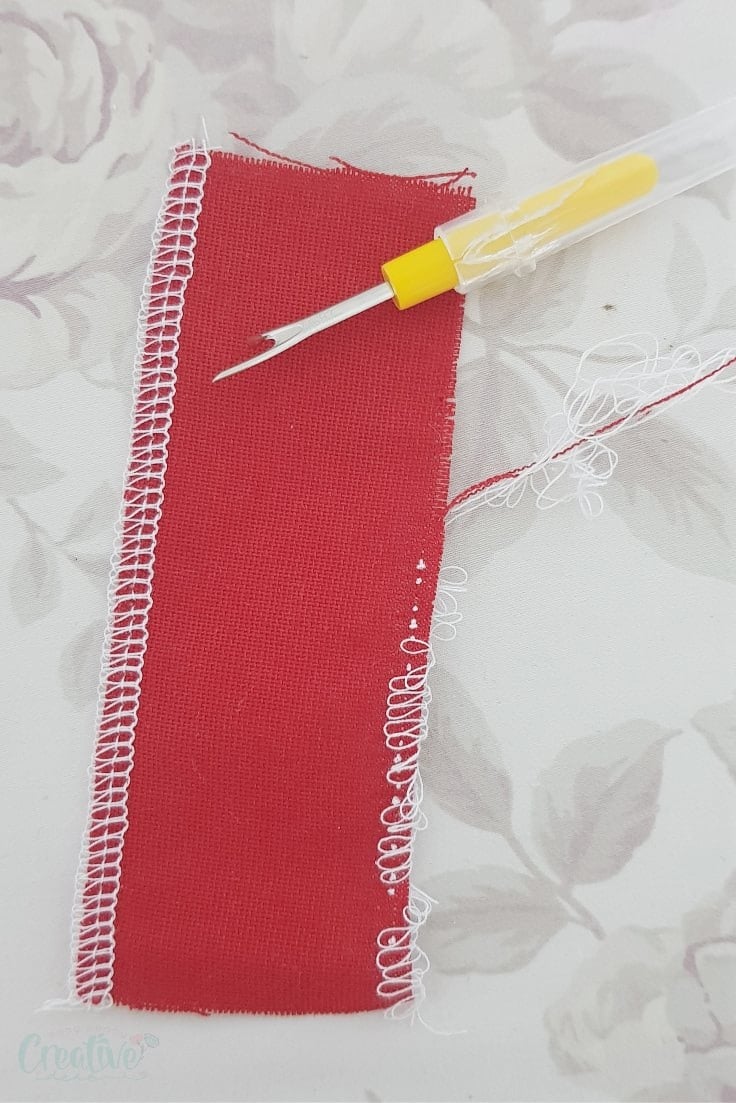
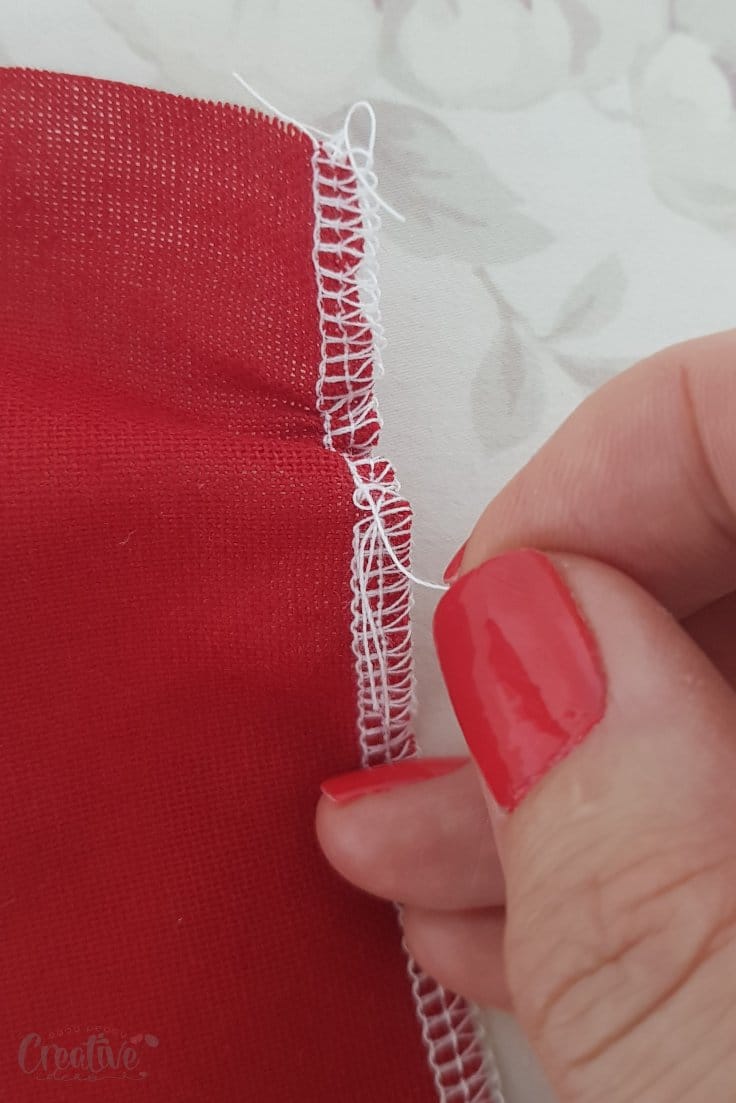
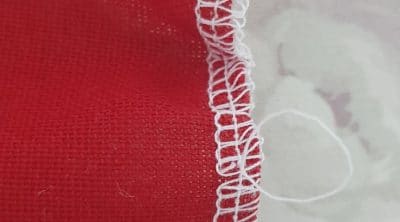
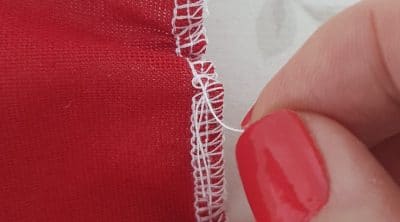
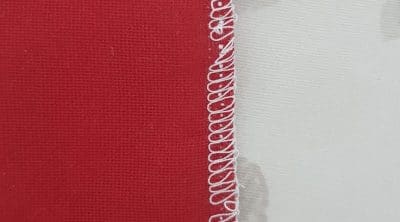
- Then grab one of these ends of the left stitch and pull as much as it will let you, until the seam thread breaks. You might get lucky and manage to pull the entire line of stitches. (photo #3 and #4)
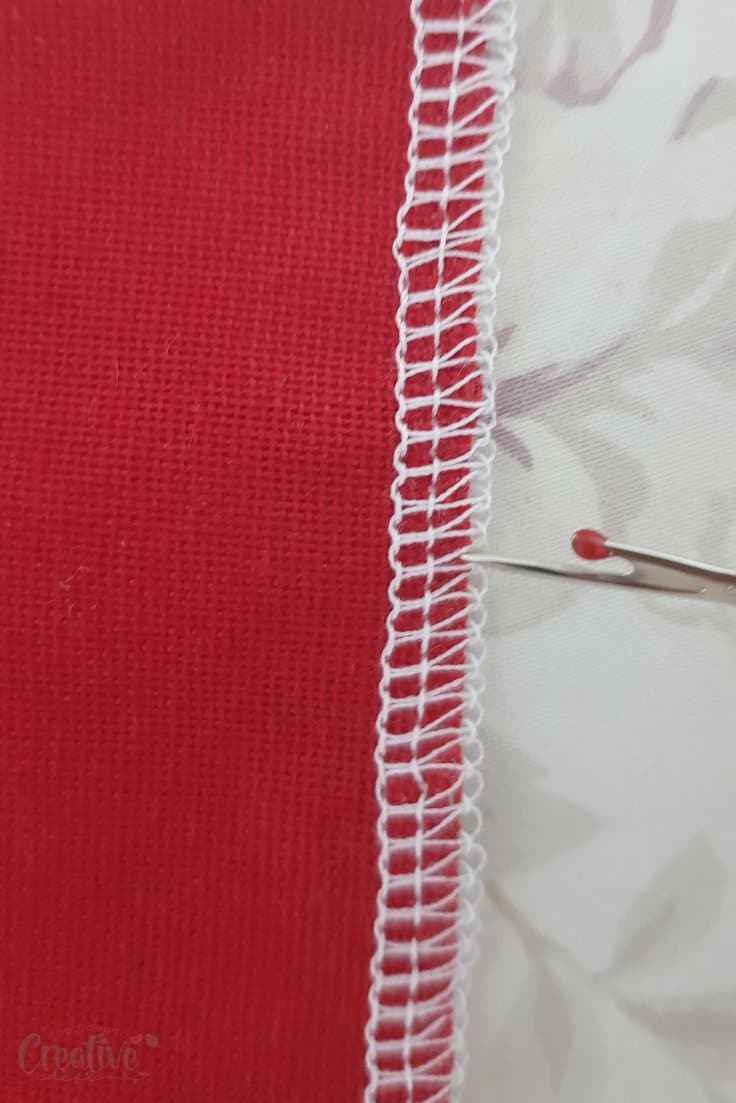
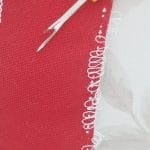
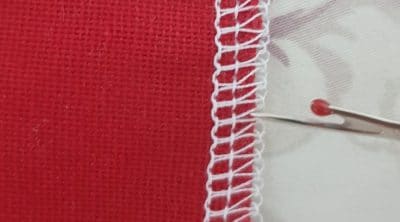
- Repeat for the second, right needle stitch. (photo #5, #6 and #7)
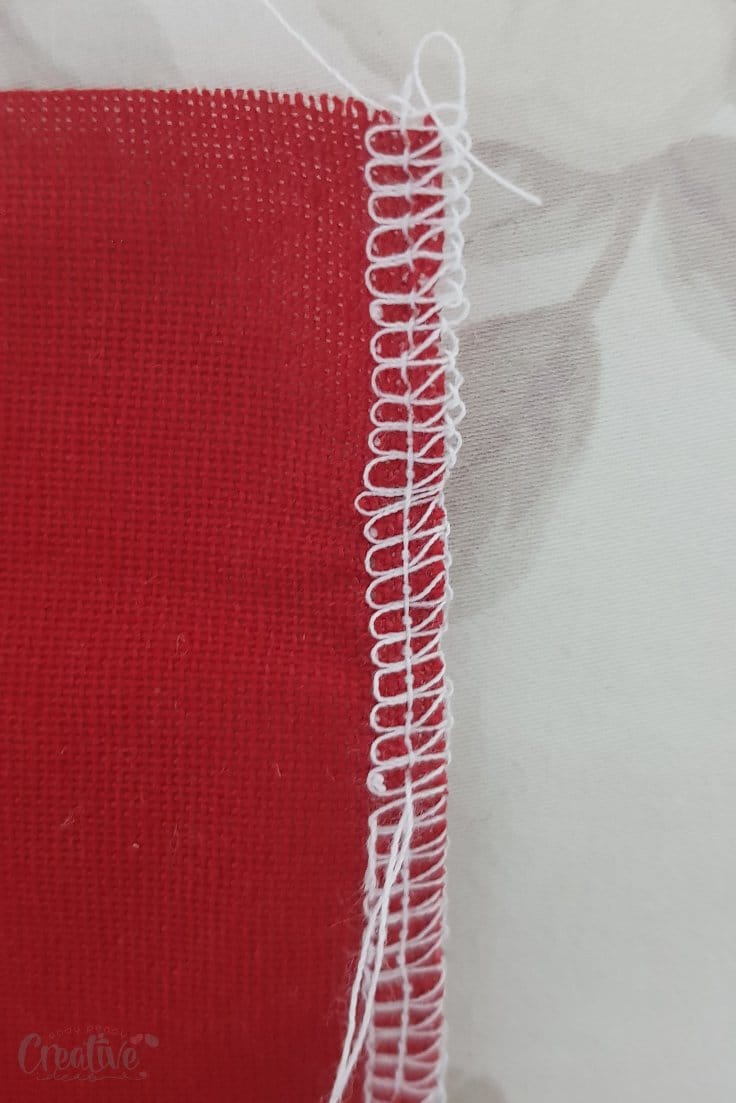
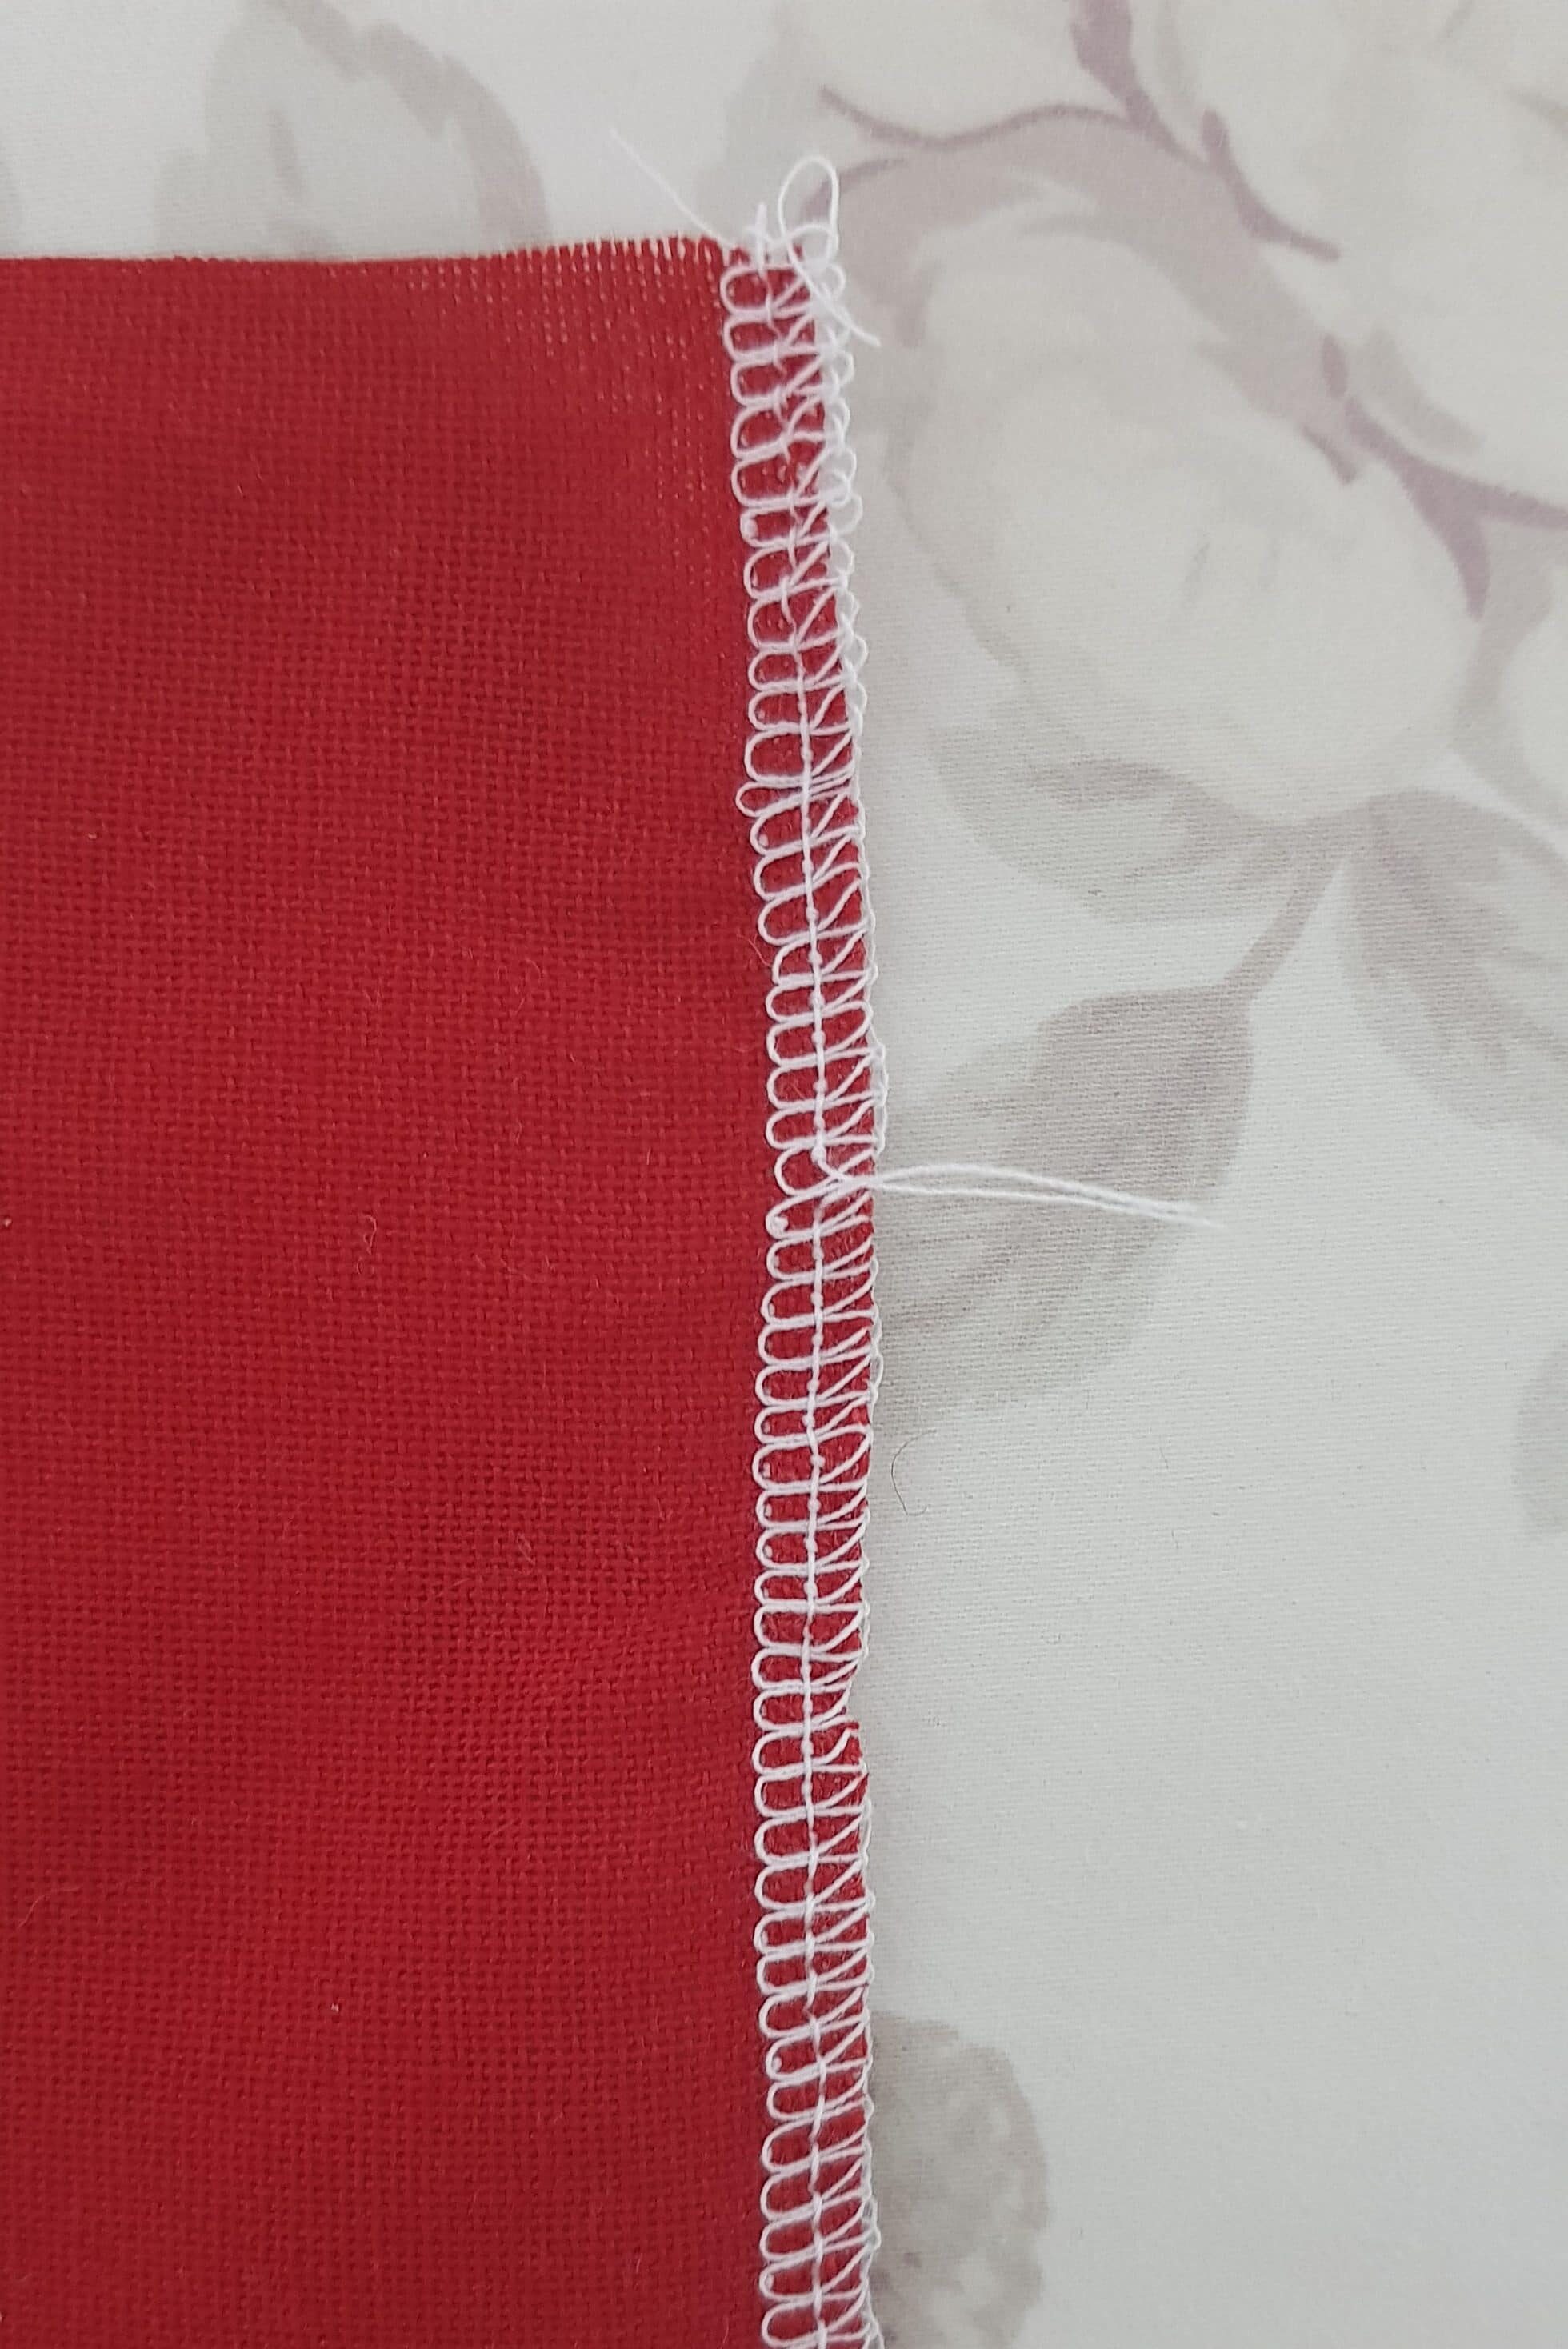
- If the seams break before you’re done unpicking the entire seam, repeat the steps above.
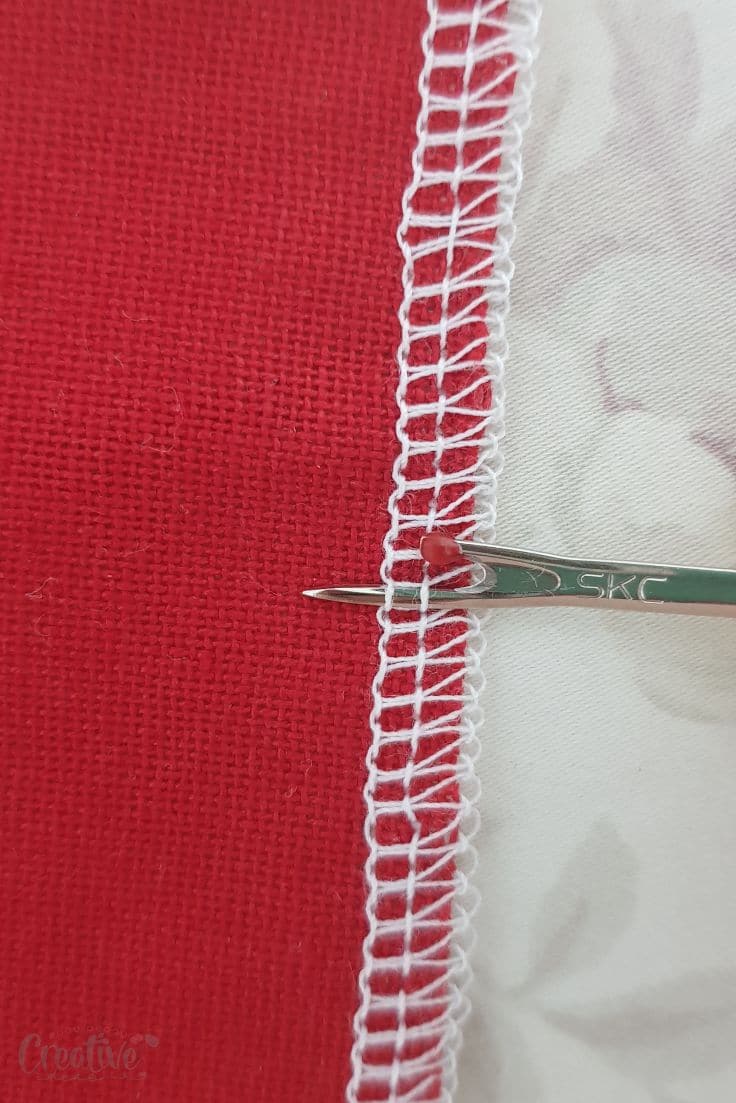
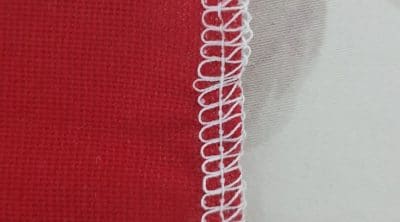
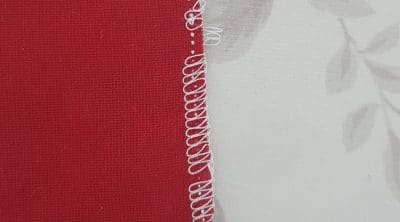
- Then simply remove the upper and lower loop stitches. At this point they should come off right away, with no effort since they have no support left (which was offered by the left and right needle stitches). (photo #8)
What is the easiest way to remove serger stitches?
If you take a look at your serger stitches now you’ll see that each chain stitch has 2 straight stitches, produced by the left needle and the right needle and two sets of looper threads, one produced by the upper looper and the second set produced by the lower looper.I was convinced that removing my serger stitches involves unpicking the loops first which look quite scary if you don’t know how they work and how they are constructed! But I was so wrong!
If you take a close look at those upper and lower looper threads you’ll notice that what keeps the loops together are the left and right stitches. Removing those will solve the whole problem and the best way to do that is by using your seam ripper, same as you would use it for regular stitches. Well, not exactly, unless you want to go very slow. If you want to make the best out of your seam ripper and unpick seams fast you must check out this tutorial I made a while back, demonstrating the proper use of the seam ripper and how to rip seams super fast.
Whether you use a 3 or a 4 thread serger, the principle is the same: look for the straight stitch to remove first and all other stitches will follow!
Some people like to unpick those straight stitches every inch or so and then remove them one by one but I find this time consuming and excruciating, honestly! So I unpick the stitches in one spot, I try and pull them out as much as it lets me then continue unpicking from there until the entire seam is out. Makes the process a little faster and sometimes I even manage to pull out an entire seam. So easy peasy!
Tips for preventing the need to remove serger stitches.
Practice on scraps first
Before working on a project, it’s always a good idea to practice on scrap fabric. This allows you to get familiar with your serger and adjust the tension and stitch length as needed.
Use quality thread
Using high-quality thread can make a big difference in preventing the need to remove serger stitches. Cheap or low-quality thread tends to break easily and can cause issues with tension and stitches.
Check the tension regularly
It’s important to check the tension on your serger frequently, especially when switching between different types of fabric. Improper tension can result in uneven or skipped stitches which may require removal.
Properly prepare your fabric
Before starting a project, make sure your fabric is properly prepped and not warped or stretched. This can help prevent issues with tension and stitches.
Avoid sewing over pins
Sewing over pins can cause them to bend or break, potentially causing issues with your serger’s blades or needles. Remove any pins before they reach the presser foot to avoid this problem.
Clean and maintain your serger regularly
A well-maintained serger is less likely to have issues with stitches. Make sure to clean out any lint or debris and oil your serger as recommended by the manufacturer.
Take breaks and rest your eyes
Sewing for long periods of time can cause eye strain, which can lead to mistakes in your stitches. Remember to take breaks and rest your eyes to avoid making errors that may require stitch removal.
Use the correct needles
Different types of serging may require different types of needles. Make sure you are using the correct needles for your project to avoid issues with stitches.
Bonus tip: Consider investing in a quality serger with automatic thread tension and cutting features to help prevent the need for stitch removal.
Alternative methods or tools for removing serger stitches
- Small scissors: If you don’t have a seam ripper, small scissors can be used to carefully cut and remove stitches. Just make sure to be gentle and avoid cutting through the fabric.
- Tweezers: Tweezers can be helpful for removing individual threads or stubborn stitches that are hard to reach with a seam ripper.
- Dental floss: In a pinch, dental floss can be used to gently “saw” through stitches and remove them.
- Razor blade: Some sewers swear by using a razor blade to carefully slice through serger stitches. Just make sure to use caution and not cut yourself or the fabric.
- Fabric eraser: If you are working with delicate or lightweight fabric, using a fabric eraser can be a great alternative to a seam ripper. Simply rub the eraser over the stitches and they will come undone without damaging the fabric.
Suggestions for what to do if the fabric becomes damaged during the stitch removal process.
- Evaluate the damage: Before taking any steps, assess the extent of the damage to your fabric. Is it a small tear or hole that can easily be repaired? Or is it a larger area that may require more extensive repairs?
- Use interfacing: If the damaged area is small, you can use interfacing to reinforce and strengthen the fabric. This will prevent the damage from getting worse and make it easier to repair.
- Patch or mend: If the damage is too large to be repaired with interfacing, consider patching or mending the fabric. This can be done by hand or machine depending on your skills and preferences.
- Repurpose the fabric: If all else fails and you are unable to repair the damaged fabric, consider repurposing it for a different project. This way, the fabric won’t go to waste and you can still create something new.
- Learn from your mistakes: Mistakes happen and it’s important to learn from them. Take note of what caused the damage and how you can prevent it from happening in the future when removing serger stitches.
Other sewing tips you will love:
- How to sew mitered corners
- Genius bobbin storage ideas
- Tips for clipping & notching seam allowances
- How to make pleats with a fork
- Easy rolled hem with a serger
- How to sew concave and convex curves
I can’t wait to hear what you think! If this tutorial was a breeze to follow and gave you some good insights, I’d really love it if you could drop your thoughts in the comments below and rate the craft card. Your feedback means a ton to me, and it’s super helpful as I work on making even better content moving forward. Thanks for reading and happy sewing!
How to remove serger stitches
Materials
- serged seam sewn over the raw edge of the fabric
Tools
- Seam Ripper
Instructions
- Place the fabric right side up (that would be the right side of the fabric, the one that was facing your serger foot). Even if you can't remember, it's easy to recognize. Just look for the side where the two straight seams are obvious as opposed to the wrong side where the right seam comes out as spots that keep the loops together rather than a line of stitches.
- Place the sharp tip of the seam ripper in between the loops, where they form a V.

- Pass the seam ripper under the straight seams (left and right needle stitches). If you're using a 3 thread overlocker instead of a 4-thread overlock, you'll only have one of those.
- I found it that it's easier for me to pick up both seams with my seam ripper but harder if I cut them at the same time. So I just pull both out but cut only the left stitch.
- Then grab one of these ends of the left stitch and pull as much as it will let you, until the seam thread breaks.
- You might get lucky and manage to pull the entire line of stitches.
- Repeat for the second, right needle stitch.
- It should look like this with both removed. If the seams break before you're done unpicking the entire seam, repeat the steps above.
- Then simply remove the upper and lower loop stitches. At this point they should come off right away, with no effort since they have no support left (which was offered by the left and right needle stitches).
Video
Most popular sewing projects:


Article may contain Amazon & affiliate links. As an Amazon Associate I earn from qualifying purchases at no additional cost to you.

Awsome! Recently I had to remove some serger stitches and had a hard time doing it. Today I decided to look for some help via internet and found you. I inmediately open your message, read it and start trying your method an dI am impress. It woks fantastic. I an embroidering the cuff of various pillowcases and piror to embroider I need to rip off the serger stitches from the cuff and a little bit more. Now I Know how to do it rigth. Thanks to you.I also own a serger and this is a valuable info for me . No more fears!!GB TX
Thanks so much for letting me know, Daisy! I’m very happy you found my method helpful!
It’s magic! magic, magic, magic! I had a top with a serged seam that when awry. Instantly, magically removed and re-sewn correctly. Thank-you so much, Petro, you removed a fear I had of using my serger.
Aww, thanks so much, Zuzanna! I’m happy I was able to help! xoxo