

How to sew a serged rolled hem – with video instructions
Did you know you can use your serger to sew both narrow and rolled hems? You may find that serging a rolled hem is actually a lot easier than the classic rolled hem method! In this tutorial you’ll learn how to sew a quick and beautiful serged rolled hem on your overlock machine!
Serged rolled hem
Ever wanted to make a serged rolled hem with your overlocker? I personally find it a lot easier to make a serger rolled hem than the classic method highlighted here. Serging a rolled hem is basically a matter of changing your overlocker settings and removing one of the needles so you end up sewing with three threads.
What is a rolled hem?
For those new to this technique, a rolled hem is an elegant way to finish off fabric edges. It’s often used for lightweight fabrics such as chiffon, lace and silk. It’s a very narrow hem that’s meant to be barely visible when viewed from the right side of your fabric. It consists of folding the raw edge of your fabric twice and then stitching it in place.
Can you sew a rolled hem without a special foot?
Yes! You don’t need a special presser foot to sew a rolled hem. All you need is your serger/overlocker and the right settings. Or you can use my method here where I made a narrow hem without a serger and no rolled hem foot.
What does narrow hem mean?
A narrow hem is a very small folded hem, usually sewn with a 1/4 inch seam allowance or less that you sew with a regular foot on your sewing machine. It’s similar to a rolled hem but not as delicate and it’s best used for lightweight delicate fabrics such as chiffon, silk and organza. It’s a great alternative to the classic rolled hem if you don’t have an overlocker or rolled hem foot on hand.
What is a serged rolled hem?
With a serger, you can easily sew your rolled hem without having to fold the edge manually and without using a special foot. Most sergers offer a two-thread or a three-thread narrow and rolled edge. Two thread rolled hems are often seen on lightweight fabrics such as chiffon and organza while the three thread serged rolled hem technique is mostly used for cottons. The overlocker rolled hem is often seen on the edges of napkins, table linens, decorative pillows, single layer ruffles, scarves and sometimes on knit garments.
More sewing tips you will love:
- How to remove serger stitches
- How to keep your sewing needles organized
- Tips to sew faster
- Two cool bobbin storage ideas
- Make your own hem gauge
- DIY seam guide
- Lettuce hem tutorial
- How to hem lightweight fabrics
- Best method for hiding serger tails
- How to make selvage fabric
- How to adjust bobbin tension
How to make the rolled hem with a serger
To get a narrow hem with a serger machine you simply need to remove the thread in the left needle, remove or adjust the stitching finger (this depends on the overlocker you’re using) and adjust the stitch width to the narrowest setting. To get a rolled hem you need to follow all the steps in a narrow hem but also adjust the tension in the upper looper and lower looper.
Confused much? No need to, I’ll get into more details below where we’ll learn how to serge a rolled hem in just a few easy and simple steps. Before that, please locate the stitch finger on your overlocker, the stitch width and stitch lengths dials and the tension dials. If necessary, grab the instructions manual and check for these components. For this tutorial I used a Brother 1034D but the instructions should be valid for most overlockers. Once you understand the process, sewing a roled hem on your overlocker is just a matter of adjusting settings.
How to sew a rolled hem with a serger
Materials:
- fabric scraps
- serger
- serger thread
Directions:
Before starting to work on your serged narrow or rolled hem, make sure you take note of your current serger settings for ease of reference when you revert to your previous serger settings before the adjustment. When you’re done making your rolled hem stitch, simply refer to these notes to revert your serger settings to a 4 thread stitch.
To sew a narrow hem
- Remove the needle thread from the left needle (if using a two needle overlocker).
- Unscrew the left needle, remove it and keep it on a side. I found that I didn’t need to re-thread my serger if I was being careful when removing the needle.
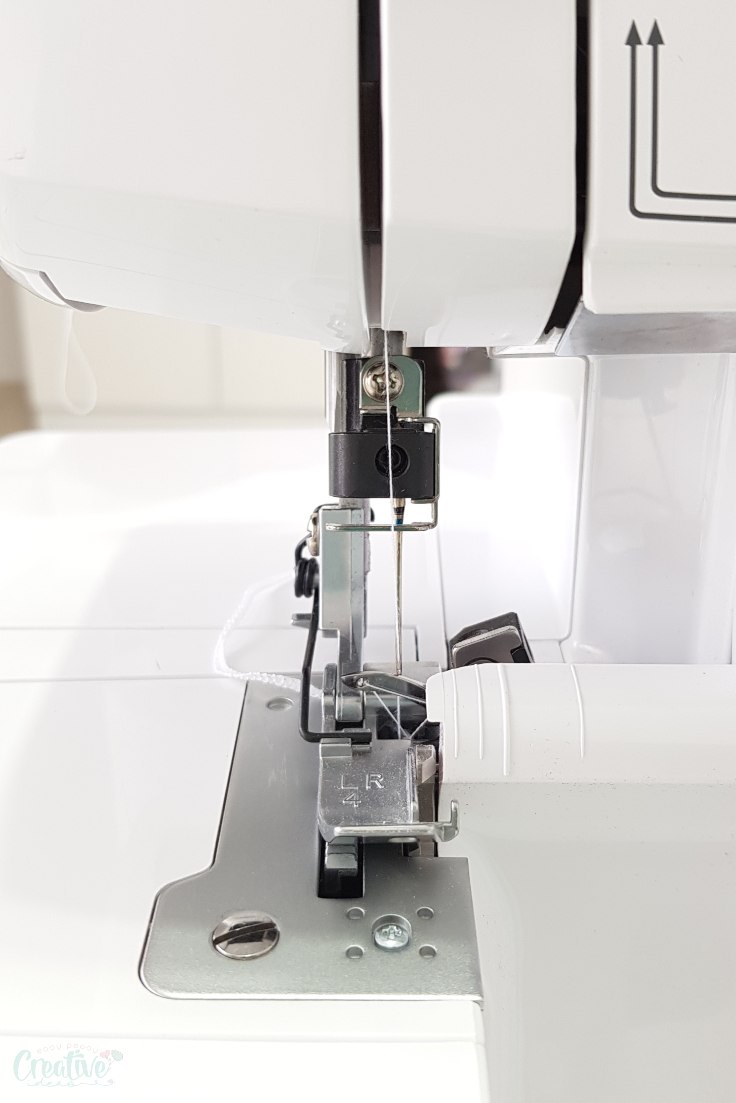
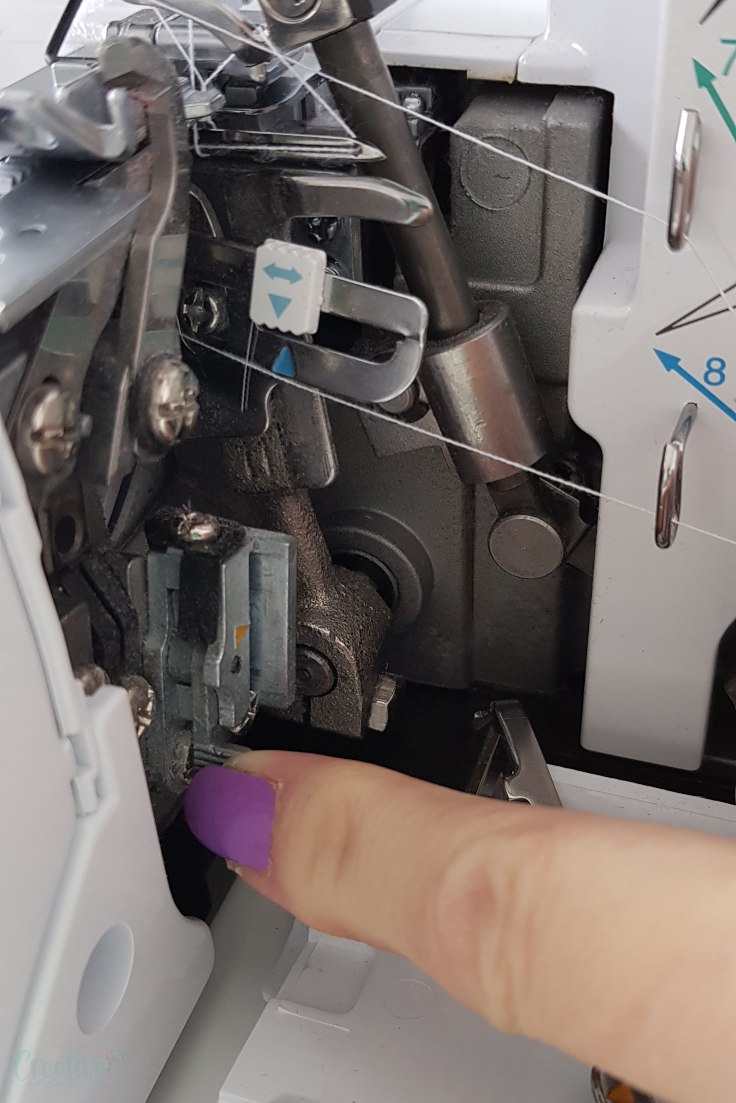
- Locate the stitch finger and either remove it or adjust it to the lowest setting. My Brother 1034D requires the removal of the stitch finger and it has a special slot where you can keep it until you need to put it back. To locate the stitch finger on such machine, simply slide the door open and look for the stitch finger on the left hand side, just below the step number 9 you follow when threading the serger, as indicated in the picture below.
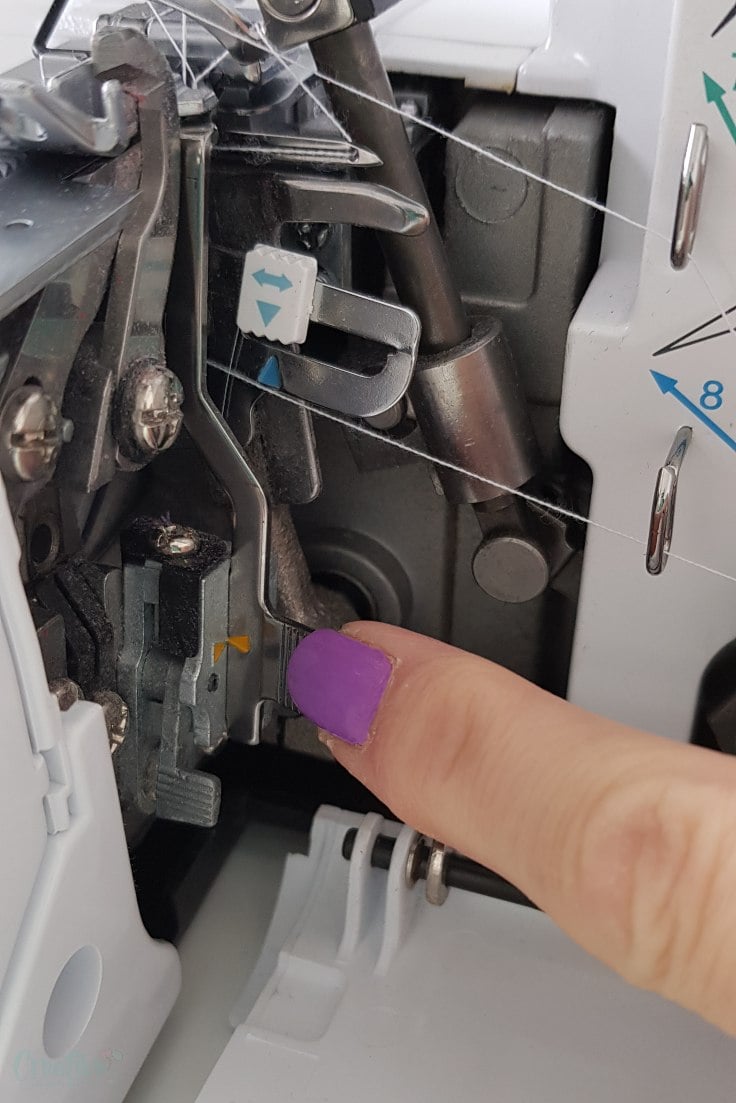
- To remove the stitch finger, firmly press the little button under the finger, as indicated below. Depending on the firmness of the push, the stitch finger will either pop out a little or fall. If it only pops out a little, simply remove it with your fingers, it will slide out easily.
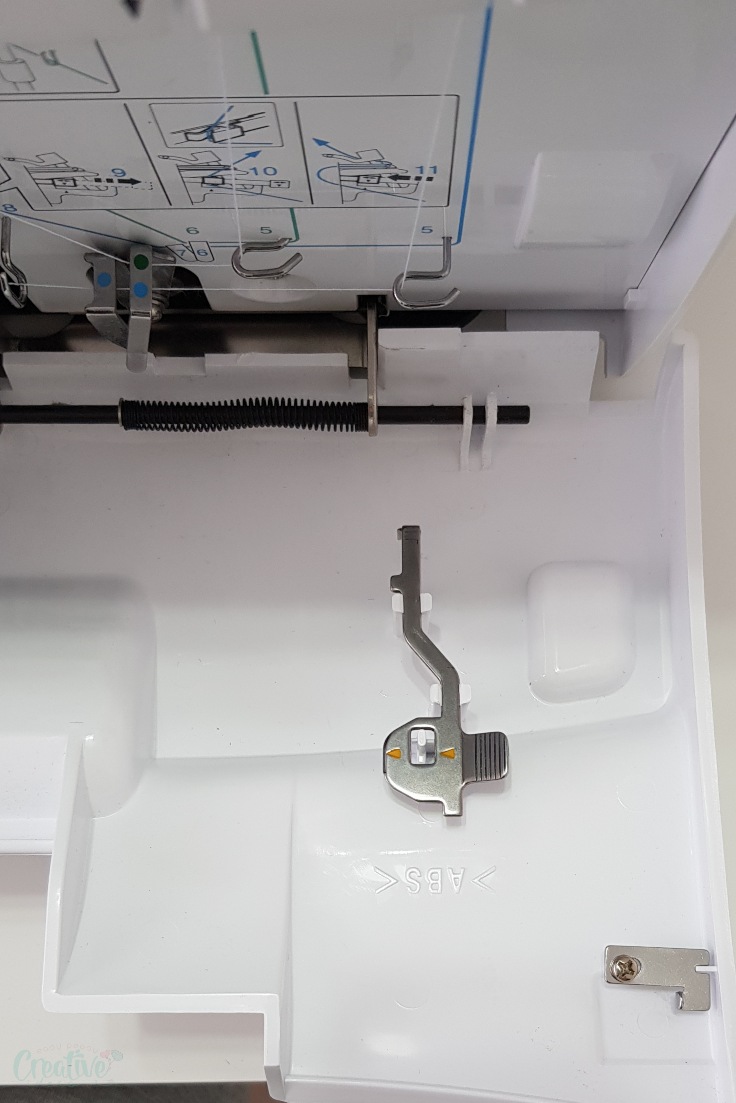
- The storing slot for the stitch finger is located on the sliding door.
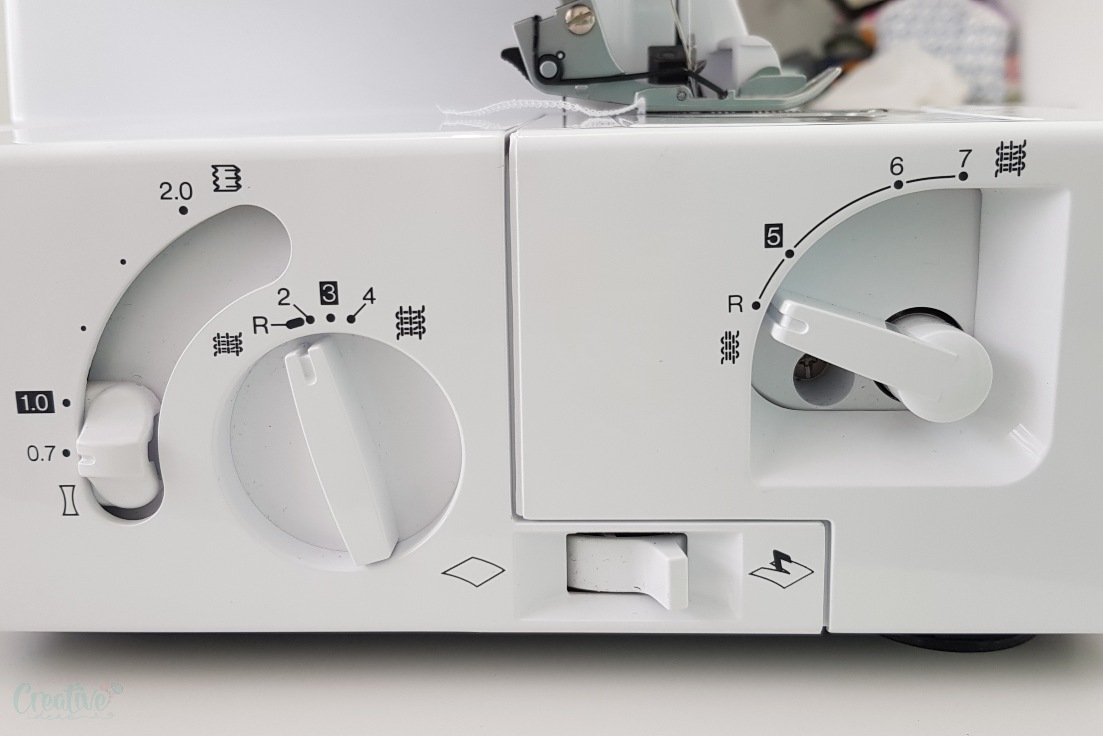
- Locate the stitch width dial and adjust to the narrowest width. If needed adjust the stitch length too (if the original length is too wide).
- Before sewing on the right side of the garment, make sure you have a nice tail sewn first. You can choose to hide those thread ends (tails) at start and end as I did in this tutorial.
- Begin sewing for a quick and pretty, narrow hem.
To sew a serged rolled hem
- Follow all the steps above but before starting to sew, do the additional steps below.
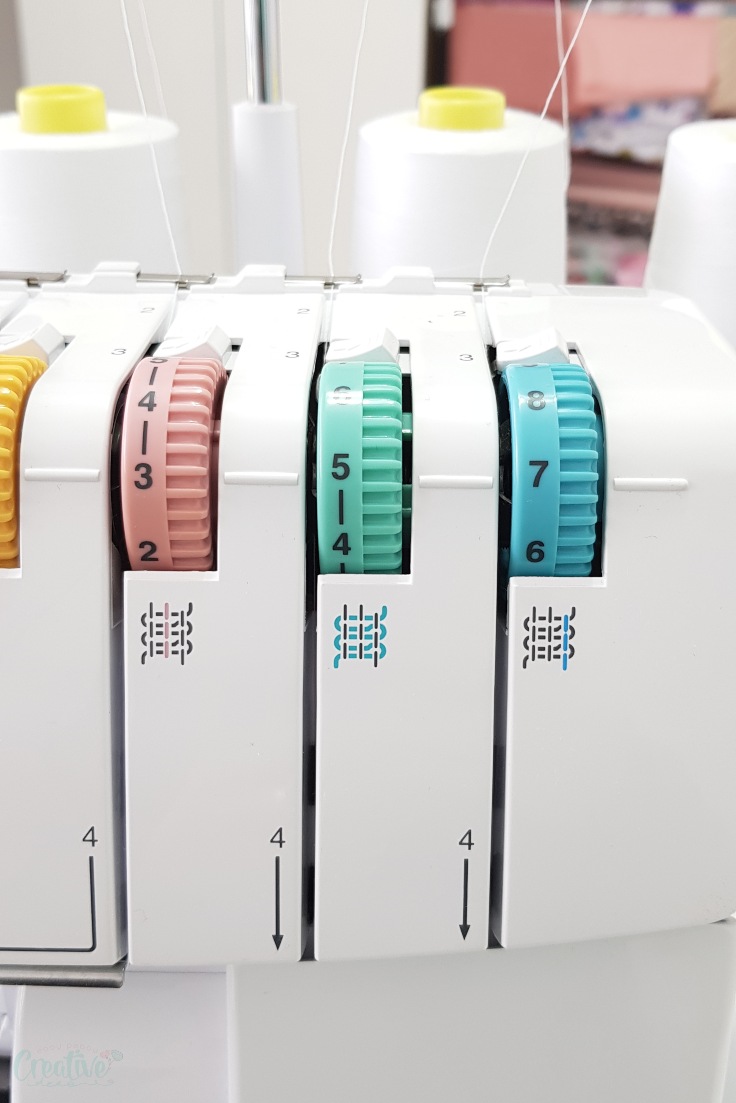
- Adjust the right needle tension to a 3.
- Adjust the upper looper tension to a lower setting than lower looper (anything between 3 and 5 should work – please run tests before serging a final hem). I used a 5 on my Brother 1034D.
- Adjust the lower looper tension to a higher setting than the upper looper tension (between 6 and 8). I used a 7 on my Brother serger.
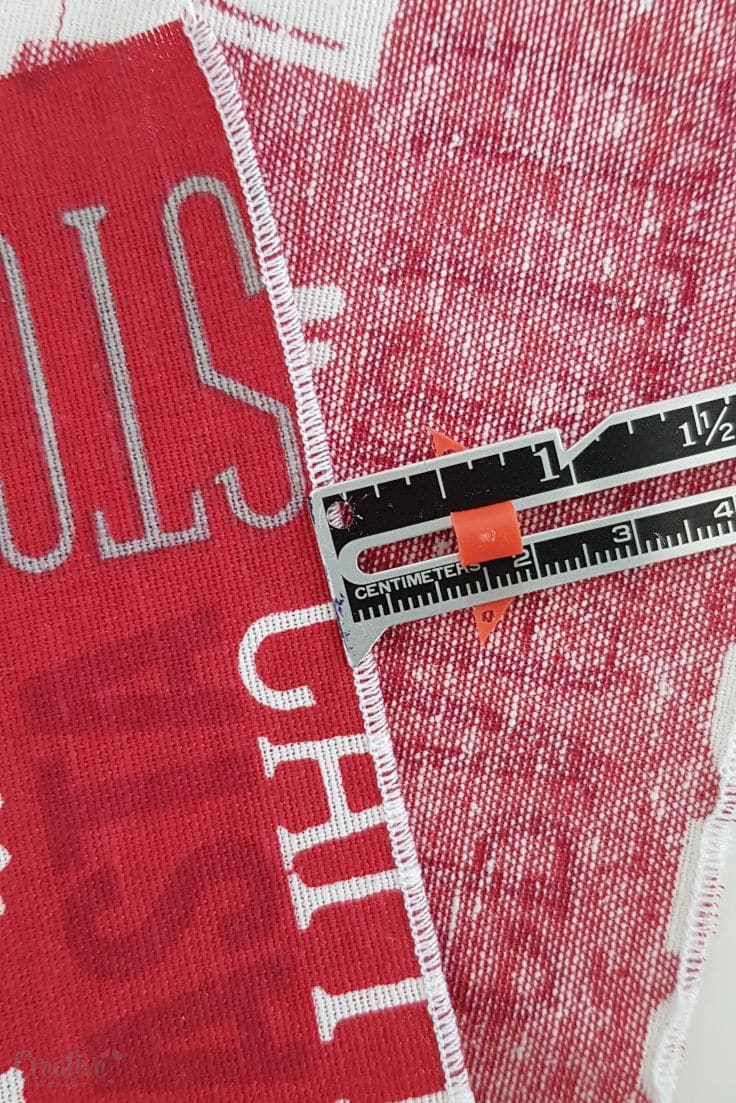
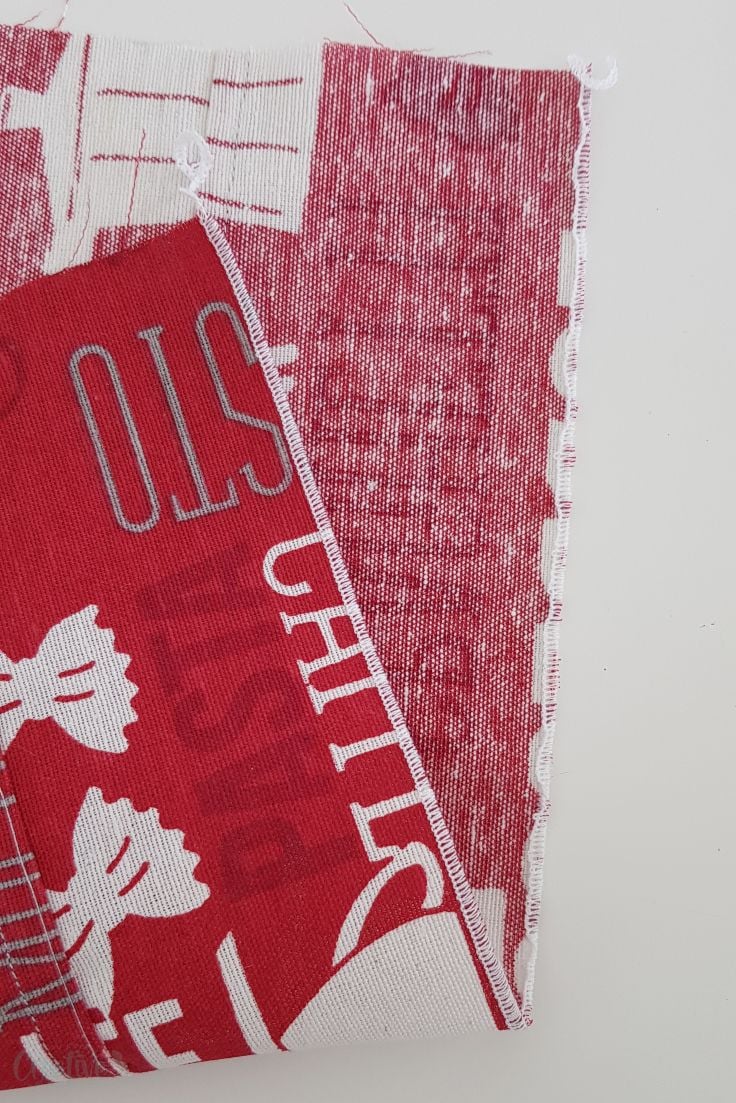
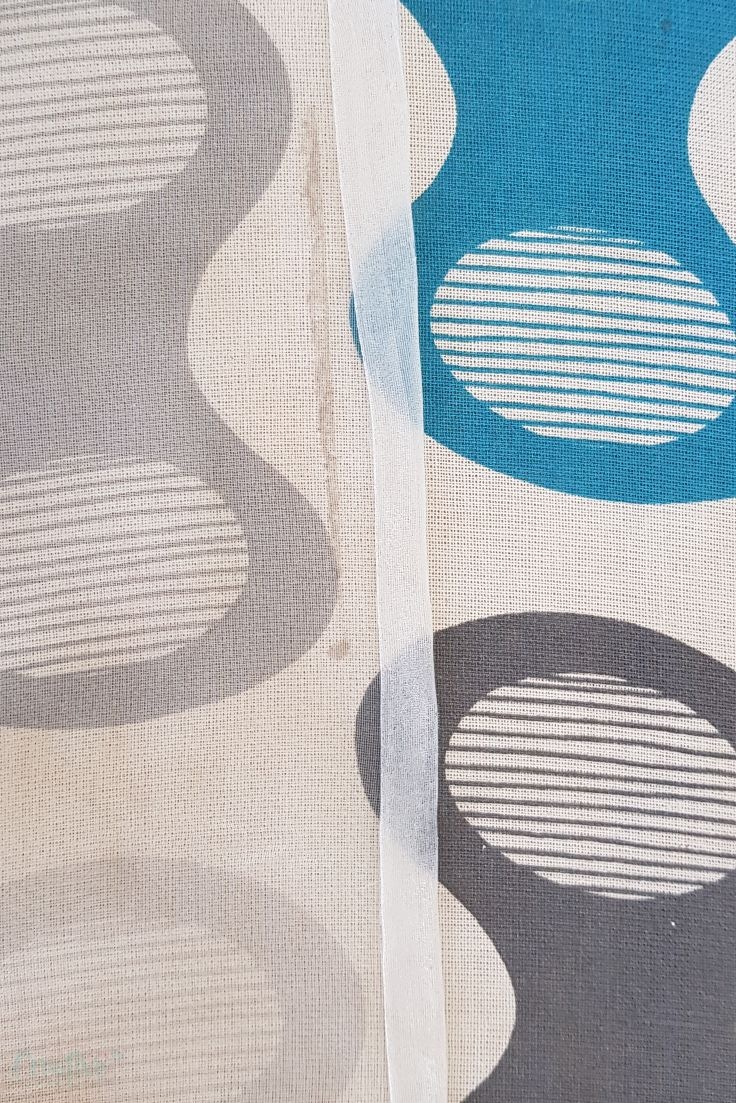
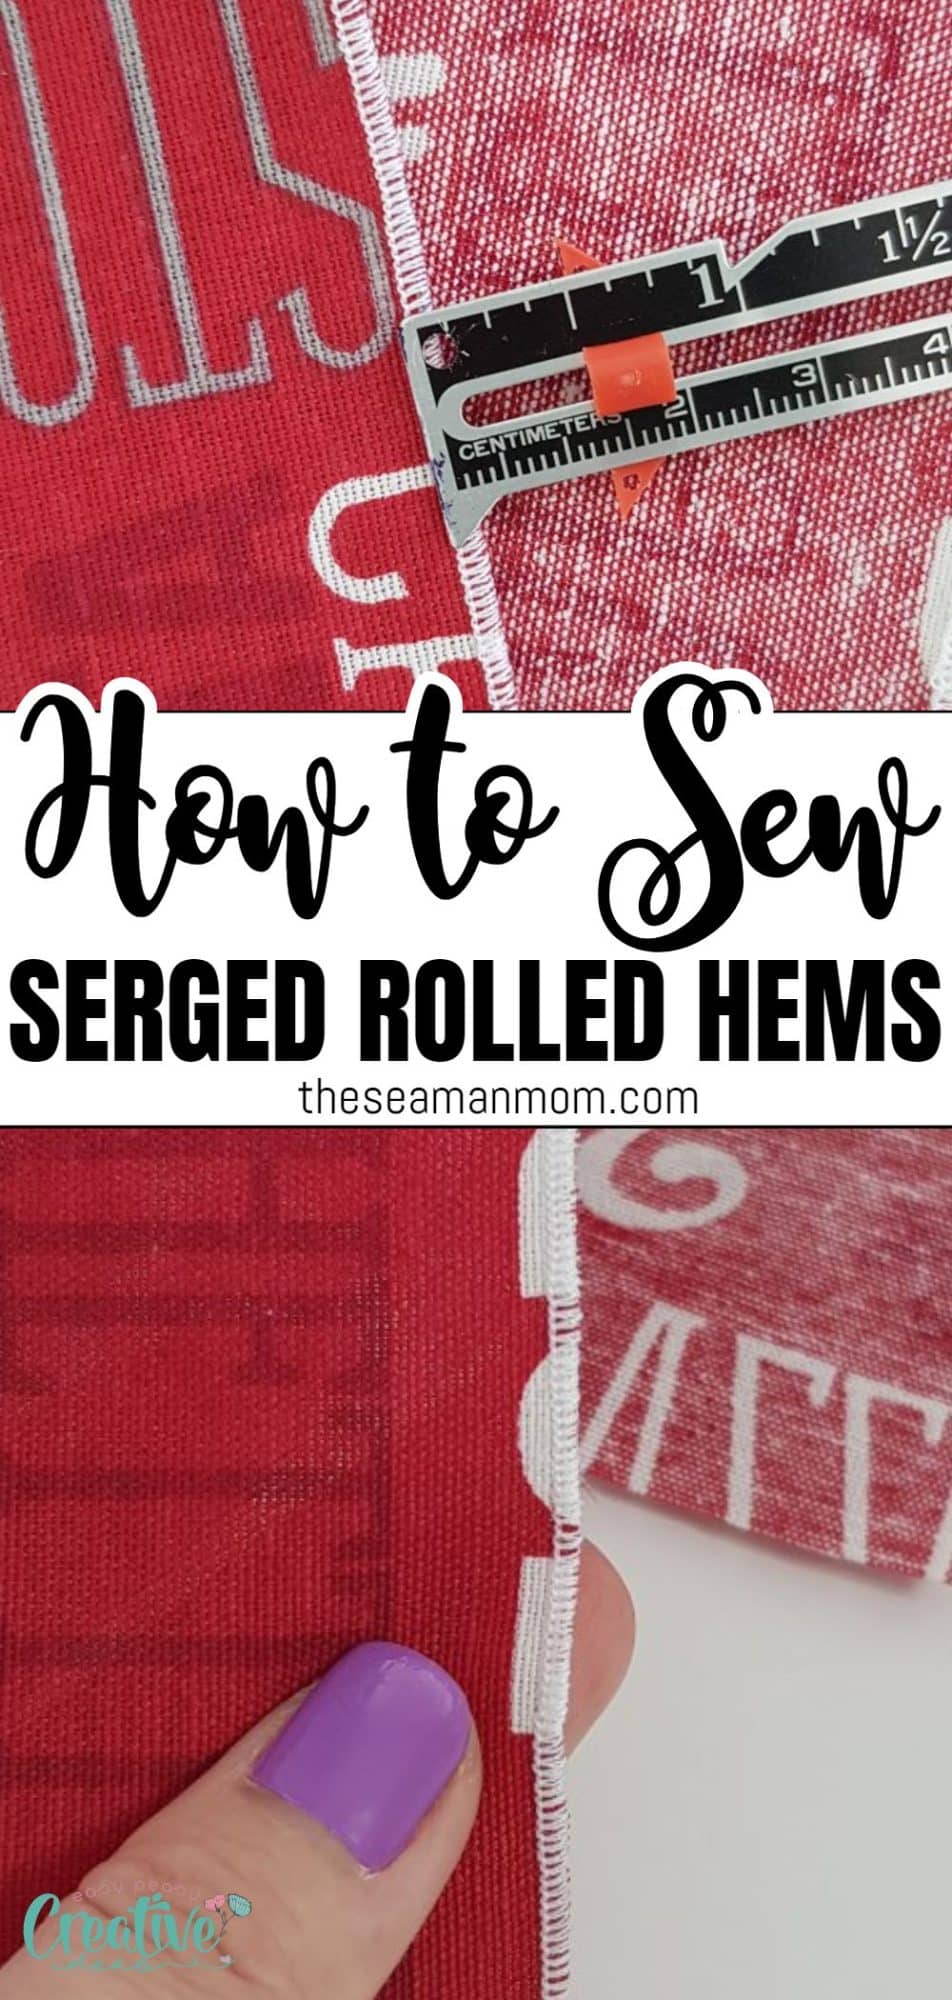
- Keep adjusting the tensions until you’re happy with how the fabric edge rolls under. Please note that the amount of rolled fabric depends on the type of fabric used and the stitch width. Thin fabrics will roll best while medium weight fabrics will roll just a little bit, like in my project here. You can change the look of your rolled hem by changing your stitch length and width.
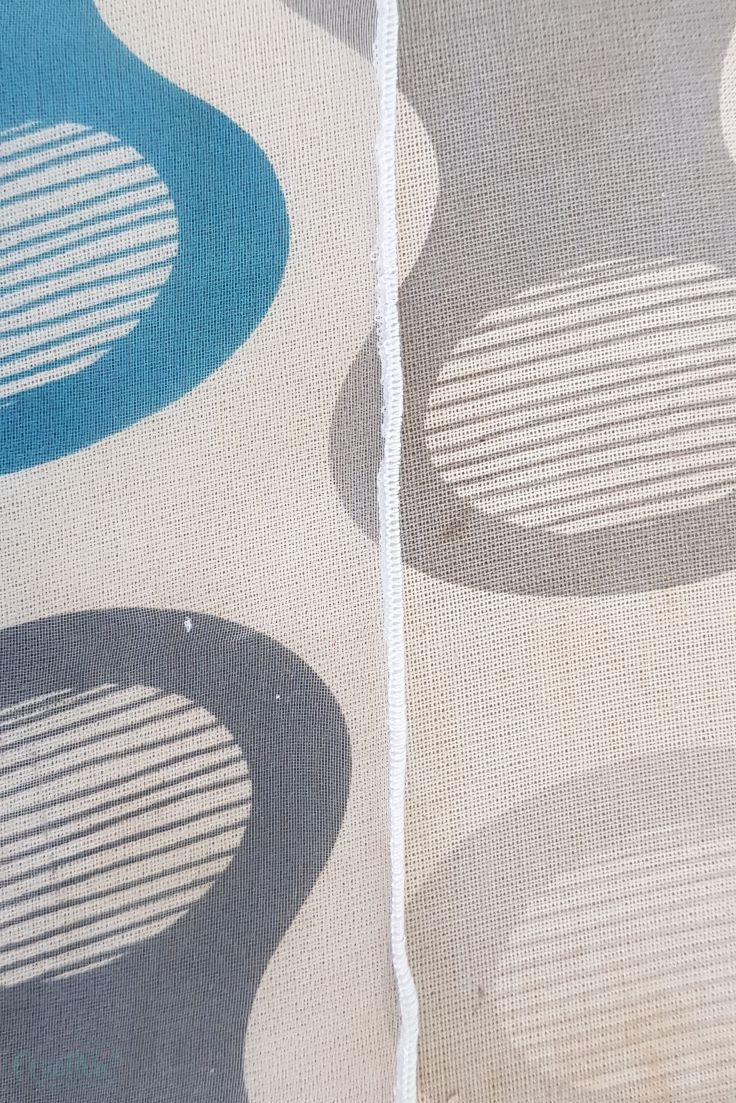
- Begin sewing with the fabric right side up and keep adjusting your upper and lower looper tensions until you see the hem edge turn under.
Revert to 4 thread stitching
- Replace the stitch finger to its original place.
- Replace the left needle in its original slot and thread.
- Revert to the original settings for the stitch width, stitch length and tension dials.
- Run a few stitches to create a tail and make sure your serger functions at normal parameters.
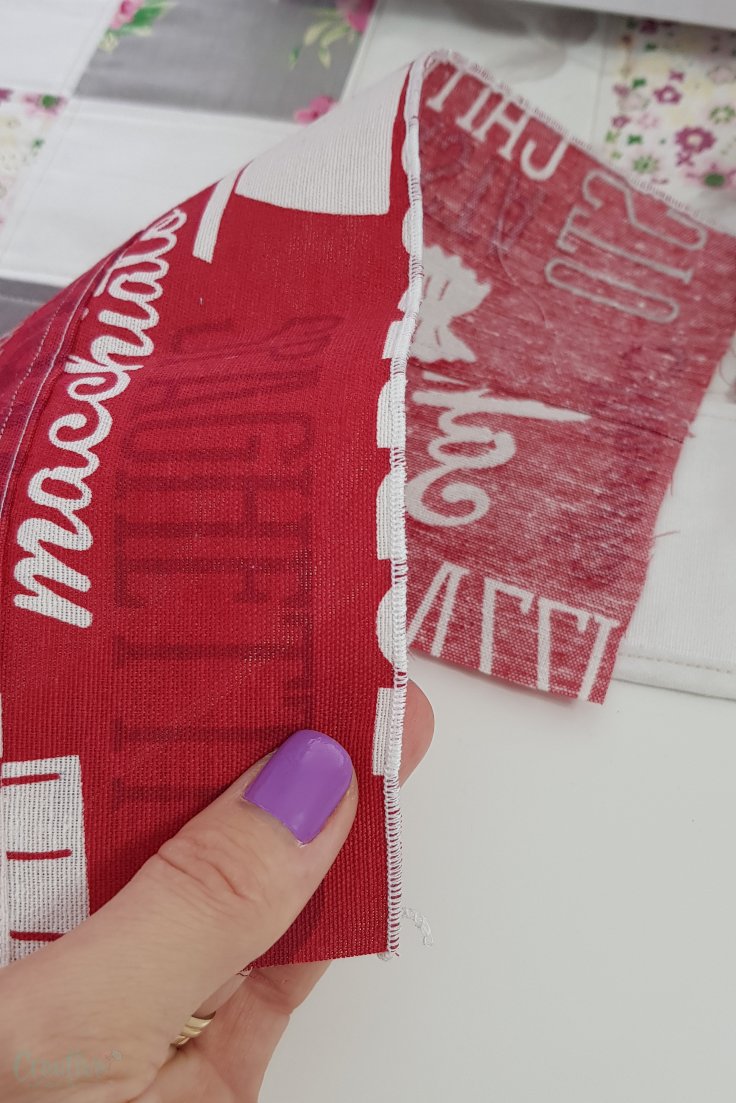
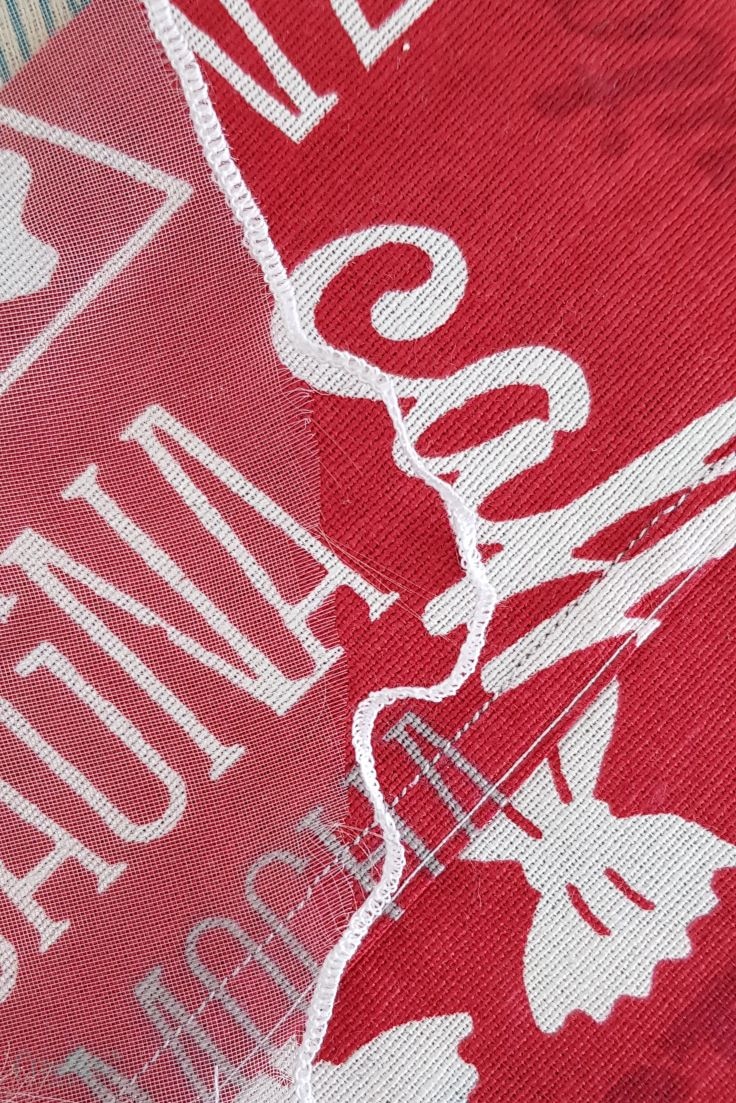
I found that applying all the above instructions to very thin fabrics like veil, thin silks or organza will not produce the same results! Meaning your hem stitches might start falling apart as you can easily pull the rolled hem off because the fibers weaved in these fabrics are not strong enough, as illustrated below.
If this is the case with your fabric, simply use some seam sealant like fusible interfacing or stabilizer to reinforce the raw edge of the fabric and prevent the rolled hem from coming off. Then fold the edge twice and press with a pressing iron.
Follow by sewing the rolled hem as indicated above. Finish by trimming the excess interfaced fabric from the finished edge with embroidery scissors.
That concludes the tutorial. Did you find it easy and enjoyable? Let me know in the comments what projects you plan to use this hemming technique for. Thank you and happy sewing!
Pin to save for later
Most popular sewing projects:
- Tips for sewing a round hem
- Corded bag handles
- Flutter sleeve dress pattern
- How to laminate cotton fabric


Article may contain Amazon & affiliate links. As an Amazon Associate I earn from qualifying purchases at no additional cost to you.

Hello Petra, thank you for the tutorial. I got wooly nylon thread and looking to do a rolled hem using my 1034D. Would you suggest a specific tension?
Hi Valerie. My recommendations for settings are highlighted in the tutorial, in the Rolled hem section. If you’ll be hemming thin fabrics you need to reinforce the hem (I also provide details in that section).
A lifesaver! I used this on some boucle fabric and it worked beautifully! The only change I made was to the differential feed where I set it at almost 2 so the fabric wouldn’t stretch and wave. Thank you so much for this easy tutorial!
Happy to help! And thanks for the differential feed tip, will keep it mind if I ever need to sew boucle fabric! xoxo