

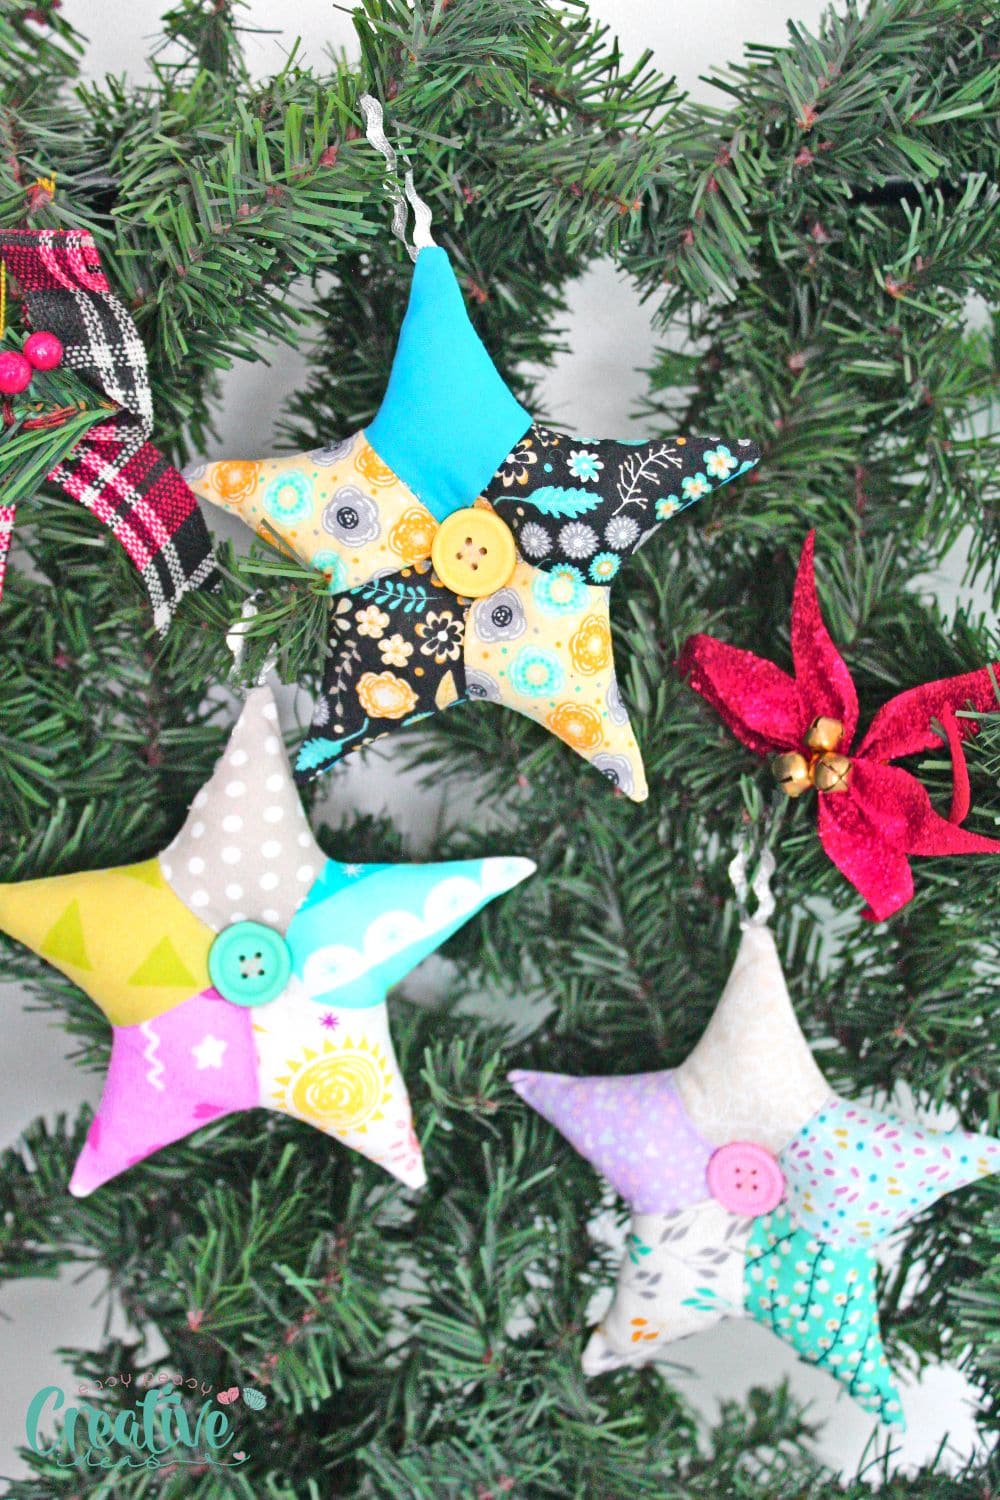
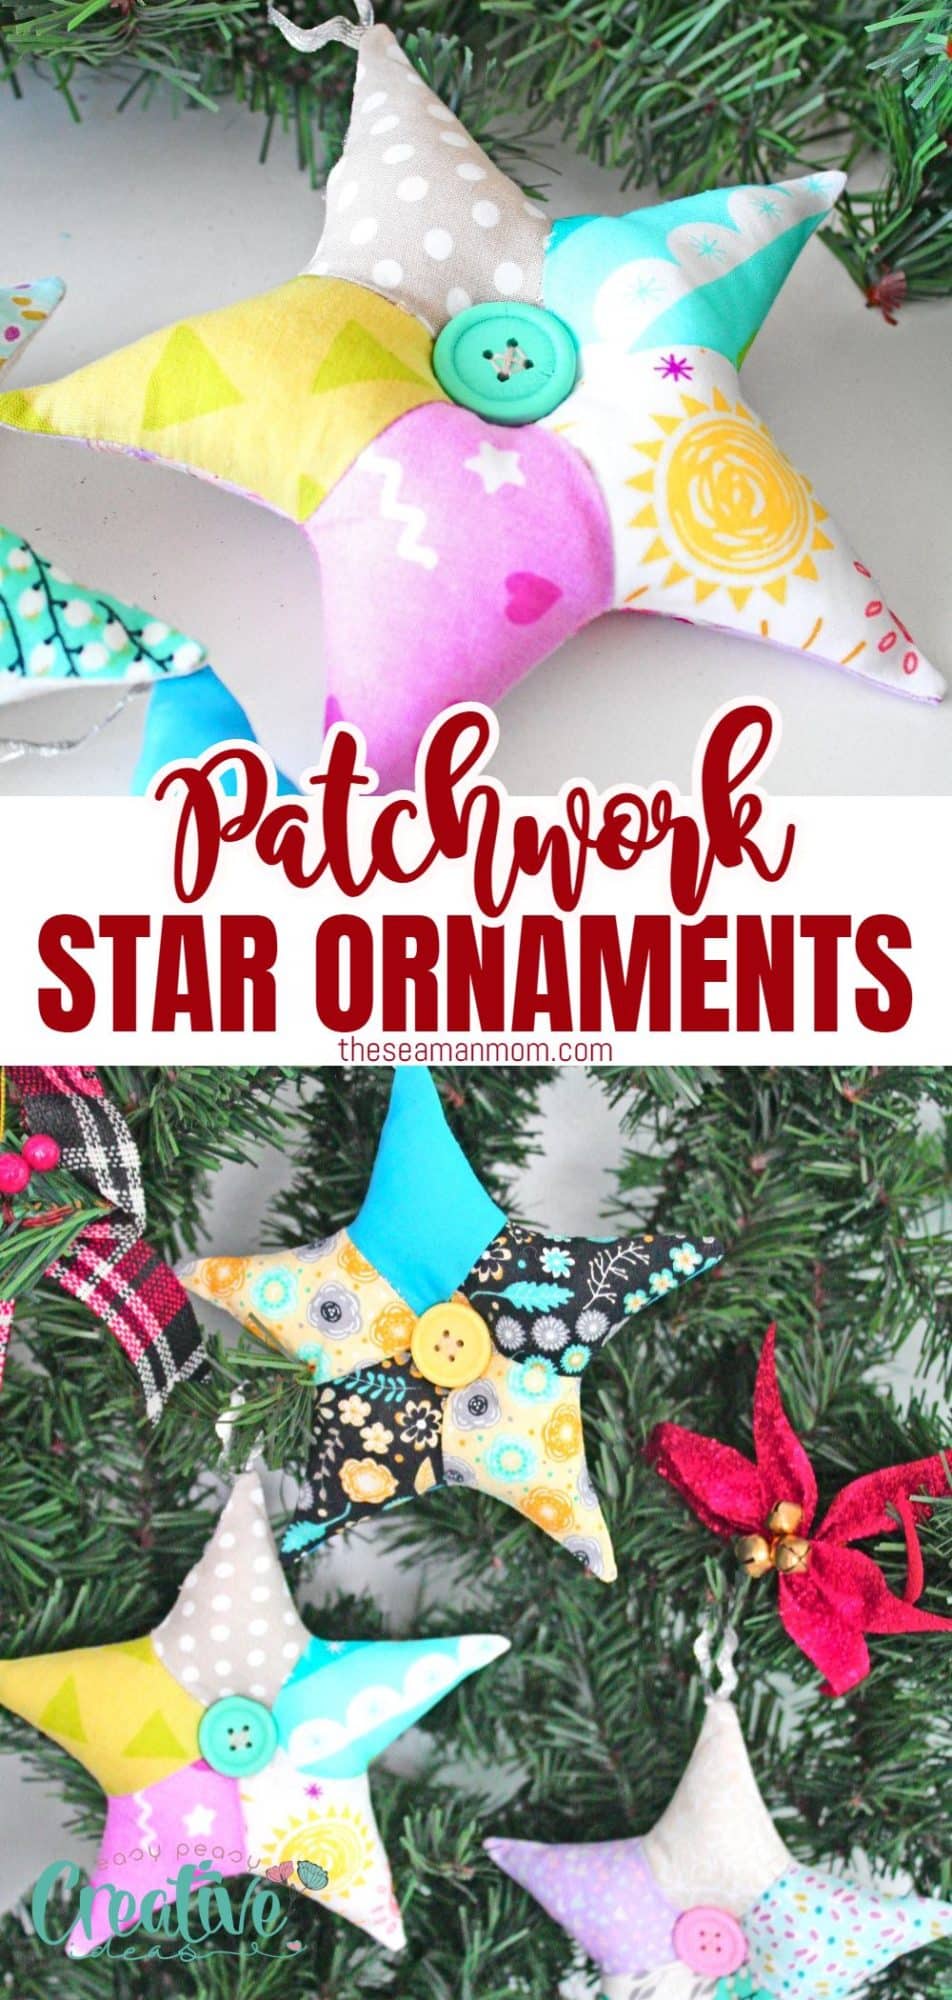
Patchwork star ornaments
Looking for a fun and easy way to decorate your Christmas tree this year? Try making some patchwork star ornaments using simple sewing and quilting techniques. With my step-by-step tutorial and Christmas star templates, it’s easy to create beautiful stars in a variety of colors. Whether you prefer traditional red and green or bolder patterns and prints, these star ornaments are sure to add a festive touch to your holiday décor. So what are you waiting for? Get started today!
Patchwork star ornaments
Add some festive flair to your Christmas tree this year with some star ornaments. These beautiful and versatile ornaments are perfect for all skill levels, from beginner sewers to seasoned quilters. With my helpful instructions and my Christmas star templates, you can easily create stunning ornaments in a variety of colors and patterns. Patchwork star ornaments are a sure way to brighten up your holiday decor in style. So why not make a bunch of these for your holidays this year?
Other Christmas ornaments you will love:
- Easy fabric bunting
- Mini mittens ornaments
- Christmas Elf stockings
- Christmas tree pillows
- Fabric Christmas tree ornaments
- Gnome ornaments
- Quilted Christmas tree door hanging
Choosing fabric and materials
To get started making your patchwork stars, you will need a variety of fabric scraps in different colors and prints. Cotton is the best option in quilting and sewing projects, particularly for this project which features lots of points and corners. You may want to choose Christmas fabrics or go with prints and patterns that can be used year-round.
In addition, you will need a sewing machine and basic sewing supplies, such as pins, thread, scissors, and a ruler or measuring tape.
Do I need to interface the fabrics?
When choosing your fabrics, you may want to consider whether or not you need to interface them. If you are using thinner materials then interfacing may be necessary in order to ensure that your finished star is strong and stable enough for use as an ornament. Otherwise, simply choose your favorite fabrics and get started with sewing!
Tips for quilting patchwork stars
Once you have gathered all the materials needed for your project, the next step is to start cutting out your fabric pieces based on the provided Christmas star pattern. Once all your pieces are cut out, you can begin assembling them into patchwork stars. Arrange them in the desired order, then secure them with pins.
One of the most important aspects of quilting patchwork stars is ensuring that all your pieces are properly aligned and sewn together. A good way to achieve this is to use fabric weights, pins or clips on each section as you sew, which will help keep everything in place while you work. Since the elements of the patchwork star are so small, you might find it hard to use these tools. If you feel you need additional help to align the pieces perfectly, add a drop of fabric glue to the seam line before sewing the pieces together.
Additionally, be sure to use a small stitch length when sewing the layers together so they do not shift out of place.
Adding embellishments and finishing touches
The first way to add your favorite embellishments is when adding the ribbon. Play around with this element by varying the color and pattern of your ribbon, as well as the length. If you like the rustic look, you can replace the ribbon with some twine. Another option would be to make a little loop from your fabric scraps.
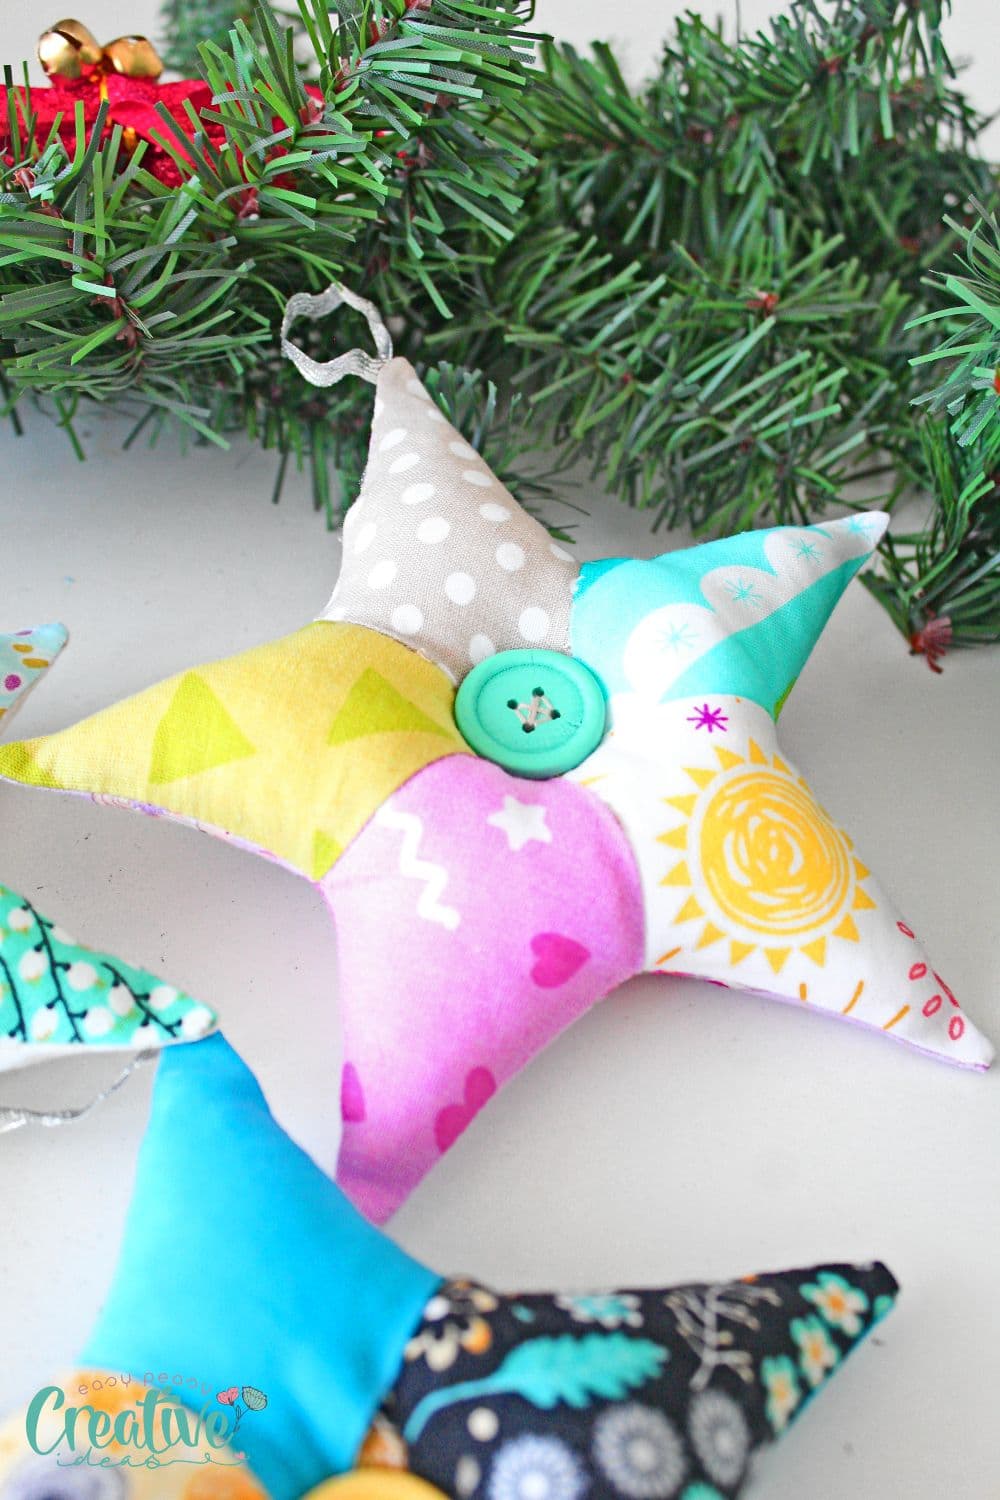
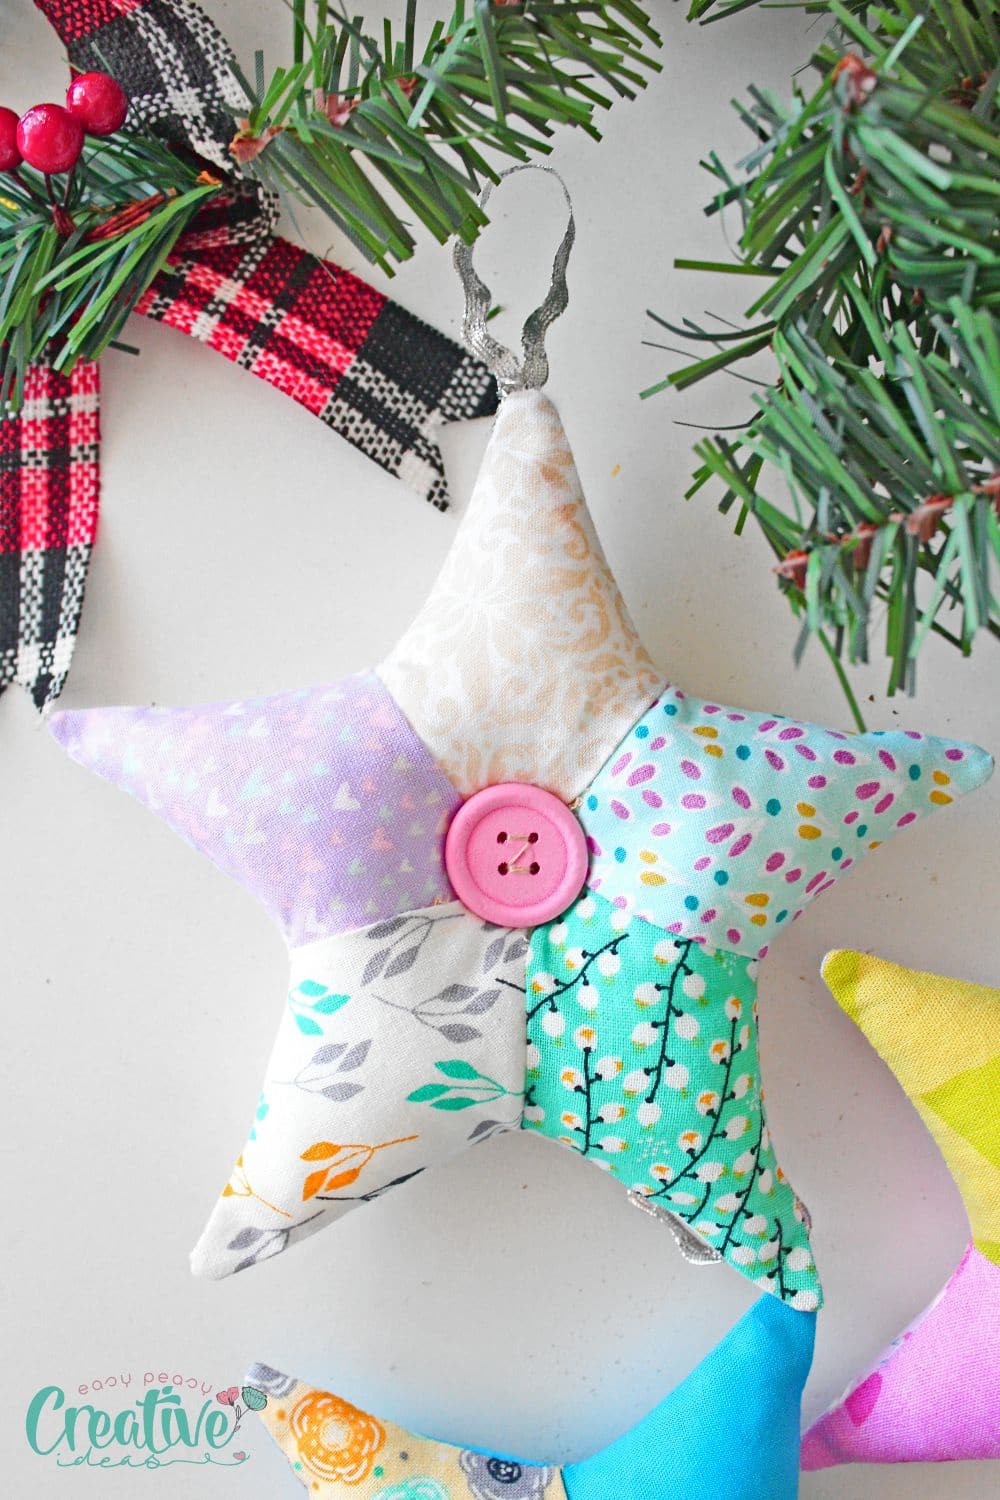
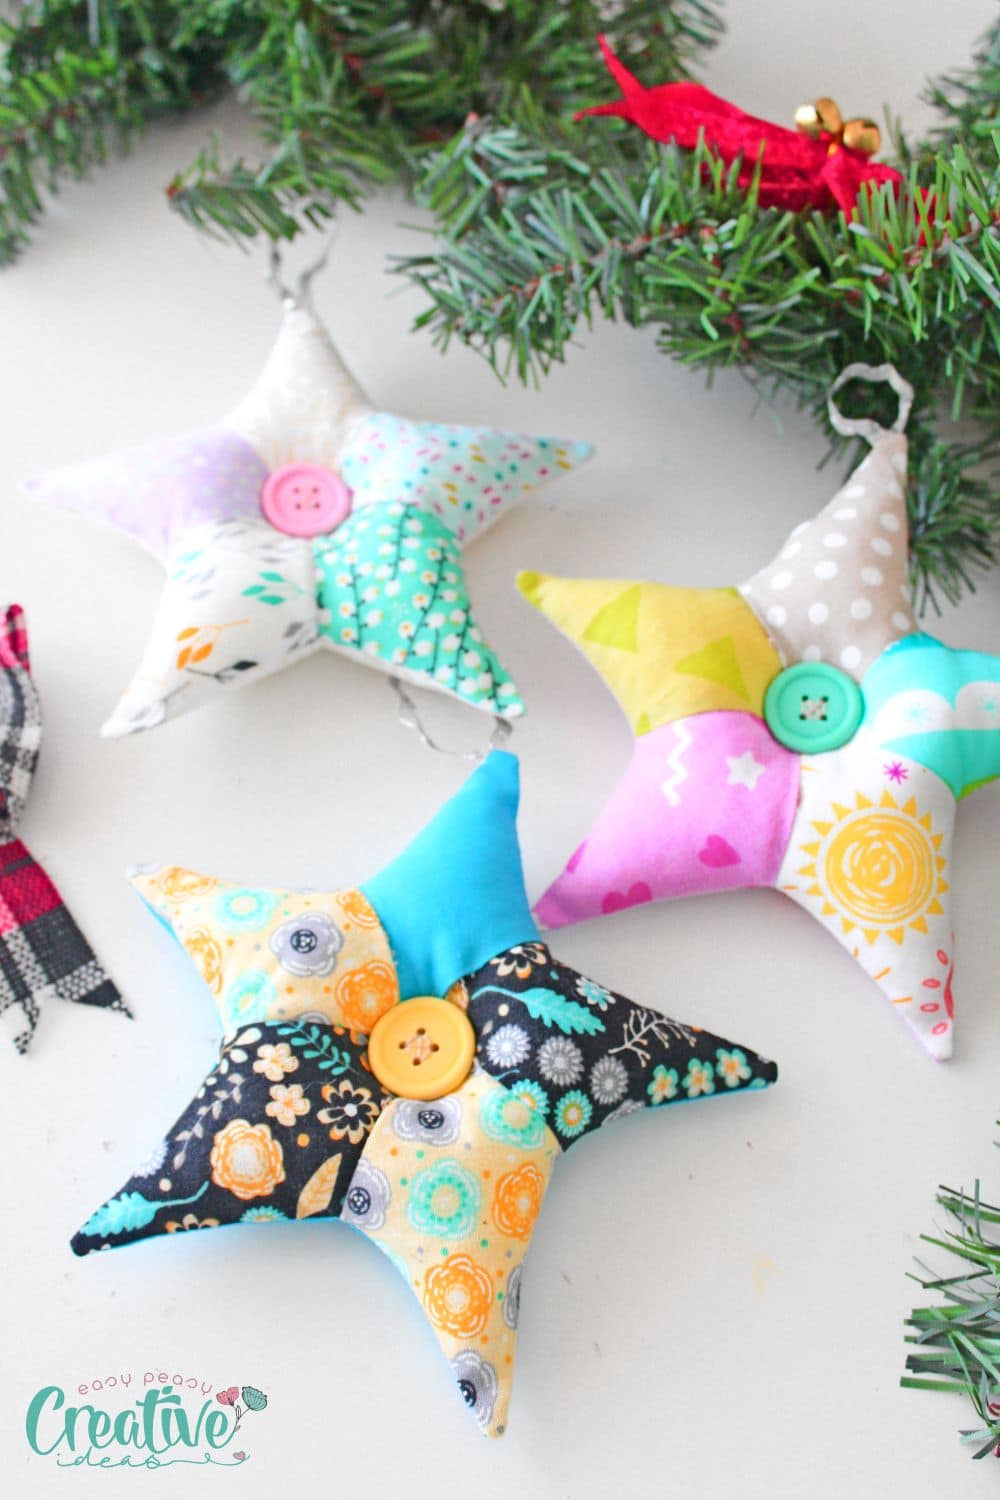
Another way to add interest to your star ornaments is to construct both sides of the star with patches, using my Christmas star templates.
Once your patchwork star is complete, you can choose to add further embellishments or simply leave it as is. Some great options for finishing touches include adding bells, bows, buttons, beads, or other decorative elements.
Ideas for displaying your patchwork star ornaments
There are many creative ways to display your beautiful patchwork star ornaments. You can hang them on the Christmas tree, fill a glass vase with them, place them on a mantle or wrap several of them around a wrapped gift for a stunning finishing touch.
You can also use them as gifts on their own, or combine them with other items like a festive holiday mug or scented candle to create the perfect homemade gift set.
These patchwork stars make pretty table centerpieces as well, whether you use them to decorate a holiday table or simply display them year-round.
No matter how you decide to display your star ornaments, they are sure to add a beautiful and festive touch to any room.
How to store patchwork stars
To maintain and store your star ornaments throughout the year, it is important to take proper care of them by cleaning and storing them properly. This can be done by wiping down your star ornaments with a clean, dry cloth to remove any dust or dirt buildup, as well as carefully placing it in a storage box or bag. I prefer storing these individually, in small boxes so they maintain their shape.
If you want to add an extra layer of protection, wrap each star in paper before storing them away. By taking the time to care for your patchwork stars, you can enjoy them for years to come! To keep your patchwork stars looking their best for years to come, it is also recommended to store them away from direct sunlight when not in use.
Variations and alternate techniques for patchwork star ornaments
There are many different ways to make patchwork star ornaments, and you can feel free to experiment with different techniques and materials to create your own unique design. For example, you might choose a different fabric for the star’s points than for the rest of the ornament. Or if you have the patience and the experience, make each piece out of smaller fabric scraps.
You could also explore using different types of ribbon or trim for additional embellishments, or choose to decorate the seams with a zigzag stitch or other decorative stitches.
Another way to make your stars extra special is to add initials or personal messages using fabric paints, stamps, or embroidery.
No matter what design choices you make, these patchwork star ornaments are sure to add a beautiful and festive touch to your home this holiday season. So whether you are looking for a fun holiday craft project or simply want some beautiful decorative accents for your home, making Christmas star ornaments is a great option!
How do you make patchwork star ornaments?
First, you’ll need the complete list of materials so here they are:
- Christmas star templates, available here. This file includes the main star pattern and the kite shape pattern.
- Craft scissors
- Fabric scraps – 1 larger for the main star and 5 smaller strips for the shapes (you can construct your star with 5 different fabrics for each kite as I did).
- Fabric marker
- Sewing shears
- Ribbon (5″ long per star)
- Ruler, measuring tape or seam gauge
- Sewing machine
- Thread to match the type of fabric used
- Sewing machine needle to match the type of fabric and thread used
- Iron with a steam setting
- Hand needle
- Point turner or blunt tool
- polyfill or other type of filling
- Buttons or pompoms (2 per star) (for unique buttons, check out Etsy)
Once you gather all your materials and the patterns you are ready to start sewing your patchwork stars.
Prepare the star pieces
- Cut out the patterns for the main star and the kite shape using your craft scissors.
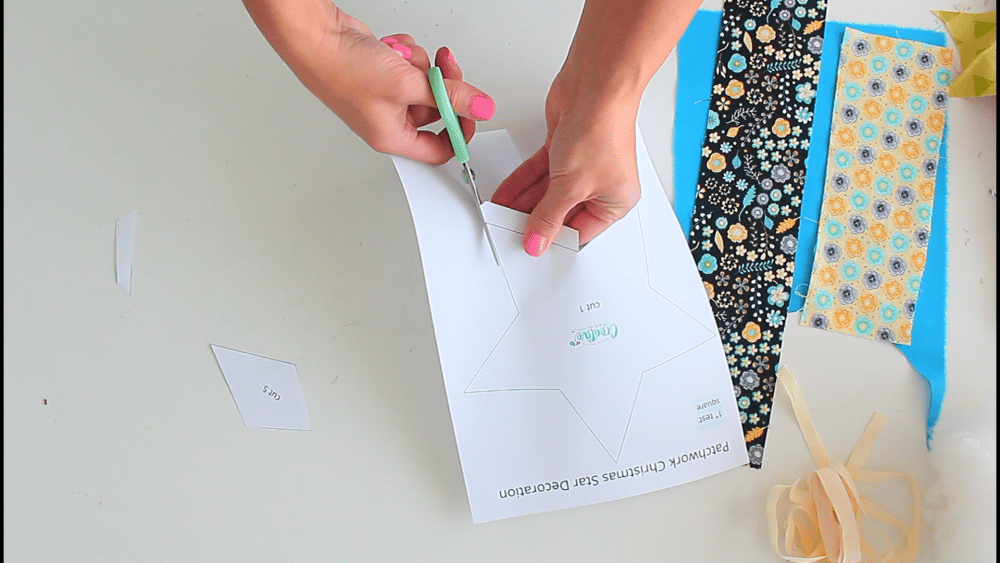
- Iron your fabric scraps with iron on steam to remove all potential wrinkles.
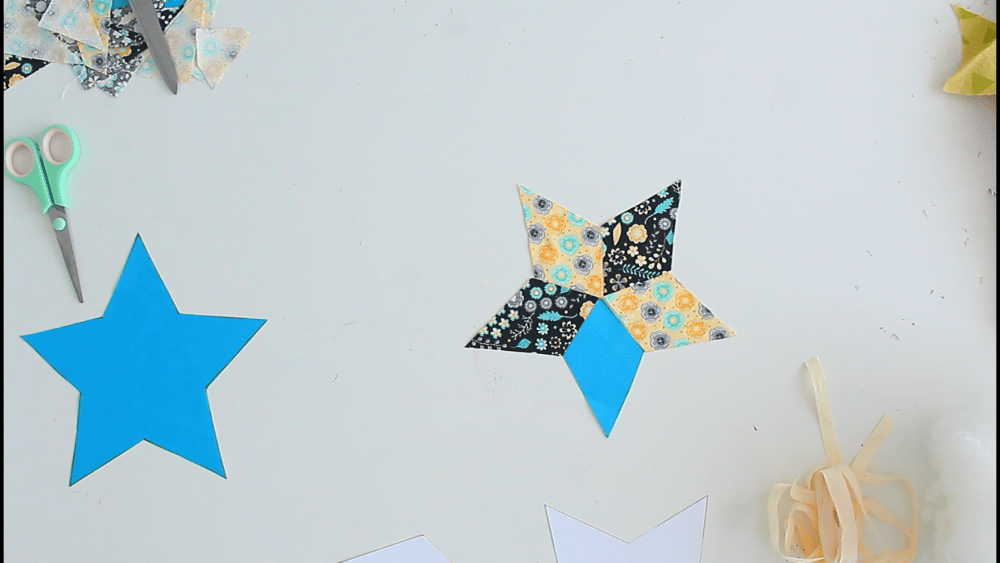
- Place the patterns onto the fabrics and using your fabric marker start tracing the patterns onto fabric. Each finished star should have one main star for the back and 5 kite shapes for the front (the patchwork side). You may choose to make both the back and the front using the patchwork technique.

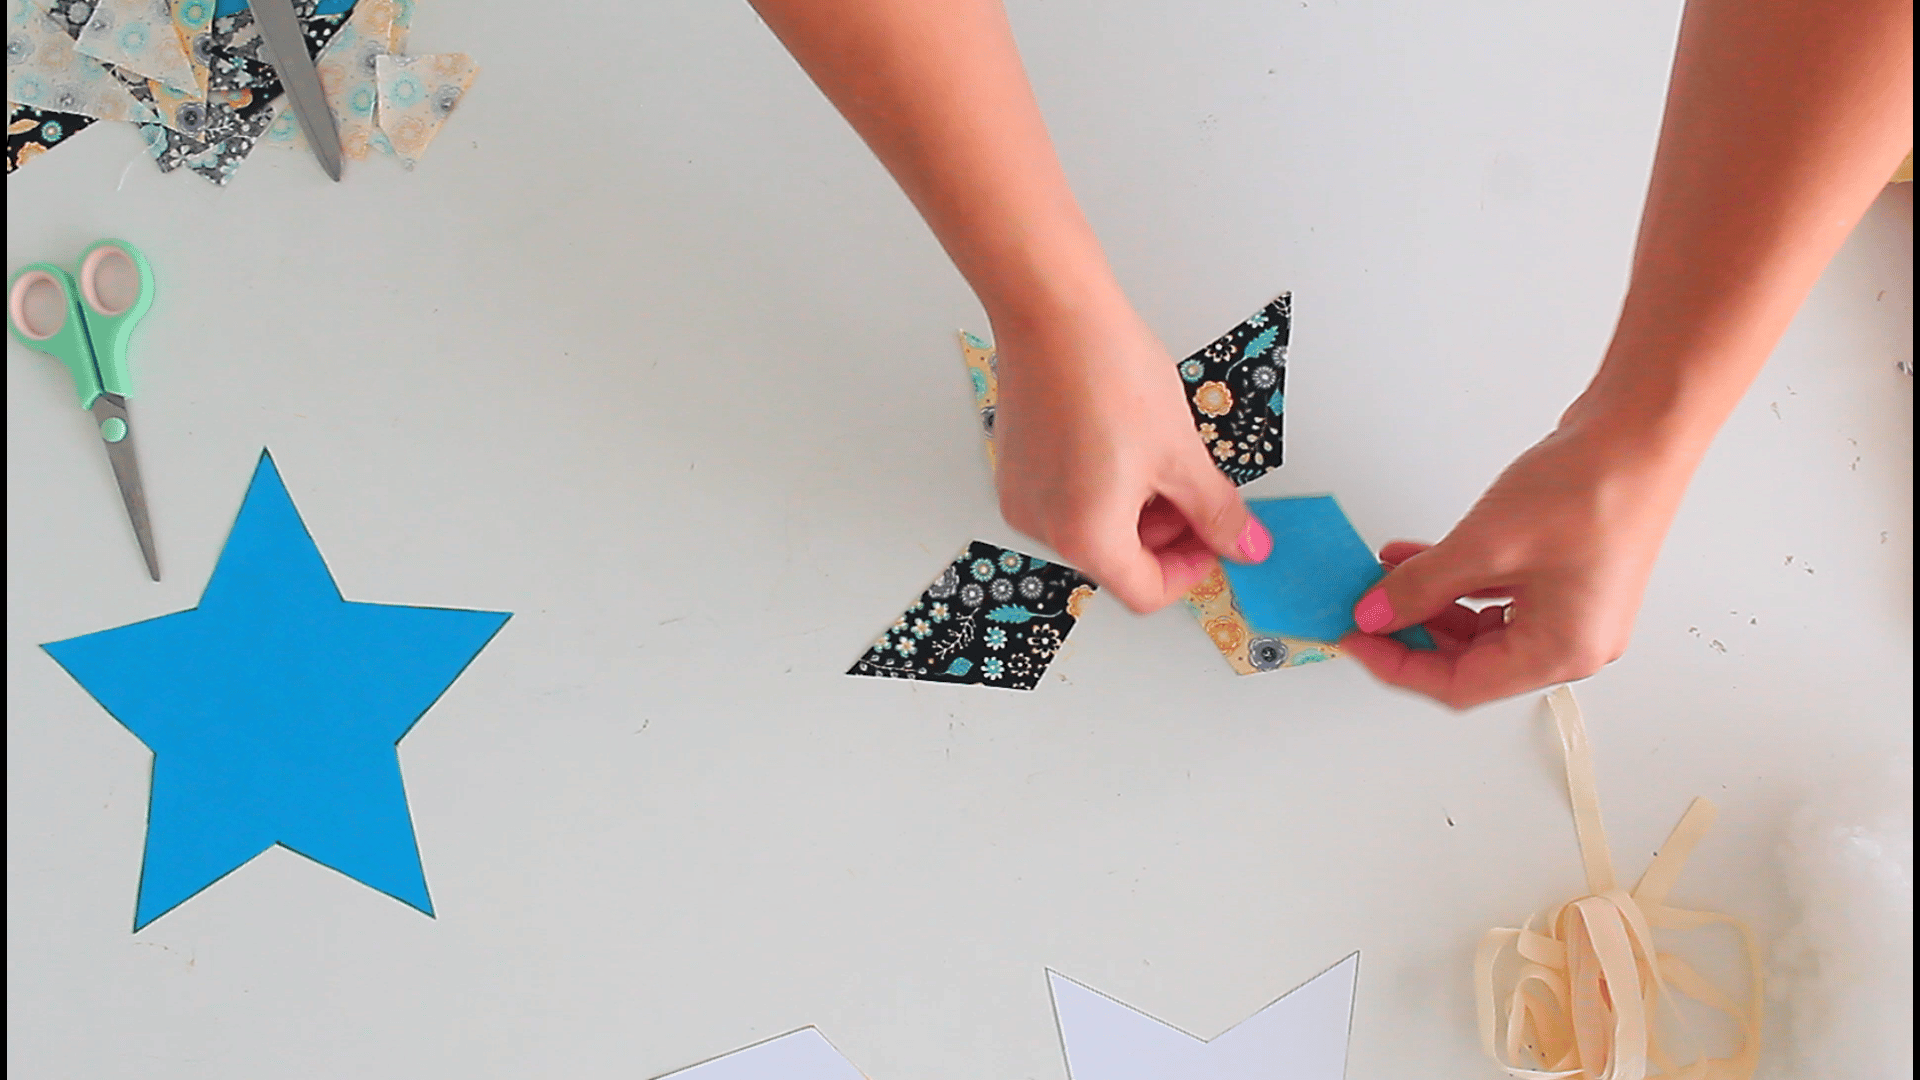
- Arrange the kite shapes as desired.
Sew the star pieces together
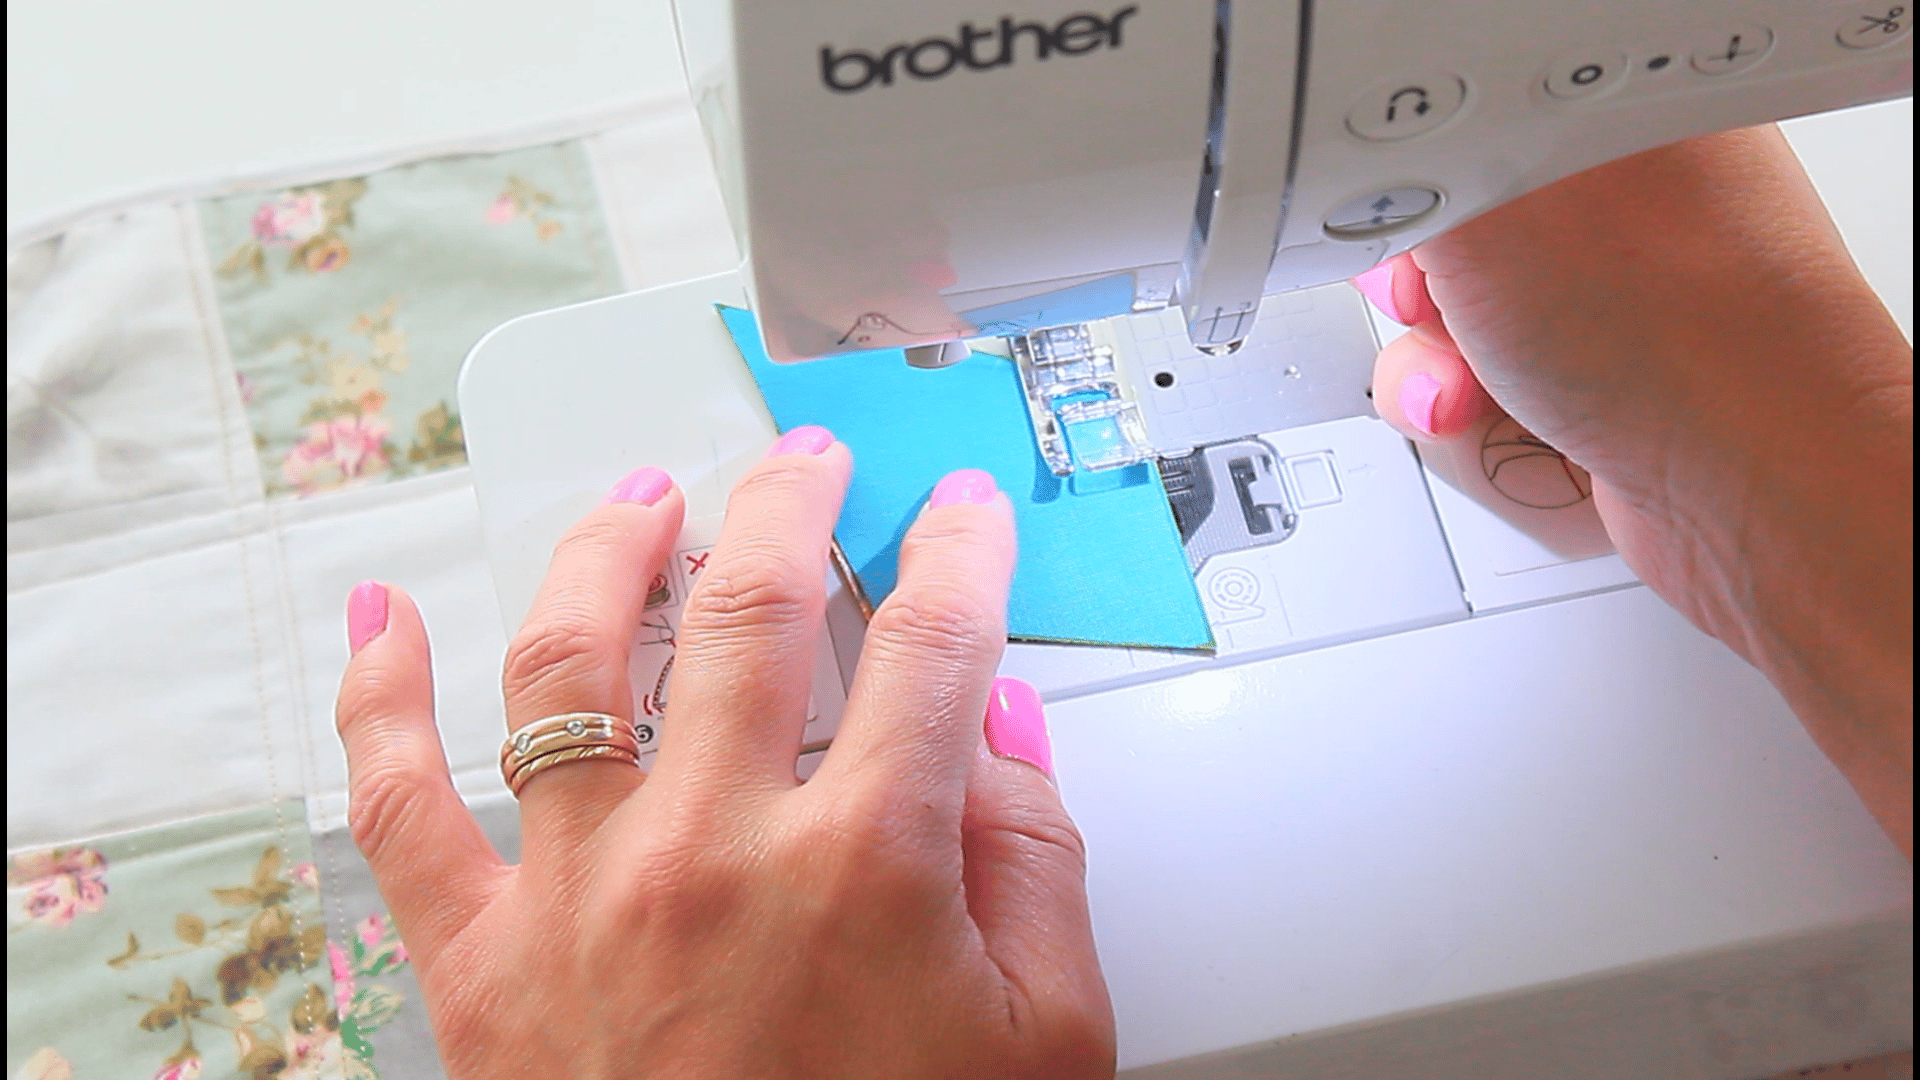
- Start sewing them together on one of the smaller sides using a 1/4″ seam allowance, backstitching at the end. I started working clockwise from the top kite. When sewing the pieces together, make sure you leave 1/2″ gap at the point that goes in the center of the star, as indicated on the pattern.
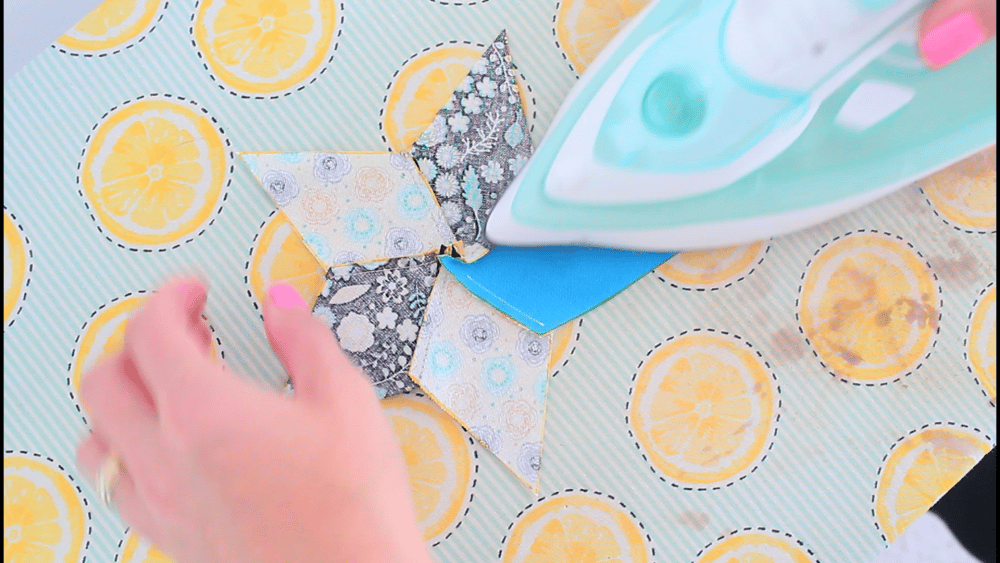
- When all kites are sewn together, press the seams to one side then press the entire star onto the right side.
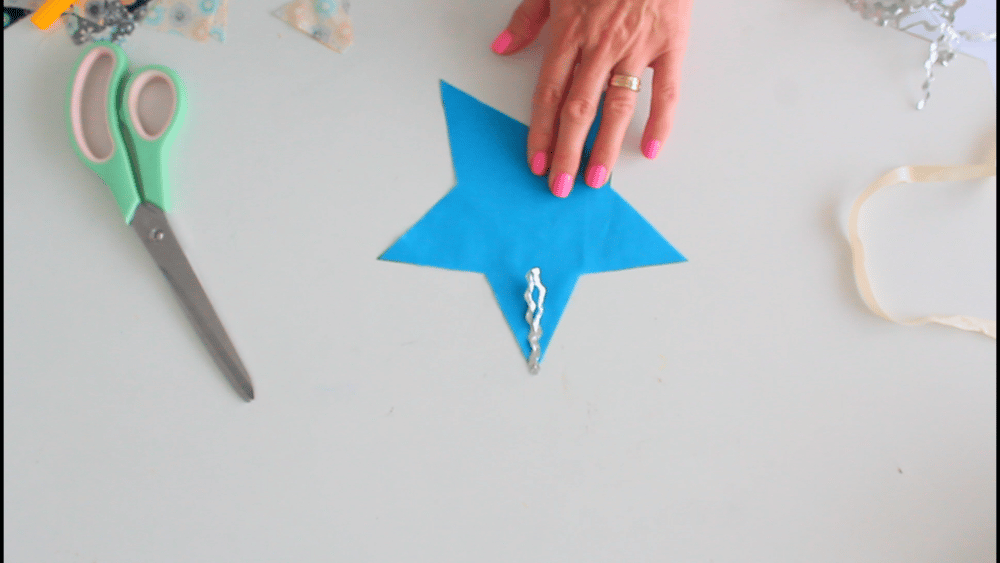
- Grab the main star and attach a piece of ribbon to the top point. I found it easier to hand sew the ribbon to this tiny, narrow space rather than using my sewing machine.
- Match the main star with the patchwork star, right sides together. Pin or use fabric glue to keep them together. Sew with a 1/4″ allowance on all sides.
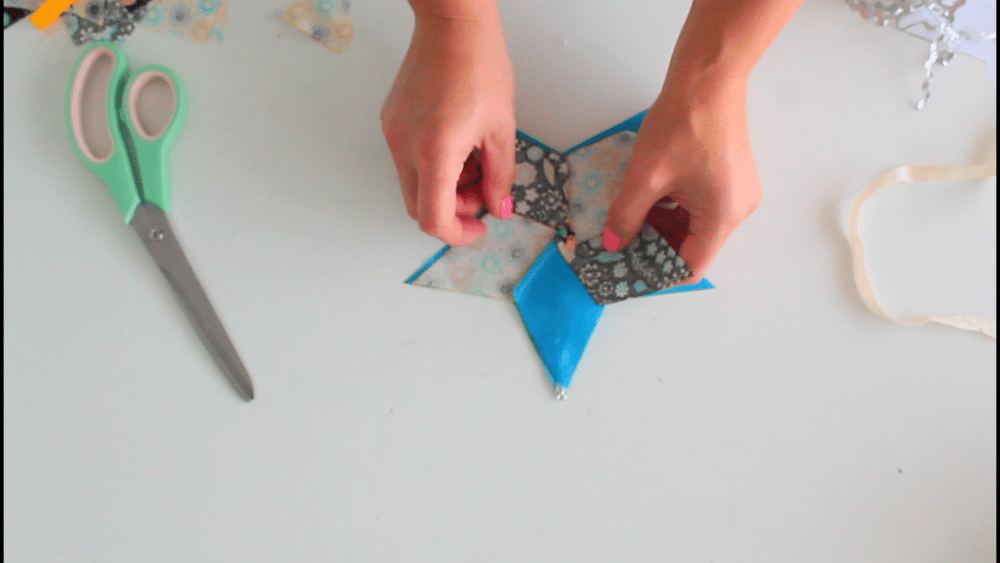
- Trim the corners to remove bulk. You might need to clip the inner points too, depending of your fabric, to allow the star to stretch when turned right side out (if your scraps are cut on the bias they’ll be stretchy enough so you won’t need to clip the points).

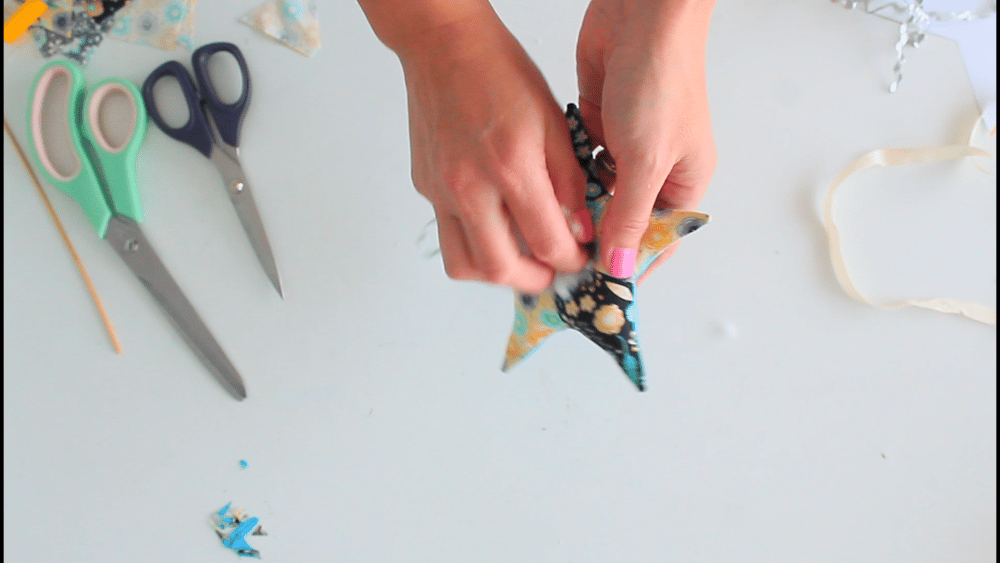
- Turn the star right side out through the center hole left by the 1/2″ gaps above. Use a point-turner or other blunt tool such as a skewer to push the points out.
Finish the star
- Smooth out the seams and press the star with steam.
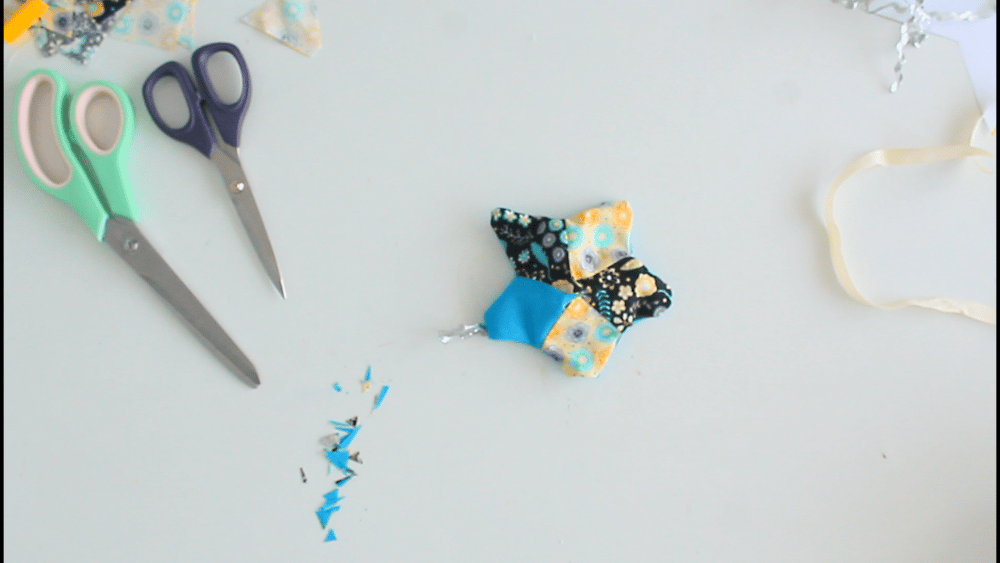
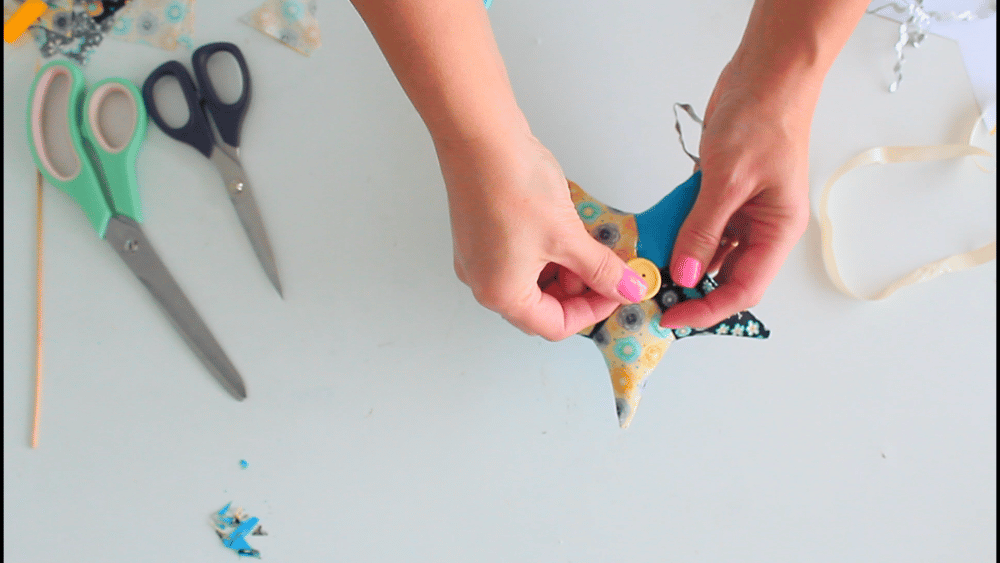
- Fill the star with polyfill, gently pushing the filling to the narrow points with the blunt end of a pencil or marker.
- When happy with the filling, gather the center of the star together and hand-sew the open gaps to the center of the star. You’ll pass the needle through the back and the stitching will be visible in front and the back of the star. So cover them with buttons or pompoms and you’re done.
These beautiful patchwork stars are easy to make and can be customized with a variety of fabrics, stitches, and embellishments. Whether you want to add initials or personal messages using fabric paints, stamps, or embroidery, or simply need some decorative accents for your home, these star ornaments are the perfect choice. So why wait? Start making your own Christmas star ornaments today! Let me know if you have any questions as you get started, in the comments below. Happy sewing!
Pin to save for later
Most popular sewing projects:
- Tips for sewing a round hem
- Corded bag handles
- Flutter sleeve dress pattern
- How to laminate cotton fabric


Article may contain Amazon & affiliate links. As an Amazon Associate I earn from qualifying purchases at no additional cost to you.
ABOUT PETRO
Hi, I’m Petro, author and founder of Easy Peasy Creative Ideas. Sewist, crafter, avid DIY-er, foodie, photographer, homemaker and mommy to one. I’m an expert at coming up with quick, clever sewing tips, recycling crafts and simple, easy recipes! You can find my ideas featured in reputable publications such as Country Living, Good House Keeping, Yahoo News, WikiHow, Shutterfly, Parade, Brit & Co and more. Thanks for stopping by and hope you’ll stay for a while, get to know me better and come back another time. Stick around for real fun projects! Read more…