

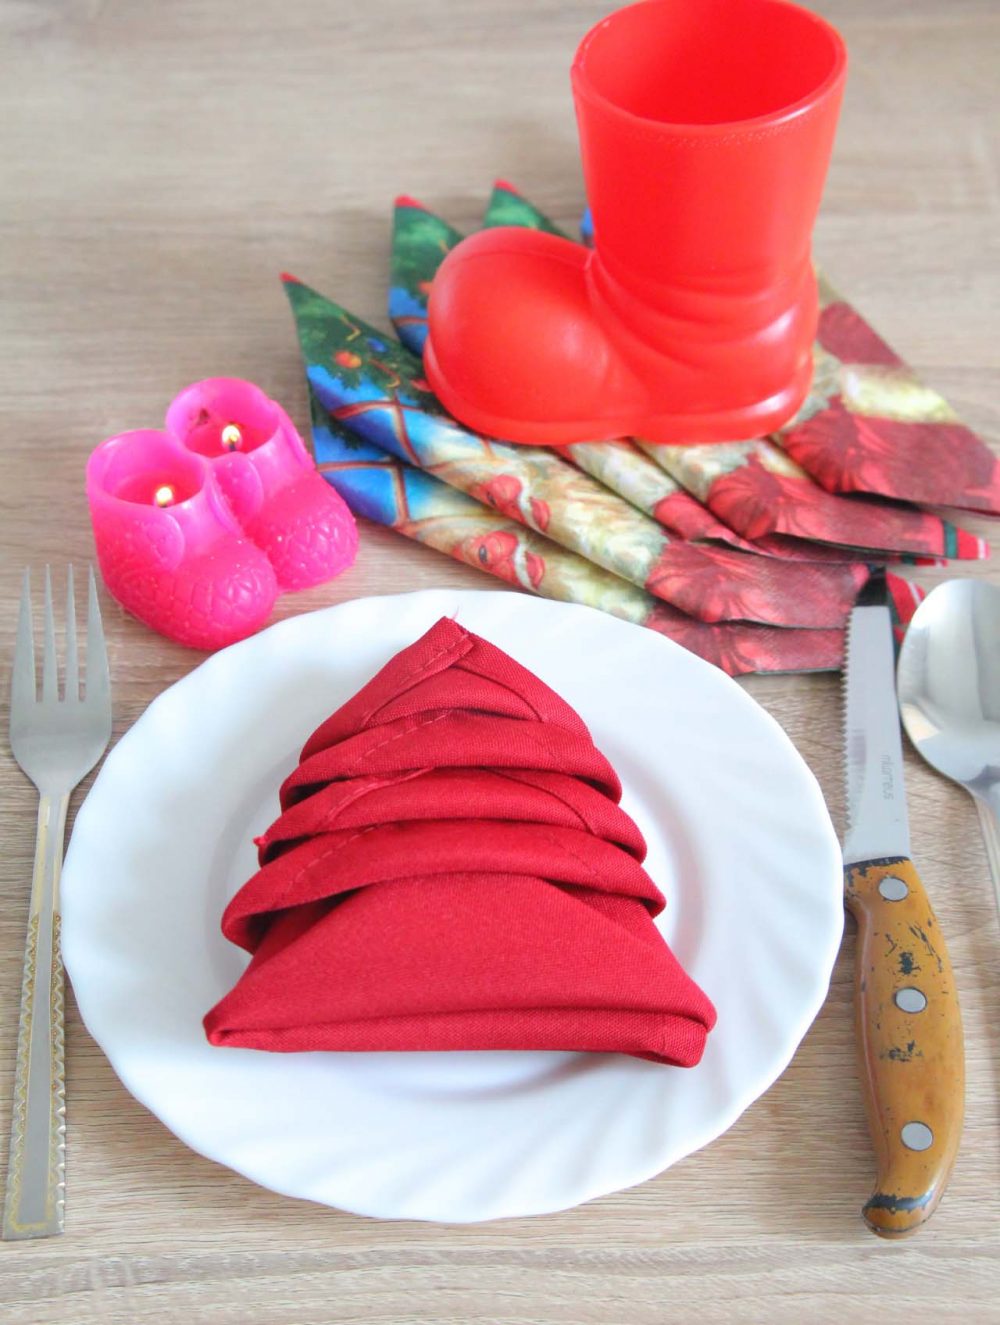
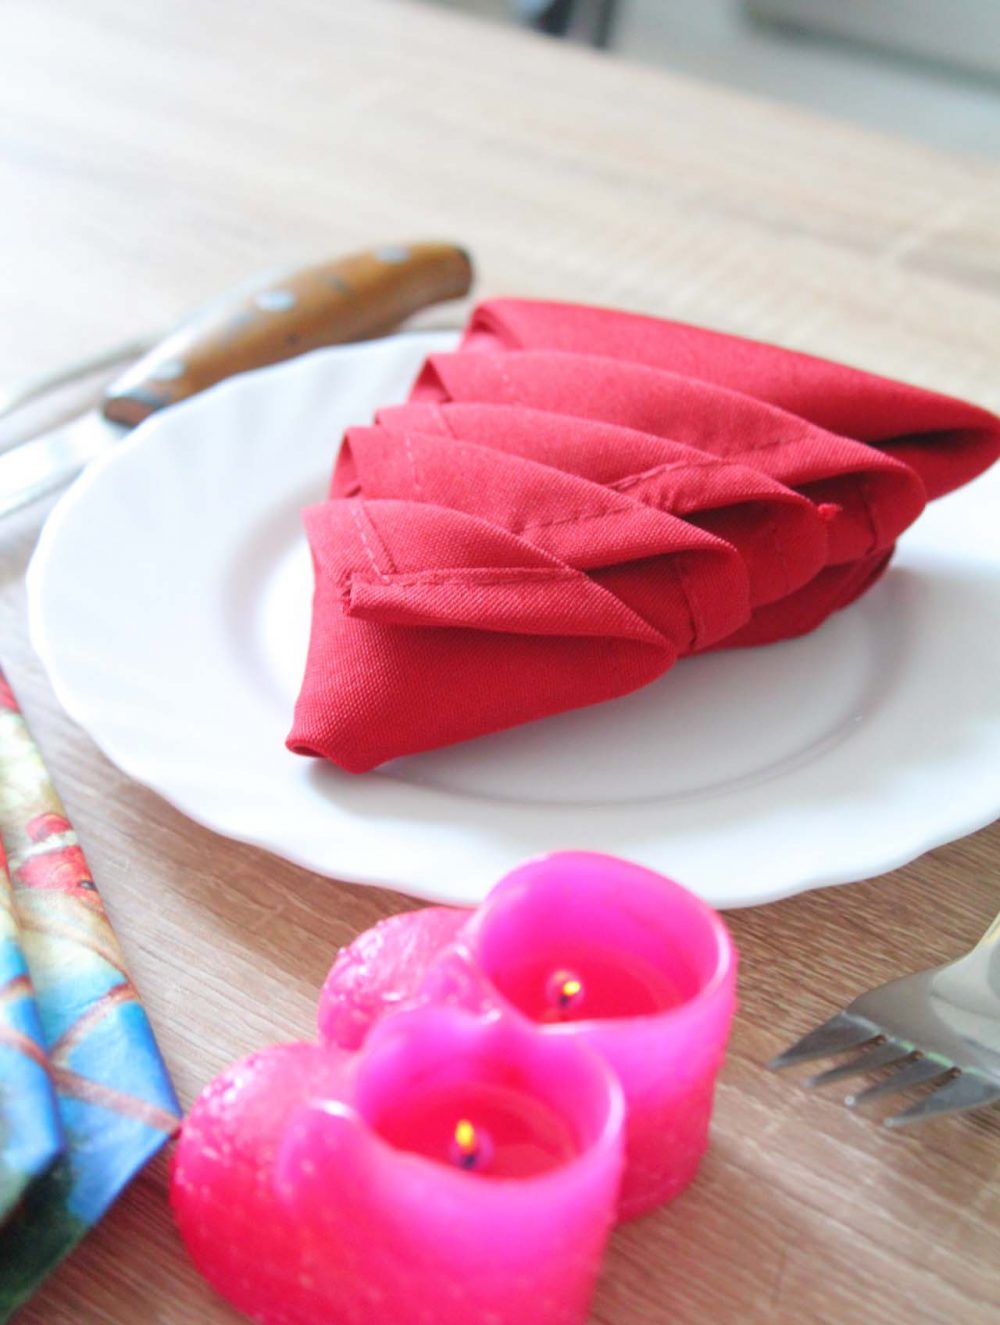
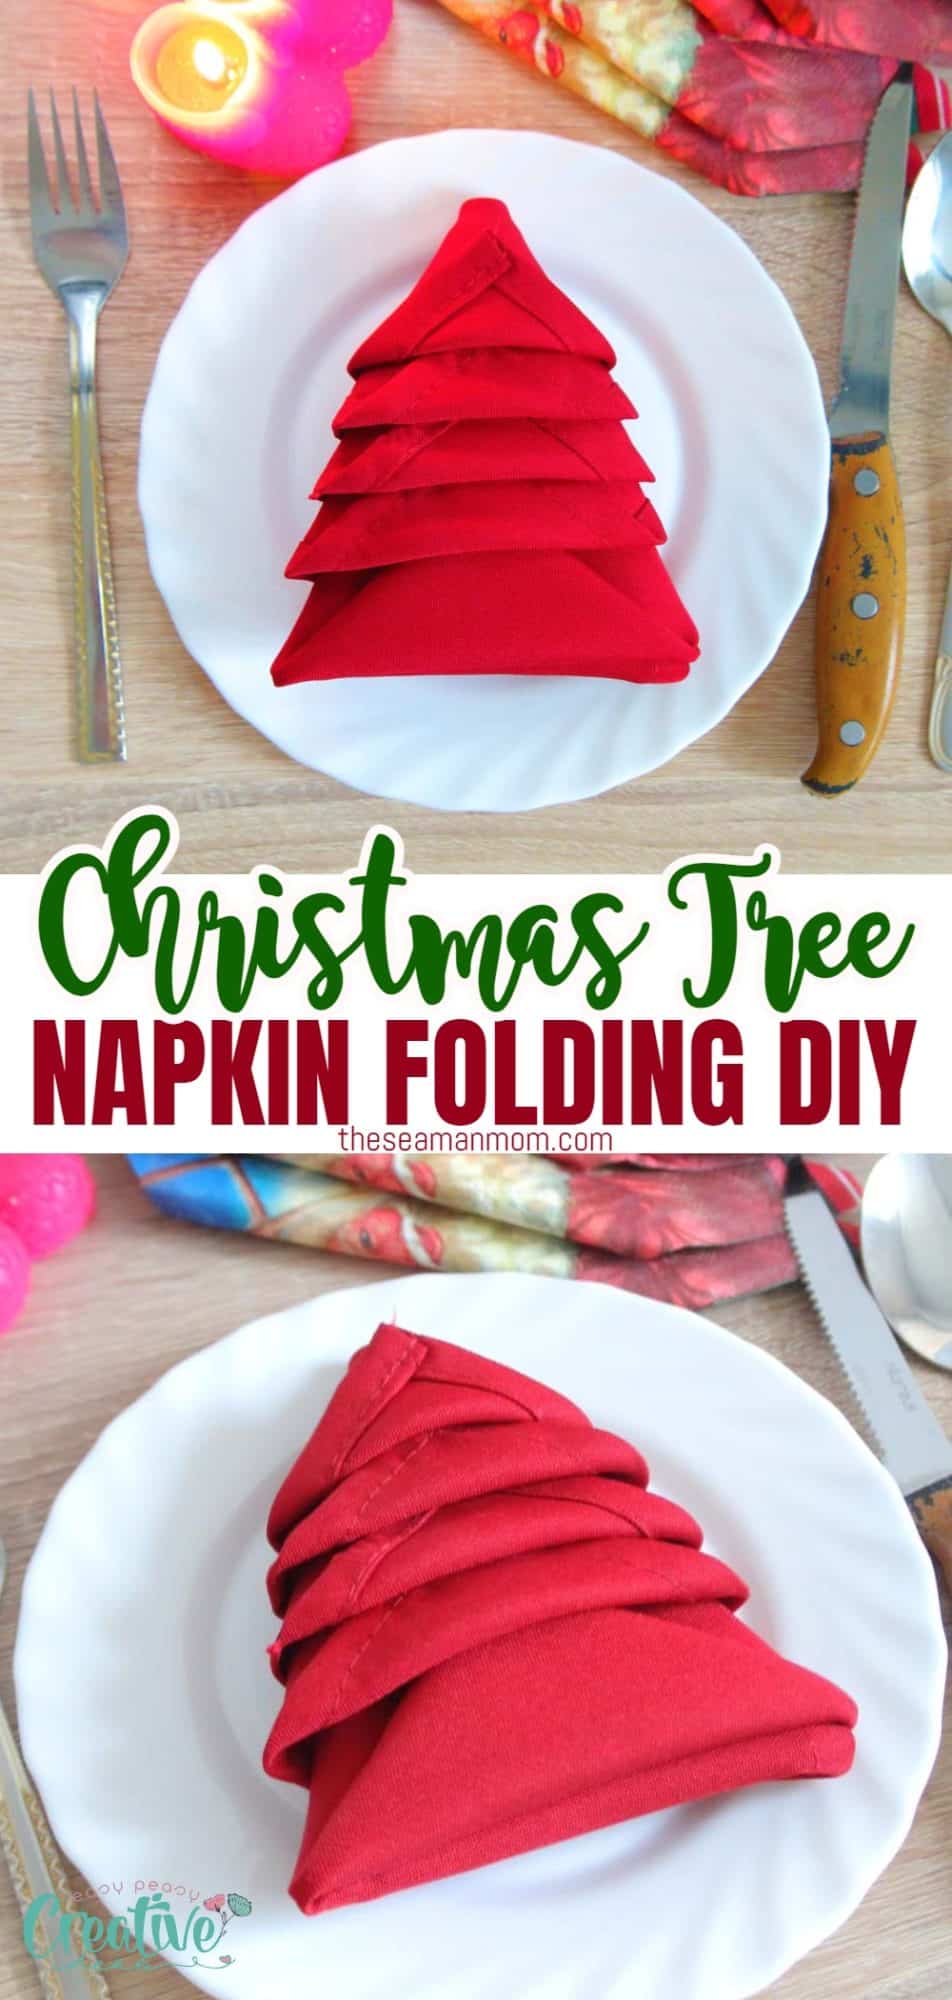
How to fold a napkin into a Christmas tree
Transform a plain napkin into a delightful Christmas craft this holiday season! Discover a quick and easy tutorial on Christmas Napkin Folding, and bring a touch of personality to your festive table in just 2 minutes. Create an adorable napkin Christmas tree and elevate your Christmas table setting with style and charm!
Christmas napkin folding
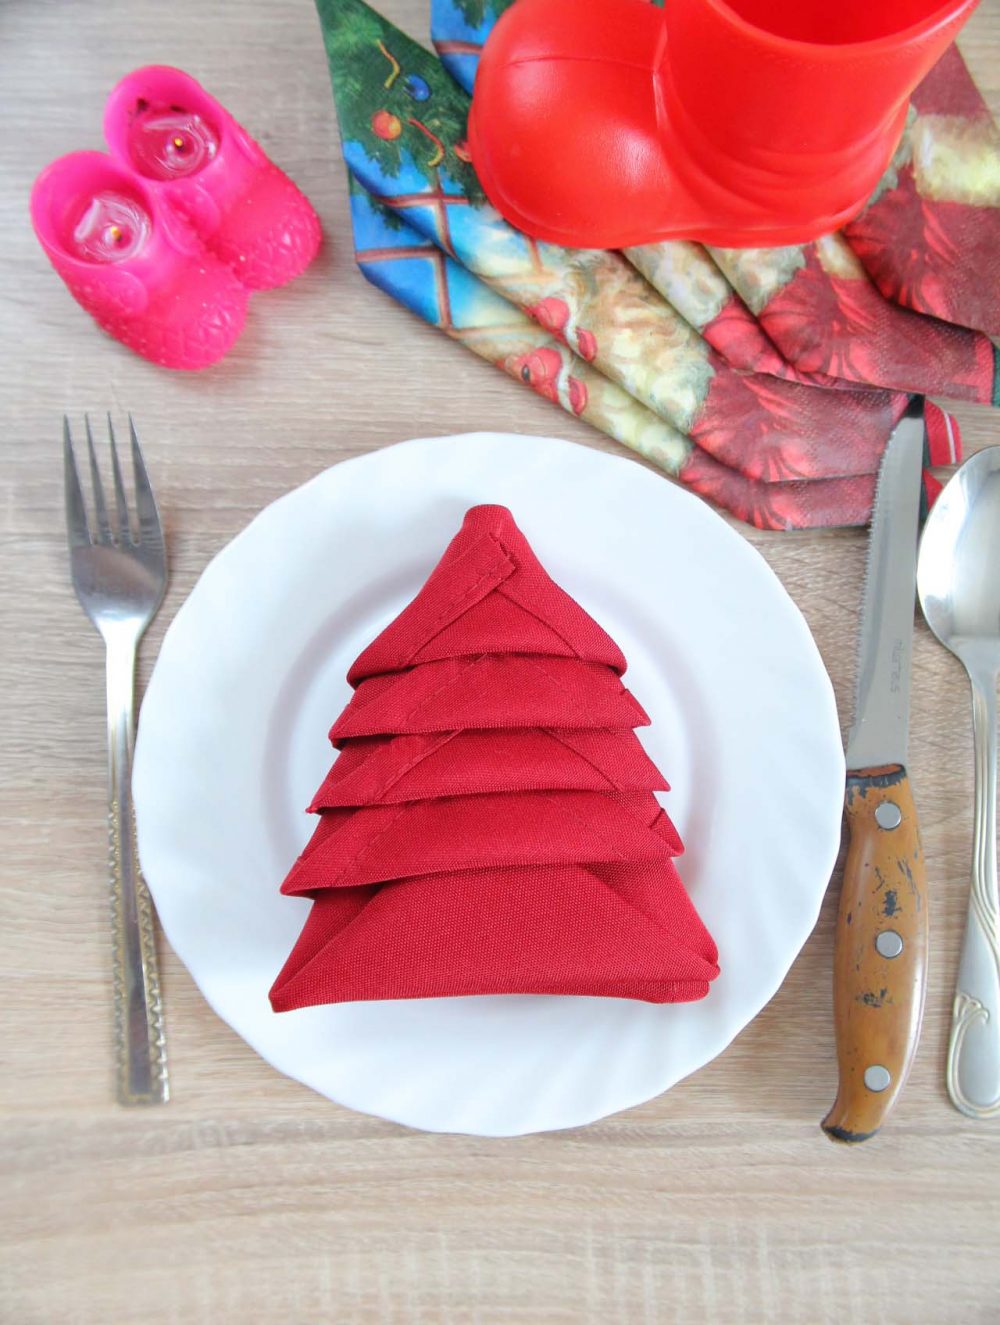
Discover how to add a festive touch to your holiday table with this delightful tutorial on Christmas napkin folding. Because who wouldn’t want to learn how to transform their napkins into charming Christmas trees? It’s incredibly adorable and is sure to impress all your guests!
Need more Christmas tree ideas?
- Paper Christmas tree decorations
- Fabric covered plywood Christmas tree
- Recycled paper tube Christmas tree
- Christmas fabric bunting
- Christmas printables
- Fabric Christmas tree ornament
- Mini mitten ornaments
- Wire snowman ornaments
- Cute sock snowmen
- Scarf Christmas wreath
- Tinsel garland wreath
- DIY cutlery holders
- Christmas fabric bunting

Learn the art of effortlessly folding napkins for Christmas! It’s a fun and easy way to add charm and personality to your holiday table settings. This timeless tradition never fails to captivate, as we all crave the whimsical allure of the holiday season.
This Christmas napkin folding technique is not only perfect for sprucing up your Christmas table settings but it’s also a super great way to spend quality time with the kiddos, if you are a parent. This cute folding Christmas tree is easy enough for kids to make and it will also make them feel important since they’re contributing to the holidays’ chores too. Nothing beats a handmade craft and everyone will be proud to put their creative hands to a good use, so kids will love being a part of this!

You could also use this Christmas tree napkin folding procedure to make tiny paper trees and decorate the house coming Christmas time. Use a fancy paper and a cute gift box and you could even give those little Christmas trees as gifts to family and friends. Are you in? Wanna learn how to fold a napkin into a Christmas tree? Read along, it only takes a couple of minutes!
How can I incorporate Christmas napkin folding into my holiday table décor?
There are endless ways you can incorporate Christmas napkin folding into your holiday table décor! You can use different colored napkins to match your theme or add embellishments like ribbons, ornaments, or even a sprig of holly to make each tree unique. You can also mix and match with other folded designs such as a snowflake or Santa hat for a fun and festive look. Get creative and have fun with your napkin folding, the possibilities are endless!
How can I make my folded napkins stand out even more on the table?
To make your folded napkins stand out even more on the table, you can add some extra touches to enhance their appearance. You can use glitter glue to add some sparkle, or use a stencil and fabric paint to create a unique design on each napkin. You can also tie a ribbon around each tree for an added touch of elegance.
How long does it take to learn and master Christmas napkin folding?
Learning how to fold a napkin into a Christmas tree only takes a couple of minutes! With some practice, you can easily master this technique and impress your guests with beautifully folded napkins in no time. And the best part is, once you learn the basics, you can experiment with different designs and techniques to create even more intricate and stunning holiday table settings.
Can kids participate in making these folded napkin crafts?
Absolutely! This is a great activity for kids to get involved in during the holiday season. Not only will they have fun creating these festive napkin designs, but it also teaches them important life skills like creativity and patience. Plus, they can proudly show off their creations to guests at the holiday table!
How to fold a napkin into a Christmas Tree

Materials:
- crisp, square napkin (preferably cotton or linen since these hold shape better and longer)
- pressing iron
Directions:
- Press your napkins well. This is optional but it helps making the fabric crispier which in return will help with holding the tree shape later.
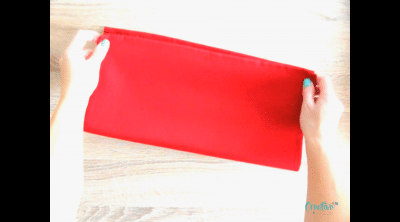
- Fold up the napkin in half, making sure the ends are smooth and are lining up.
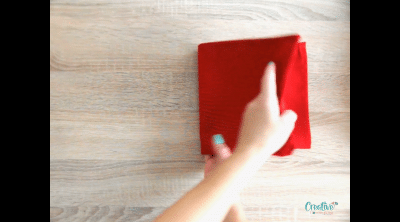
- Fold in half again, to the right, making sure corners are smooth and lining up.
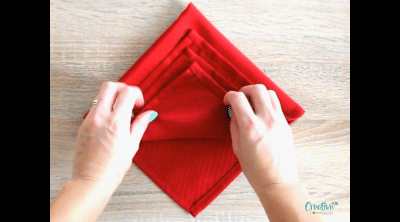
- Spin the napkin so the folded corner points away from you.
- Fold up each corner, then flip the napkin over.
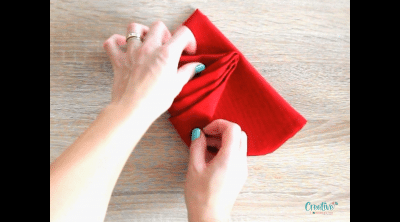
- Fold outer corners to opposite sides, making sure the tops are parallel to you.
- Flip back again and fold up the corners again, tucking each under the one above them.
Pin to save for later
Print the craft card

Christmas napkin folding
Materials
- piece crisp square napkin preferably cotton or linen since these hold shape better and for longer
Tools
- pressing iron
Instructions
- Press your napkins well. This is optional but it helps making the fabric crispier which in return will help with holding the tree shape later. Fold up the napkin in half, making sure the ends are smooth and are lining up.

- Fold in half again, to the right, making sure corners are smooth and lining up.
- Spin the napkin so the folded corner points away from you.
- Fold up each corner, then flip the napkin over.
- Fold outer corners to opposite sides, making sure the tops are parallel to you.
- Flip back again and fold up the corners again, tucking each under the one above them.


Video
Article may contain Amazon & affiliate links. As an Amazon Associate I earn from qualifying purchases at no additional cost to you.

What size napkin you are using to make the Christmas tree fol?
Super fun crafting ideas. Directions well explained. Thank you.
Thanks so much, Helen! I’m glad you enjoyed it! Happy holidays! 🥰
You lost me at the first step. Do you fold so that it forms a triangle or do you fold to get a rectangle?
You really need pictures of each step or more detailed directions.
I tried both ways and could not follow your directions!
Sorry–it looks so nice!
Hi, Jane. There’s a video included. I’m sorry but I cannot explain it better than through a video recording.
There’s a video?? Where?? I missed it.
The video is playing in the article & stays with you as you scroll down through the article until you click it close.