

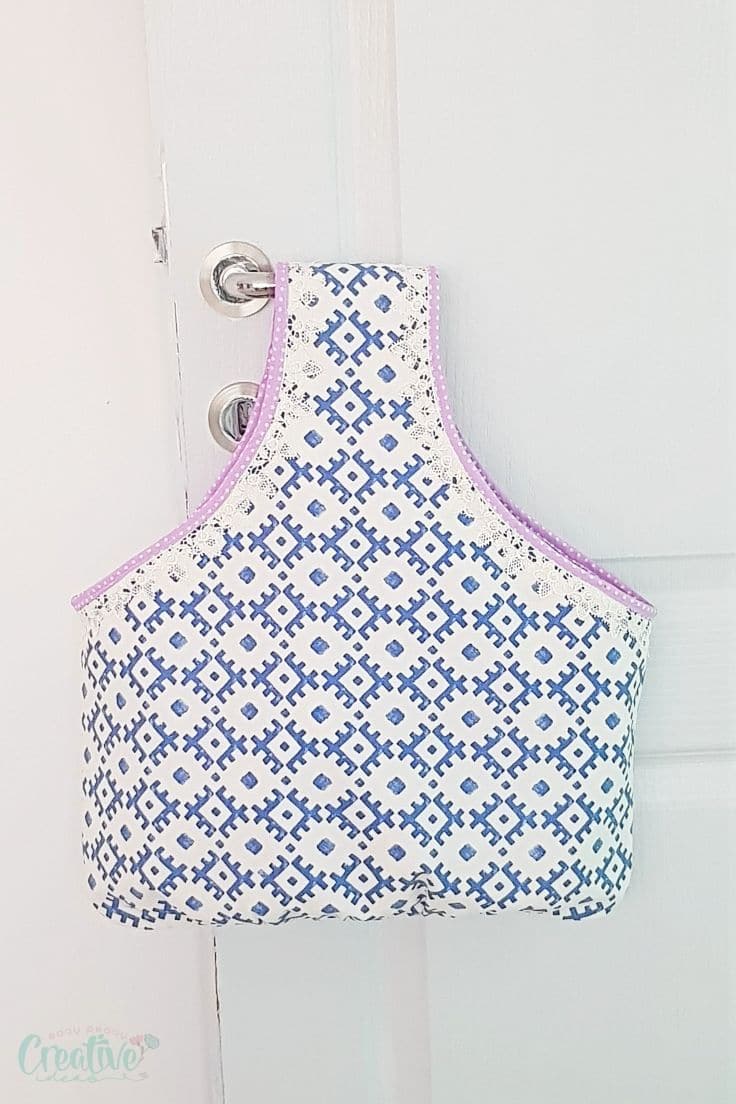
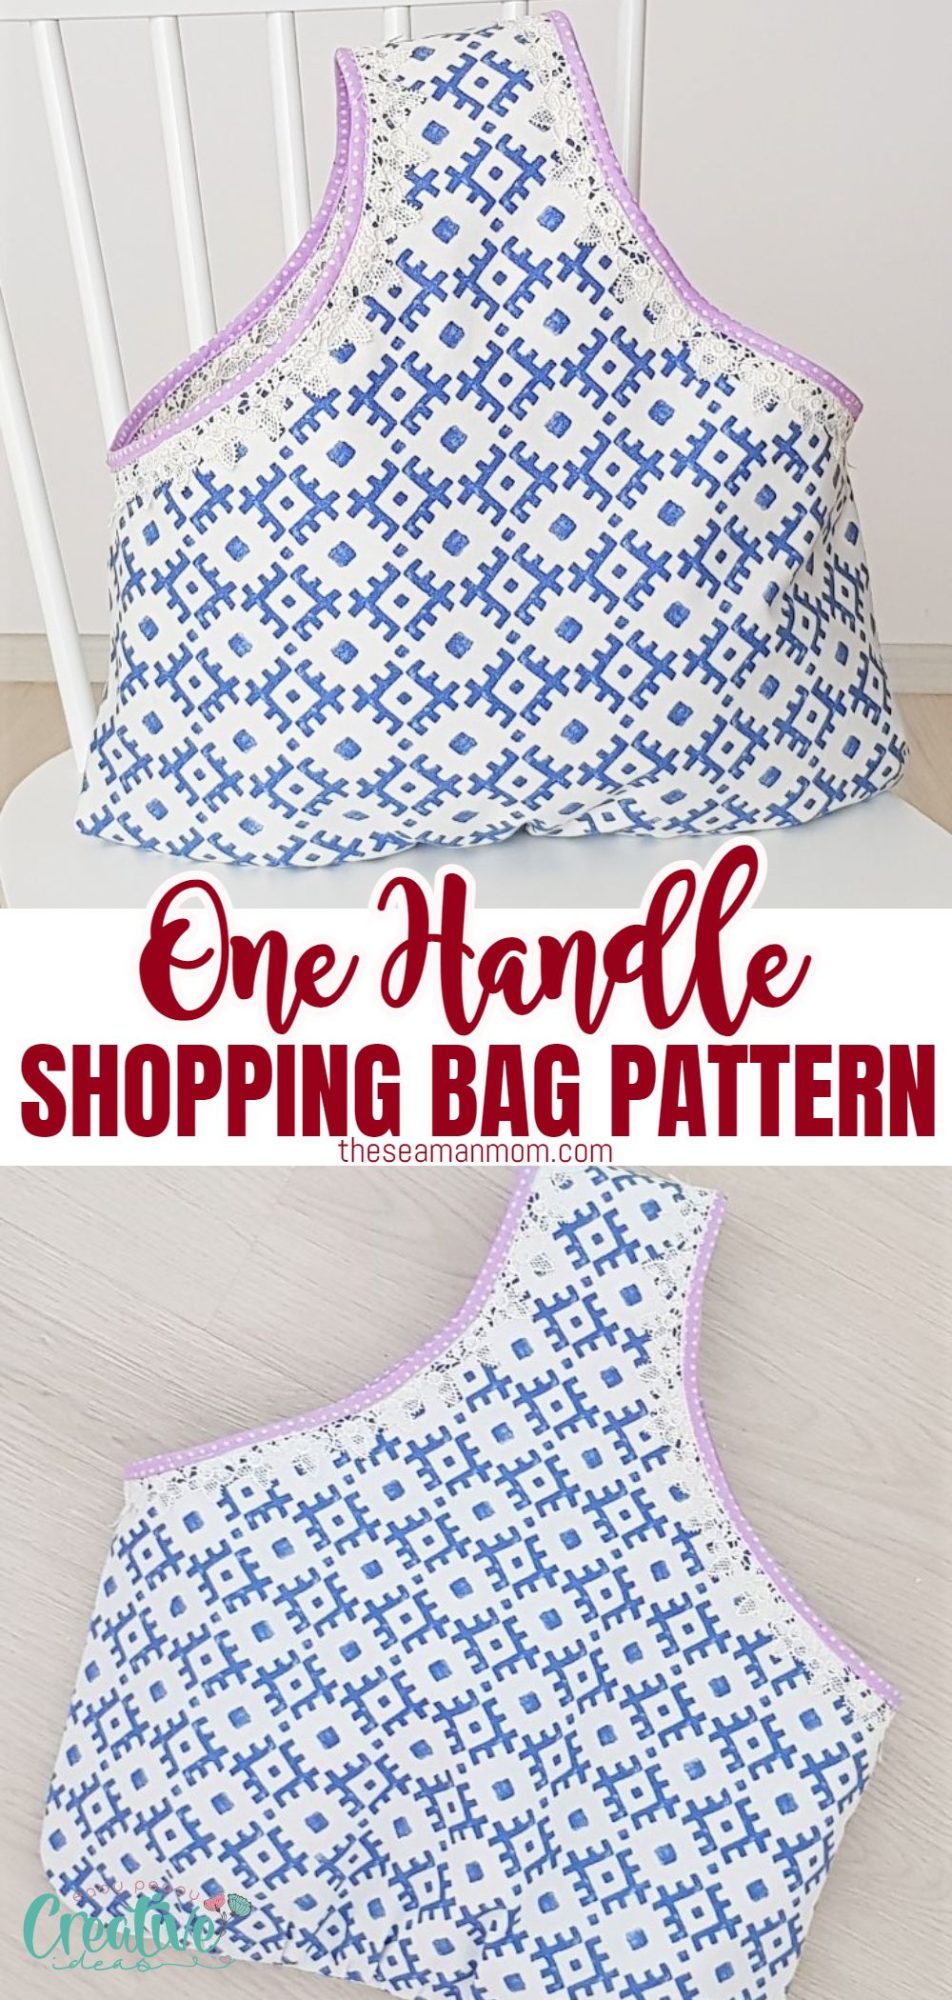
One handle shopping bag pattern
Visit the market or the mall in style when you make your own personalized fabric tote bag! This shopping bag pattern is pretty, functional and easy to use and comes together in no time! Great project for beginner sewists or someone who needs a quick fabric shopping bag!
Shopping bag pattern
Tote bags have become a necessary accessories due to their versatility and ease of use. They’re also a great way to make a statement while being mindful of the environment. This pretty shopping bag pattern is crazy easy to construct and sew and easy to personalize to represent your style!
Sewing a shopping bag is a great way to reduce your plastic consumption and help the environment. This tutorial will show you how to make a durable bag with one handle that is sturdy and easy to carry. You can use any fabric you like, so it’s perfect for using up larger scraps from other projects.
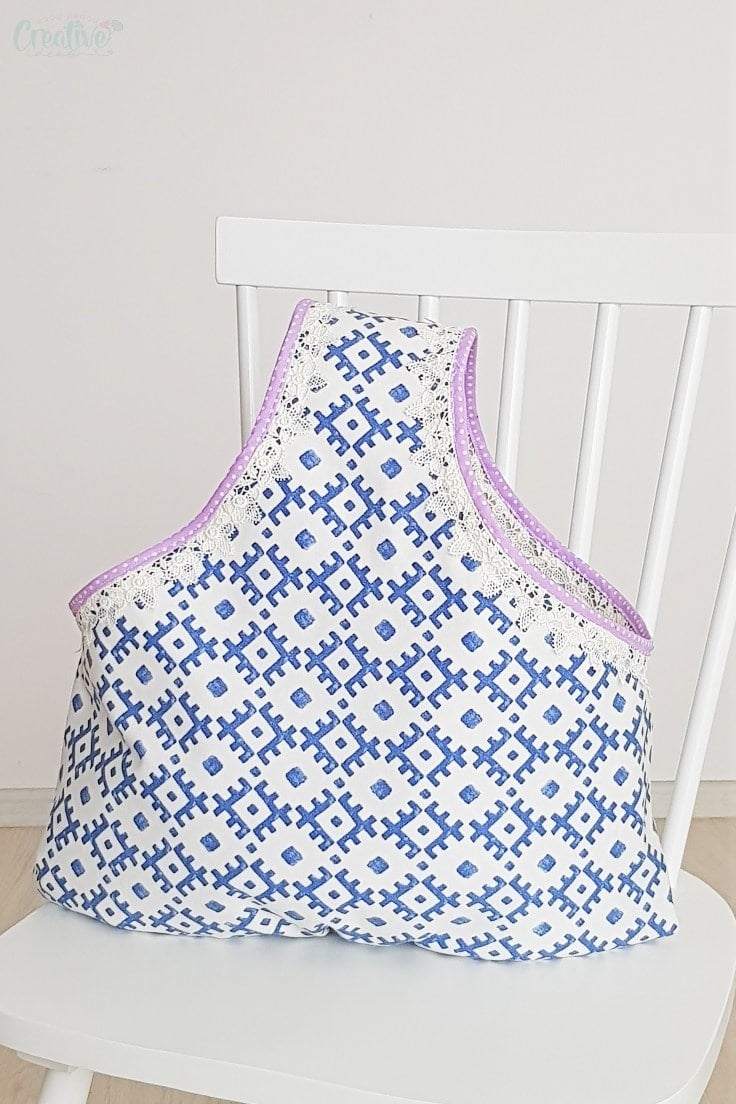
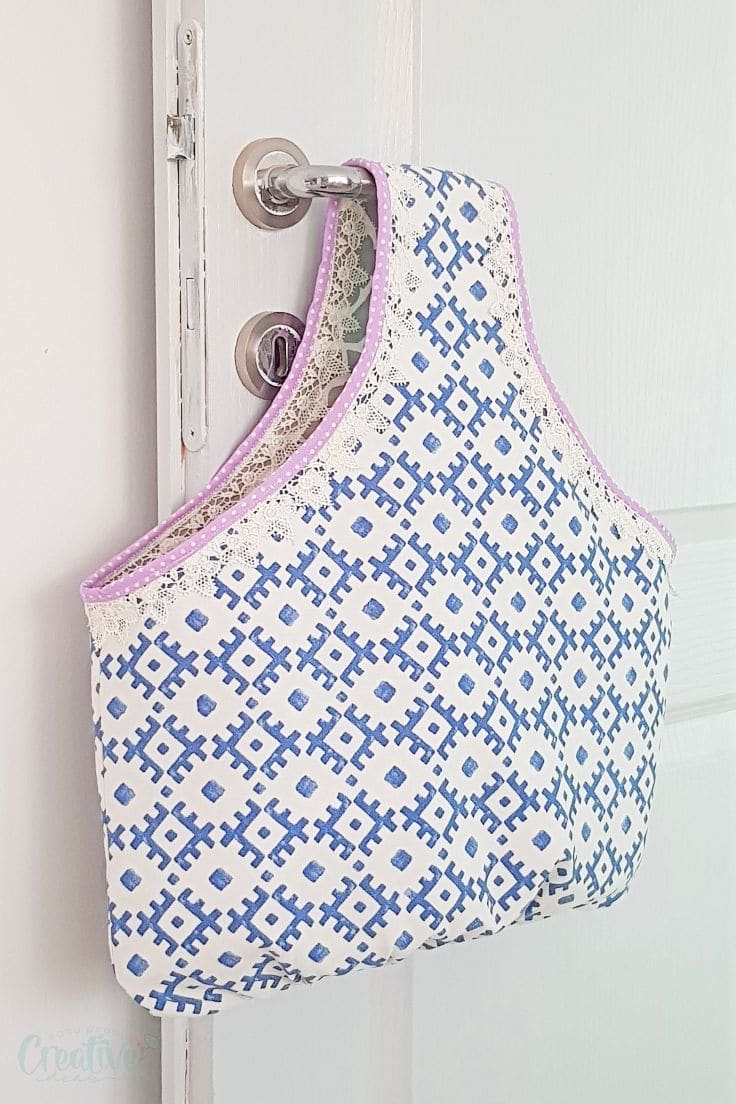
If you’re anything like me, you have a bag in your closet to serve every purpose. So naturally you need to make a shopping bag too and this casual, practical and pretty good-looking! The simple but groovy design of this one handle tote bag is also pretty impressive, making your shopping bag pattern quite unique! This bag is roomy enough and such an easy carryall, particularly useful on those busy days spent shopping or running errands!

Other bags you will love:
- Rounded top canvas tote bag
- Evening purse form a place mat
- Rope tote bag
- Reusable grocery bag
- Color block tote bag
- 6 Pocket tote bag
- Rope handled reversible tote bag
- Bamboo handle handbag pattern
How do you make a sturdy tote bag?
I designed my bag to mainly carry light stuff like bread, greens and flowers so I didn’t use heavy interfacing to make my shopping bag pattern. I did have to interface the bag on one side though to make it sturdy enough for groceries.
But if you estimate you’ll need to use your fabric tote bag for heavier items when shopping, add interfacing to both the outer fabric and the lining. This will make your bag sturdier.
How to personalize your shopping bag
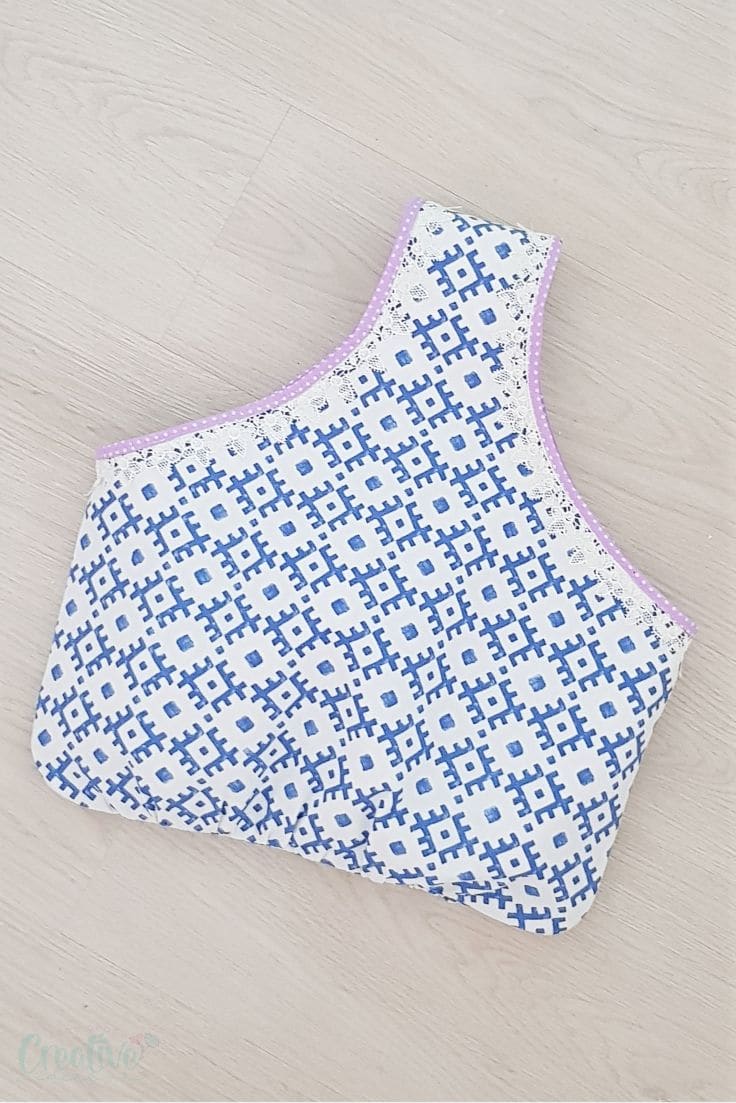
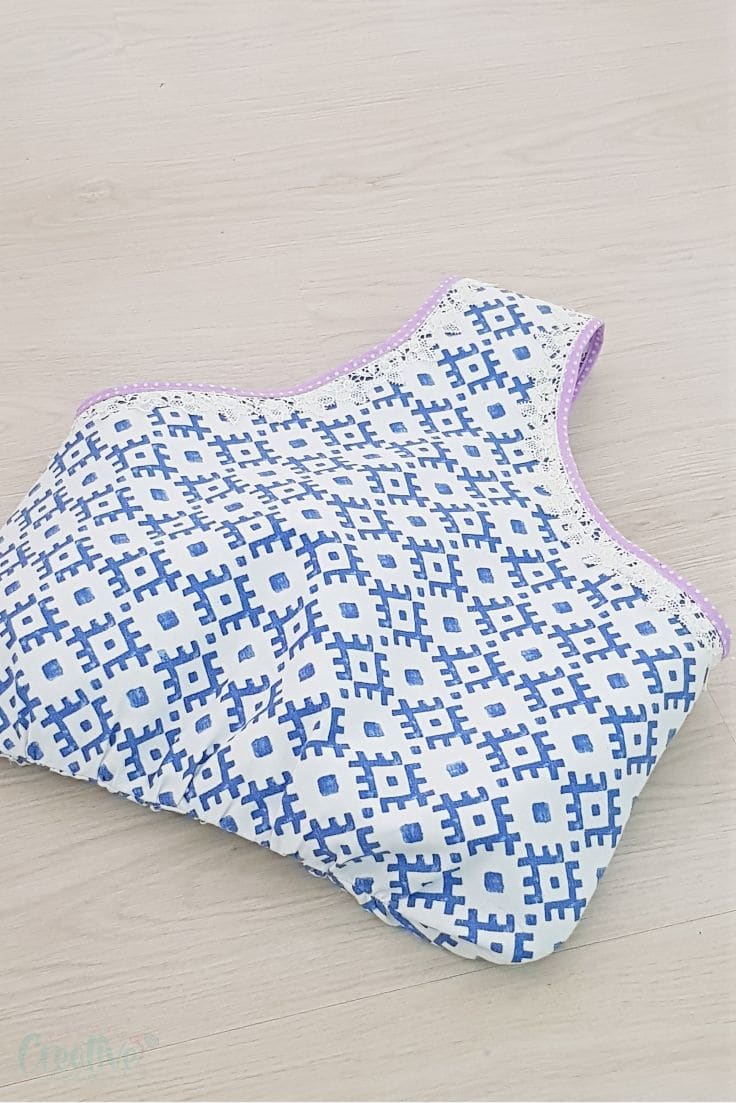
This tote bag is pretty easy to personalize in other ways too, like adding double bias tape and lace trim as I did, so that your pretty bias and the lace show on both the front and the back of the bag. Or you can print a design to the fabric (use this tutorial to print on fabric if you need to learn how to or if you don’t have iron-on vinyl).
Other options are adding pom pom trim to the handle, an applique design to the front and making the bottom of the bag square and boxed or egg-shaped. Pretty versatile bag, right? And you know the best part? You can make this funky bag from two pillow covers! That’s right! If you don’t have any spare fabric to make this shopping bag pattern, you can grab two pillowcases and use them to draw the pattern on. Oh, and the bag is reversible, can be worn either side. Isn’t that a nice bonus?

What is the best material for reusable shopping bags?
The main advantage of shopping bag pattern is that it is not just easy and quick to make, but also very functional! This one handle tote bag’s simple construction, with just one handle instead of hard to construct straps, means that there aren’t any complicated or tricky parts. The result is pretty impressive too!
I made my fabric tote bag from medium weight canvas fabric for both sides and I didn’t need interfacing. But if you want a more roomy and sturdy bag just add interfacing to your fabric.
Other fabrics that make a good choice for a grocery bag pattern are oilcloth, denim or heavy weight cotton.
You can choose to use a thicker or lighter weight fabric, depending on the purpose and strength you need in your shopping bag pattern!
A few things to keep in mind when making your reusable bags
Making the bottom of your bag shaped and not flat will make it more useful. I designed this bag with a few folds/ruffles in the bottom for this purpose. You can choose to ruffle the middle of the bottom seam or add a few small pleats instead.
Knife pleats are also a great way to add structure and shape to your fabric shopping bag pattern.
When you are working with bias tape, you need to pay extra attention when stitching the two sides of your tape together. Because the bag is reversible, bias tape will be visible on both sides and any mistake in sewing it will be noticeable too.
Overall this is a great DIY bag for beginners who want to improve their sewing skills or learn how to sew!
With just a few simple steps, you can have your own shopping bag that is both stylish and functional. Plus, it will save you money in the long run by not having to buy disposable bags every time you go to the grocery store. Follow my easy instructions now and start sewing your own shopping bag today!
This lovely one handle reusable shopping bag pattern is available to purchase HERE.
Reversible bag pattern
Materials:
- shopping bag pattern
- canvas fabric or medium weight cotton fabric
- fabric marker
- medium weight interfacing (optional)
- scissors
- lace trim
- double fold bias tape
- pins
- quilting clips
- matching thread
- sewing machine
- pressing iron
Directions:
Preparing the fabrics
- Transfer the PDF file to your computer and print the pattern out. Assemble the pieces as indicated in the pattern.
- Get the fabric for the outer bag and fold it in half, right sides together.
- Place the pattern over the fabric, on the fold, keep in place with pattern weights (you can make your own with this super simple and cute chicken weights tutorial).
- Trace around the pattern using a fabric marker then cut out.
- Repeat for the lining (inner fabric).
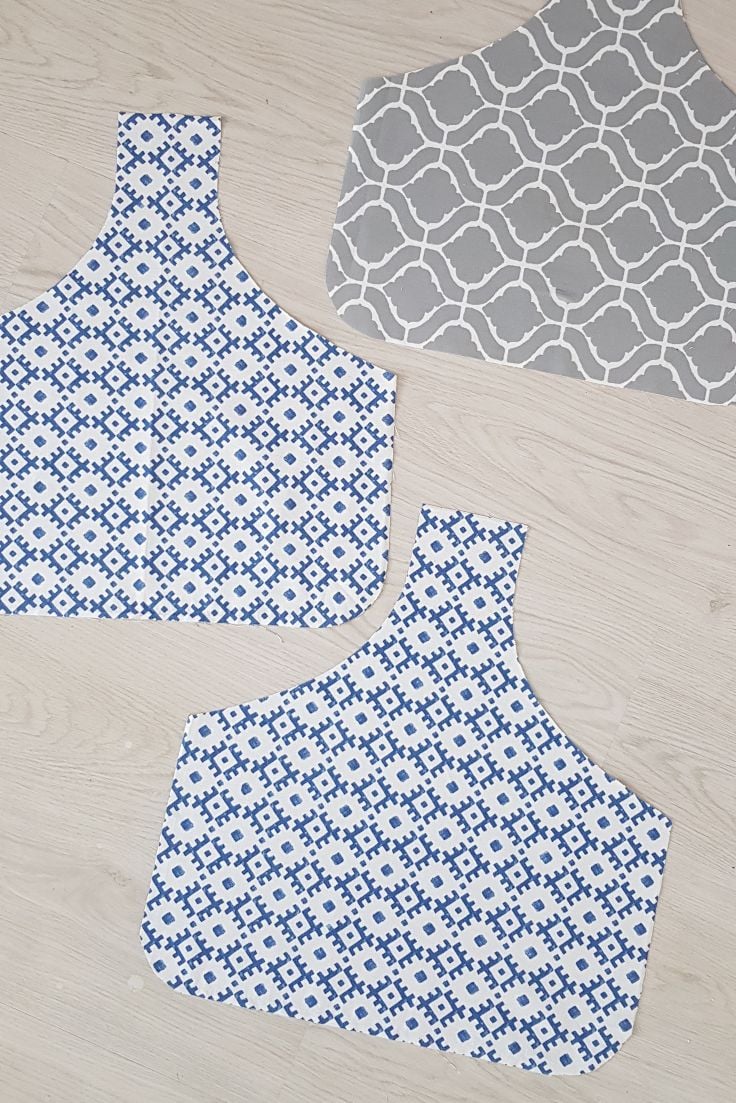
- If you like to make your bag sturdier, cut out some interfacing using the above method. You can interface only the outer fabric or both outer an dinner, if your fabric is not thick enough to make the bag sturdy. Although I used canvas fabric, I found that my bag wasn’t as thick and sturdy as I wanted and added interfacing to one set of fabrics.
Sewing the bag pieces
- Take one of the outer fabrics and gather the bottom until is 1/3 shorter than the original. You might find this gathering method very useful. Use a seam allowance just a little smaller than 1/4″. In addition to being decorative, the ruffles will give body to the bag.
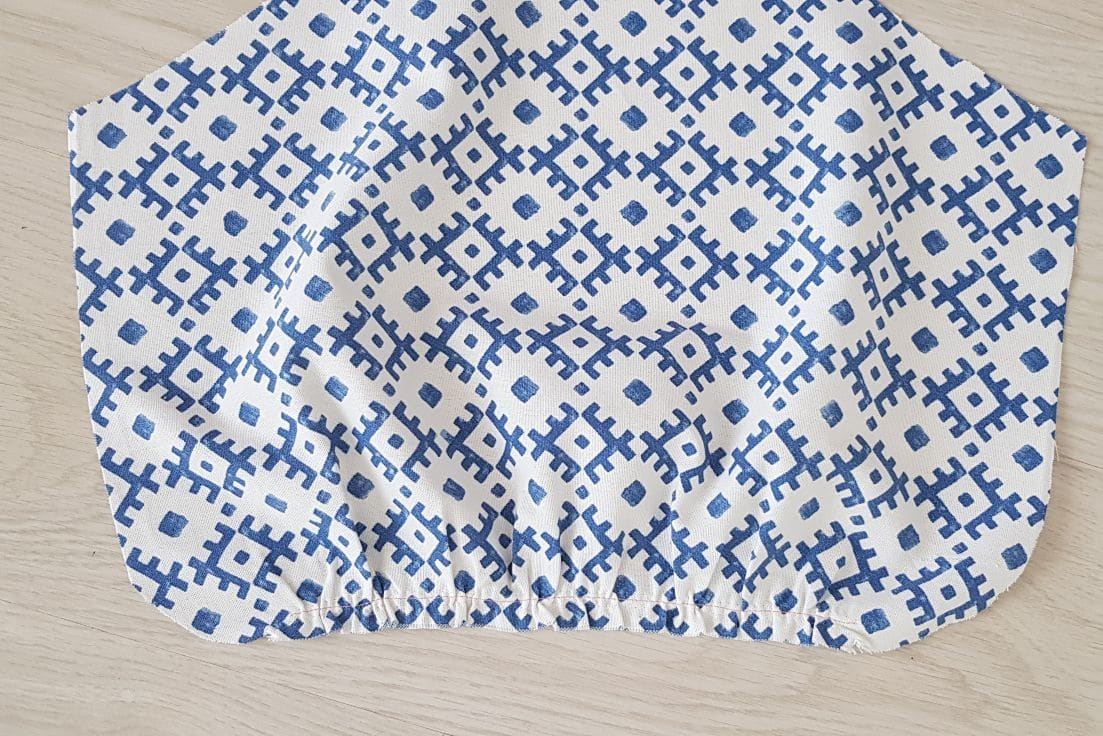
- Repeat for the second outer fabric piece.
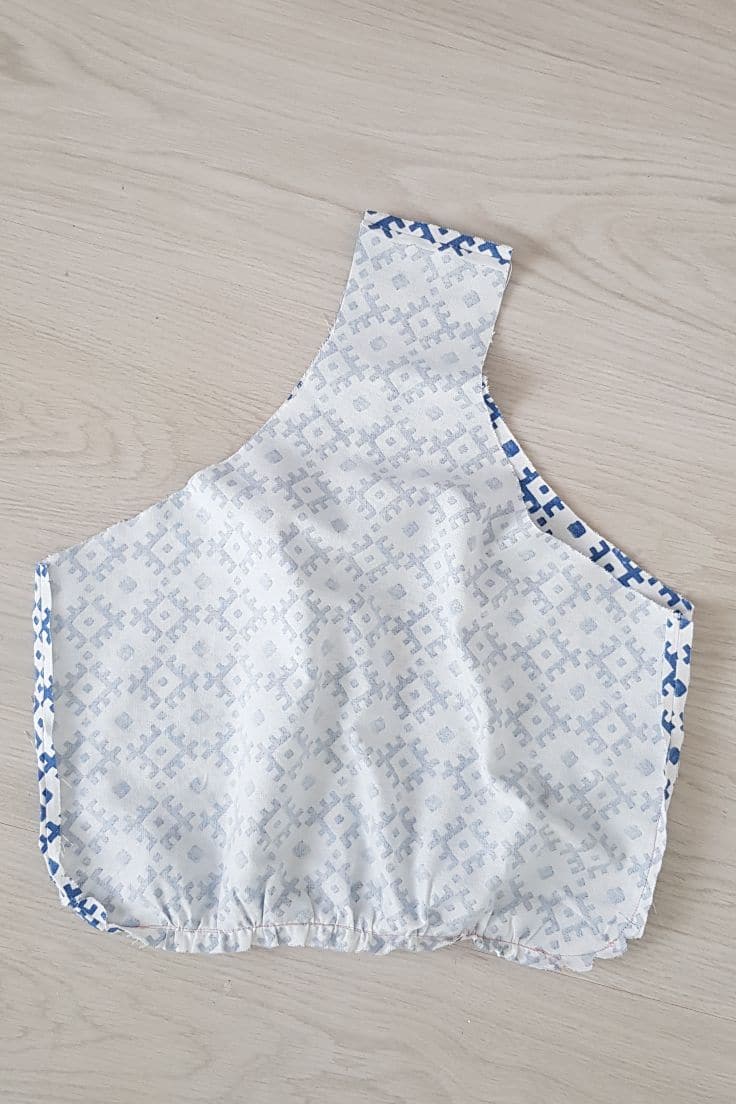
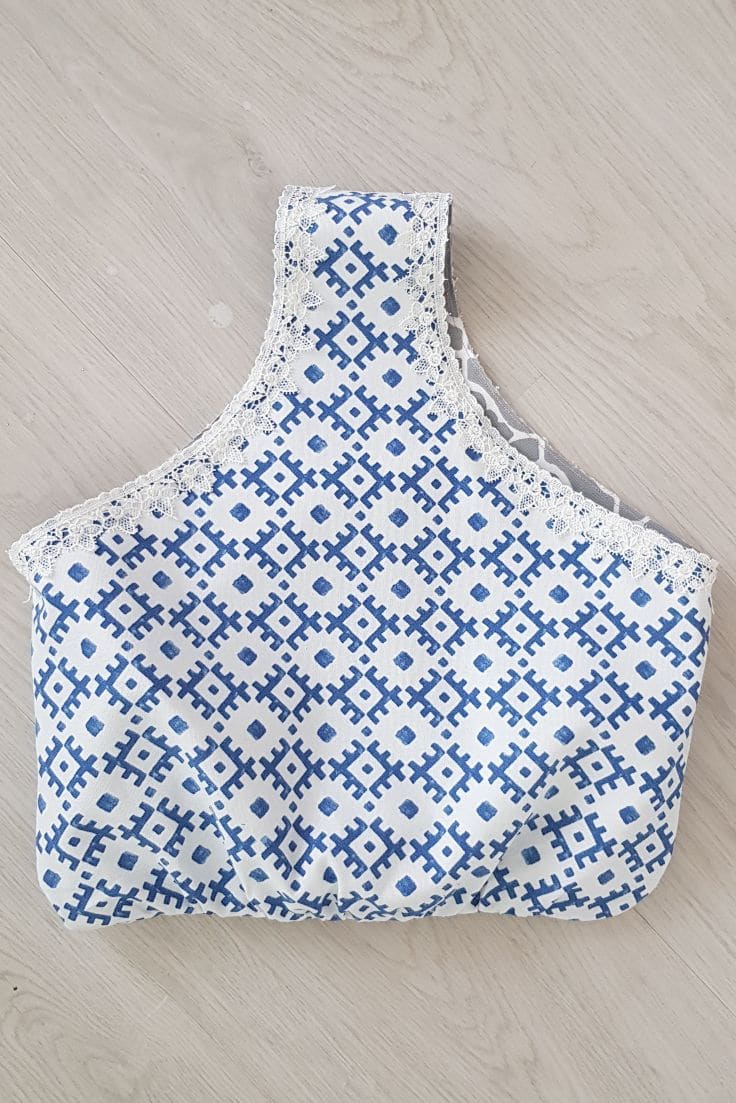
- Place outer fabrics right sides together, pin the sides, the bottom and the handle. Please ignore the drawings on the fabric, I used it to create the pattern.
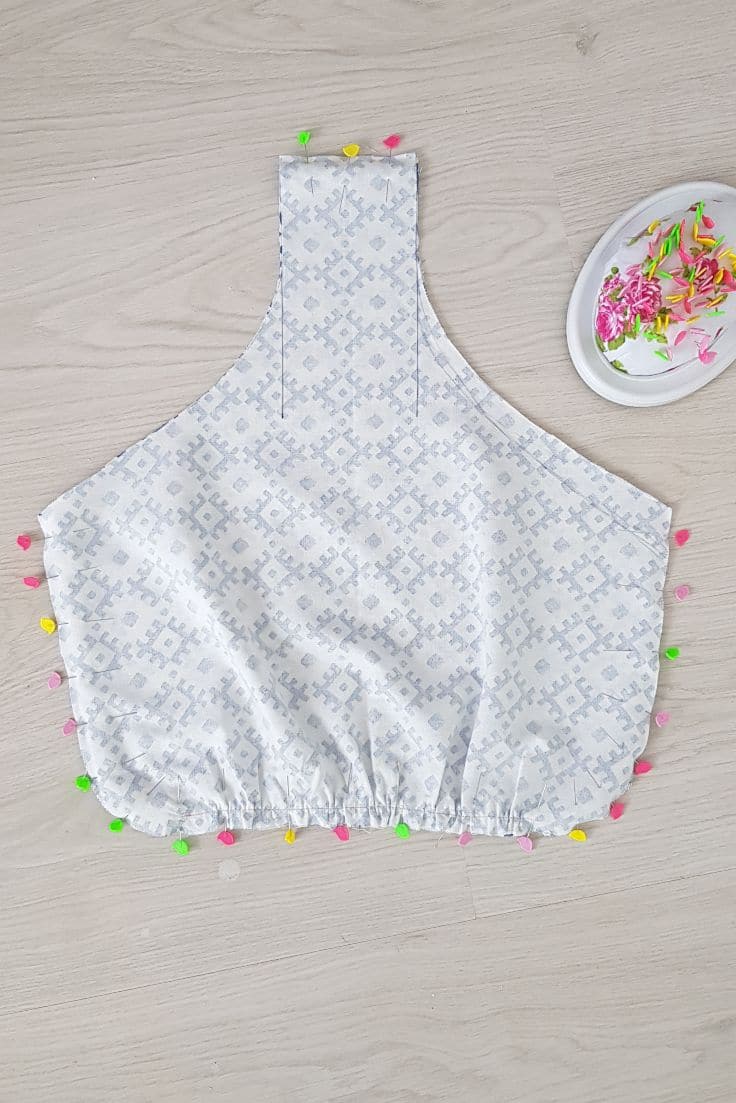
- Sew the pinned areas using 1/4″ allowance.
- Turn right side out.
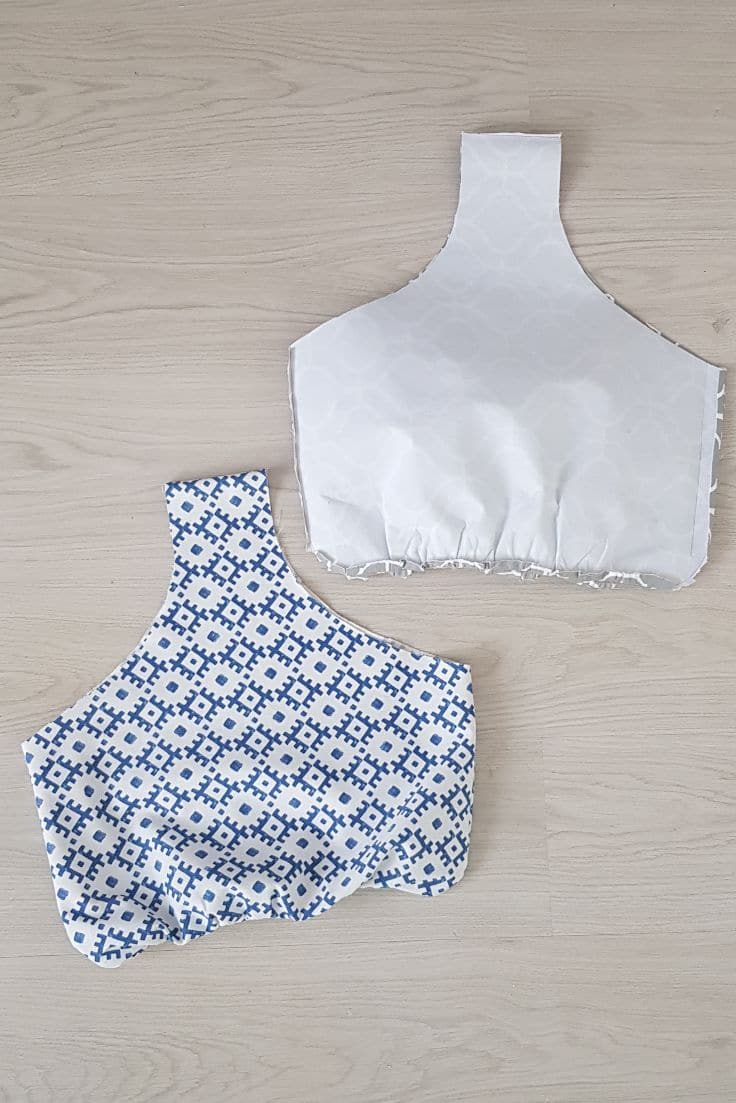
- Repeat the above steps for the inner bag.
- Clip the seam at corners as indicated here.
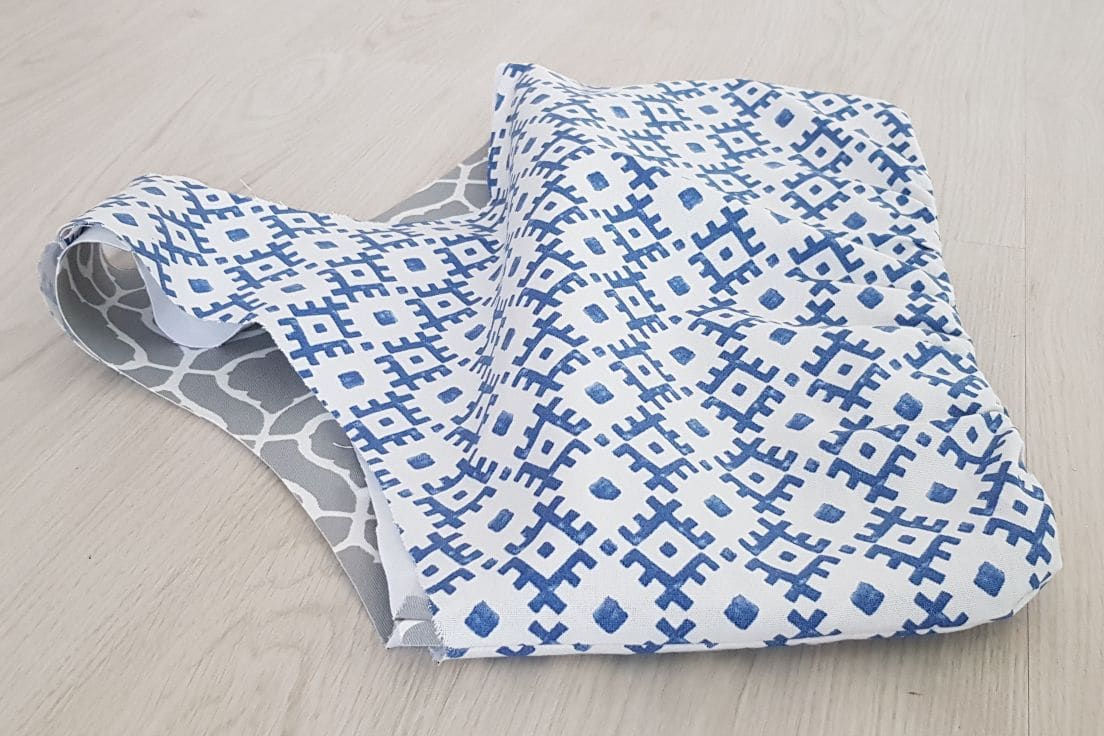
- Bring the bag to your ironing board and with your iron on steam, open the seam at the handles and sides. If possible, open the entire side of the bag and bottom seam. It’s hard to press with a regular iron so if you can’t open the whole seam, make sure the sides and the handle are pressed open perfectly. This way you can sew the lace trim and the bias tape easier.
- With the outer bag right side out and the inner bag wrong side out, insert the inner bag inside the outer bag.
- Clip together around the handle holes, matching the side seams and the handles perfectly.
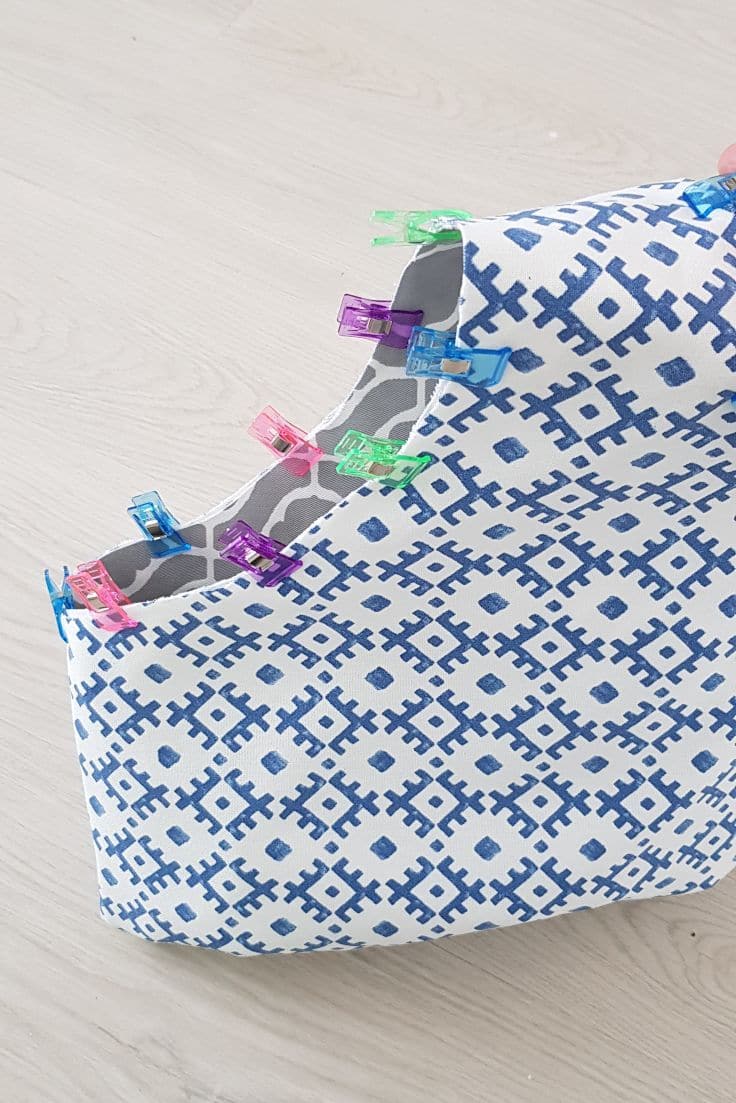
- Sew with 1/8″ allowance. This seam’s purpose is keeping the bags together and help you sew easier through the next steps.
Attaching the trim and bias
- Attach lace trim around the handle holes, using 1/8″ allowance.
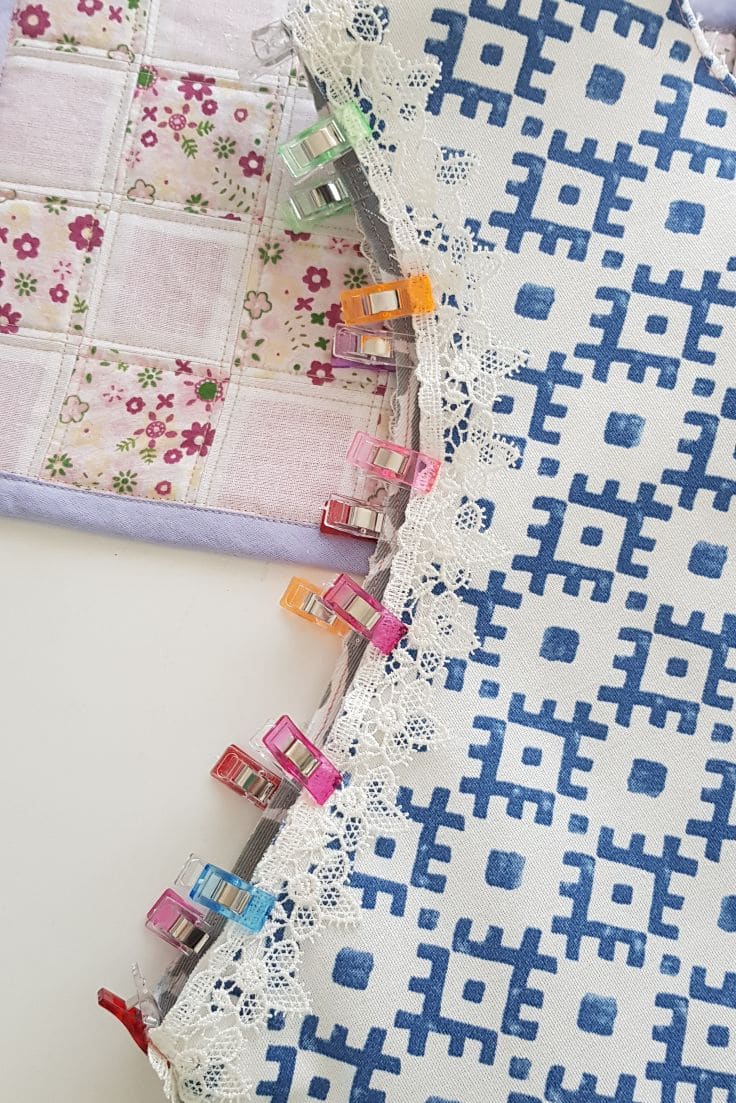
- You may find that the lace trim tends to roll. If this is the case, run an additional seam, close to the edge of the lace trim but in an inconspicuous area.
- Repeat for the inside of the bag.
- Apply double folded bias tape to the handle holes as indicated in this tutorial. I made my own bias using this tutorial.
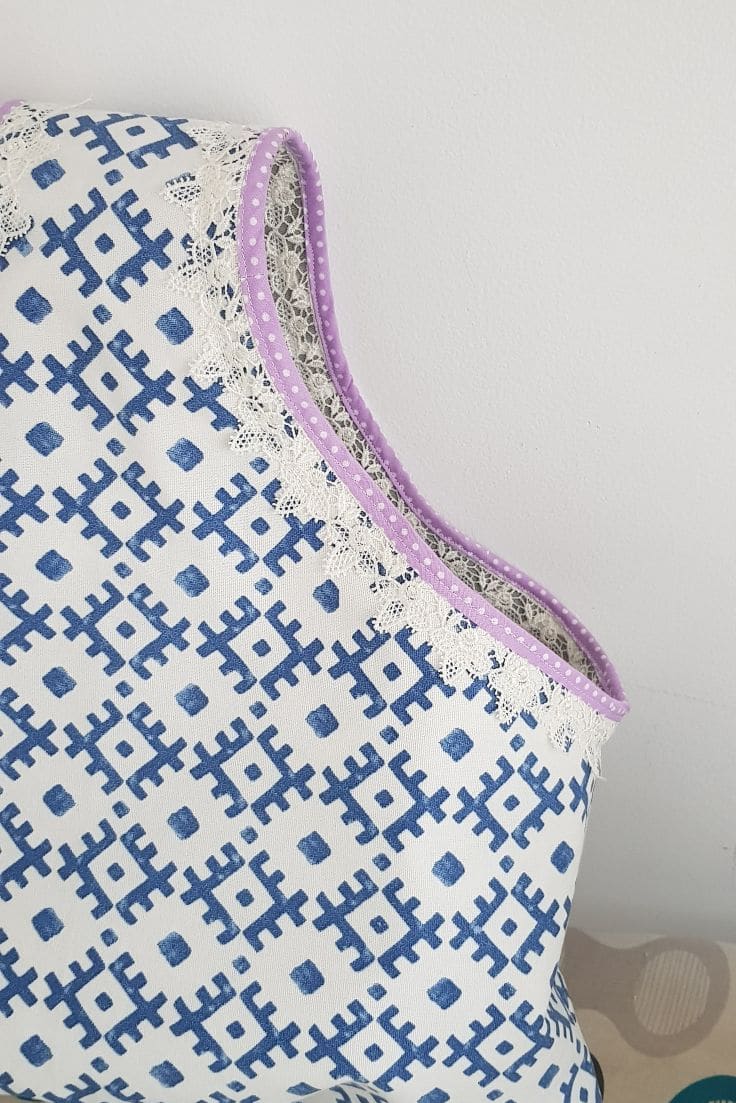
- I just realized I haven’t indicated how to sew the start and end of the bias tape in the mentioned tutorial. But I made a tutorial for my most loved method here. I know some won’t agree with my method but it’s the only way I get a perfect finish. What works for others might not work for everyone, right?
- And that’s pretty much it! Your finished bag is now ready for a walk to the grocery store! Take a step back and admire your beautiful new bag! And don’t forget your new baby with you on your next shopping trip!
If you enjoyed this pattern and tutorial, please let me know in the comments below! Thanks!
Pin to save for later
Most popular sewing projects:
- Tips for sewing a round hem
- Corded bag handles
- Flutter sleeve dress pattern
- How to laminate cotton fabric


Article may contain Amazon & affiliate links. As an Amazon Associate I earn from qualifying purchases at no additional cost to you.

This handy, easily made little bag had been made and used many times from 1950s, by members of my family from my grandmother, mother, sisters….etc to be used as a clothes peg (pin) bag that hangs easily from your arm as laundry is pegged out. I read fairly recently that clothes dryers are preferred by many nowadays. Having used a relatives dryer occasionally, I still prefer to dry my laundry in fresh air when practicable …. call me a dinosaur- I am almost 80, but I
don’t begrudge younger, busier folk the ability to have modern technology to help them. Your posting reminded me about this little bag and I’m thinking one might be useful for me on my infrequent shopping trips
Thank you, Petro, you made me smile.
Aww, that is such a sweet story! Thanks for sharing it with us, Val! xoxo
I’ve signed up for your newsletter numerous times.. I would like to make the reusable shopping bag tote but cannot get the pattern. What am I doing wrong? Thanks.
Hi Jini. Thanks for being a member! I see you’ve opened a few of the emails I sent and the latest opened is the sewing newsletter on 02/19. This email includes the link to the sewing library and the password. For future reference, all of my emails to my newsletter subscribers include the links and the password to the corresponding resource library. Once in the library, use the search bar at the top to find the item needed. Hope this helps! xoxo