

The best easy & quick way to sew your own bed skirt
Ever wondered how to make a bed skirt yourself? With this DIY bed skirt tutorial, sewing a bed skirt has never been easier and more enjoyable! And the end result is a practical linen bed skirt with sheer ruffles, loaded with tons of cuteness!
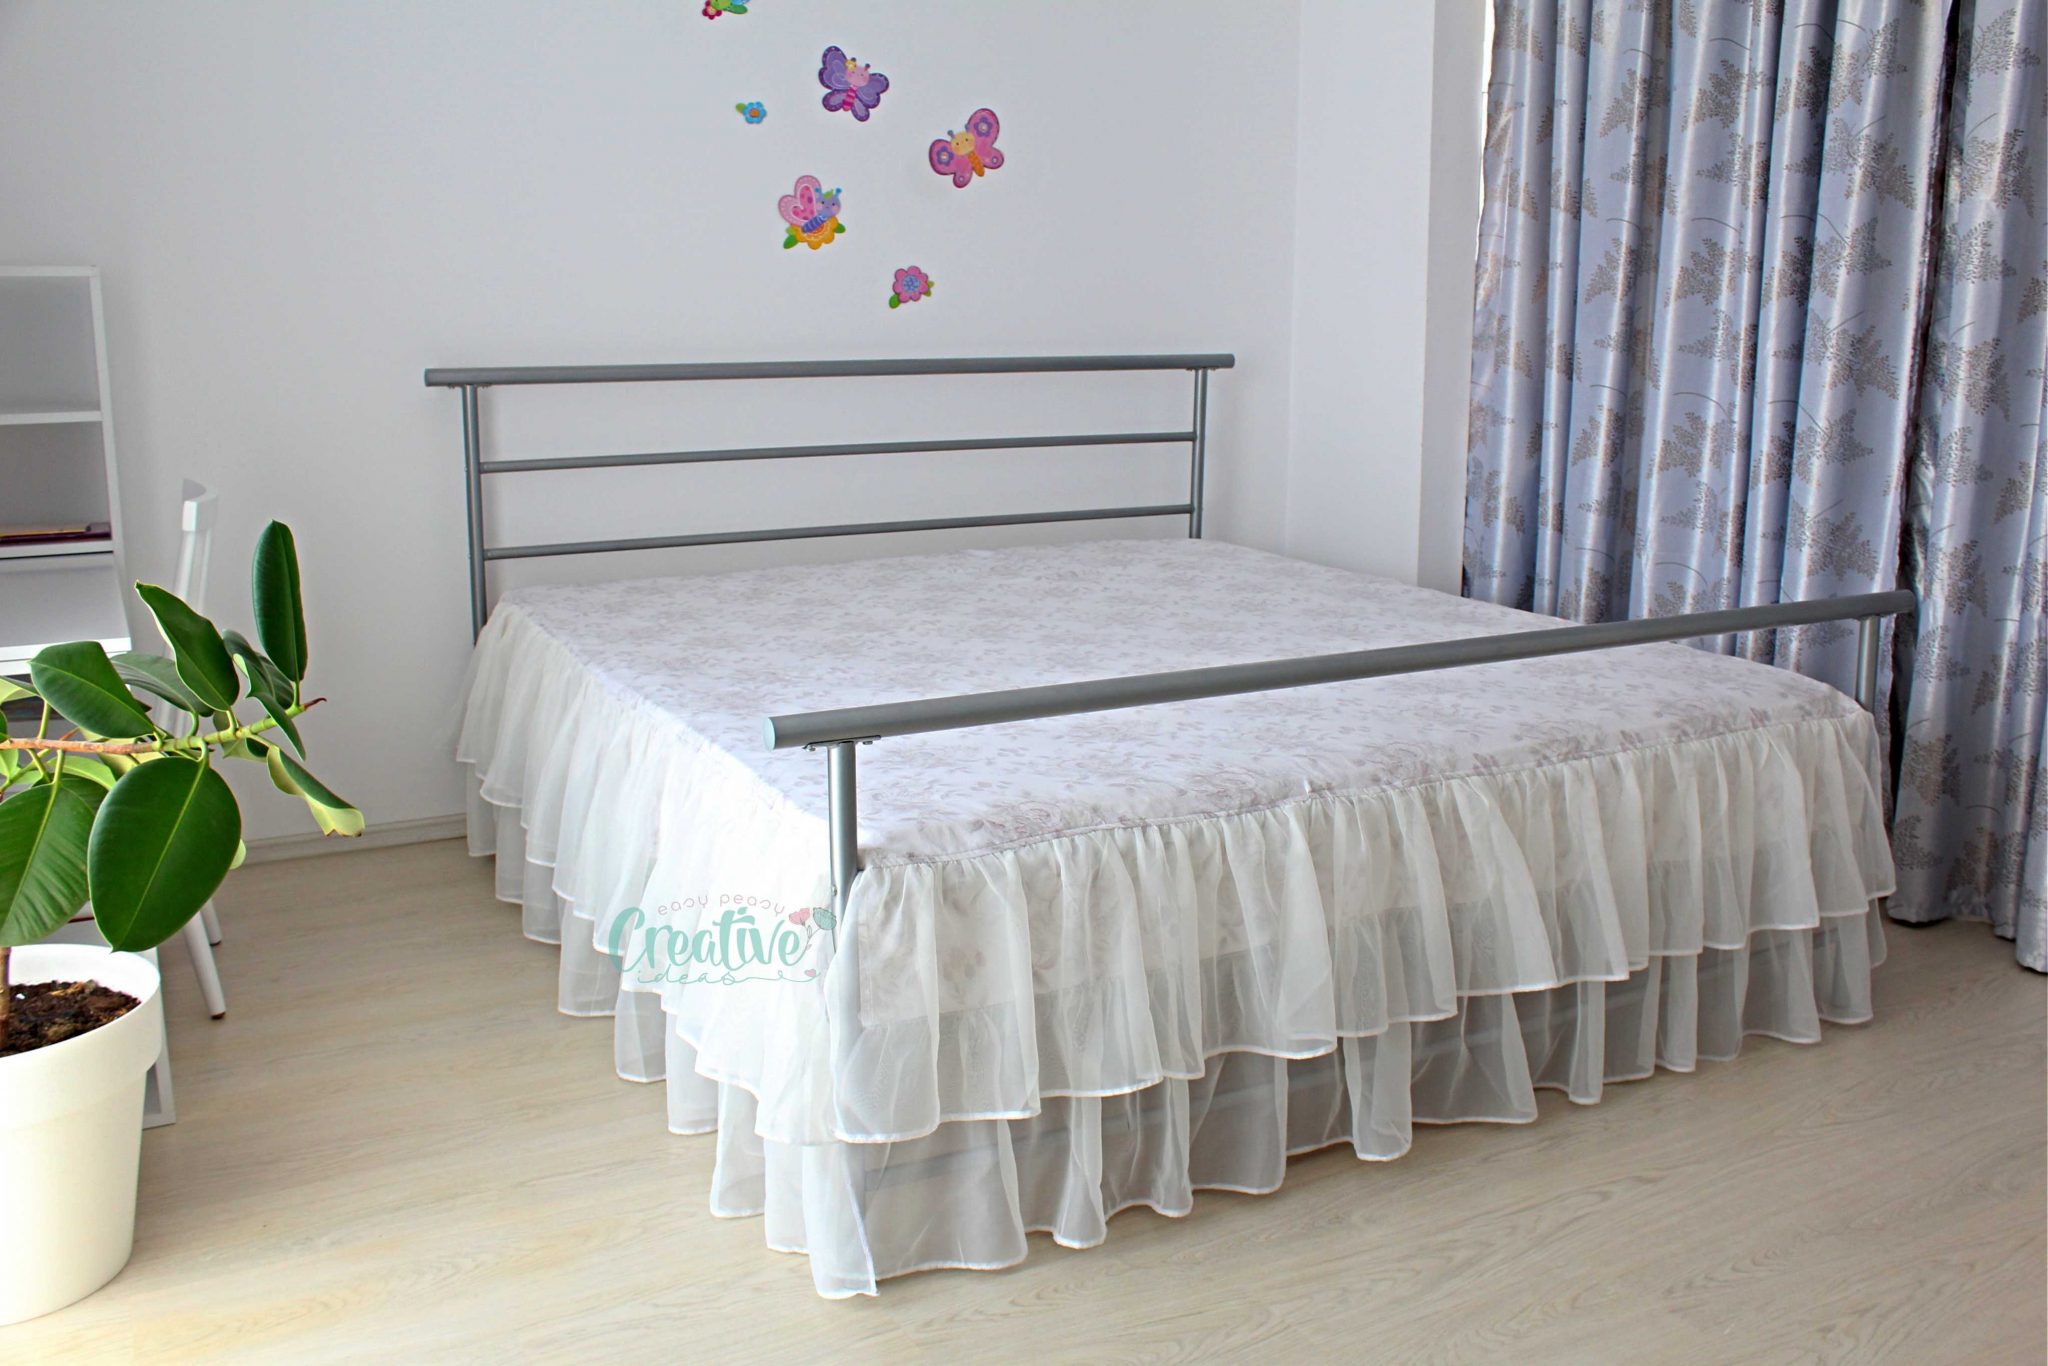
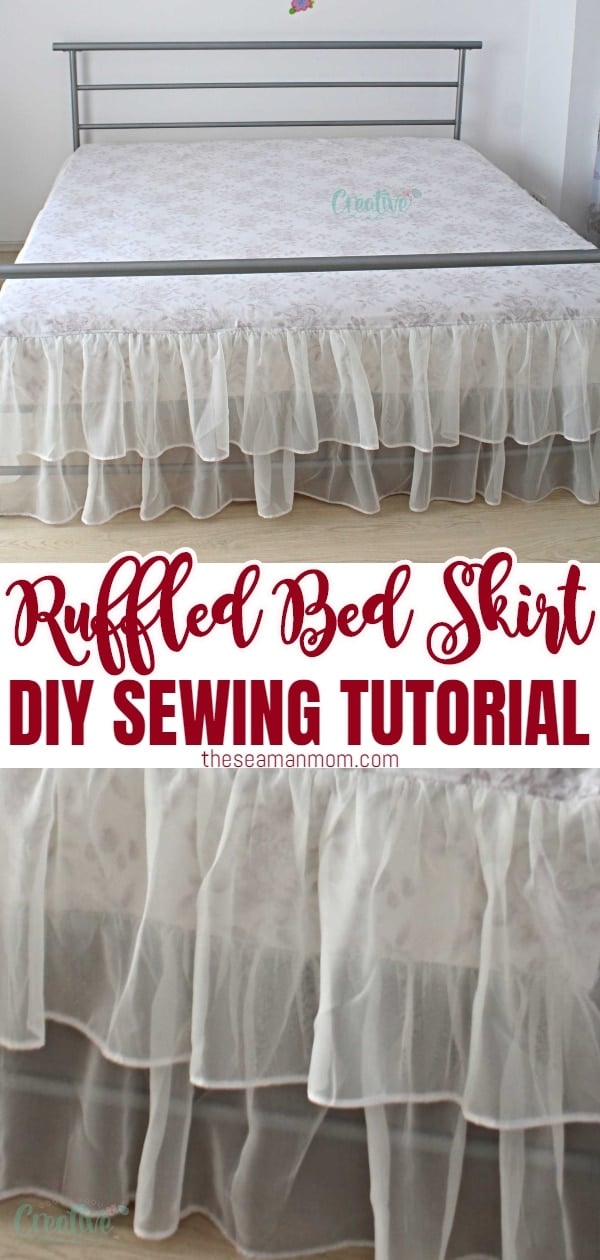
Ruffled bed skirt
If you’re anything like me, you most likely LOVE sewing for your home! And a DIY bed skirt probably crossed your mind a few times in the past but lacked the time to make one as in my case.
Or maybe you’ve had no clue how to sew a bed skirt? I personally thought it’s something super complicated, especially a ruffled bed skirt! But then I decided to spend some time on figuring out how to make my own DIY bed skirt and realized making a bed skirt is basically insanely easy!
Need more projects for home?
- Best way to gather fabric
- DIY cutlery holder sewing tutorial
- Flower pillowcase tutorial
- Christmas Elf stocking pattern
- Simple Christmas stocking pattern
- Fabric twine trivets tutorial
- Reversible ruffled bed throw
- Farmhouse ruffled pillowcase
- Bean bag chair tutorial
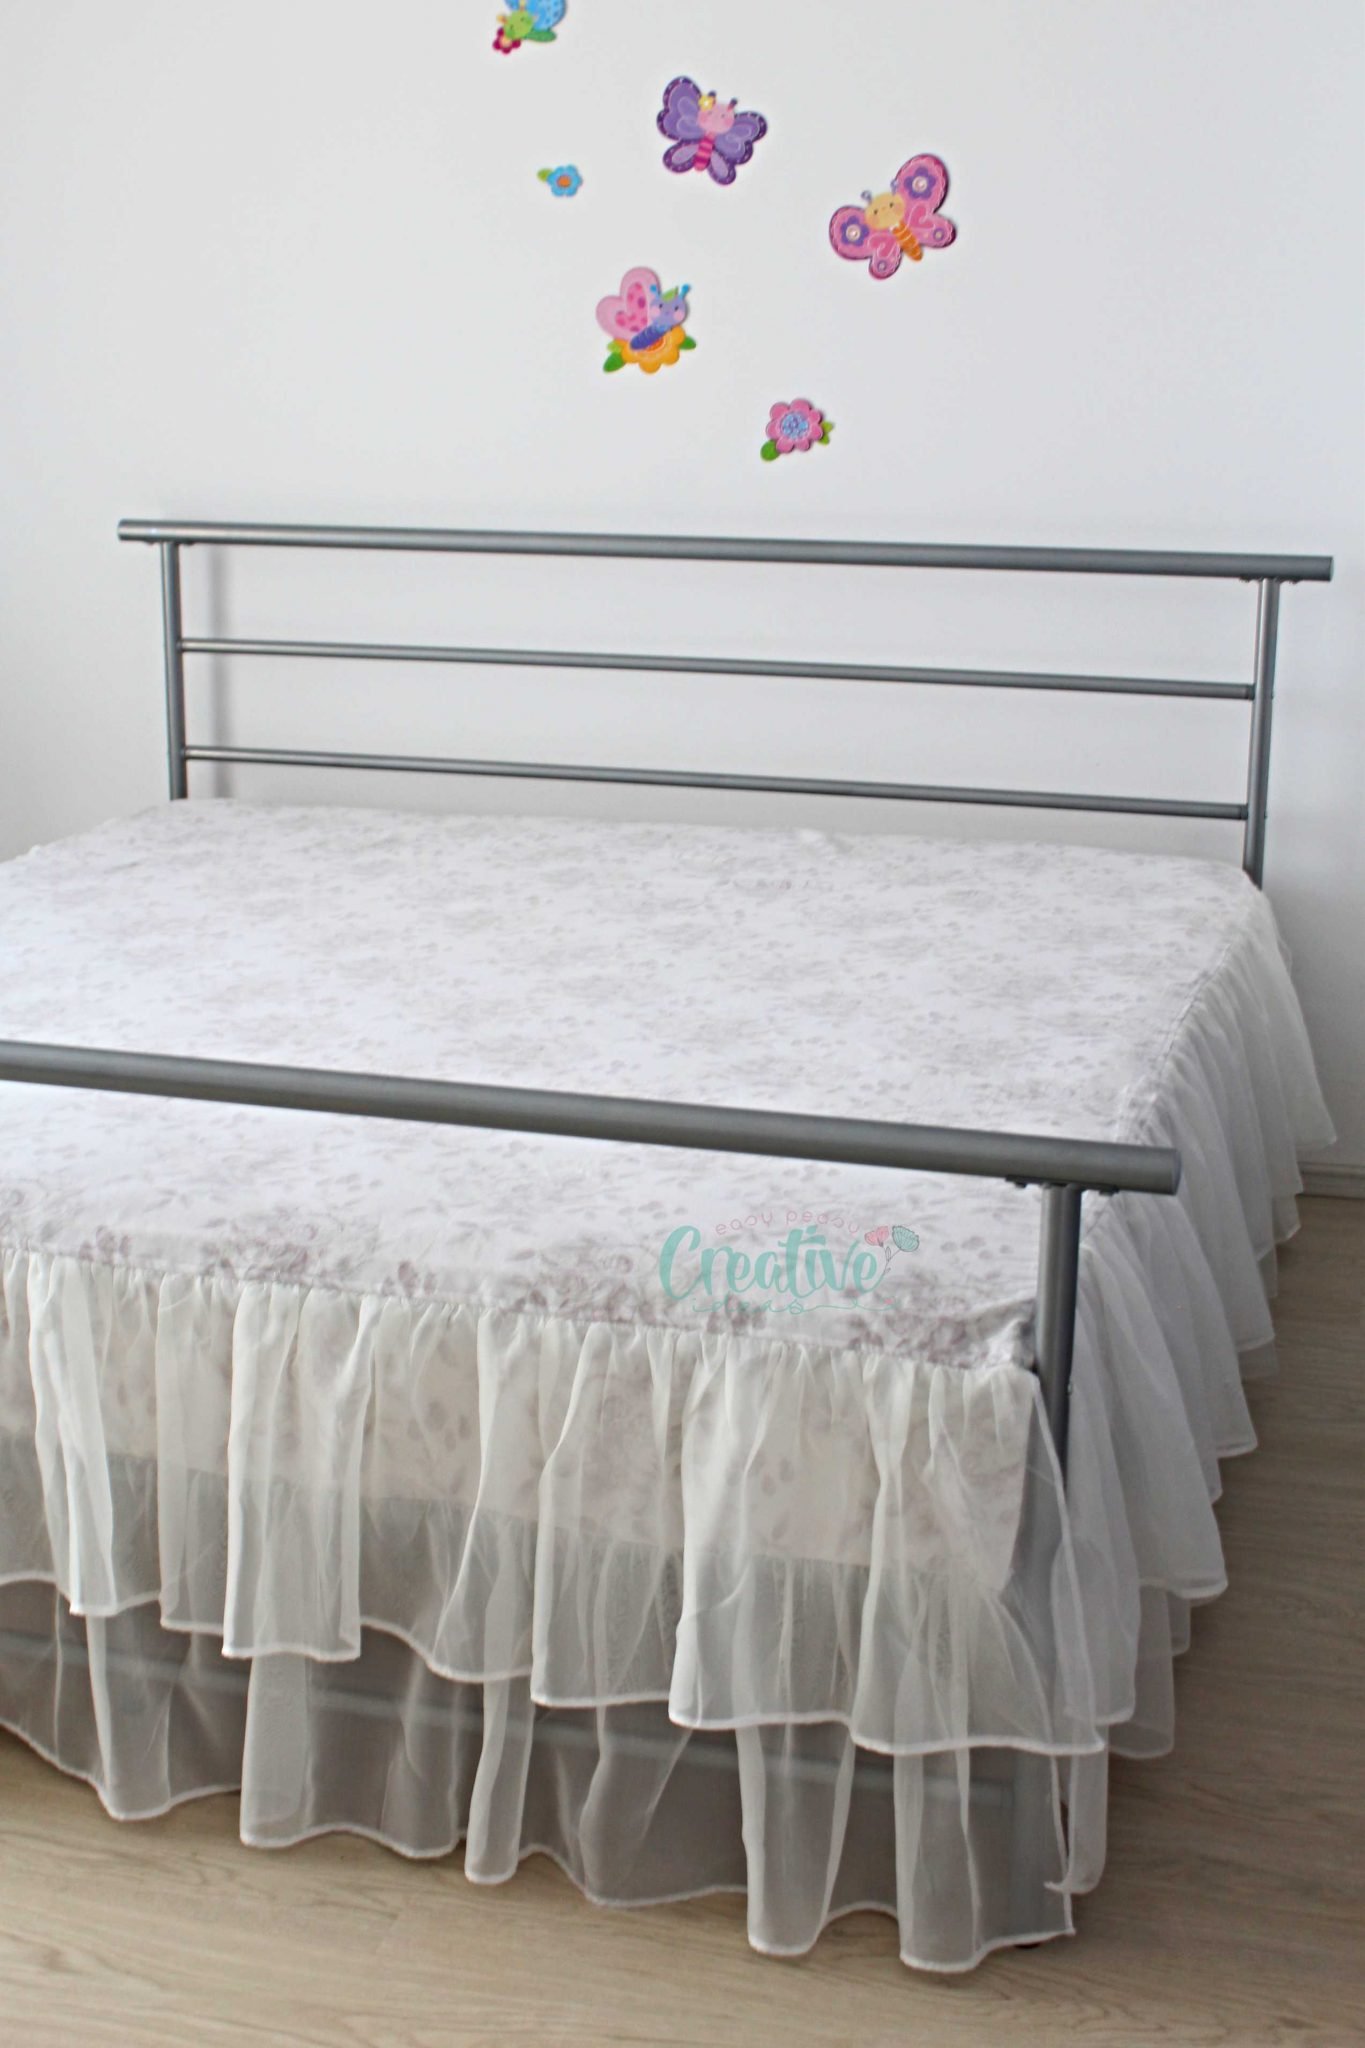
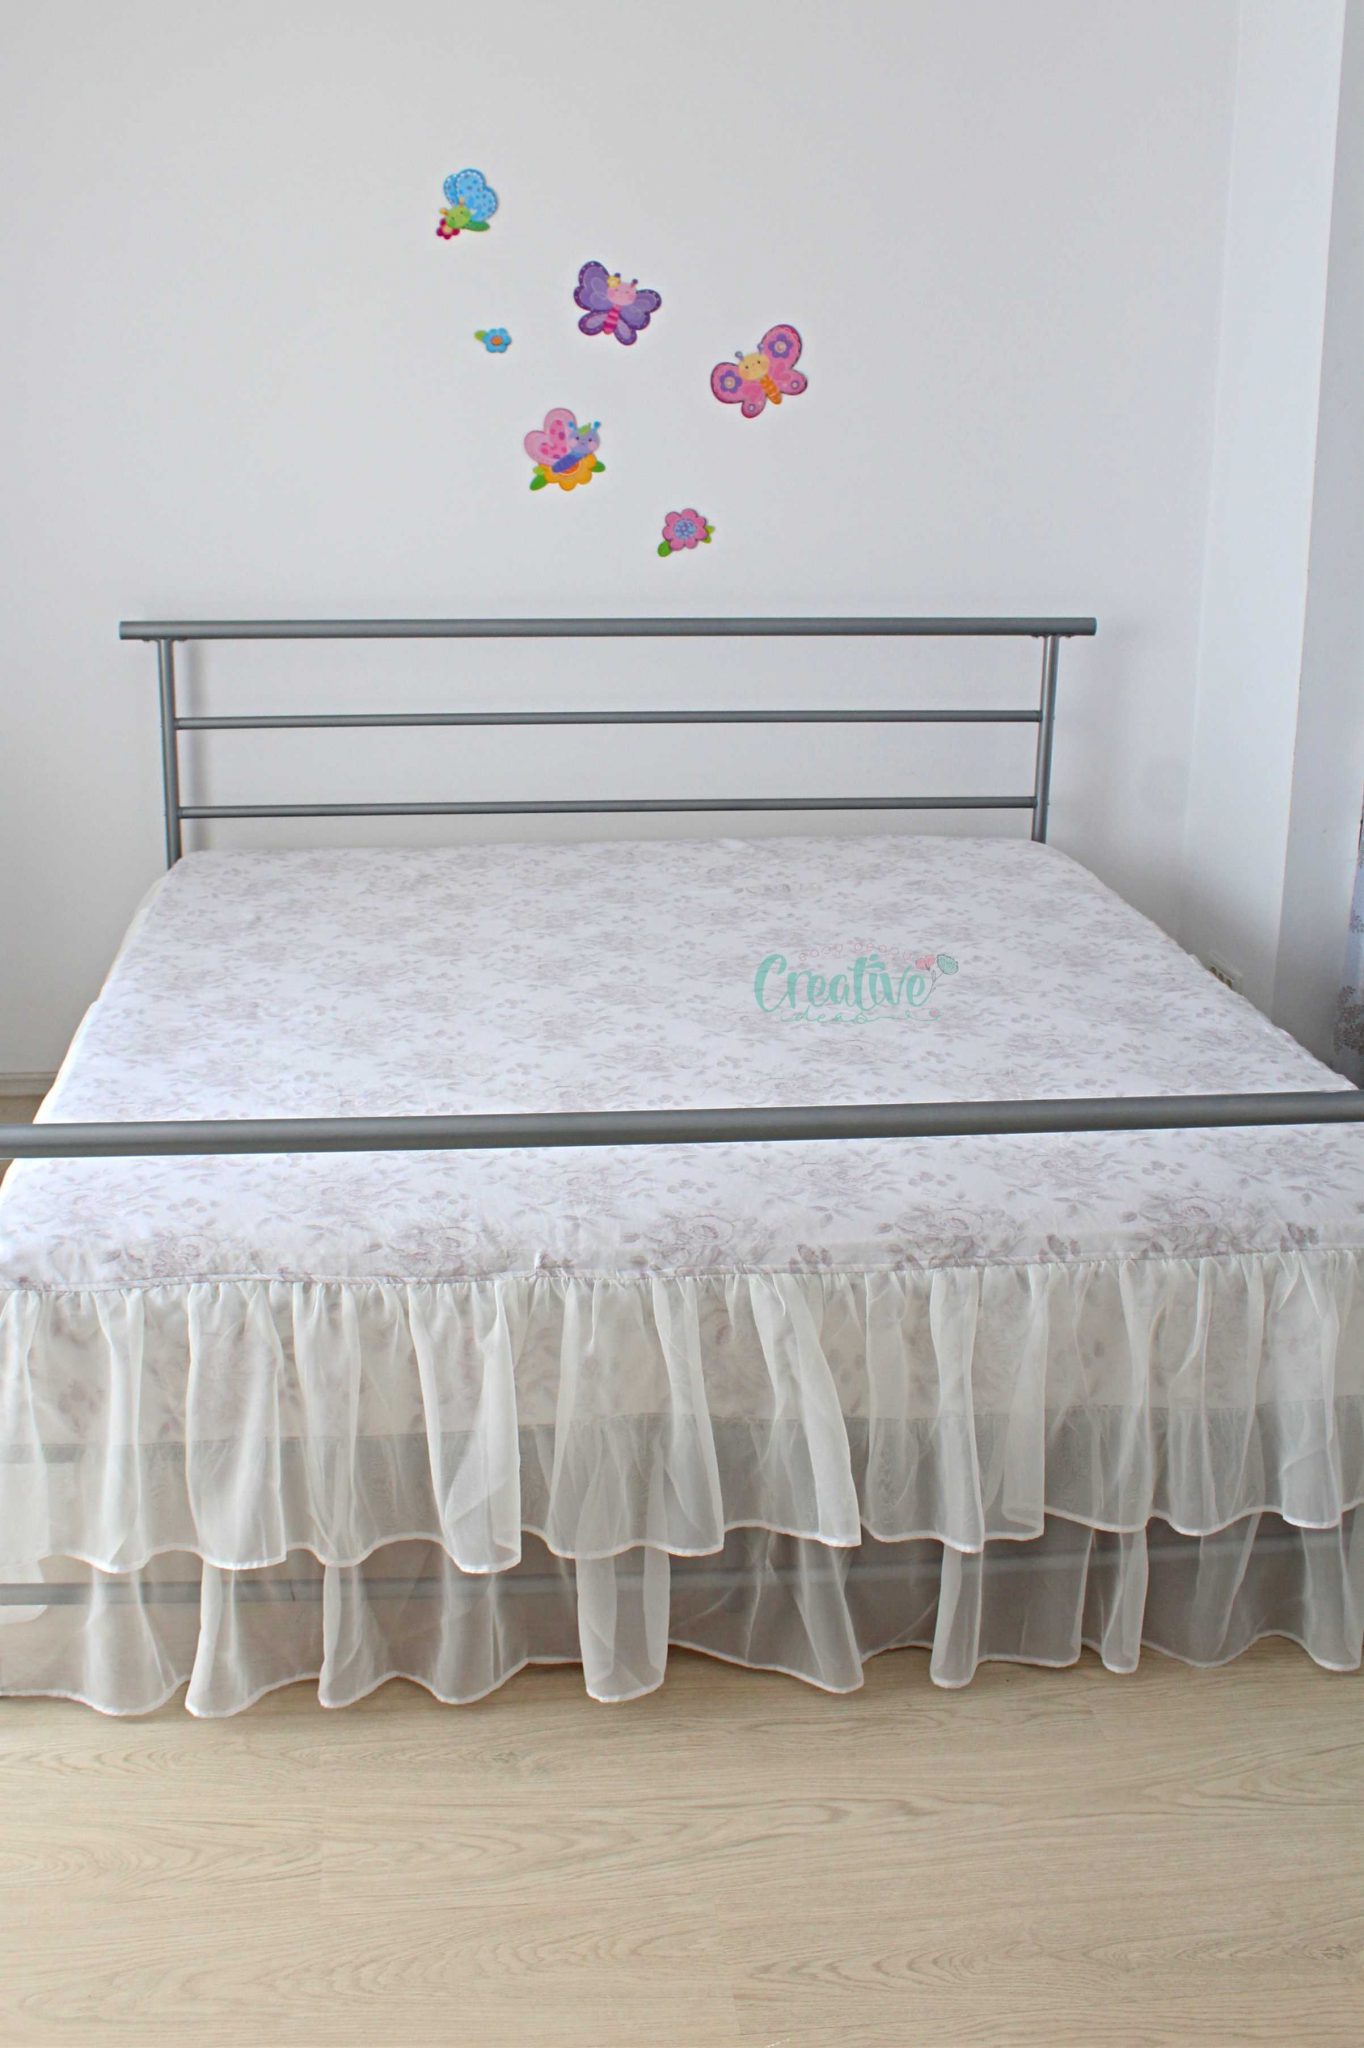
At a first glance my DIY bed skirt might seem hard to make and super time consuming but truth is, this adorable and easy bed skirt needs just a little free time and some patience. The end result is totally worth the effort! I mean look at all those cute ruffles! Perfect way to add loads of interest to a boring room!
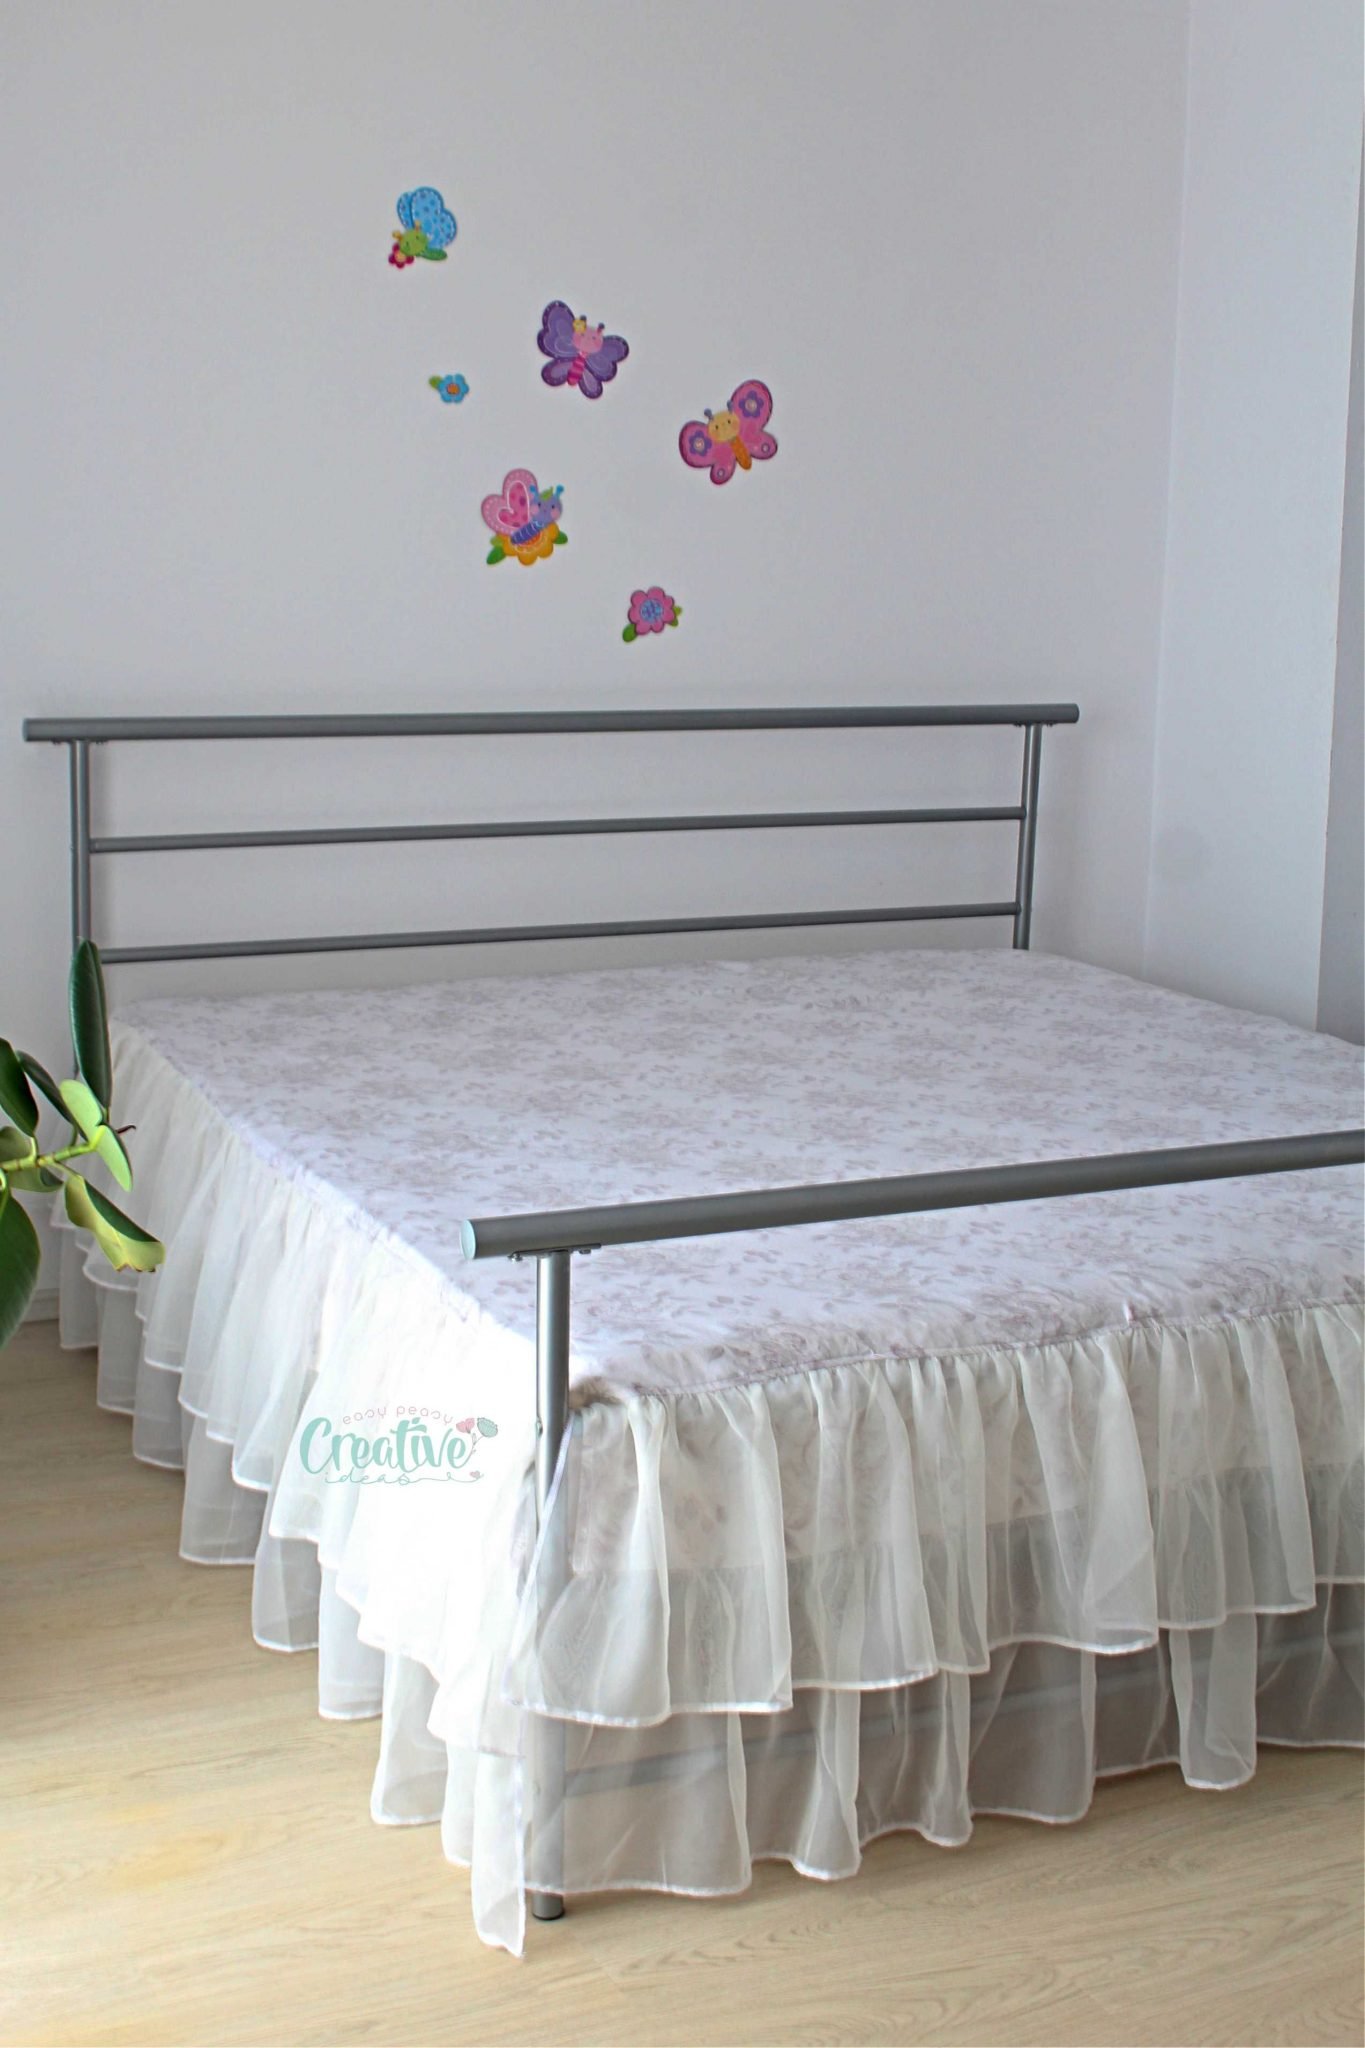
My DIY bed skirt is also a super cheap project as I made my ruffled bed skirt using an old linen bed sheet and scraps of sheer fabric from when I made my own curtains! It basically cost me nothing! I had a few issues figuring out how to make the best out of the scraps I had because the sheer fabric wasn’t as wide as I needed it to be so I decided to add two rows of ruffles which I think add even more cuteness to my DIY bed skirt!
A few notes about this particular DIY bed skirt
A regular bed skirt only covers the lower part of the bed, being installed under the mattress. But I wanted to make mine as a protecting layer for my mattress so that’s why my linen bed skirt looks a bit unusual, sort of like a very long and wide ruffled bed sheet.
Also this piece is just a tiny part of an ampler project I have in mind for this particular room which happens to be Ellie’s room. I’m completely redoing the room! The bed will also have new bed sheets, pillow covers and a bed throw. I plan to make all of these myself soooo…keep the fingers crossed for me!
Before starting to work on my DIY bed skirt project I thought this would be done in one day! And it probably would’ve been ready within a day if I could find a few good hours in just one day. But I only had 2-3 hours available for sewing so my project extended over a three days period. It was a bit stressful since I don’t like sewing a project in sections. So heads up, this is not a short project and if you are anything like me and hate spreading a project over a few days, don’t start working on your DIY bed skirt before finding a few free hours in one day.
Other than that, making a bed skirt was super easy and enjoyable, even with making the ruffles (hoping to find some time and show you the best way I found to make ruffles!) and attaching them to the linen. I absolutely love how this turned out, I think it completely changed the look of that room so I totally recommend you sewing a bed skirt for your room too!
Before proceeding to the actual DIY bed skirt tutorial I’d like to cover a few facts regarding bed skirts, for the ones of you who never heard of or seen a bed skirt before.
Frequently asked questions
What is a bed skirt?
A bed skirt is a decorative piece, made out of fabric, that is placed under the mattress and is designed to cover and mask the lower part of the bed (the box spring) and the space under the bed. A bed skirt adds style to your bed decor, helps blocking draft under the bed and also prevents the dust from accumulating under the bed.
Bed skirts are also known as dust ruffles and the name says it all.
How many types of bed skirts are there?
Bed skirts come in various sizes and shapes but can be categorized into two main types: with decking and without decking. The decking bed skirts are made out of a platform that goes over the box spring and three panels on the sides and the front (foot). The bed skirts without decking are only made with the three panels which are secured to the box spring with special pins, non grip pads or velcro.
Each of these two main categories may come in different styles and shapes such as gathered, ruffled, pleated, single box pleat and different types of fabric such as linen or sheer fabrics.
How do I keep my bed skirt from moving?
If you use a platform bed skirt, it will be secured by the mattress that sits on top of the platform. For non platform bed skirts, there are special non grip pads, pins or velcro that should come with the bed skirt and keep the skirt securely attached to the box spring. If not you can pin the bed skirt or use tape.
How can I keep my mattress from sliding?
If you’re using a bed skirt with a platform made out of slippery fabrics, when you place the mattress on top of the platform, it may slip with every move you make while in bed. To prevent this from happening, choose a bed skirt made out of linen or use rubber rug pads, double sided tape or sew a few felt patches onto the bed skirt platform.
Now that we know what a bed skirt is and how to use it, it’s time to make our own DIY bed skirt. So here’s how to make a bed skirt! Please note this tutorial is for a bed skirt that covers the mattress too. Feel free to adjust my tutorial to your own needs.
DIY Bed skirt
Materials:
- linen fabric for the platform (I’ll explain below how to calculate)
- lined fabric for the sides and front panels of the mattress
- sheer fabric for the ruffles on sides and foot (I’ll explain below how to calculate)
- pins
- scissors
- yard stick
- ruffling foot (optional)
- sharp needle
- jeans needle
- sewing machine
Directions:
Cutting the linen fabric
- Cut the linen fabric to match the size of the top of your mattress, plus 1″ on each side for seam allowance.
- Cut the linen fabric for the side panels and the front panels, in the width of your mattress and the length of the sides and front of the mattress, plus adding 1/2″ – 1″ allowance (I serged my linen panels before sewing all pieces together, so I only used 1/2″ allowance)
Cutting the sheer fabric
- #1 Measure from the bottom of the mattress to the floor and add 1″ – 1 1/2″ for allowance and hemming.
- #2 Measure the height of the mattress and add about 6″ plus 1″ – 1 1/2″ for allowance and hemming.
- #3 Measure the length of each side and the front of the mattress and double the measurements plus about 1″ for hemming.
- To make a double layer of ruffles as I did, you will need to cut 2 sets of 3 panels of sheer fabric: 2 for each side and 2 for the front.
- The first set of panels will match the first and third measurements.
- The second set of panels will match the second and third measurements.
- Please note that I serged all of my sheer fabric and the linen so I didn’t need much for allowance and hemming; the above allowances are just suggestions, please adjust as needed.
Preparing fabric for each panel and the platform
- Cut fabric as indicated in the previous section
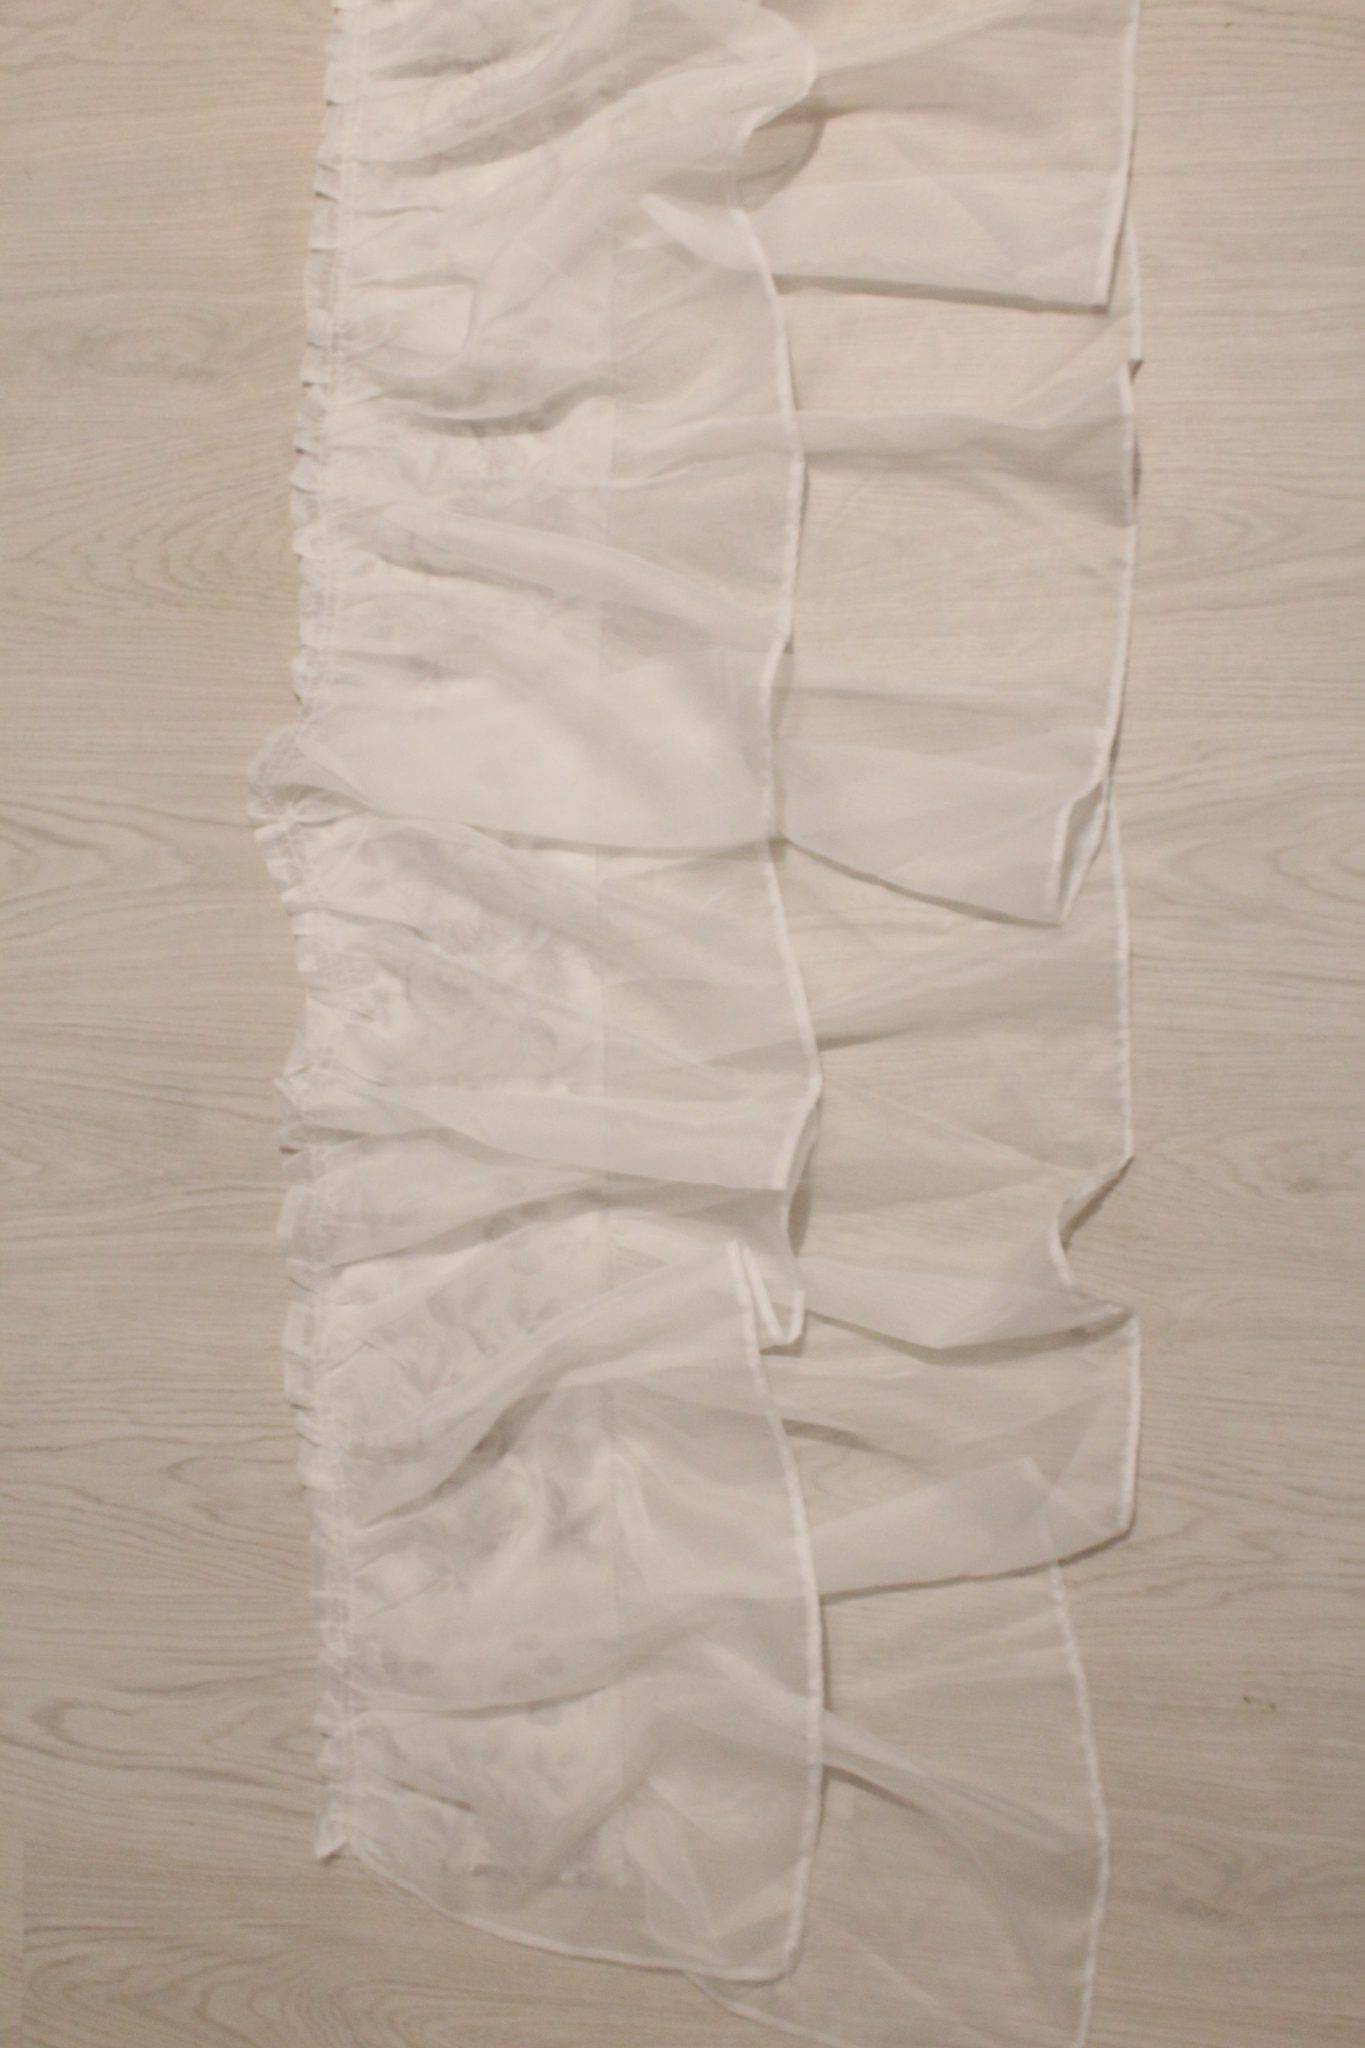
- Finish the edges through your preferred method. I have a serger so I first serged every single piece of fabric using matching thread. Then I hemmed the bottom of the sheer panels by simply folding the fabric 1/4″ and sewing a regular stitch.
- For the platform, after serging all edges, I did a hem for the back edge (that goes to the back of the bed and doesn’t need ruffled panels) in the simple method specified above.
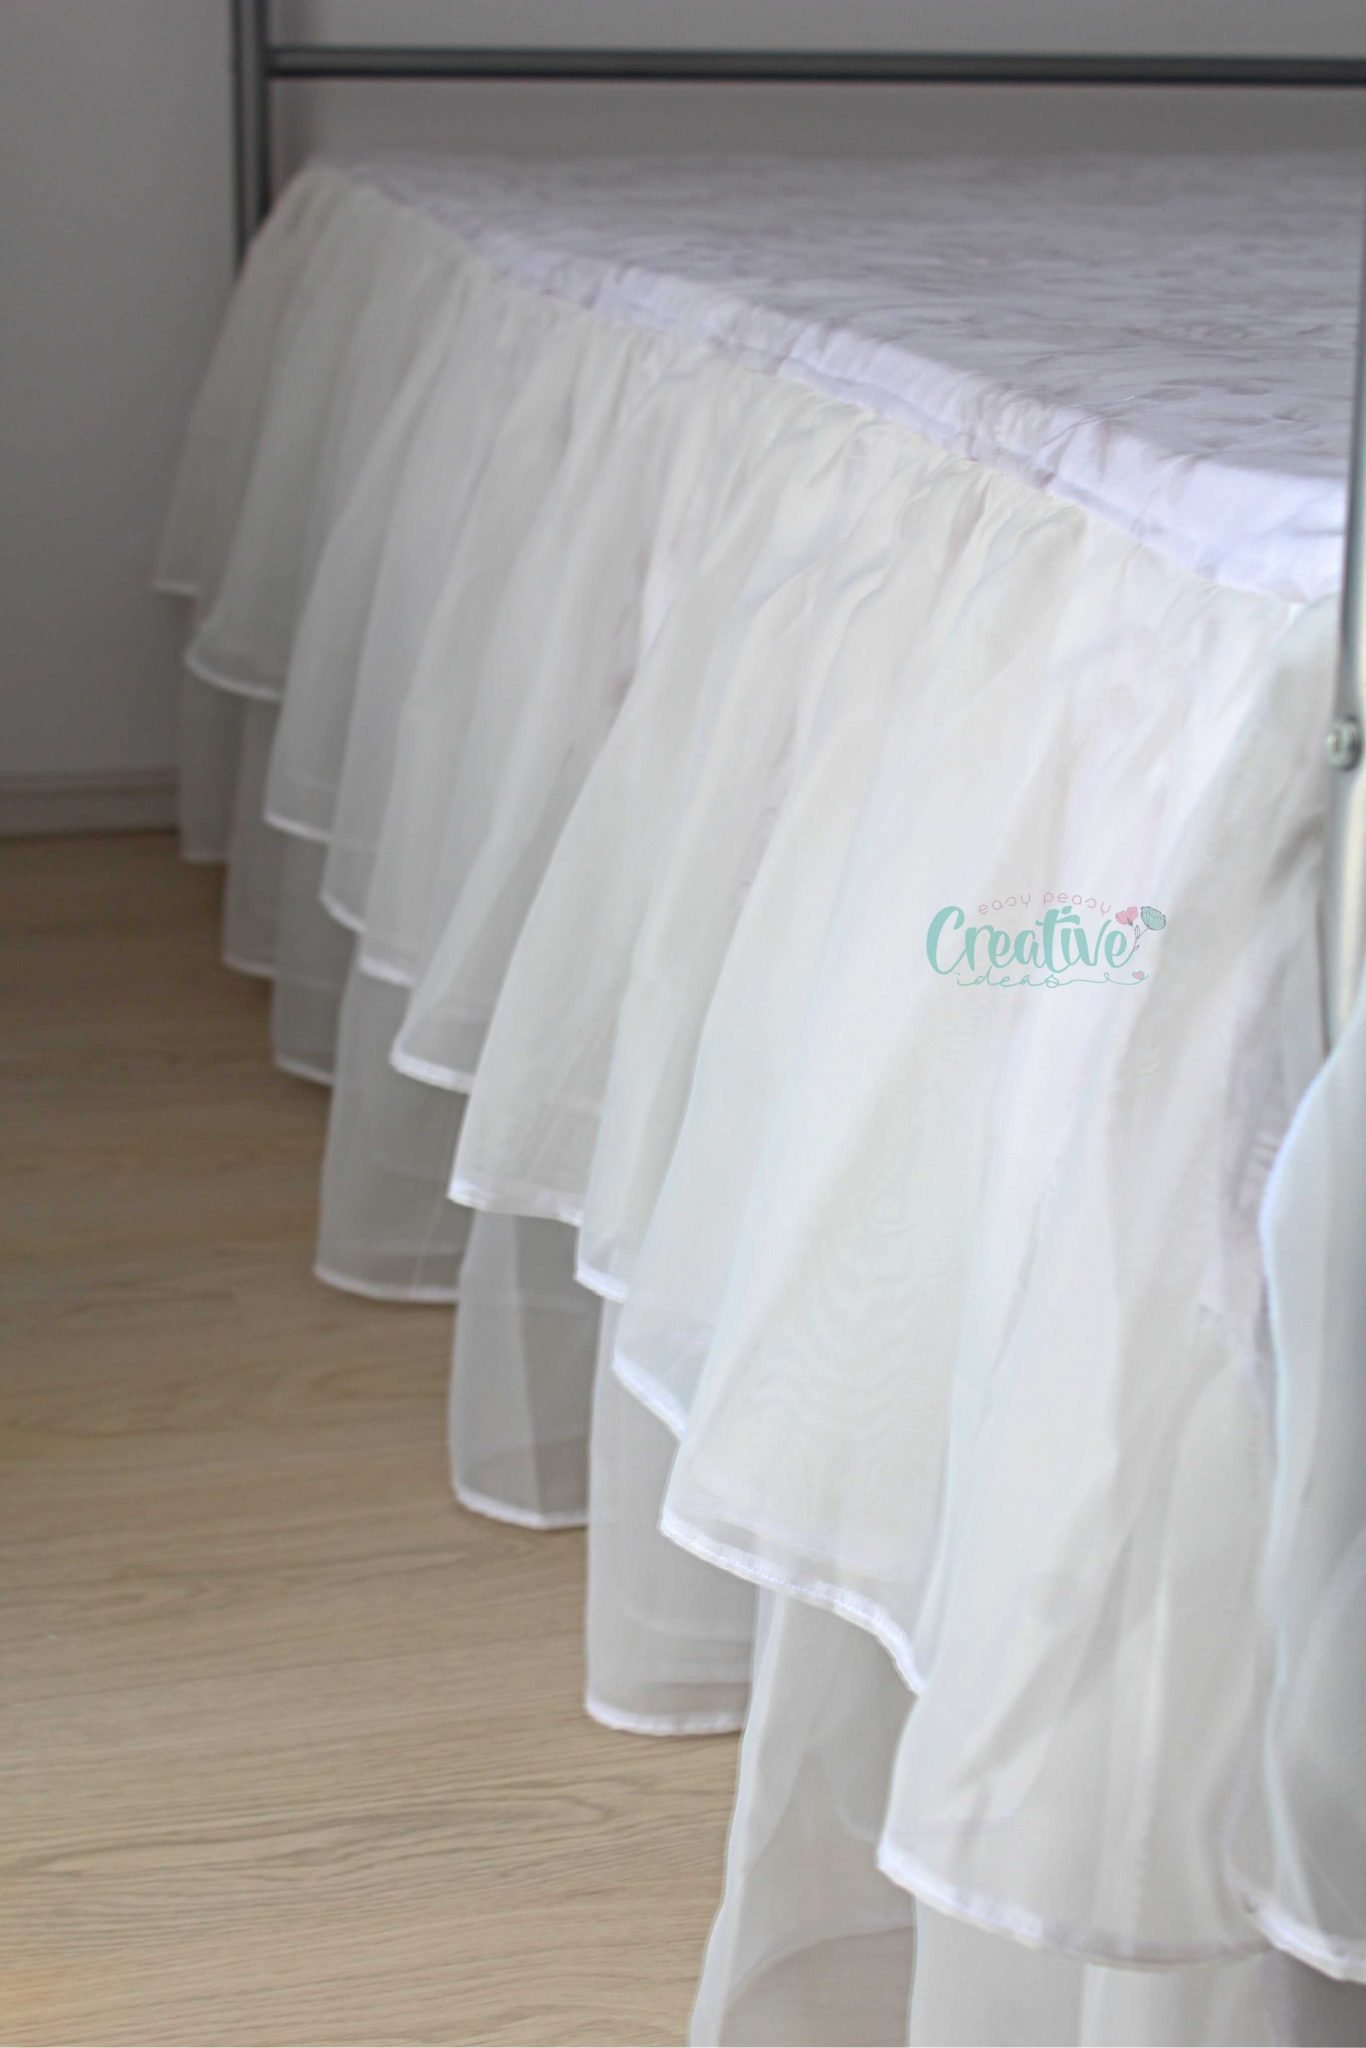
- Take each sheer panel and ruffle using the preferred method. The end length should match the linen panels for the sides and front.
- Press the ruffles very well to make sewing them onto the linen fabric a tons easier.
Sewing sheer and linen panels together
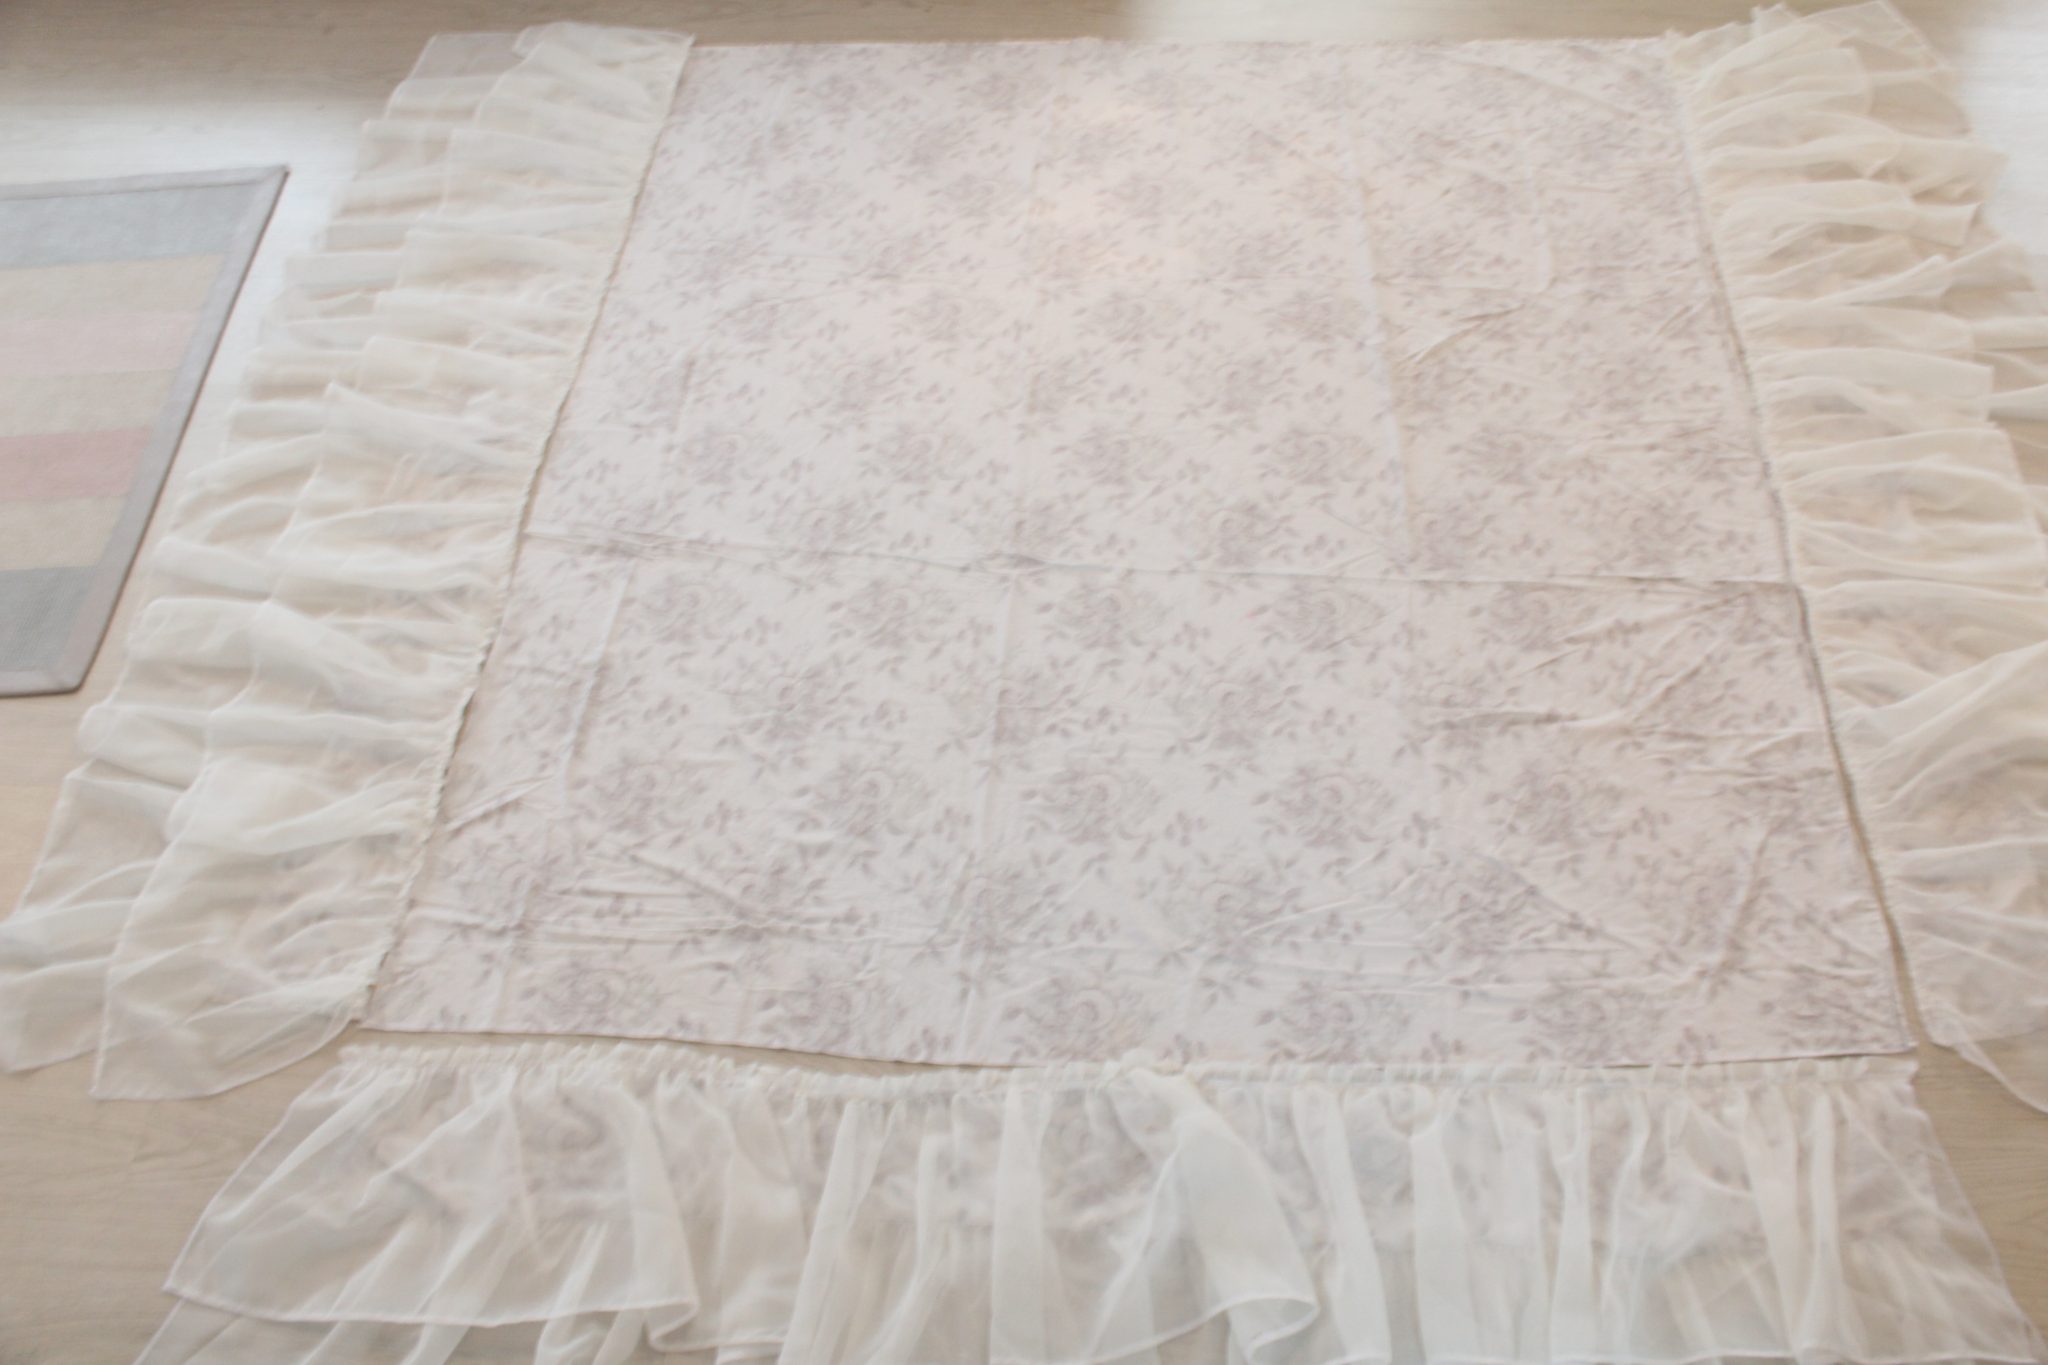
- Take one of the linen side panel and lay it on the floor, right side out
- Place the matching sheer panel over it, wrong side out,raw edge matching the bottom of the linen panel as shown below
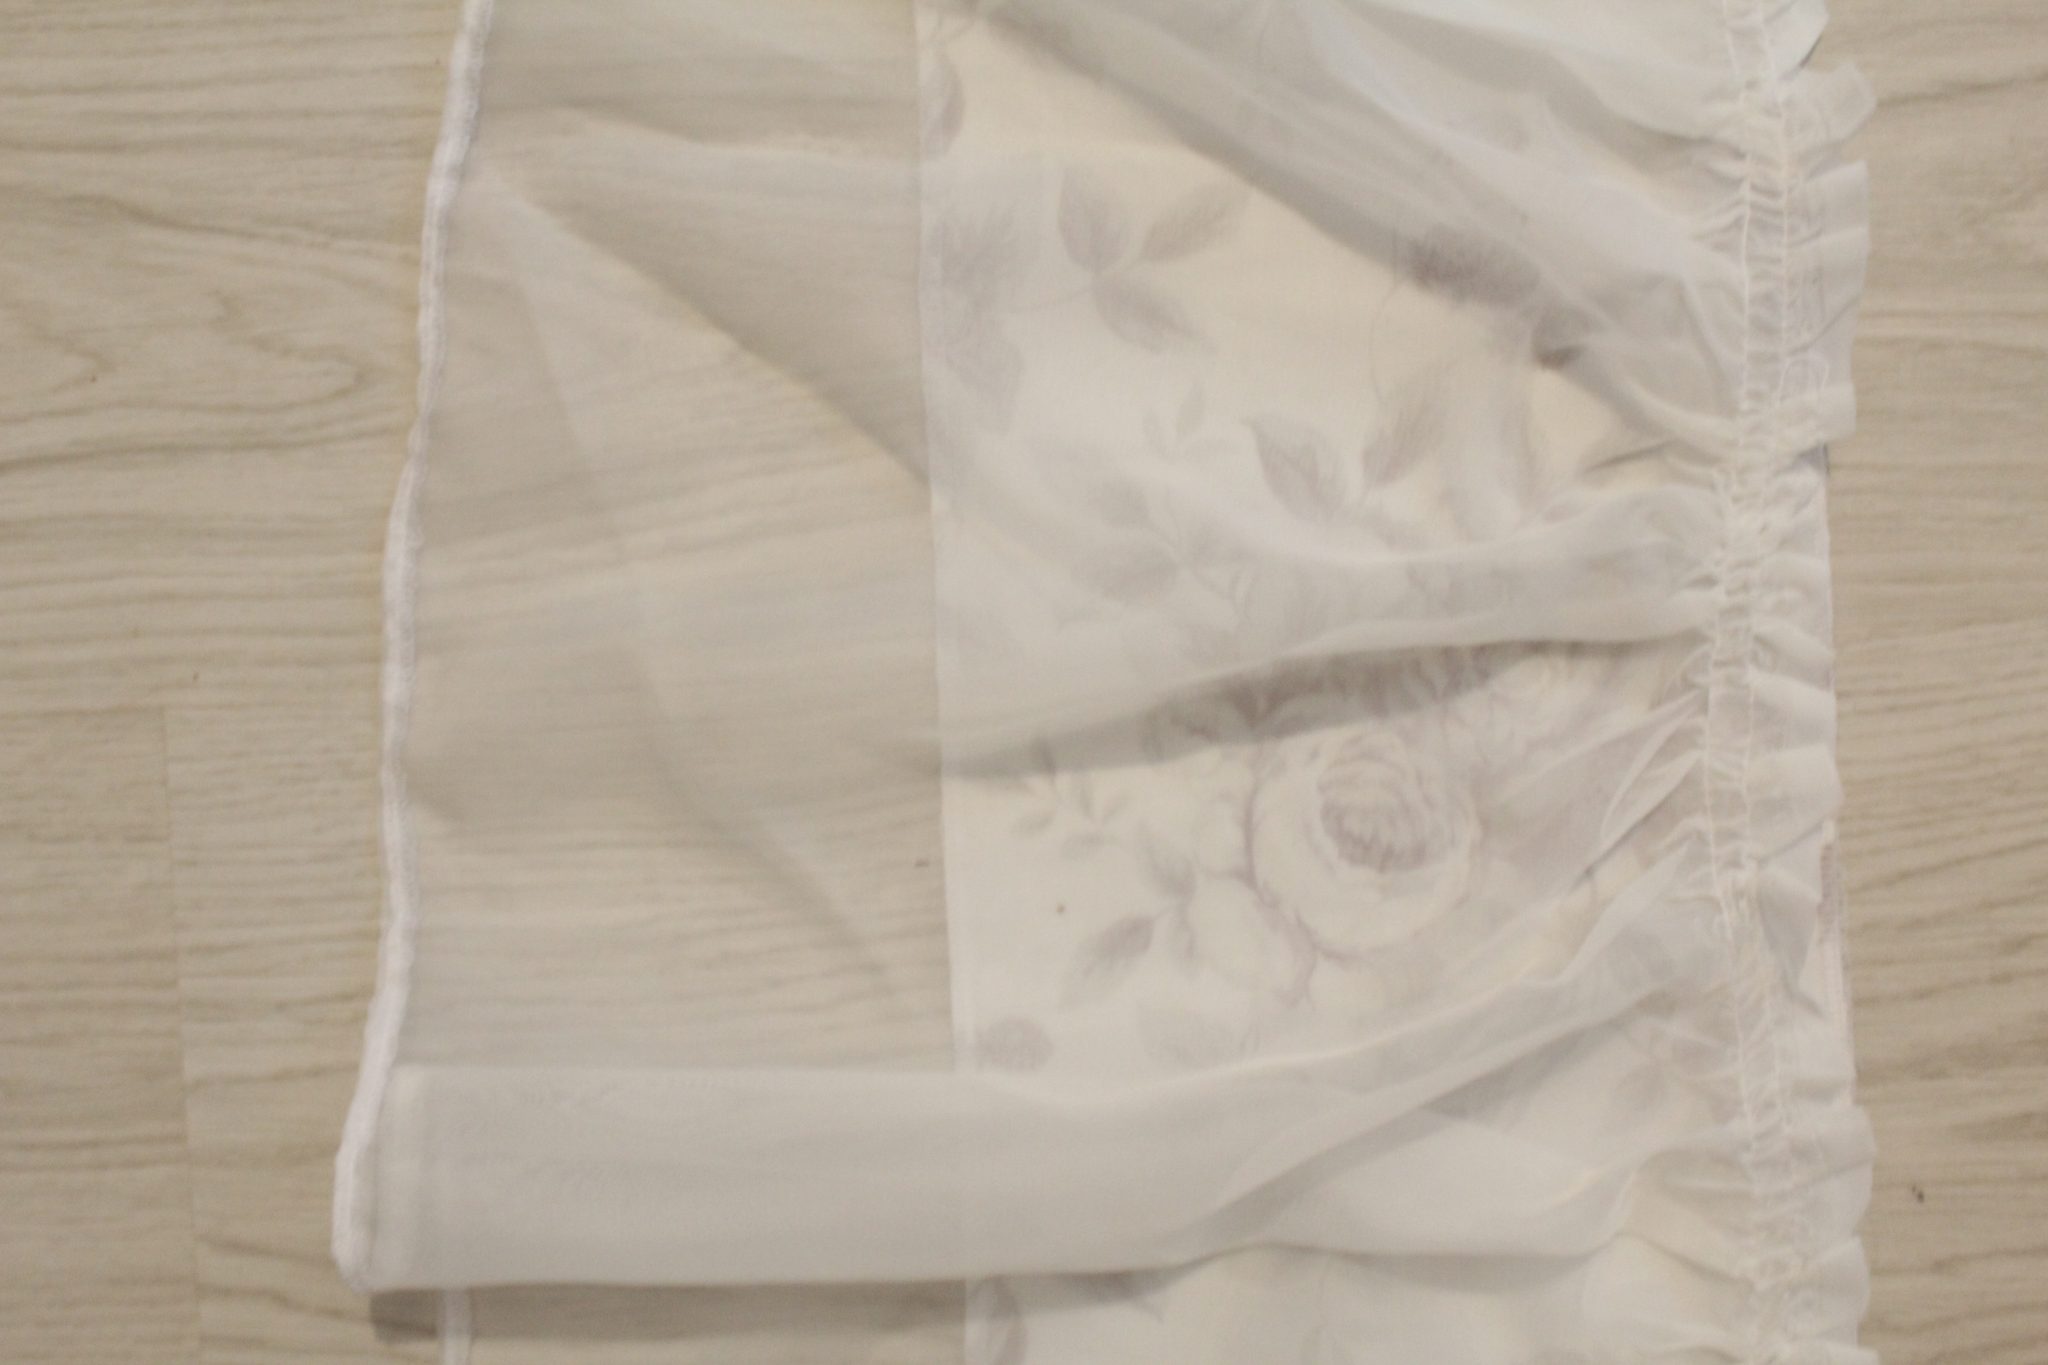
- Sew down with 1/4″ allowance.
- Fold the sheer panel down (or to the right in this particular image)
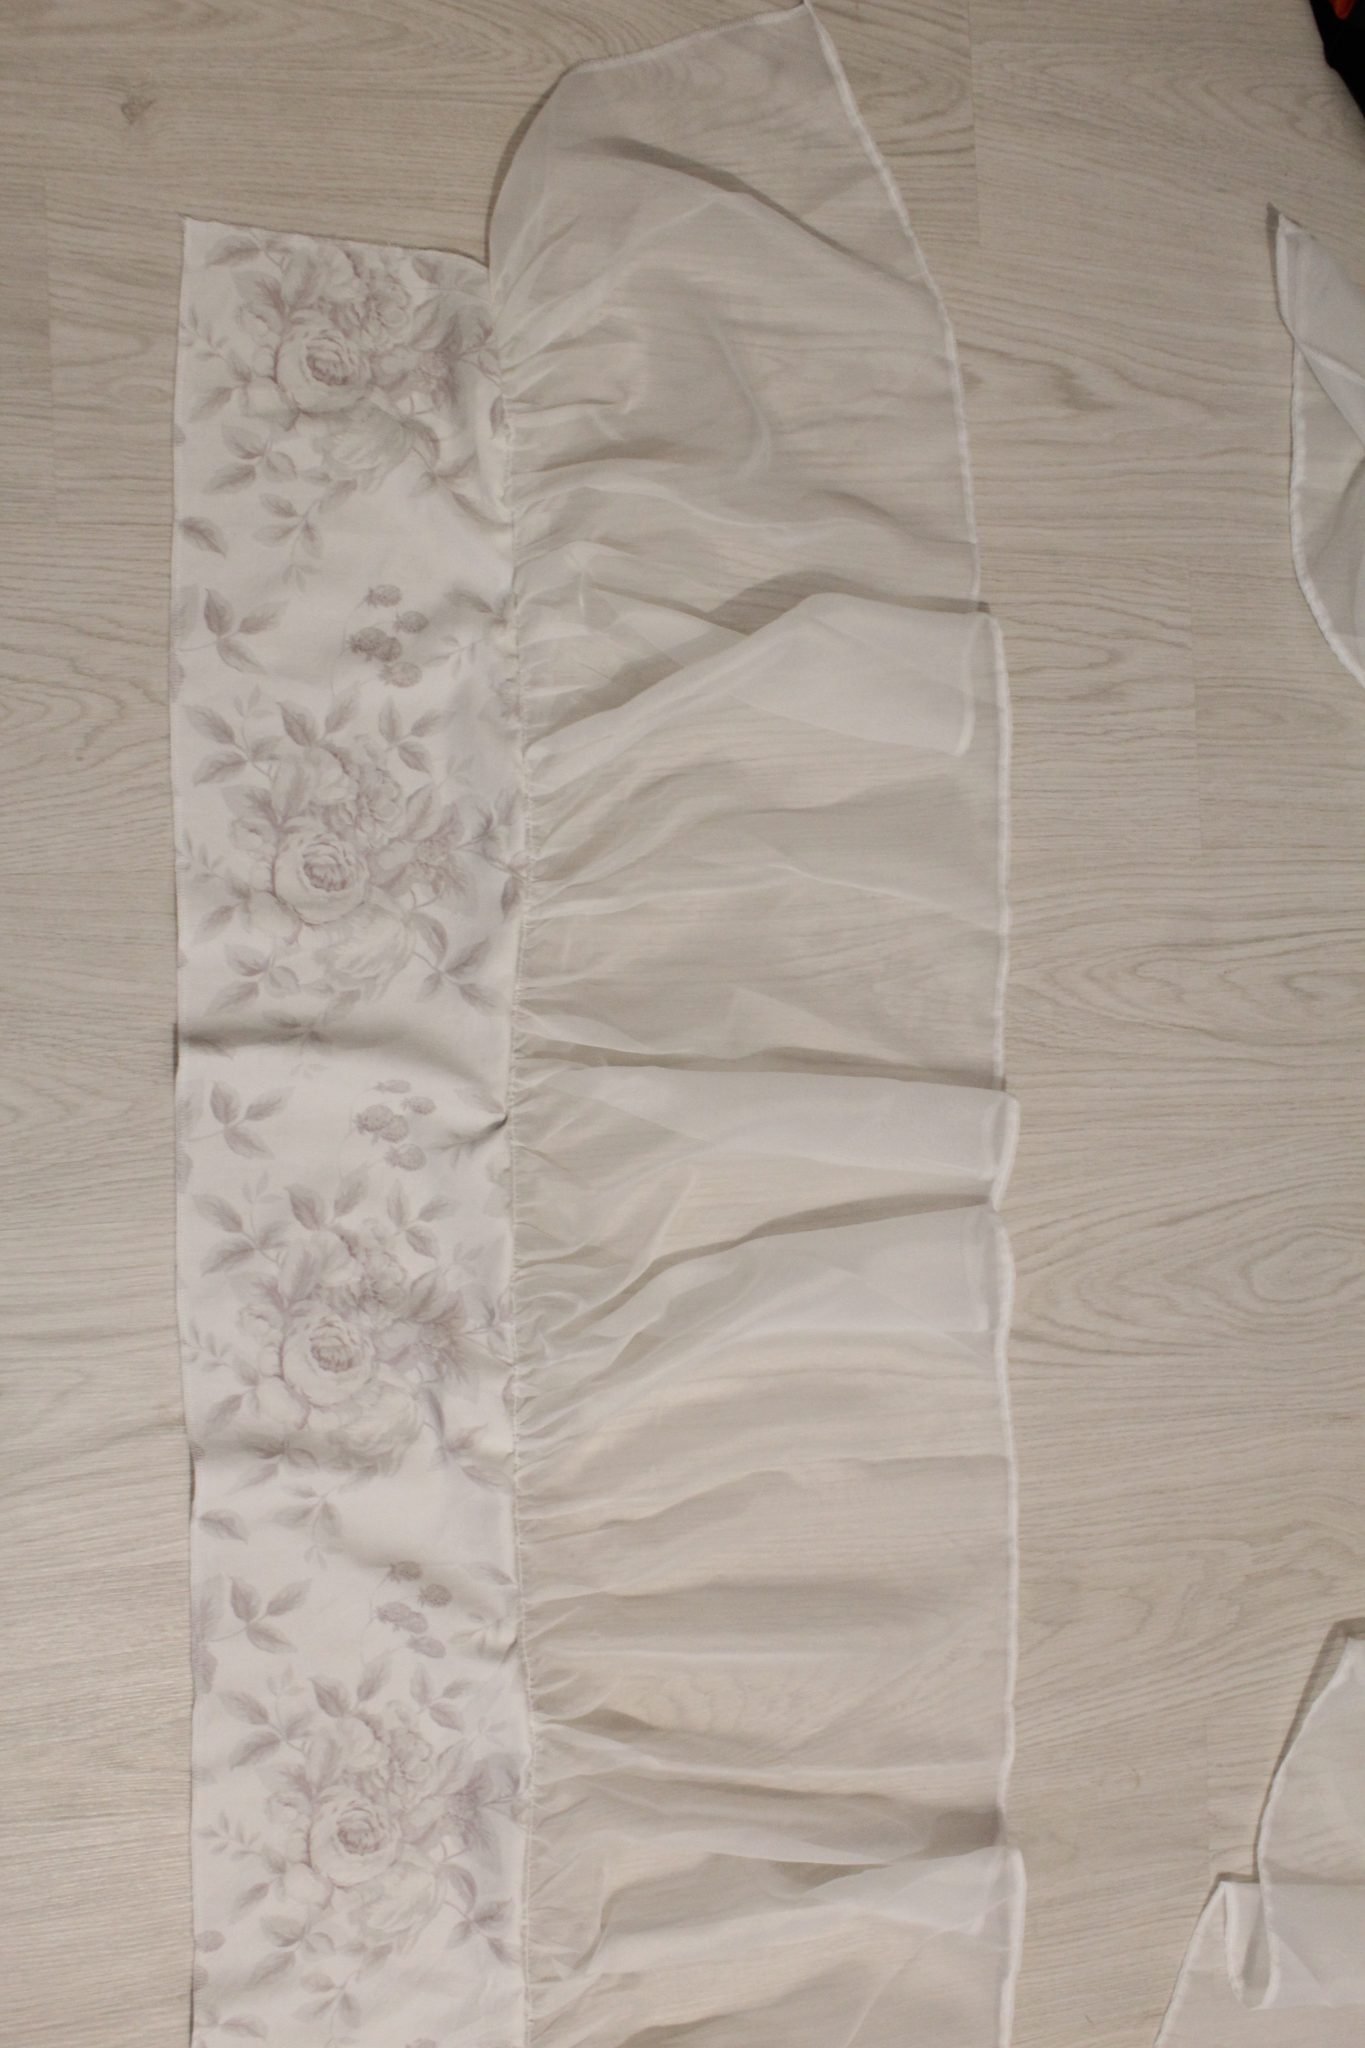
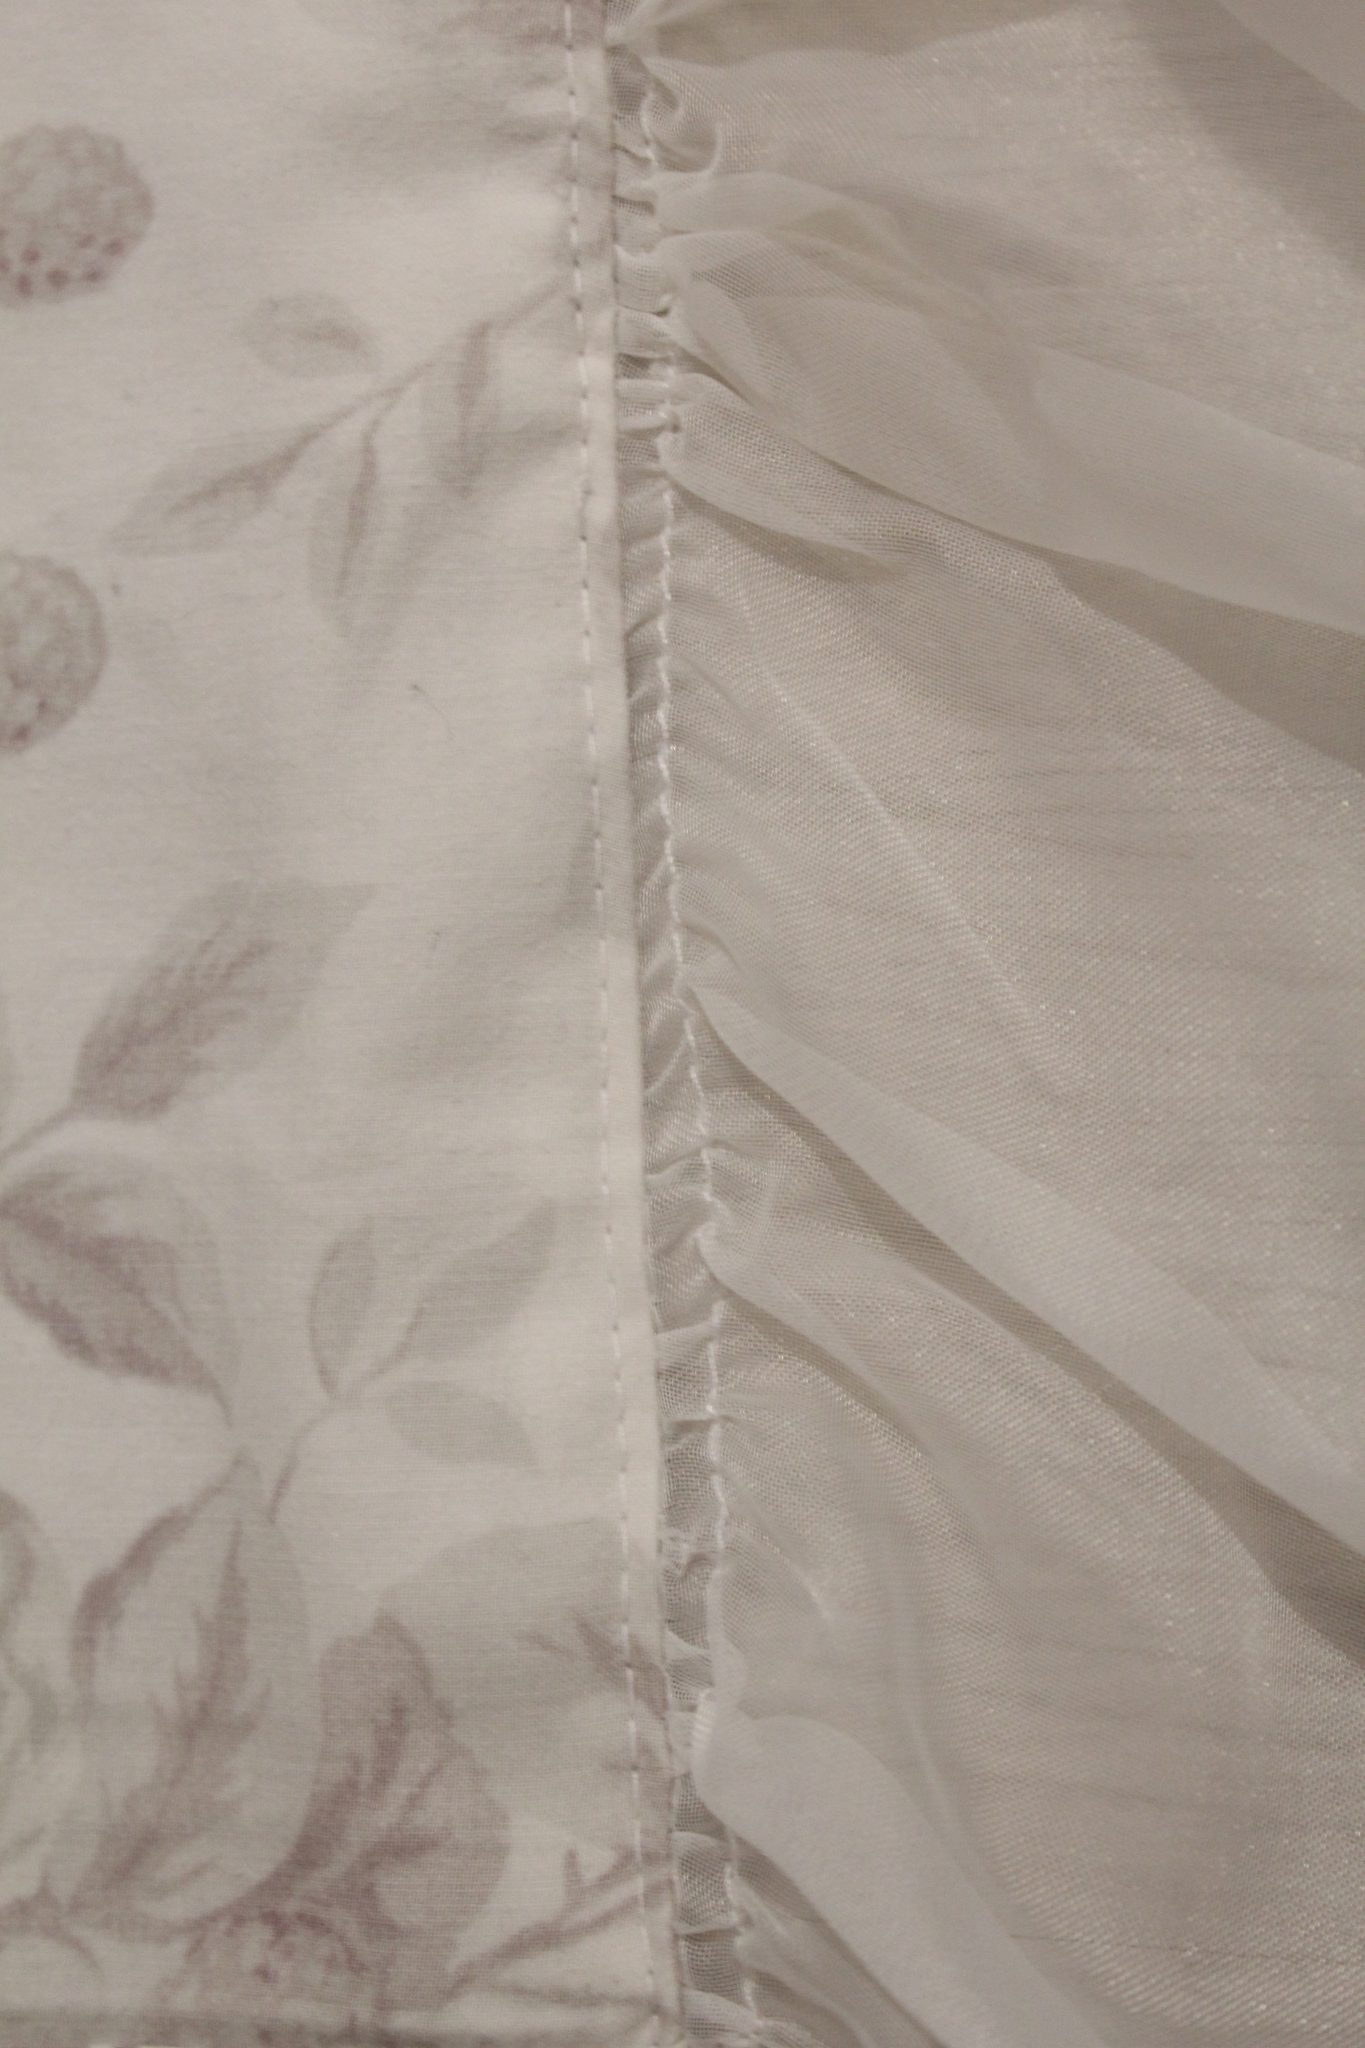
- Press the seam well towards the linen panel.
- Sew over the seam with a 1/8″ allowance
- Place the second sheer panel over the linen panel above, right side out. Raw edges should be matching the top edge of the panel.
- Sew down with 1/4″ allowance and your first set of panels is done.
- Repeat for the second side panel and the front panel in the exact manner highlighted above.
Sewing finished panels onto the platform
- Take the platform, the finished side and front panels and place them on the floor, right side out as below
- Fold right and left panels inside, raw edges matching the platform’s raw edges
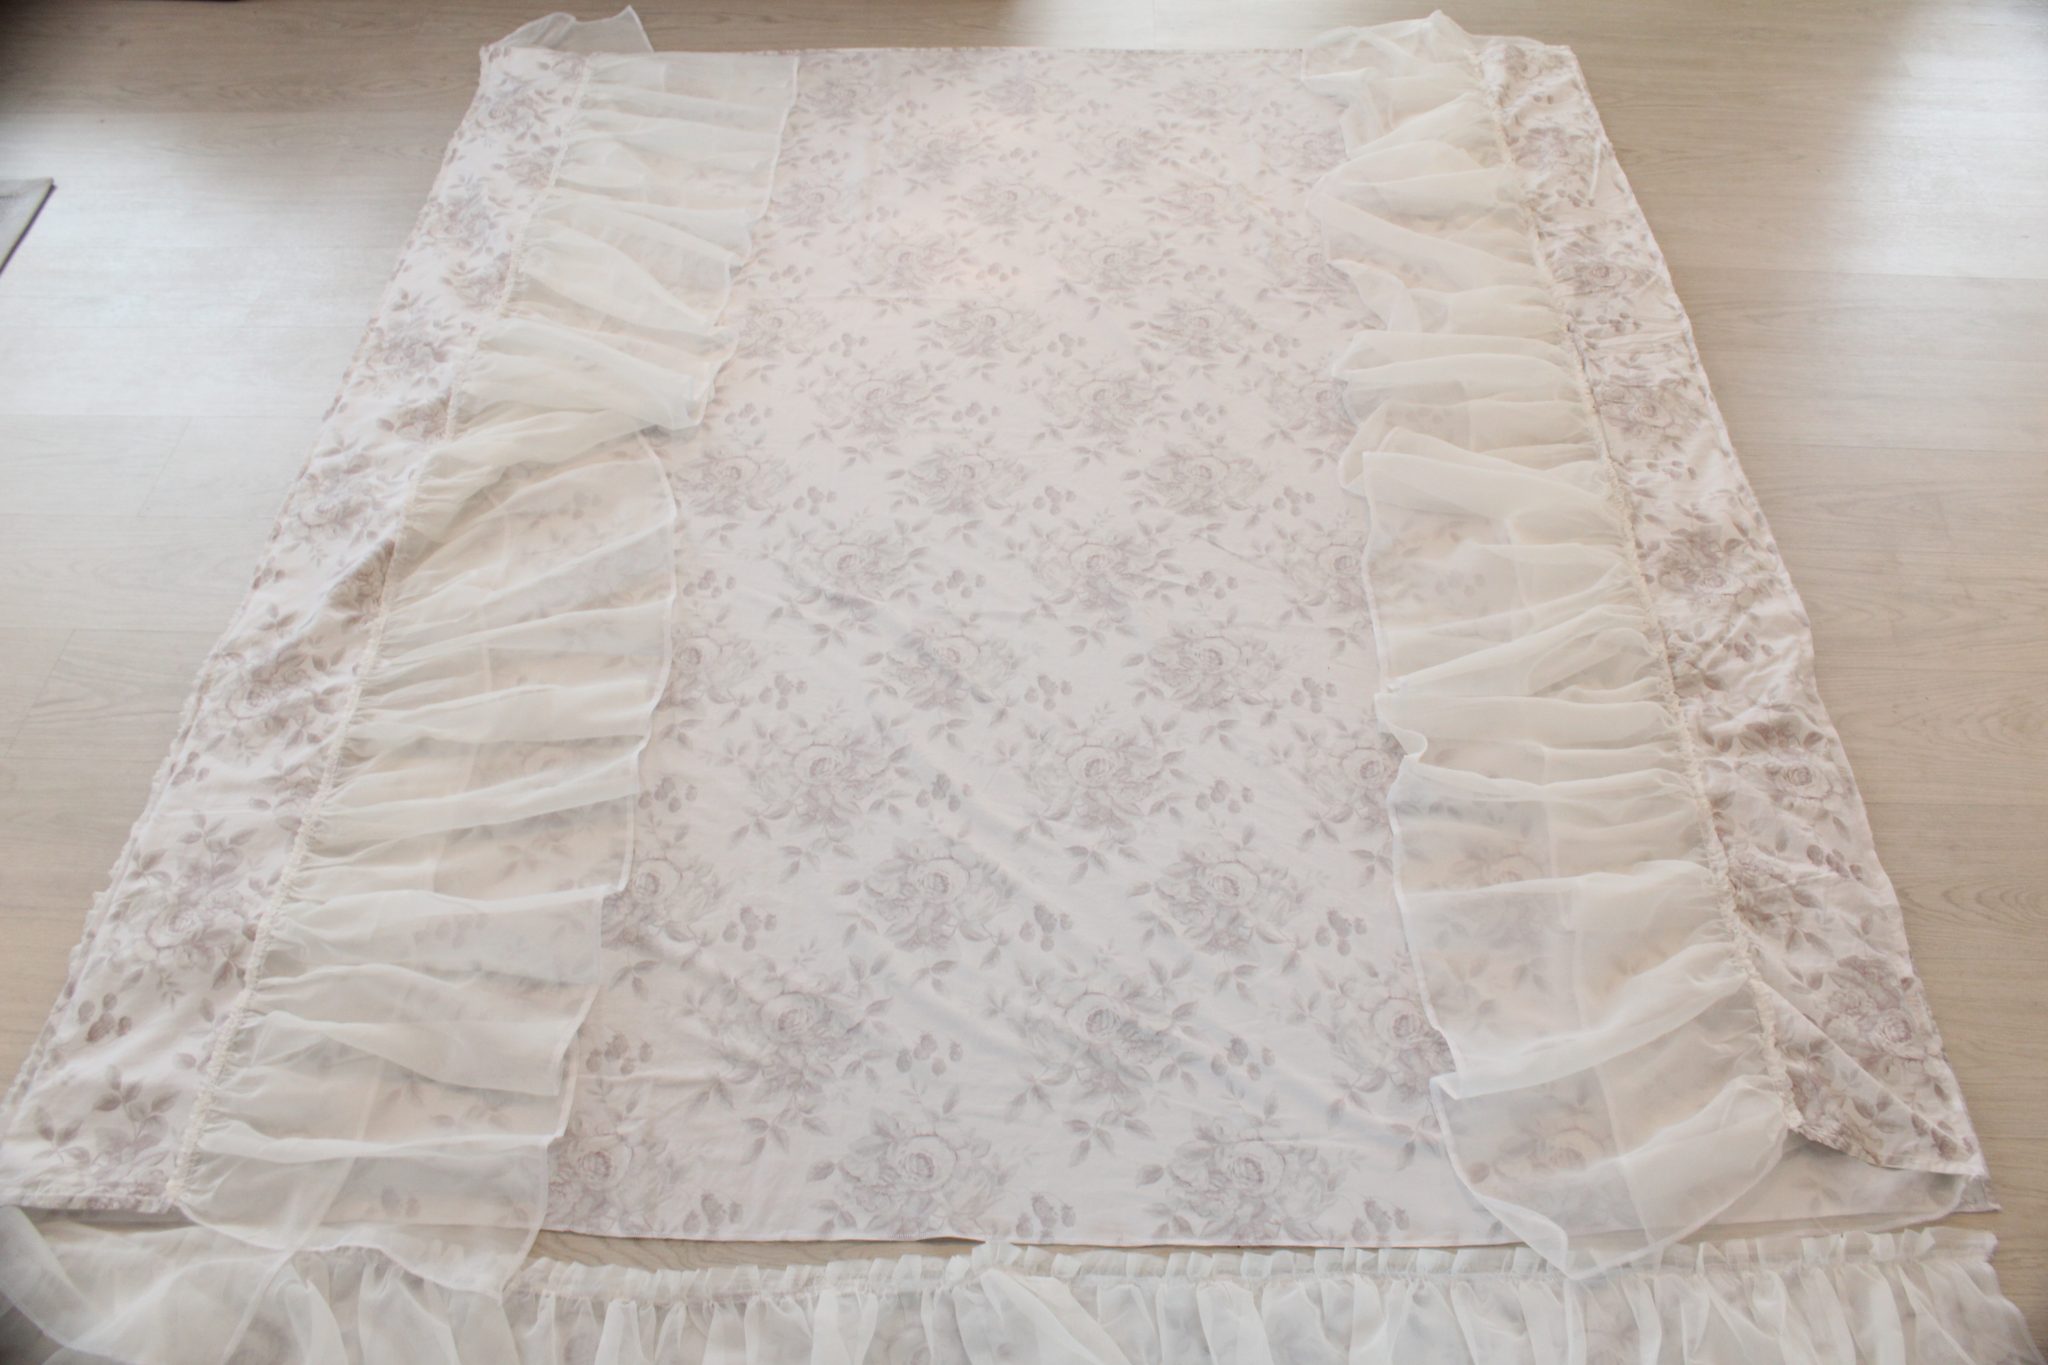
- Sew down using a 1/4″ seam allowance
- Repeat for the front panel
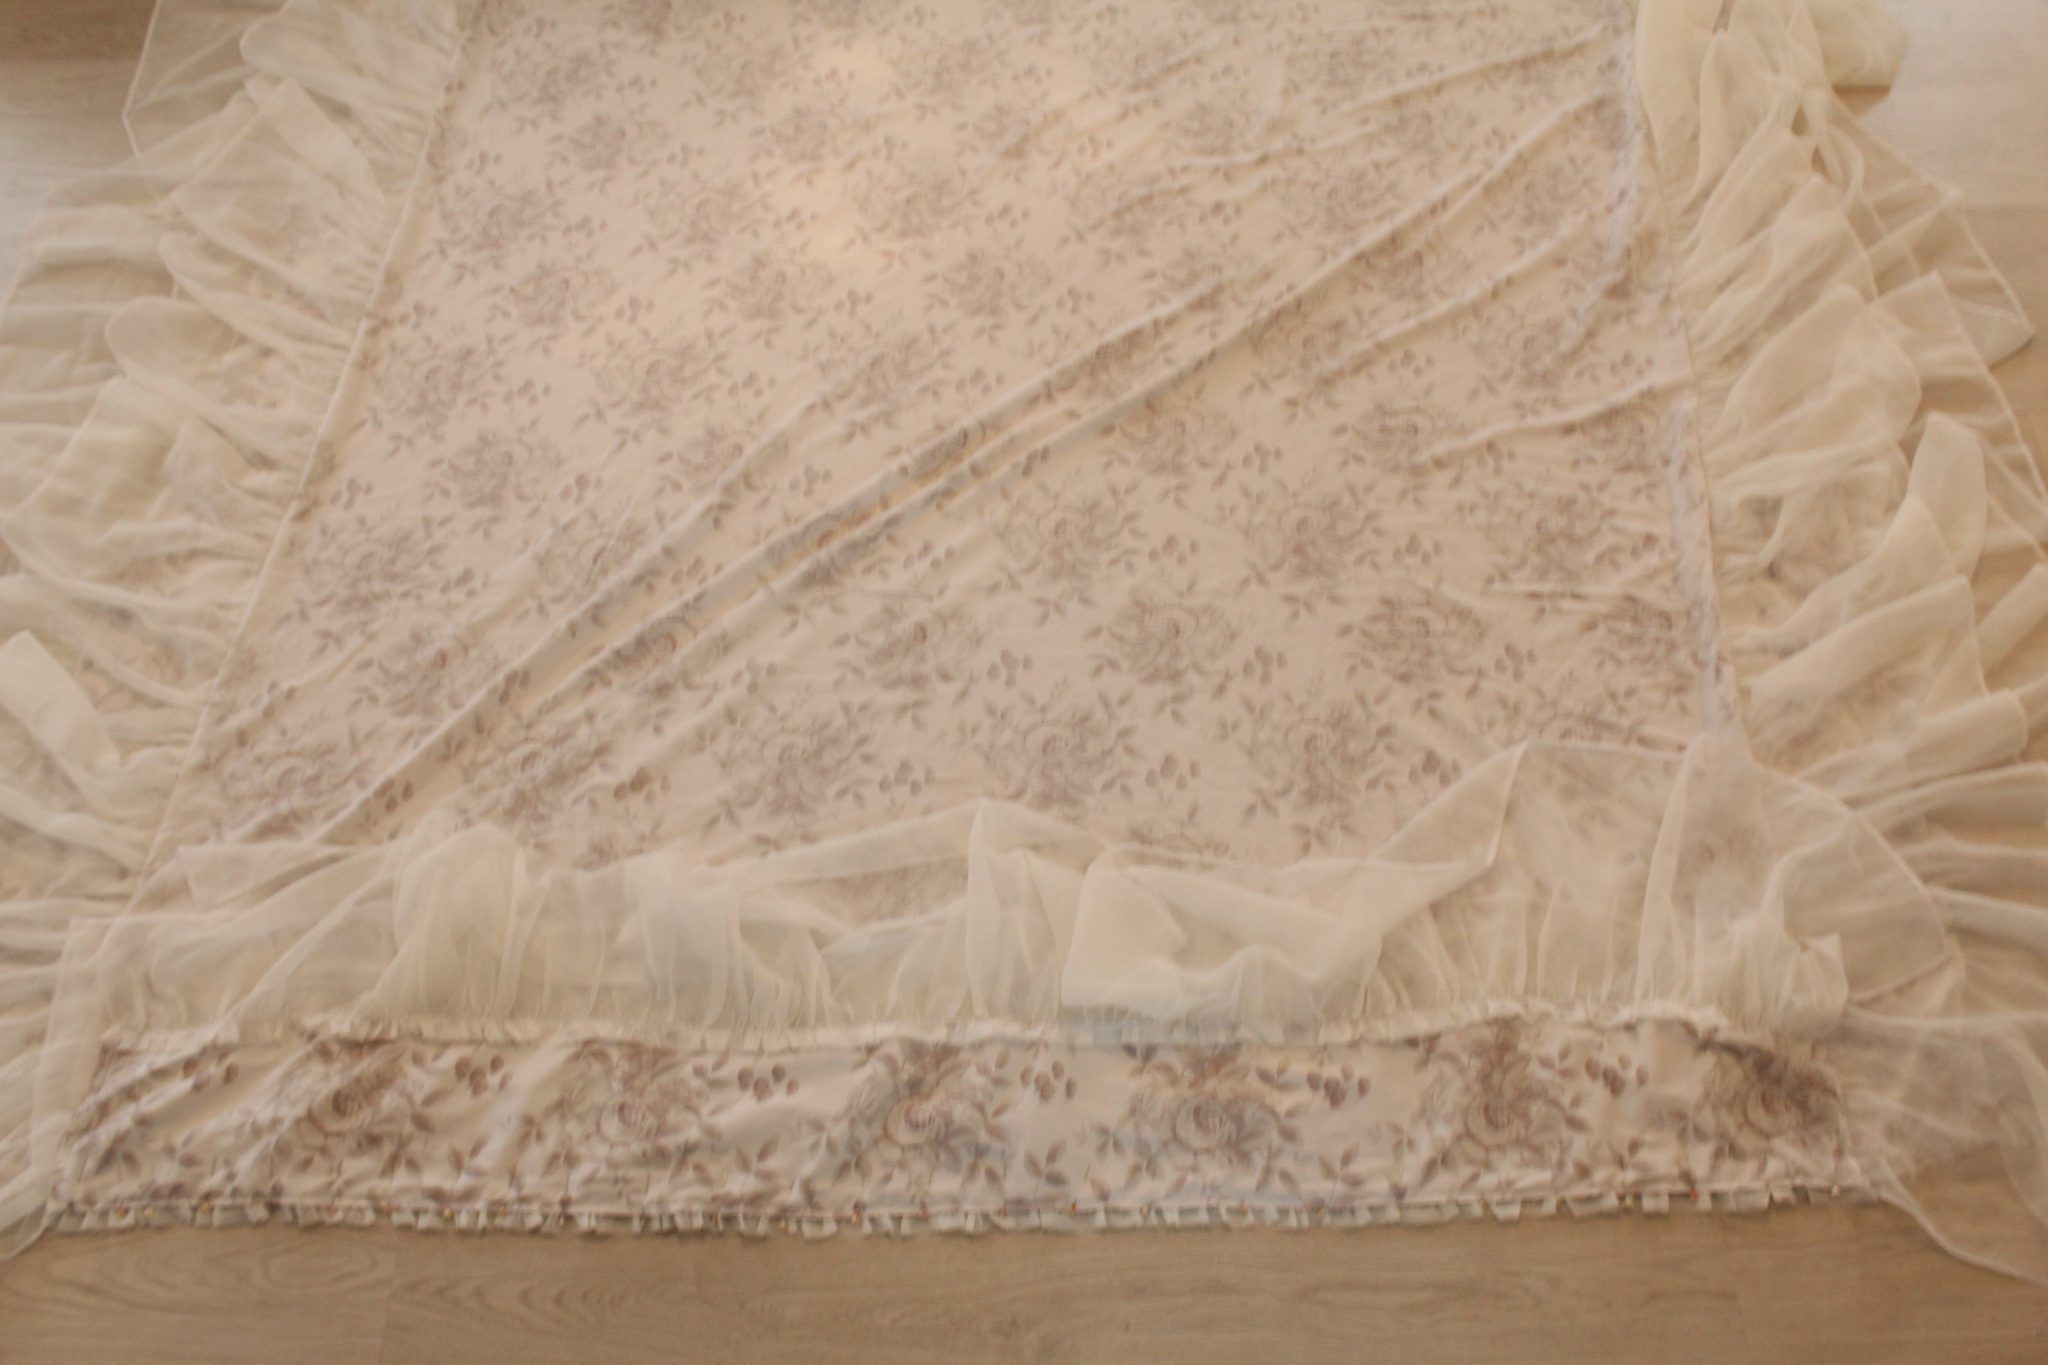
- Fold each panel back to its place & press the seams towards the platform.
- Then edge stitch over the seams with 1/8″ allowance. And now you’re dealing with tons of fabric and even more ruffles and slippery sheer fabric. S you need to sew slow and be very careful not to catch any other fabric under the needle. How do I know that? Pff…it happened to me a few times!

- Your DIY bed skirt is done! All you have to do now is lay it on your bed as you would a regular bed sheet. Enjoy!
Pin to save for later
Most popular sewing projects:
Article may contain Amazon & affiliate links. As an Amazon Associate I earn from qualifying purchases at no additional cost to you.

I’ve made quite a few bed skirts over the years. My suggestion for those attempting this for the first time is to buy an expensive flat sheet for the platform. I find a twin size sheet is almost perfect for a full or queen size box springs. Save the top hem of the flat sheet for the top of the platform so you don’t have to hem that section. After cutting your platform to size plus seam allowance, measure from the top of the box springs to the floor, add seam allowance and hem allowance. Easy peasy. Also, mattresses/box springs have rounded corners so remember to follow the line of your box springs at the foot for a more professional look.
Thanks for the tips, Patty! I used an old sheet myself, for the platform, so easy and quick!
If this is covering your mattress, how do you put sheets on your bed and keep them tucked in? As far as a tutorial for making a bed skirt/ruffle, it seems easier than I thought it would be.
Hi Diane. I wanted to make something really special for my daughter’s room and as I mentioned in the tutorial this is a custom made bed skirt. I’ve sewn custom bed sheets for my daughter’s bedroom that go well with this particular bed skirt. I made those sheets in the size of the mattress, with ruffles on sides and top, and attached straps at corners so I can tie them to the feet of the bed. This only works for this type of farmhouse style beds.
I like your idea the only thing I would say is that if you don’t have the money for the top material I have used an old fitted sheet and attached the skirting, it’s cheaper and will not slide around.