

How to make a dress pattern with video instructions
Are you interested in making your own clothes but don’t know where to start? If you have some basic sewing skills, you can create your own dress patterns! With a few simple steps, you can turn your fashion sketches into reality. Keep reading to learn how to make a dress pattern.
How to make a dress pattern
Got your eye on a pretty dress that’s too expensive for your budget? Learn how to make a dress pattern with this insanely easy method on DIY dress pattern making! You won’t believe how simple but effective making a basic dress pattern truly is!
This method is great for creating dress patterns for beginners ! It’s also free, as most commercial patterns online are not, and you have the certainty it will fit your measures perfectly. Standard patterns are for standard measurements and we all know that nobody is standard, right? So it’s very time-saving to have one just for you instead of trying to alter one that’s between two sizes.
Or you may find that your favorite dress is all worn-out and you want an identical one. If you don’t plan on repurposing or making any modifications, just rip the seams and use each part of the dress as a pattern itself, without marking it on paper.
Also, if a dress you love has a very well-fitted bodice and you want another one but with a different kind of skirt, there’s no need to buy a new dress or pattern. Just use the old one and make a dress with a different bottom.
Need more dress ideas?
- V neck dress pattern
- Girls gathered dress pattern
- Easiest pillowcase dress tutorial
- How to sew a v-neck
- Shirred dress tutorial
- Easy cross back dress
When I made the easy knit dress with pockets I really wanted to find some free time to make patterns in more sizes for that dress. Because it’s so darn cute and comfortable, every girl should own a dress like this! But when I realized that’s never going to happen lol I thought it’s better if I show you how to make a dress pattern so you can draft your own pattern that fits you perfectly. And so I’ve put together a quick dress pattern making tutorial to illustrate the step by step.
This is also great as you get to keep your patterns and, as long as your body doesn’t change much, you can use them over and over again to create new patterns or items. This kind of pattern making can use most clothes you already have, like T-shirts, tanks, one shoulder, pants, it just depends on what you want to make.
Tips to keep in mind before making your pattern:
- It is better to use a similar fabric type while using one garment to create a new one, like using a knit T-shirt for a knit dress. Using the T-shirt to make a dress from a stiff fabric like denim, for example, may not work so well and you may not move freely in the end. Stiff fabrics also require darts and other fitting work that knit or other elastic fabrics don’t need, so patterns can turn out quite different.
- Also, the original designer matched the fabric type and weight with the design to get a nice drape, so this is another reason to use similar fabrics.
- Always make sure you follow the same grain line as the original garment so that it looks the same. The grain line will usually run from your shoulder down to your knee, but check every piece of your pattern to make sure this goes for your particular project as well.
- The same pattern can be used on clothes for different seasons. Just use it on different fabrics to suit the season.
Similar posts you might like:
- How to sew a V-neck
- Summer dress pattern
- The ultimate list of beginner sewing projects
- Bubble skirt tutorial
How long will it take to make a dress?
The time it takes to make a dress will depend on the style of dress you choose, as well as your sewing skills. A simple dress can be made in a few hours, while a more complex dress may take a day or two.
How much fabric will I need to make a dress?
The amount of fabric you’ll need to make a dress will depend on the size of the dress and the style. A simple dress made from lightweight fabric may only require 2-3 yards (1.8-2.7 meters) of fabric, while a more complex dress made from heavier fabric may require 4-5 yards (3.6-4.5 meters).
If you’re unsure how much fabric to purchase, it’s always better to err on the side of too much rather than too little. You can always use the extra fabric for something else, but if you run out in the middle of sewing, it can be difficult to match new fabric to the old.
How to make a dress without a dress form?
With my idea below you won’t need a dress form. You’ll need a dress with similar measurements to you and some chalk or a pencil. Follow my simple instructions and you’ll see how easy it is to make a dress without a dress form.
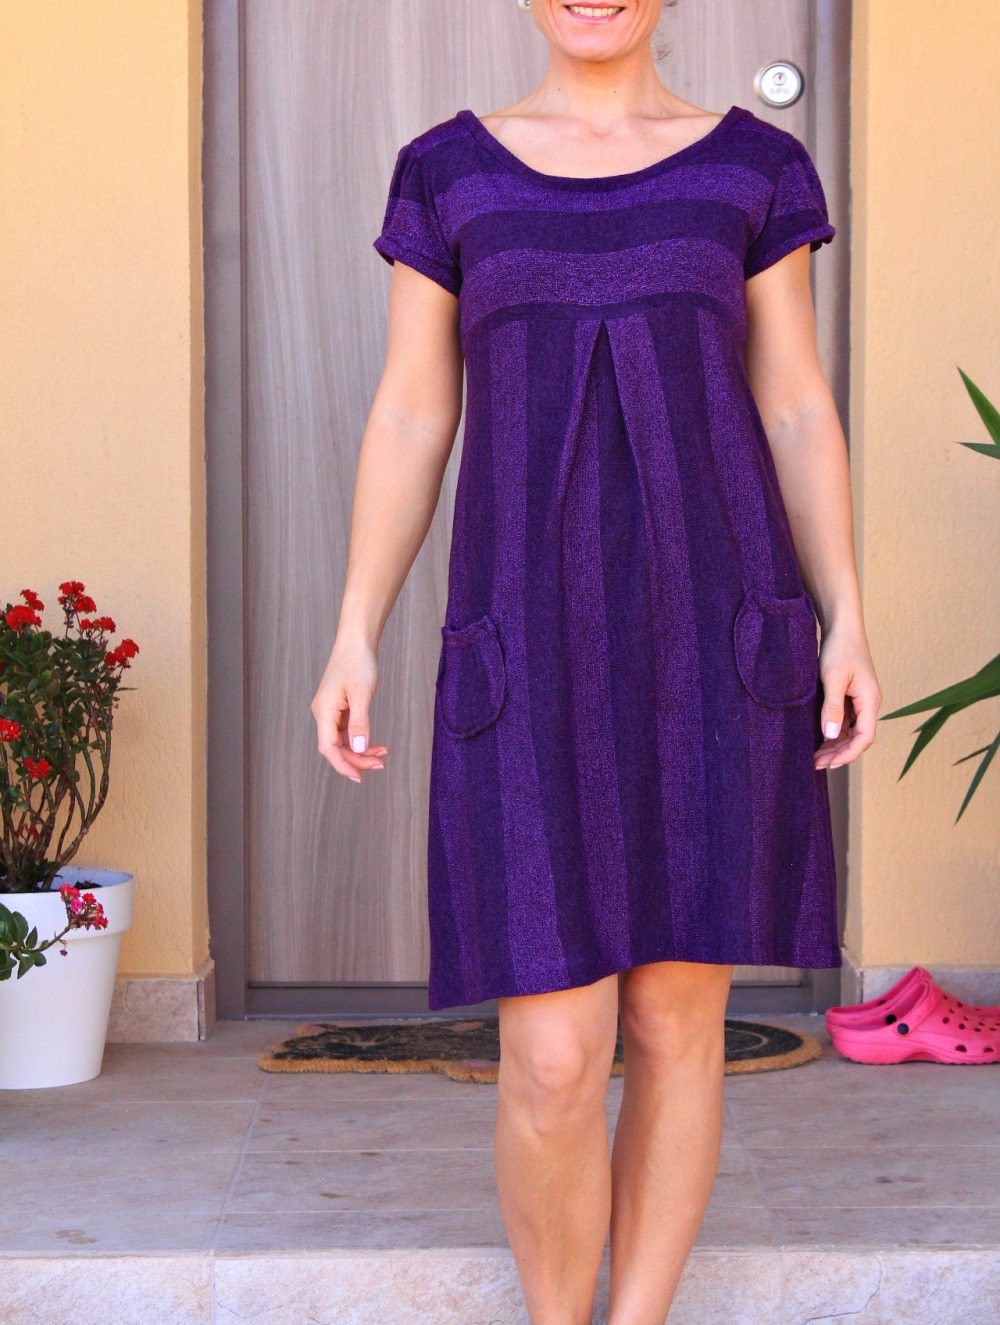
Making a dress pattern is super simple and quick, you’ll want to apply this idea to all your future patterns! My dress is made out of 2 pieces: the bodice and the skirt. Below I’ll show you exactly how I did both and for assembling you can always refer to the dress with pockets tutorial. For this tutorial I used a t-shirt that fits Ellie, my daughter, since I plan to use this pattern to make a dress for her, exactly like mommy’s.
If you wanted to learn how to make a dress pattern and create your own dresses that are a perfect fit, this simple and easy dress pattern making tutorial will teach you the basics of dressmaking in just a few easy steps!
Steps for making a simple dress pattern
What do you need to make a dress?
- t-shirt that fits you well
- large paper to draw your pattern pieces
- measuring tape
- ruler
- pin
- pencil/pen
- paper scissors
- fabric
- sewing machine
- thread
- needle to match the fabric type
How to make a dress?
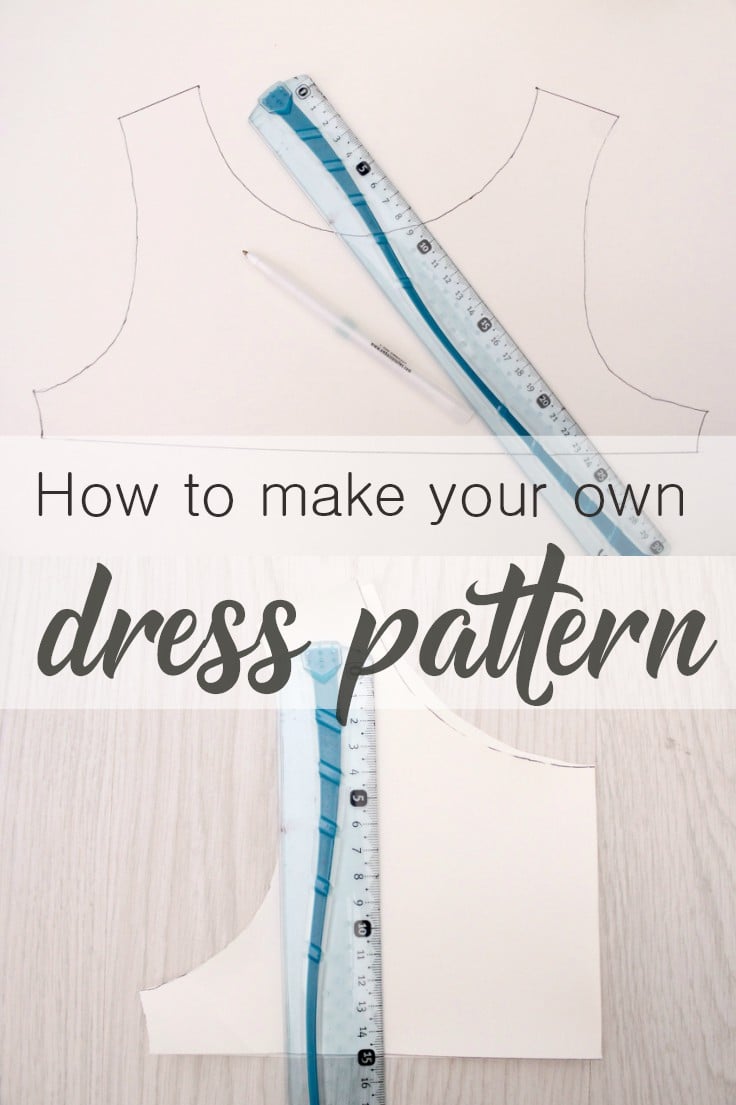
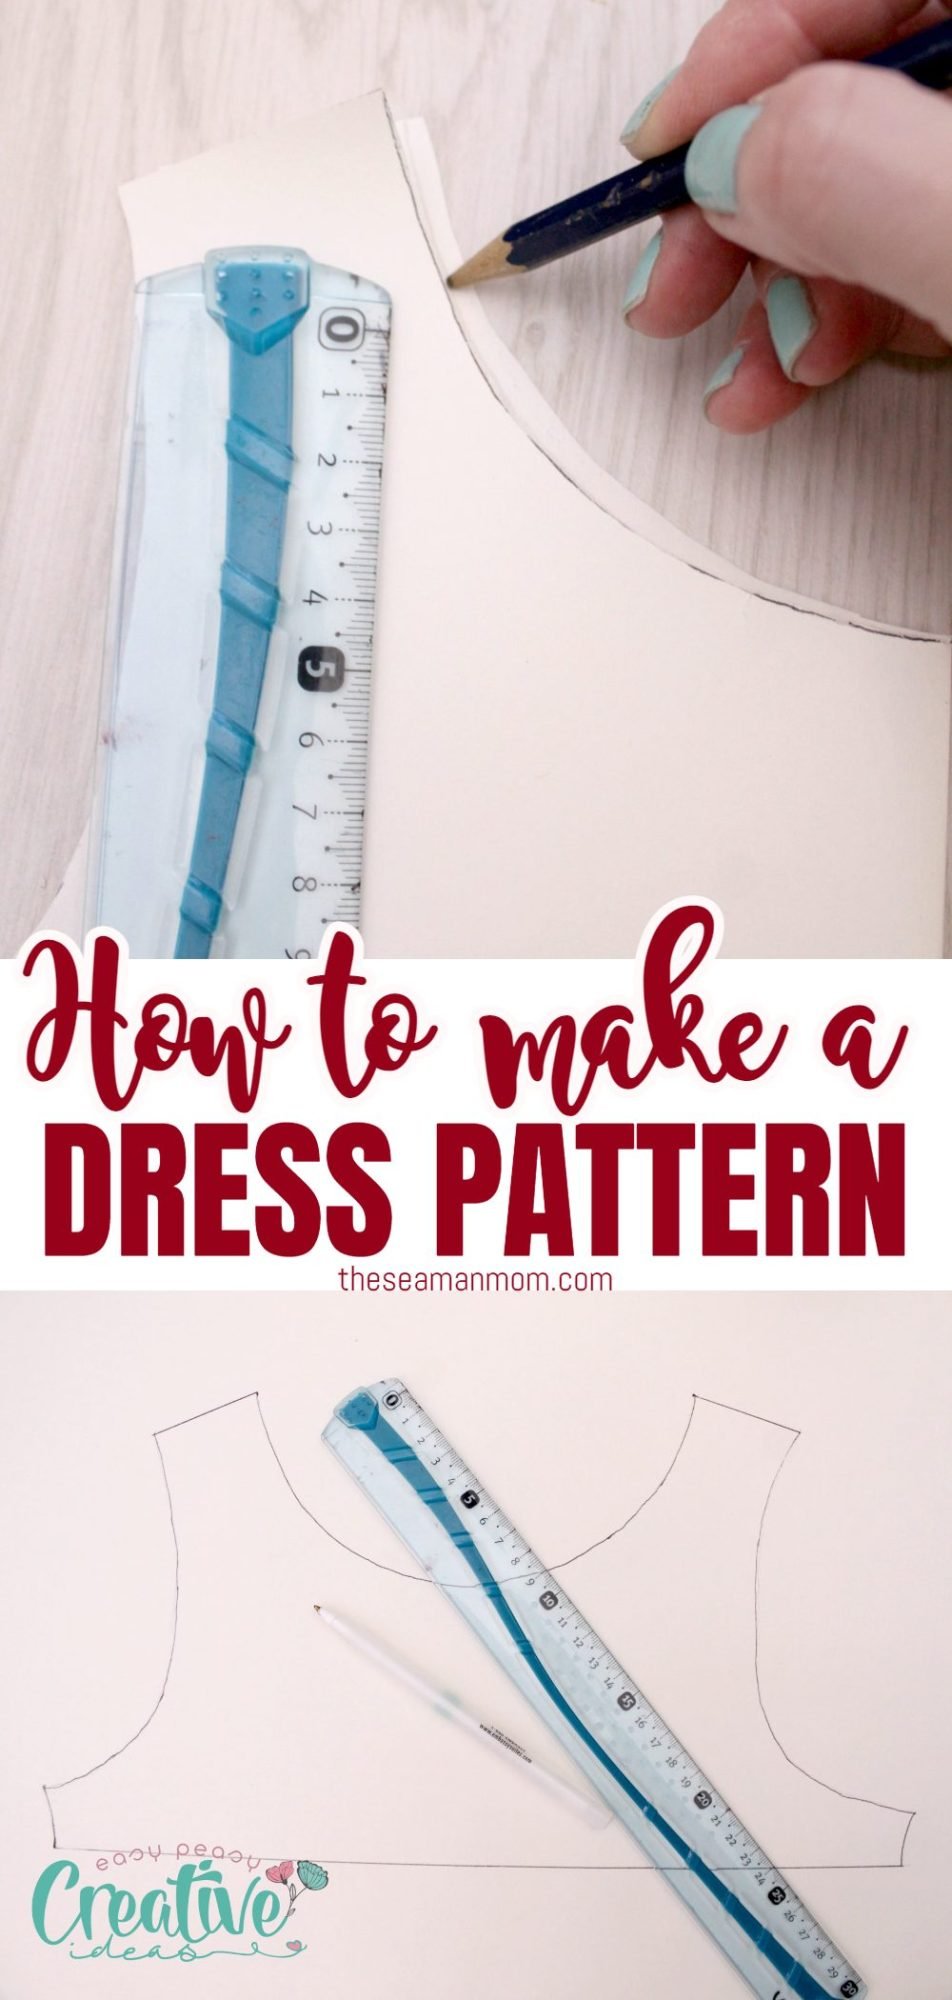
Step 1 – Making the bodice:
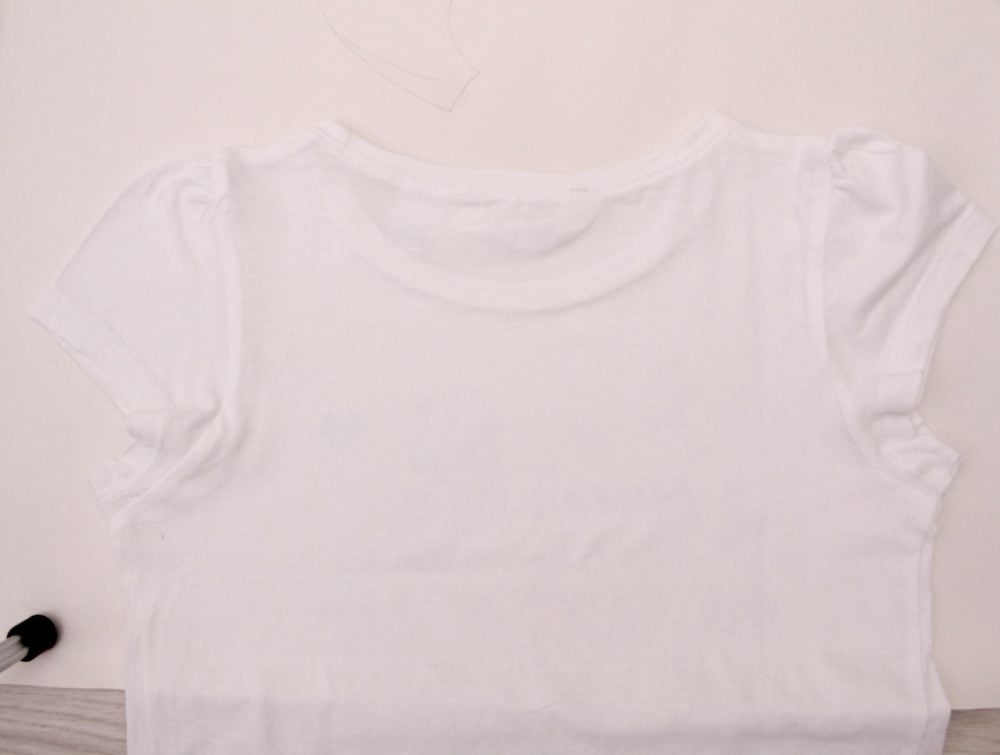
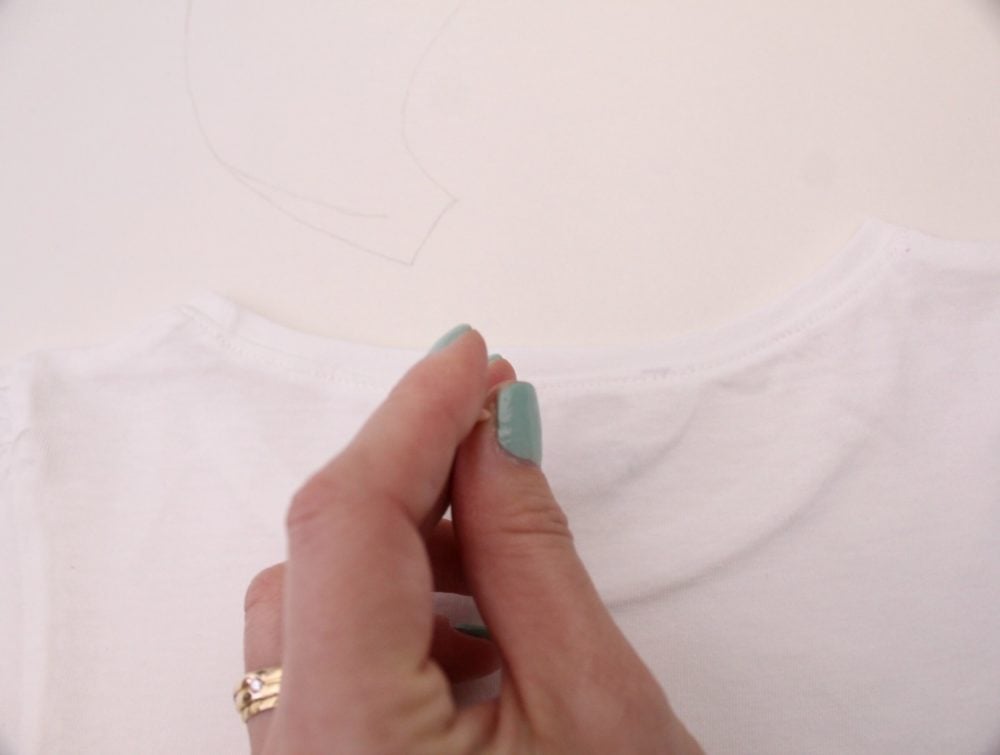
- Lay your t-shirt on the paper front side or back side up and try to make it as neat and wrinkle free as possible.
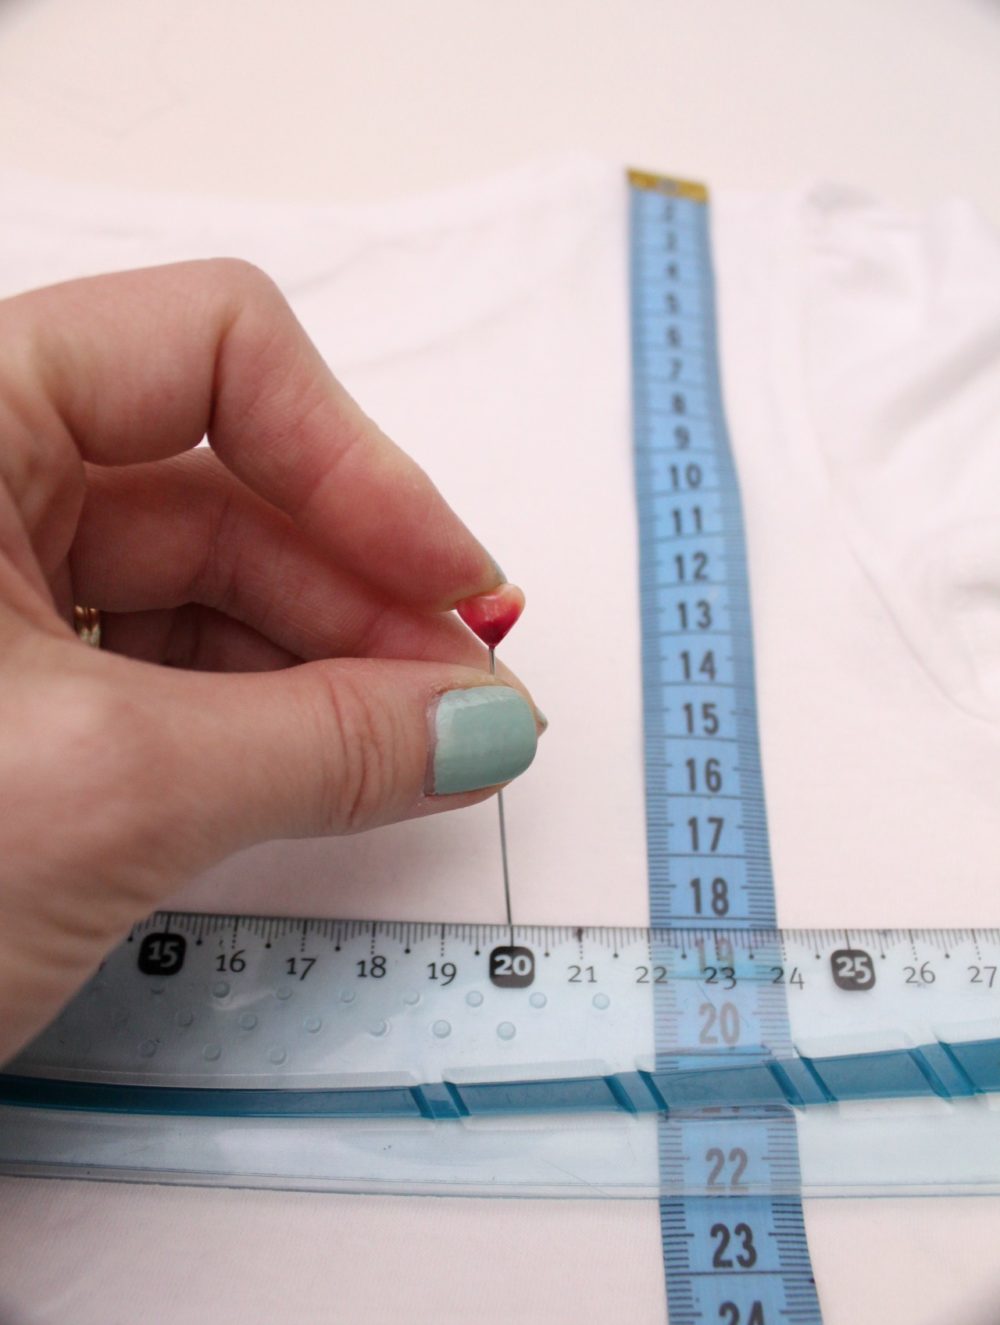
- Measure yourself from shoulders to right under your chest.
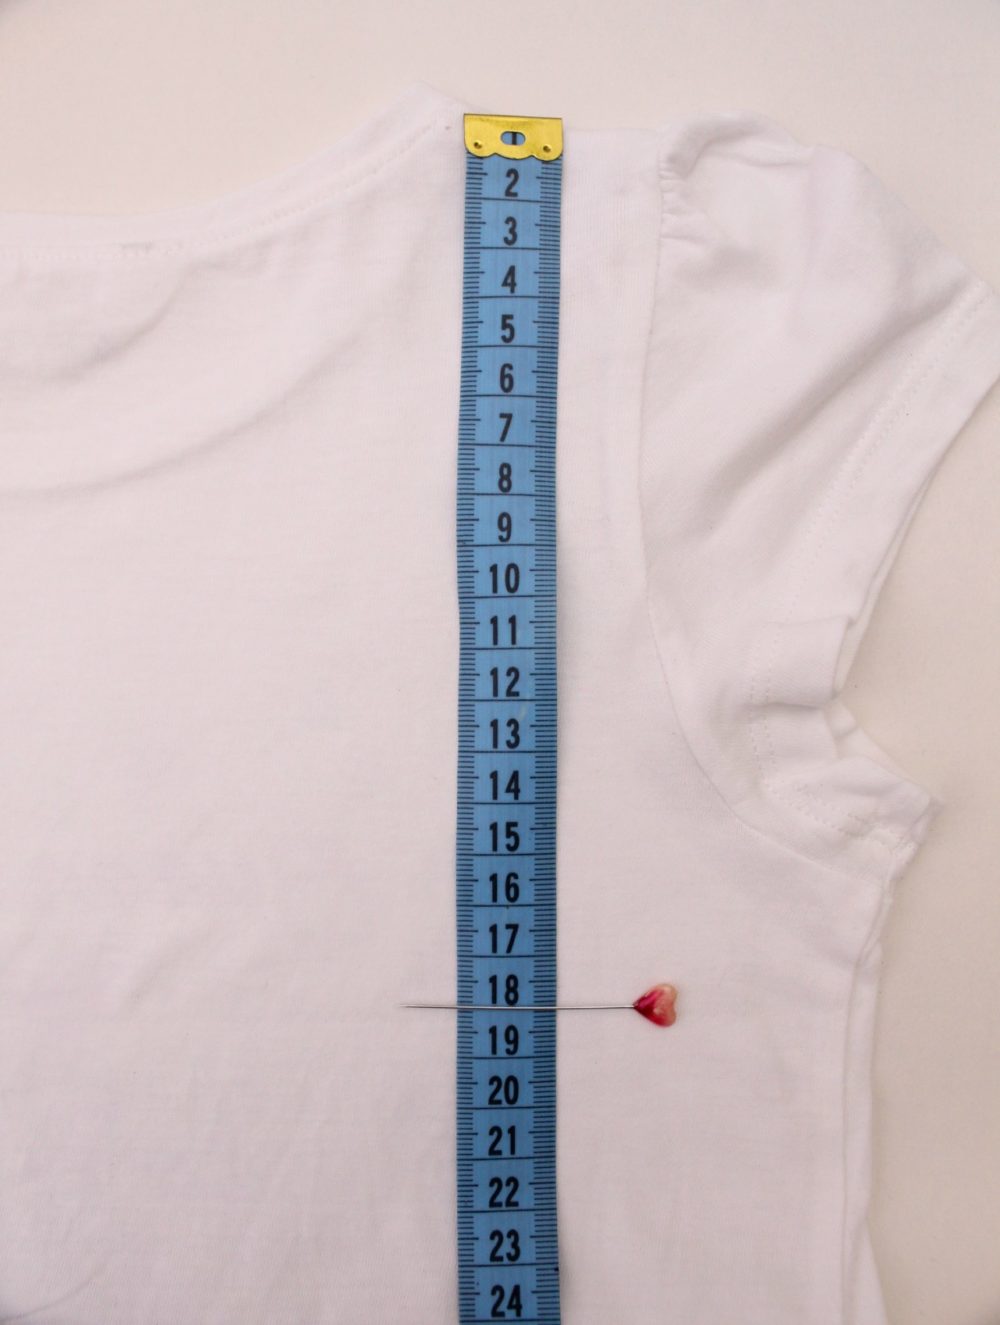
- Using these measurements, lay a ruler across your t-shirt.
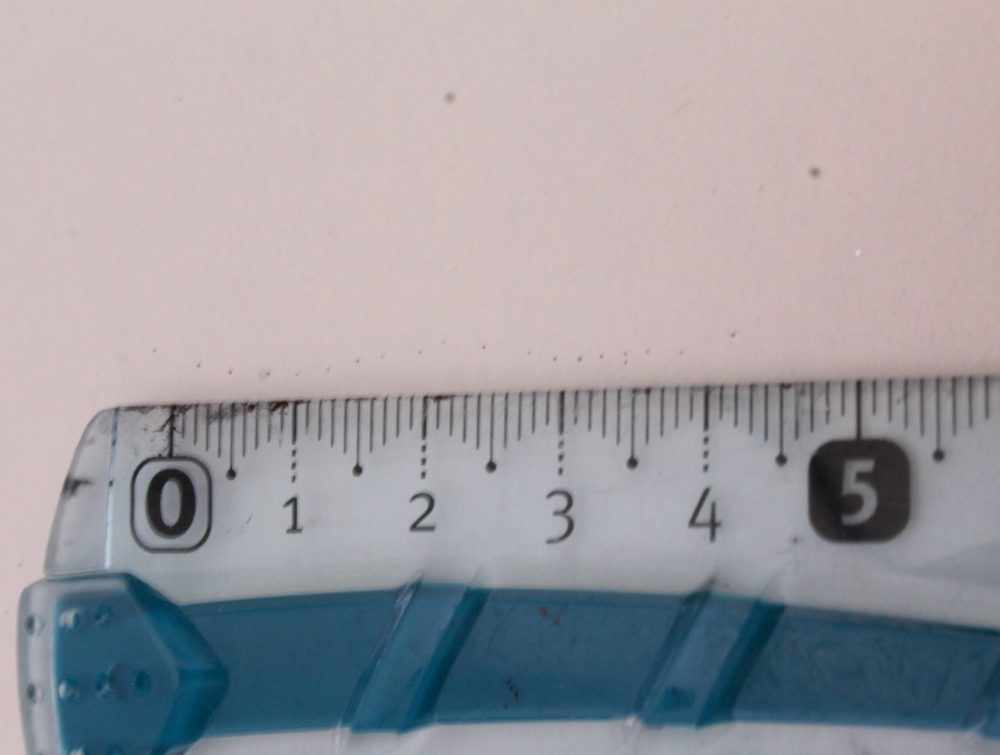
- Grab a pin and punch holes through your t-shirt, all the way along the ruler, thus marking the bottom of your bodice onto the paper under the t-shirt. Don’t worry, your t-shirt won’t feel a thing!
- Continue punching holes along the side seams of the t-shirt
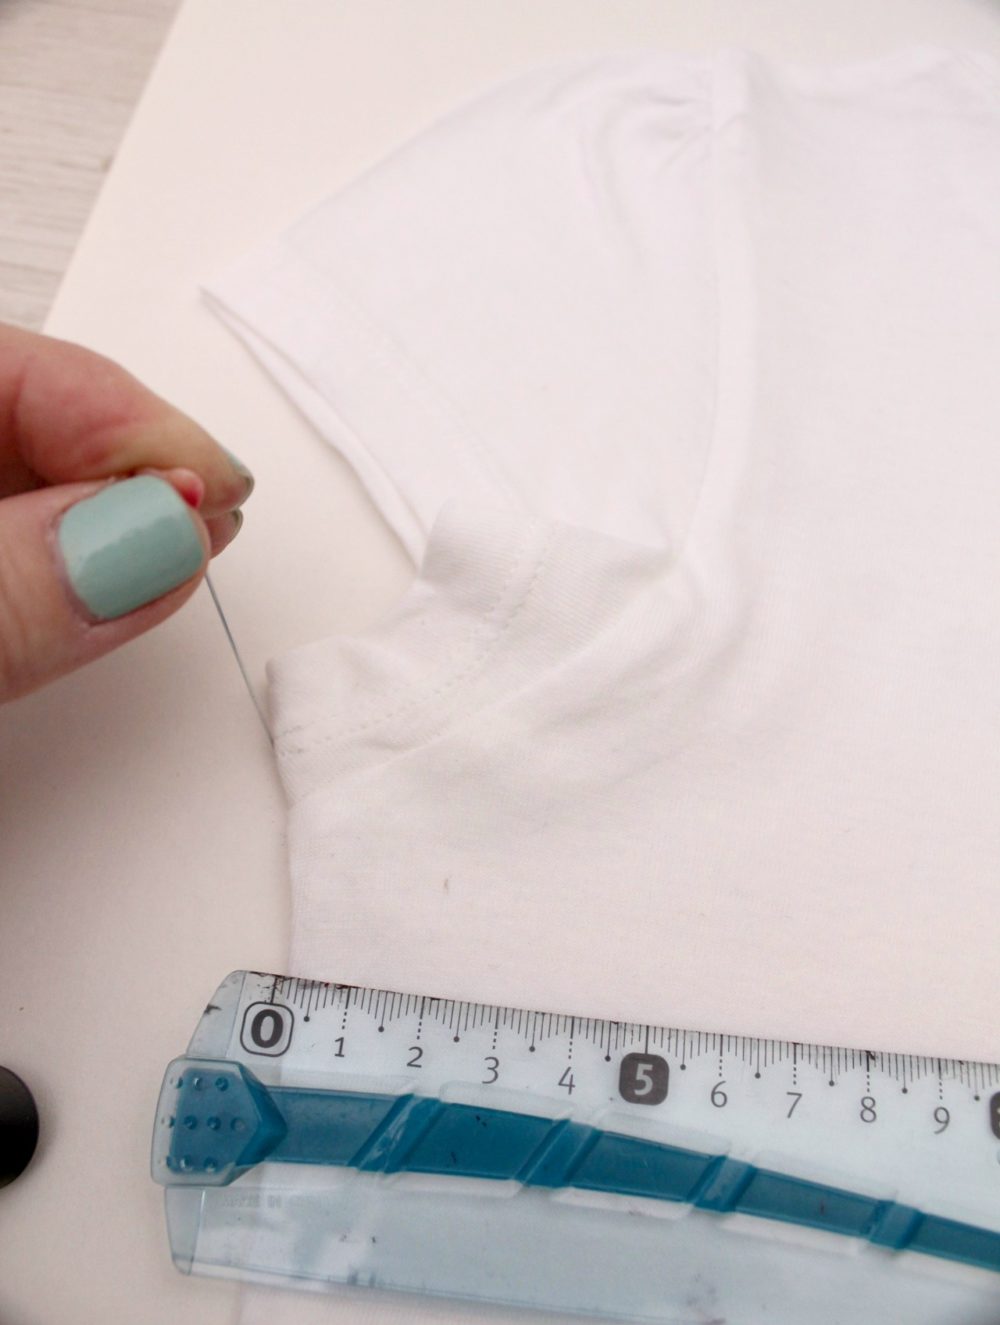
- Then go to the sleeve area and punch holes along the armhole, right through the seam.
- Continue to punch holes along the shoulders
- When you get to the neckline, punch again through the seam line.
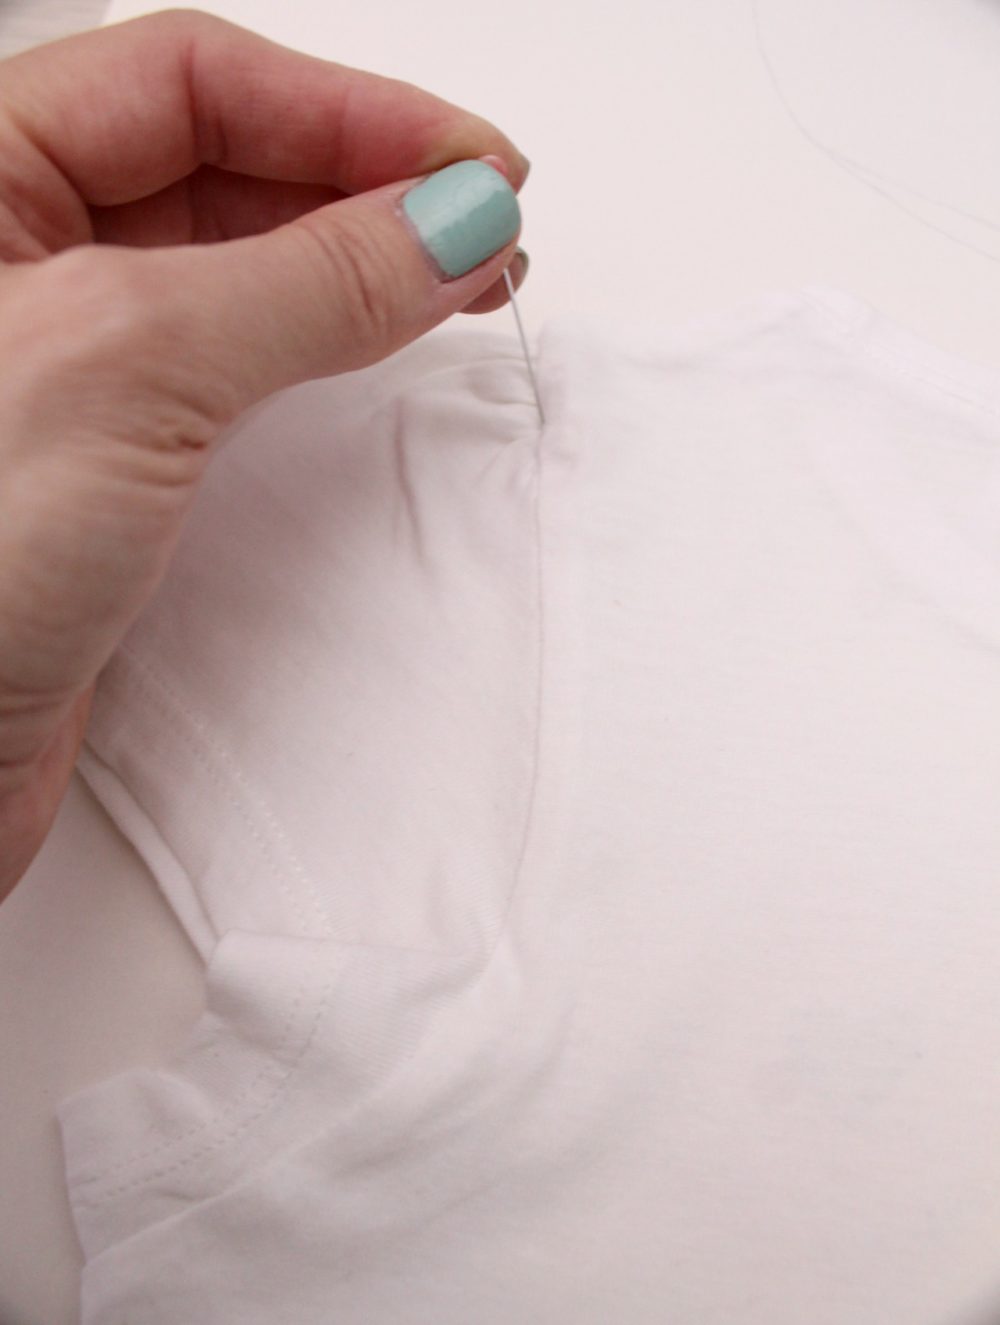
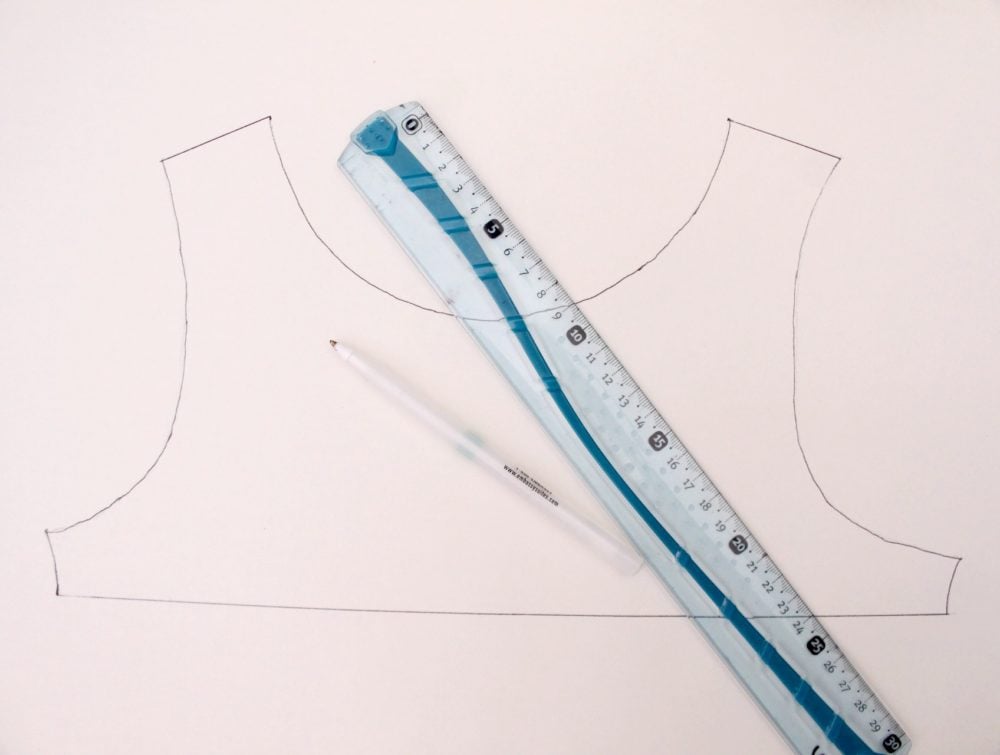
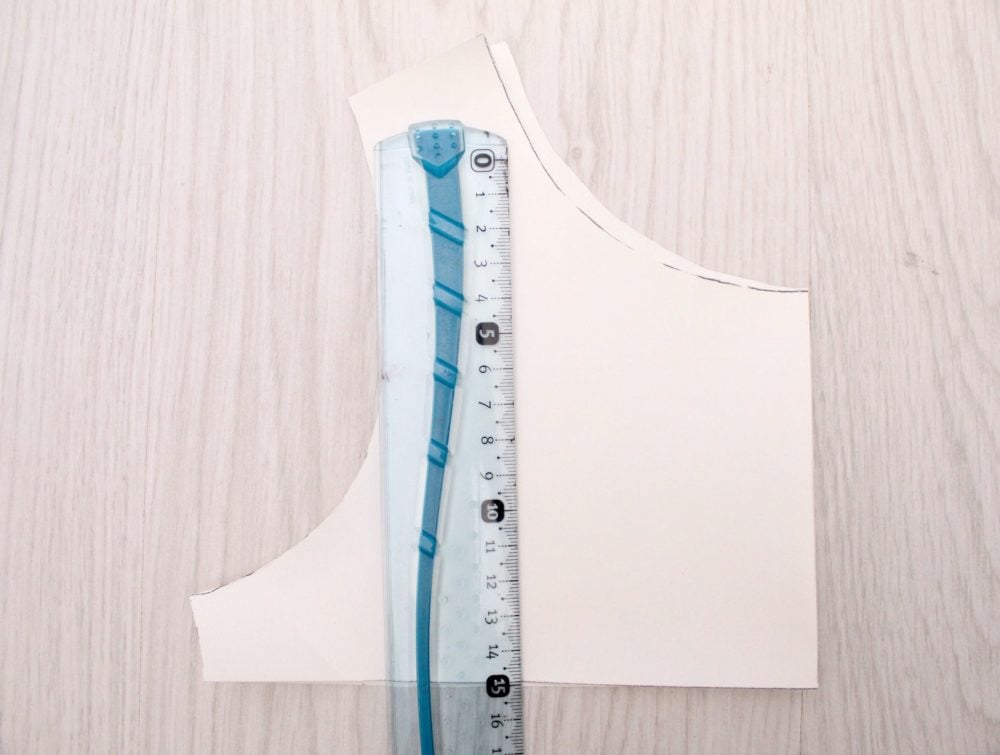
- Remove the t-shirt and connect the dots with a pen or pencil.
- Repeat for the other side of the t-shirt (back if you did the front first or vice-versa)
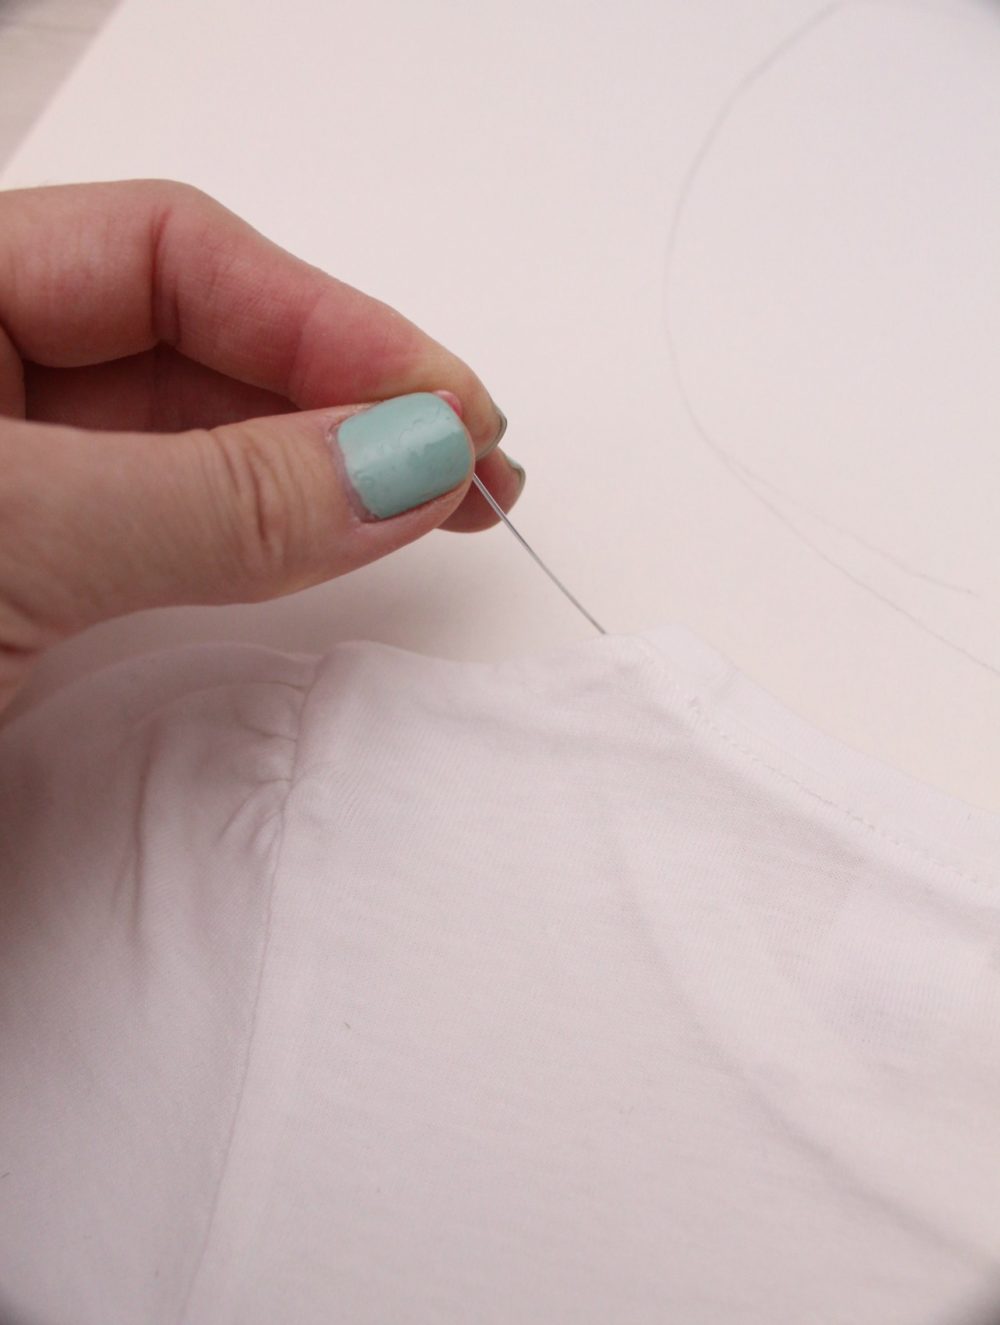
- Repeat the process for the sleeve. If you want to make the sleeve a little puffy as I did on mine for the knit dress with pockets, make the sleeve a little larger than your t-shirt so you can gather it when sewing.
- Take seam allowances into consideration then cut out your patterns and fold in half. Both halves should match but if they don’t, mark and make alterations to the patterns as needed.

Step 2 – Making the bottom (skirt pattern):
- You basically need to draw a trapezoid shape for each side of the skirt. The top side should be matching the length in the bottom of your bodice plus allowance for the fold (I think an extra 6″ would be enough, unless you need a lot of room in the tummy area which will be ensured by a larger fold).
- The length of the trapeze is your choice (make the dress short, medium or long, it’s all up to you)
- The bottom side of the trapezoid should be the top length plus 1/2 (i.e if the top side is 20″, the bottom side is 20″+10″=30″)
- Make the bottom slightly curved. Measure about 1/2″ down from the middle of the bottom line, mark and round up. If you don’t do this step, the sides of your skirt will look a little longer than the rest of the skirt when you wear it.
- Repeat for the other side of the skirt.
Step 3 – Transferring onto the fabric:
- Place each piece of pattern on the fabric, except for the sleeves and cut around the patterns. Leave enough allowance for seams and hem.
- When cutting the fabric for the sleeves, cut on fold, twice
- Assembly the pieces together and finish sleeves and neck with binding as indicated in the knit dress with pockets tutorial.
Are you ready to make your own simple dress pattern for beginners? I really hope this tutorial helped you and I’m eager to know what amazing pieces of clothing you made with this technique so please let me know in the comments section below!
Pin to save for later
Most popular sewing projects:
- Tips for sewing a round hem
- Corded bag handles
- Flutter sleeve dress pattern
- How to laminate cotton fabric


Article may contain Amazon & affiliate links. As an Amazon Associate I earn from qualifying purchases at no additional cost to you.

I can’t believe all the time I wasted seam-ripping a shirt with collar, front buttons, long sleeves, etc. to make a pattern. It was successful. But now I am definitely going to use the needle hole method. You just saved me so much time. Thank you!
Thanks so much for your comment, Kara! I’m very happy you liked my method! Let me know how it works for you if you get to use it.
Wow this is so smart! I am a newbie in sewing and I think it’s brilliant that you make use of what already fits you to construct a new piece.
I haven’t made my own clothes in years, but find I want to do it again. I was delighted to find your instructions for making my own patterns. It is so logical to use a garment that already fits well as your guide. And your tip to use a similar fabric is so right. Thank you so much for giving me the incentive I needed to get going!
This is a very nice tutorial and it is simple and easy to see how to so it with your instructions. Now, tell me what is that ruler? ;)
I love your tutorial, its straightforward and easy for me to understand. Thank you, its really helpful for me
Thanks for your kind comment, Debby! I’m glad you found my tutorial informative & easy to follow! xoxo
It is so easy to follow and make it.i’m a beginner at sewing and I love your blog. you’ve made my day flow with ease in sewing. Thank you.
Awww! Thanks so much Setaita! You made my day :) I’m glad I could help and hope you’ll find more interesting projects here! xoxo
Nice basic tutorial for a simple dress pattern. I’ve used this method to copy garments. One thing though the pin makes HOLES in the paper, not wholes :)
Haha! Thanks for bringing this to my attention Rebecca! :) I’m glad you liked my tutorial and putting it in practice worked out well for your own pattern! xoxo
I love how you broke all of this down! I run a DIY fashion blog and was looking for something to link to when I talk about basic pattern drafting. Thank you so much for creating such a thorough post!