How to make a half circle skirt
Create a stunning skirt tailored to fit you flawlessly with this straightforward half circle skirt sewing tutorial! Without the hassle of a zipper, you’ll have your beautiful half circle skirt ready in moments! With just a few measurements, cuts and simple seams, you’ll quickly have a beautiful skirt that drapes elegantly around your body, ready to impress at any moment. Perfect for beginners and experienced sewers alike, this tutorial ensures you’ll create a stunning piece tailored just for you, with minimal fuss and maximum style.

Sewing a half circle skirt becomes incredibly easy with this simple tutorial! All you need is knit fabric, a piece of elastic and some free time; not a lot though. And the best part is, you won’t need a pattern, I’ll teach you how to make your own. A quick and easy project you can do in about an hour (except that you will probably need to let your skirt hang over night before finishing the hem; read along for more details).
I’ve made a circle skirt and a half circle skirt before but I never experienced with knits for this kind of projects so this was completely new to me. It turns out that working with knits is not that big a deal, even when you don’t own all the sewing tools needed. The fabric I used is jersey and to me this seemed the safest and easiest knit to work with.

While I love a full circle skirt for girls, I think a half circle skirt is better suited for women as a skirt like this is less full and takes less fabric to make. This skirt is perfect for a casual look and great to wear when taking the kids out, so comfortable to wear, and “safe”. Being made out of knit, my DIY half circle skirt doesn’t need a zipper or a button so it’s so much easier and faster to sew than other skirts.
Ready to sew your own pretty skirt? Let’s get started!
Half circle skirt tutorial

Materials:
- about 2 yards of fabric – similar here (or a little more if your measurements are bigger than mine)
- measuring tape
- pins
- fabric marker
- scissors
- matching thread
- knit needle or jersey needle
- walking foot (optional)
- 2″ wide elastic
- safety pin
- knit tape or very soft and thin interfacing
- screw driver (your machine might come equipped with one)
- sewing machine
How to make a half circle skirt – step by step instructions
Make the half circle skirt pattern
- First let’s do a little bit of math calculations and measurements. Measure your waist and divide by 3.14 to get the waist radius (inner circle). Round up to the nearest inch.
- Measure your waist and divide by 3.14 to get the waist radius (inner circle). Round up to the nearest inch.
- Measure the desired skirt length and add it to the waist radius to get the hem radius (outer circle).
- Check the stretch in your fabric. You’ll want the stretch to go sideways.
- Depending on the stretch, fold the fabric in half (stretch will need to be perpendicular to the fold).
- Take your measuring tape and pin it at the fold, on the left hand side corner.
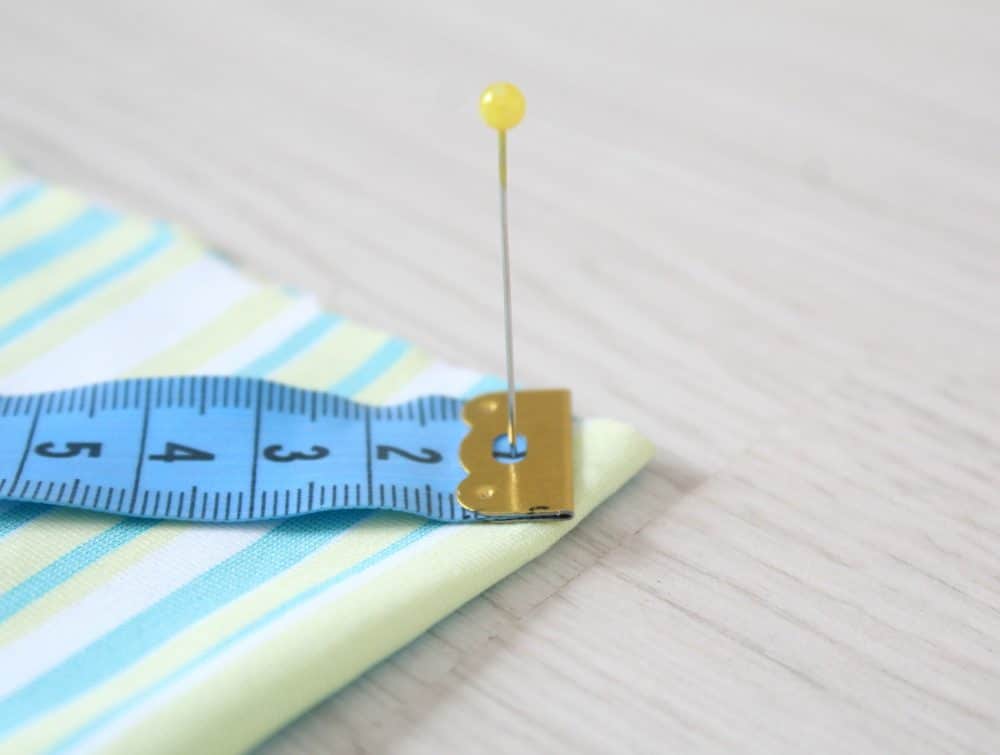
- Measure out from this corner, using your waist radius and moving the tape and marking right at the radius number to create a circle
- Repeat for the hem radius using the hem radius number.
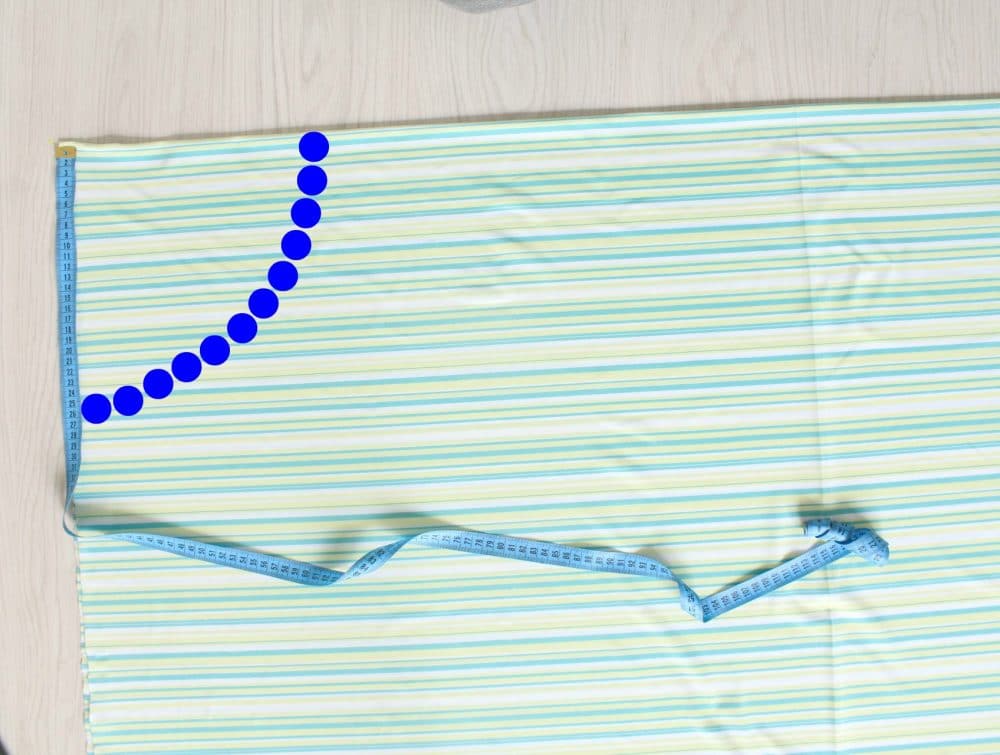
How to cut a half circle skirt and sew
- Cut fabric along the circles.
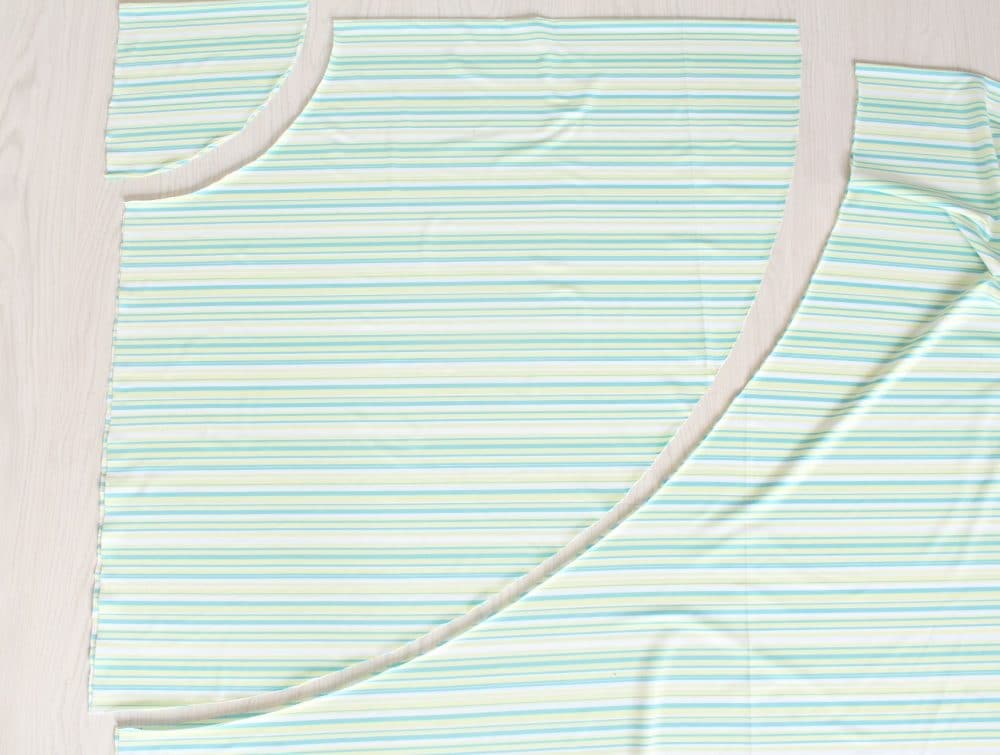
- Pin the raw sides and sew down using a regular stitch and a kit or jersey needle. Use a walking foot to make sewing knits easier. If you don’t have one, adjust the presser foot tension to minus (see here how to change the settings in your presser foot tension). A looser presser foot will allow the knits to slide through easily without stretching. Test on a piece of fabric to get the best tension fot your project.
- Finish side seam with a serger or a zig zag stitch or just leave as is, knits won’t fray.
Make and sew the waistband
- Cut a piece of fabric for the waistband. You’ll need it to stretch it sideways. The waistband should be 5 inches tall, and your waist measurement wide, adding 1/2″ seam allowance.
- Place the ends of the waistband together, right side together, pin and sew down the raw edges, leaving a small gap in the middle, to thread the elastic through later on.
- Fold the waistband in half, turning it right side out and press.
Attach the waistband to the skirt
- Turn the skirt right side out, slide the waistband over the top of the skirt and pin the raw edges together. Make sure the opening in the waistband is facing out. Also make sure the seam in waistband matches the seam in your skirt.
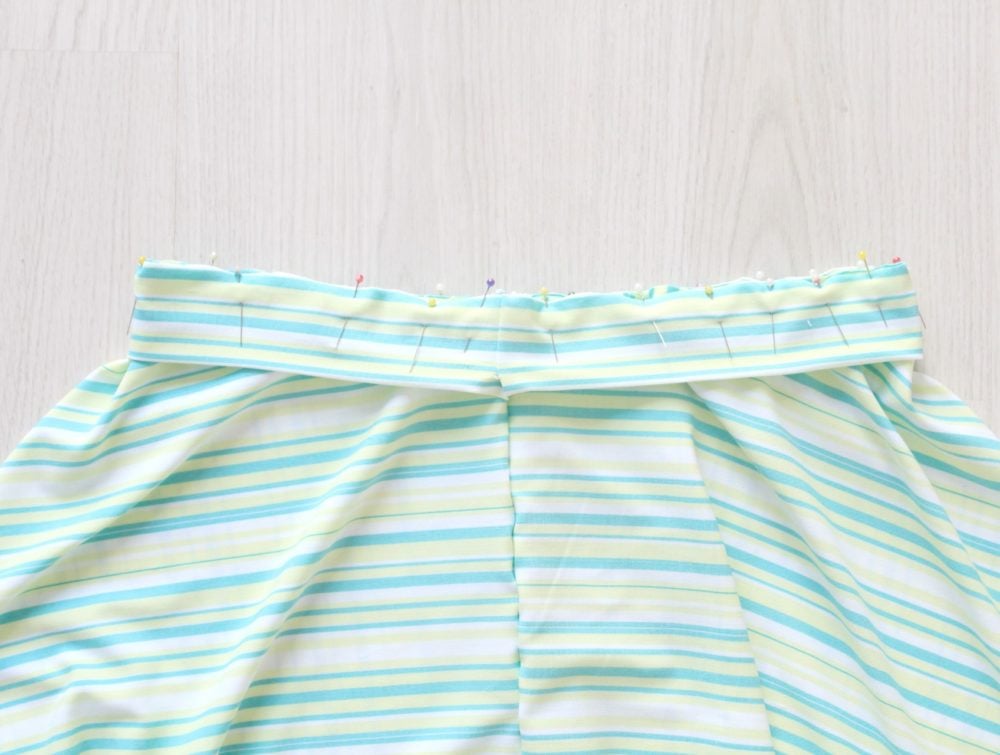
- Sew the waistband to the skirt. Make sure you are using a stretch or zig zag stitch here so the waistband will stretch over when taking it on and off. Finish raw seam with a serger or zig zag stitch or just leave as is.
- Flip waistband up and press.
- Decide how tight you want the elastic.
- Using a safety pin, thread the elastic through the waistband, trim, pin the ends and sew with a zig zag stitch.
- Using a ladder stitch, close the gap in your waistband.
- Hang the skirt over night. Since you are cutting some of the fabric on the bias, some parts of the skirt might stretch out a little more than others and it’s best to know that before hemming.
Hem the skirt
- Also before hemming knits, is best to stabilize the hem so it won’t stretch while sewing. You can use knit tape if you have or use very thin and stretchy interfacing. Make sure the stretch in your interfacing goes with the stretch in your fabric. A stabilized hem won’t pucker or stretch while sewing so you will get a smooth finish.
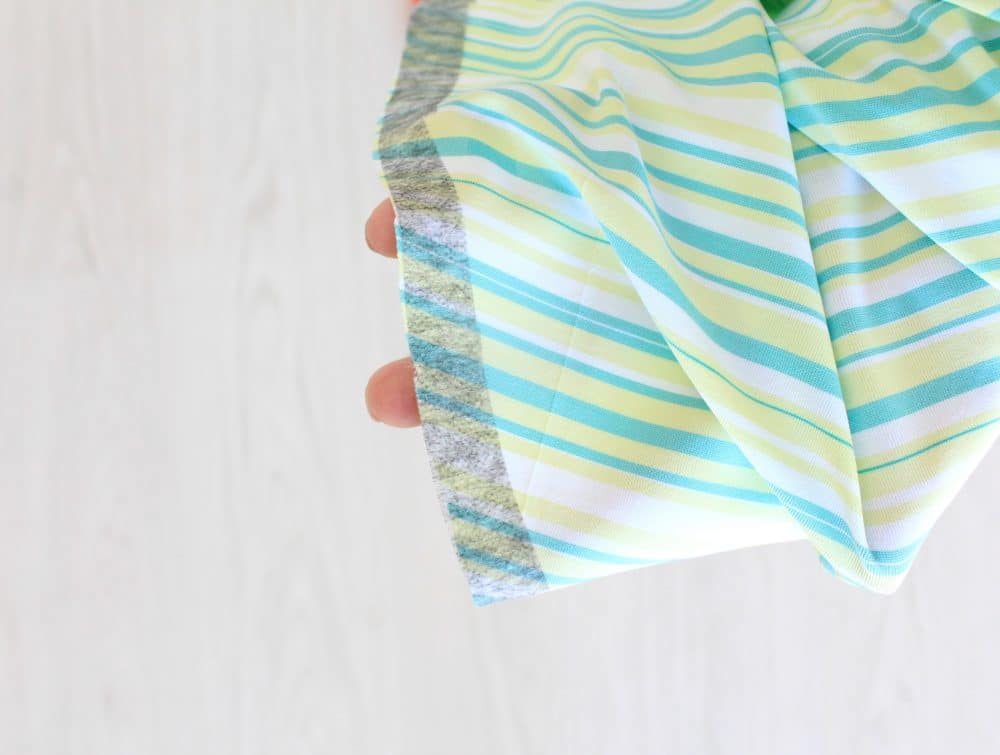
- Press the hem up using an up and down motion of your iron to avoid stretching the hem.
- You may need to adjust the presser foot tension to an even lower tension for hemming your skirt. Test on a piece of fabric first. Sew down the hem using a regular straight stitch.
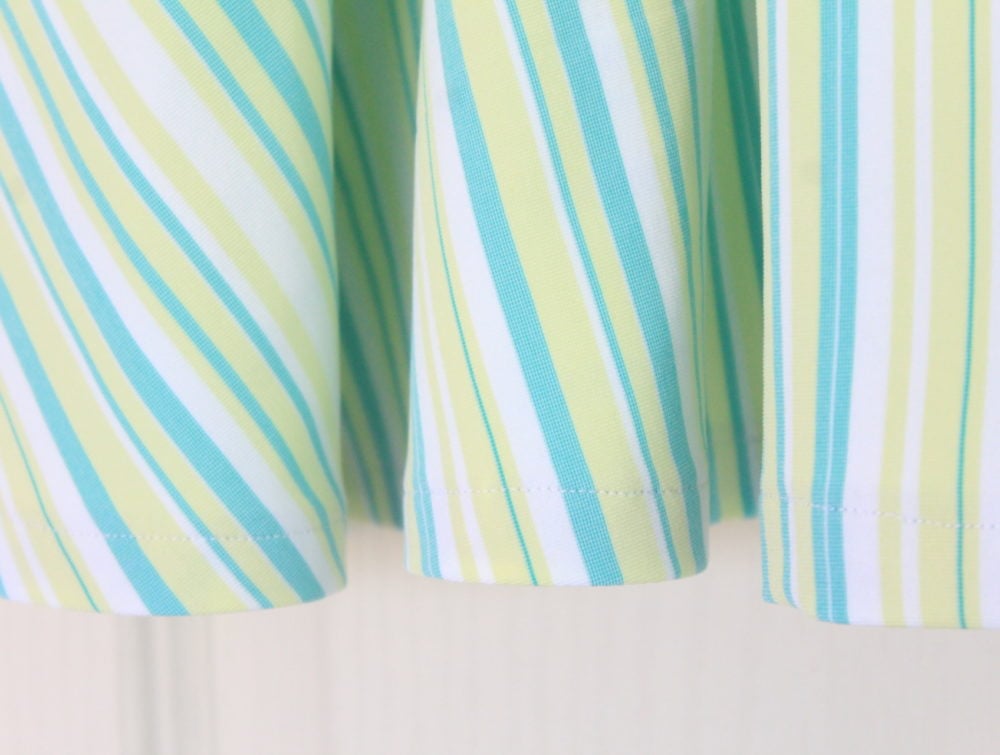
- And you’re done! Your easy half circle skirt is perfect for spring and summer!
Tips for selecting the right knit fabric for the skirt!
- Consider the weight and drape of the fabric: The weight of a knit fabric can greatly affect the way it drapes and moves on the body. Heavier knits will provide more structure, while lighter knits will have more flow and movement.
- Look for stretch and recovery: Stretch is an important characteristic of knit fabrics, as it allows for ease of movement and a comfortable fit. Make sure to also check the recovery of the fabric, which is how well it bounces back after being stretched.
- Check for content and care instructions: Different types of knit fabrics have different content compositions, such as cotton, polyester, or spandex. It’s important to consider these when selecting a fabric as they can affect its durability and care requirements.
- If possible, read online reviews or ask for swatches of the fabric before making a purchase. This can give you a better idea of the quality and characteristics of the fabric.
- Don’t be afraid to experiment: While there are some general guidelines for knit fabric selection, don’t be afraid to try different types and weights to see what works best for your specific project.
Troubleshooting tips and common mistakes to avoid when sewing a knit half circle skirt!
Use the right tools
- Make sure to use the correct needle: When sewing with knit fabrics, it’s important to use a ballpoint or stretch needle. Regular needles can cause skipped stitches and damage to the fabric.
- Use a walking foot or adjust your machine’s pressure settings: Knit fabrics tend to stretch and shift while being sewn, so using a walking foot or adjusting the pressure settings on your machine can help prevent this.
- Use the correct thread: It’s best to use a polyester or cotton-wrapped polyester thread when sewing with knit fabrics. These threads have some stretch and give, which is important for maintaining the stretch of the fabric.
- When hemming, use a twin needle or coverstitch machine: These techniques create a professional-looking finish on knit fabrics and help prevent the hem from popping or breaking when stretched.
Apply the correct techniques
- Avoid too much tension: It may be tempting to increase the tension on your machine to create a tighter stitch, but this can actually cause the fabric to pucker and become distorted. Keep the tension at a medium level for best results.
- Use a stretch stitch or zigzag stitch: These stitches allow for more give in the fabric, which is important for knit fabrics that need to stretch and move with the body. Straight stitches can cause seams to break or pop when the fabric is stretched.
- Don’t pull or stretch the fabric while sewing: This can lead to uneven gathers and distortion of the finished garment. Instead, let the fabric feed naturally through your machine while gently guiding it along.
- Avoid using steam when pressing: Steam can cause knit fabrics to stretch and become misshapen. Instead, use a dry iron and press gently without pulling or stretching the fabric.
- Always do a test stitch on scrap fabric before starting your project: This will allow you to adjust your tension, needle, and stitch settings as needed before sewing on your actual fabric.
Take your time and be patient: Sewing with knit fabrics can be tricky, but with practice and patience, you can create beautiful garments that are comfortable and easy to wear. Don’t get discouraged if your first few attempts don’t turn out perfectly – keep practicing and learning from your mistakes!
So, it is important to be patient while sewing a knit half circle skirt. Experimentation with different techniques is also key in finding what works best for you.
More skirt tutorials you will enjoy
- Half circle skirt with lining and zipper
- 30 minutes skirt
- Bubble skirt tutorial
- Incredibly cute tulle skirt for women
- Ruffled wraps skirt pattern
- How to add pockets to a skirt or dress
How to care for a knit half circle skirt
- Depending on the content of your fabric, you may need to use special care instructions such as hand washing or laying flat to dry.
- Avoid using harsh detergents or bleach when washing knit fabrics as they can damage the fibers and cause them to lose their stretch.
- To keep your knit half circle skirt looking its best, turn it inside out when washing and avoid using a dryer as the heat can also damage the fabric.
- Usually knit fabric s don’t need ironing but if you do need to iron your skirt, use a low heat setting and iron on the wrong side of the fabric or with a pressing cloth to avoid damaging the delicate fibers. Use an up and down motion rather and back and forth and if possible, don’t use the steam setting.
Sewing a half circle skirt with knit fabric can seem intimidating, but with the right tools and techniques, it can be a fun and rewarding project. Don’t be afraid to experiment and try different variations of this classic skirt style. With these tips and tricks, you’ll be sewing up beautiful half circle skirts in no time!
So, go ahead and start creating your own unique version of this versatile wardrobe staple. Happy sewing!
Half circle skirt sewing tutorial
Materials
- about 2 yards of fabric - similar here or a little more if your measurements are bigger than mine
- matching thread
- 2 " wide elastic
Tools
- measuring tape
- scissors
- knit needle or jersey needle
- walking foot (optional)
- safety pin
- knit tape or very soft and thin interfacing
- screw driver (your machine might come equipped with one)
Instructions
- First let's do a little bit of math calculations and measurements. Measure your waist and divide by 3.14 to get the waist radius (inner circle). Round up to the nearest inch.
- Measure your waist and divide by 3.14 to get the waist radius (inner circle). Round up to the nearest inch.
- Measure the desired skirt length and add it to the waist radius to get the hem radius (outer circle).
- Check the stretch in your fabric. You'll want the stretch to go sideways.
- Depending on the stretch, fold the fabric in half (stretch will need to be perpendicular to the fold).
- Take your measuring tape and pin it at the fold, on the left hand side corner.
- Measure out from this corner, using your waist radius and moving the tape and marking right at the radius number to create a circle
- Repeat for the hem radius using the hem radius number.
- Cut fabric along the circles.
- Pin the raw sides and sew down using a regular stitch and a kit or jersey needle. Use a walking foot to make sewing knits easier. If you don't have one, adjust the presser foot tension to minus (see here how to change the settings in your presser foot tension). A looser presser foot will allow the knits to slide through easily without stretching. Test on a piece of fabric to get the best tension fot your project.
- Finish side seam with a serger or a zig zag stitch or just leave as is, knits won't fray.
- Cut a piece of fabric for the waistband. You'll need it to stretch it sideways. The waistband should be 5 inches tall, and your waist measurement wide, adding 1/2" seam allowance.
- Place the ends of the waistband together, right side together, pin and sew down the raw edges, leaving a small gap in the middle, to thread the elastic through later on.
- Fold the waistband in half, turning it right side out and press.
- Turn the skirt right side out, slide the waistband over the top of the skirt and pin the raw edges together. Make sure the opening in the waistband is facing out. Also make sure the seam in waistband matches the seam in your skirt.
- Sew the waistband to the skirt. Make sure you are using a stretch or zig zag stitch here so the waistband will stretch over when taking it on and off. Finish raw seam with a serger or zig zag stitch or just leave as is.
- Flip waistband up and press.
- Decide how tight you want the elastic.
- Using a safety pin, thread the elastic through the waistband, trim, pin the ends and sew with a zig zag stitch.
- Using a ladder stitch, close the gap in your waistband.
- Hang the skirt over night. Since you are cutting some of the fabric on the bias, some parts of the skirt might stretch out a little more than others and it's best to know that before hemming.
- Also before hemming knits, is best to stabilize the hem so it won't stretch while sewing. You can use knit tape if you have or use very thin and stretchy interfacing. Make sure the stretch in your interfacing goes with the stretch in your fabric. A stabilized hem won't pucker or stretch while sewing so you will get a smooth finish.
- Press the hem up using an up and down motion of your iron to avoid stretching the hem.
- You may need to adjust the presser foot tension to an even lower tension for hemming your skirt. Test on a piece of fabric first. Sew down the hem using a regular straight stitch.
Video
Most popular sewing projects:
Article may contain Amazon & affiliate links. As an Amazon Associate I earn from qualifying purchases at no additional cost to you.


Super helpful for someone who’s new to sewing (like me)! Great tutorial :)
Hi Petra,
After hanging overnight, if some areas stretch out, do you recut them before hemming?
Hi
What if I wanted to use a cotton non- stretchy fabric. What kind of allowance do I need to make in the waist circumference in order to get the skirt over my hips?
Thank you
Gehenna
Hi Gehenna. For your situation this tutorial might be a good guide https://theseamanmom.com/how-to-make-a-circle-skirt/ You’ll basically need to use the measurements from the widest part of your mid section (typically the thigs)
Thank you Petro, this I have to try. I’m just now waiting for the special sewing machine foot.So many beautiful projects in there! I have a 5 year old daughter and she’s super sassy! I would love to make some totally adorable spring/ summer get-ups for her this year and I know she would love it too! Thanks for the inspiration.
Hi, Angela. Thanks so much for your lovely comment!
Pinned for later! Thanks for sharing Petro, I really liked the style of the video to go along with the instructions.
Hey, Kat! Thanks so much! xoxo