

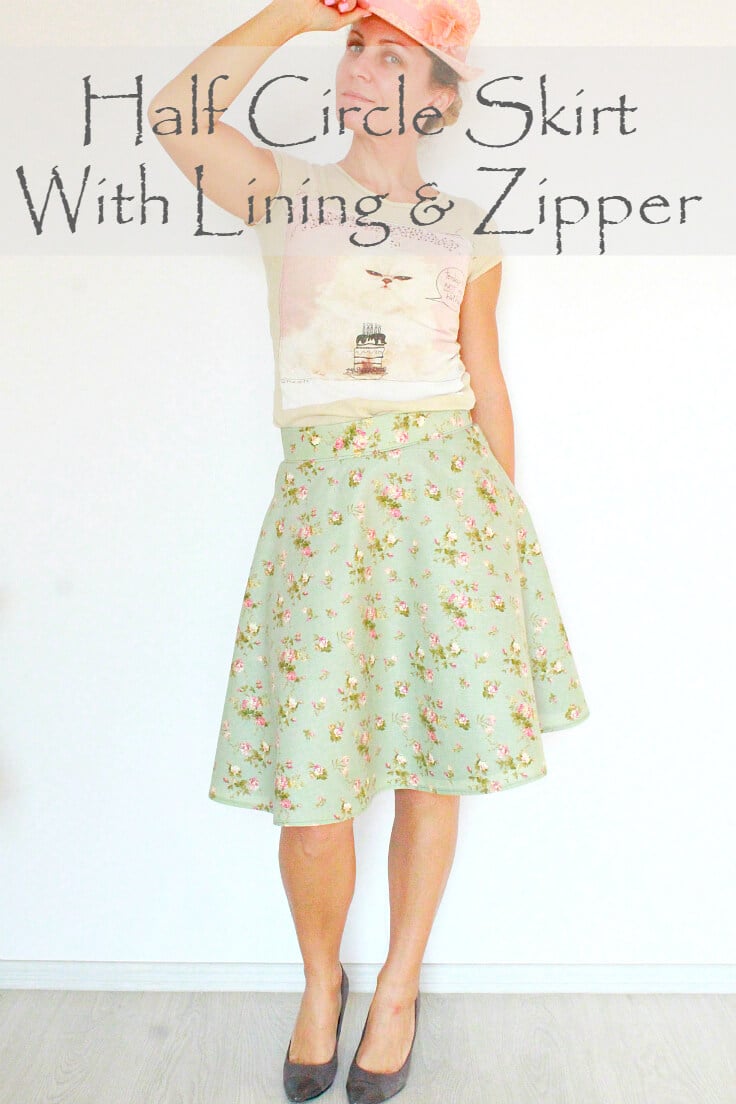
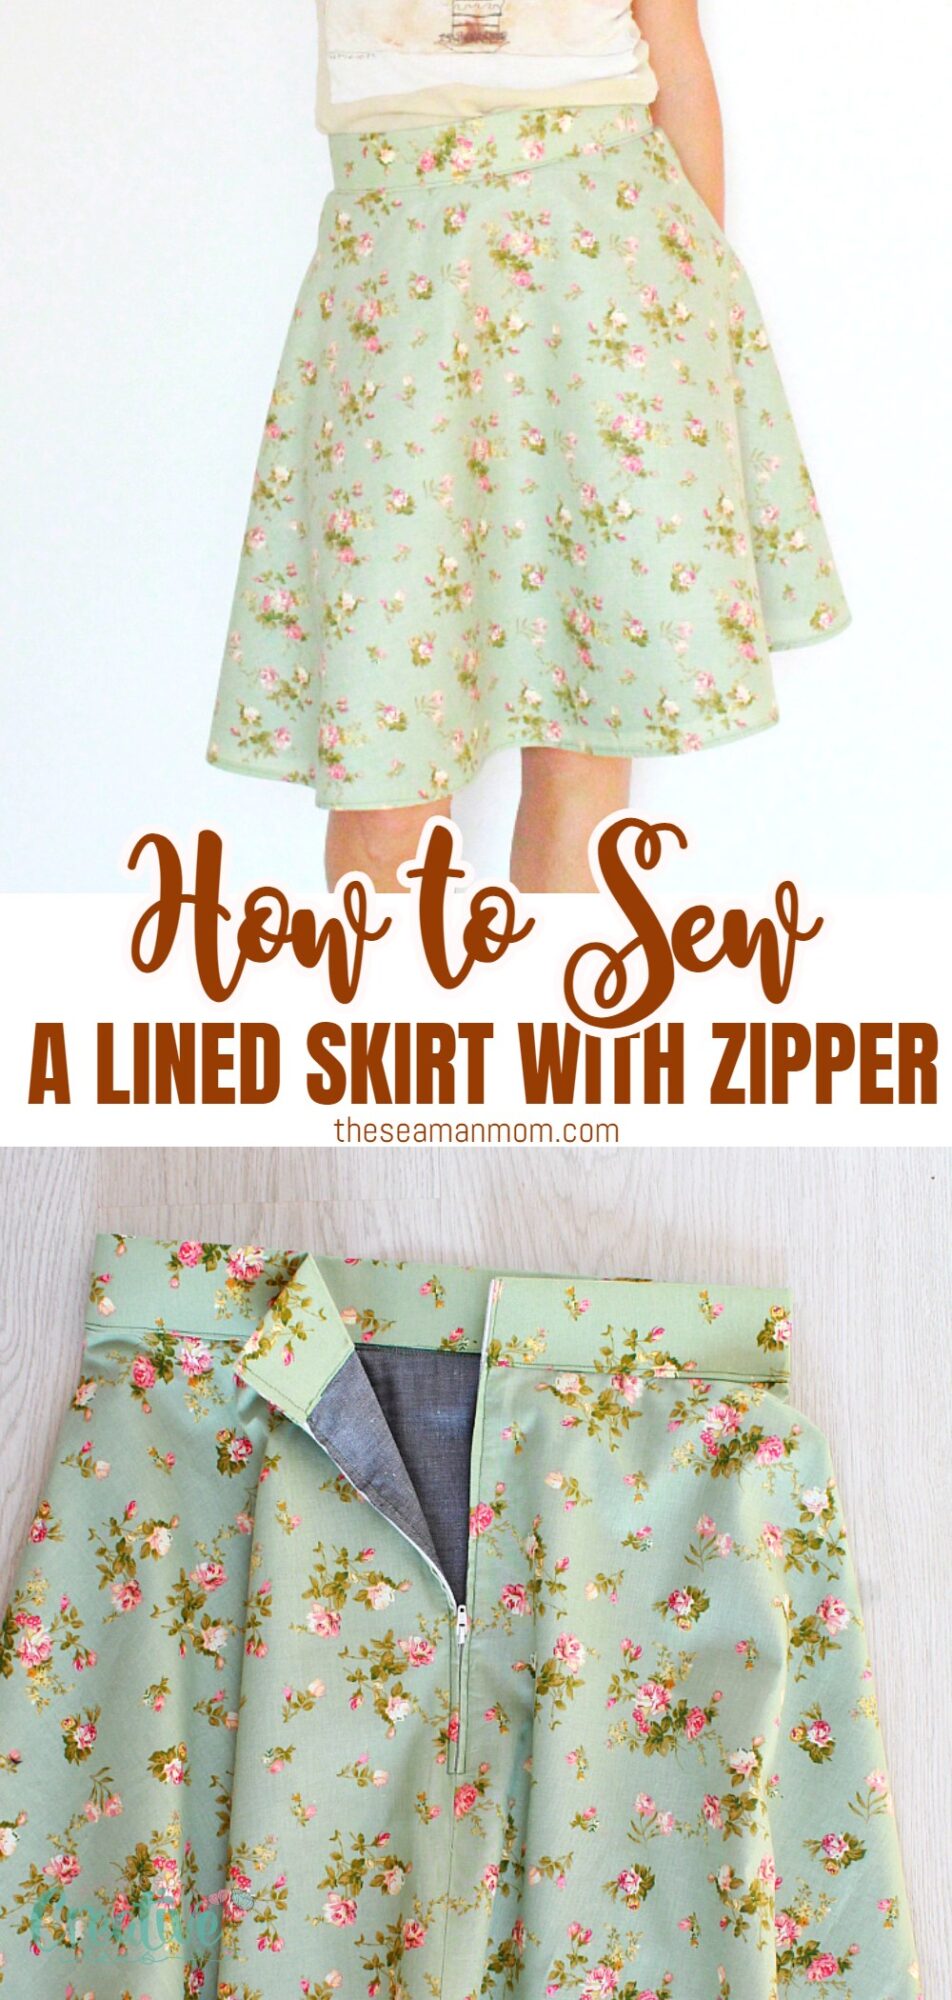
How to sew a lined skirt with zipper
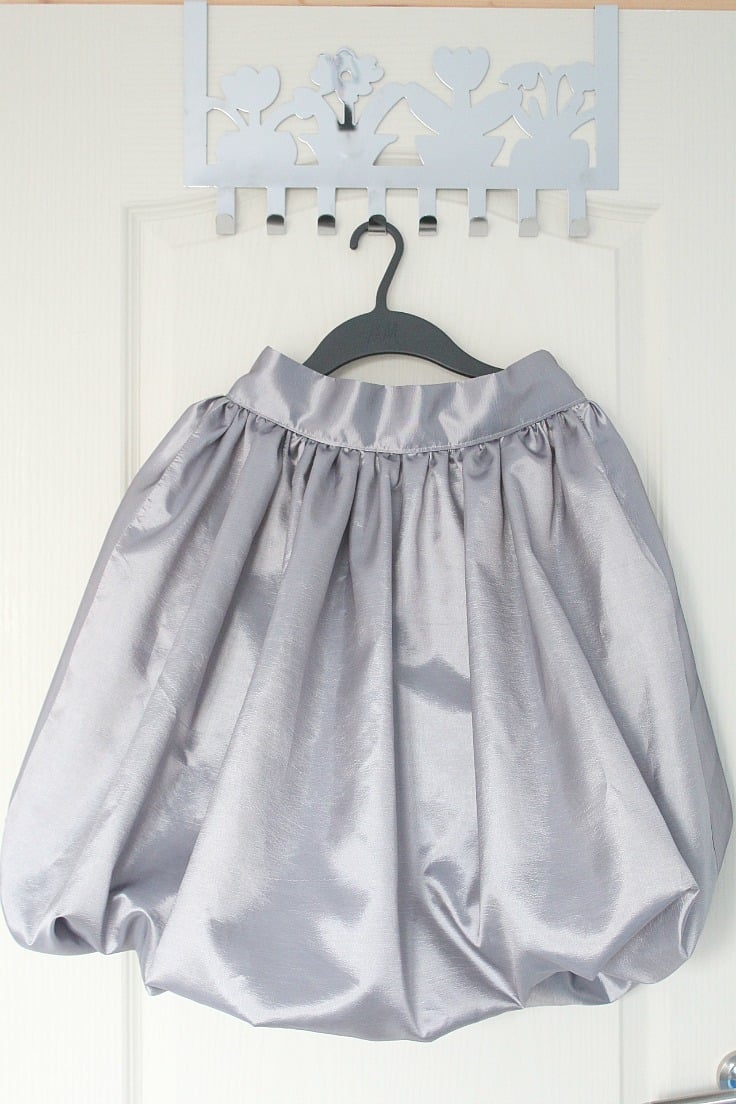
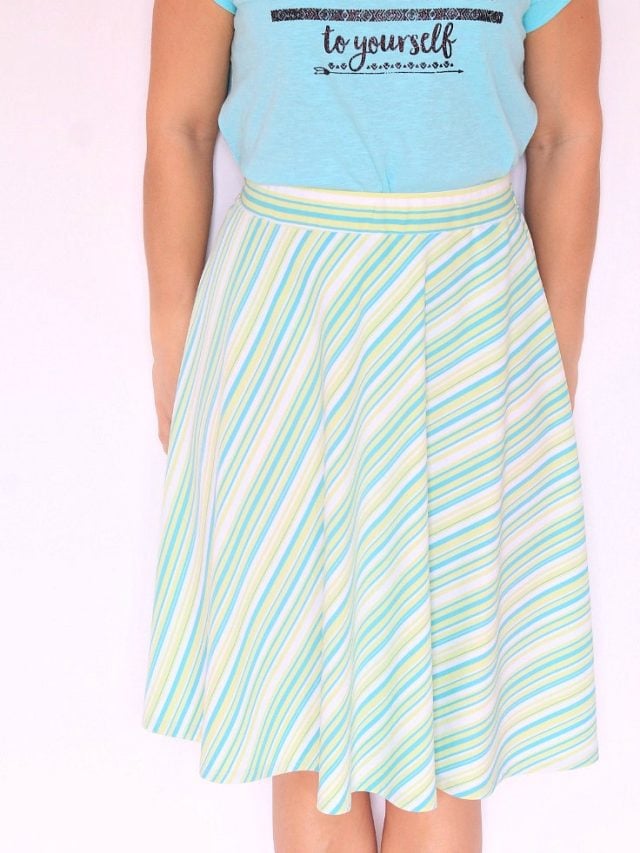
Sewing a lined skirt can be a delightful and rewarding experience! This easy to follow tutorial is designed to guide you in sewing a charming half circle skirt completed with a zipper and lining for a polished finish. Say goodbye to the need for a pattern – simply follow these easy instructions to stitch together a custom-made knee-length skirt that will not only fit you perfectly but also make you look fabulous!
If you were on the lookout for a fun project, sewing a lined skirt is the perfect choice! Whether you are an experienced seamstress or a beginner, this tutorial can help you create your own unique and stylish skirt with ease. If you’ve tried my full circle skirt tutorial, you know they’re a breeze to make! This lined skirt? Even easier – you’ve got this!
This tutorial has been converted to a PDF file, available to purchase HERE. The article is completely free to read.
Creating your own half skirt is simple and enjoyable, even for beginners! The only tricky part? Dealing with the zipper! Inserting a zipper, especially when adding lining like I did, can pose a slight challenge. But don’t worry, I’ll guide you through each step, making it a breeze.
Let me show you how to line a skirt with a zipper in just a few easy steps. But before that, go ahead and read this post first and see how easy it is to insert a zipper into a lined skirt with my super simple method; then you’re ready to move on to the next step which is this pretty half circle skirt. (If you’re a beginner you might want to take a look at this basic tutorial for inserting a zipper into a skirt)

How to sew a lined skirt
Materials:
- measuring tape or long ruler
- pen
- marker
- pattern paper (or any large paper)
- about 2 yards of fabric for the skirt (I used cotton) – similar here
- about 2 yards of fabric for lining (I also used cotton)
- zipper
- some interfacing for the waistband (optional; you can replace it by folding the fabric more to get the desired stiffness)
- scissors
- zipper foot
- matching thread
- contrast thread
- pins
- pressing iron
- sewing machine
Instructions:
Making the half circle skirt pattern
- Take your waist measurement, add 1″ and divide by 3.14 to get the waist radius (inner circle). Round to the nearest quarter inch.
- Measure the length of the skirt (from waist down to where you want the skirt to fall) and add 2″ seam allowance. This will give you your hem radius (outer circle).
- On a large piece of paper, draw your inner circle, away from the corner of your paper, by moving the measuring tape as you mark.
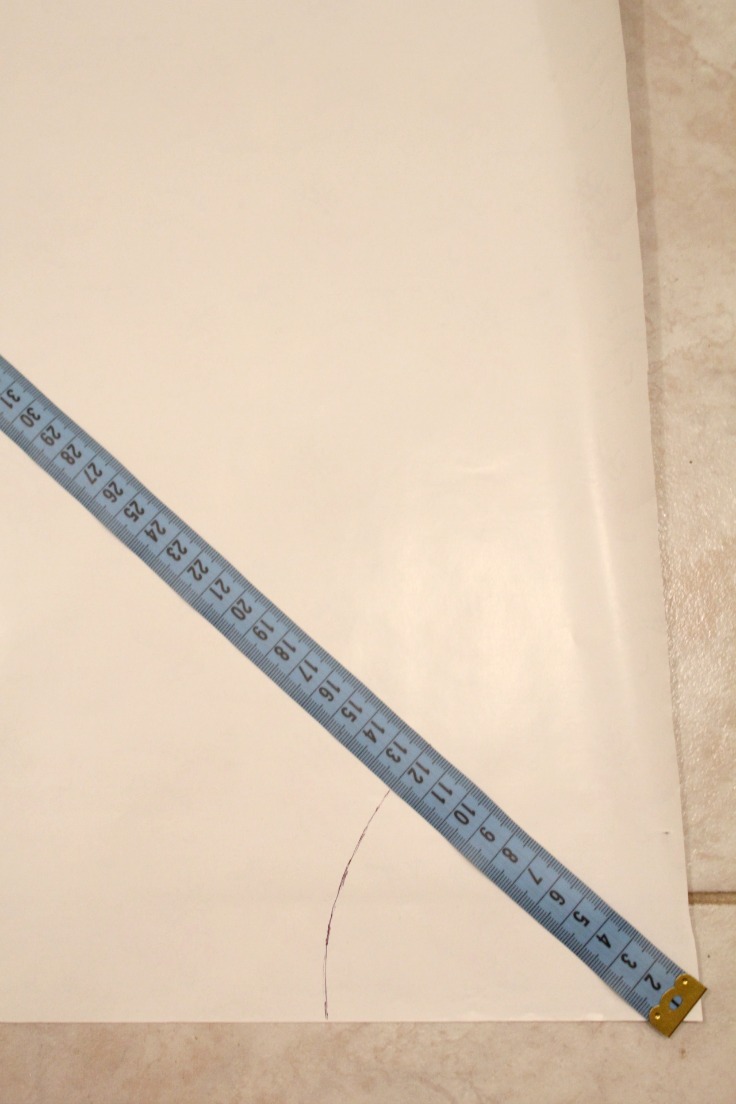
- Now do the same for the length. Measure your desired length from the inner circle, not from the corner.
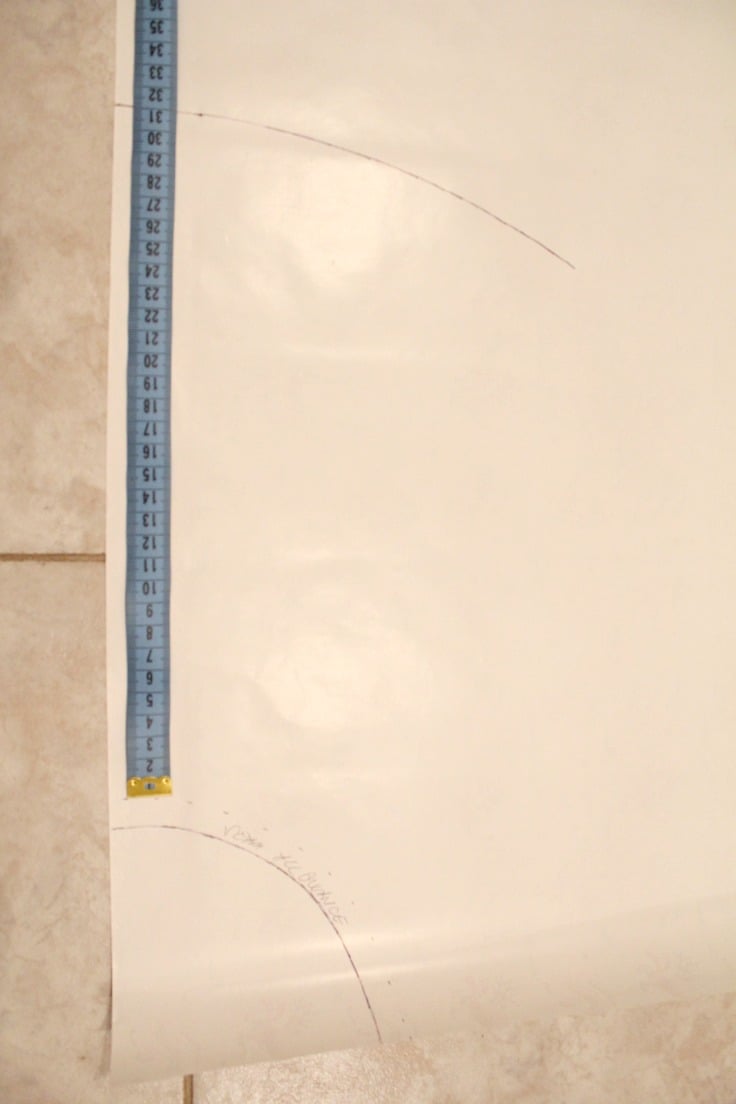
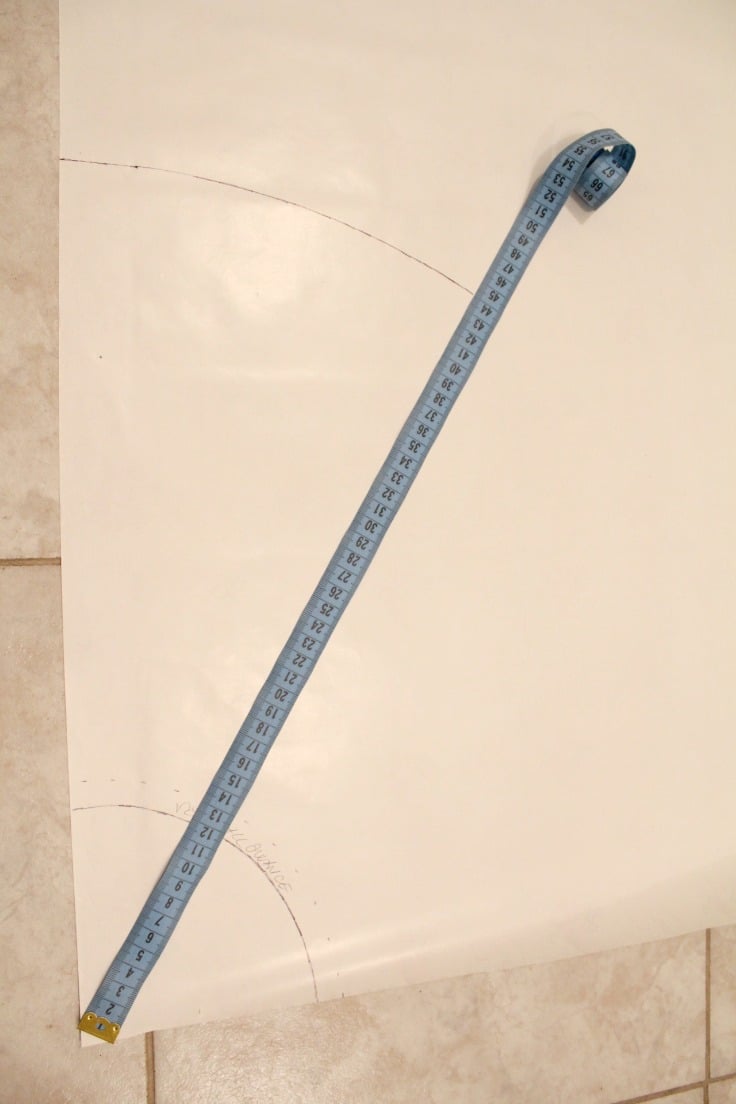
- Cut your pattern around the inner circle than around the outer circle. This will be 1/2 of a pattern.
Preparing the fabric
- Fold the skirt fabric in half, right sides together and place it on the floor with the fold going along the top and the selvedge edges running down each side.
- Place the pattern over your fabric, with your inner circle matching the folded corner, pin and cut around the inner circle and the outer circle.
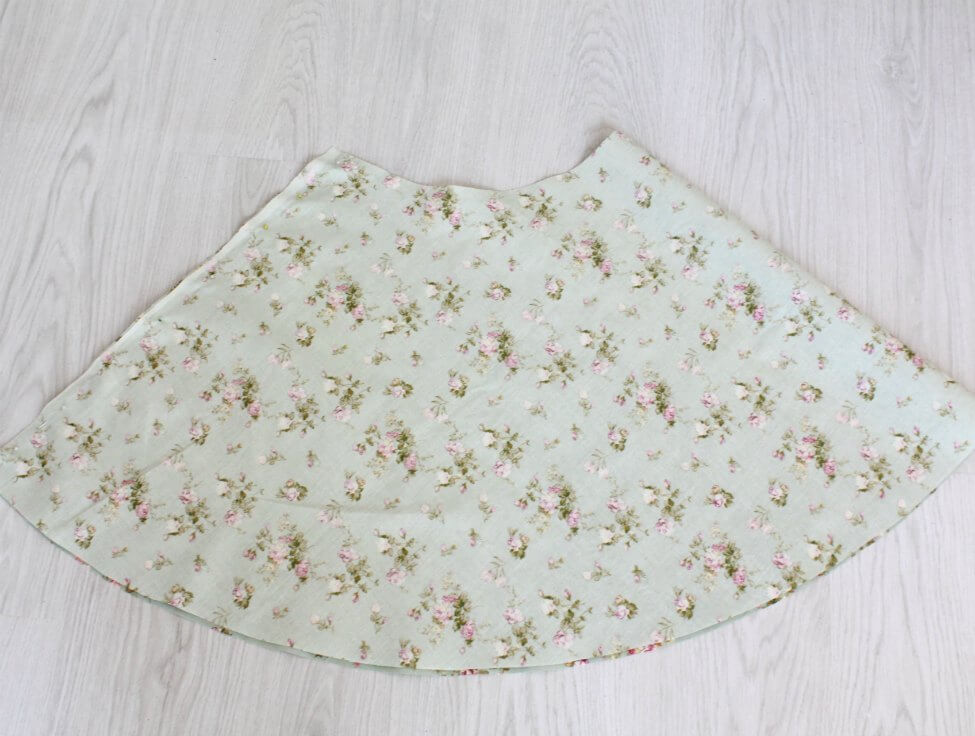
- Repeat the above step for the lining.
Sewing the skirt
- Put the skirt fabric right sides together and sew down the side seam. Finish the seam with a serger or a zig zag stitch.
- Do the same for lining.
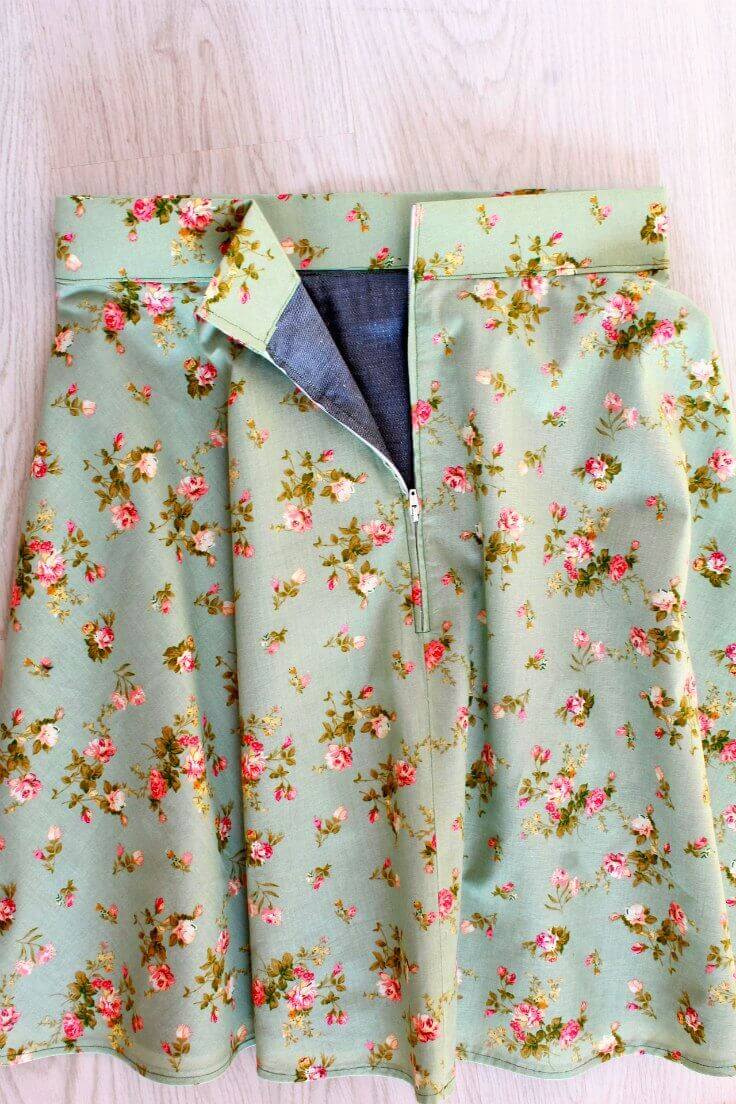
- Replace your regular foot with a zipper foot.
- Decide how long you want your zipper opening to be in your skirt. Make a mark.
- Decide how wide you want your waistband to be and with that in mind leave allowance for the zipper at the top of the lining.
- Then insert the zipper into the skirt and lining as indicated in this tutorial.
Making the waistband
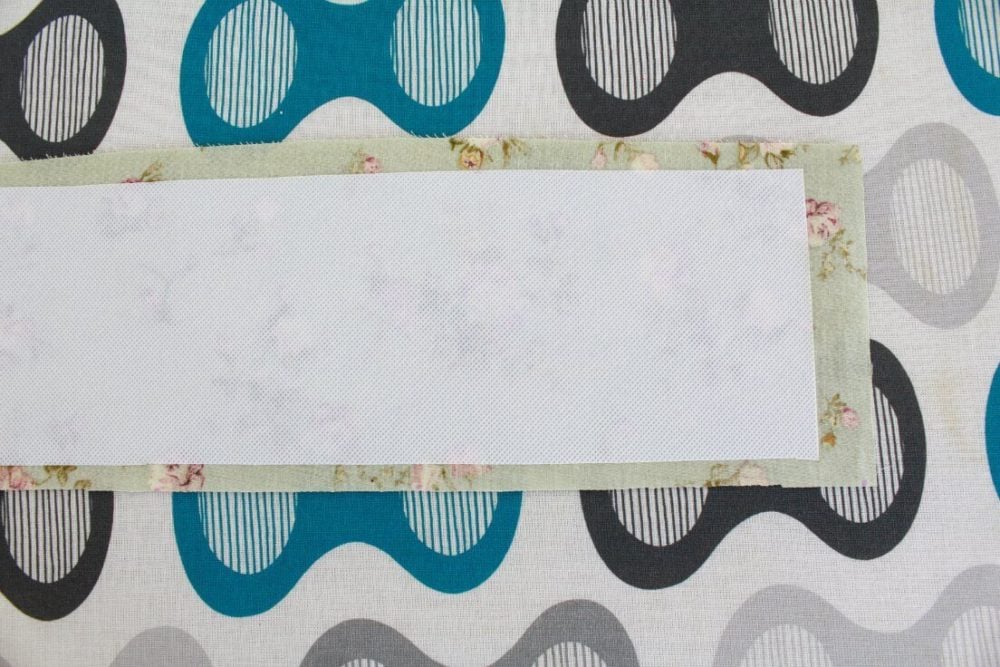
- Cut a strip of fabric for your waistband, to match your inner circle measurements (that would be your waist plus 1″)
- Cut a piece of soft interfacing to match the waistband, minus 1″ in length, 1/2″ from bottom and 1/2″ from top.
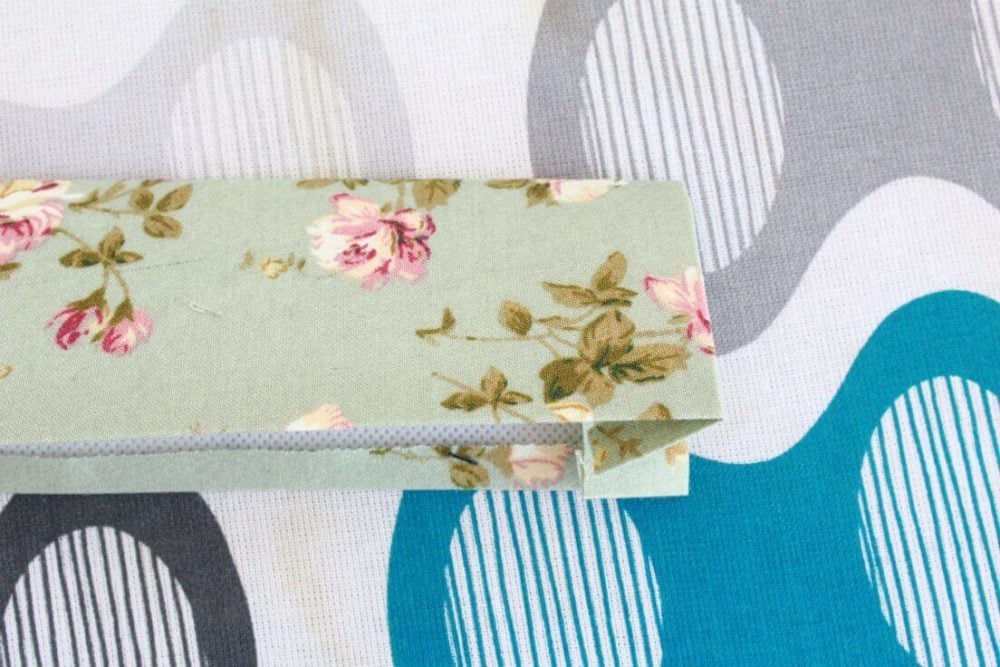
- Attach interfacing to the wrong side of your waistband using your pressing iron. Fold the up and bottom edge in then fold the side edges in and press.
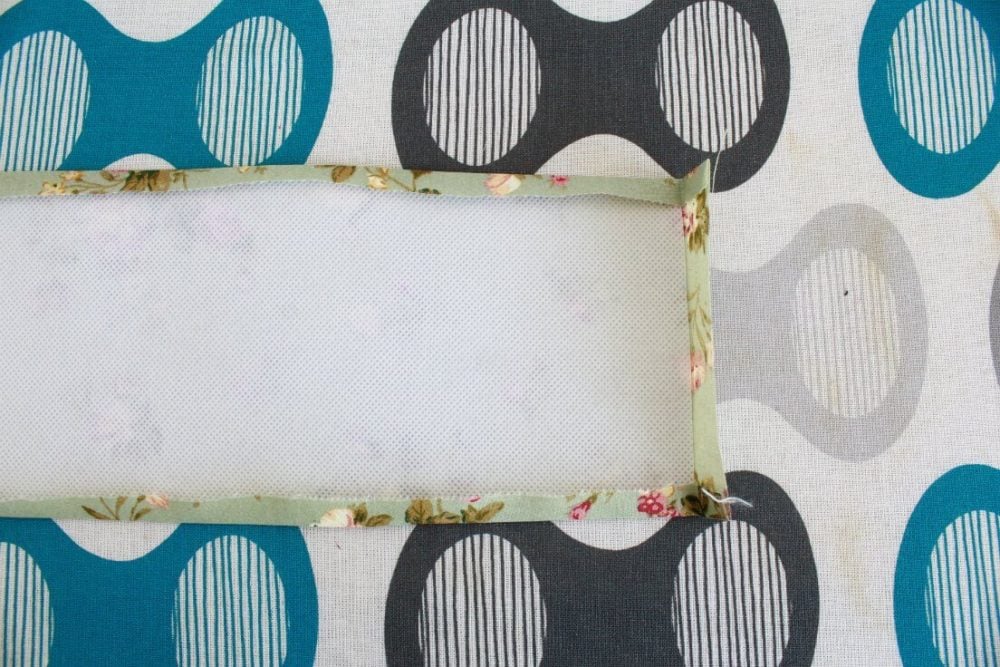
- Fold the waistband in half, right side out and press.
Attaching the waistband to the skirt
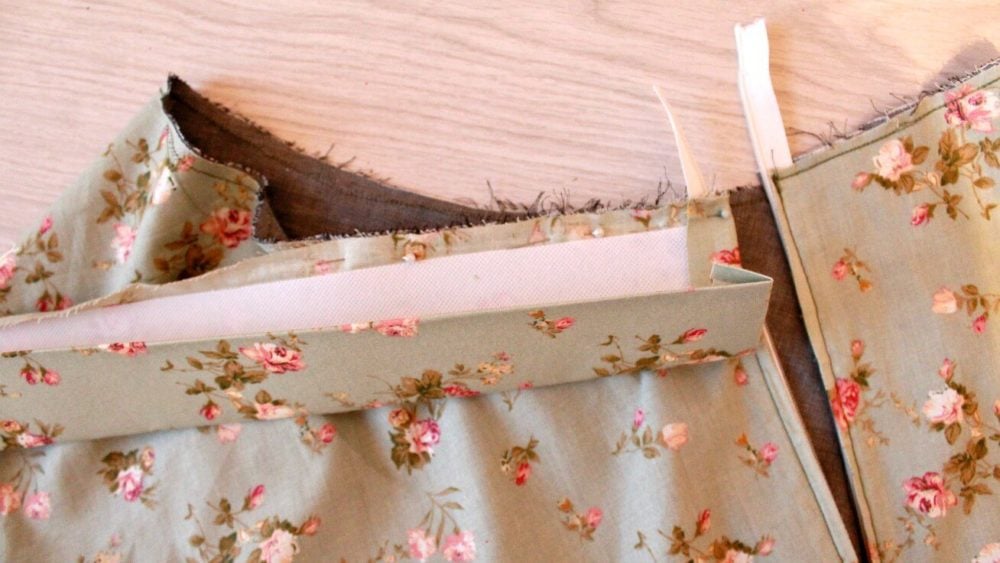
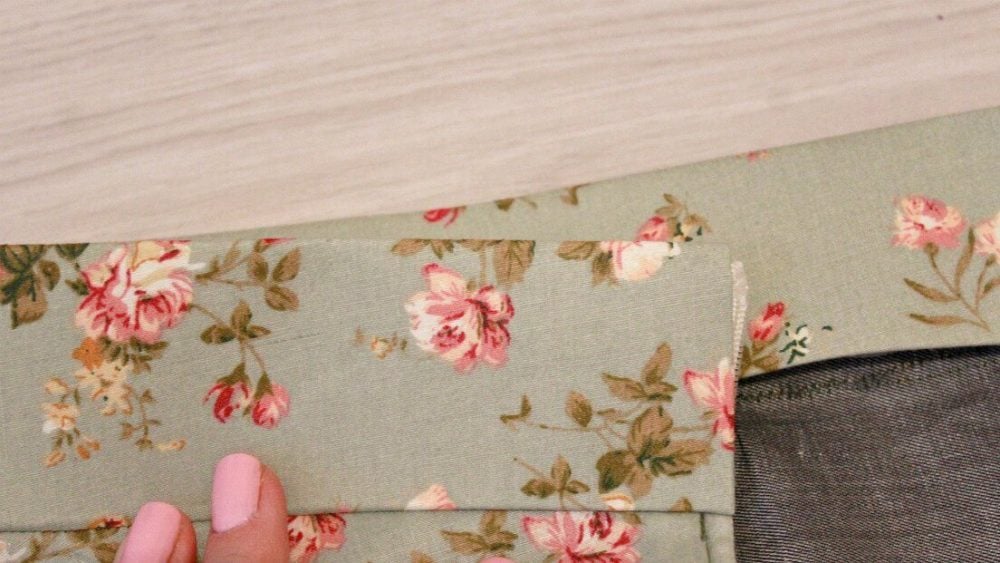
- Pin the skirt and the lining together at the inner circle then sew down with a 1/8″ allowance. This will help keep the skirt and lining together when you sew the waistband.
- Slide the waistband over the top of the skirt and lining and pin the raw edges together (that would be the folded edges). Pay careful attention when you get to pinning the zipper; trim the top of the zipper if needed and push zipper inside the waistband just enough to be able to comfortably move the zipper pull up and down. Fold the side edges of the waistband inside so they’re concealed.
- Sew down the pinned area then flip the waistband up.
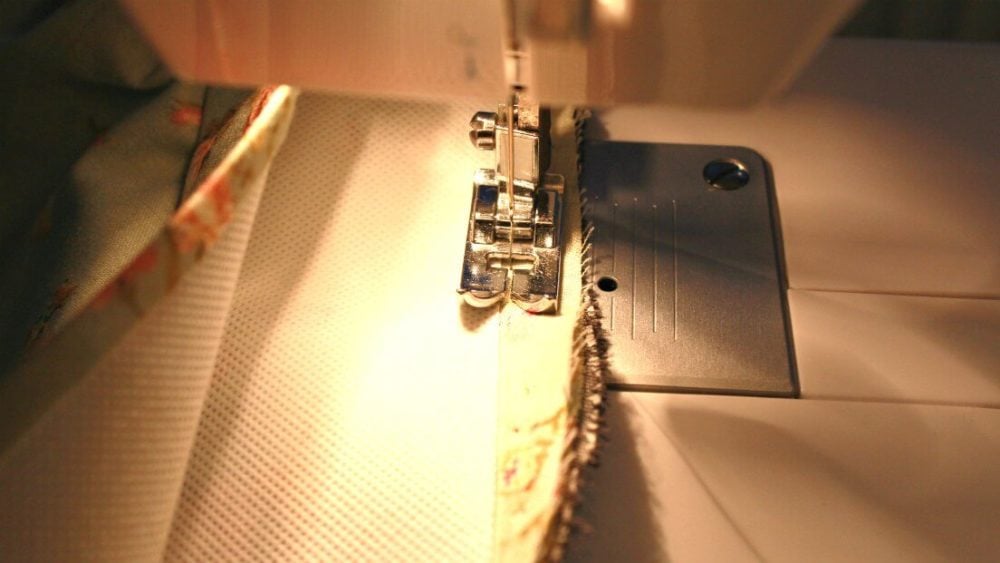
- Looking on the inside of the skirt, turn the other edges of the waistband in, making sure they cover the raw edges of the skirt and lining, then pin.
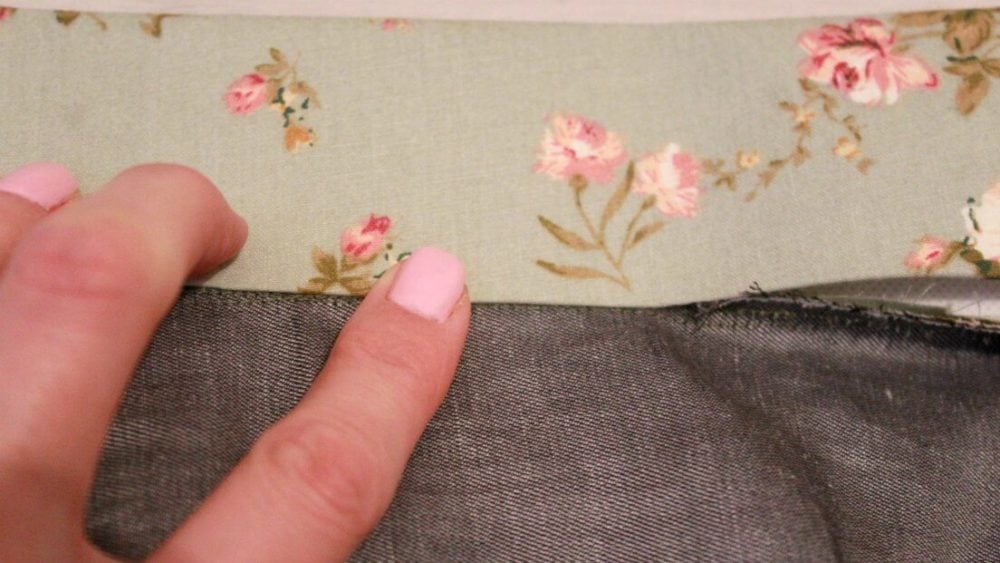
- Looking at the right side of the skirt, sew down the waistband about 1/8″ from the seam you made before. This should capture the back of the waistband, leaving you with a nice finish in the front too.
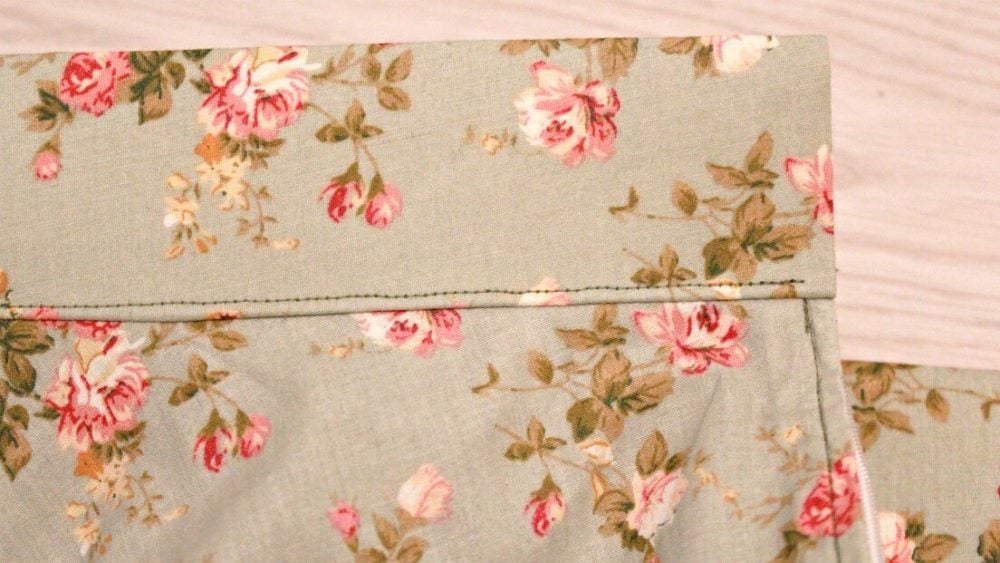
- Now sew down the top of the zipper to finish the waistband.
- Replace the foot with a regular foot.
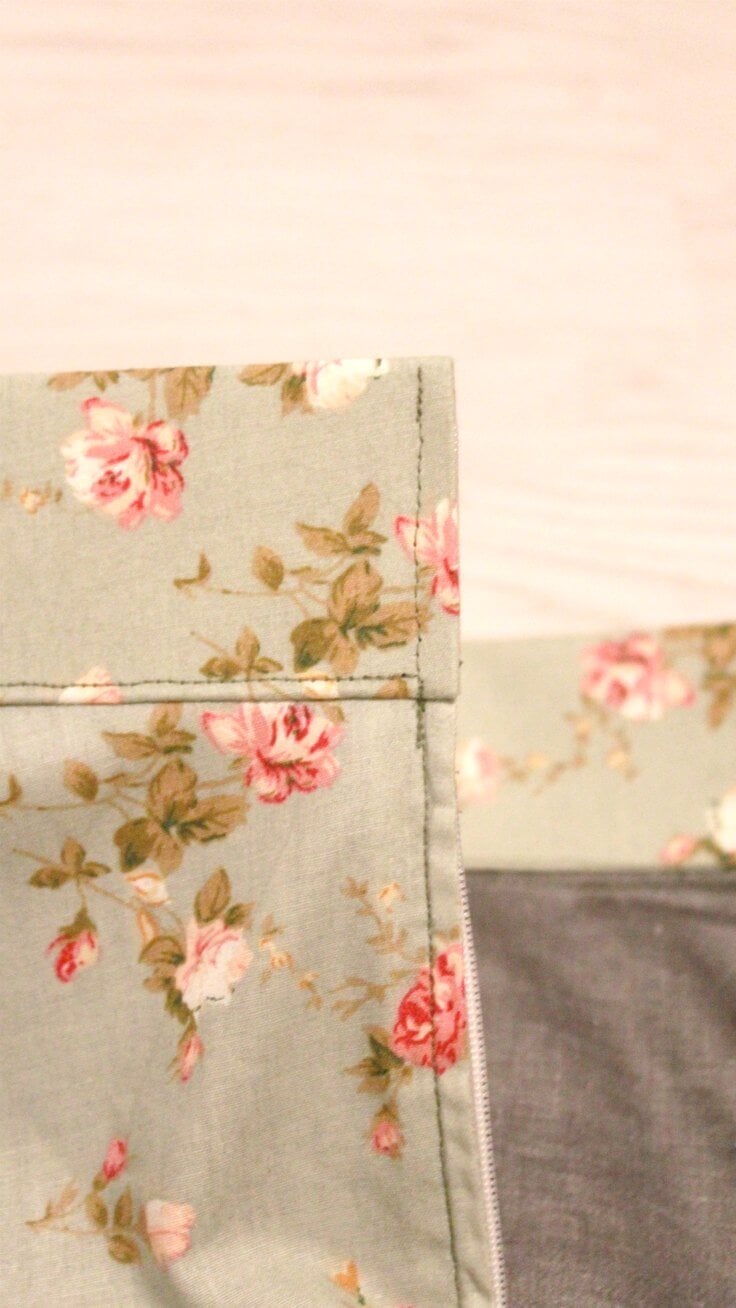
- Hem your skirt as you wish (I used this tutorial cause I’m a sucker for tiny hems!)
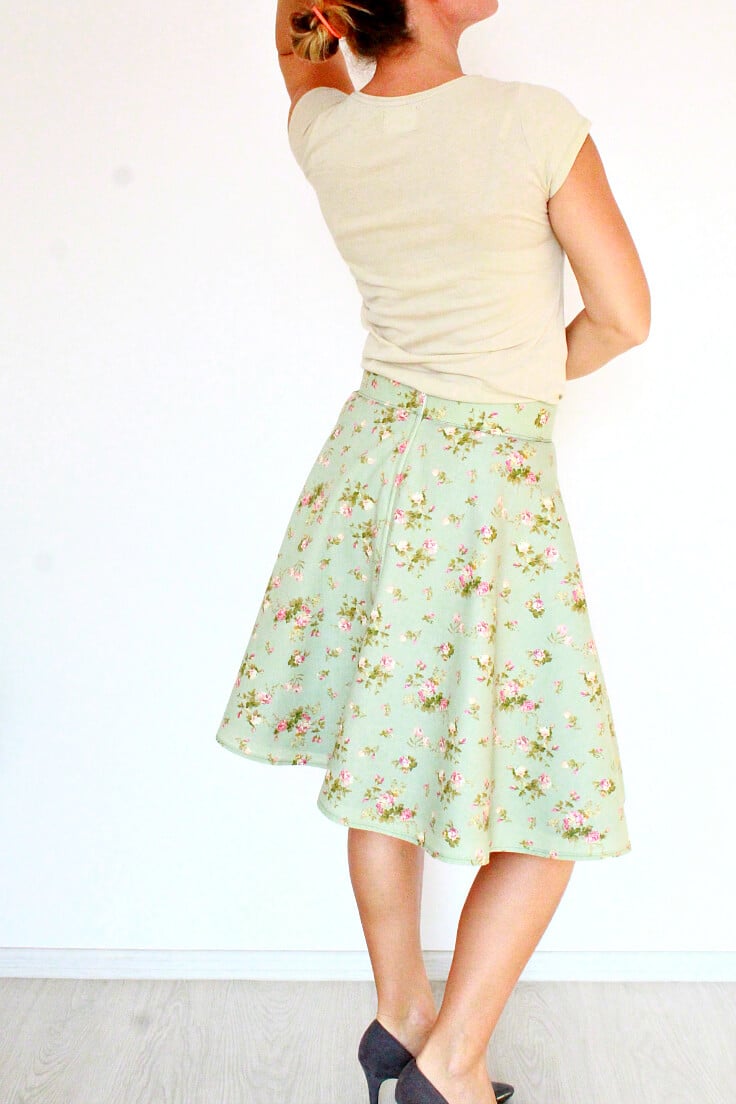
And you’re done! Enjoy wearing your beautiful half circle skirt with zipper!
Tips for sewing this lined skirt
- Use medium weight interfacing to reinforce the waistband for added stiffness. You can replace interfacing with folded fabric if desired.
- Use a zipper foot when attaching the zipper.
- Trim the top of the zipper before attaching it to ensure a smooth finish.
- Take your time when sewing the waistband and make sure to hide all raw edges for a clean finish.
- Experiment with different fabric choices to create unique looks for this skirt. You can use a solid for the waistband for added contrast.
Variations of this project
- Add pockets to the skirt for added convenience.
- Lengthen or shorten the skirt for different hemline options.
- Finish the hem with contrasting bias tape.
- Sew the skirt into a circle skirt or A-line skirt shape for different silhouettes.
- Use a contrasting fabric for the lining and let it peak from under the skirt to add a pop of color or pattern to your outfit.
- Add decorative topstitching along the waistband for added detail.
More sewing ideas you will love


- Bubble skirt tutorial
- 30 minutes skirt
- Full circle skirt tutorial
- Tulle circle skirt
- Ruffled wrap skirt
- Knit half circle skirt
- Wide leg pants pattern
This lined half circle skirt is a versatile and stylish addition to any wardrobe. With its flattering shape and customizable design, you can create your own unique version of this classic style. So grab your sewing supplies and get ready to create a beautiful lined half circle skirt that you’ll love wearing for years to come!
If you liked my tutorial please let me know in the comments below and don’t forget to rate the sewing card! Thanks!

How to sew a lined skirt
Materials
- about 2 yards of fabric for the skirt I used cotton
- about 2 yards of fabric for lining I also used cotton
- zipper
- interfacing for the waistband
- matching thread
- contrast thread
Tools
- measuring tape yardstick or long ruler
- pen
- pattern paper (or any large paper)
- scissors
- zipper foot
- pressing iron
Instructions
Making the half circle skirt pattern
- Take your waist measurement, add 1" and divide by 3.14 to get the waist radius (inner circle). Round to the nearest quarter inch.
- Measure the length of the skirt (from waist down to where you want the skirt to fall) and add 2″ seam allowance. This will give you your hem radius (outer circle).
- On a large piece of paper, draw your inner circle, away from the corner of your paper, by moving the measuring tape as you mark.
- Now do the same for the length. Measure your desired length from the inner circle, not from the corner.
- Cut your pattern around the inner circle than around the outer circle. This will be 1/2 of a pattern.
Preparing the fabric
- Fold the skirt fabric in half, right sides together and place it on the floor with the fold going along the top and the selvedge edges running down each side.
- Place the pattern over your fabric, with your inner circle matching the folded corner, pin and cut around the inner circle and the outer circle.
- Repeat the above step for the lining.
Sewing the skirt
- Put the skirt fabric right sides together and sew down the side seam. Finish the seam with a serger or a zig zag stitch.
- Do the same for lining.
- Replace your regular foot with a zipper foot.
- Decide how long you want your zipper opening to be in your skirt. Make a mark.
- Decide how wide you want your waistband to be and with that in mind leave allowance for the zipper at the top of the lining.
- Then insert the zipper into the skirt and lining as indicated in this tutorial.
Making the waistband
- Cut a strip of fabric for your waistband, to match your inner circle measurements (that would be your waist plus 1")
- Cut a piece of soft interfacing to match the waistband, minus 1" in length, 1/2" from bottom and 1/2" from top.
- Attach interfacing to the wrong side of your waistband using your pressing iron. Fold the up and bottom edge in then fold the side edges in and press.
- Fold the waistband in half, right side out and press.
Attaching the waistband to the skirt
- Pin the skirt and the lining together at the inner circle then sew down with a 1/8" allowance. This will help keep the skirt and lining together when you sew the waistband.
- Slide the waistband over the top of the skirt and lining and pin the raw edges together (that would be the folded edges). Pay careful attention when you get to pinning the zipper; trim the top of the zipper if needed and push zipper inside the waistband just enough to be able to comfortably move the zipper pull up and down. Fold the side edges of the waistband inside so they're concealed.
- Sew down the pinned area then flip the waistband up.
- Looking on the inside of the skirt, turn the other edges of the waistband in, making sure they cover the raw edges of the skirt and lining, then pin.
- Looking at the right side of the skirt, sew down the waistband about 1/8" from the seam you made before. This should capture the back of the waistband, leaving you with a nice finish in the front too.
- Now sew down the top of the zipper to finish the waistband.
- Replace the foot with a regular foot.
- Hem your skirt as you wish (I used this tutorial cause I'm a sucker for tiny hems!)
Video
Most popular sewing projects:


Article may contain Amazon & affiliate links. As an Amazon Associate I earn from qualifying purchases at no additional cost to you.
ABOUT PETRO
Hi, I’m Petro, author and founder of Easy Peasy Creative Ideas. Sewist, crafter, avid DIY-er, foodie, photographer, homemaker and mommy to one. I’m an expert at coming up with quick, clever sewing tips, recycling crafts and simple, easy recipes! You can find my ideas featured in reputable publications such as Country Living, Good House Keeping, Yahoo News, WikiHow, Shutterfly, Parade, Brit & Co and more. Thanks for stopping by and hope you’ll stay for a while, get to know me better and come back another time. Stick around for real fun projects! Read more…