Women’s bubble skirt sewing tutorial
Looking for a fun and easy sewing project? Why not try your hand at making a bubble skirt! Bubble skirts are a great way to show off your creative side, and they’re surprisingly simple to make. With just a few basic materials and some patience, you can stitch up a fun skirt that’s perfect for any occasion.
Bubble Skirt

Make yourself an easy bubble skirt that’s both flattering and comfortable. This adorable item is really simple to sew, attractive, fun, charming and innocent. What’s not to love?
I simply adore this bubble skirt! It’s so fun to wear and not complicated to make! It makes me feel like a school girl again and at my age, that is a huge deal, I tell ya’! If you want to learn how to make a balloon skirt too, you’ll end up with one of the most flattering, pretty and comfortable skirts you’ll ever make!
Make this bubble skirt in the right fabric and you can wear it anywhere, at parties, family gatherings or even on New Year’s Eve if you dress it up a bit. Also, once you learn how to make a bubble dress, use this bubble skirt pattern to make big puffy dresses for the little girls in your life. A poof skirt on a little girl is oh, so sweet and innocent!
Need more skirt ideas?
- Half circle skirt with lining and zipper
- Knit half circle skirt
- 30 minutes skirt
- DIY tulle skirt for ladies
Bubble skirts are so popular with the little ones but why should they have all the fun? They are as adorable on women too!
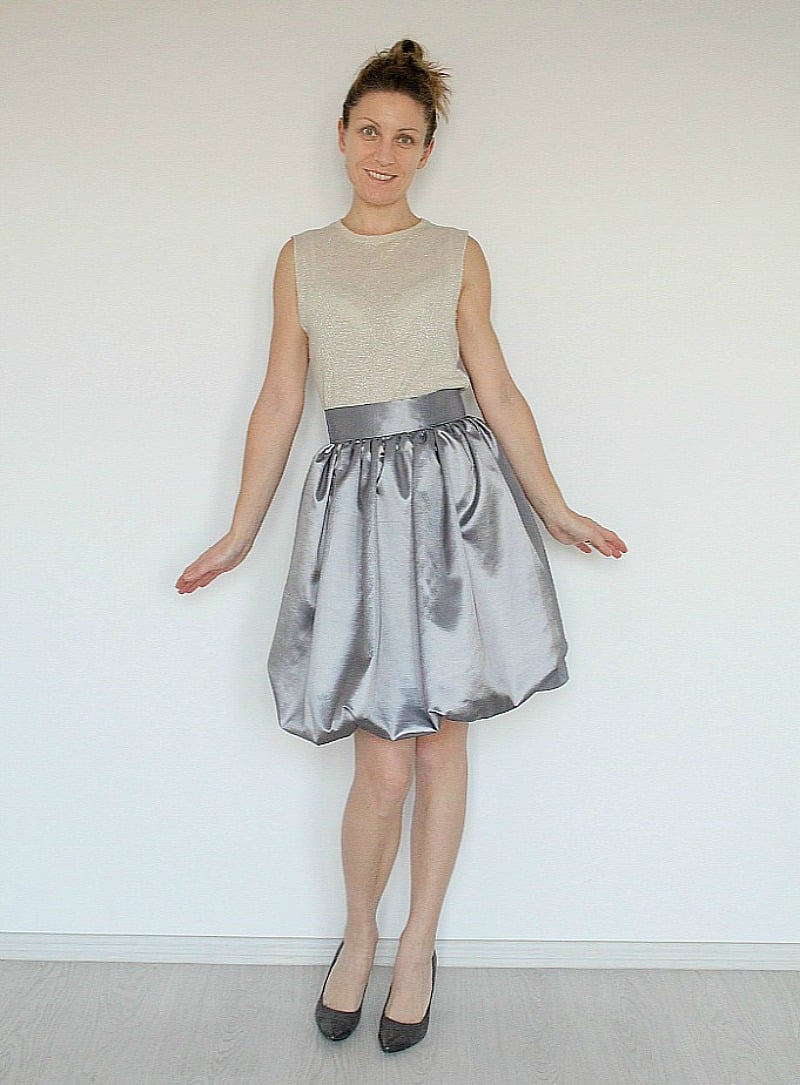
I absolutely love how slim this bubble skirt makes me look! It may seem like this skirt has quite the opposite effect on a woman’s body but it’s not, really. I don’t normally look this slim and tall and I have some serious love handles but this balloon skirt hides all of my flaws. And the high waistband makes my waist look way smaller than it truly is and my legs a mile long. Trust me, you’ll want to wear this bubble skirt everywhere! Ready to learn how to make your own?
What is a bubble skirt?
A bubble skirt is a skirt with several tiers of fabric that create a “bubbled” or “ballooned” effect. You can find bubble skirts and dresses in any fabric imaginable but they are most commonly made in lightweight, flowy fabrics such as chiffon, tulle or organza.
Bubble skirts are very flattering on any body type and are often seen as being quite girly and innocent. But they can also be made in more sophisticated fabrics and worn to dressier occasions.
Are bubble skirts in style?
Bubble skirts have been around for decades and always seem to come back in style. They are currently very popular with little girls but can be seen on women of all ages.
Bubble skirts look best in a short or midi length but can also be made in a maxi length. A long skirt like this will swish and swirl around you as you walk, making it a truly eye-catching piece and works best as a statement piece for a special event.
What fabric is best for a bubble skirt?
Most bubble skirts are made in lightweight, flowy fabrics such as chiffon, tulle or organza. These types of fabrics allow the skirt to maintain its shape and billow out nicely.
You can also find bubble skirts made in more structured fabrics such as cotton, denim or corduroy but these are less common.
What type of thread do you use to sew this skirt?
I recommend using a lightweight thread that matches the fabric you are using. You don’t want the thread to be too heavy and weigh down the fabric. Polyester or cotton threads are both good options.
What needle size should I use?
For bubble skirts made from lightweight fabrics, I recommend using a size 60/8 needle. For bubble skirts made from medium-weight fabrics, I recommend using a size 70/10 or 80/12needle.
How much fabric do you need to make a bubble skirt?
The amount of fabric you need will depend on the length and size of the skirt you are making. I would recommend starting with 2 yards of fabric.
How do you make the bubble hem?
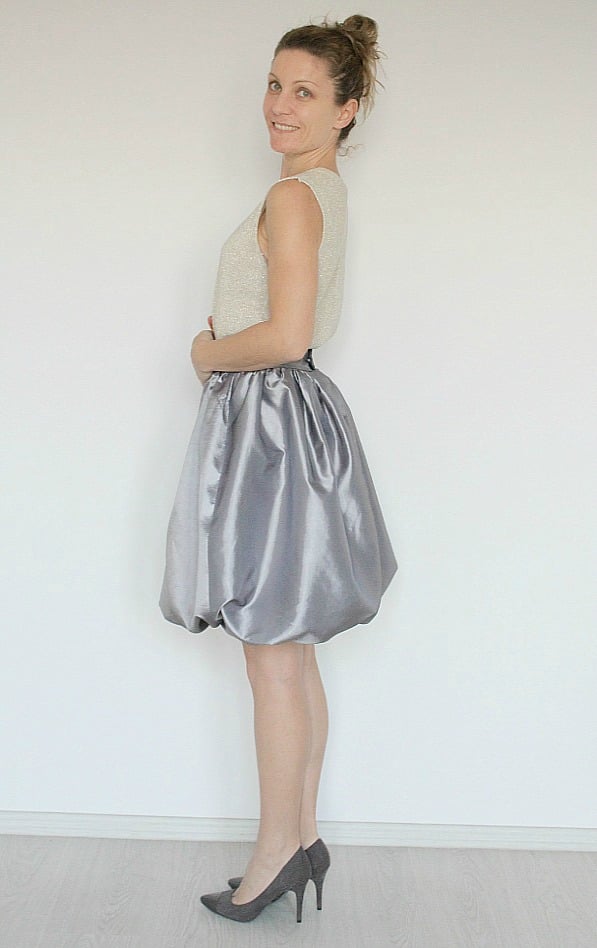
The bubble effect of the hem in this skirt is created by cutting the lining shorter than the skirt fabric. The skirt fabric is then pulled up underneath when the two fabrics are attached to the waistband, creating the bubbling effect at the bottom in the hem area.
What to wear with balloon skirt?
A bubble skirt can be dressed up or down depending on the fabric and accessories you choose. For a more casual look, pair your bubble skirt with a t-shirt, tank top or blouse. Add a cardigan or jacket for cooler weather.
For a dressier look, choose a skirt made from a more sophisticated fabric and pair it with a nicer top, heels and jewelry.
The tops that match best a bubble skirt are usually crop tops, bustiers or halter tops.
Where do you wear bubble skirts?
Bubble skirts are perfect for a variety of occasions such as weddings, parties, proms, a birthday or any other formal event. They can also be worn more casually with the right top and accessories.
How to care for bubble skirts?
Bubble skirts can be hand-washed or dry-cleaned, depending on the fabric. If you choose to hand wash, use lukewarm water and a delicate detergent. Air dry the washed skirt by hanging it on a clothes hanger.
To iron bubble skirts, start by setting your iron to a low heat. You don’t want to damage the fabric. If the fabric is still damp from washing, set it out to dry completely before ironing.
Place the skirt on an ironing board and begin by ironing the waistband. Then, move on to the fabric itself. Start at the top and work your way down, taking care not to wrinkle the fabric and flatten the bubbles.
Bubble skirts are best stored hanging in a closet.
Sewing a balloon skirt
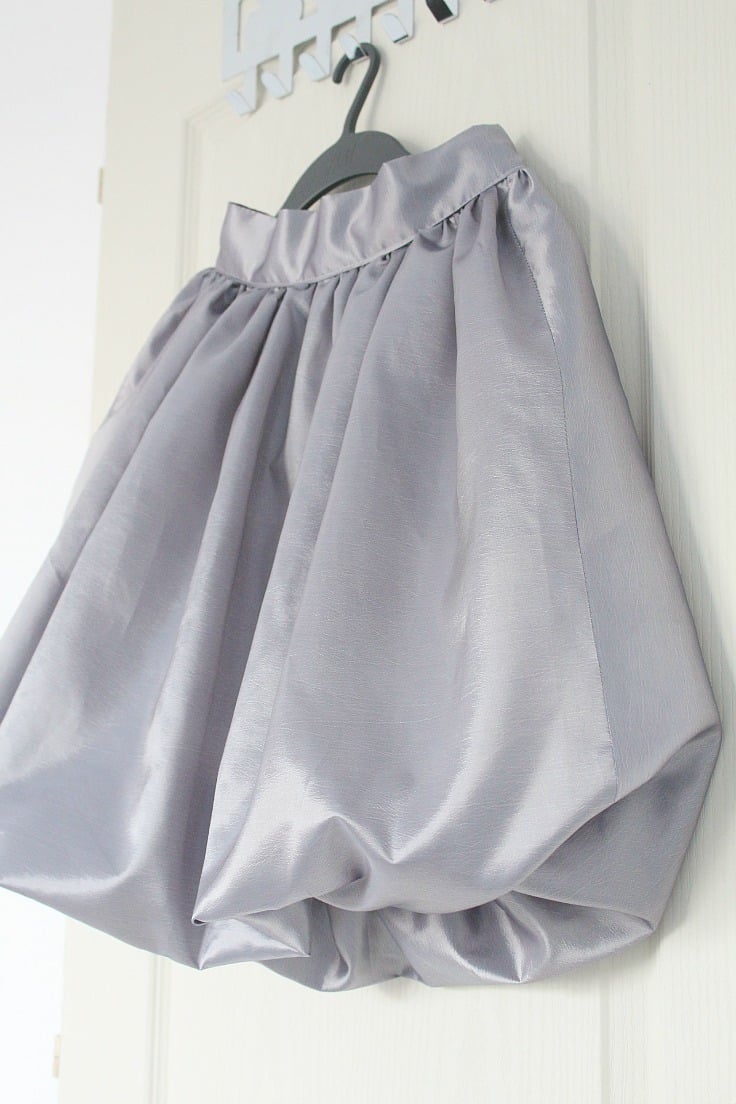
The instructions below are for a bubble skirt with a waistband and a button closure. This type of skirt is designed to be paired with a longer top underneath. You can replace the button closure with a back zipper closure or add velcro.
Materials:
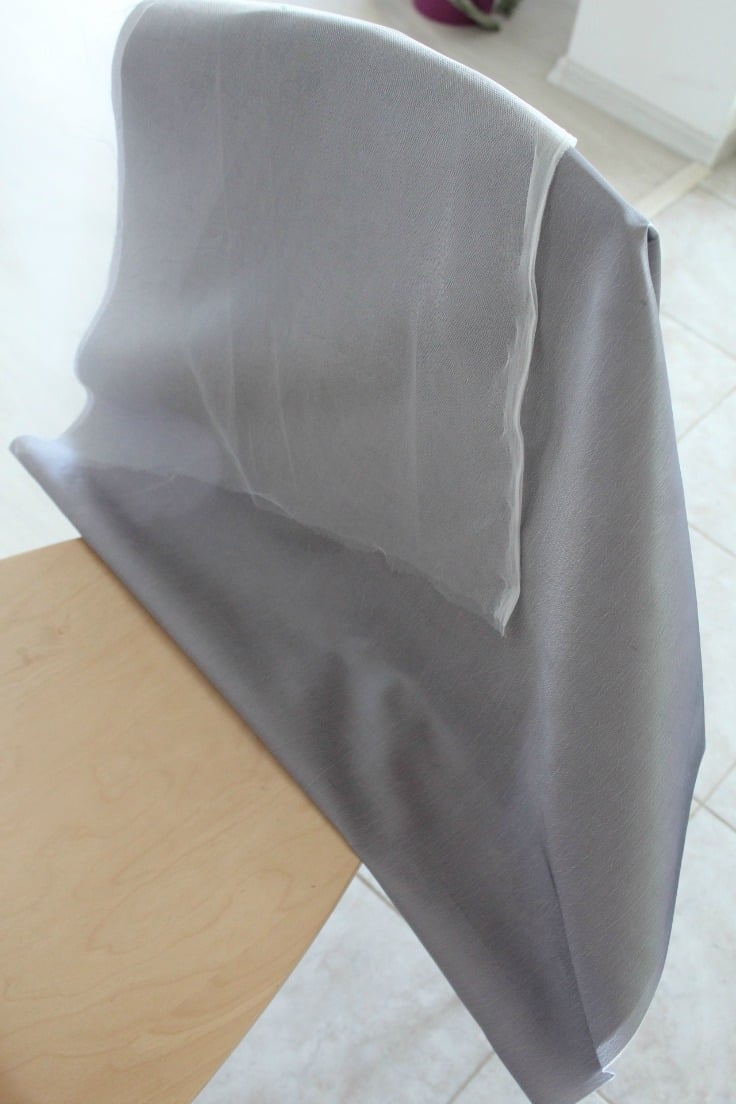
- Fabric for the skirt and waistband (I used some crepe satin, left from this A line dress)
- Fabric for lining (I used tulle as I wanted my bubble skirt to become really puffy)
How do you make a bubble skirt?
Prepare the fabrics
- Measure your waist and the skirt length (I wanted mine knee length but you can make it shorter or longer; I just don’t think t will look this sweet in a longer version, it may even look overwhelming)
- Cut the fabric for your waistband: height should be 10″ and width should be your waist plus 1 1/4″ for turning the ends inside and to add the button and buttonhole.
- Cut the fabric for your skirt: Height should be your skirt length plus 4″; Width should be three times your waist plus seam allowance.
- Cut the fabric for your lining: Height should be your skirt length minus 4″; Width should be your waist plus 12″.
- I’m a size 8 and I used these fabric measurements: Waist – 30″ x 10″; Skirt – 25″ x 88″; Lining – 18″ x 40″. Also I didn’t have enough fabric to make the skirt and lining in one piece so I used 3 (one large for the front and 2 small for the back, connected at the back). If this happens to you too, just cut half the measurements, make 2 panels and cut one in half. Join the panels at the sides and make one large panel for skirt and one for lining (You will have side seams and a back seam on the finished skirt this way). Then follow this tutorial.
Match skirt & lining
- Gather the bottom of the skirt fabric to match your lining width.
- Place lining and the gathered skirt right sides together and sew.
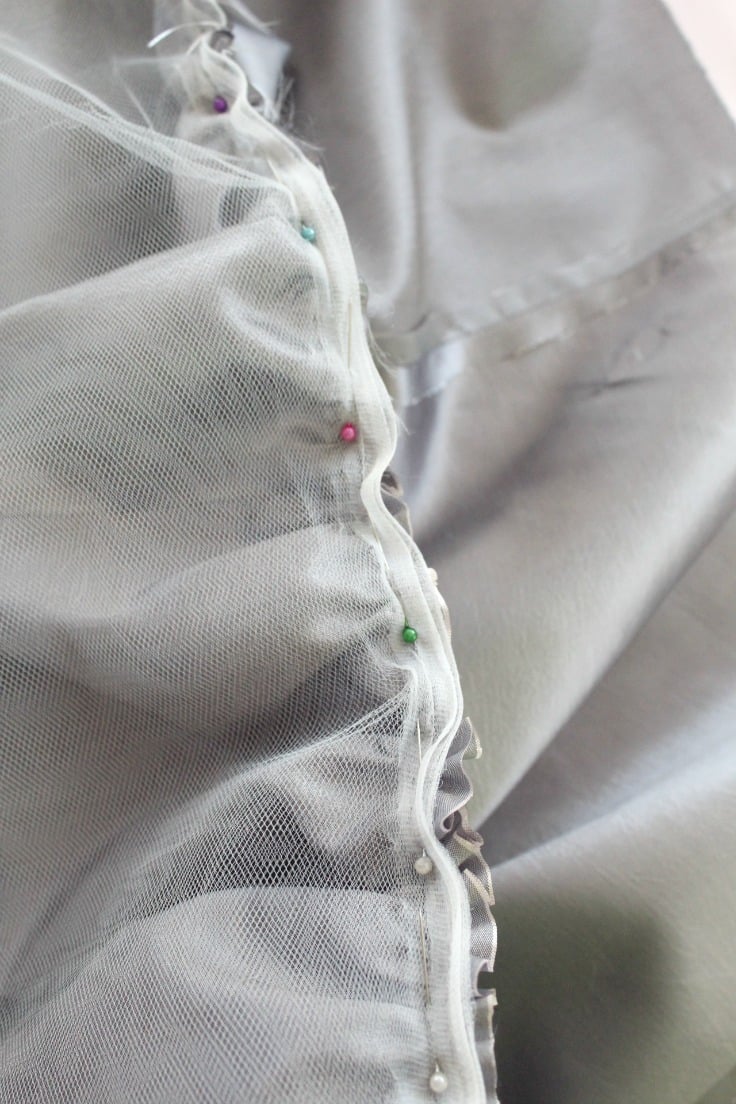
- Gather the top of your skirt to match your waist (minus the 1 1/4″ used for turning the ends inside and for the buttonhole).
- Gather the top of your lining to match your waist, as above.
Sew the skirt
- Place the skirt and the lining, previously joined at the bottom, right side out, then fold in half so that the sides join right side (one side of the skirt will join the other side of the skirt; one side of the lining will join the other side of the lining).
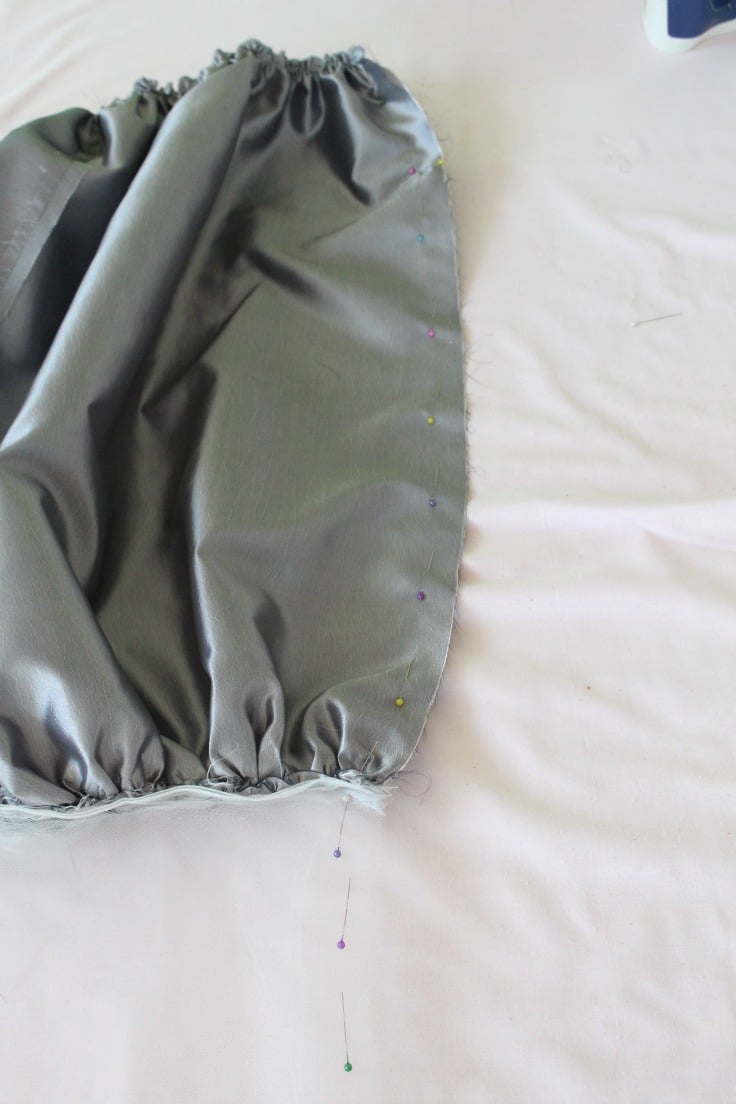
- Pin together, leaving an opening on both ends (one on skirt and one on lining). I left 5″ on both. Check if your body fits through these openings then sew the skirt and lining, skipping the opening you just marked (ignore the pins you see on the opening in the photo below, they were there for the sole purpose of keeping the fabric in place as it was very slippery).
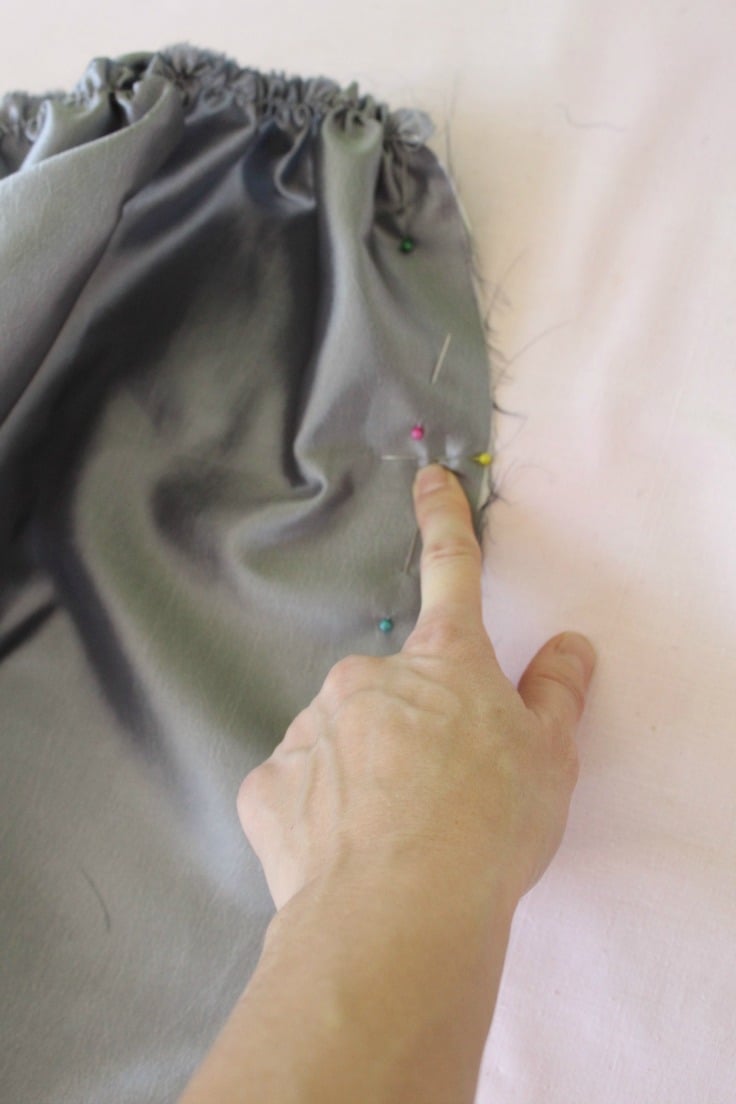
- Pull the lining through the inside of the skirt so now they face wrong side together.
- Pin the top of the skirt to the top of the lining and sew.
Make the waistband
- Make the waistband: fold fabric in half, lengthwise, and iron. Open the strip and fold each half again and iron so now you’ll have 4 folds. Fold the ends inside 1/4″ and iron. Fold everything back and iron.
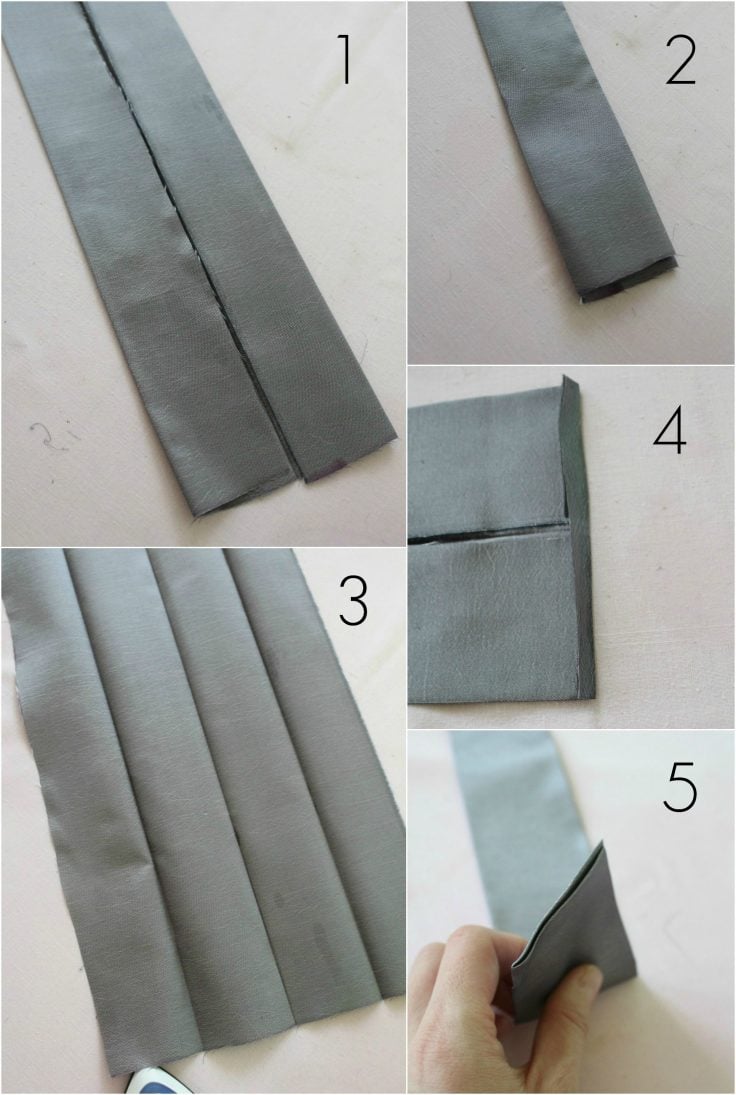
- Pin the top of the skirt and lining to the waistband, starting on one side of the waistband towards the other side (which should be longer than the skirt to accommodate the buttonhole). Open the waistband and pin the skirt to the back of the waistband so the skirt and waistband face wrong side.
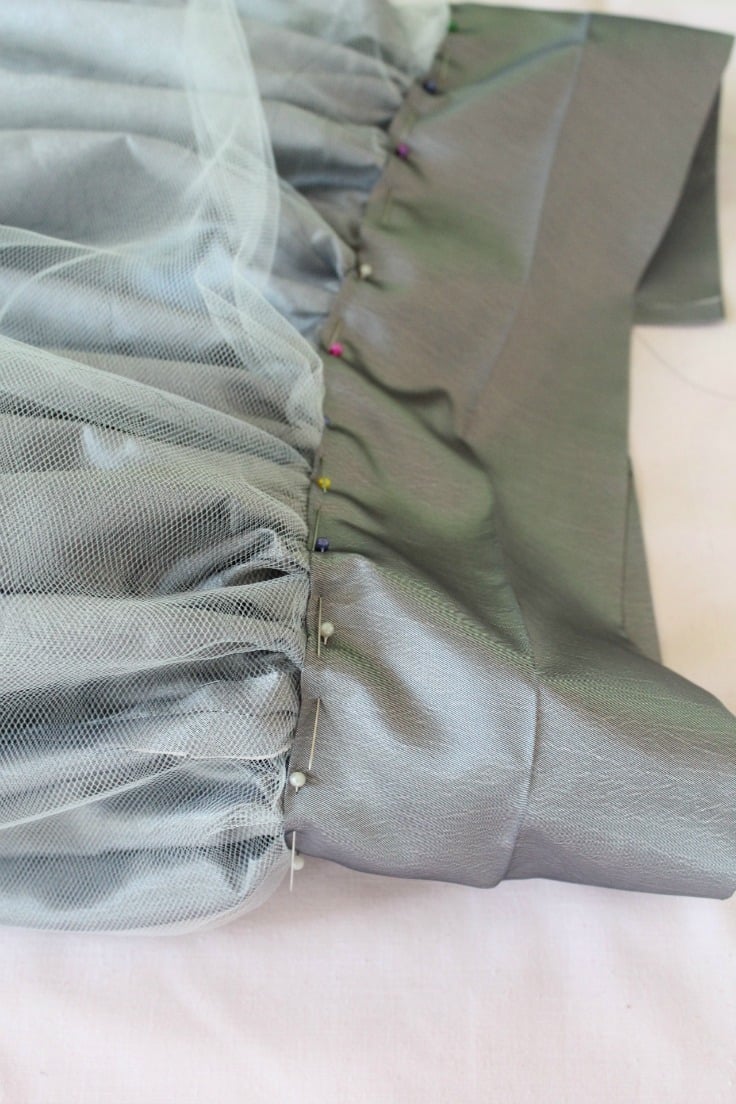
- Sew. Fold the front of the waistband over the right side of the skirt. Then pin and sew.
- Sew the sides of the waistband as close to the edge as possible.

- Make the buttonhole on one end of the waistband and sew the button on the opposite one.
- That’s it! Your lovely bubble skirt is ready! Now that you know how to make a bubble skirt, go make yourself loads of pretty little bubble skirts! Your friends will be impressed and ask you to make one for them too!
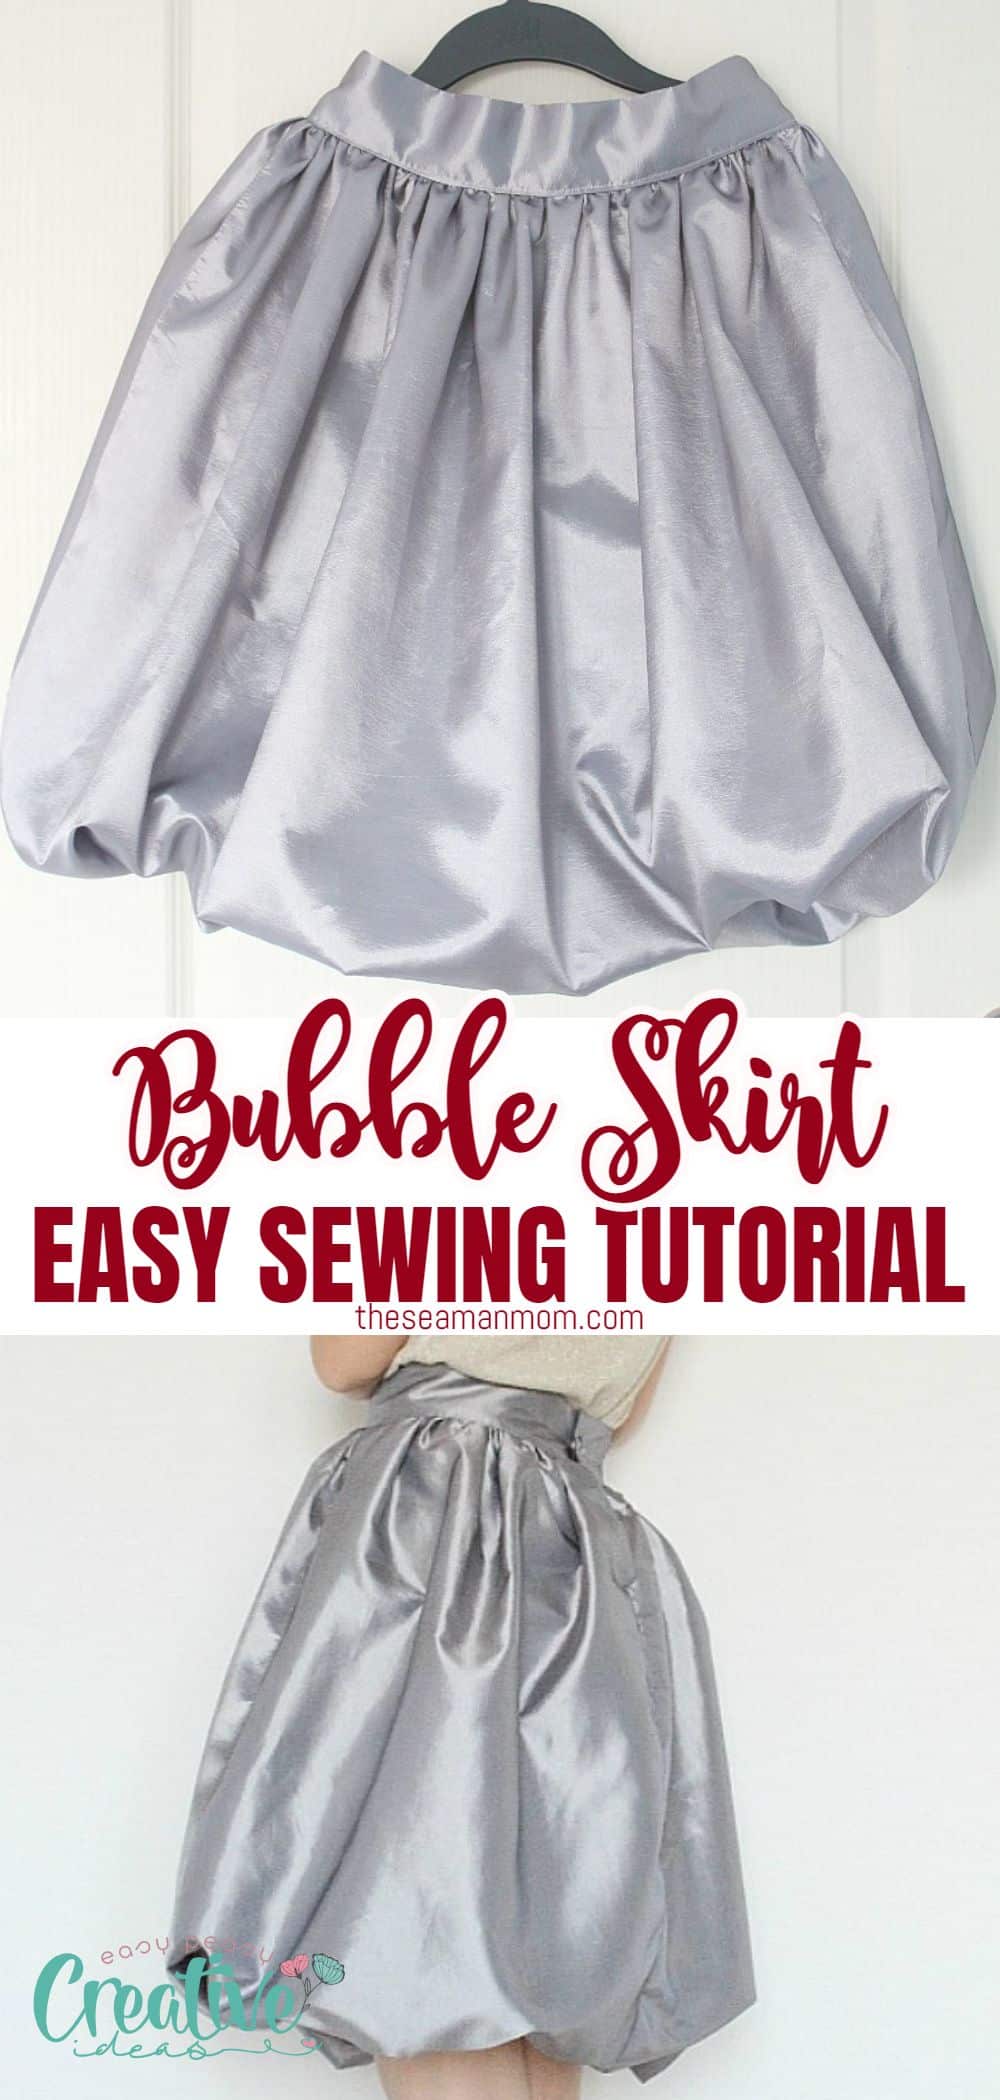
Pin to save for later
Most popular sewing projects:
- Tips for sewing a round hem
- Corded bag handles
- Flutter sleeve dress pattern
- How to laminate cotton fabric
Article may contain Amazon & affiliate links. As an Amazon Associate I earn from qualifying purchases at no additional cost to you.


Hi! I was about to make this skirt, cut the fabric out and everything, but then I read through and noticed, it seems like the button is the only closure on it? Is that right? If so how do you get it over your hips?
Hi Mimi. Yes, in my skirt the closure is with a button. The skirt has a slit in the back to pull it over the hips. Yiu can replace the button closure with a zipper if that suits you best. If you’re new to sewing, here’s a tutorial on how to insert a zipper in a skirt https://theseamanmom.com/how-to-sew-a-zipper-on-a-skirt/. This tutorial is a little more advanced, showing how to insert a zipper in a lined skirt https://theseamanmom.com/how-to-sew-a-zipper-into-a-lined-skirt/
Thank you! I appreciate it
Hi! This is gorgeous! Just wondering roughly how much material you used to make your skirt? Thanks!
Hi, Charlie! Thanks so much, I’m happy you loved my skirt idea! I’ve highlighted the method for calculating the fabric in the tutorial but here it is: to calculate the skirt fabric, measure yourself at the waist and decide the length of the skirt. Width of fabric is 3 x your waist measurements plus seam allowance, height is the desired length plus 4″. Add some fabric for the waistband (height should be 10″ and width should be your waist plus 1 1/4″). The lining should be 4″ shorter than the skirt fabric and same width. Hope this helps.
Love this skirt. If you turn it inside out is it the crepe on the inside or the tulle?
Thanks, Kate! Not sure I understand your question though.
Wow! This is a very nice skirt. I have so many questions about how it was put together. You dhoulf make a Youtube video on how you sewed it. It is an extremely beautiful design.
Hey Petro, Hands down for this beautiful bubble skirt. I was actually planning to make it for me for Christmas but in red color, can you tell me which fabric did you use. Thanks so so much for this post, very easy to follow the steps you have mentioned. I will subscribe to your blog for more posts like this in my inbox.
Hi Hanna! Thanks so much for your lovely comment, you just made my day! I used crepe satin. I found it made the skirt even more puffy.
You look adorable in that skirt. Thanks for sharing this great tutorial!
Great skirt! I have been wanting to make a bubble skirt for my granddaughters. Now I know how. Thanks!
Thanks for your lovely comment, Linda Sue. I’m sure your skirt will look amazing!! Have a wonderful weekend!