

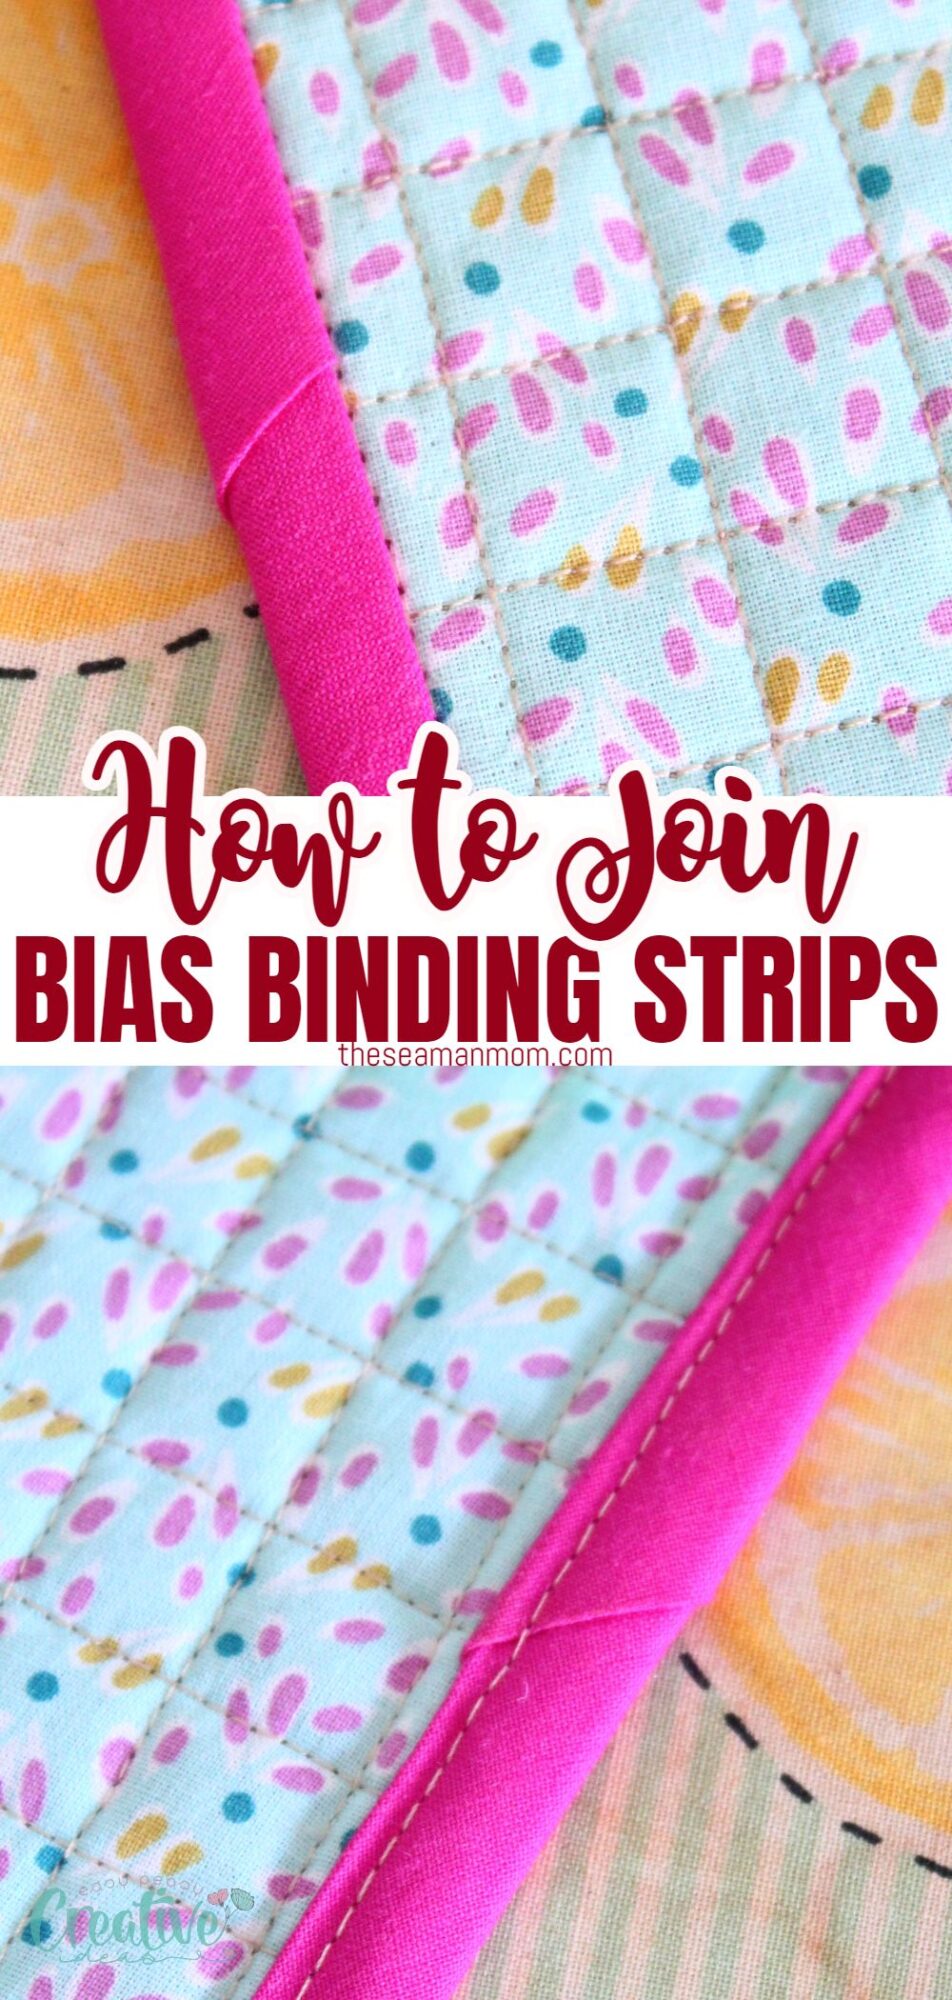
How to join binding strips the “non-lazy” way
Learn how to join bias strips seamlessly for your next sewing project. In this second tutorial on joining binding ends, I’ll uncover the tips and tricks for joining bias binding ends perfectly on a quilt, creating a professional finish. You can also check method number one and method number three and decide which one is best for your style and skills.
Whether you’re aiming to complete the edges of a quilt or add a decorative trim to your garments, mastering how to join bias strips can elevate your sewing work from good to great. Joining bias strips may seem daunting at first, but it’s an invaluable skill for crafters, quilters, and anyone looking to add a beautiful finish to their sewing projects.
In this tutorial I showed you my preferred method for joining bias ends and I called it the “lazy method”. It’s not really lazy, but it’s also not something most sewing enthusiasts like to use in the quilting projects. Today I’ll be showing you how to join bias strips with the “non-lazy method”. While more popular than my previous method, I find it’s not what I’m looking for when I need to finish my binding as it doesn’t have a seam.
The ends don’t join together through a perpendicular seam as in my previous method and to me this raises a few issues:
- I find it hard to align perfectly the fold where the two ends meet.
- To me it looks like the join is a bit bulkier for some reason.
- You’ll find it harder to keep the fabric straight as you stitch.
- When doing the stitch in the ditch method, the line of stitching will be obvious at the join.
Why the “non-lazy” technique works
This technique not only provides a pretty neat finish but also ensures durability and stretch, making it perfect for curved edges. Joining binding ends effectively allows for a continuous binding that lays flat and stretches along the quilt’s edge, accommodating its shape without puckering.
So this method ensures a polished look and longevity of the binding. If you manage to align the ends perfectly, this method is perfect for giving your projects a professional touch. And the 45 degrees fold looks quite pretty in the bias binding.
But let’s get back on track and start discussing the non-lazy way of joining bias strips.
How to join bias strips
Materials needed
- Bias binding strips (cut at a 45-degree angle to the fabric’s weave)
- Quilt or quilted fabric for practicing purposes
If you don’t have pre-made bias tape, you can create your own from any fabric that matches or contrasts beautifully with your project. Here’s a tutorial on how to make bias)
Equipment
- Measuring tape or ruler
- Fabric marking pen or chalk
- Sewing machine
- Wonder clips
- Iron
- Ironing board
Note
For the purpose of this tutorial I used 2 separate bias strips. I found it a lot easier to illustrate the method in a clear way, without so much bias and quilted fabric in the frame of the camera as a regular project would involve. For a regular quilt you will obviously use a long continuous piece of bias strip.
Step-by-step instructions
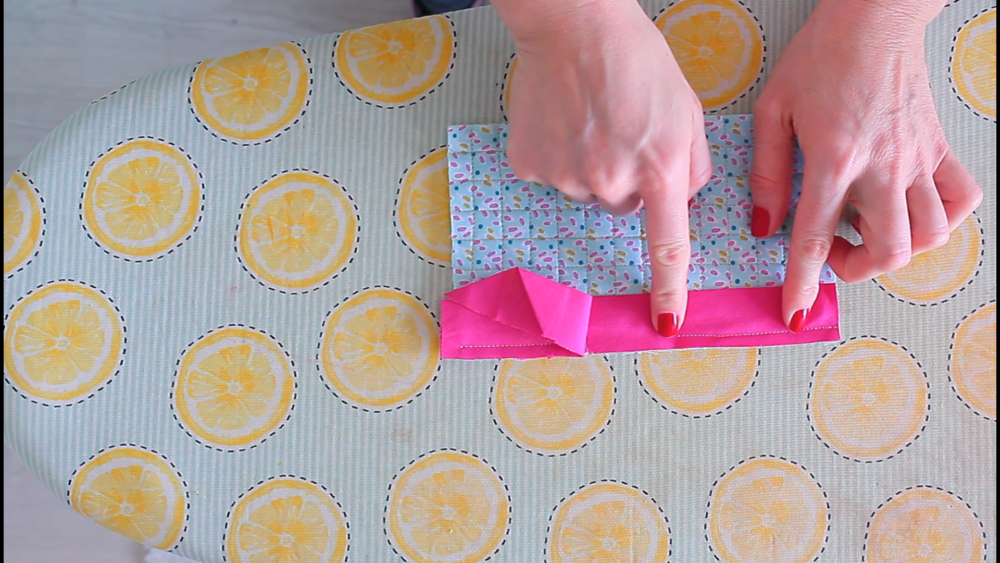
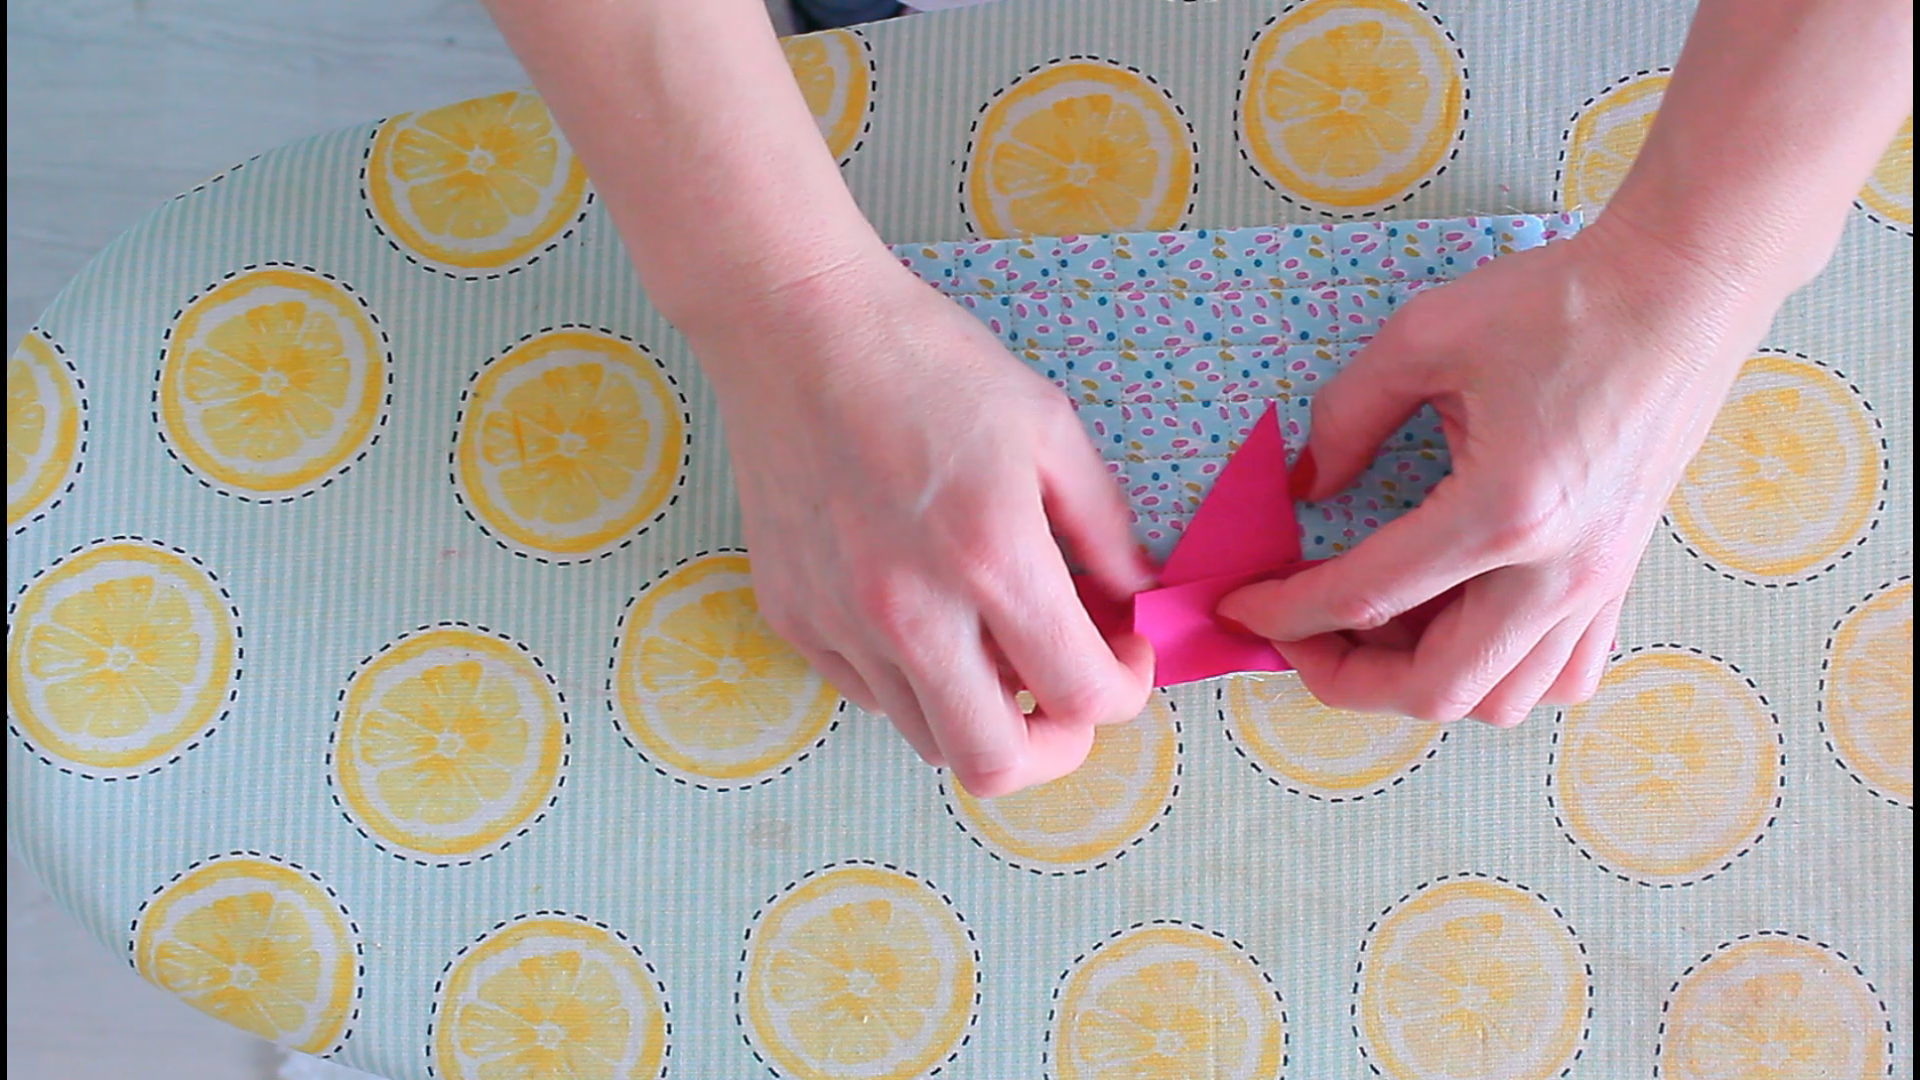
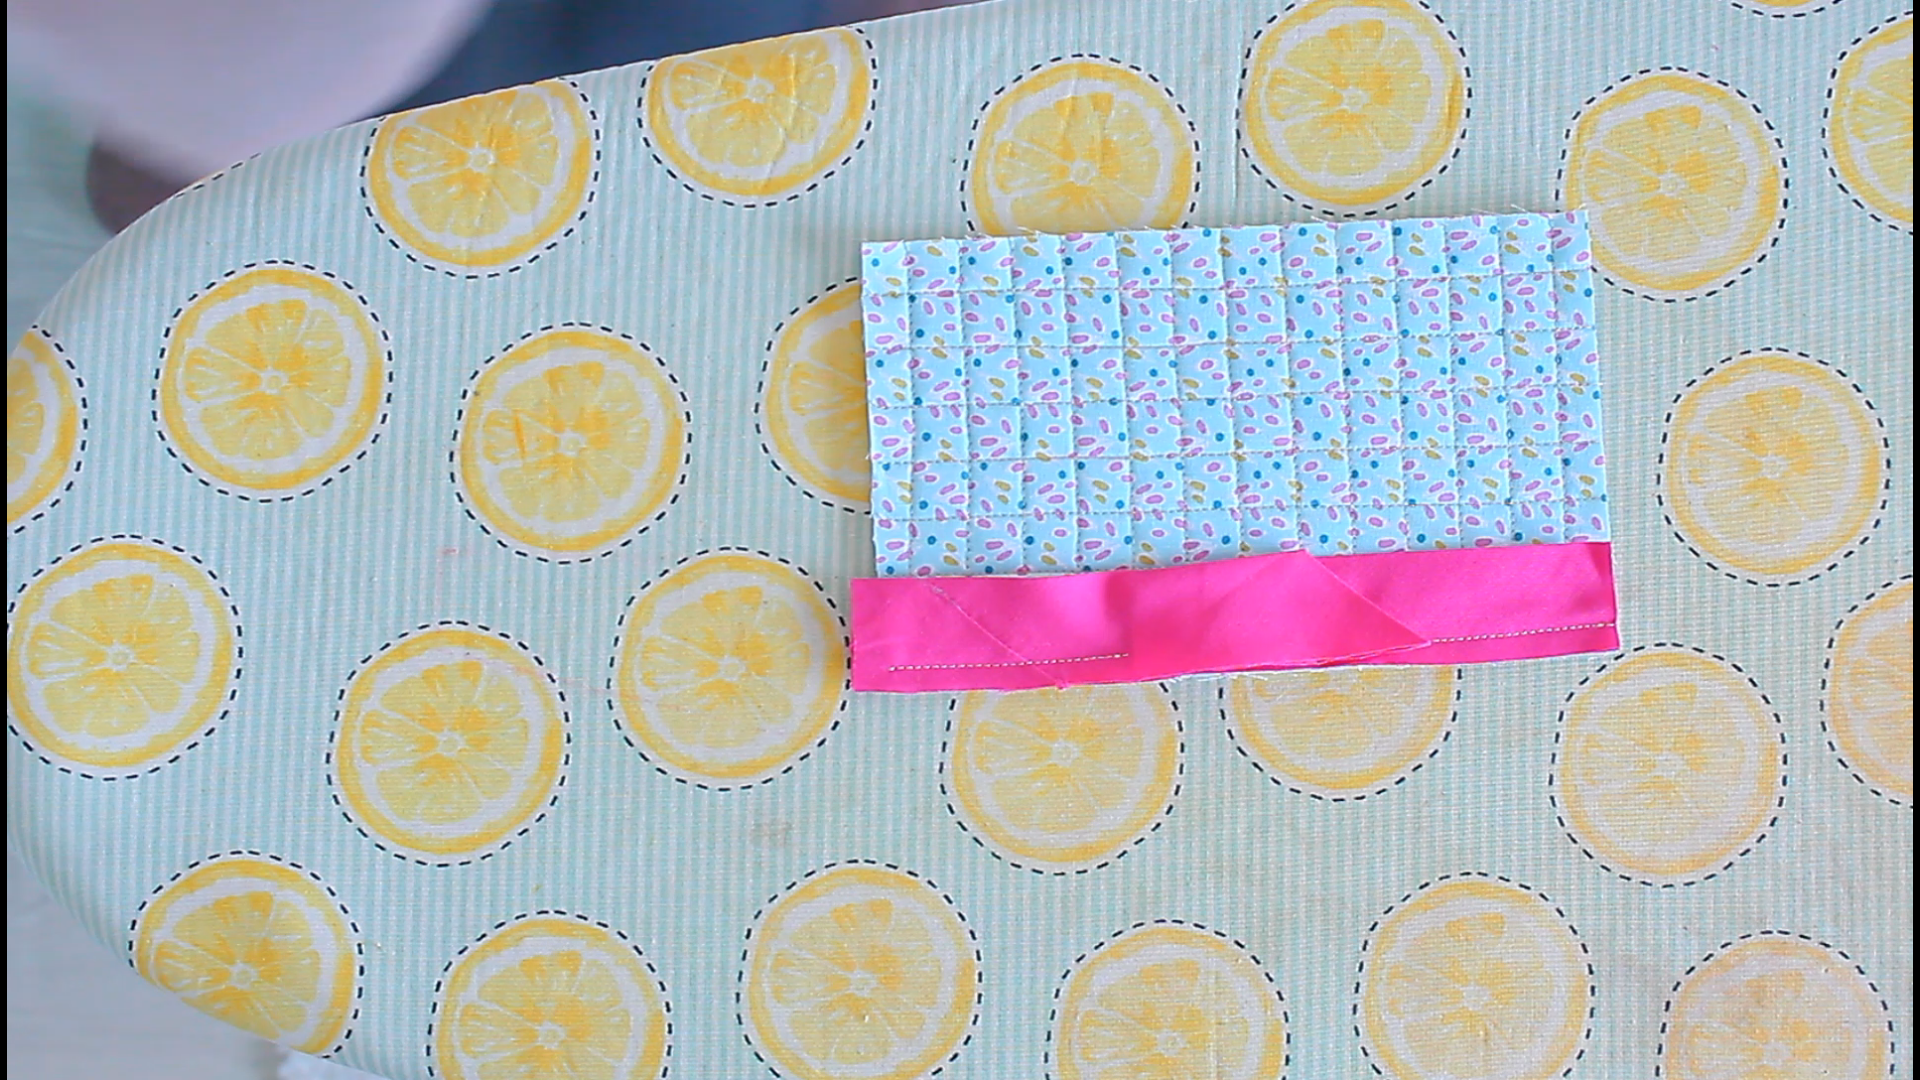
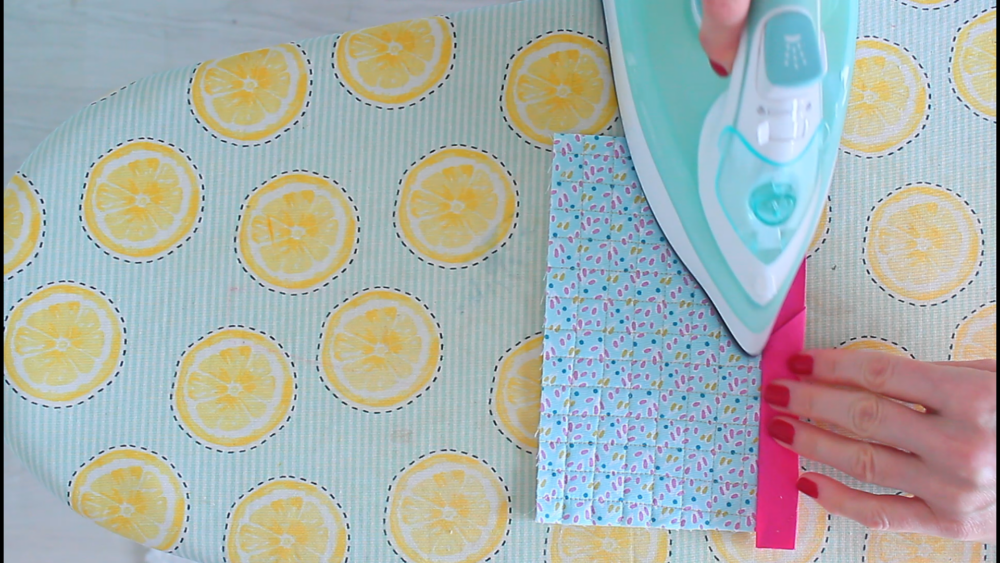
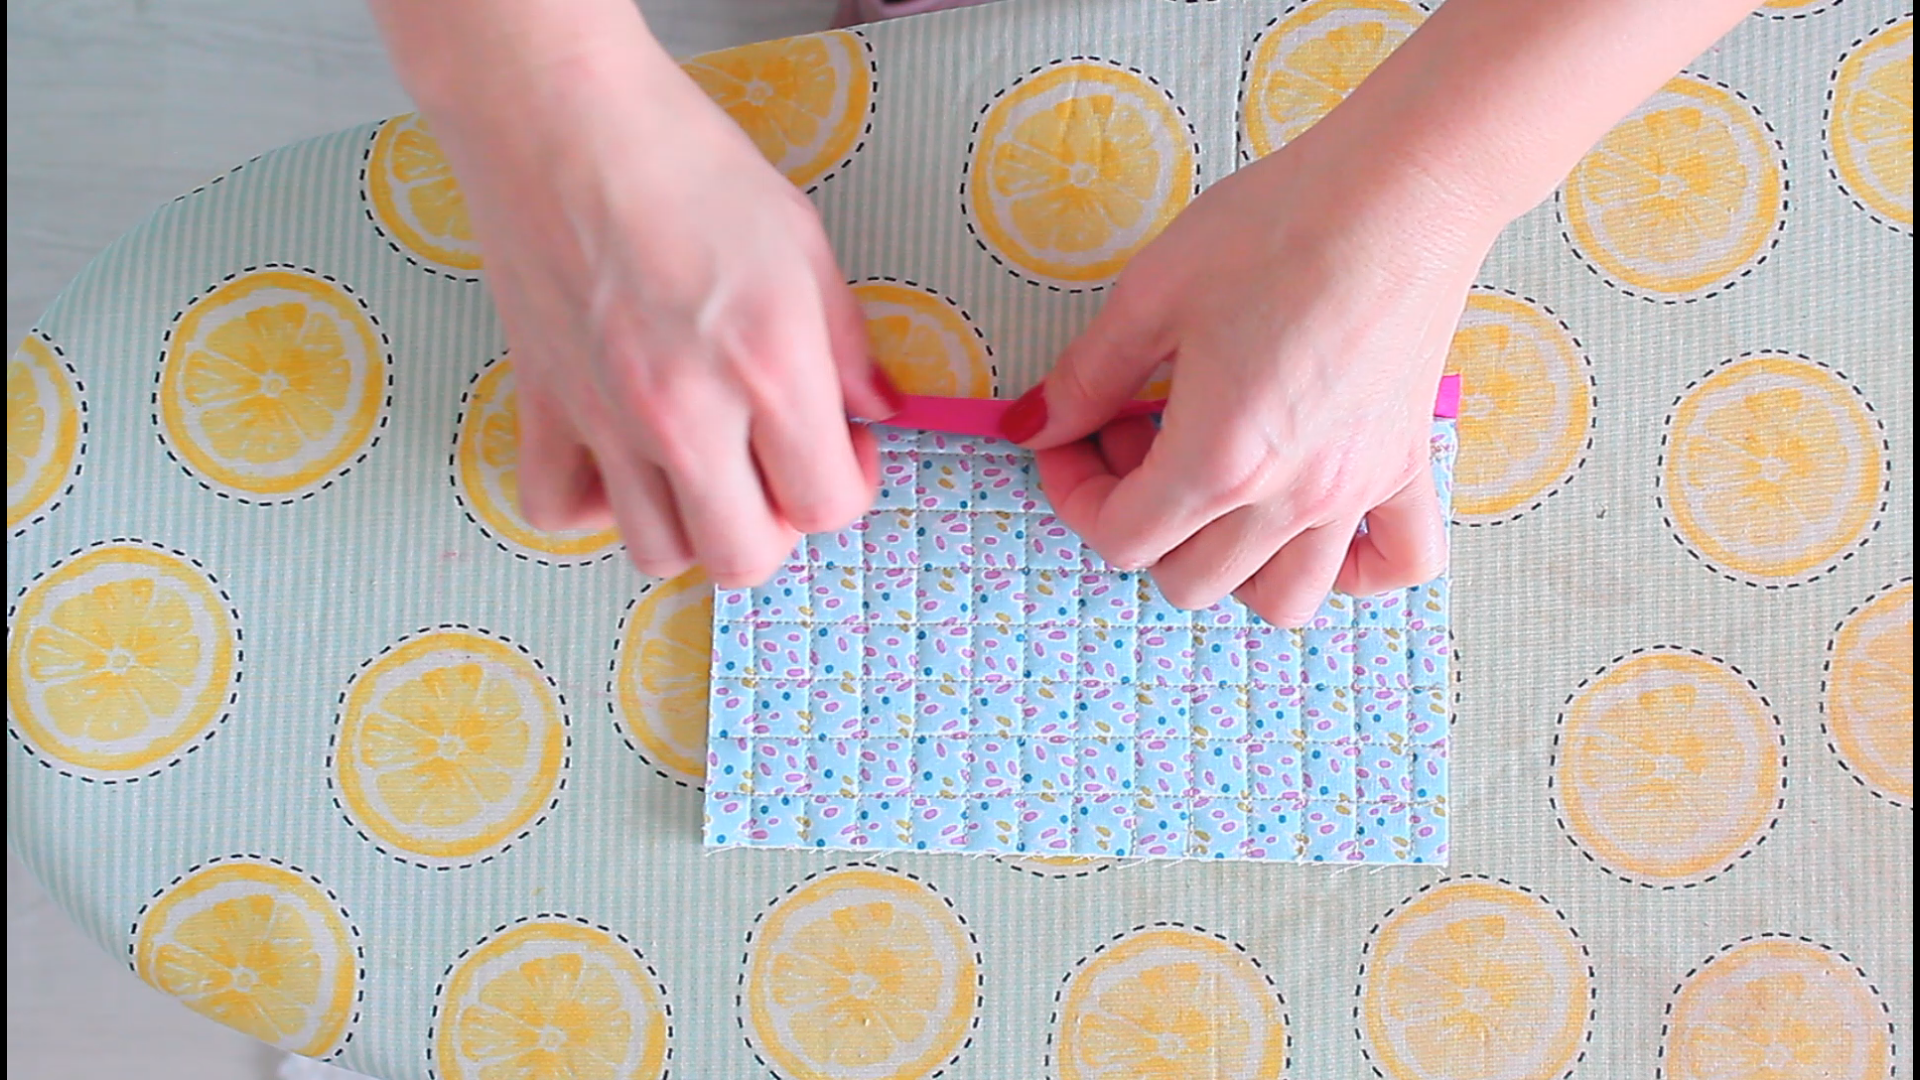
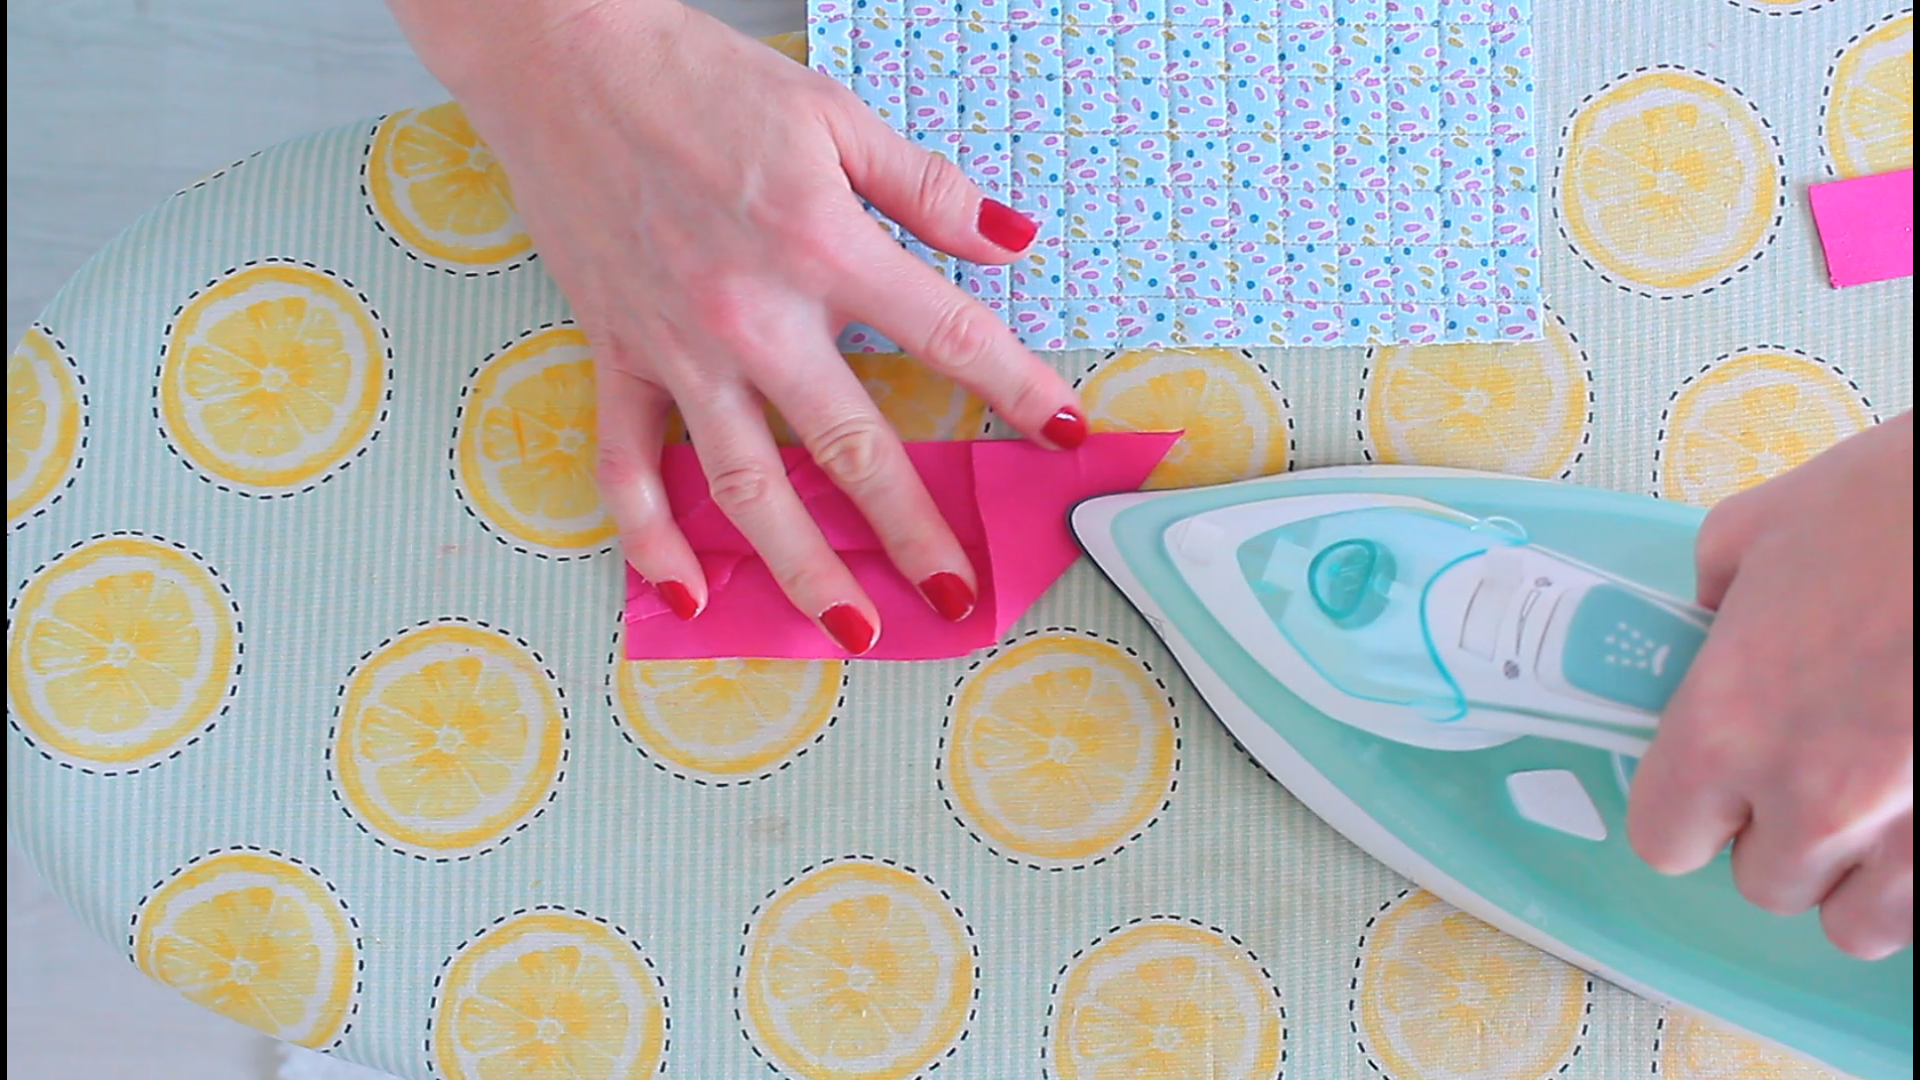
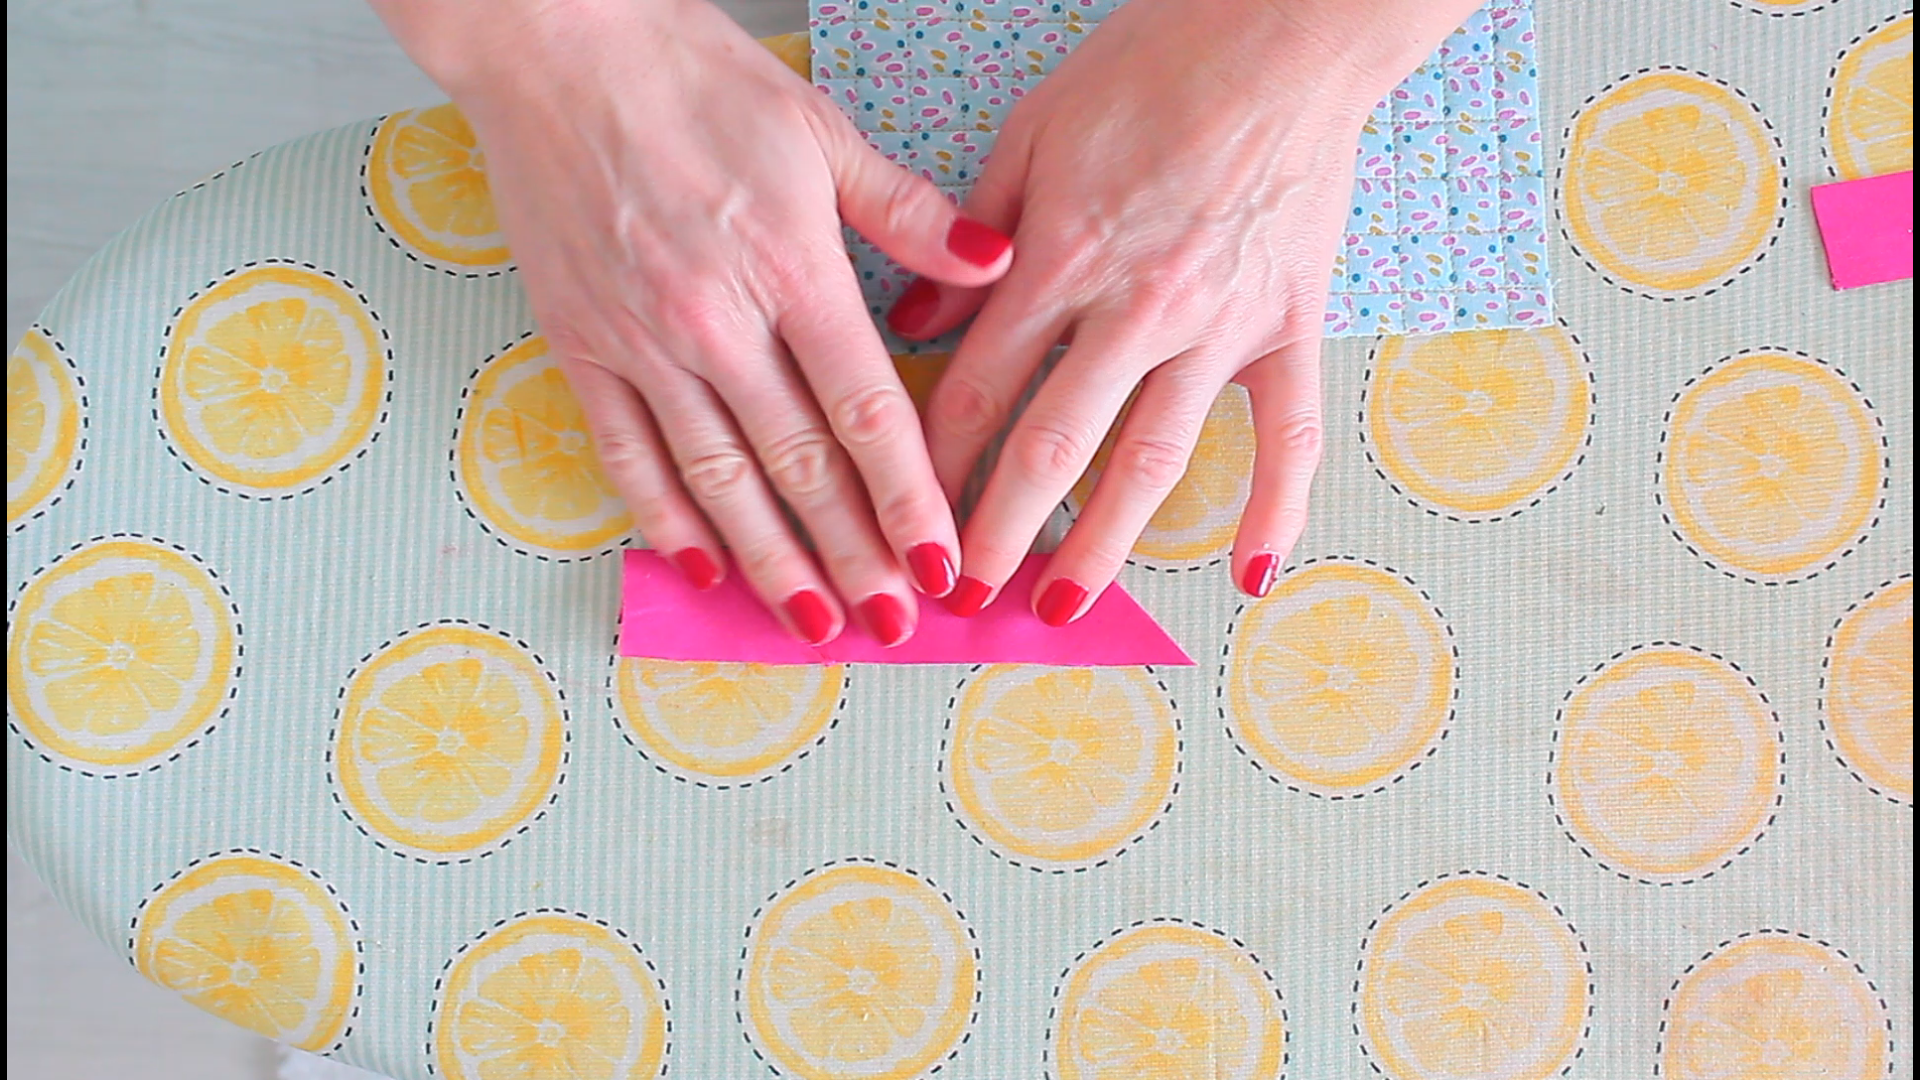
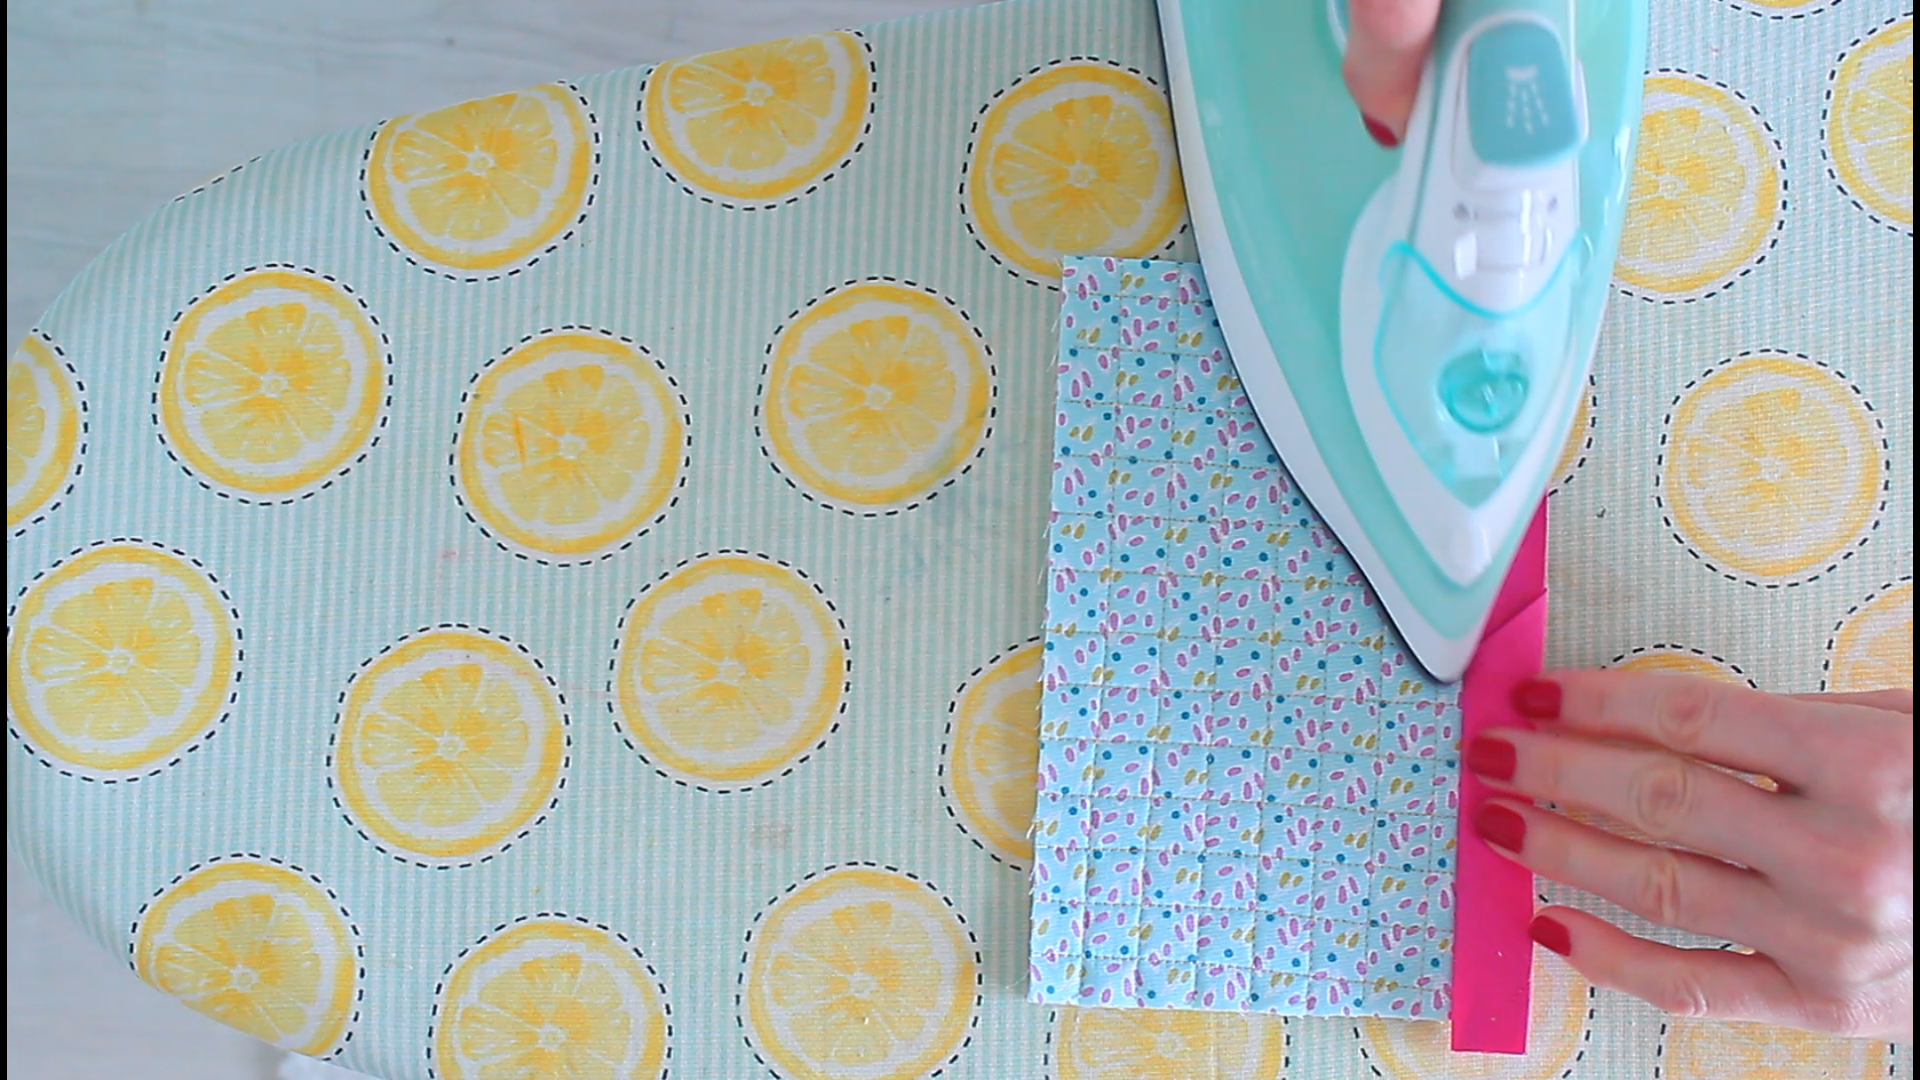
- Before sewing the binding strip to the quilt, open the strip and fold the bottom corner of the starting end of the strip to a 45 degree angle like so. Press the angle well.
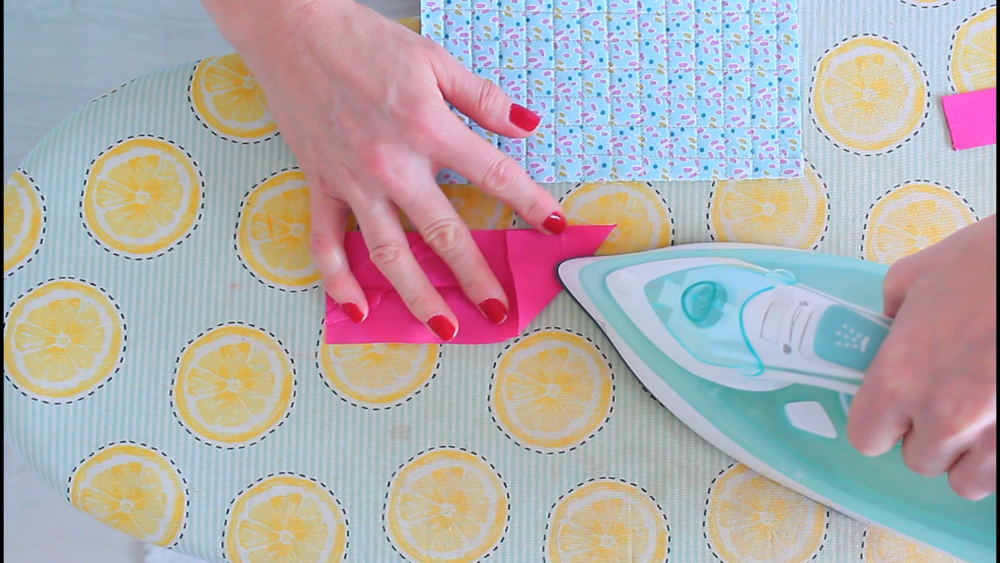
- Then fold the strip back and press.

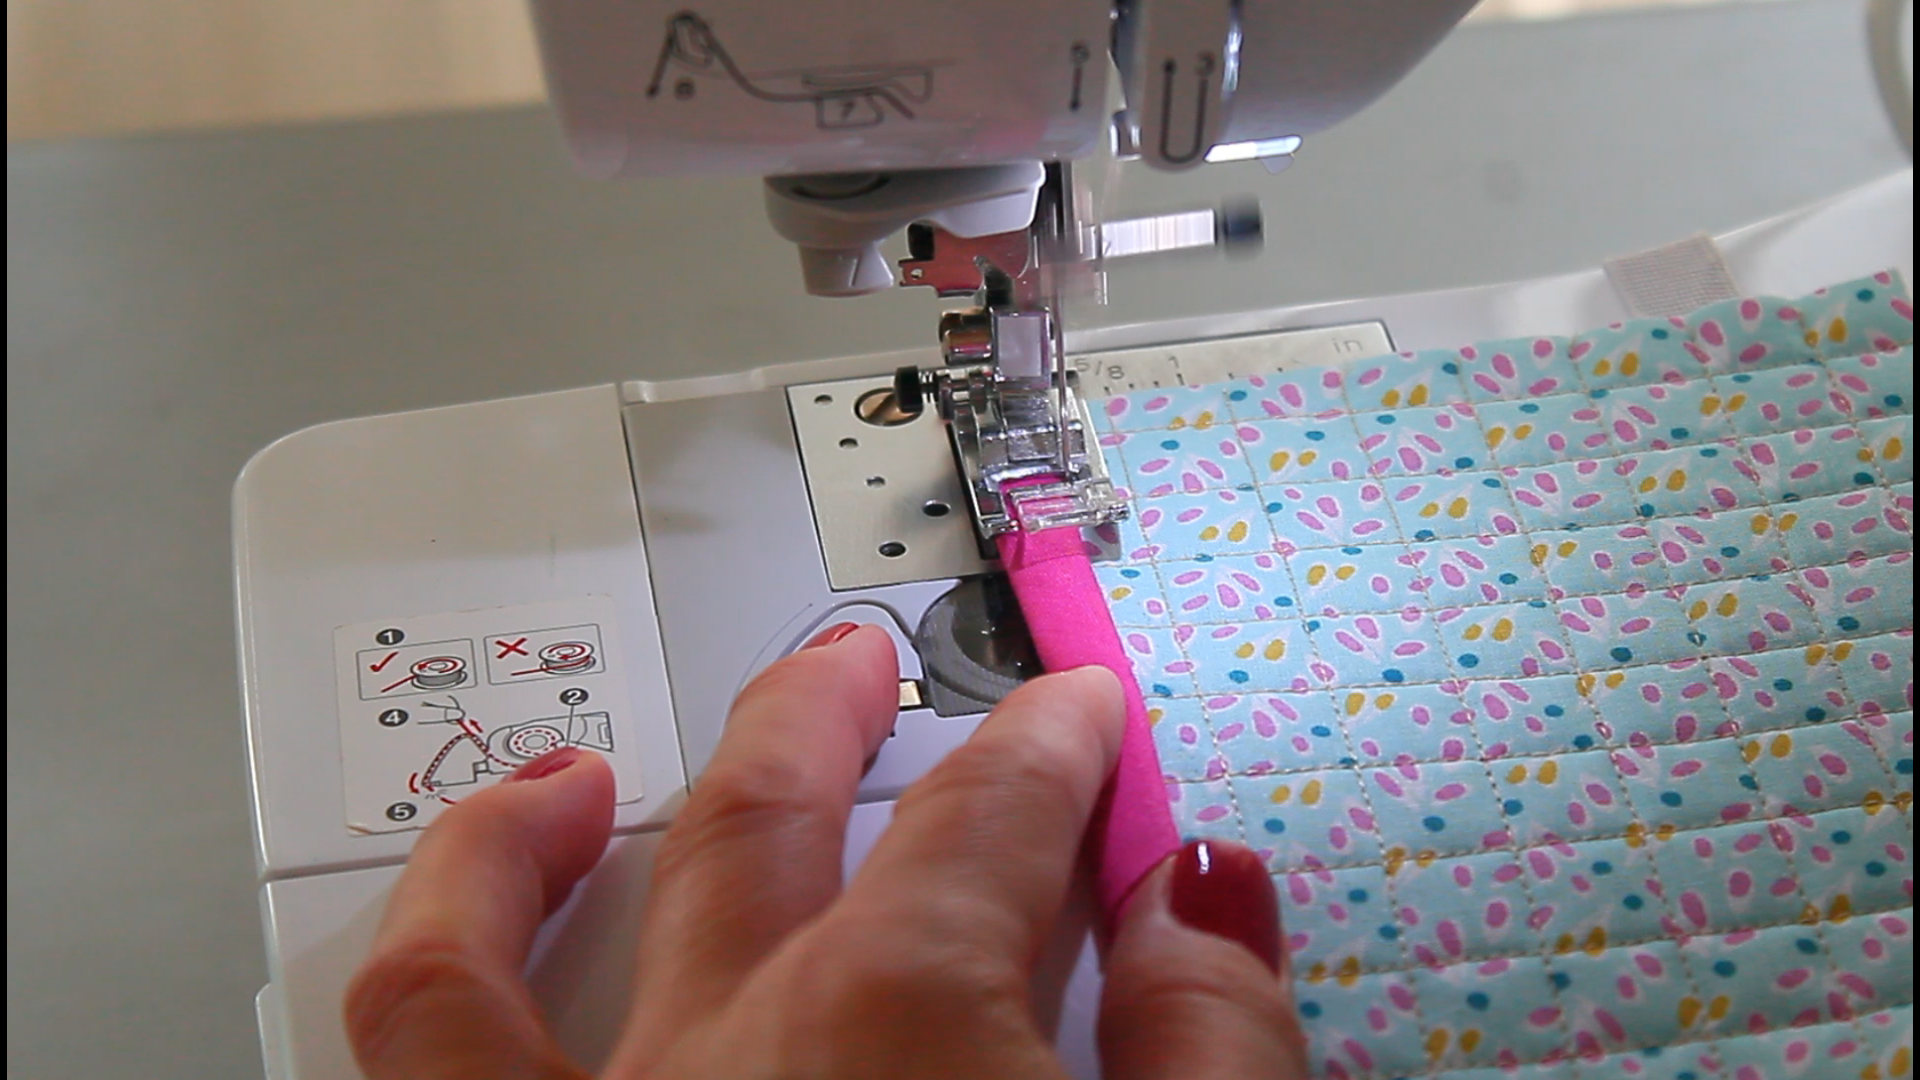
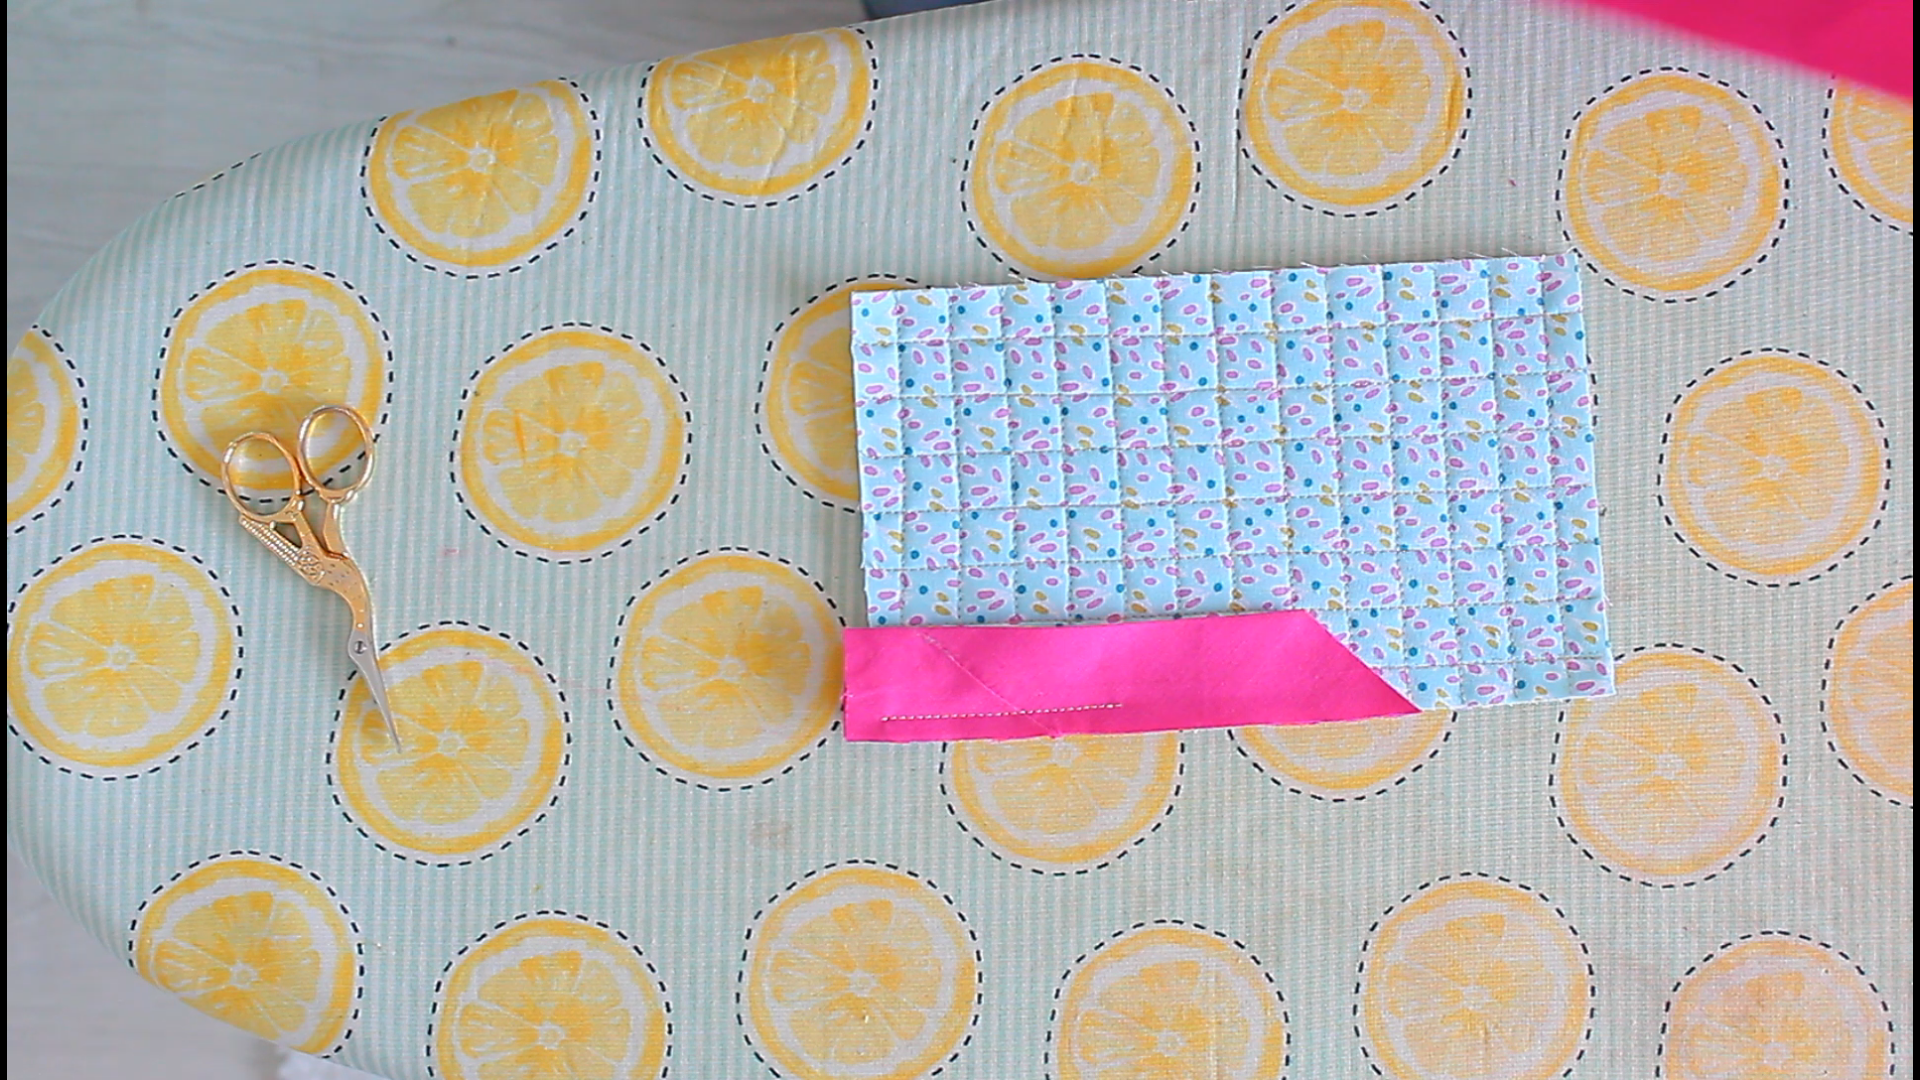
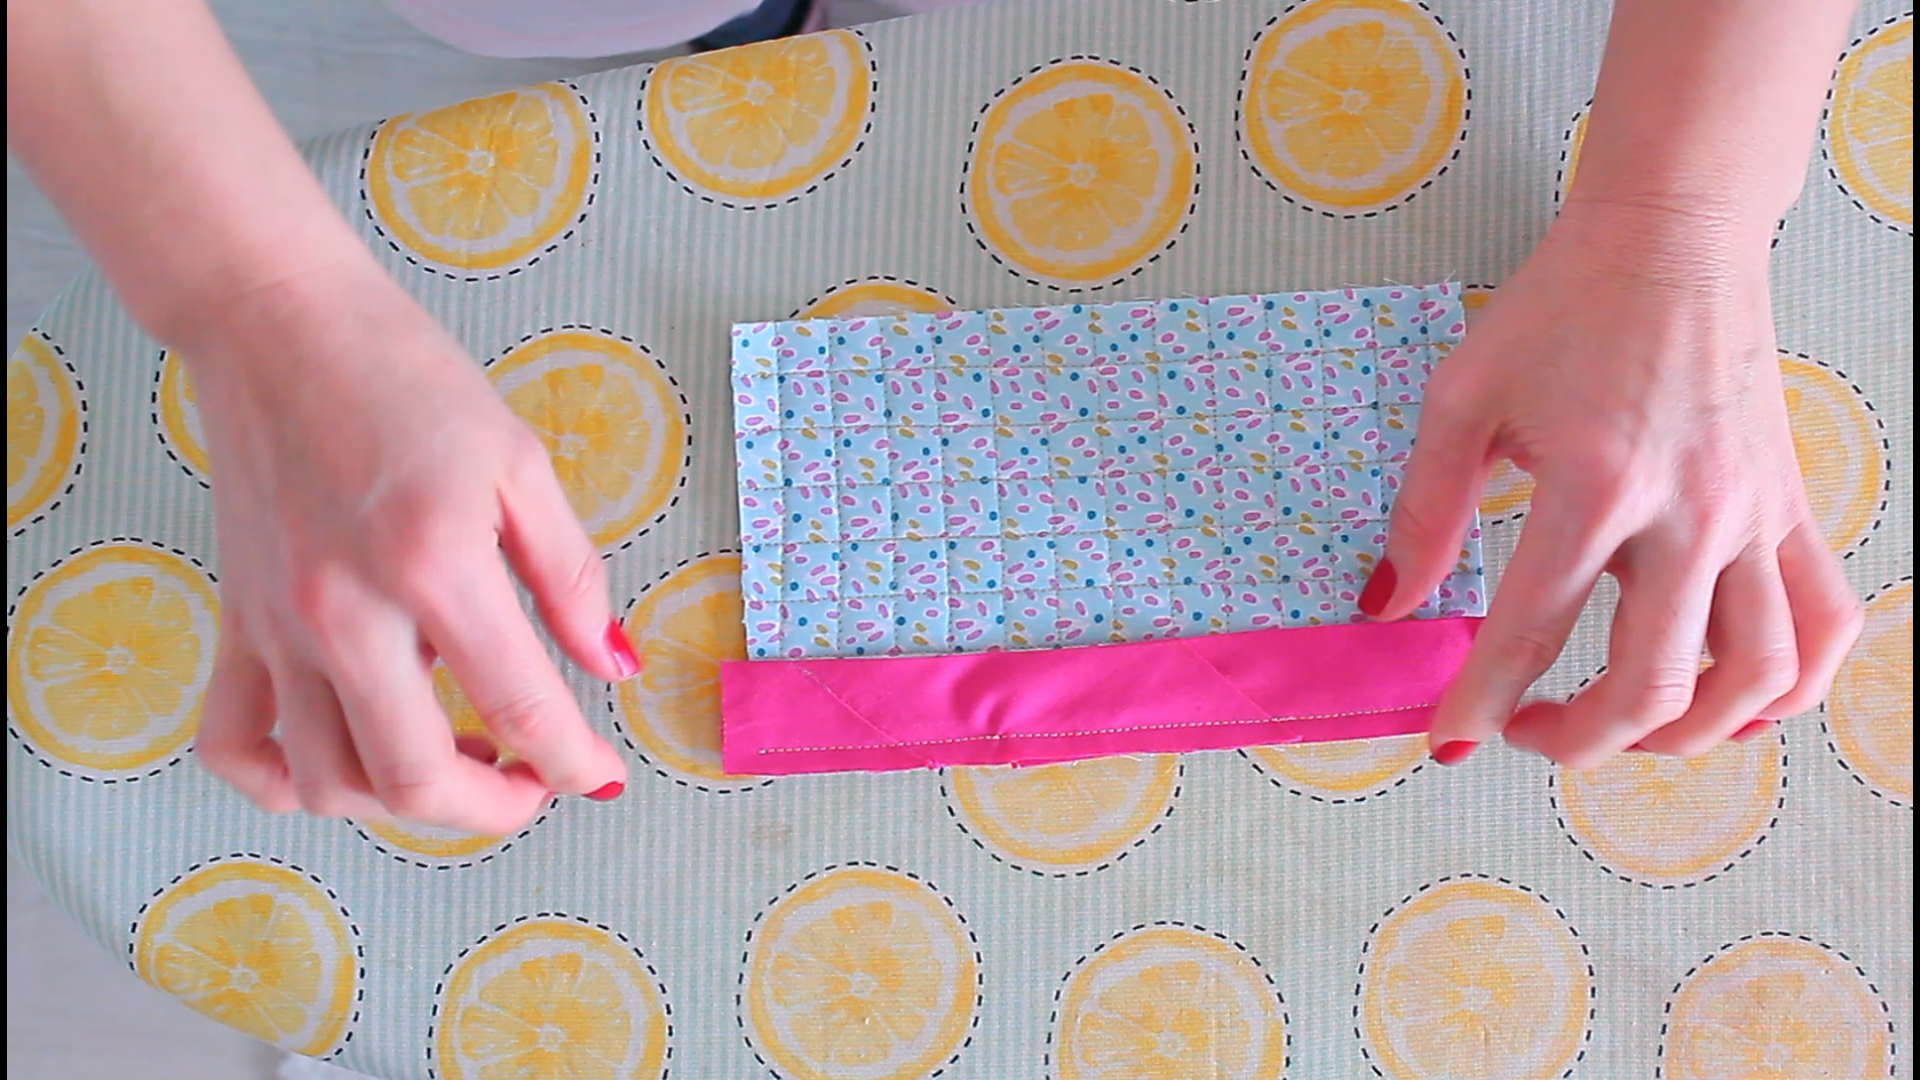
- Place the raw edge of the strip level with the raw edge of the quilt. Sew the bias binding to the raw edges of the quilt with 1/4″ seam allowance, starting about 2 inches in from the end of the binding strip.

- When you almost reach the other end of the binding, stop sewing about 2 inches away from the other end.
- Take your quilt off the machine and lay it flat on a surface.
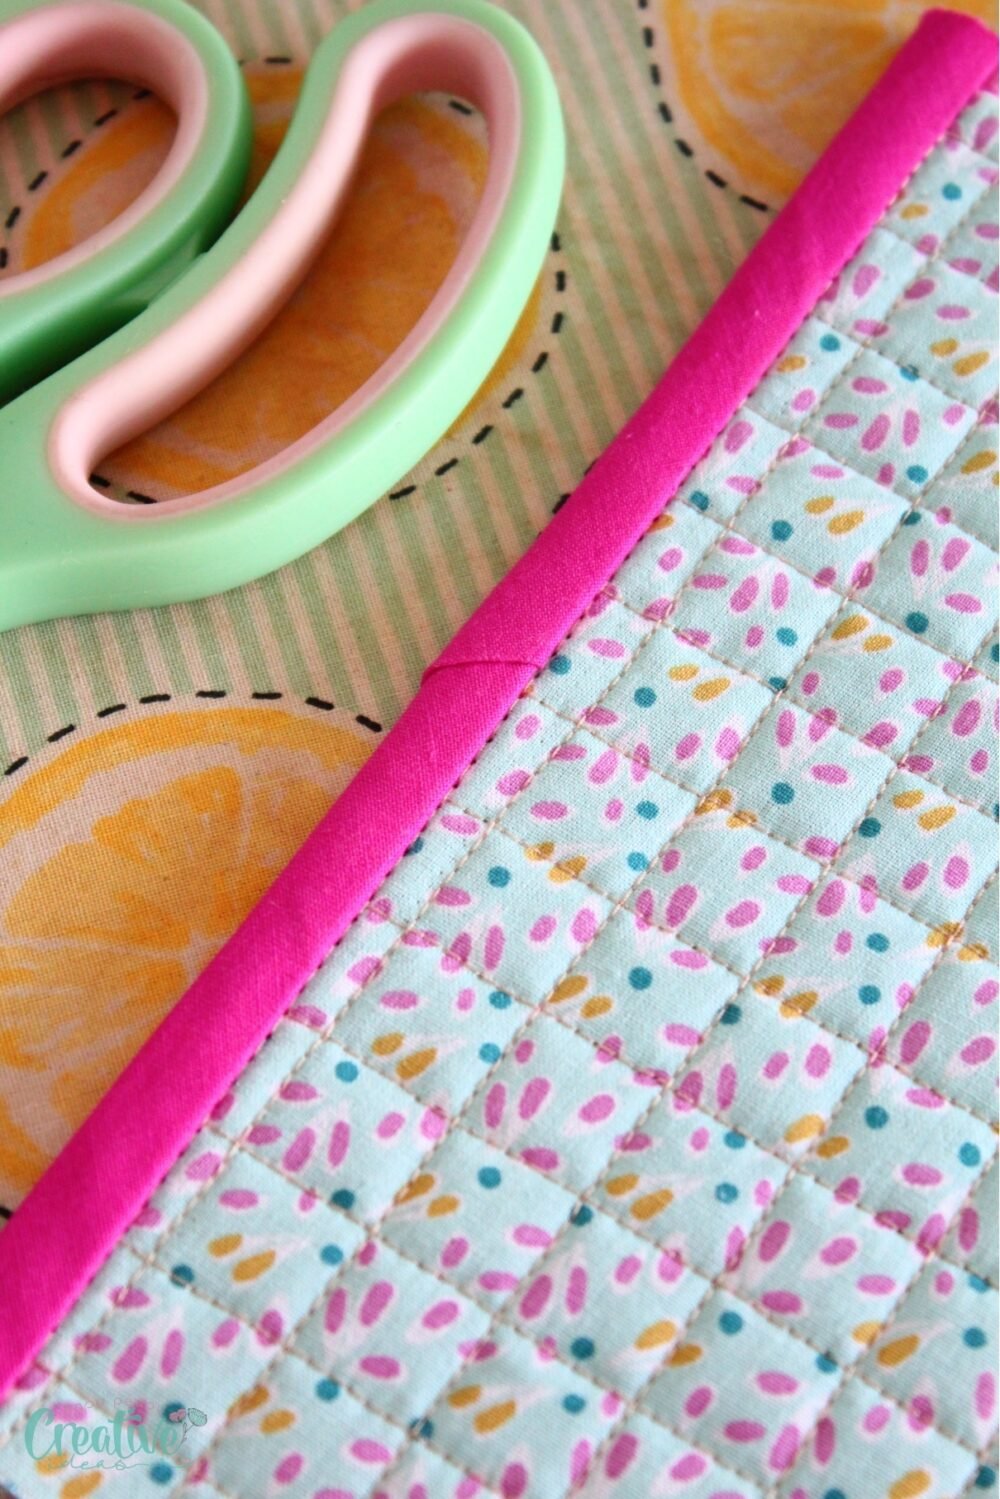
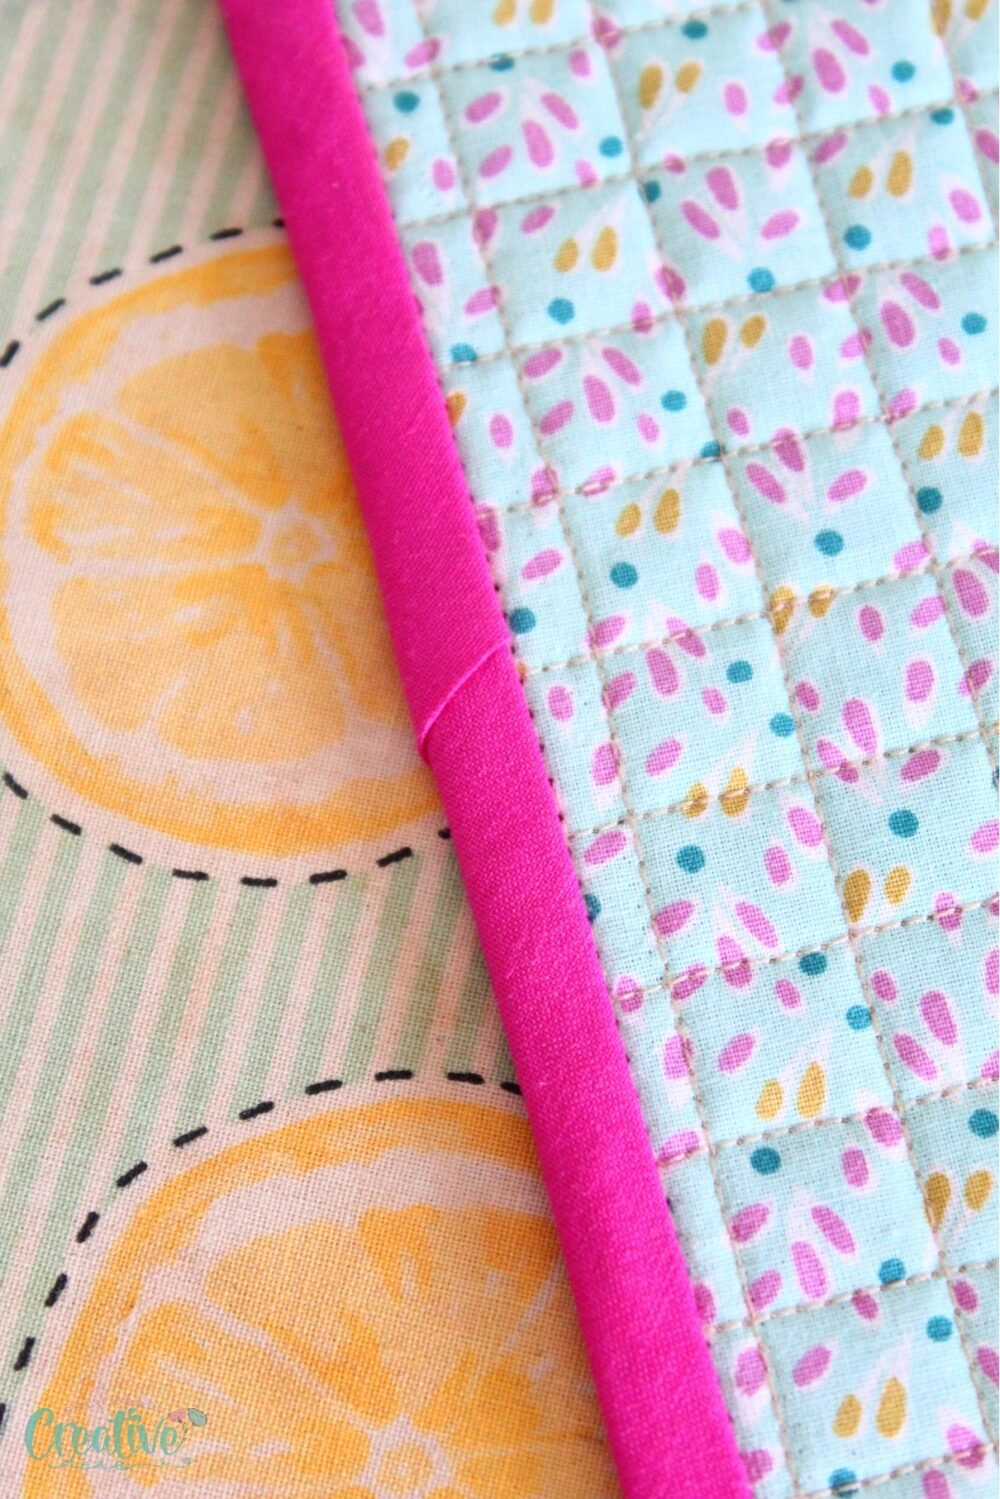
- Open the first end (the one with the 45 degree angle) and insert the second end into the first end of the strip. Trim the second end if too long so that it fits inside the strip.
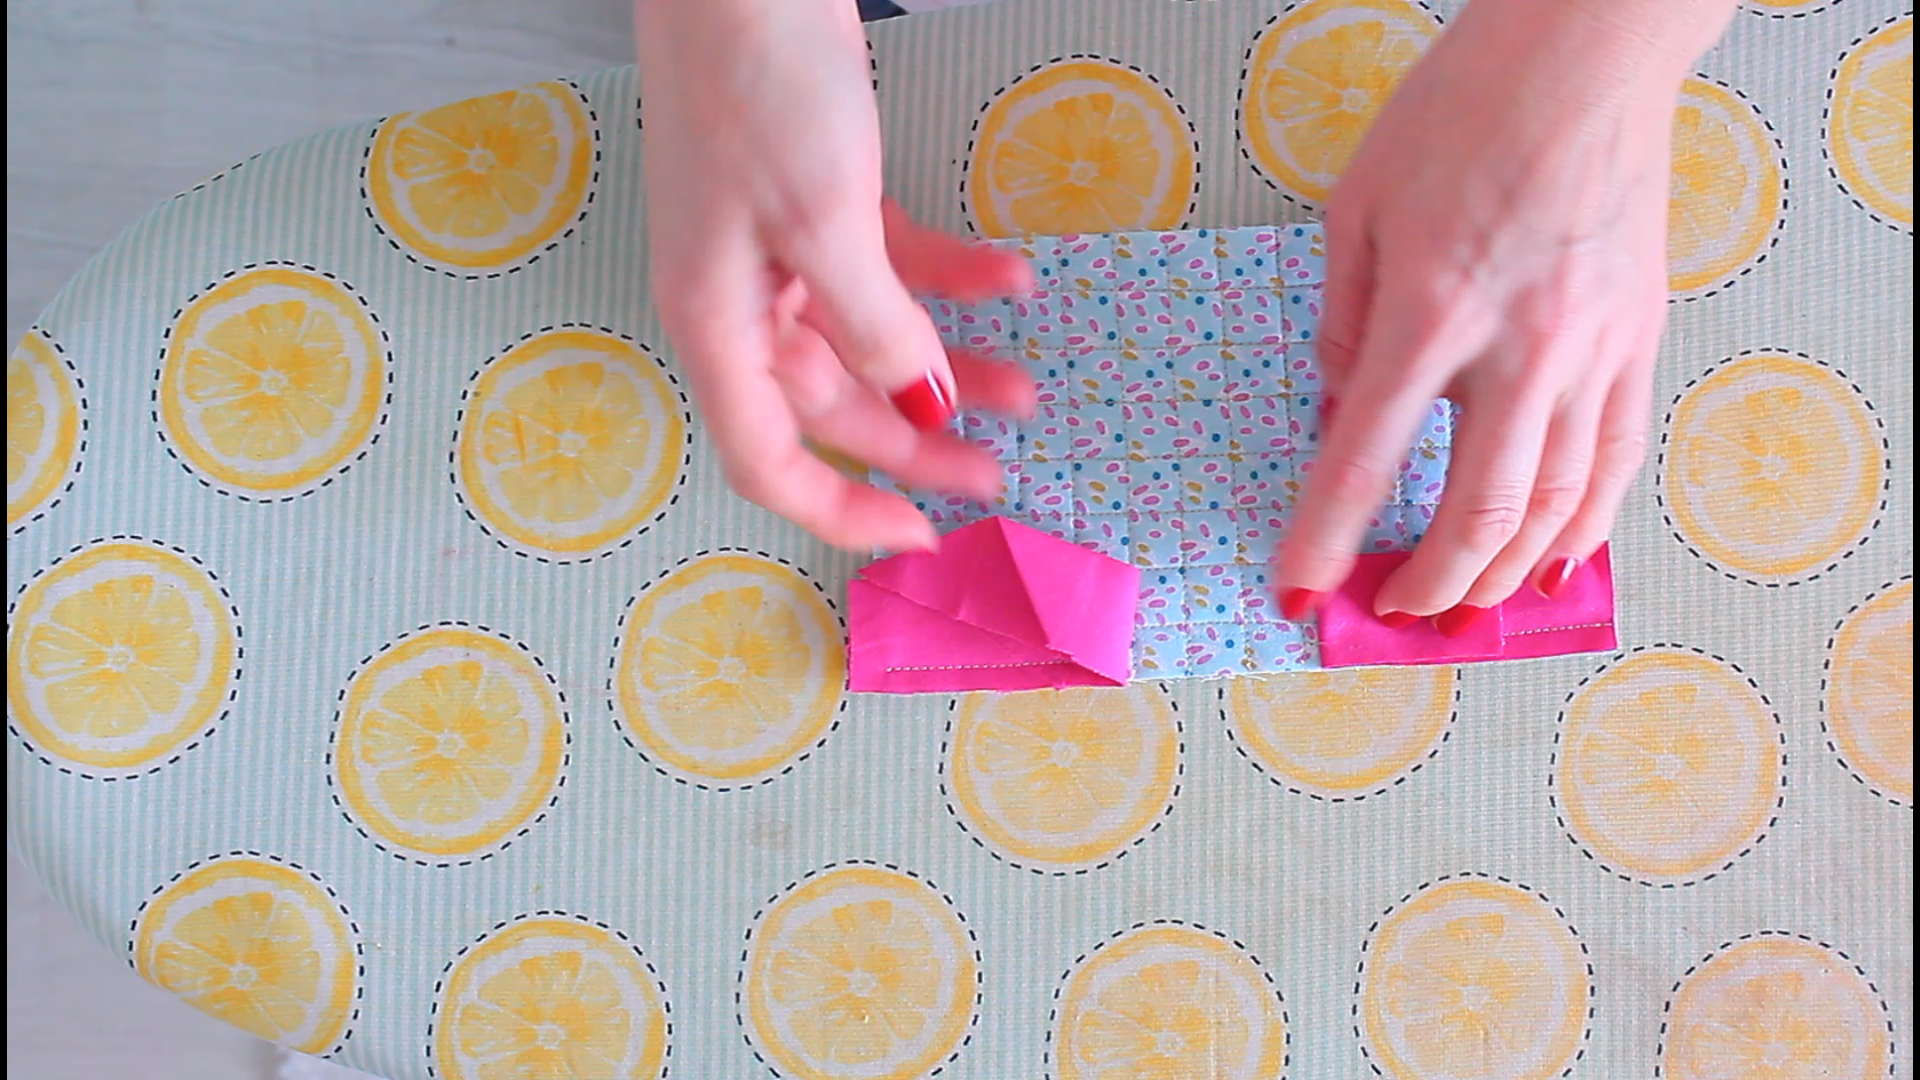
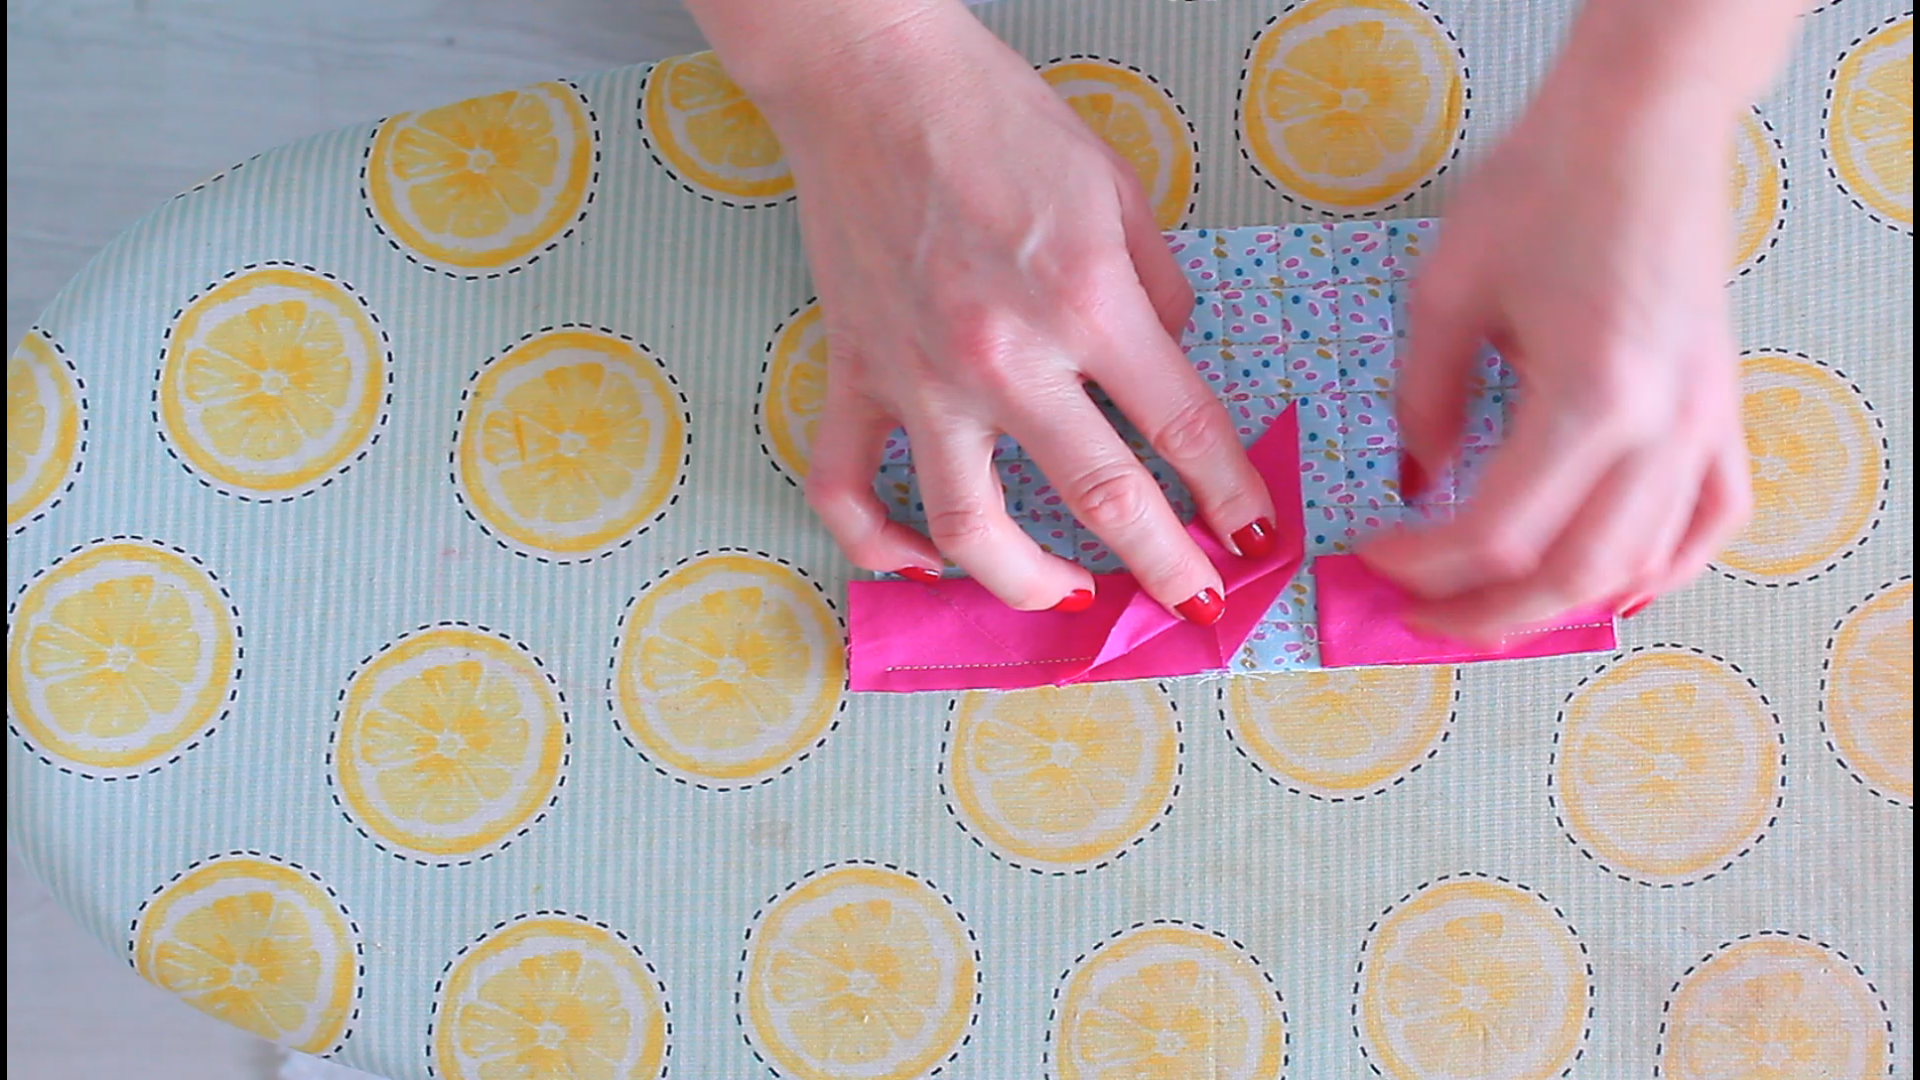
- Smooth out the strip and align the edges as neat as possible.
- Continue sewing the 1/4″ seam.

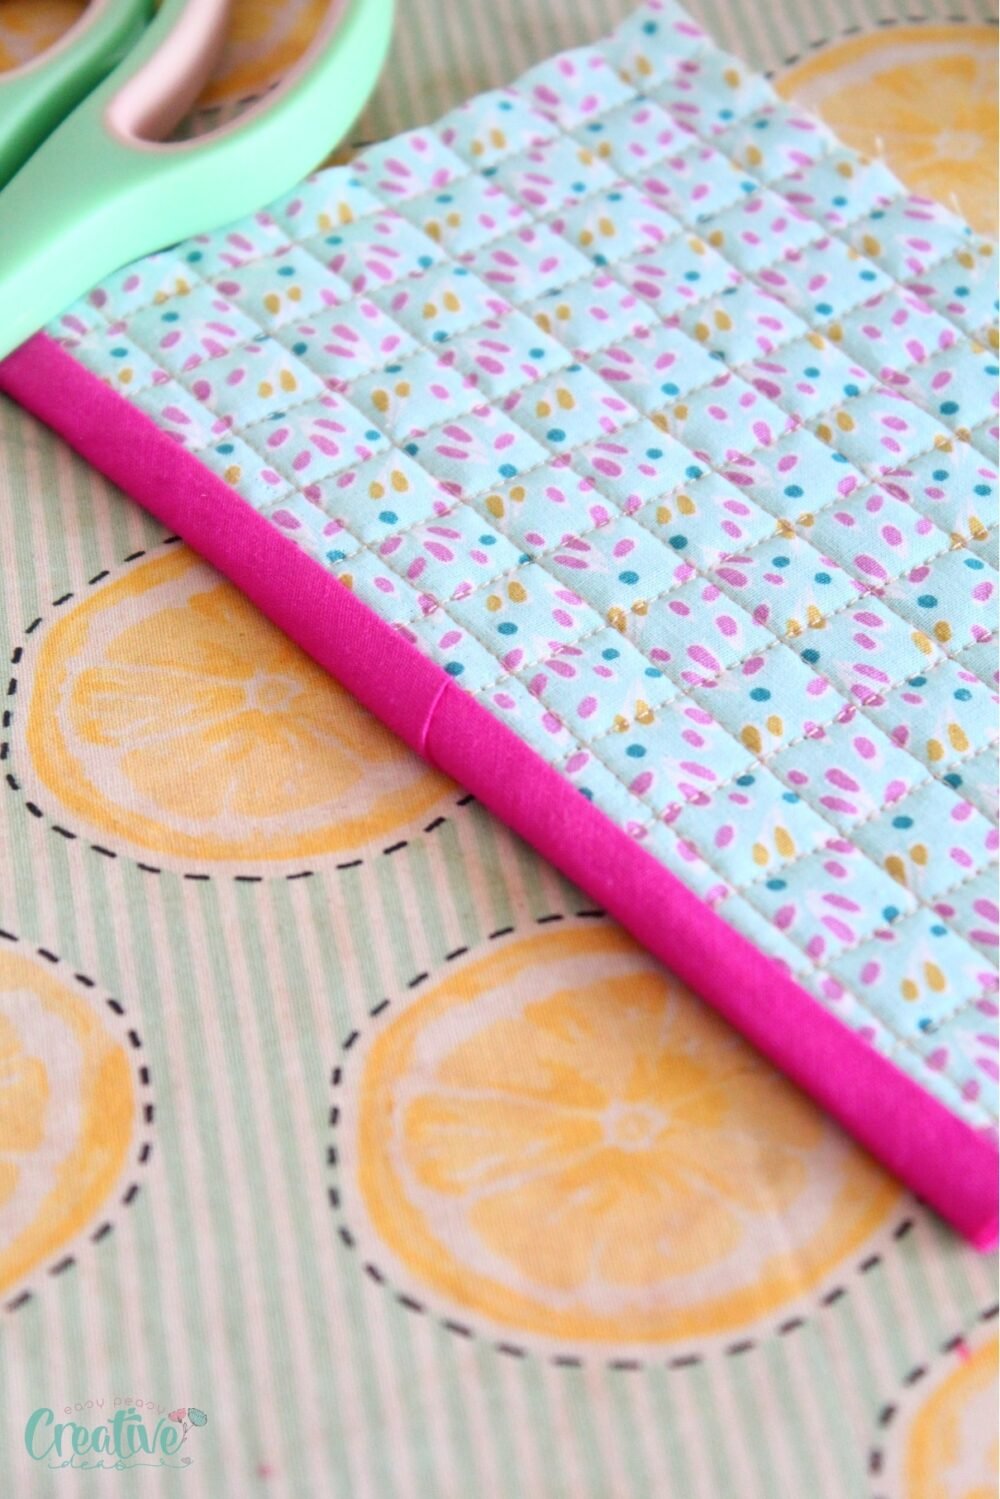
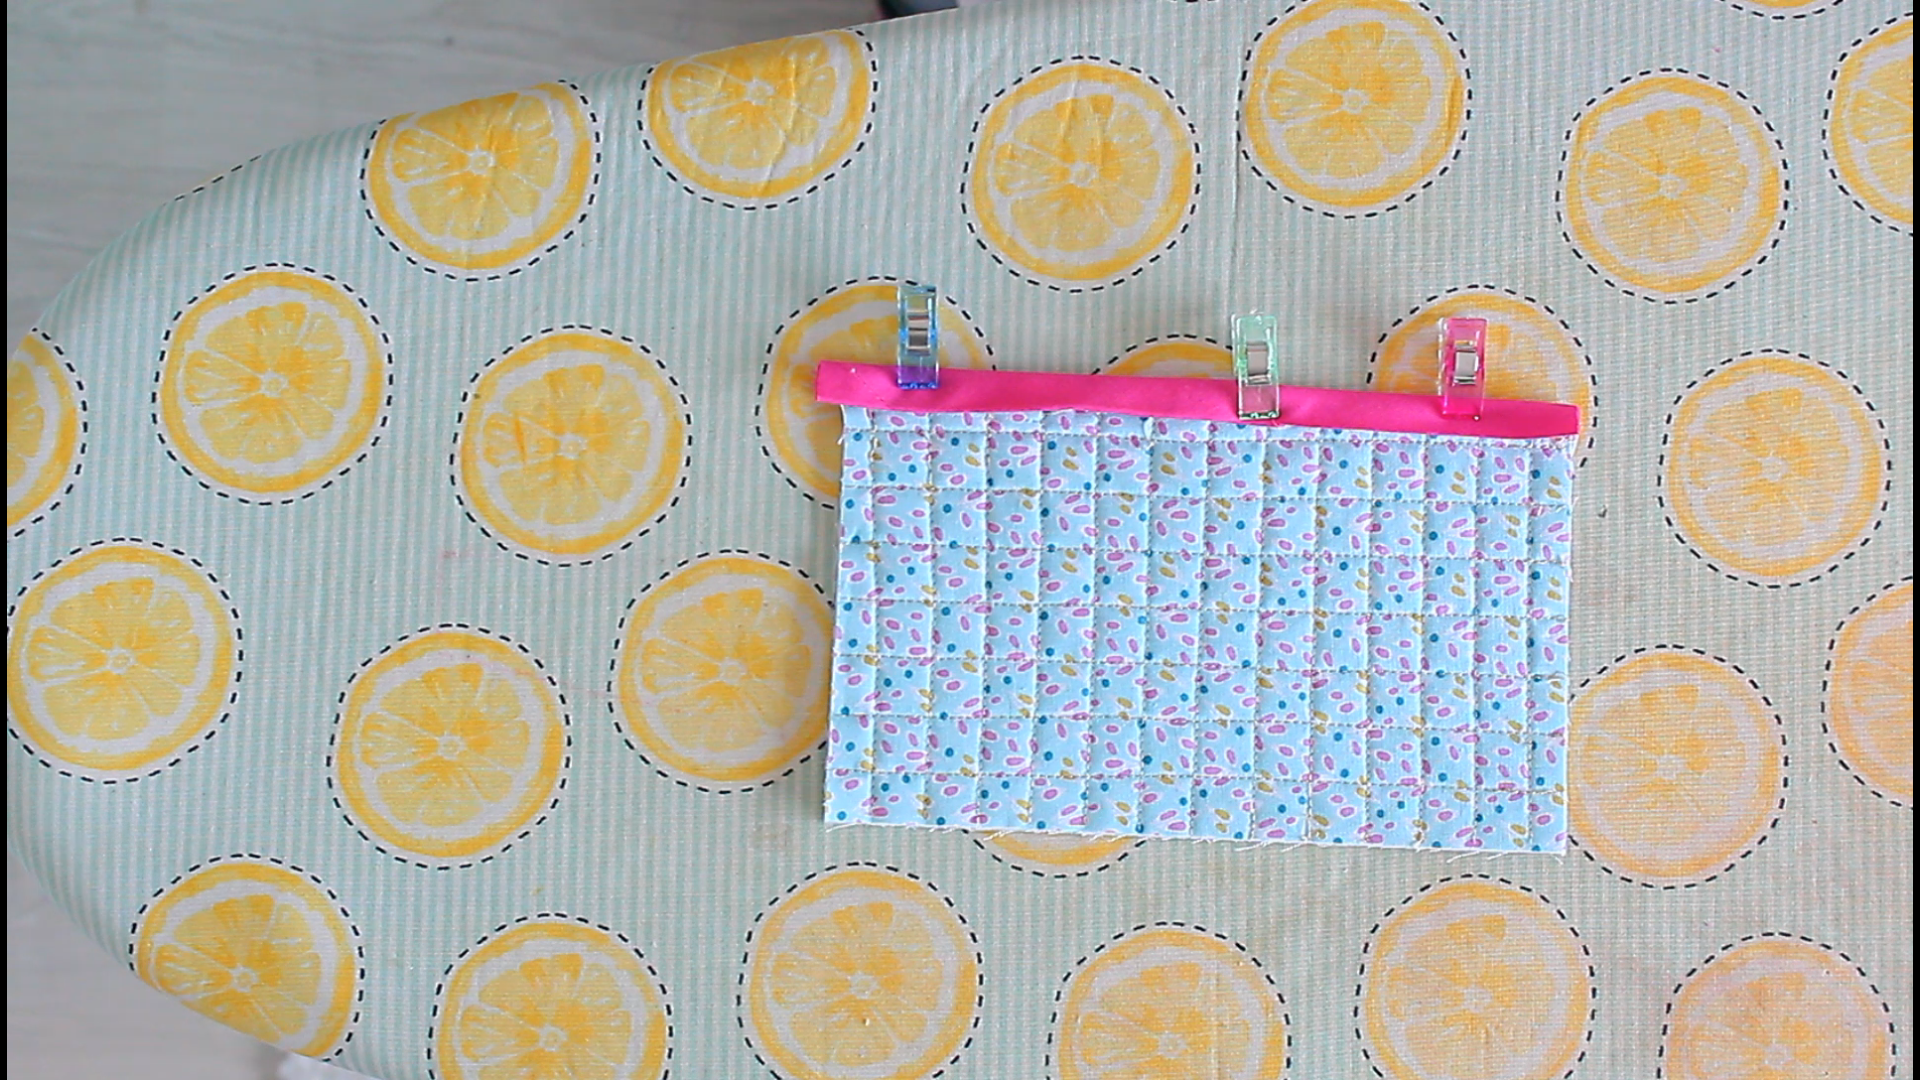
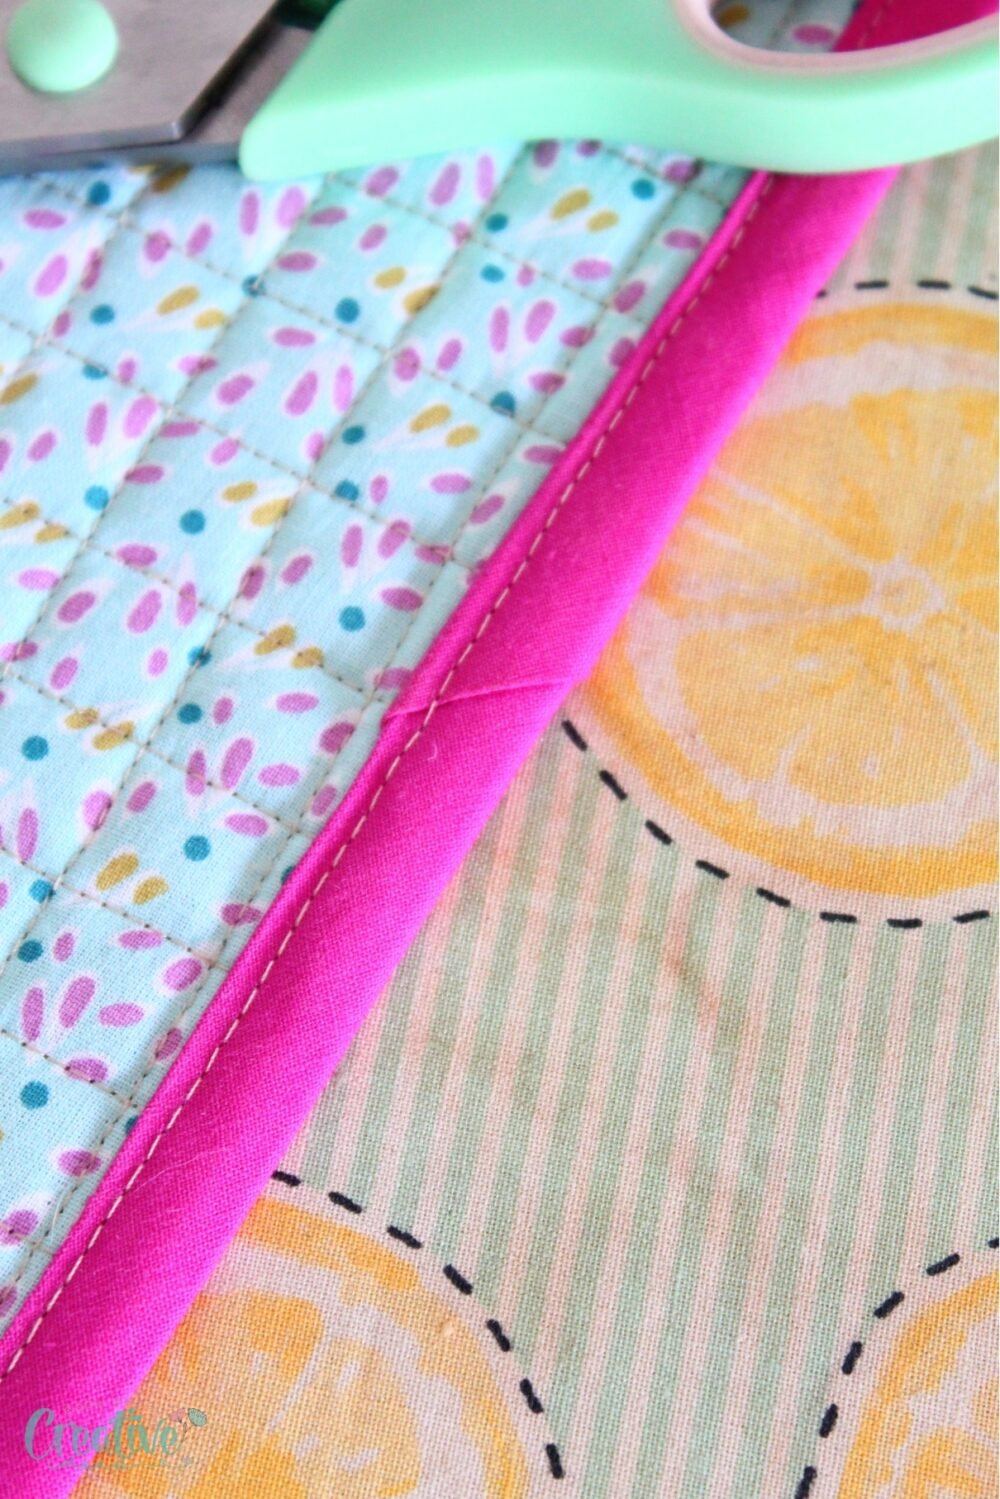
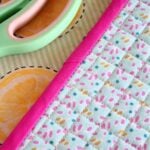
- Fold the bias binding up and press.
- Then fold to the other side of the quilt.
- Clip with wonder clips and finish sewing the other side of the binding using the stitch in the ditch technique.
I used to have so many troubles aligning the bias binding neatly on the other side of the quilt so my stitch in the ditch was always kind of wonky or skipping/missing parts of the binding. But now I have a little tip that allows me to sew the binding flawlessly with this technique, tip that I’ve illustrated in this tutorial.
Variations
- Select a binding strip that contrasts with your main project for a pop of color.
- Use contrast thread for a decorative finish.
- Instead of a straight stitch, use a decorative stitch to sew the binding onto the quilt.
- Use this method for curved edges and see how it makes your binding lay perfectly flat.
More sewing tips you will enjoy:
- How to use hemming tape in sewing
- Tips for sewing single fold bias tape
- How to adjust the bobbin tension
- The complete guide to sewing needles types
FAQs
Can I use this technique on straight edges?
Yes, this technique can be used on both straight and curved edges. It’s particularly helpful for curved edges as the join in the binding stretches perfectly, accommodating the curved edge.
Can I use this method on thicker fabrics?
Yes, this method is suitable for all types of fabrics, including thicker ones. Just make sure to adjust your machine’s settings accordingly and use the proper needle for thicker materials.
Is this technique suitable only for quilts?
No, you can use this method for any sewing project that requires bias binding or bias tape to finish the edges neatly. It’s a versatile skill that can elevate any project, from garments to home décor items.
By following this simple guide on how to join bias strips, you’ll soon find that adding a professional touch to your projects is easier than you think. Let me know your thoughts on this method in the comments below and please feel free to share your own tips for joining bias strips.
For more useful sewing tips and tutorials, sign up to my newsletter and never miss a post. Happy sewing!
Most popular sewing projects:


- Tips for sewing a round hem
- Corded bag handles
- Flutter sleeve dress pattern
- How to laminate cotton fabric
How to join bias strips
Materials
- Bias binding strip
Tools
- Fabric marking pen or chalk
- Iron
- Ironing Board
Instructions
- Before sewing the binding strip to the quilt, open the strip and fold the bottom corner of the starting end of the strip to a 45 degree angle.

- Press the angle well then fold the strip back and press.
- Place the raw edge of the strip level with the raw edge of the quilt. Sew the bias binding to the raw edges of the quilt with 1/4" seam allowance, starting about 2 inches in from the end of the binding strip.
- When you almost reach the other end of the binding, stop sewing about 2 inches away from the other end.
- Take your quilt off the machine and lay it flat on a surface.
- Open the first end (the one with the 45 degree angle) and insert the second end into the first end of the strip. Trim the second end if it's too long, so that it fits inside the strip.
- Smooth out the strip and align the edges as neat as possible.
- Continue sewing the 1/4" seam.
- Fold the bias binding up and press then fold to the other side of the quilt.
- Clip with wonder clips and finish sewing the other side of the binding using the stitch in the ditch technique.

Video
Article may contain Amazon & affiliate links. As an Amazon Associate I earn from qualifying purchases at no additional cost to you.

Thanks so much for the tip. Much appreciated!
Hi, Betty! I’m glad you enjoyed this tutorial and thanks for taking the time to leave a comment! Have a wonderful day!