

Easy trick for binding a quilt perfectly
Learn how to bind a quilt flawlessly using the stitch-in-the-ditch technique along with a simple yet effective trick. By following these easy step-by-step instructions, you can achieve stunning quilt binding results that will enhance the beauty of all your quilting projects.
If you were looking for an easy tutorial on how to bind a quilt perfectly, you’re in the right place! Here I’ll show you how to sew binding on a quilt with flawless results, using the stitch in the ditch binding technique and a very simple and easy trick. Quilt binding can sometimes seem like a daunting task, but with the right approach and some helpful tips, you’ll be able to bind your quilts like a pro in no time.
Quilting is a beautiful art form that allows you to create unique and personalized pieces of fabric art. However, one of the most challenging parts of quilting is binding the edges to give it a clean and finished look. The stitch in the ditch quilt binding technique is a popular and effective way to bind a quilt, giving it a professional touch.
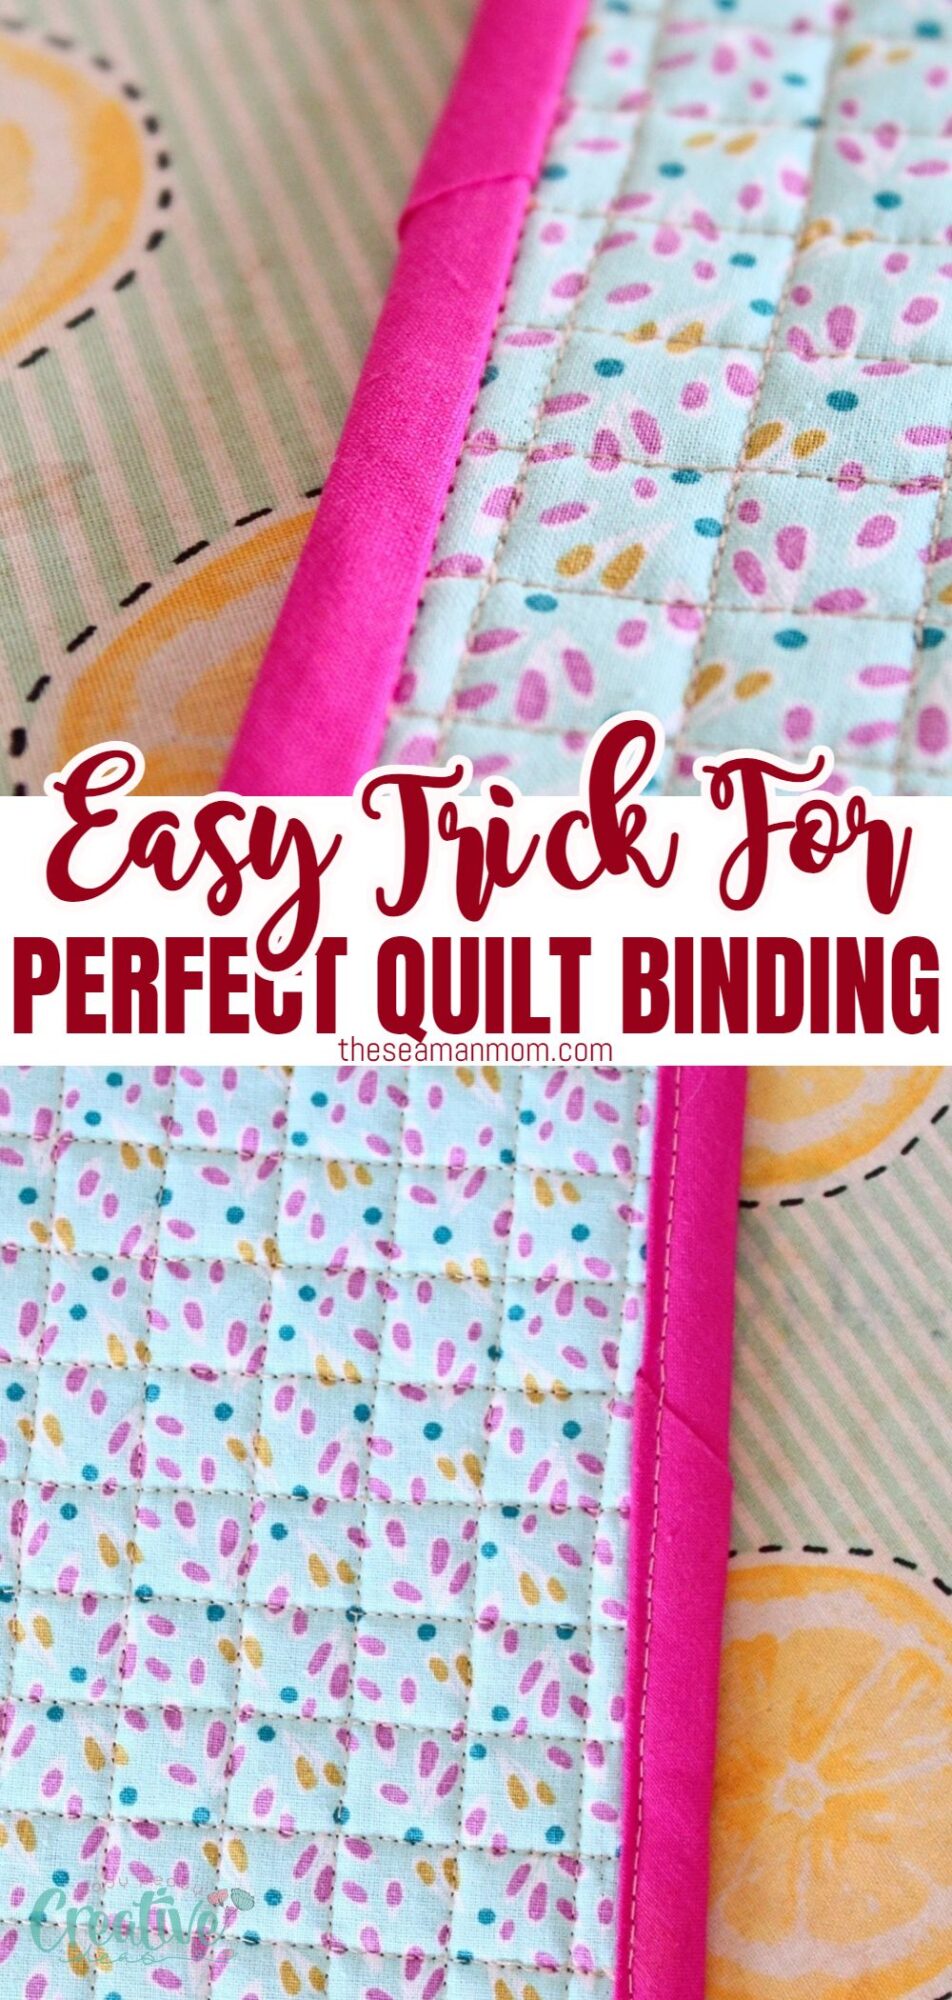
The stitch in the ditch binding technique is my go-to method for binding quilts because it gives a neat and clean finish. The stitches are hidden in the seams of the quilt, creating an almost invisible look. But it’s not always easy to sew the binding strip perfectly using this technique, especially if you are new to quilting. That’s where my little trick comes in handy. And it’s all in the hemming tape!
How to bind a quilt perfectly, using hemming tape and the stitch in the ditch technique
Materials needed:
To bind a quilt using the stitch in the ditch technique, you will need the following materials:
- Quilt or a scrap to practice on
- Binding strip
- Paper backed hemming tape
- Matching thread
Equipment:
In addition to the materials, you will need a few essential tools for binding your quilt:
- Scissors
- Pins or clips
- Iron and ironing board
- Sewing machine
- Stitch-in-the-ditch or walking foot (optional but useful)
Step-by-step instructions for sewing binding:
Preparations:
- Layer your quilt with the right side facing up.
- Trim off any excess batting or backing fabric so that all layers are even.
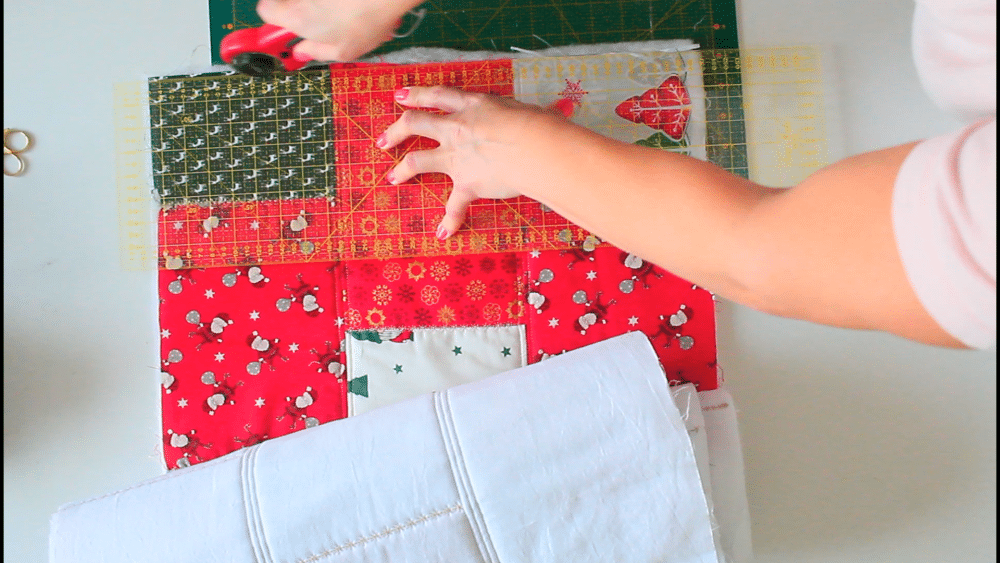
- Fold your binding fabric in half, wrong sides together, and press with an iron.
- Starting from the middle of one side of the quilt, pin or clip one side of the binding to the raw edge of the quilt top, leaving at least 2″ inch tail at the beginning.
- Pin or clip all around the quilt top until you reach the starting point.
- Leave another 2 inch tail of binding and trim off any excess.
Sewing:
Sew the binding on one side of the quilt
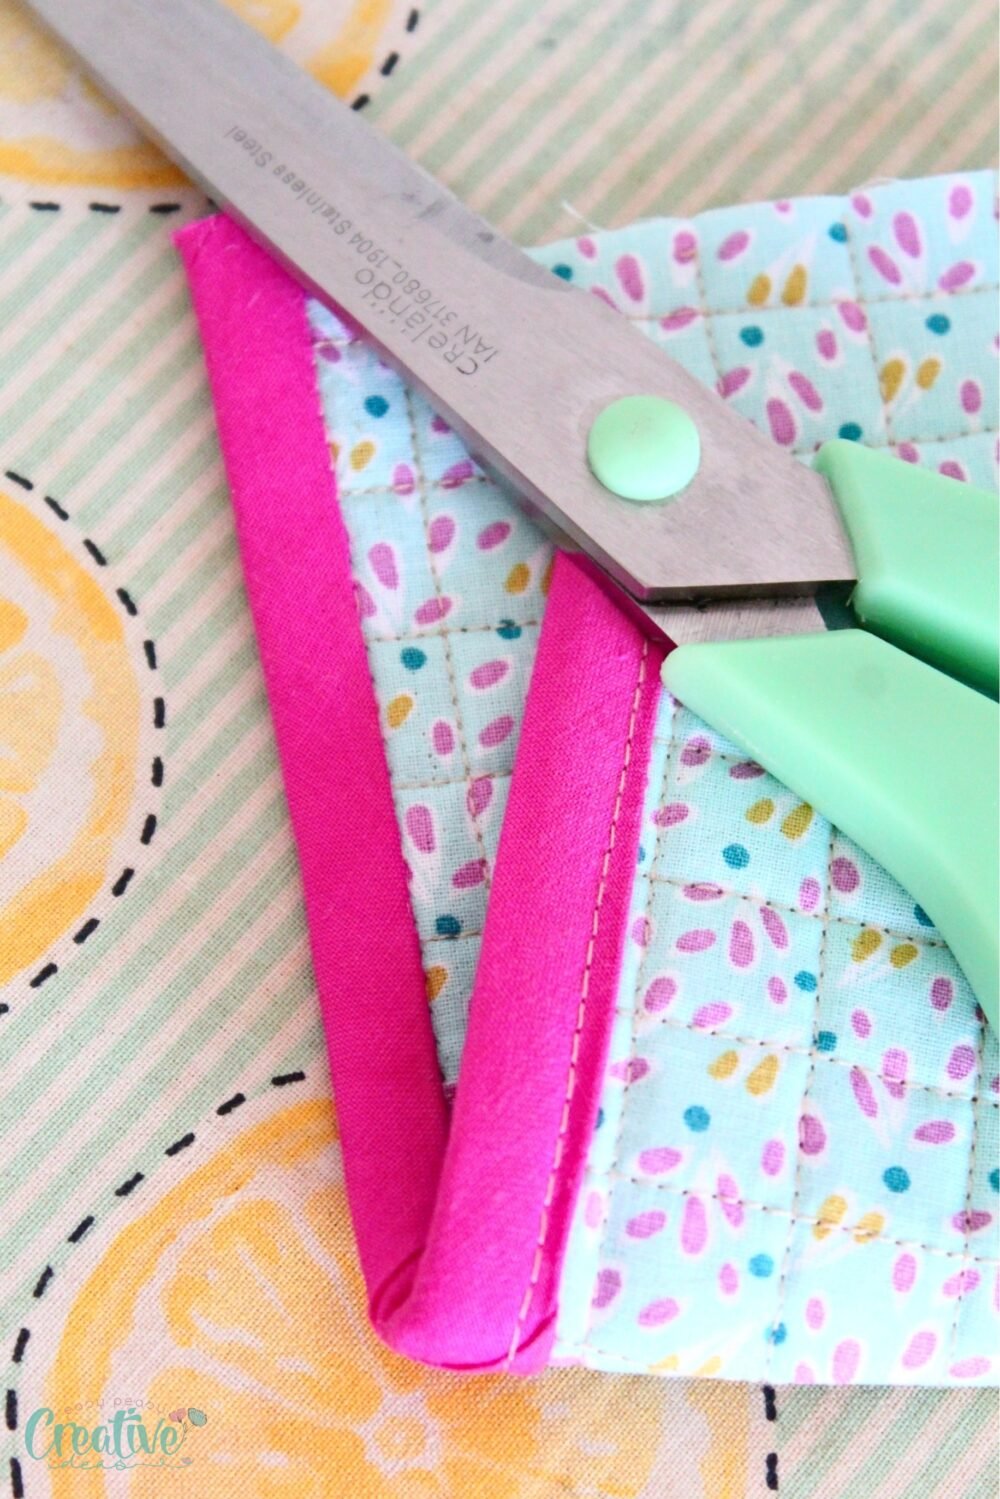
- With your sewing machine, start stitching the binding on one side of the quilt (I usually start with the front side but for the project in these images I did it on the back), using a ¼ inch seam allowance. Start sewing the binding to the quilt, about 2″ away from the end of the strip.
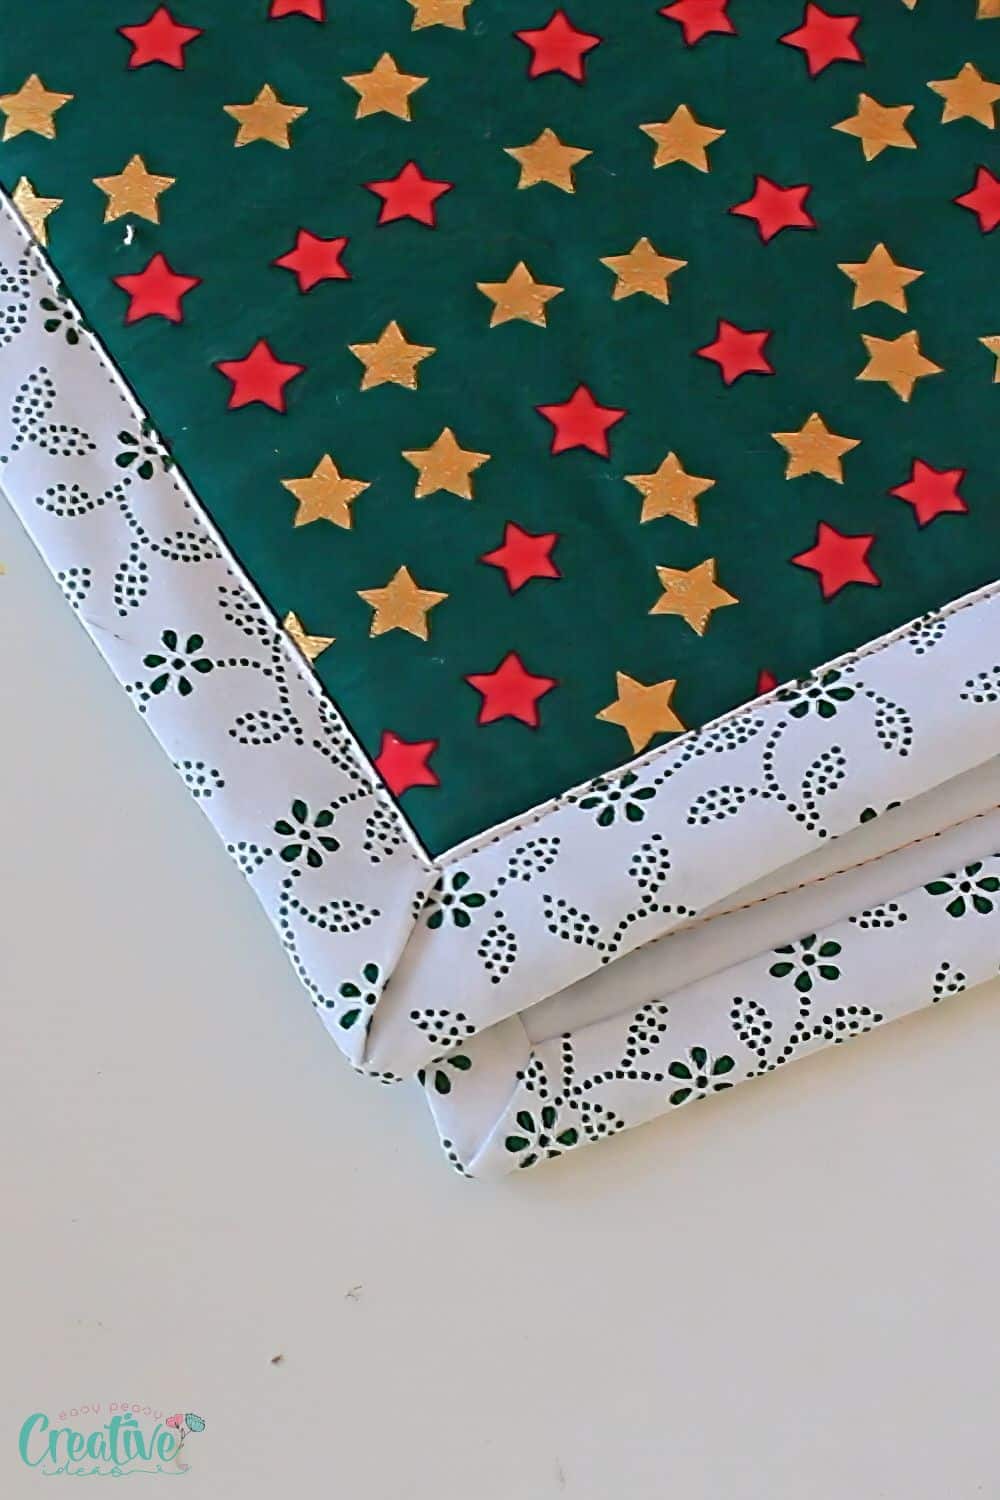
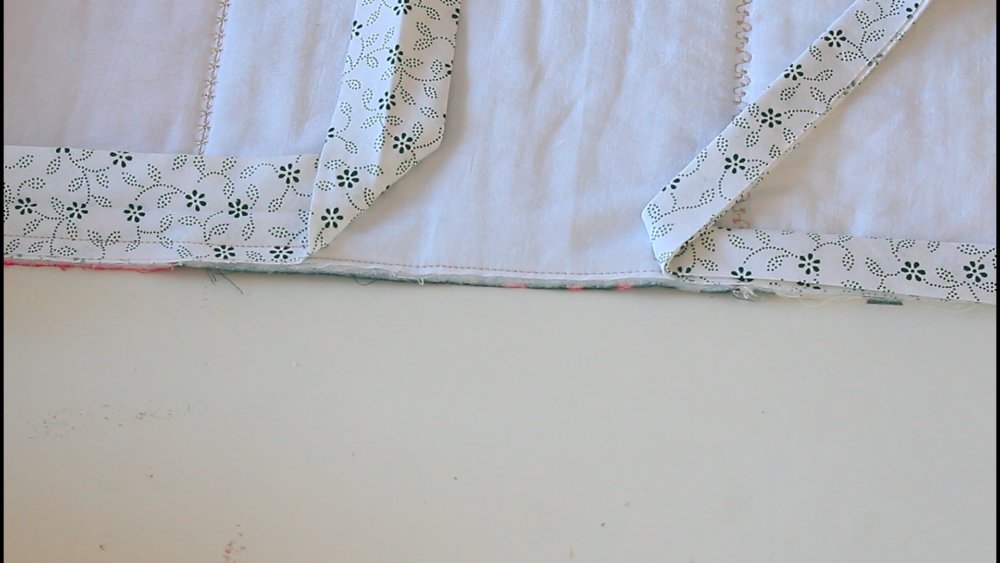
- When almost reaching the corners, use this tutorial to sew perfectly mitered corners.
- Continue stitching until you reach the next corner and repeat the process.
Join the binding ends
- Once you reach the starting point, stop stitching 2 inches before reaching your first stitch.
- Join both ends of the binding by using this method or this method.
- Sew along this overlap to secure the binding and finish stitching all around the quilt. (from this point on I’m using small samples of quilted fabric and binding. I find it easier to illustrate this technique without a lot of fabric and binding from a real quilt blocking the camera and taking up space)

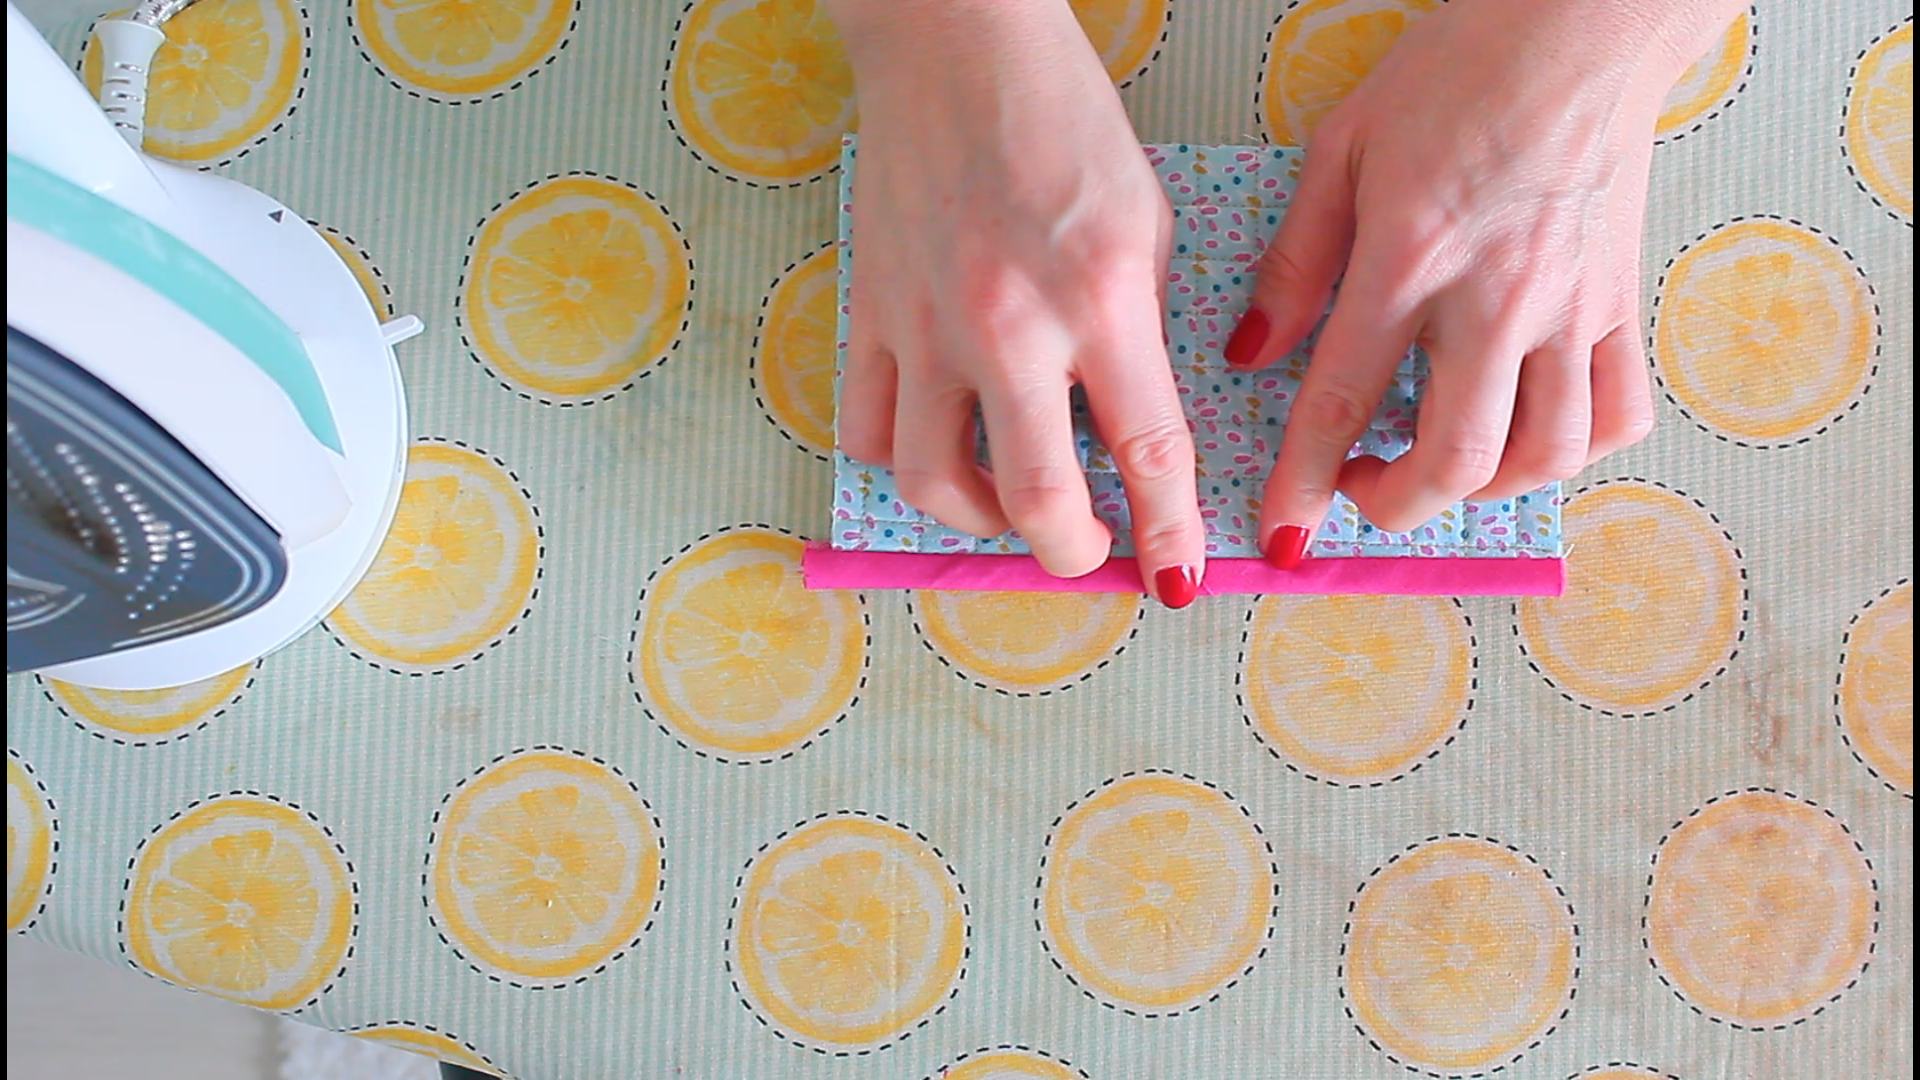
- Next press the binding up with your iron on steam.
Fuse binding to the back of the quilt
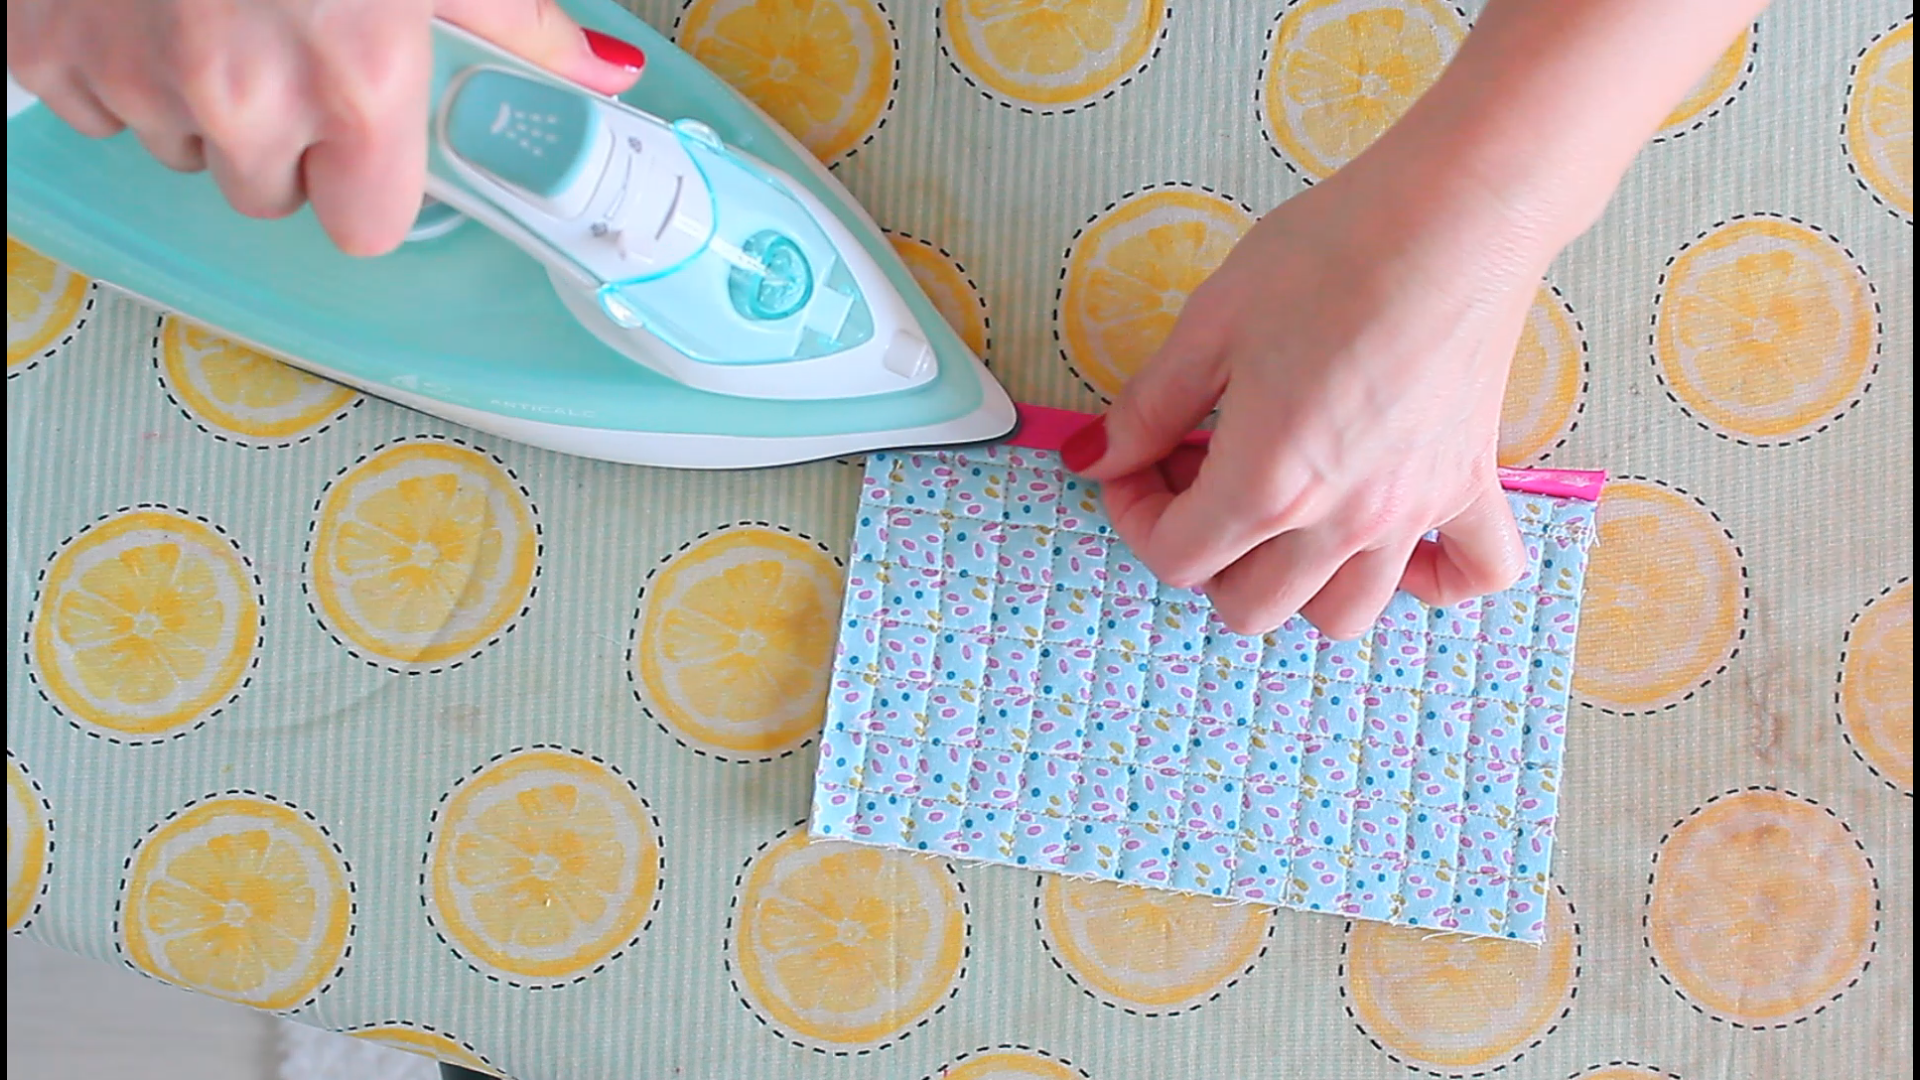
- Then flip the quilt to the other side and gently press the binding down.

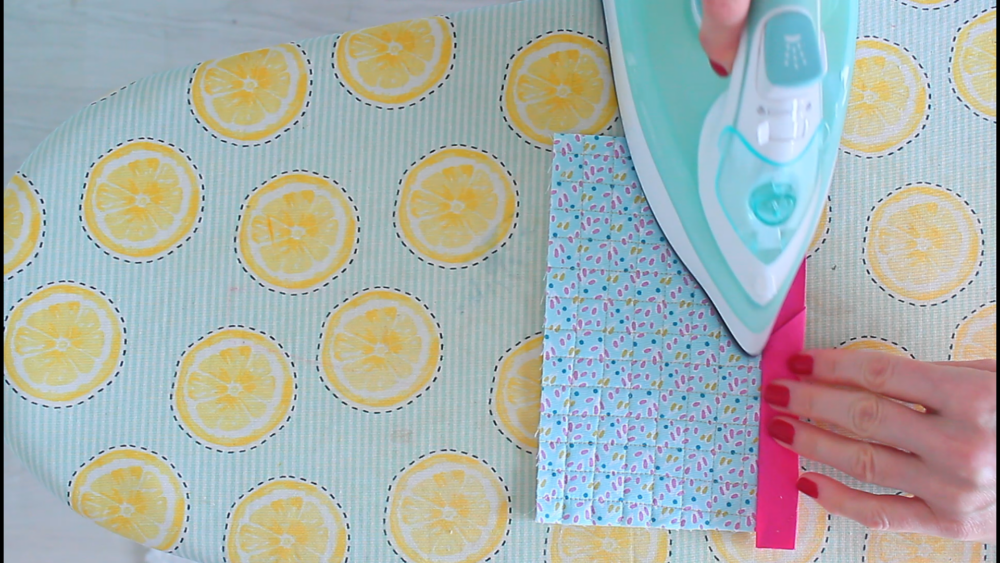
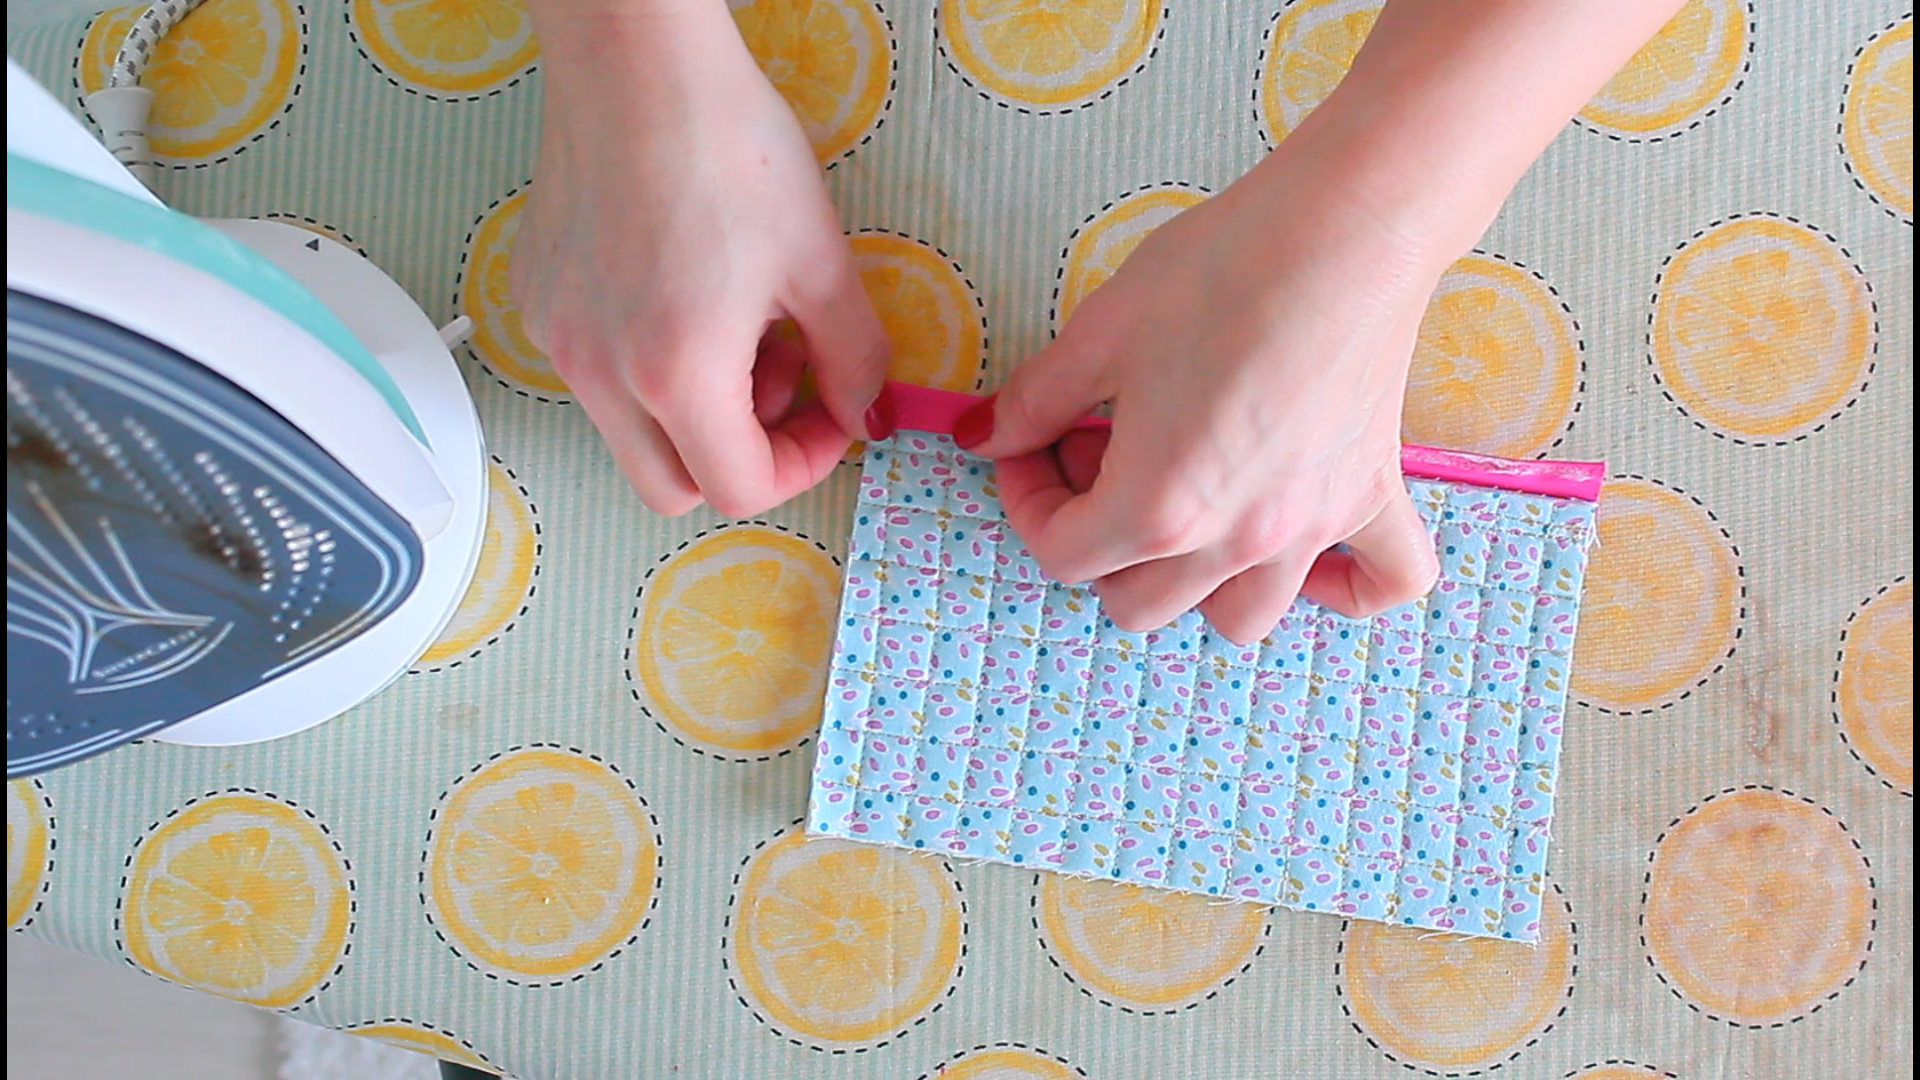
- Open the binding. Grab the paper backed hemming tape and fuse it to the edge of the binding or to the seam (the seam you’ve just sewn but on this side of the quilt)
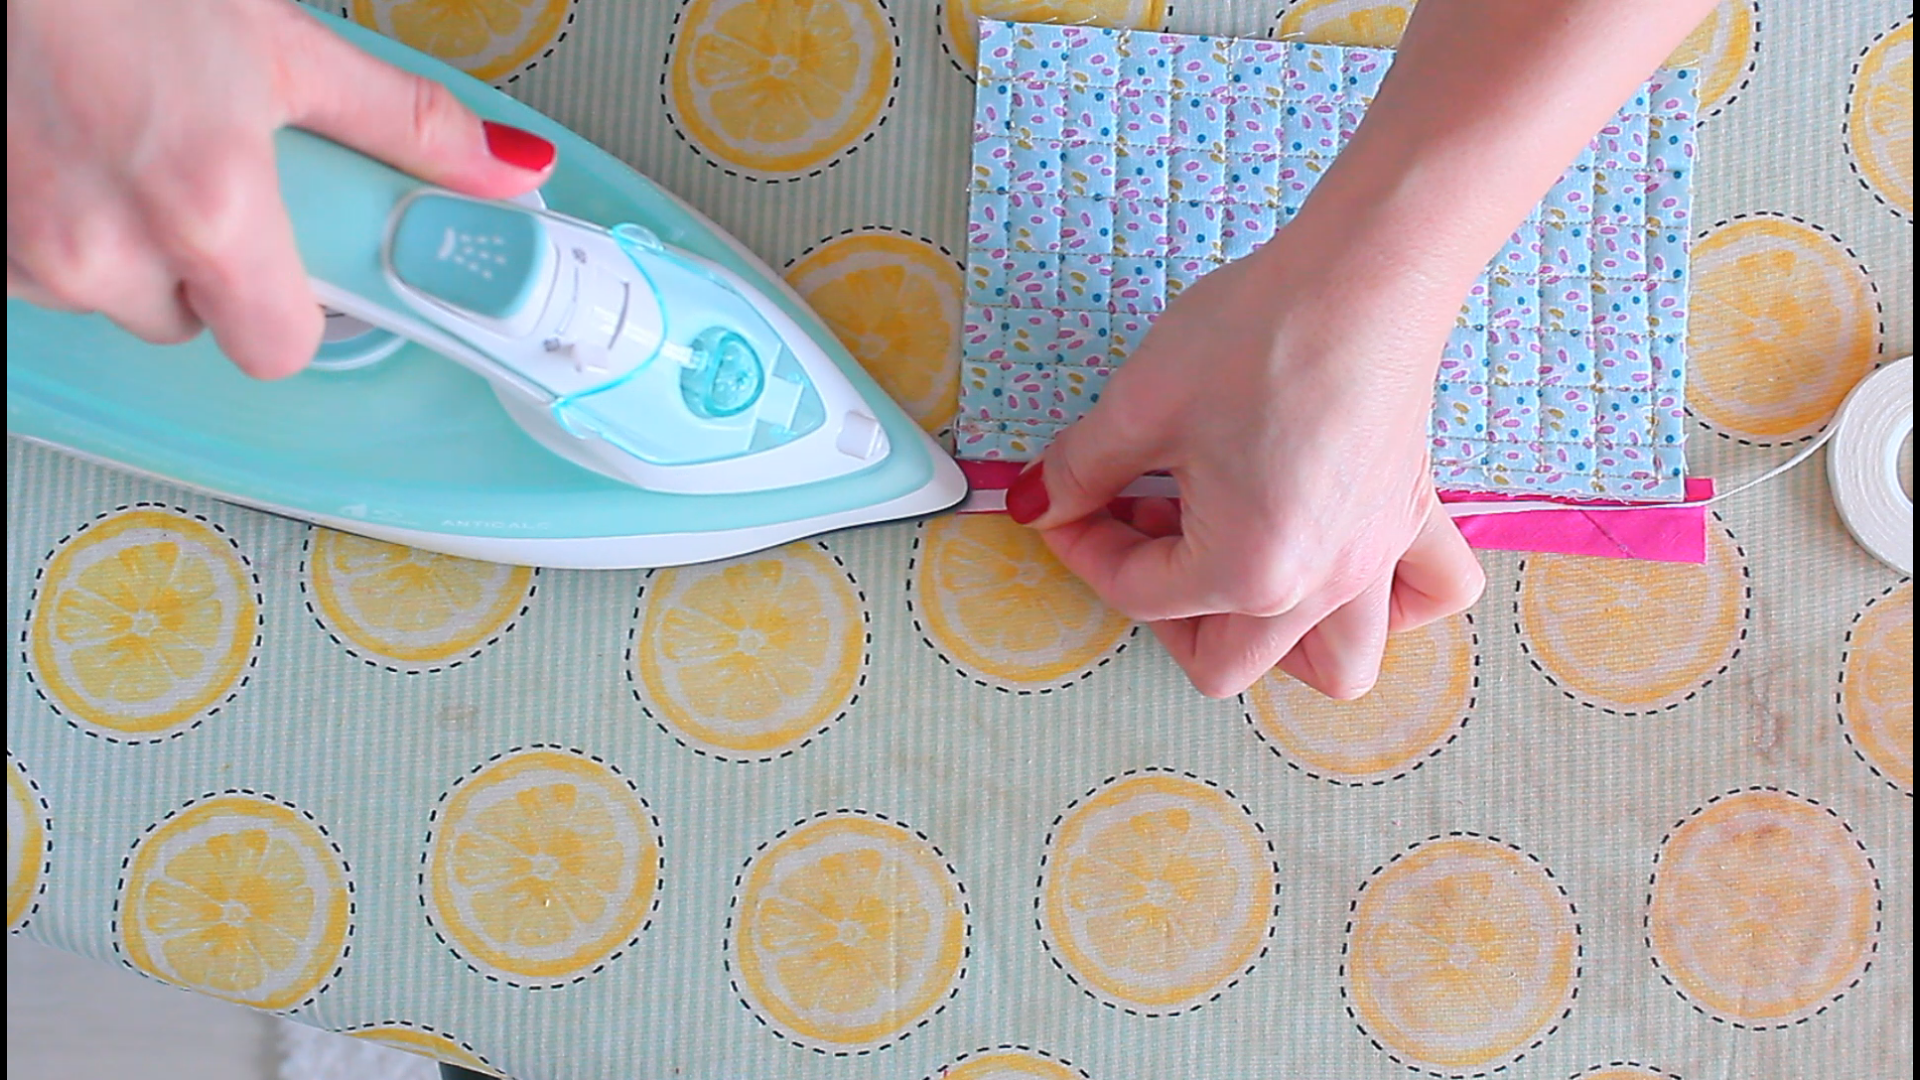
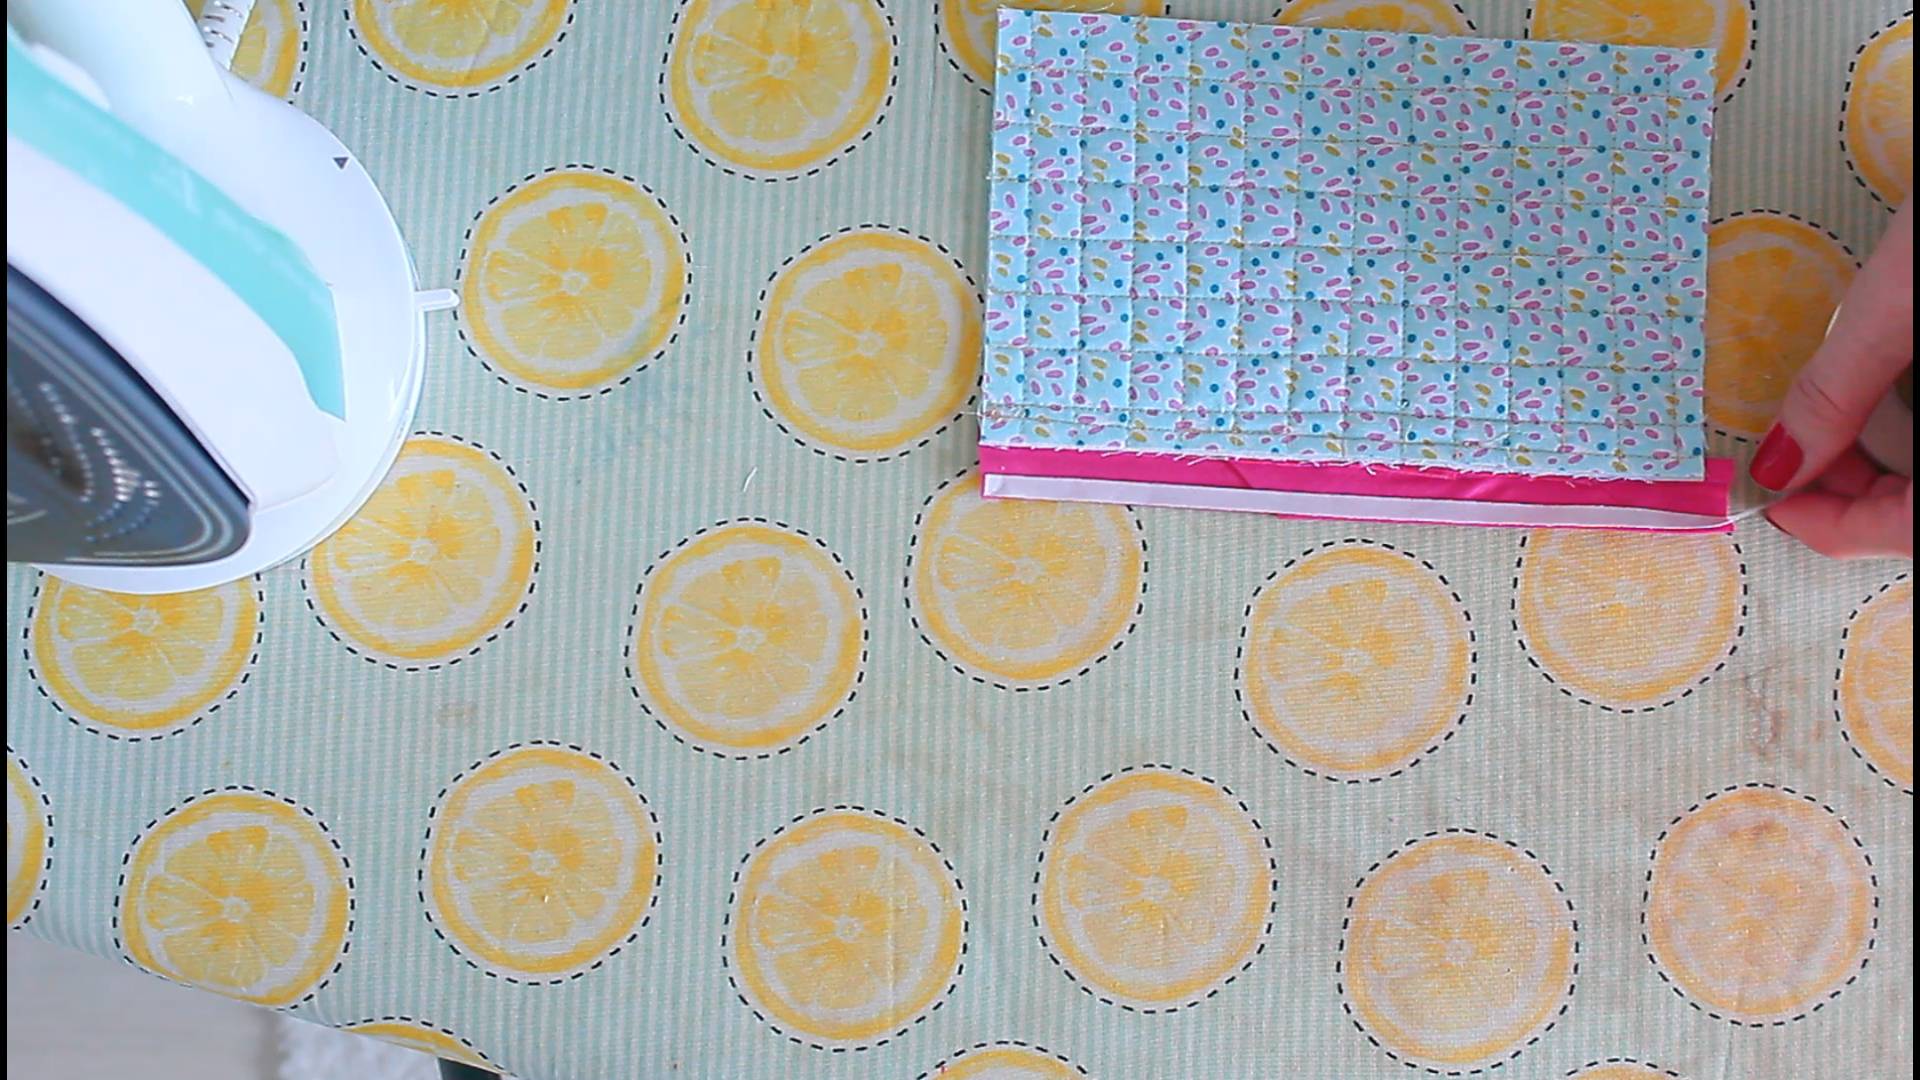
- Remove the paper backing.
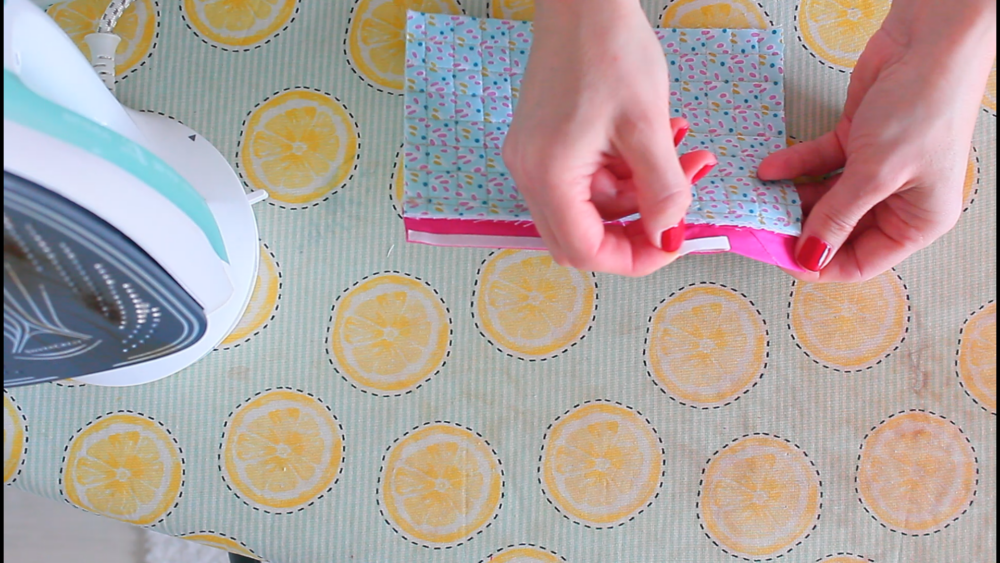
- Using your hands and the iron, press the edge of the binding down again, over the seam, so that it covers it just a tad.
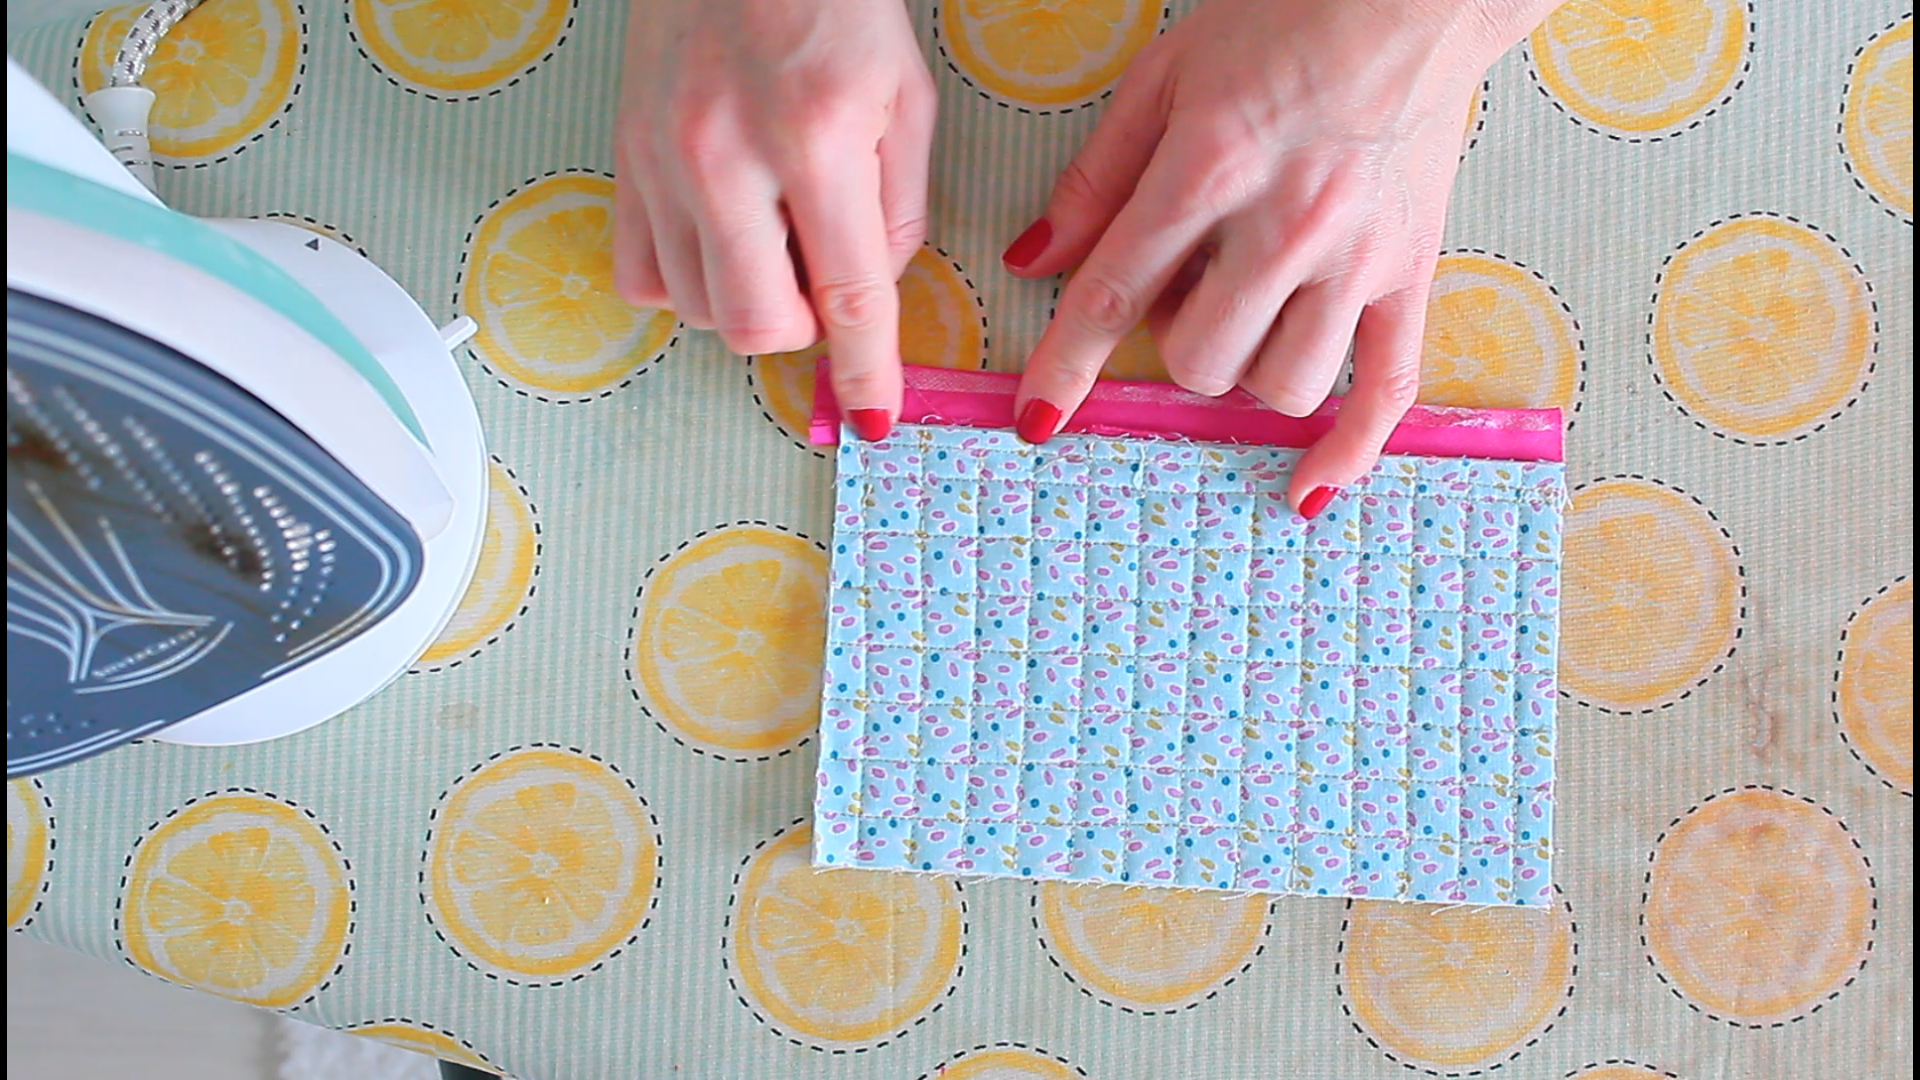
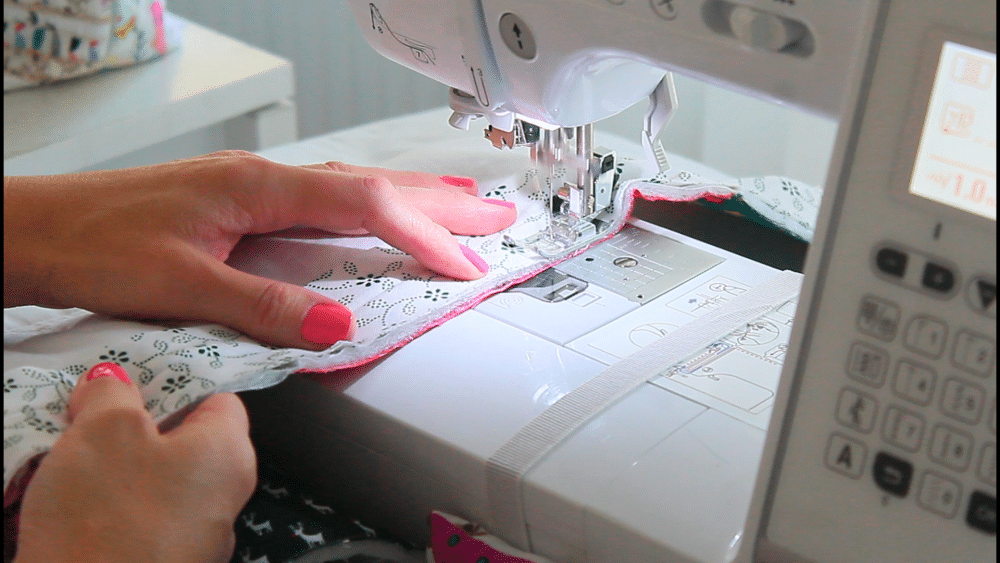
Sew the other side of the binding with the stitch in the ditch technique
- Flip the quilt again so that the front side is up.
- Change the presser foot if needed. I didn’t use a walking foot or stitch-in-the-ditch foot as I have a clear, see-through foot that allows me to see the seam.
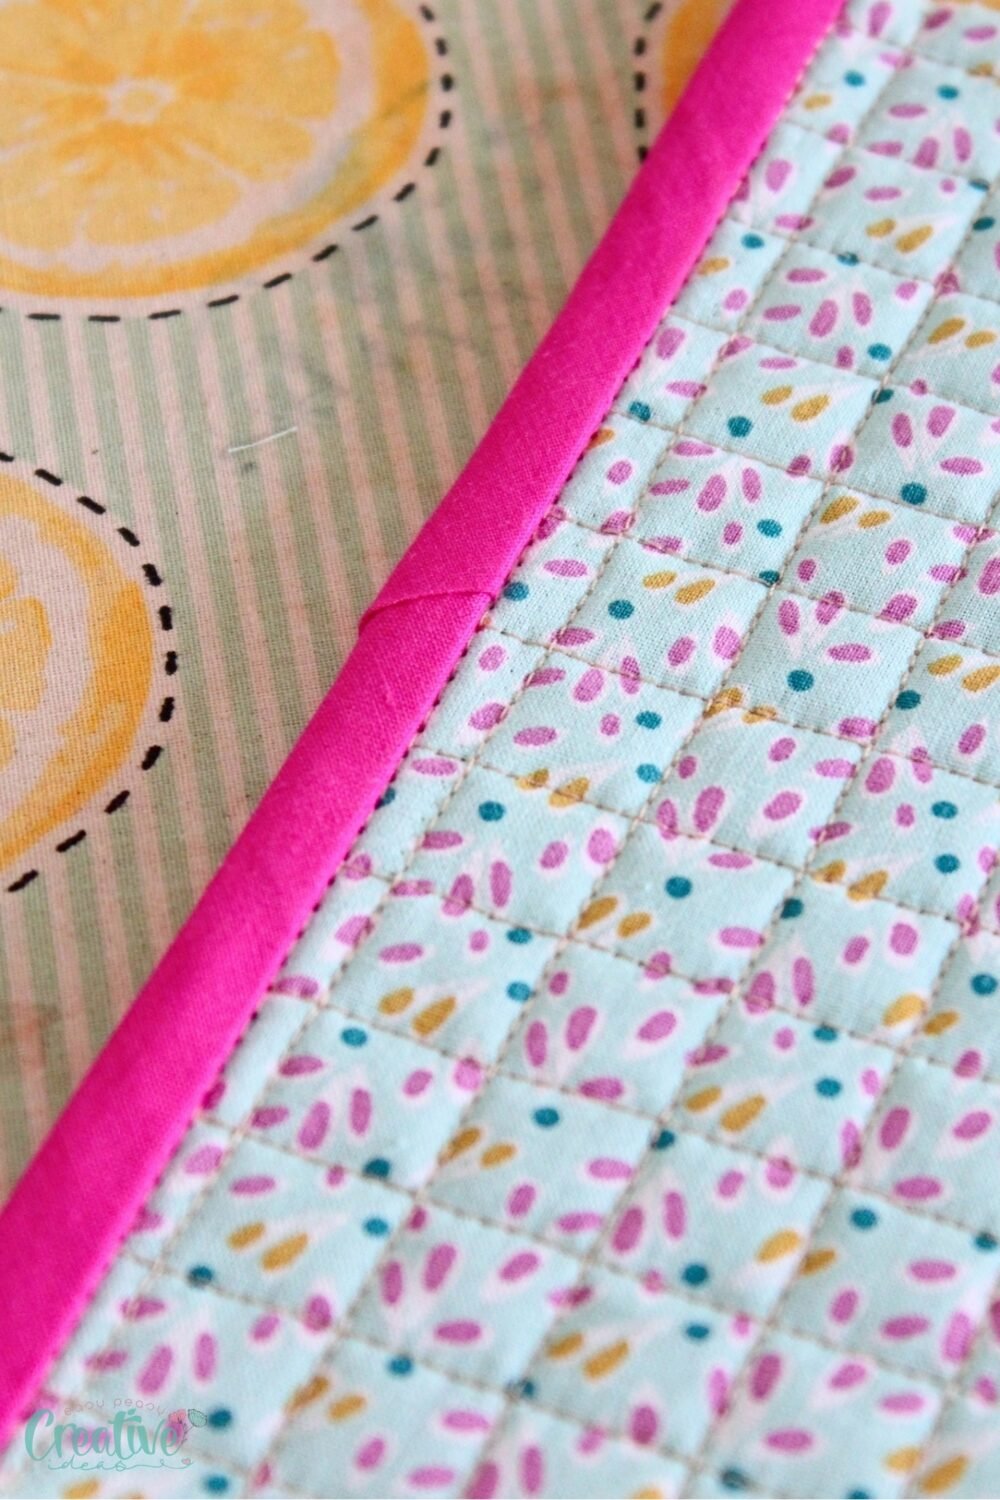
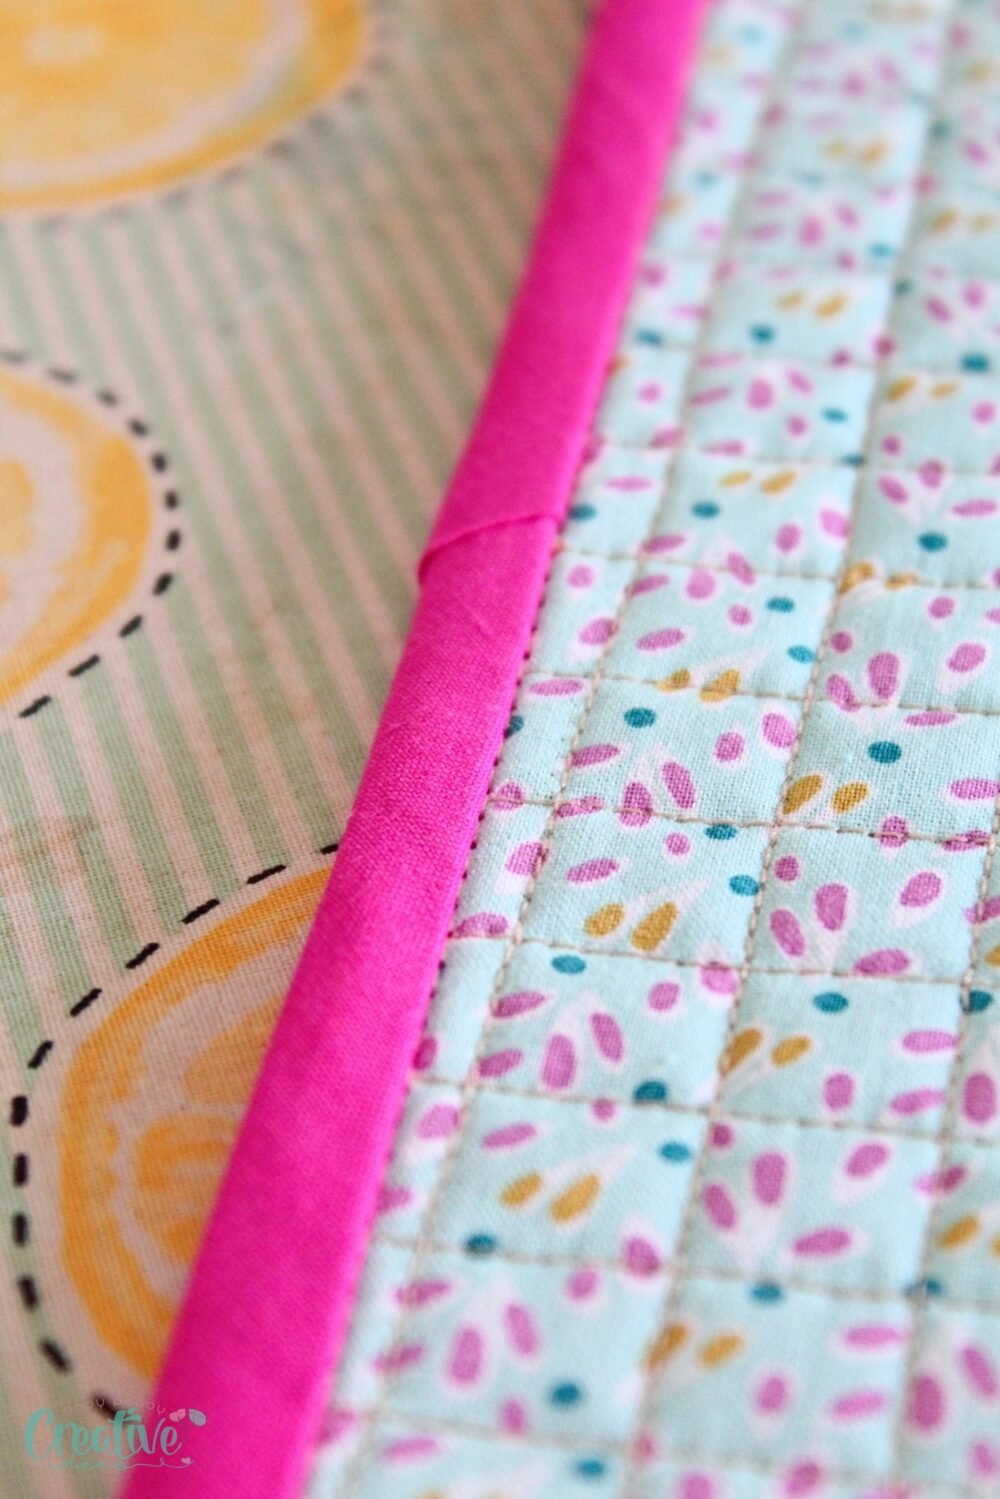
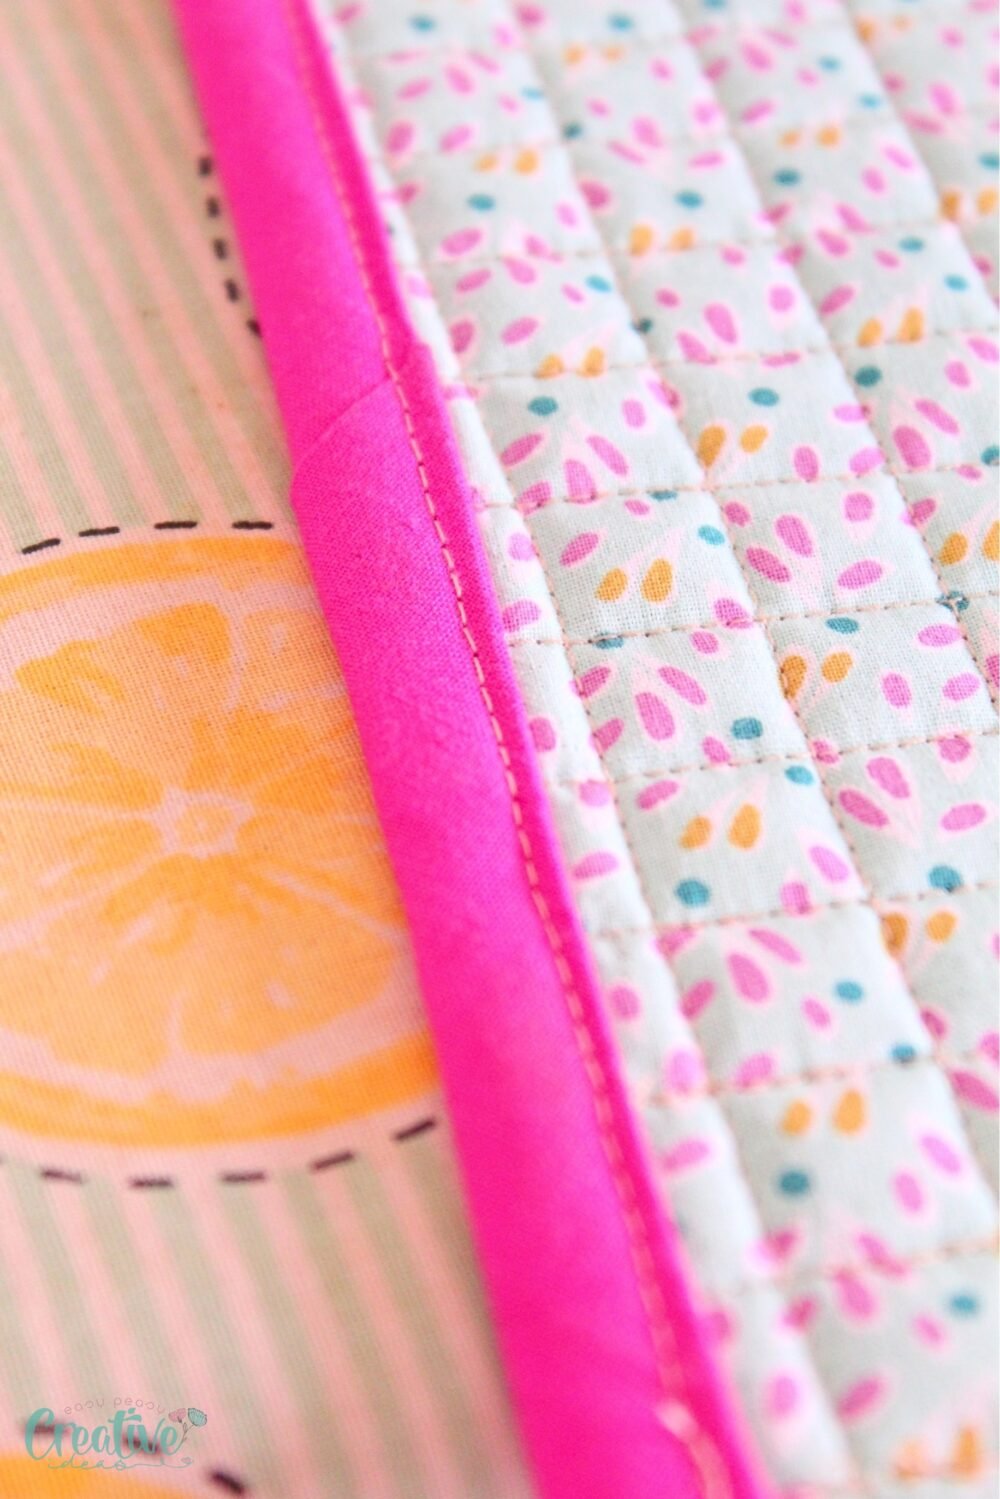
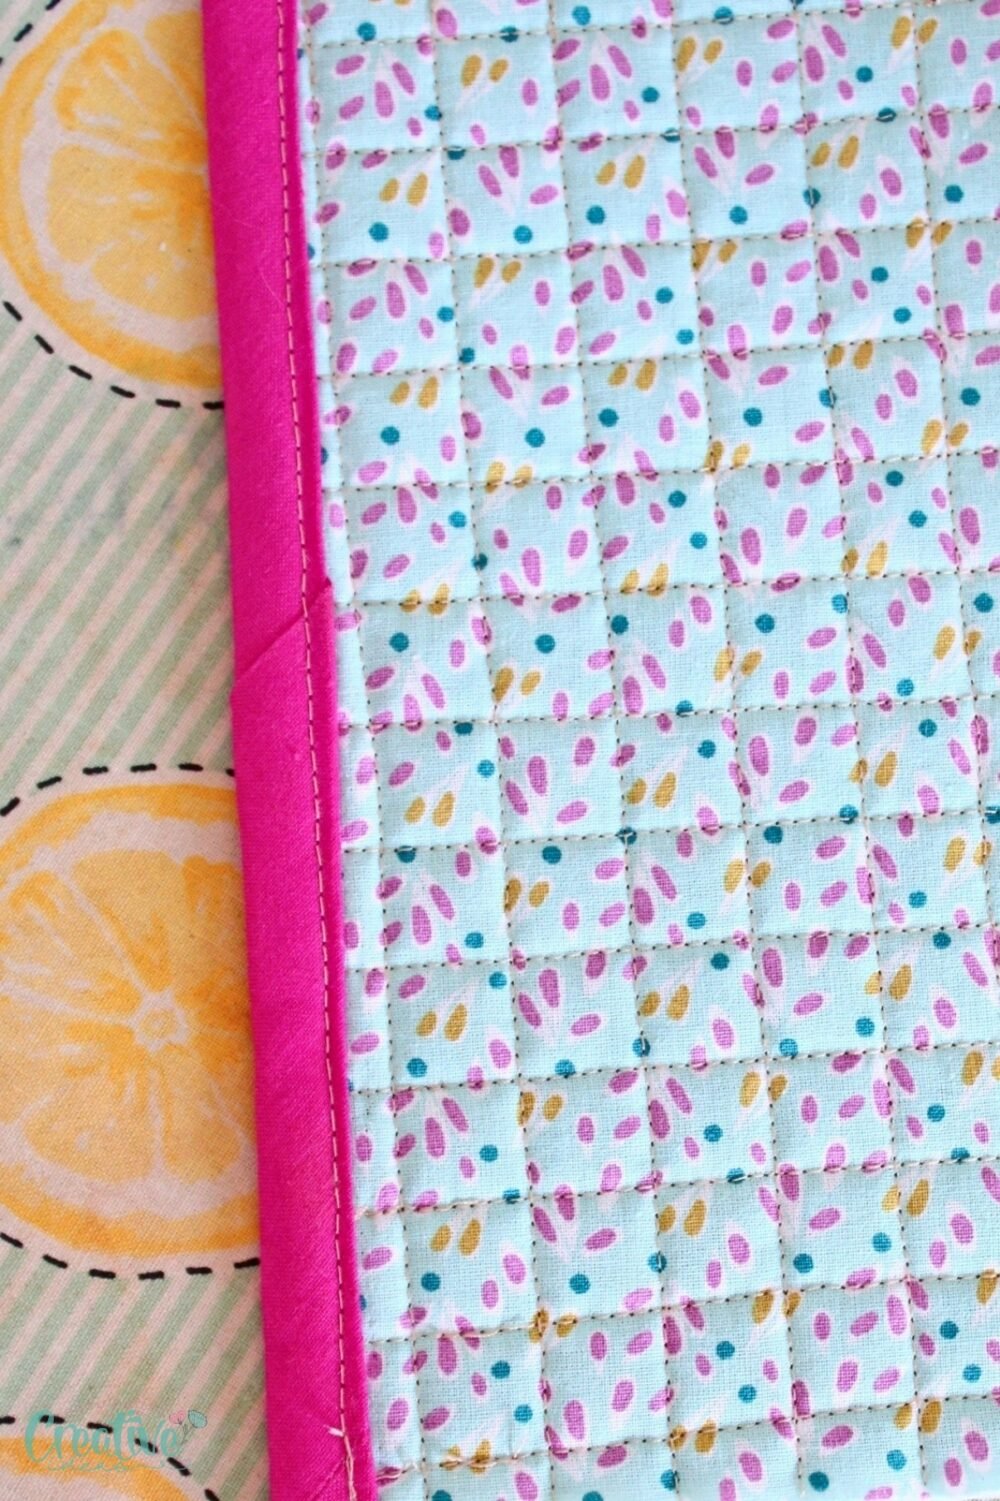
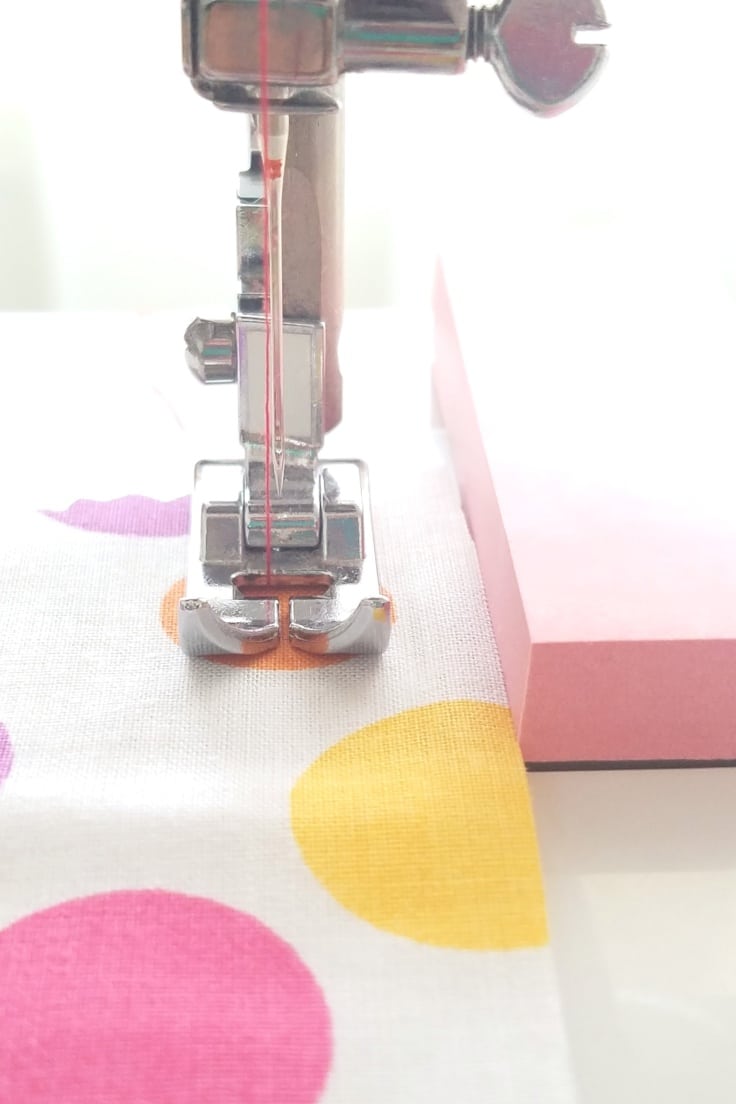
- Sew a stitch in the ditch seam to finish attaching the binding to the quilt. Tis stitch is done right in the “ditch” formed between the binding and the quilt after you’ve sewn the first seam of the binding.

This stitch should barely catch the binding onto the back side of the quilt and should look almost invisible onto the front side of the quilt. When you flip the quilt to the other side, you should also see a nice, straight and narrow seam on the opposite side of the binding.
Tips to sew binding perfectly
- Practice makes perfect! Try this technique on a scrap quilt before trying it on your main project.
- Use high-quality thread to ensure durability and longevity of your quilt binding.
- Take breaks if needed. Sewing can be tiring, so don’t hesitate to step away and come back with fresh eyes if you’re feeling overwhelmed or fatigued.
- Be patient and take your time. Rushing through the process may result in mistakes or uneven stitching.
Variations:
- Instead of folding your binding fabric in half, you can opt for single-fold bias tape for a thinner and more delicate look.
- For a more decorative finish, try adding a decorative stitch to the binding seam.
Where to use this technique:
The stitch in the ditch binding technique is perfect for all types of quilts, from small wall hangings to large bed-sized quilts. It also works well for any shape of quilt, whether square, rectangular, or even curved.
You can also use it for attaching bias binding or bias tape to garments or small quilted projects such as this tissue holder or this phone charger holder, using the exact steps described above.
Frequently Asked Questions
Can I use this technique for hand quilting?
In theory the stitch in the ditch binding technique works well for both machine and hand stitching. But truth is, hand stitching it takes a lot of time and hand work, so I would only recommend this technique for machine stitched quilts.
Can I use a decorative stitch instead of the stitch in the ditch seam?
Yes, you can definitely use a decorative stitch to finish off your binding. Just keep in mind that it will be visible on both sides of the quilt, so choose a stitch that complements your quilt design.
Can I use a different seam allowance?
While ¼ inch is the recommended seam allowance, you can adjust it as needed for a thinner or thicker binding.
More sewing tips you’ll enjoy:
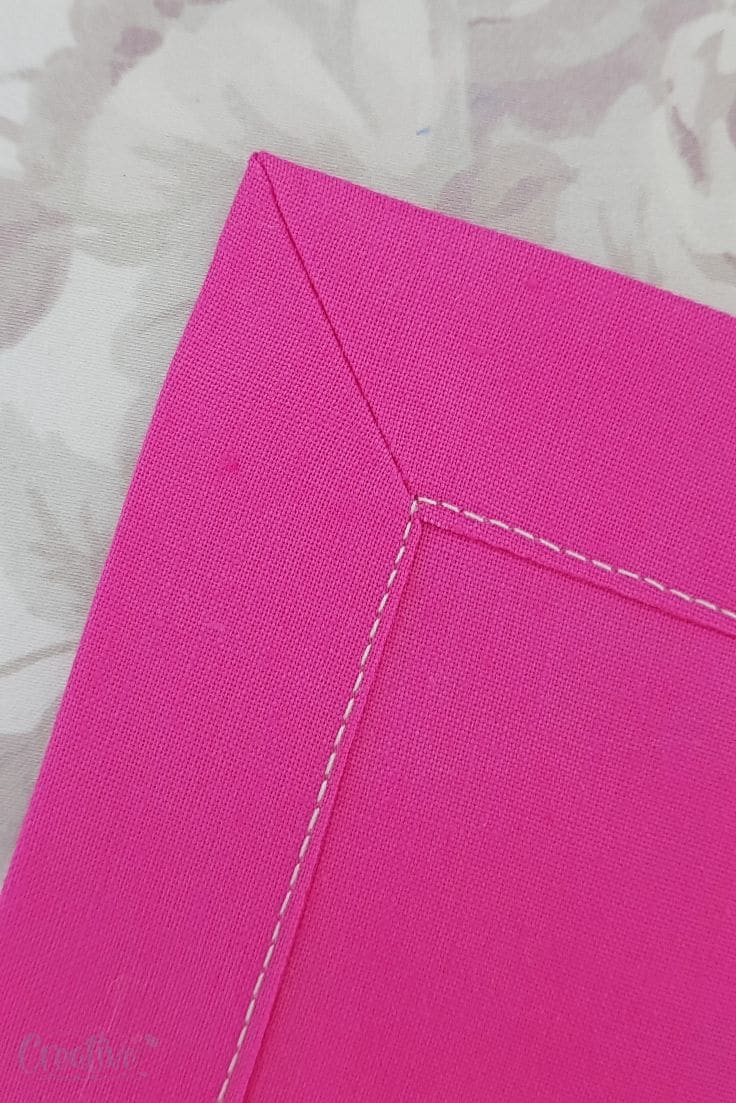
- How to miter corners
- Elastic join tip to reduce bulk
- Easy DIY seam guide
- Genius bobbin storage ideas
Now that you know how to bind a quilt using the stitch in the ditch technique and the hemming tape trick, it’s time to put your skills to the test! Start binding your quilts with confidence!
Have any questions or comments? Leave them down below, I would love to hear from you! Also, don’t forget to subscribe to my newsletter for more quilting tips and tutorials delivered straight to your inbox.
Happy sewing!
Most popular sewing projects:


- Tips for sewing a round hem
- Corded bag handles
- Flutter sleeve dress pattern
- How to laminate cotton fabric
How to bind a quilt perfectly
Materials
- Quilt or a scrap to practice on
- Binding strip
- Pape backed hemming tape
- Matching thread
Tools
- scissors
- Pins or clips
- Iron and ironing board
- Stitch-in-the-ditch or walking foot
Instructions
Preparations
- Layer your quilt with the right side facing up.
- Trim off any excess batting or backing fabric so that all layers are even.
- Fold your binding fabric in half, wrong sides together, and press with an iron.
- Starting from the middle of one side of the quilt, pin or clip one side of the binding to the raw edge of the quilt top, leaving at least 2" inch tail at the beginning.
- Pin or clip all around the quilt top until you reach the starting point.
- Leave another 2 inch tail of binding and trim off any excess.
Sewing
- With your sewing machine, start stitching the binding on one side of the quilt (I usually start with the front side), using a ¼ inch seam allowance. Start sewing the binding to the quilt, about 2" away from the end of the strip.
- When almost reaching the corners, sew mitered corners.
- Continue stitching until you reach the next corner and repeat the process.
- Once you reach the starting point, stop stitching 2 inches before reaching your first stitch.
- Join both ends of the binding
- Sew along this overlap to secure the binding and finish stitching all around the quilt.
- Next press the binding up with your iron on steam.
- Then flip the quilt to the other side.
- Grab the paper backed hemming tape and fuse it to the edge of the binding or to the seam (the seam you've just sewn but on the other side of the quilt)
- Using your hands and the iron, press the edge of the binding over the seam, so that it covers it just a tad.
- Flip the quilt again so that the front side is up.
- Change the presser foot if needed. I didn't use a walking foot or stitch-in-the-ditch foot as I have a clear, see-through foot that allows me to see the seam.
- Sew a stitch in the ditch seam to finish attaching the binding to the quilt. This stitch should barely catch the binding onto the back side of the quilt and should look almost invisible onto the front side of the quilt. When you flip the quilt to the other side, you should also see a nice, straight and narrow seam on the opposite side of the binding.
Video
Article may contain Amazon & affiliate links. As an Amazon Associate I earn from qualifying purchases at no additional cost to you.

Hello !
Thank you for a great tutorial. I LOVE the look of the stitch in the ditch, along with the fact that it’s much faster than hand sewing the binding (although I do enjoy hand sewing it too). I’m just wondering if you have a ‘magic’ measurement for how much to ‘turn over’ to the wrong side of the quilt. I’ve had numerous attempts, but the stitching either doesn’t catch the binding, or, it’s too far ‘into’ the binding. I can’t seem to get it to look nice along the edge. I would love any suggestions you may have. Thanks again for sharing your trick with the hem tape. Pure genius!
Hi, Laurie. Thanks for your kind comment! This is actually the best “trick” that works for me with flawless results, using hemming tape. With tape I always catch the binding, the stitch line is nice & straight and never too deep into the binding. I make sure I align the edge of the binding to the sewn seam, arranging it just slightly over the seam so when I do the stitch in the ditch, it catches just the right amount of binding. So basically spend a bit more time on adding the tape & arranging the binding and then the stitching goes fast and smooth.
So simple and so effective. What a great idea.
Thank you.