

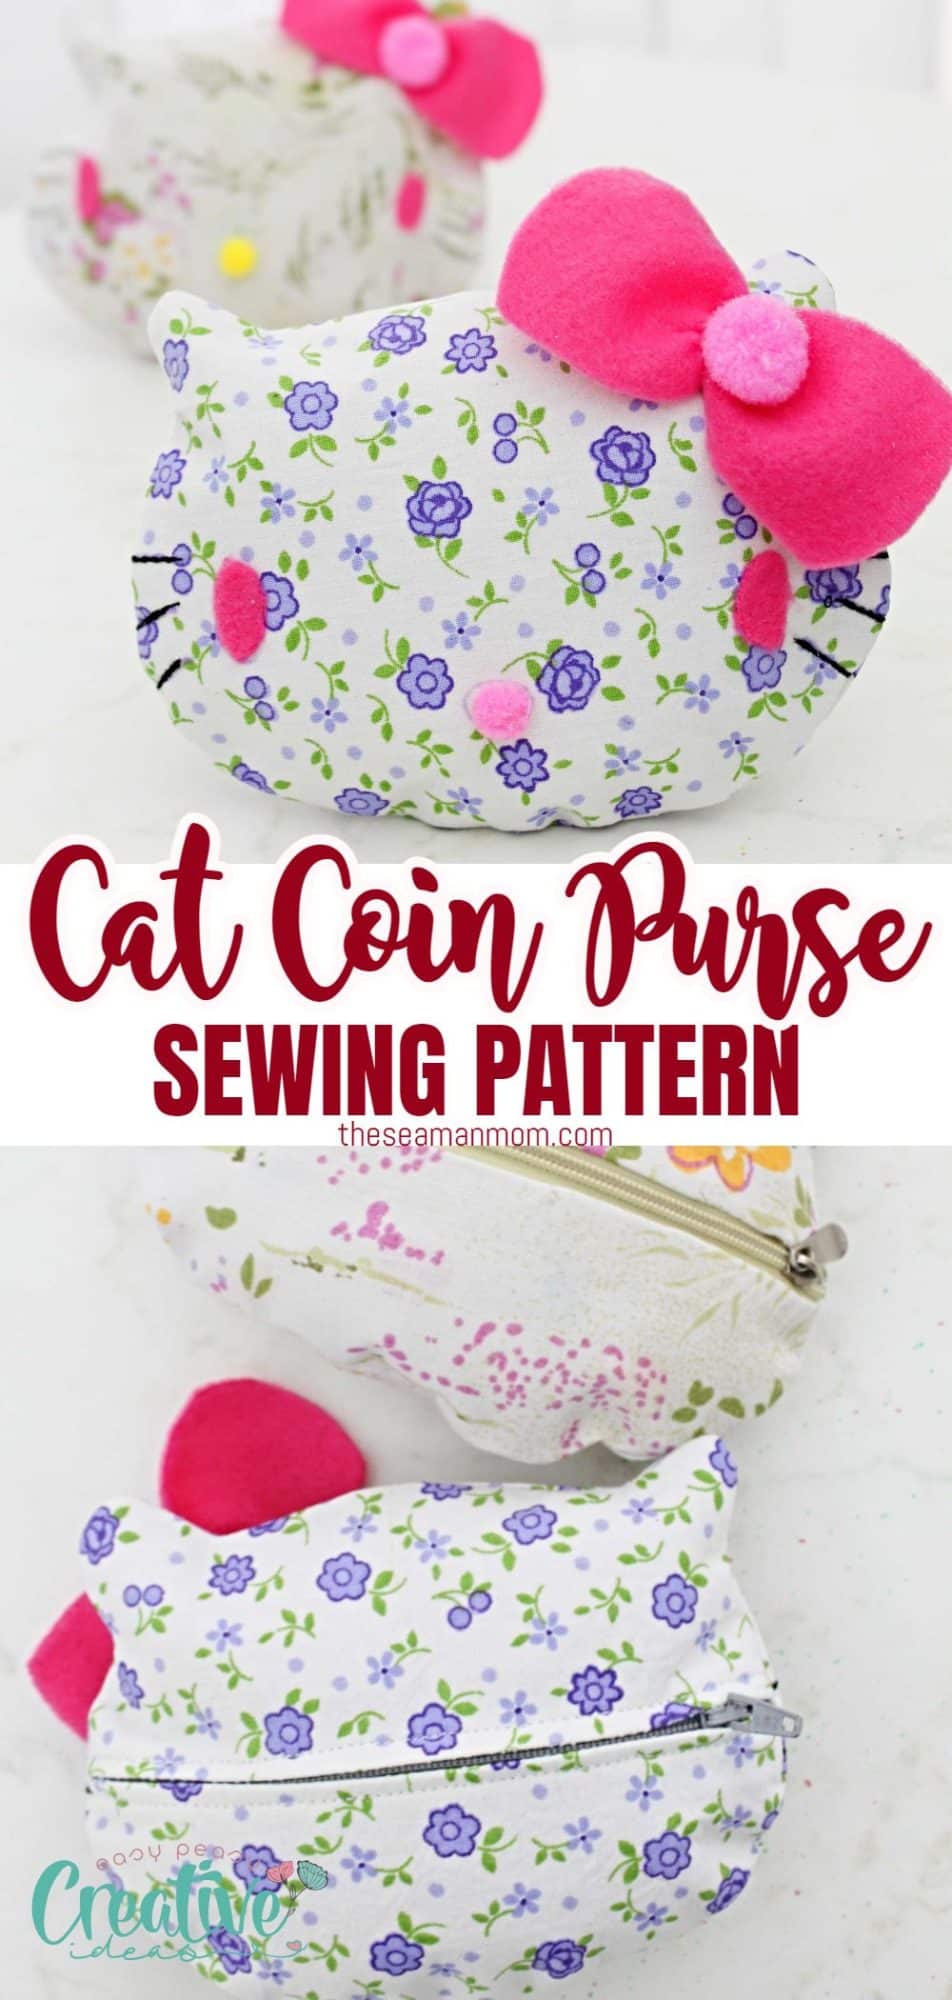
Cat Coin Purse Sewing Pattern
If you’re looking for a fun and unique coin purse, look no further than this cute cat coin purse! This practical accessory is perfect for cat lovers and can be easily made with a few simple sewing supplies. Follow my step-by-step instructions to learn how to make your own coin purse, complete with a zipper closure. You’ll love using this cute purse to keep your coins and other small items safe!
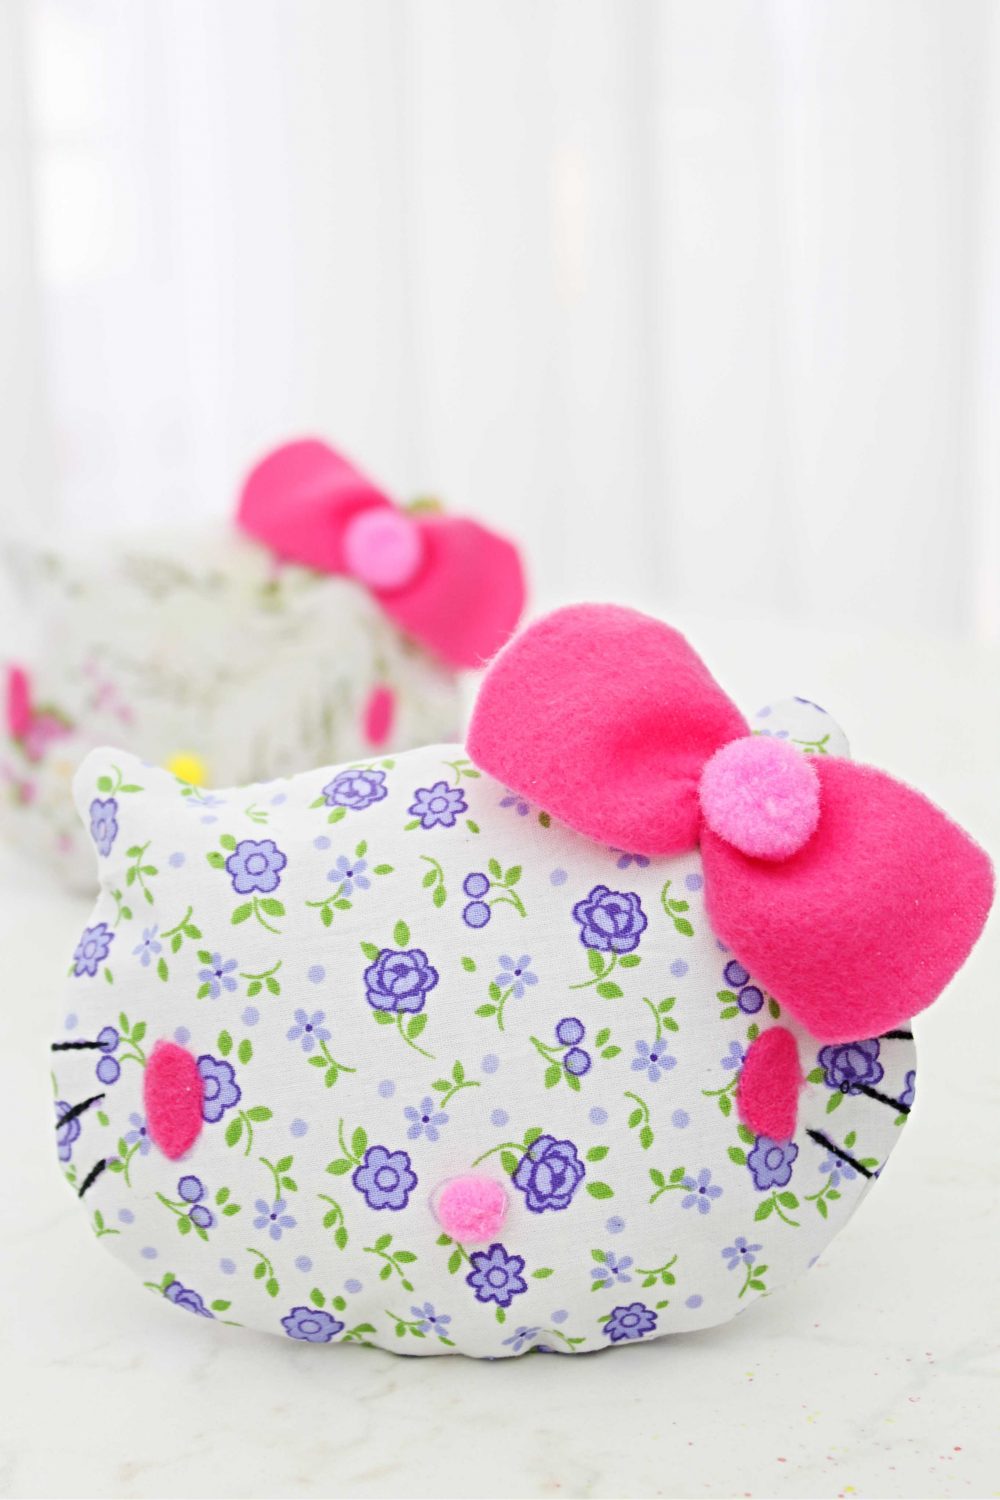
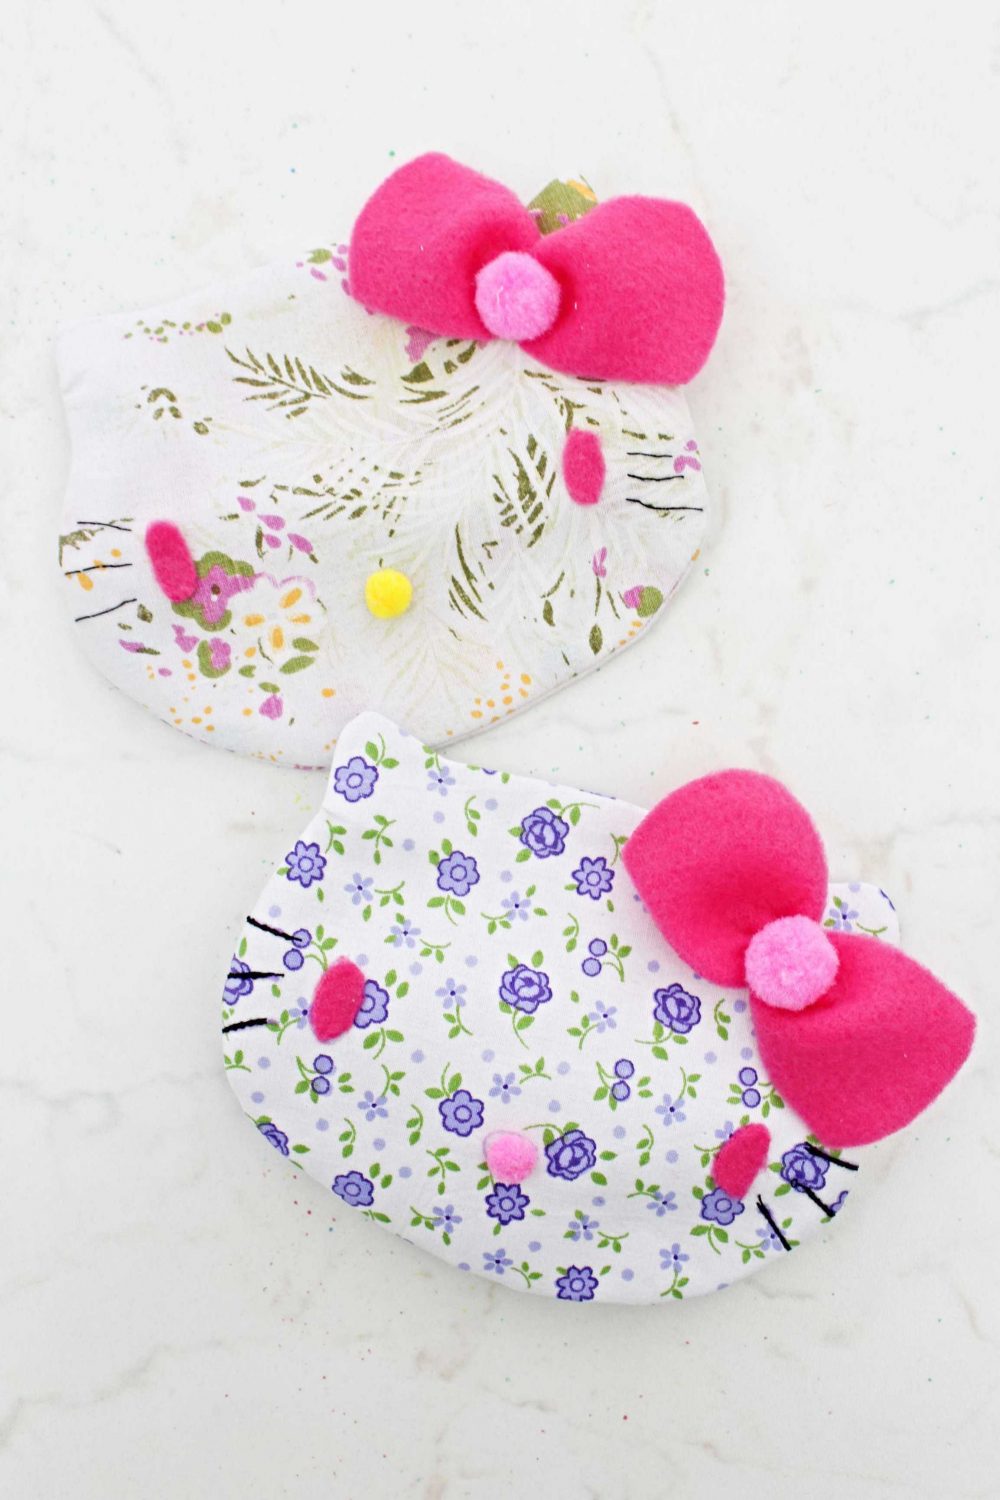
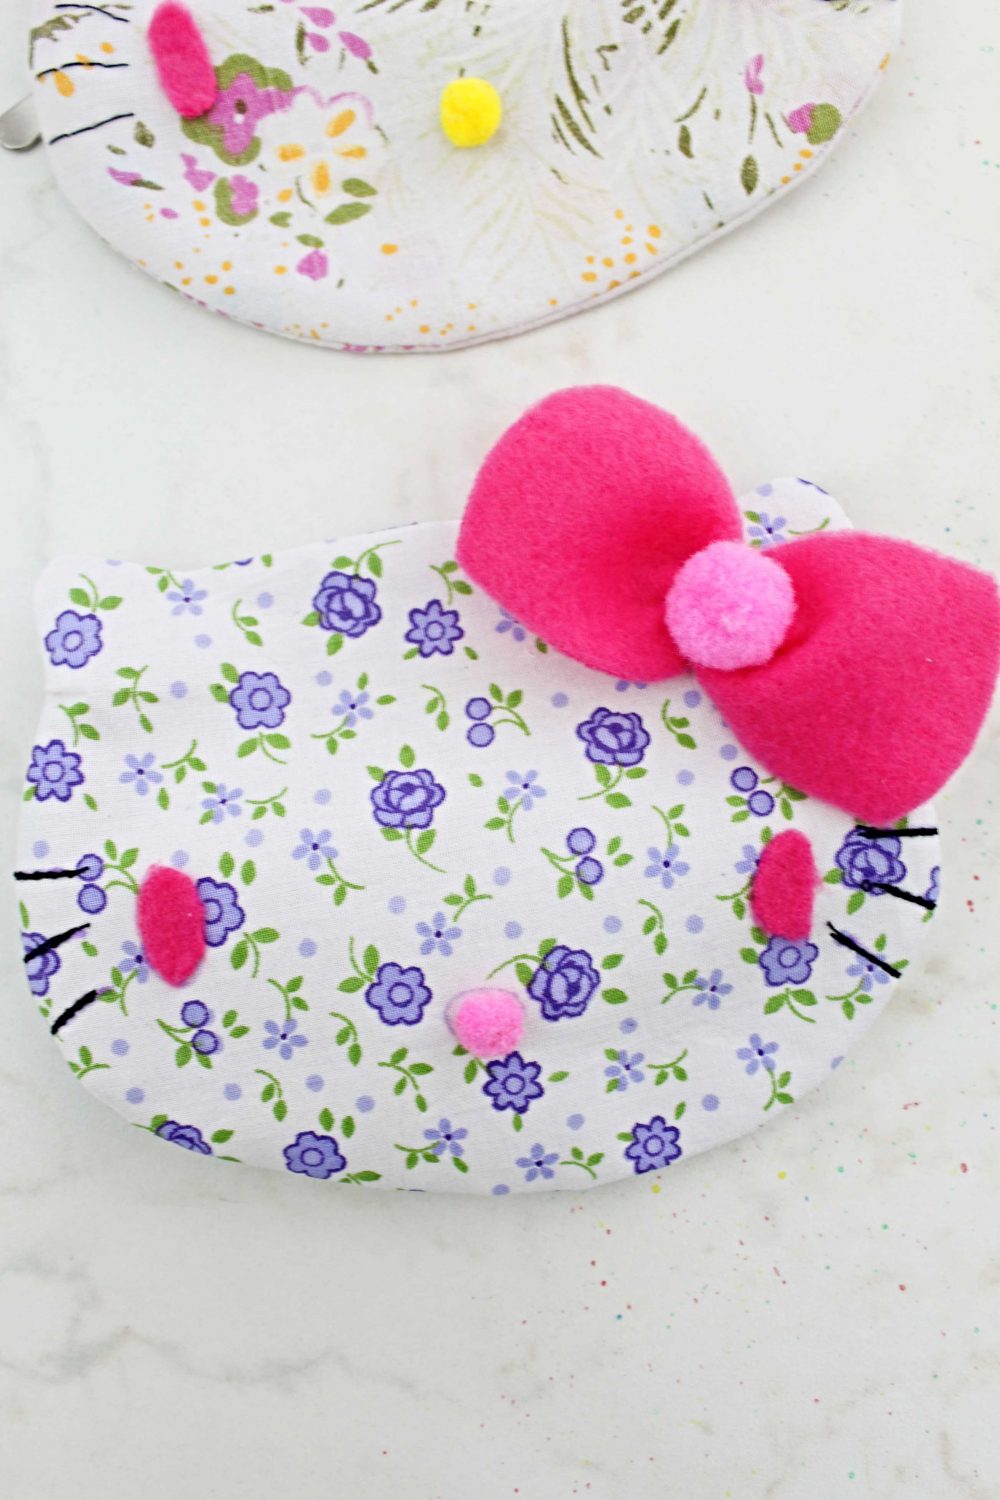
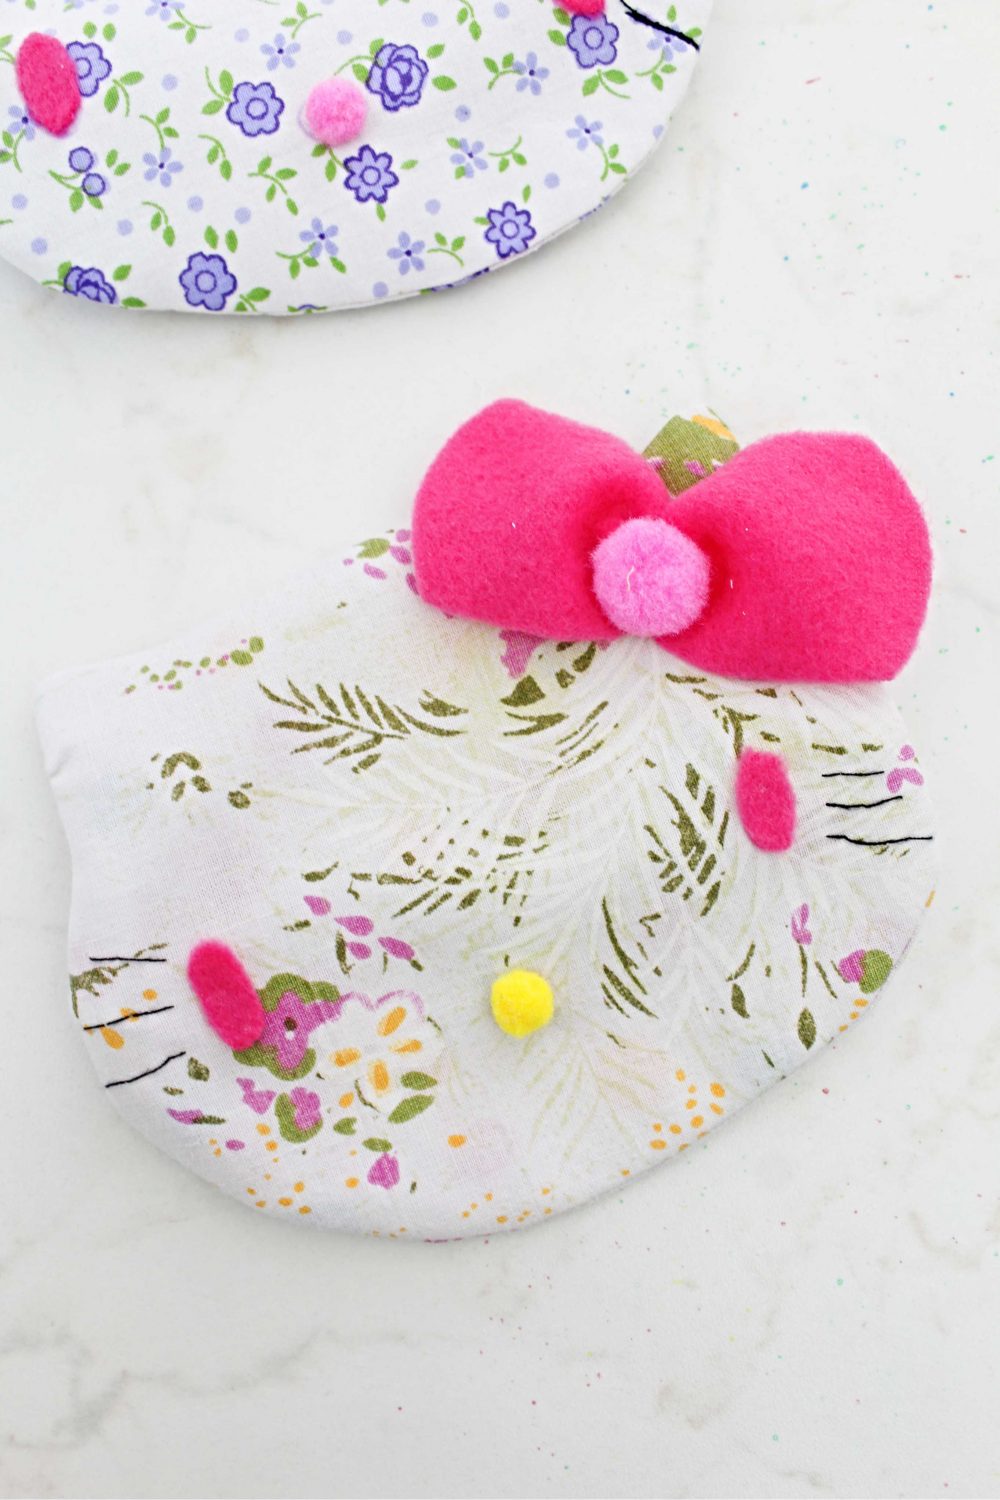
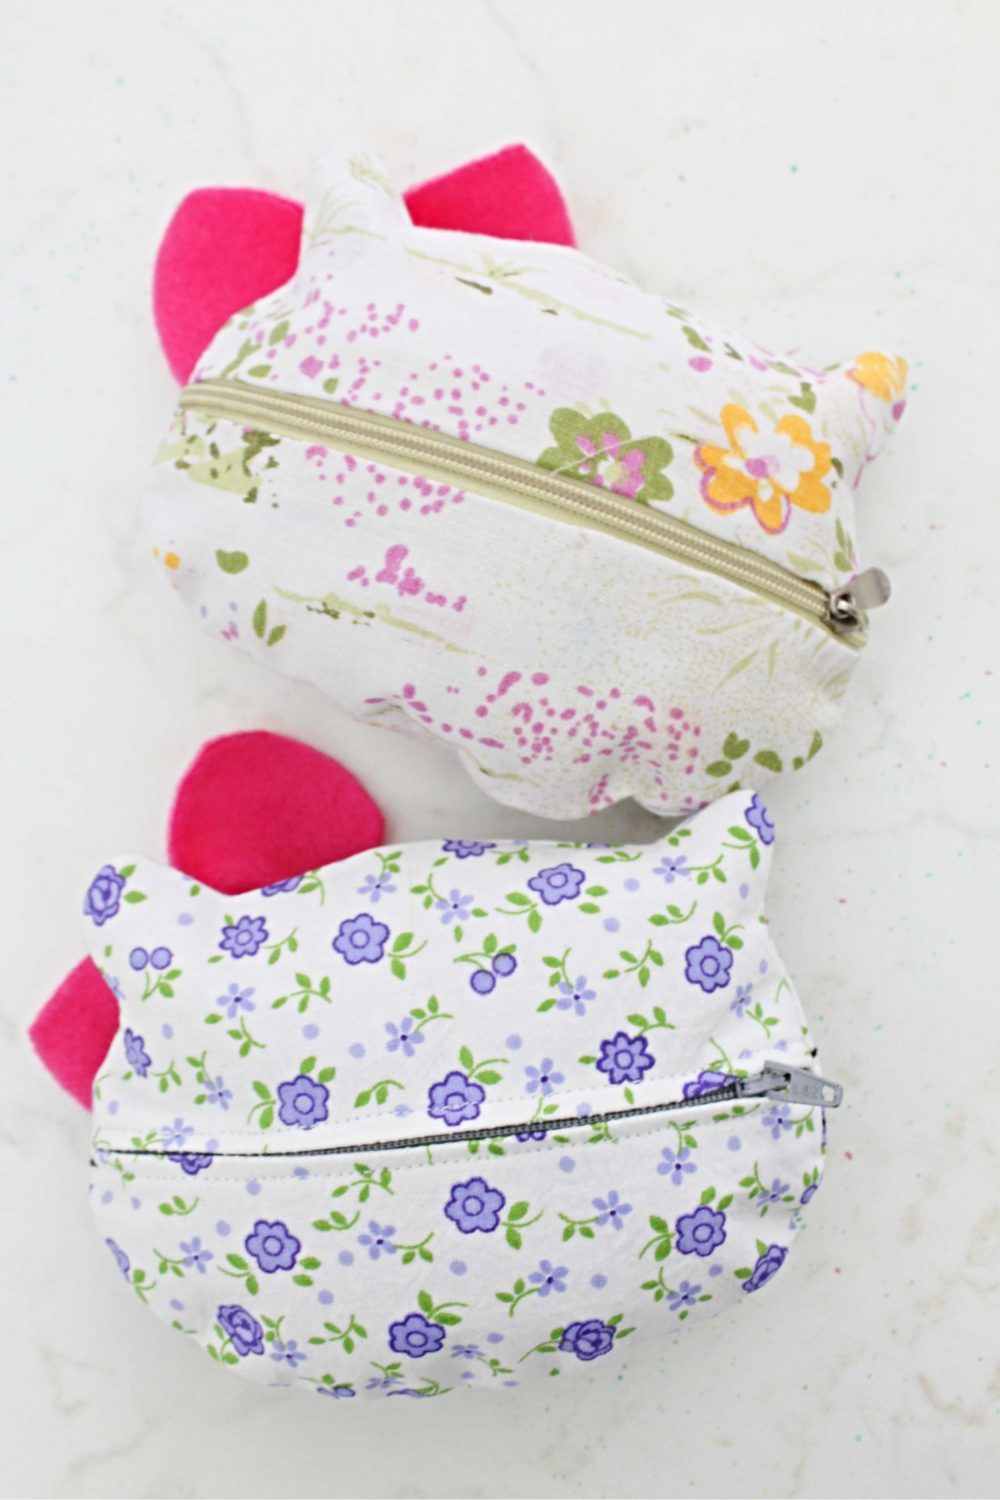
Cat coin purse
I must admit I am really bad at sewing up Christmas gifts! My creativity is pretty much limited to mug rugs, Christmas ornaments and kitchen accessories like pot holders or oven mitts. But when you have a huge cat lover in the house, you know you won’t need a lot of thinking! A cat coin purse is the perfect gift for them!
Need more cute sewing ideas?
- Pretty flower pillowcase tutorial
- DIY tulle skirt for women
- Christmas Elf stocking pattern
- Sweet vintage ruffled apron
- Lined zipper pouch tutorial
- Reusable snack bags
- Small quilted coin purse
My little munchkin is all about cats! She’s always been a big pet lover and she absolutely adores our dog, cat and bunny! But the cat is by far her most favorite pet! So this cute cat coin purse made total sense when I thought of ideas for her Christmas gift.
I also must make a confession! We’re trying to be more careful with our spendings as we tend to over spend at Christmas time. And what better way to save than coming up with adorable handmade gifts like this DIY coin purse? Great way to put some of those fabric scraps to a gorgeous use!
What is a coin purse?
A coin purse is a small pouch that’s used to hold coins, credit cards, cash and other small items. They’re usually made out of fabric or leather and have a zipper closure.
Coin purses are super handy and make great everyday accessories! I personally love using them to keep my loose change organized in my bag. And they’re also perfect for carrying around small items like lip balm, Band-Aids or bobby pins.
How do you wear a coin purse?
Coin purses can be worn in a few different ways! You can carry them around in your handbag, or you can attach them to your keys using a key ring. Some people also like to wear them as a neck pouch by threading a cord through the key ring.
Why a cat coin purse makes a great gift
If you have a cat lover in your life, then they’ll absolutely adore this cute cat coin purse! It’s the perfect gift for any occasion, whether it’s Christmas, a birthday or just because.
A cat coin purse makes a great stocking stuffer or Secret Santa gift! They’re also perfect for giving to your child’s teacher or a cat-loving friend.
How to add a personal touch to your handmade coin purse
One of the great things about making your own coin purse is that you can personalize it to suit the recipient. If you’re giving it to a cat lover, why not add some cat-themed fabric or embroidery? You could also add their initials or a special message to make it extra special.
Another way to personalize your coin purse is to choose fabrics that match the recipient’s style. If they’re into bright and bold colors, then go for something eye-catching! Or if they prefer more subdued tones, then opt for a pretty patterned fabric.
What kind of fabric works best for this coin purse?
The great thing about this cat coin purse is that you can use any kind of fabric! I personally love using quilting cotton as it’s nice and sturdy. But you could also use home decor fabric, canvas, genuine leather, pvc vinyl fabric or even upcycled materials like an old pair of jeans.
If you’re using quilting cotton, I recommend opting for a medium to heavy weight fabric so that the coin purse is nice and sturdy. And if you’re using a lighter weight fabric, then you may want to add some interfacing to give it more structure.
Who’s this project recommended to?
While this lovely fabric coin purse is super easy and quick to make I wouldn’t recommend this project for an ultimate beginner for a few simple reasons: this zipper coin pouch involves sewing a zipper, is practically all about curves (although not very deep but still difficult to sew for an ultimate beginner), it’s made with lining and is also small so it requires slow sewing and a lot of control over your hands, the needle and your foot and the pedal.
This kitty wallet is more suitable for intermediate or advanced sewers but if you’re brave enough to give this zip coin purse a try, please read this zipper tutorial first as it will come in handy when sewing the zipper in this Kitty coin purse.
As I just mentioned, my cat coin purse is made with lining and I tried one of the purses with interfacing. I found this version a lot sturdier and durable than the purse with no interfacing. But using interfacing will make sewing a little harder and will require a thicker needle and thread. The choice is yours but remember, this coin purse pattern is designed to carry coins which can get pretty heavy so you need to make your cat coin purse as durable as possible.
My cat coin purse pattern can be purchased here.
Coin purse pattern and tutorial
Materials:
- cat and bow pattern (available here)
- Xacto knife
- self healing cutting mat
- 2 fabric strips for outer purse
- 2 fabric strips for lining
- fabric marker
- pattern weights (make your own here)
- scissors
- fabric glue
- interfacing (optional)
- small strip of fleece for eyes
- small strip pf fleece for bow
- a tiny pom pom for nose
- a small pom pom for bow
- pins
- sewing machine
- hand needle
- jeans needle (if using interfacing)
- thread
- zipper foot
- seam ripper
- seam gauge (optional but helpful)
- blunt tool for corners (like a skewer stick)
- pressing iron
How to sew the cat coin purse:
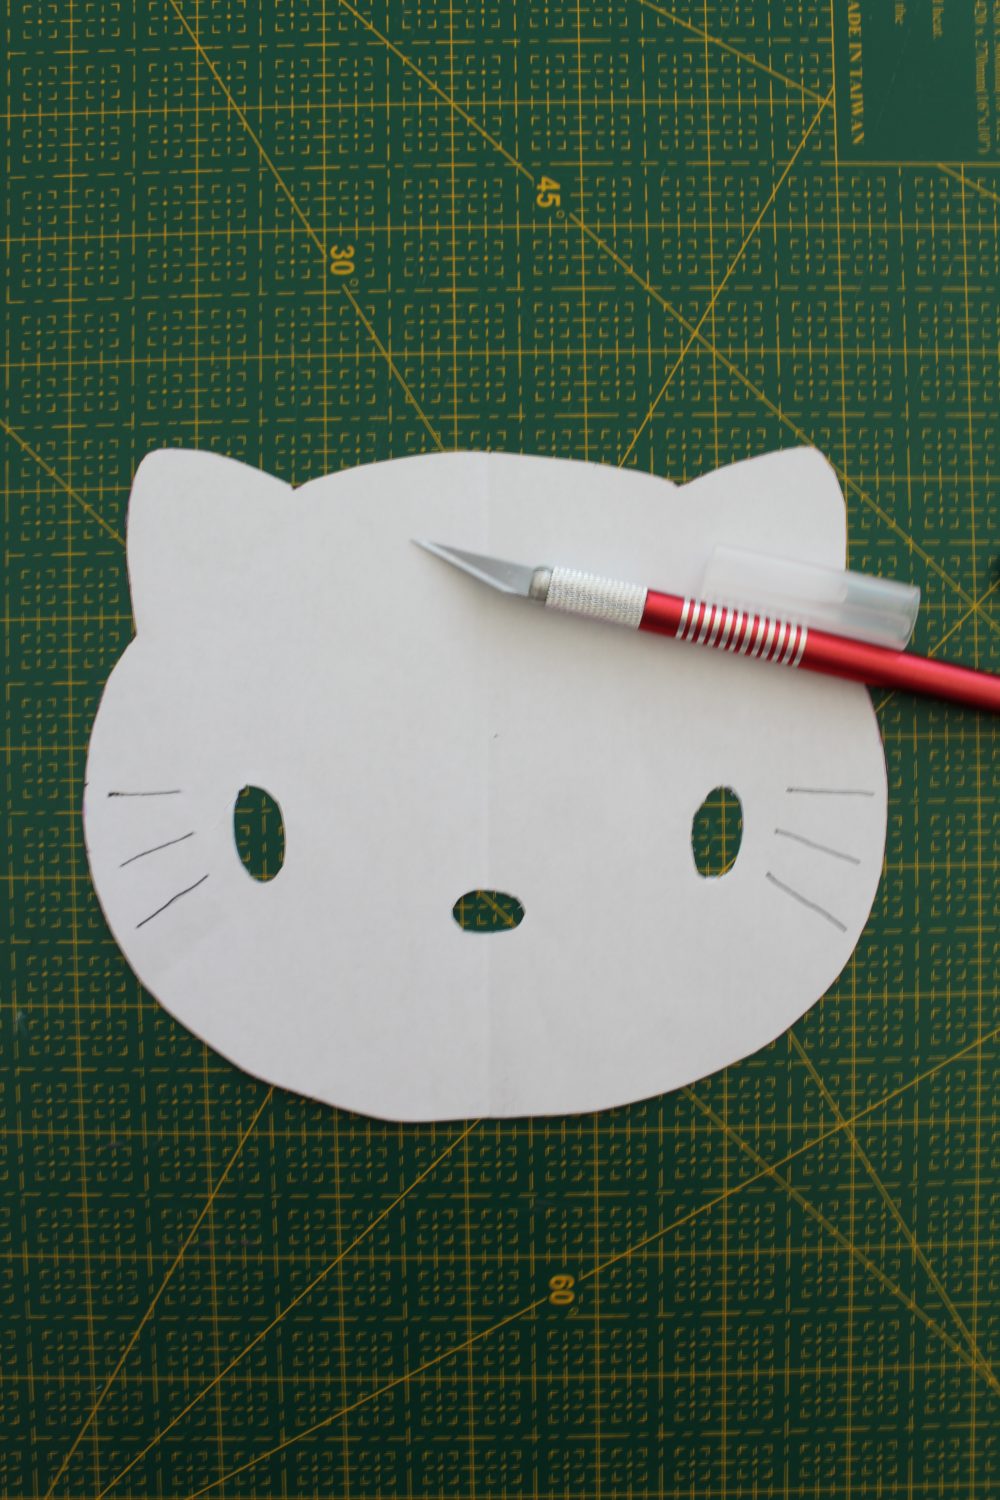
Prepare the pattern pieces
- Place your pattern on a cutting mat and using an exacto knife cut out the kitty, the eyes and the nose.
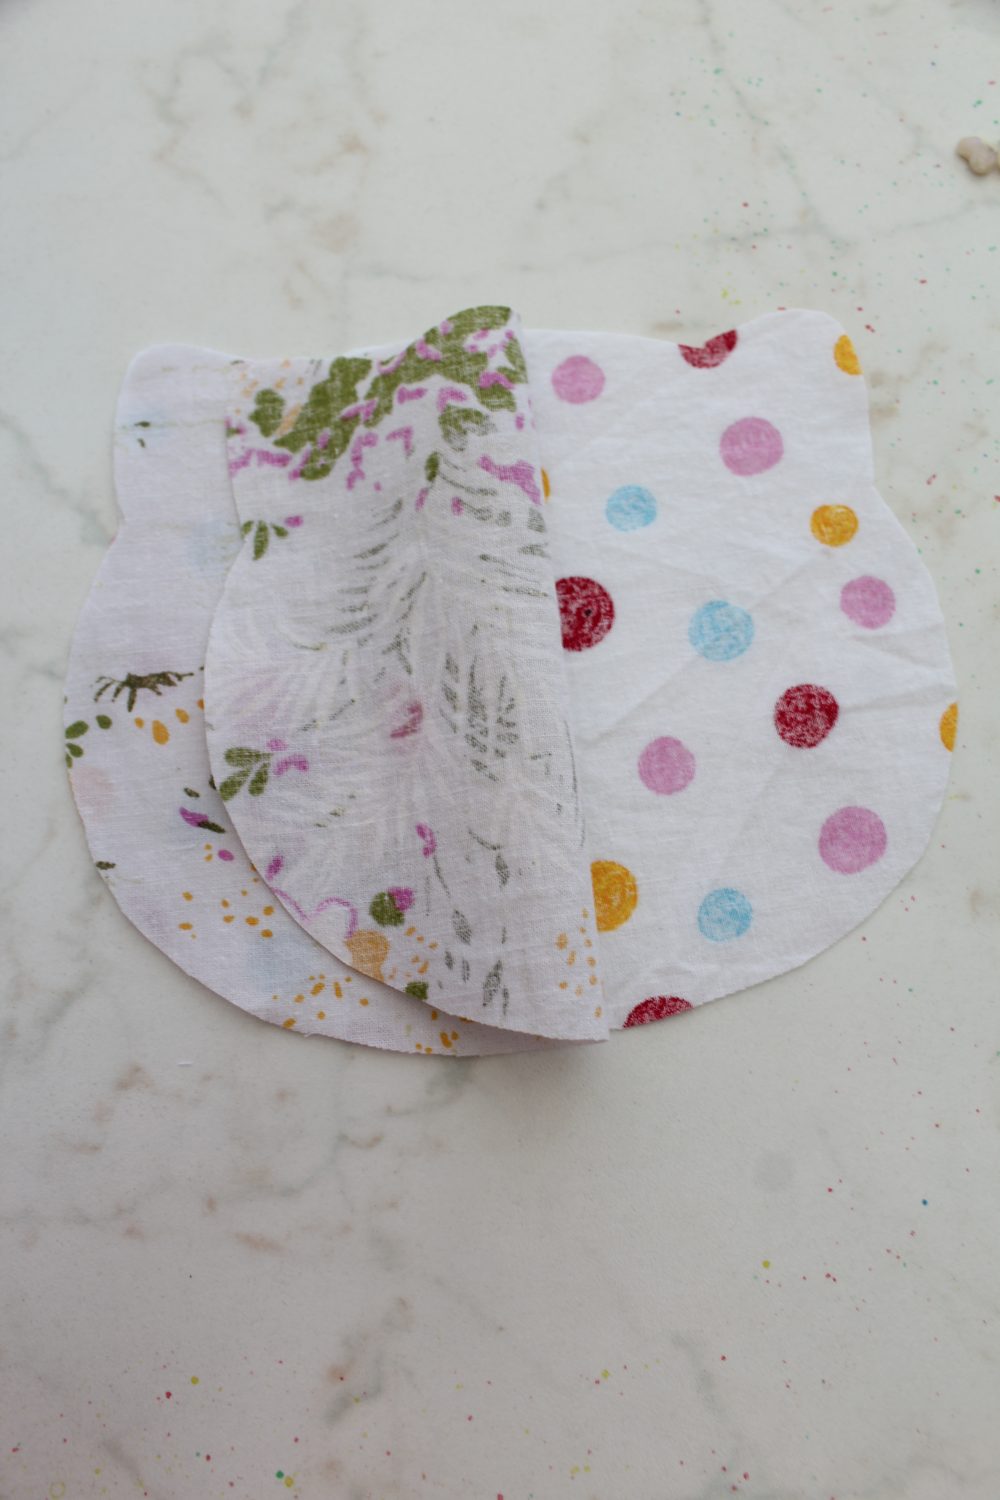
- Take outer fabrics and place them wrong side together. Do the same for the lining pieces.
- Place lining pieces under outer pieces then place the pattern over all four layers of fabric.
- Top the pattern with a small pattern weight and trace around the pattern using a fabric marker.
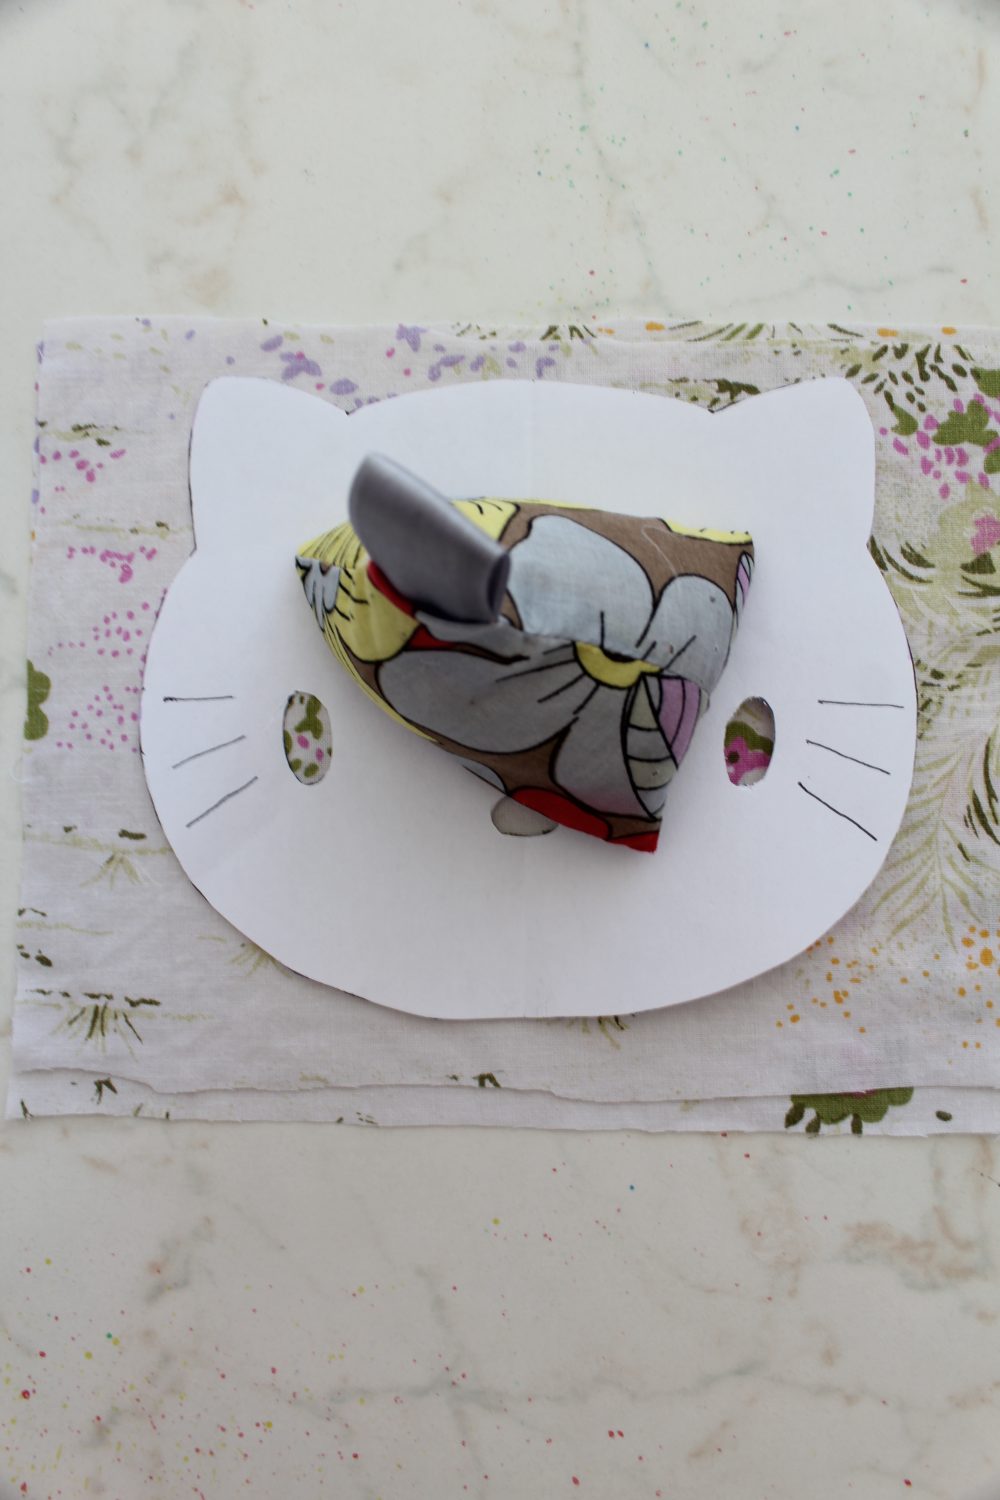
- Remove the pattern and the weight and use a couple of pins to pin through all layers of fabric.
- Mark where the eyes and nose are and draw the whiskers/eye lashes with the fabric pen not sure what these are so I’ll just call them whiskers for the rest of the tutorial).
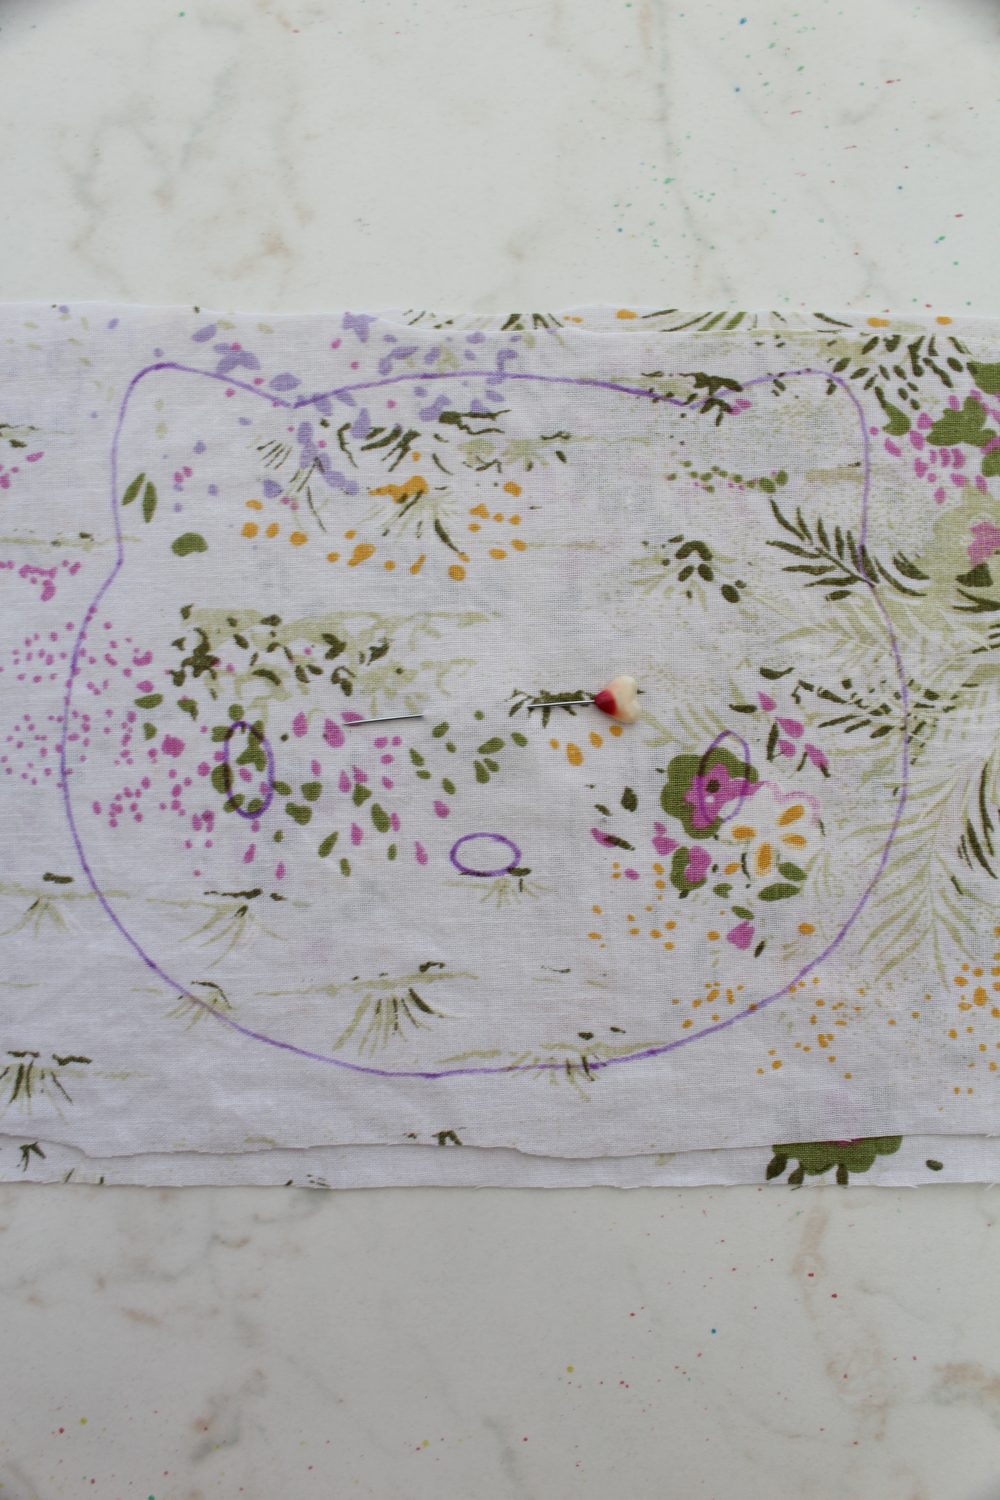
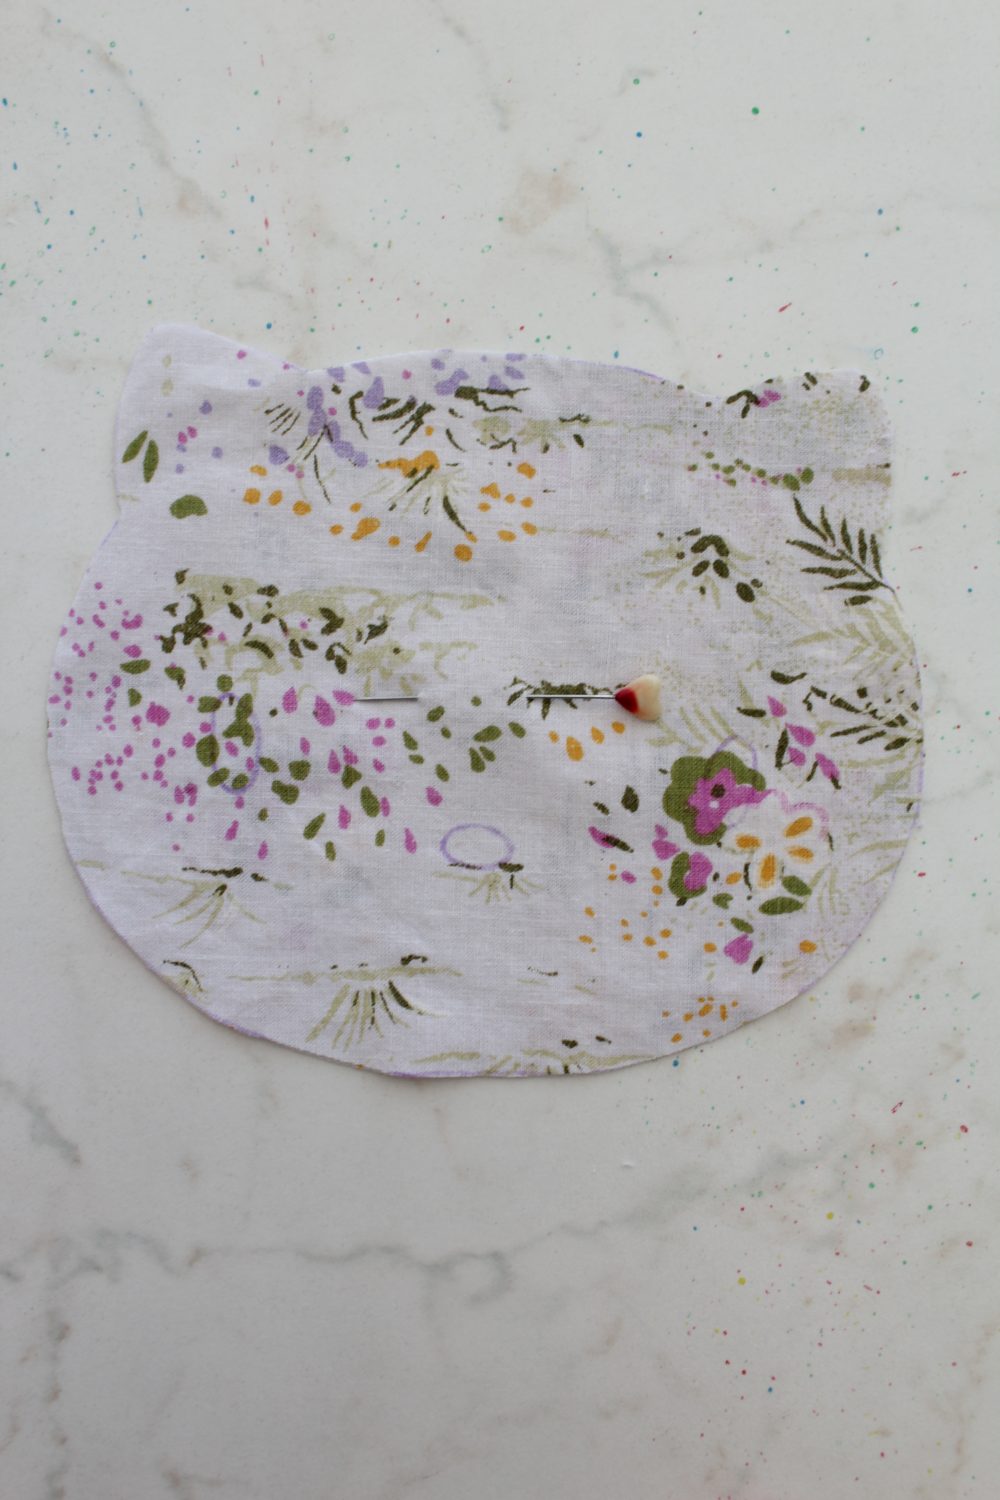
- Cut out the kitty, cutting through all layers, then remove the pins. Do not cut out the eyes, nose or whiskers!
Interface outer fabrics
- Grab the interfacing and draw two kitties on, using the pattern. No need to draw eyes, nose or whiskers. (I took photos only for the first purse where I didn’t use interfacing so you won’t see the interfacing in these photos)
- Cut out the interfacing pieces 1/4″ smaller than the drawing (use seam gauge to measure) then apply each to the back of the outer pieces of the kitty and iron in place until completely glued.
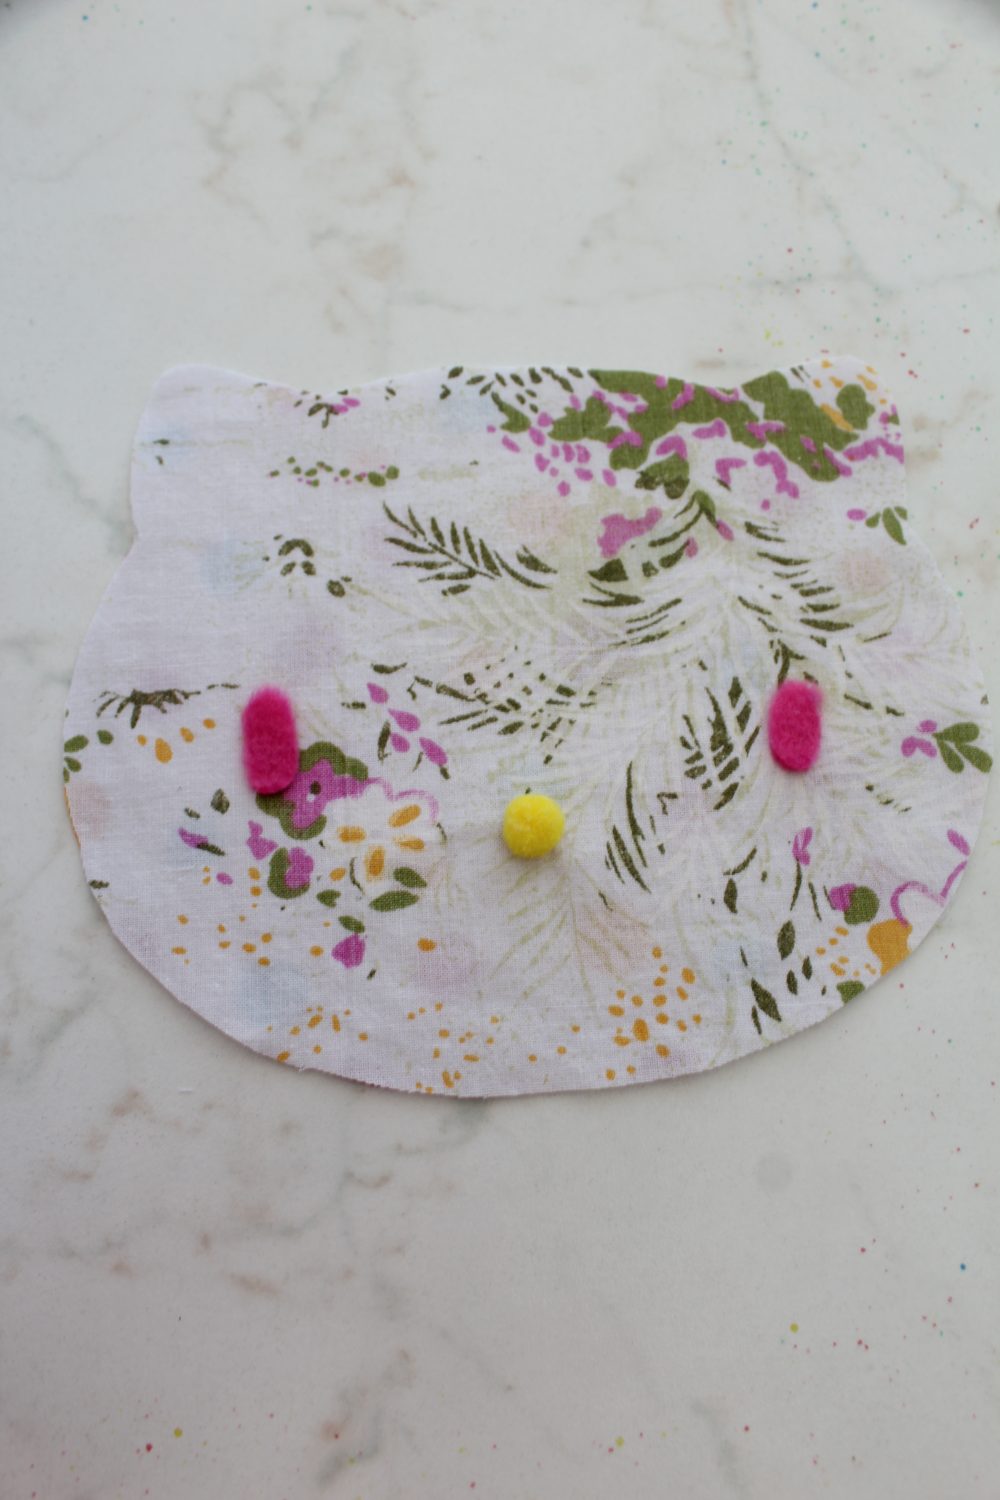
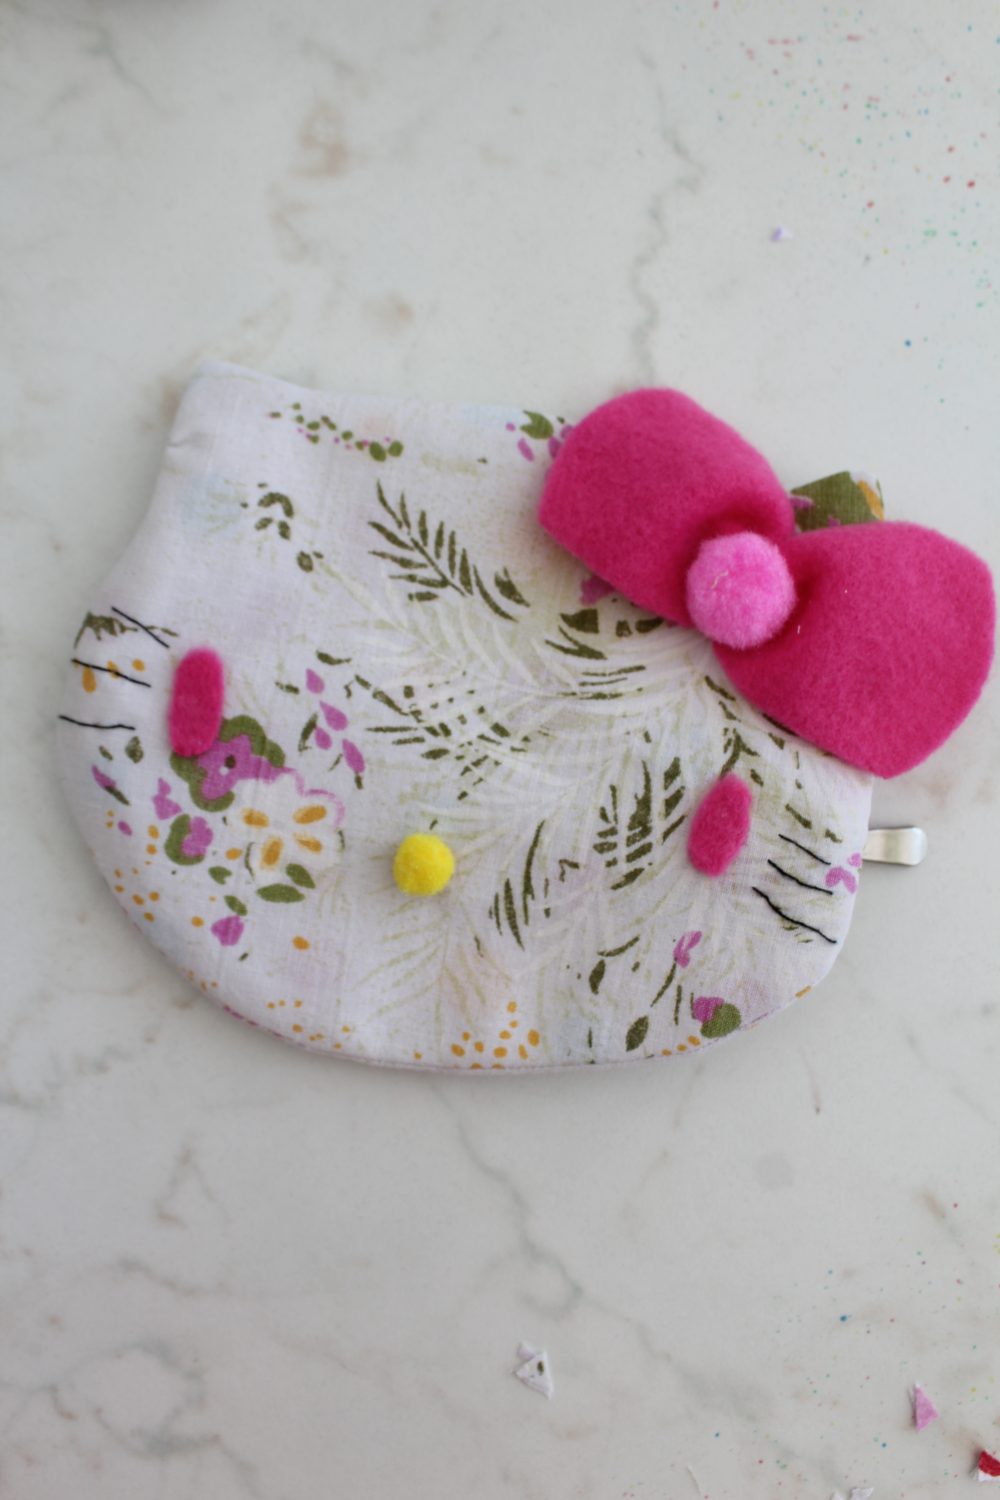
Prepare eyes, nose & whiskers
- Use the pattern to draw the eyes on a piece of fleece and cut out.
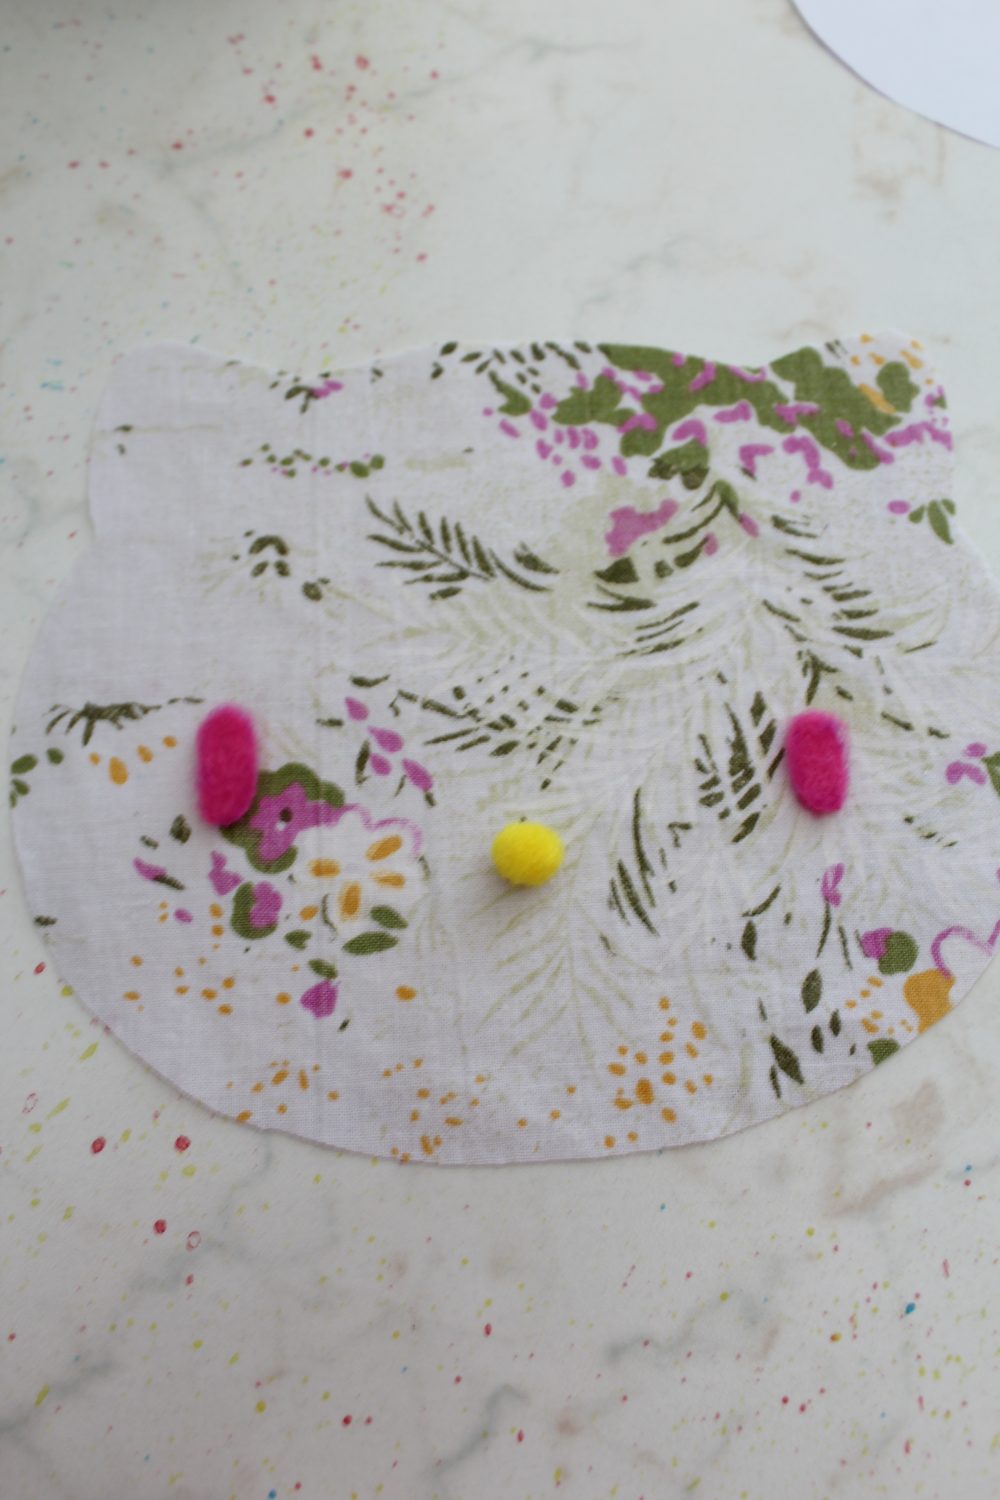
- Take the front outer piece and using the fabric glue, apply the fleece eyes (leave to completely dry before sewing the piece onto the rest of the pattern pieces).
- Mark the whiskers on the front outer piece then sew whiskers with your sewing machine, in contrasting thread. (when taking the photos I forgot to sew the whiskers and added them manually afterwards but as you can see on the second kitty, using a sewing machine gives better results)
- Using a hand needle and matching thread, attach the pom pom where the nose is marked on the outer front piece.
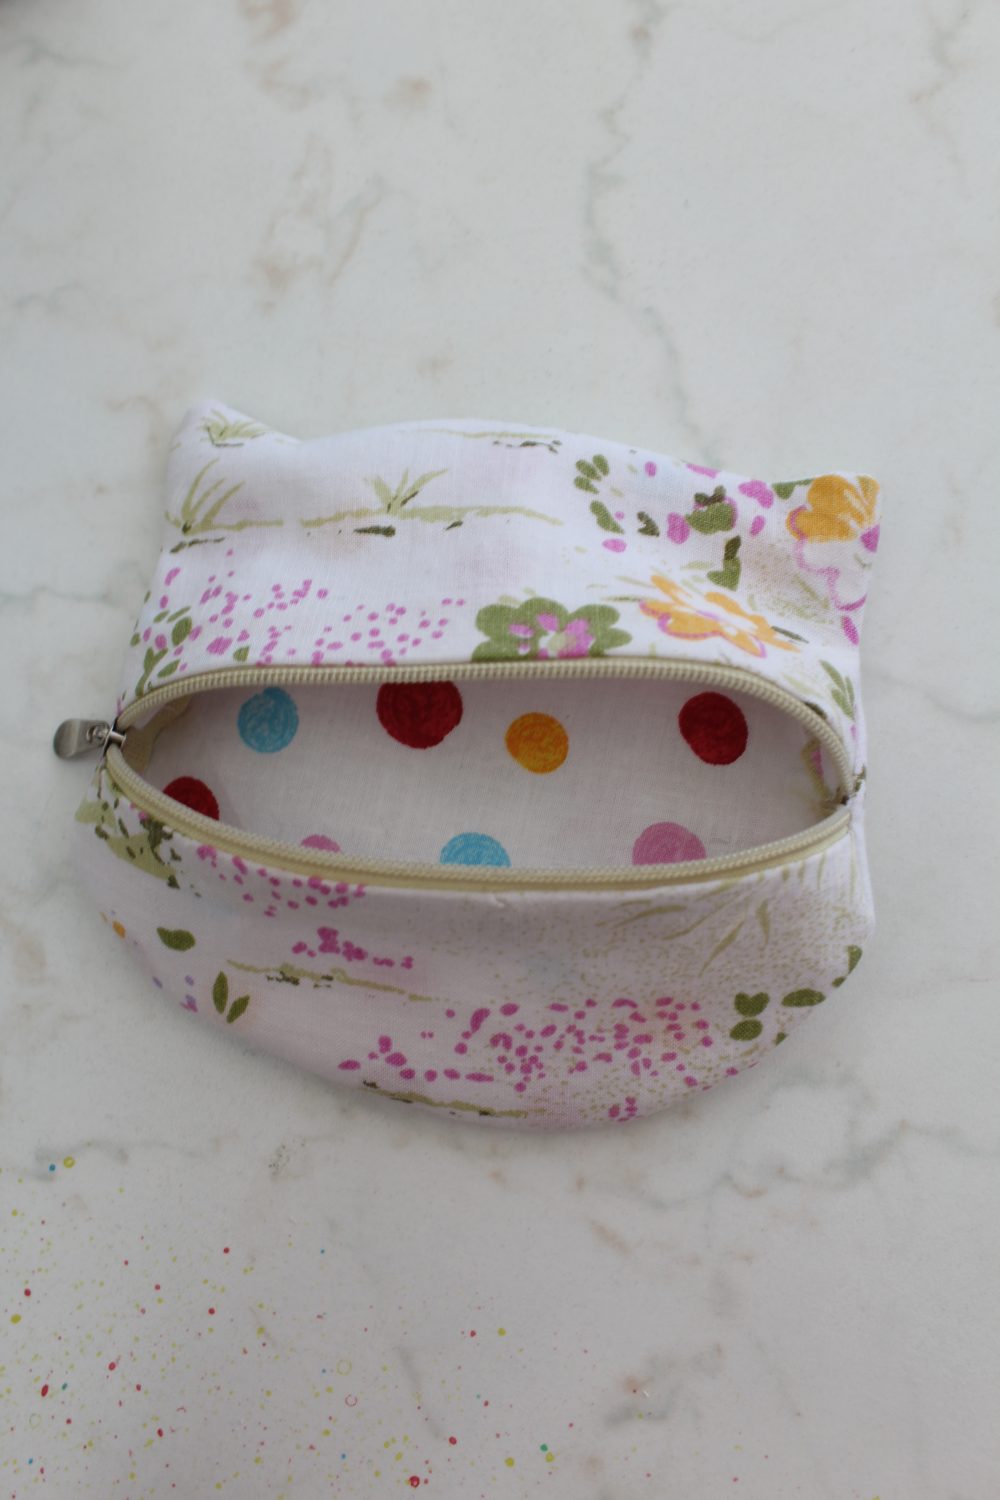
Attach the zipper to back pieces
- Leave the outer and inner front pieces aside and grab the back outer and lining pieces.
- We’ll be attaching the zipper now and this is where the above mentioned zipper tutorial comes in very handy.
- Place them wrong sides together, fold in half, lengthwise (horizontally) finger press, pin then cut along the fold.
- Leave the outer pieces aside and use the lining pieces first.
- Place them right sides together and sew along the cut with an 1/8″ allowance (you basically join them together again making a whole back lining piece).
- Open up the seam and press.
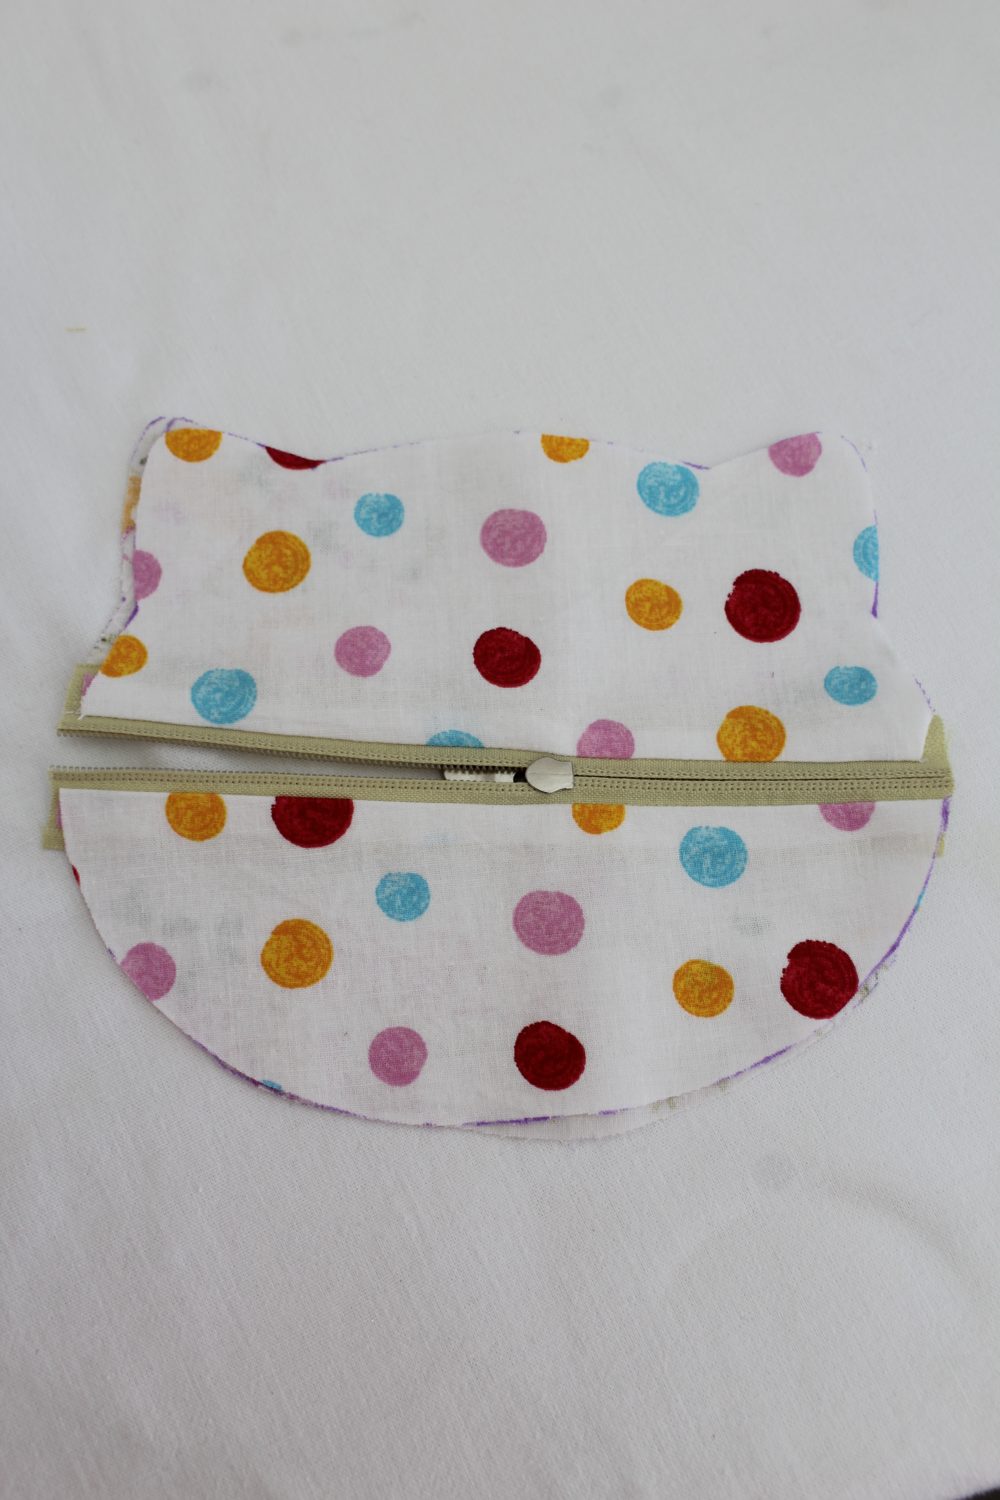
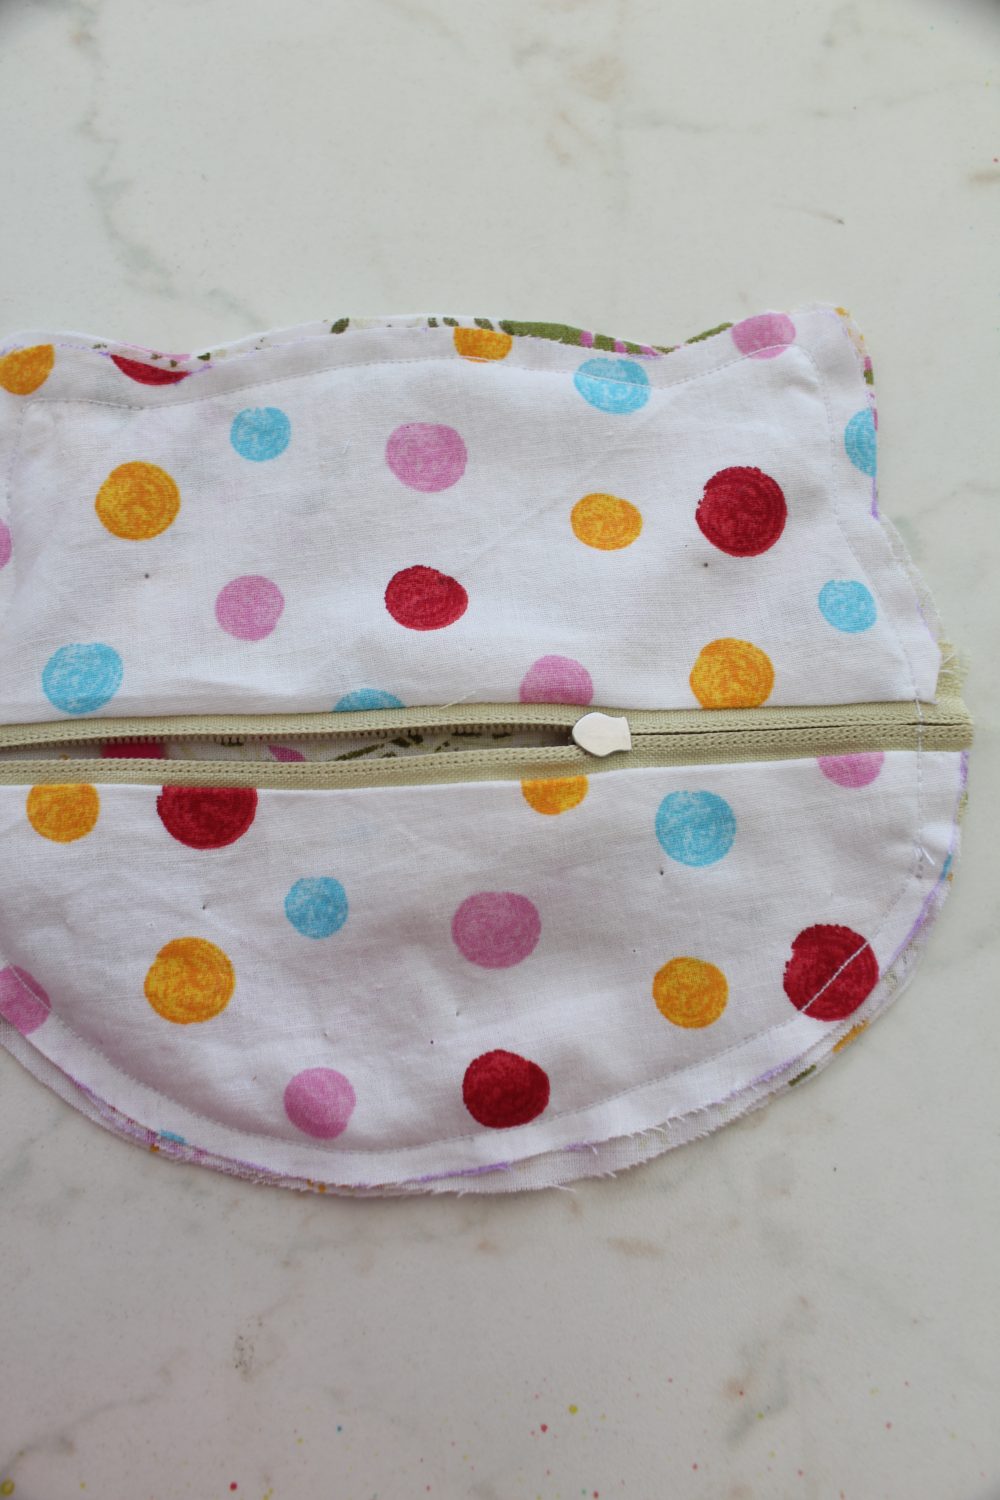
- With this piece wrong side up, place the zipper along the seam, the zipper teeth matching it perfectly. Pin the zipper to the fabric.
- Go to your sewing machine and change the foot to a zipper foot then sew down both sides of the zipper, using a basting (temporary) stitch with a 1/4″ allowance on both sides.
- Using your seam ripper rip out the seam.
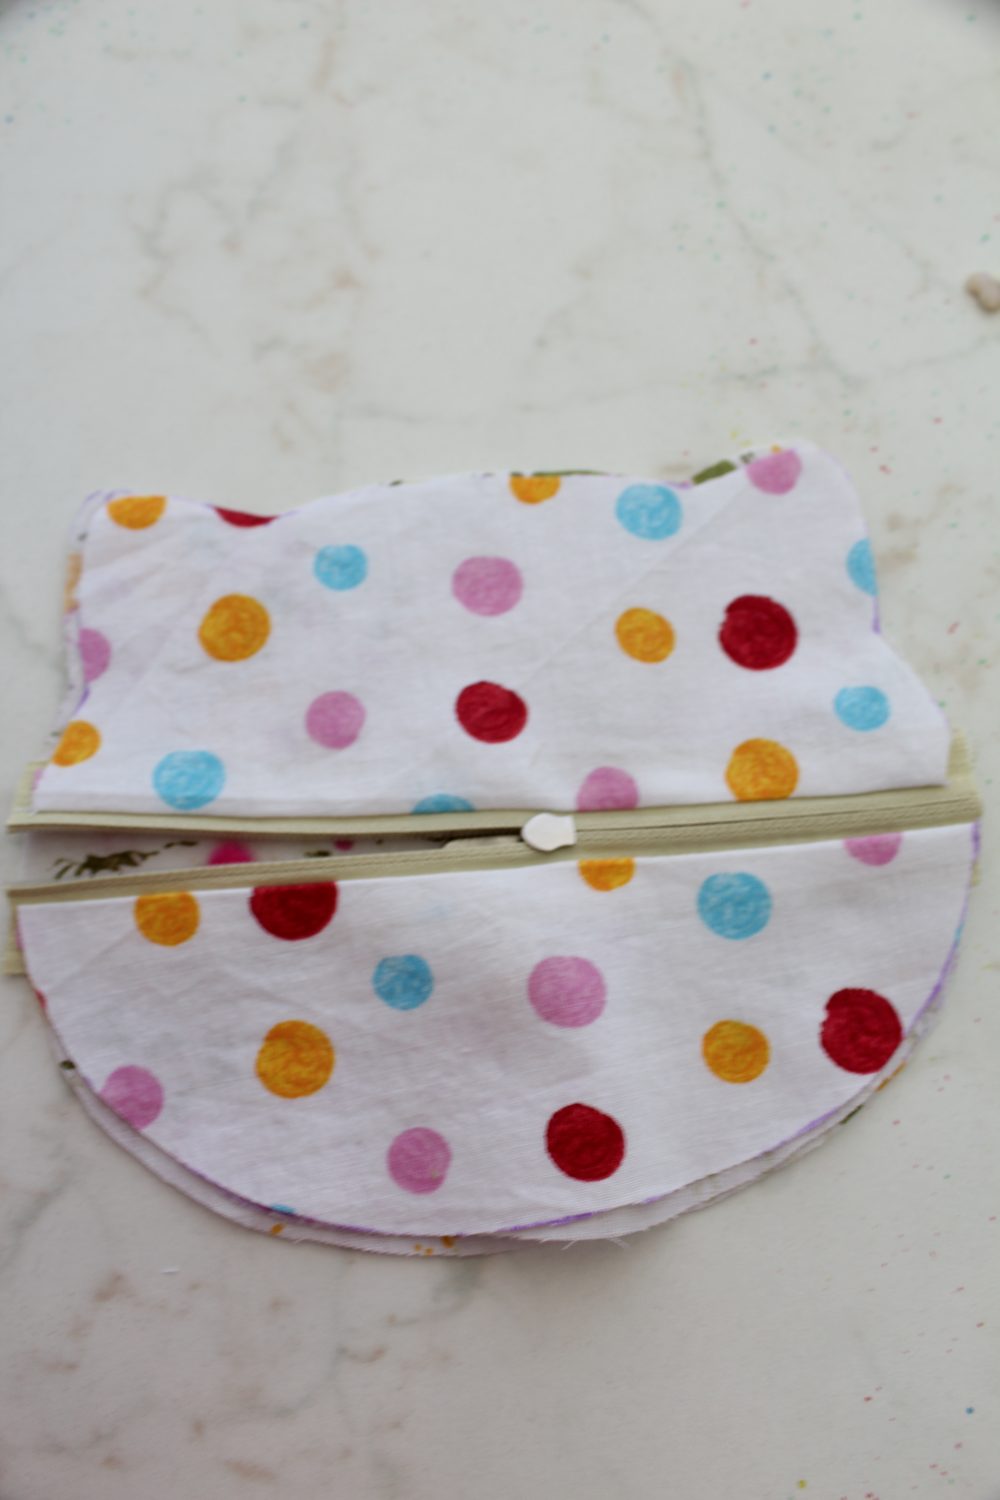
- Take the back outer pieces and place them right sides together. Sew down using a 1/8″ allowance.
- Open up the seam and press.
- Place the back lining piece and the back outer pieces wrong sides together. The seam in the outer piece should match the zipper teeth perfectly.
- Pin along the zipper then sew down with an 1/4″ allowance.
- Using the seam ripper rip out the entire seam.
- Remove basting stitches if needed.
- Open the zipper then trim the ends as needed.
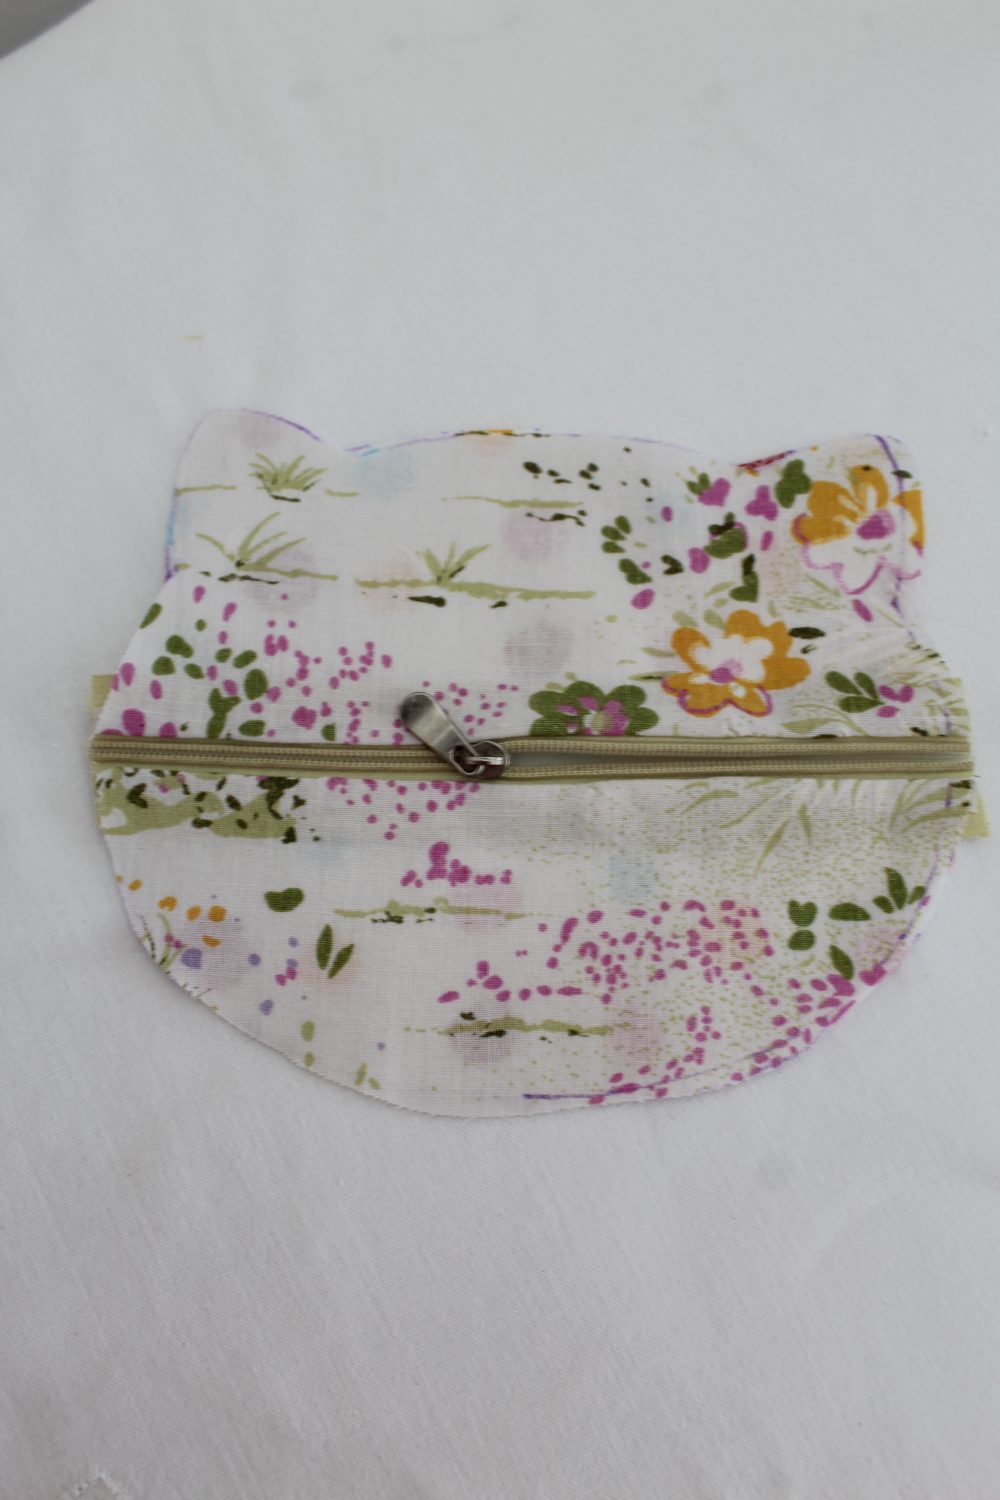
- The entire back piece of the kitty is now ready. All we need to do is attach it to the front pieces. Here’s how it looks on the outer and the lining side
Put all pieces together
- Place the front lining wrong side up and the outer fabric right side up (so they’re wrong sides together).
- Top with the back piece. Outer fabric facing down, lining right side up.
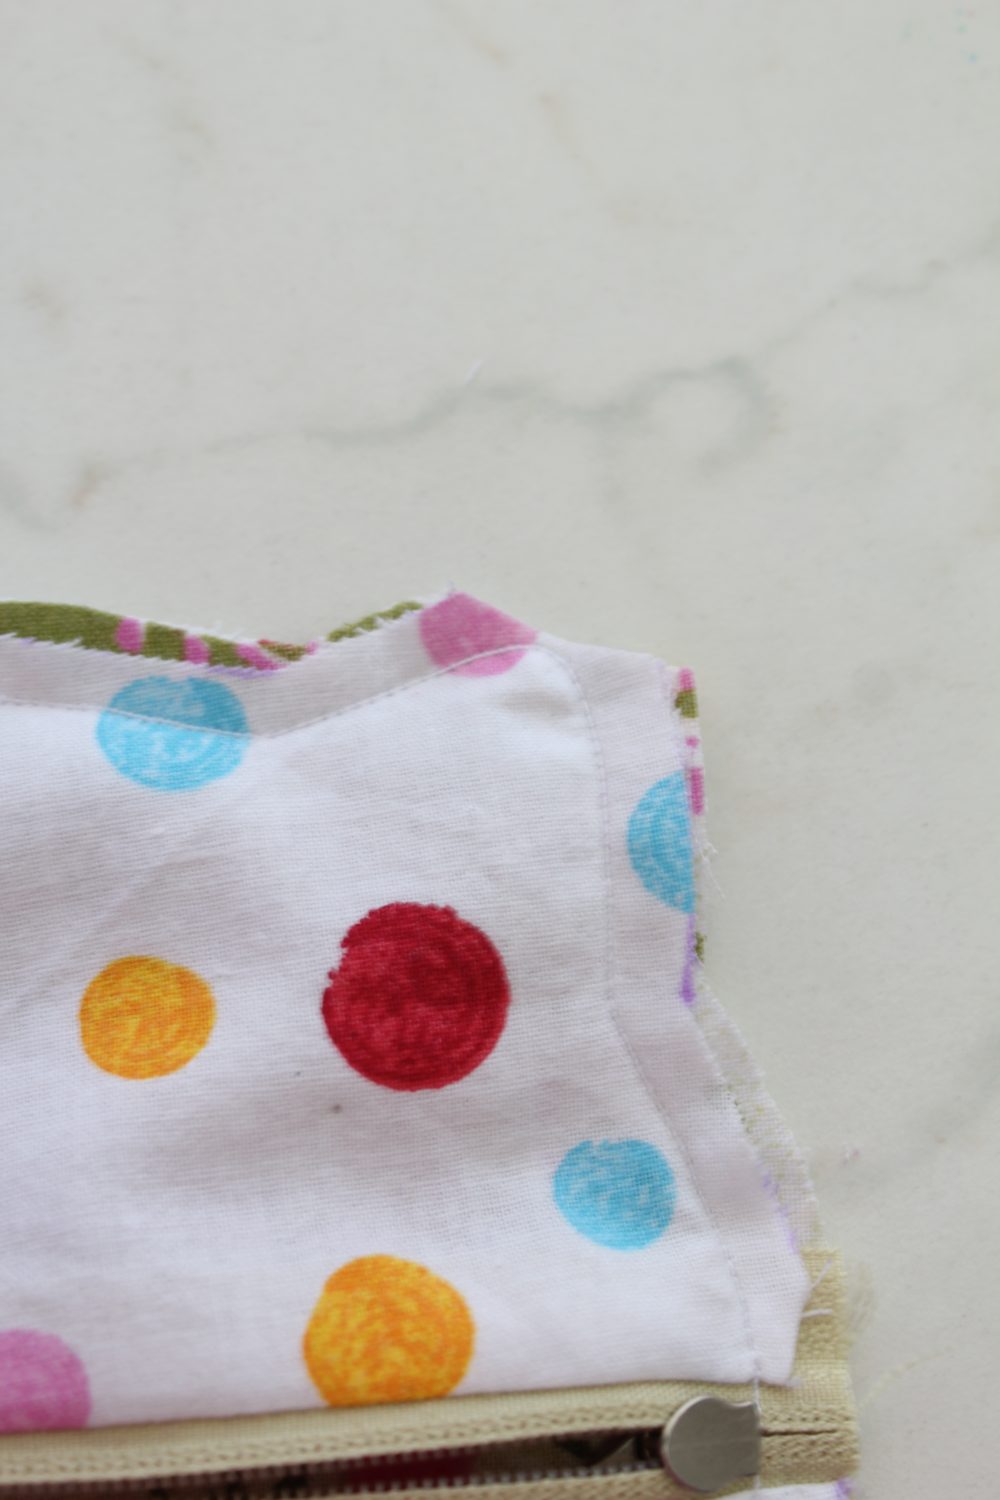
- Pin through all layers then sew around with a 1/4″ allowance. Make sure the zipper is open as much as possible before sewing.
- Clip notches around the curves
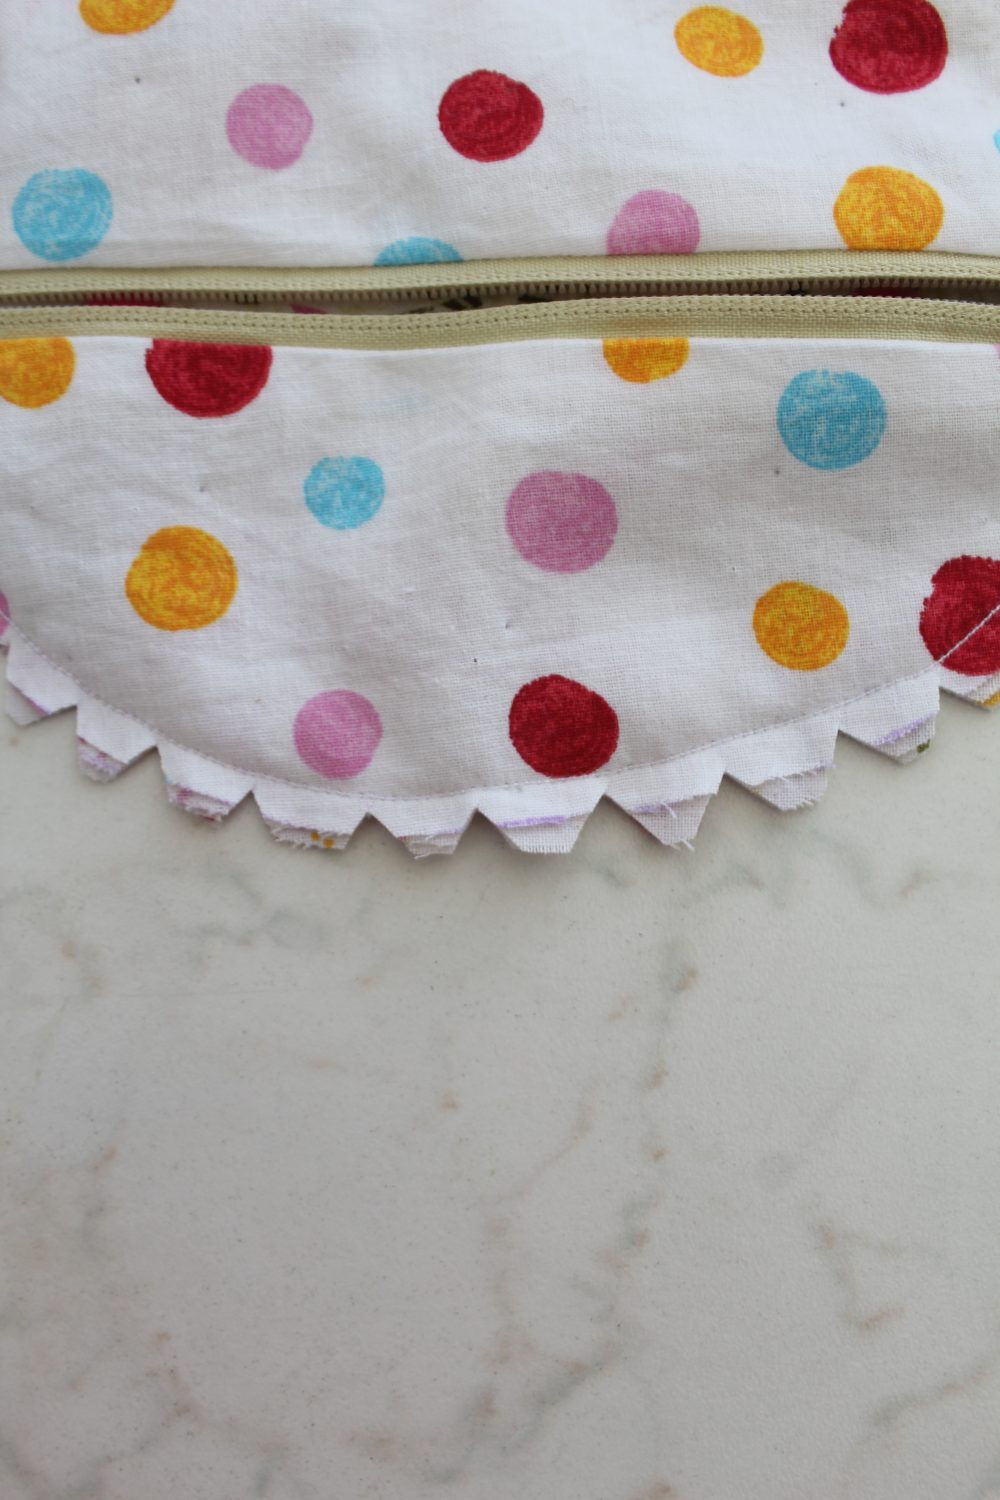
- Blip the base of the ears making sure not to clip through the seam.
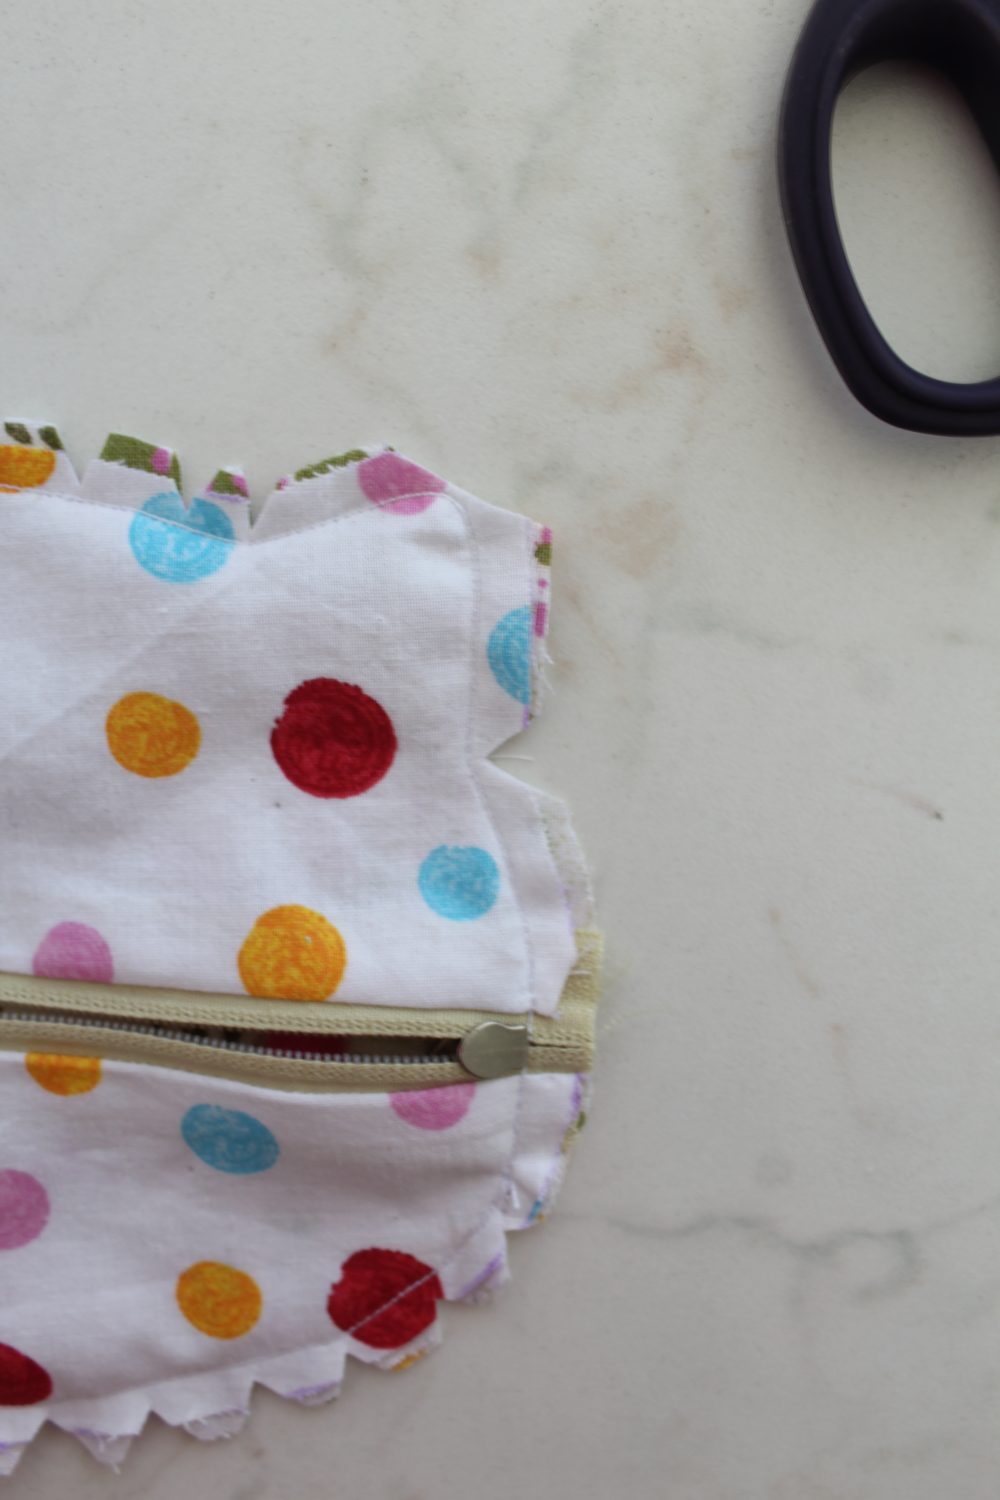
- Trim the seam at the top of the ears. All these are done to remove bulkiness and make your life easier when turning the kitty right side out.
- Now turn the kitty right side out and use a blunt tool to push ears out and smooth out the seams.
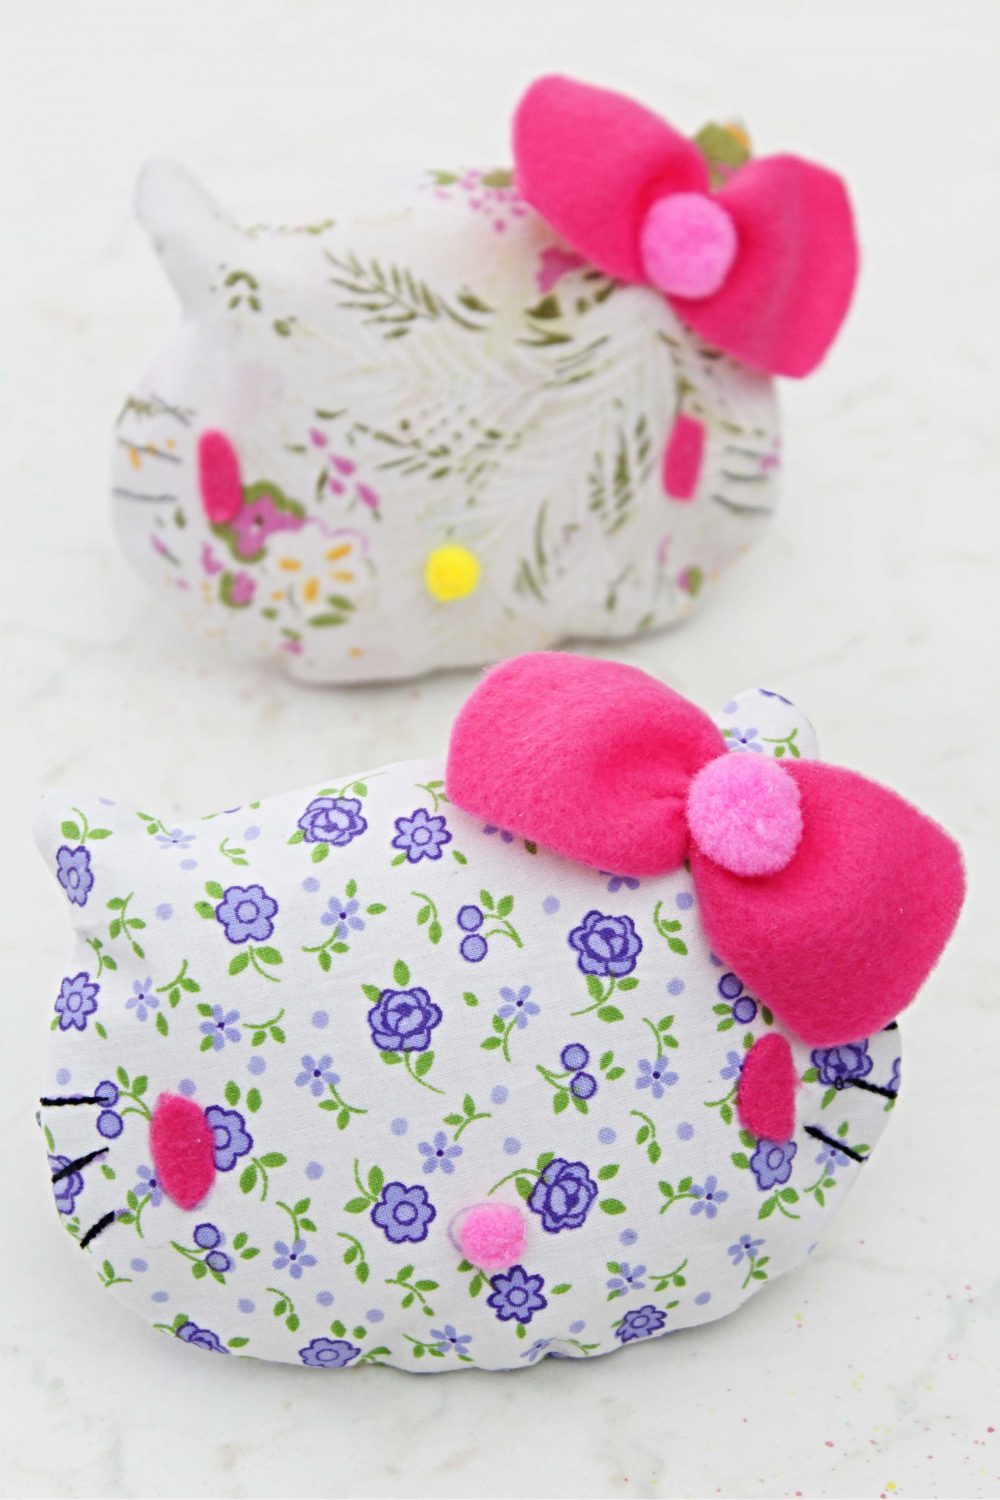
Make the bow
- Place the bow template onto a piece of fleece and cut out.
- Find the middle and ruffle the bow there using a hand needle and thread.

- Hand stitch a small pom pom in the middle of the bow.
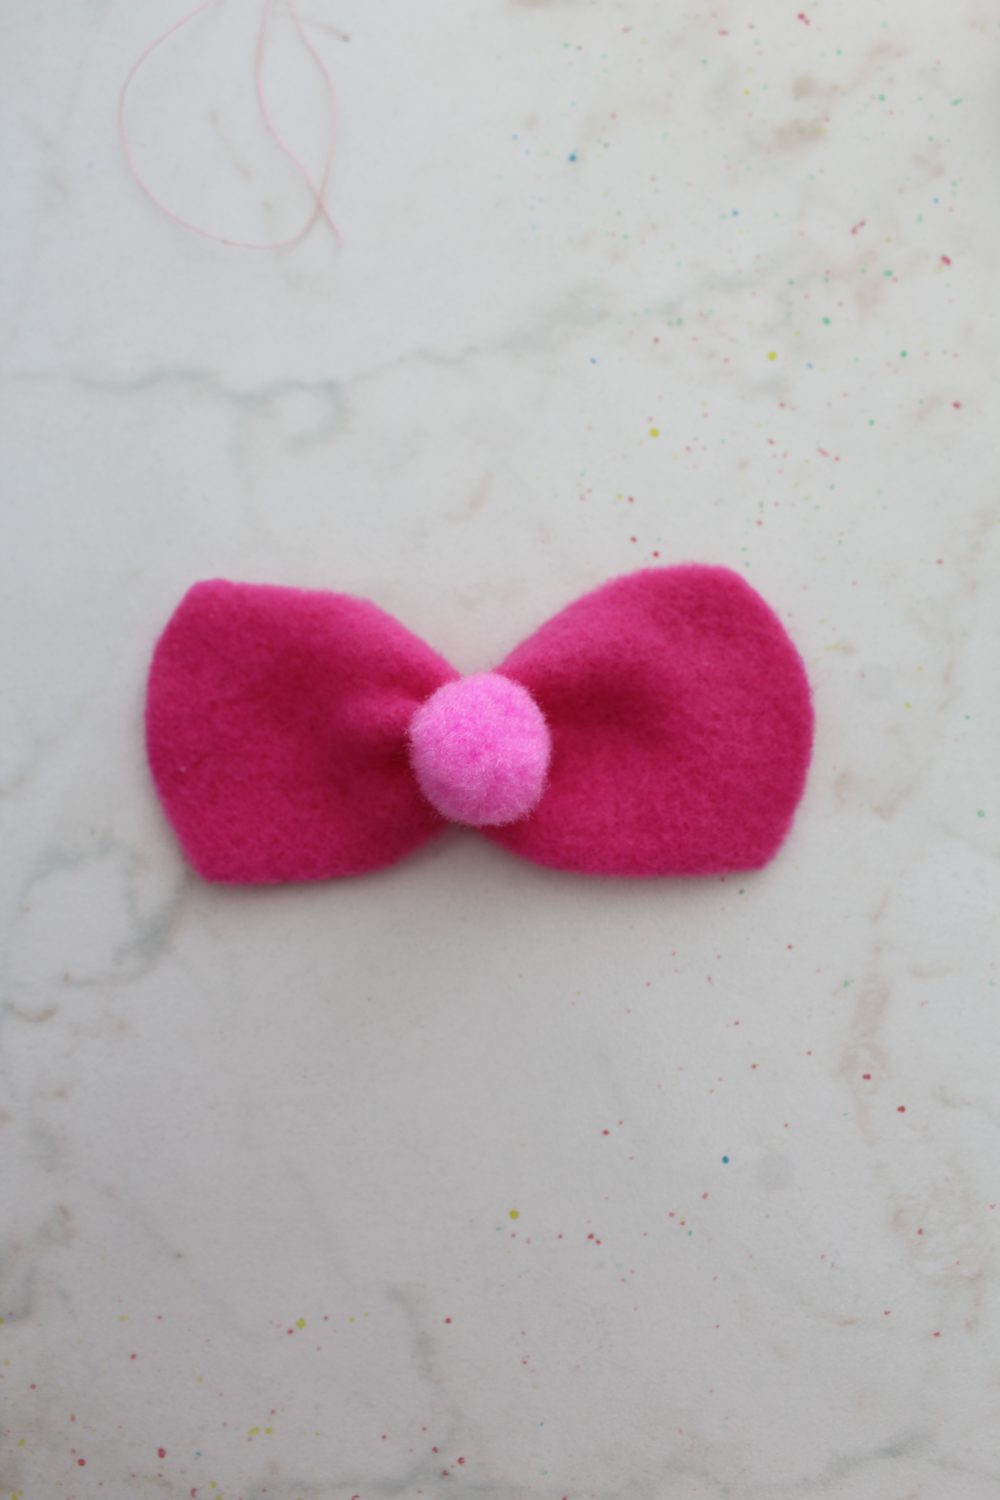
- Then hand stitch the bow to the kitty, making sure to attach it to the outer fabric only.
- And that’s all! Enjoy your kitty cat coin purse or gift it to friends and family! They’ll be in awe!
There you have it! A cat coin purse that is sure to impress your friends and family. This project is not only fun to make, but it’s also useful too. So get sewing today and enjoy your new cat coin purse!
Let me know how your cat coin purse turns out in the comments below! And don’t forget to sing up to my newsletters for more patterns and tutorials sent straight to your inbox!
Happy Sewing!
Pin to save for later
Most popular sewing projects:
- Tips for sewing a round hem
- Corded bag handles
- Flutter sleeve dress pattern
- How to laminate cotton fabric


Article may contain Amazon & affiliate links. As an Amazon Associate I earn from qualifying purchases at no additional cost to you.
ABOUT PETRO
Hi, I’m Petro, author and founder of Easy Peasy Creative Ideas. Sewist, crafter, avid DIY-er, foodie, photographer, homemaker and mommy to one. I’m an expert at coming up with quick, clever sewing tips, recycling crafts and simple, easy recipes! You can find my ideas featured in reputable publications such as Country Living, Good House Keeping, Yahoo News, WikiHow, Shutterfly, Parade, Brit & Co and more. Thanks for stopping by and hope you’ll stay for a while, get to know me better and come back another time. Stick around for real fun projects! Read more…