

Easiest Pillowcase Dress with size chart
Love beginner sewing projects for kids? This ultimate pillowcase dress is the perfect project! Here’s how to make an easy to sew, cute and comfy DIY pillowcase dress!
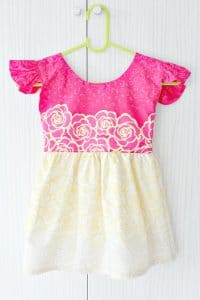
Pillowcase Dress

Beginner sewing projects for kids are awesome, just like this pillowcase dress! These type of dresses are so much fun to make, not to mention cute as a button! I find them also crazy easy to sew too! You simply cut out a basic shape dress and hem it! Add a little detail here and there, like a pretty ribbon as I did here, on this project, and you got yourself a fabulous dress in no time!
Similar posts you might like:
- Easy pillowcase dress for adults
- Paper bag skirt
- Gathered dress for girls
- Flutter sleeve dress pattern
- Awesome beginner sewing projects
- Circle skirt with elastic waist
- Reversible kids apron
- Box pleated skirt with ruffled hem
- Basic pillowcase pattern
- Peasant blouse pattern for girls
- A line dress pattern for girls
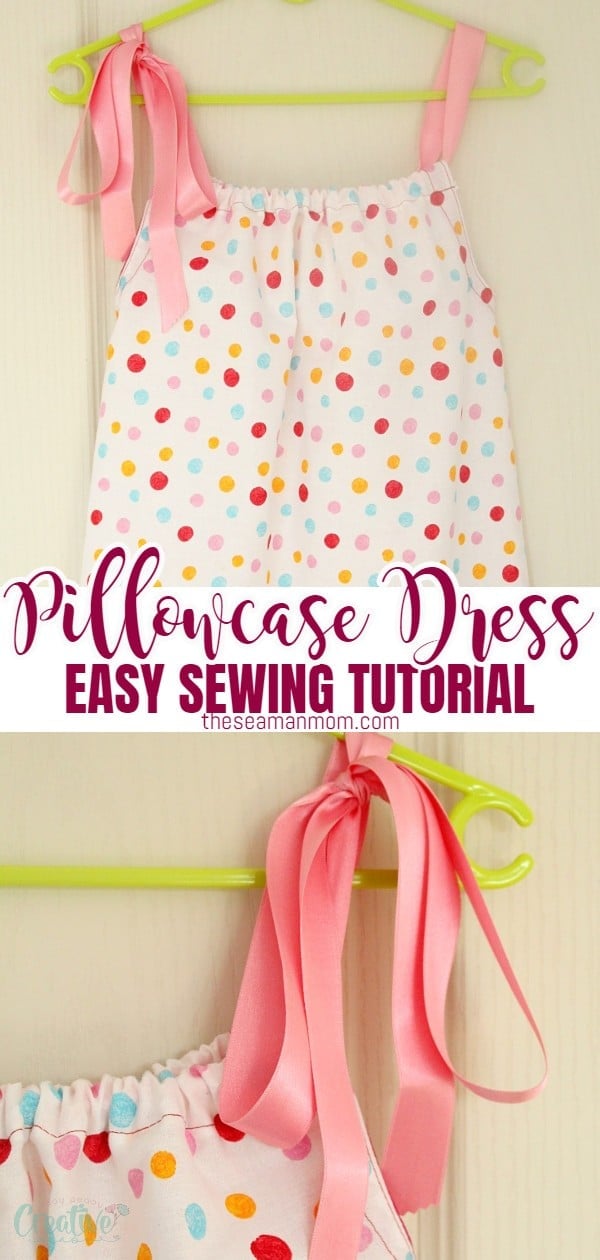
Plus a pillowcase dress is so comfortable to wear, my little one loves wearing these at school. She is very active and a dress like this gives her freedom to move. And she is such a girly girl, she loves anything pink, dots and bows so I think my fabric choice and the ribbon are perfect for this pillowcase dress tutorial.

How to make a pillowcase dress for a little girl?
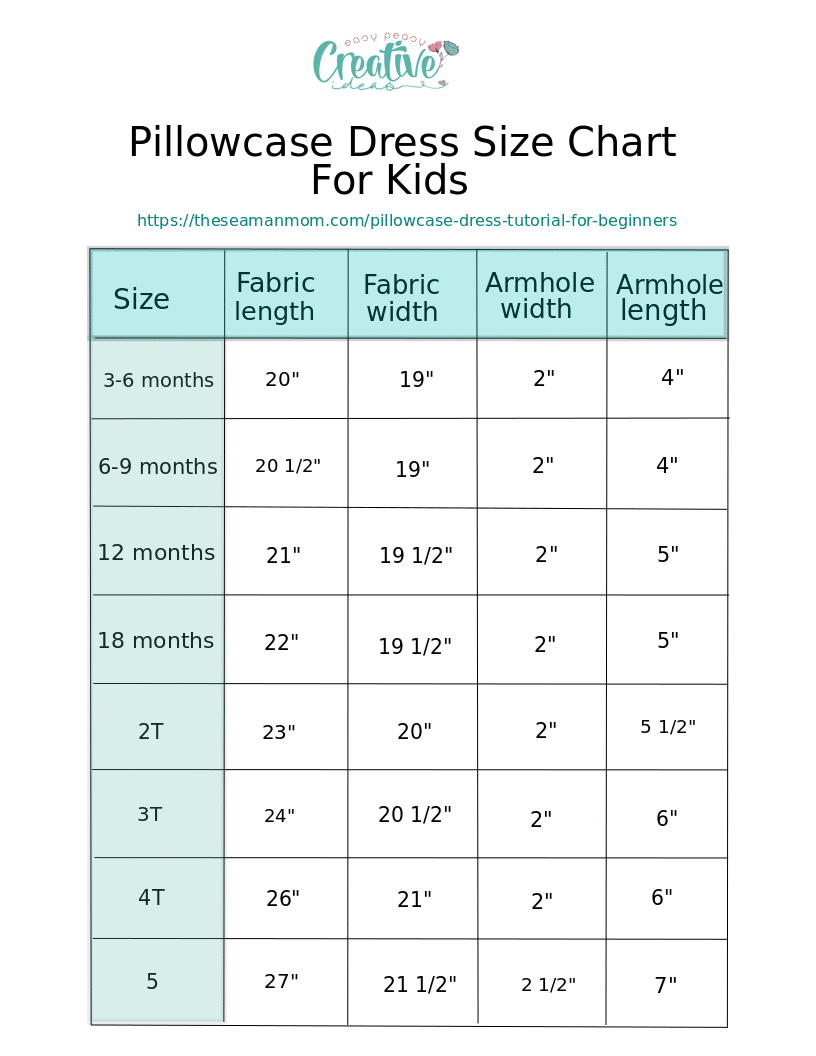
This pillowcase dress and the tutorial is for a size 4, as my daughter’s, but you can easily adjust it to larger or smaller sizes. Add or subtract a couple of inches to the length and width of the fabric (an inch might be enough in most cases), for each size up or down. For the armhole, add or subtract 1″ from the top and 1″ from the side when cutting down, for each size up or down.
How to make a pillowcase dress from fabric?
For this dress pattern you have the option to use a large pillowcase for a quicker and easier project. But you can also create the dress from scratch, using regular fabric, as I did if you’re feeling adventurous, don’t have a spare pillowcase or simply want to sew the dress in the fabric you love!
If you use a pillowcase, keep the already sewn sides of the pillowcase as the sides of your dress and the open end of the pillowcase as the hem of the dress. Cut the top of the pillowcase and use it to construct the top of the dress as indicated in the below tutorial.
If you are using regular fabric, follow all the steps in the below tutorial.
That’s the beauty of beginner sewing projects for kids, they’re so easy to adjust ans customize! Click the link below to see how to make a pillowcase dress yourself.
Pillowcase dress pattern

Materials needed:
- 100% cotton fabric (plenty of gorgeous options here, here and here). You’ll need 2 panels of 21″ x 26″ for front and back to make a size 4 dress.
- size chart – download from here
- scissors
- fabric marker
- pinking sheers (optional; I used them to cut the ribbon)
- ribbon for the bow and to add as detail to the hem
- matching or contrast thread
- sewing machine
- pins
- single fold bias binding (make your own with this tutorial)
Pillowcase Dress Instructions:
- Start by pre-washing and ironing your fabric.
- Lay your fabric on the table, both panels (front panel and back panel), wrong sides together.
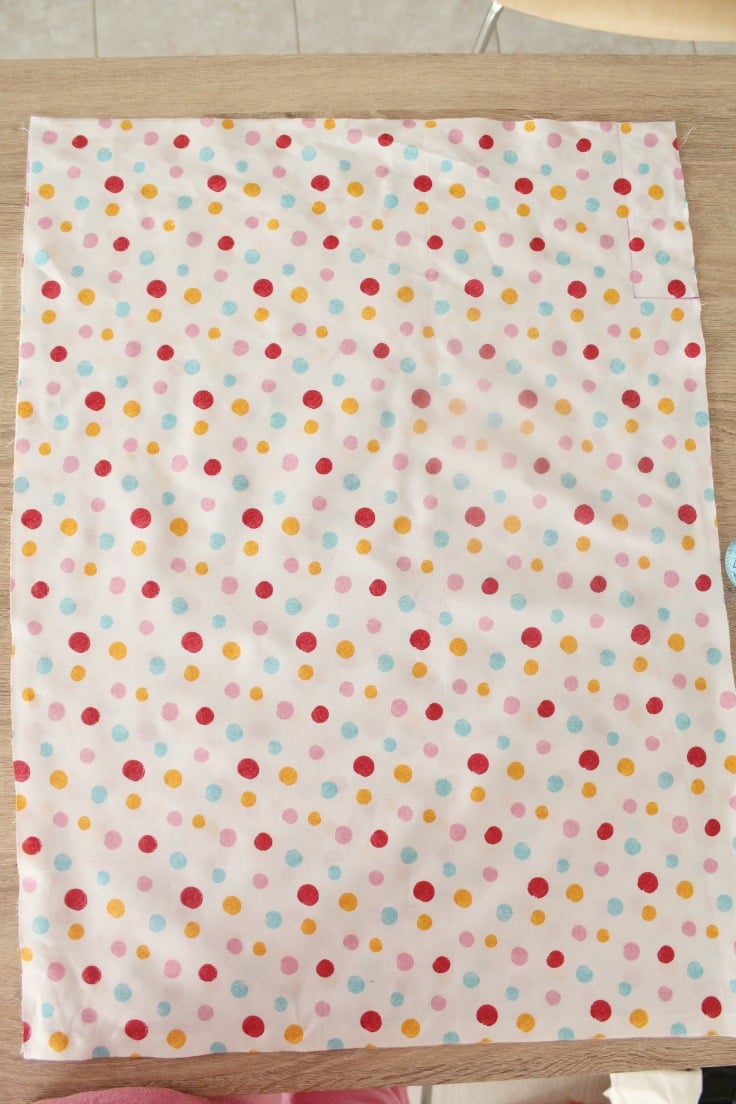
- Fold both in half, lengthwise.
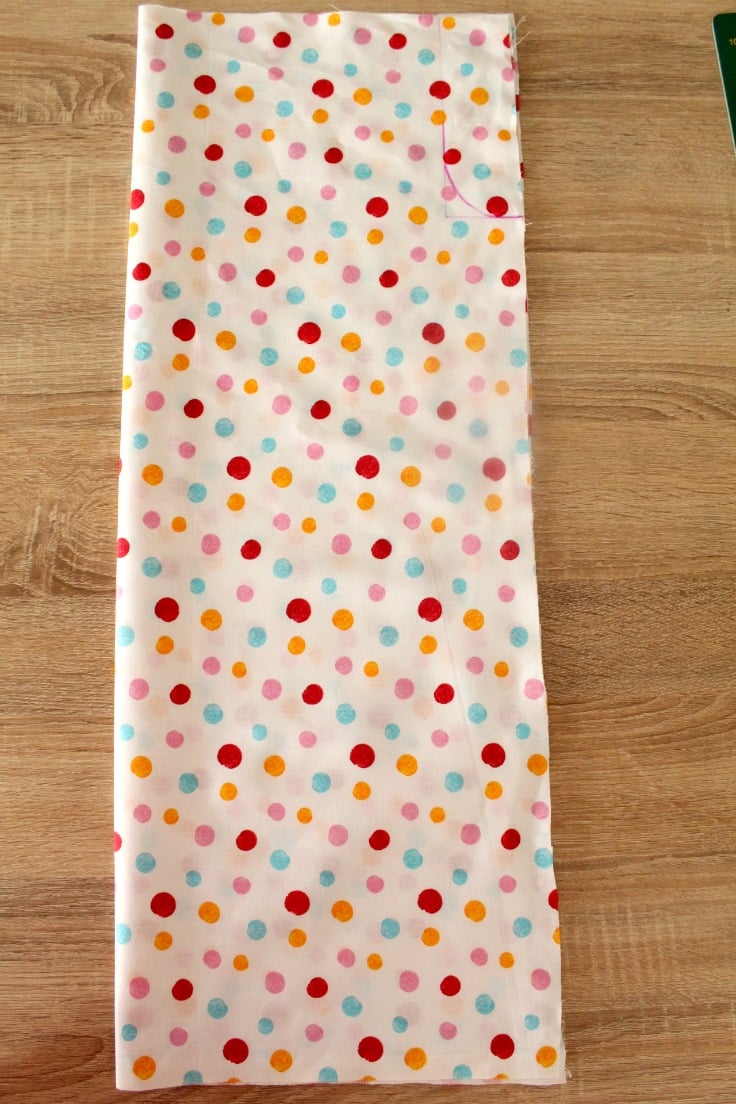
Pillowcase dress armhole template
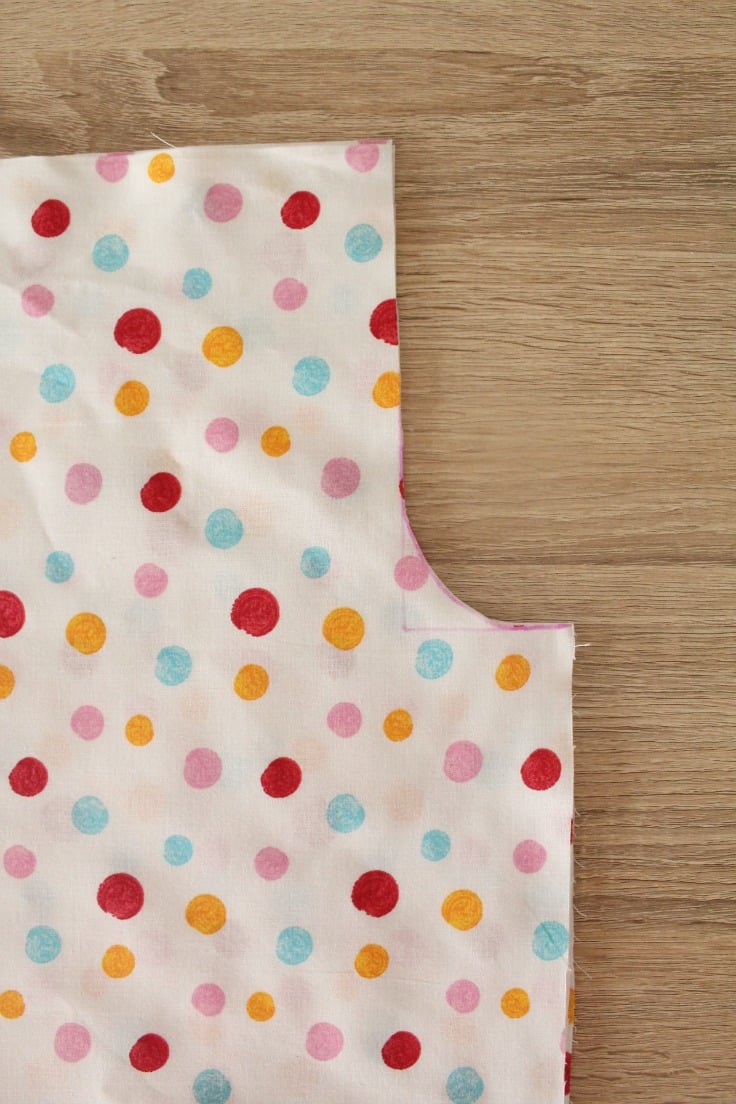
- Cut out the arm holes. By folding the fabric first you can cut perfectly symmetrical arm holes.
- Cut down 6″ from the top of the fabric and 2″ from the sides. Mark using a fabric marker. Round the corner as shown in photo below.

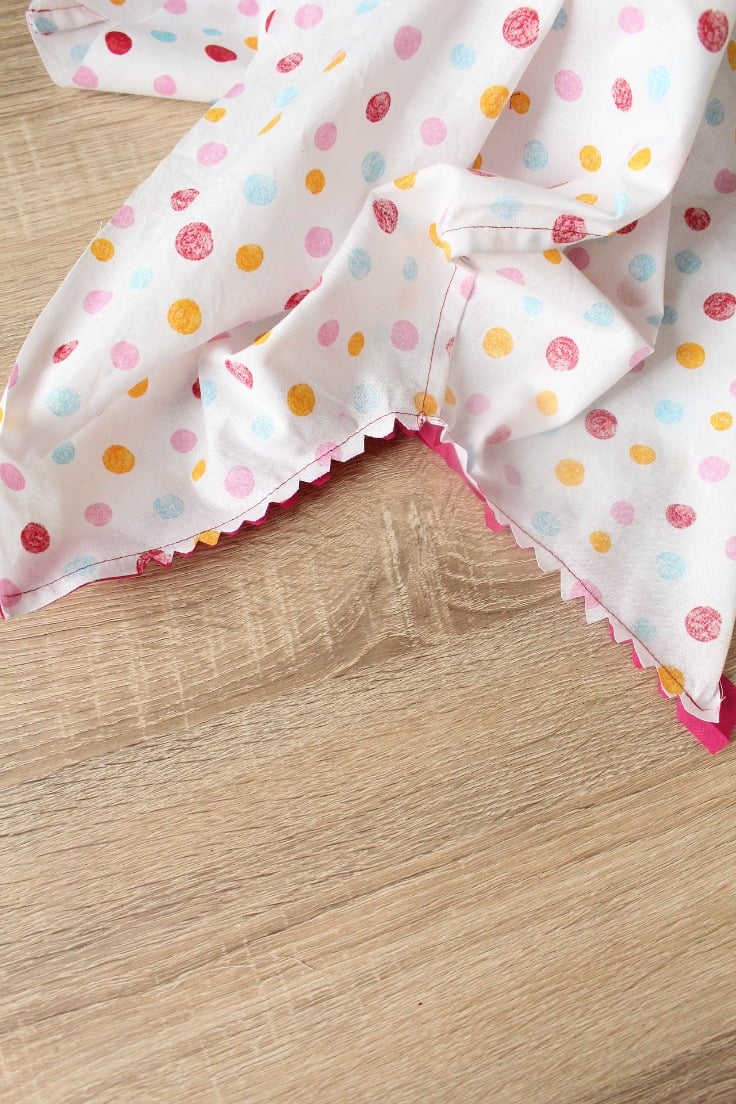
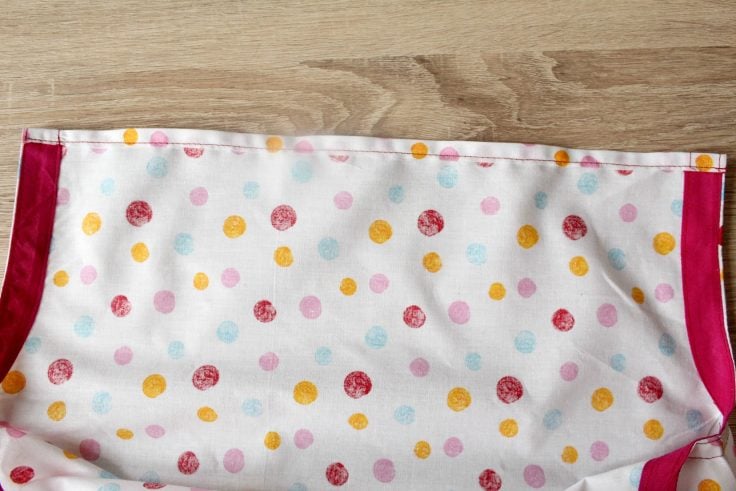
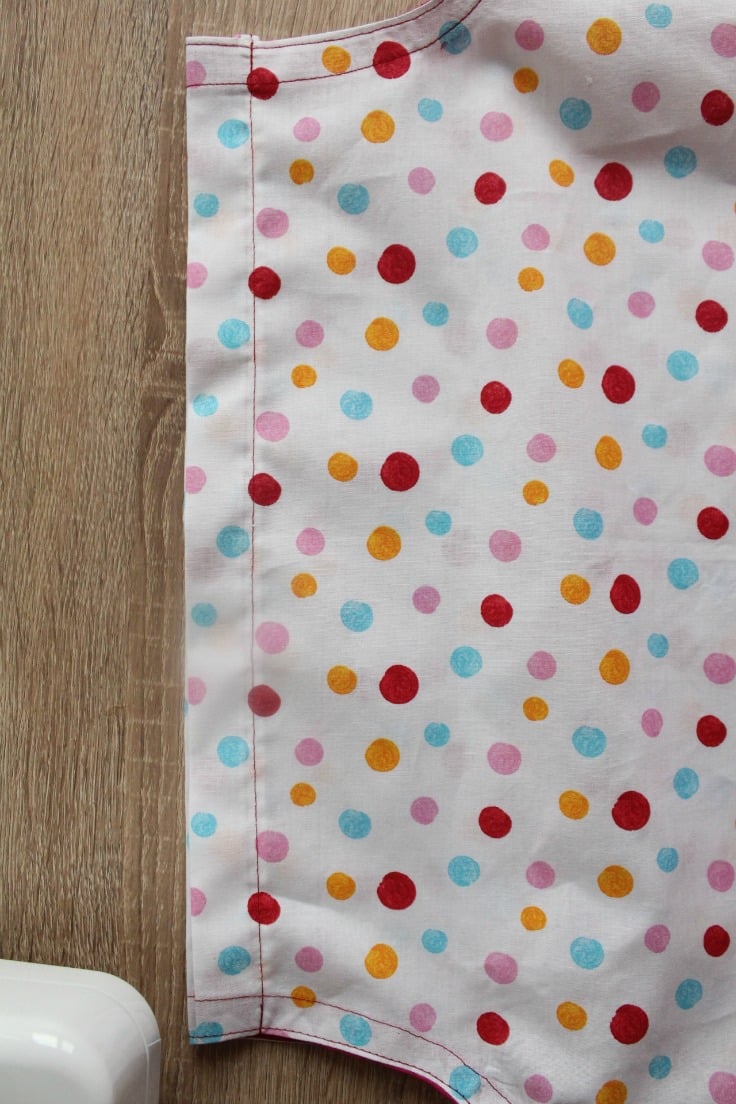
- I used French seams to join the front and the back panels at the sides as I din’t own a serger back then when I made this dress (I do have this one now and it makes my life countless times easier!). If you don’t like French seams and don’t have a serger but have pinking sheers, use those. I wasn’t particularly fond of French seams back then, in spite of the clean finish, but I thought I should give it a try for this project. For an ultimate beginner though it’s so much easier to just use pinking sheers or double fold the seam in.
Finish the armholes:
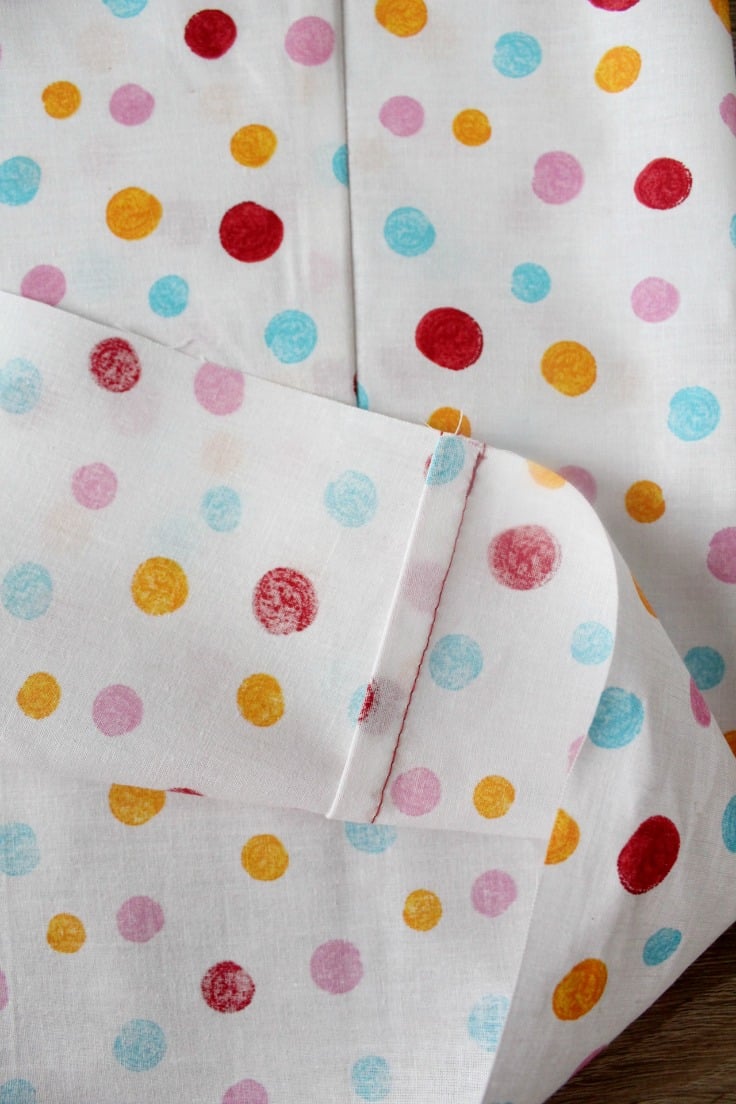
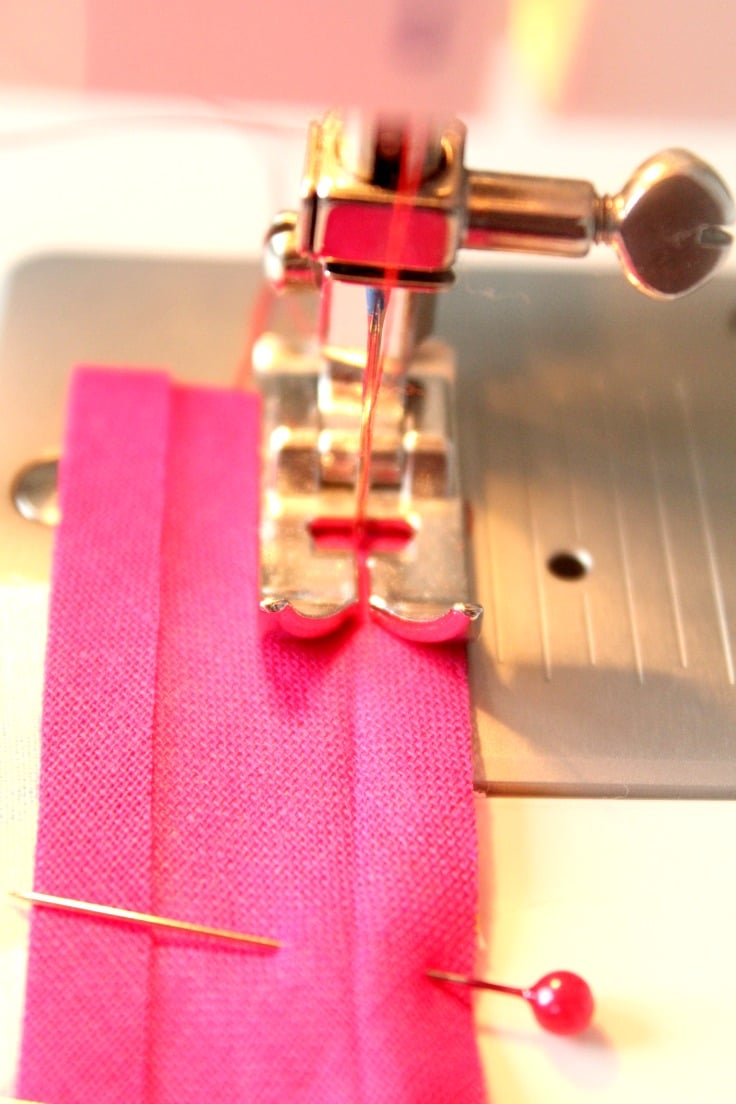
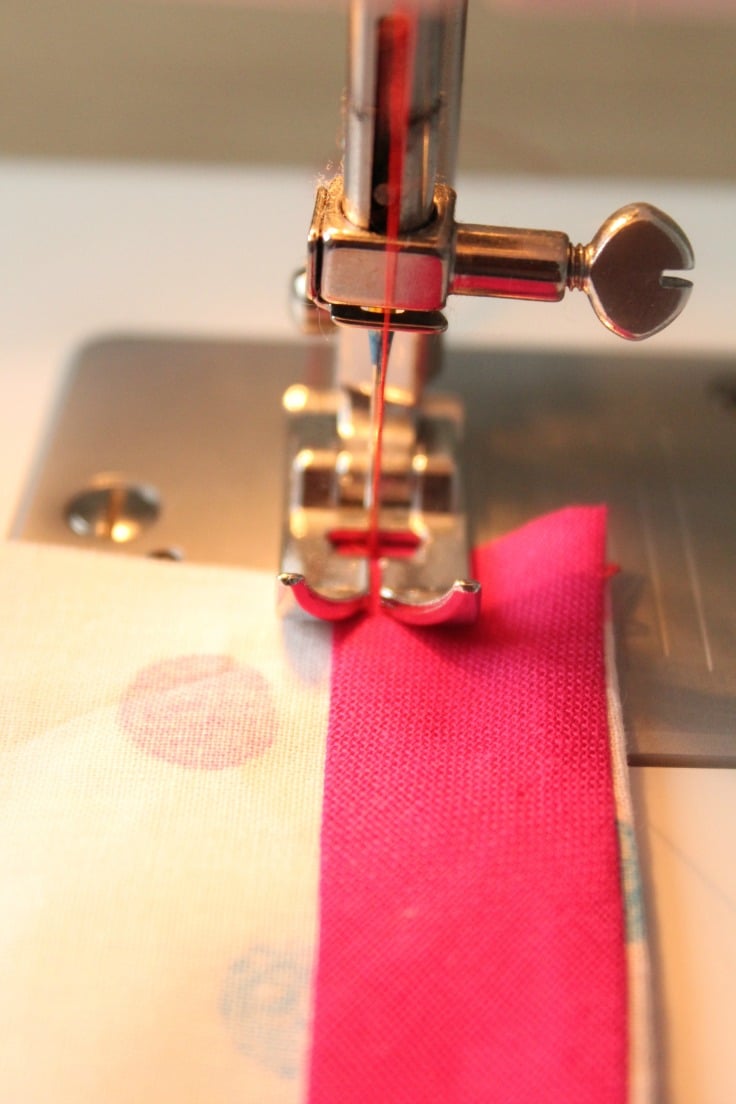
- Next is time to sew the single fold bias binding to finish the arm holes. Line up the edge of the seam binding with the edge of the fabric, right sides together. Pin carefully, especially around the curve, to avoid puckering and pleating in the fabric.

- I did find this a pretty challenging experience for a beginner so be patient if this is your first time sewing bias strips at arm holes. Stitch straight down the fold line of the seam binding. Backstitch at the beginning and the end.
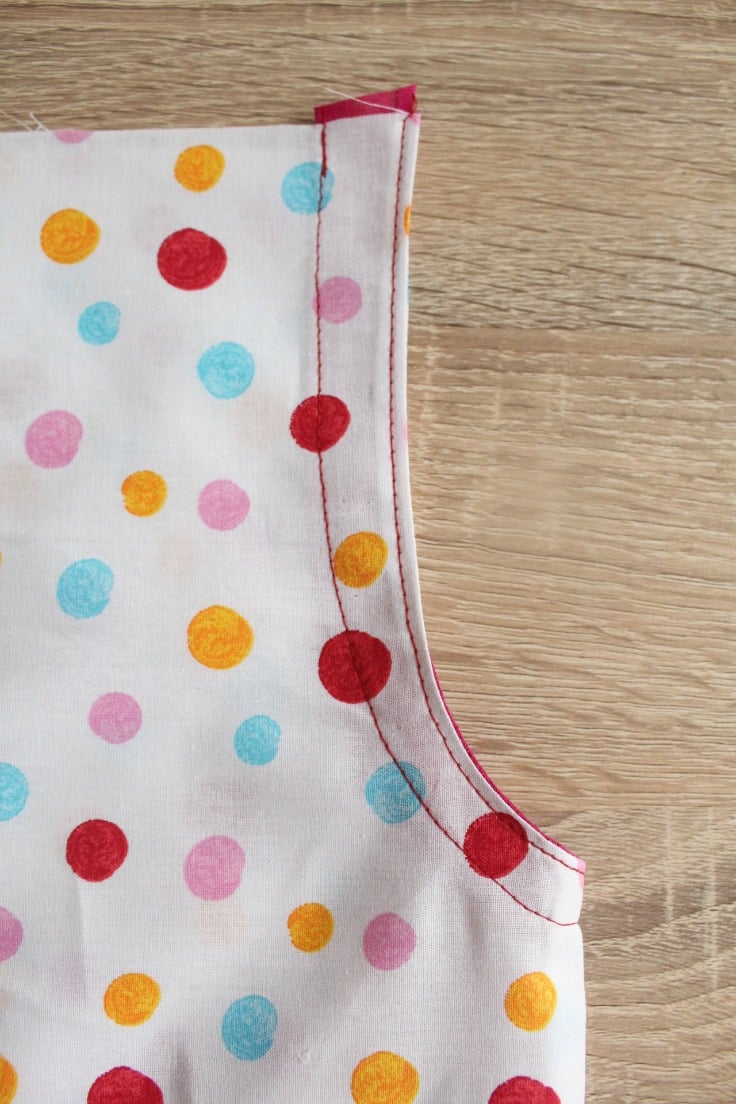
- Clip the seam and fold bias binding to the wrong side of the dress (inside). Clipping will help you sew around the armhole easier as the fabric won’t be pleating that much.
- Press and pin it in place again. There should be no raw edges visible as they will all be encased within the binding.
- Starting somewhere inconspicuous such as the underarm seam, edgestitch the binding to the inside of the dress all the way around the armhole. Backstitch at the beginning and the end. I used contrast thread for the purpose of this tutorial but I think matching thread looks much better on the outside of the dress.
- I added an extra decorative edgestitch around the armhole but you can skip this step if you wish.
Finish the dress
- Next is the casing at the neck for the ties. Fold under 1/4″ twice, from the top of the front and the back panels of the dress and make a small hem.
- Then fold the tops down 1 1/2″ and stitch in place to form the casing in both the front and the back panel.
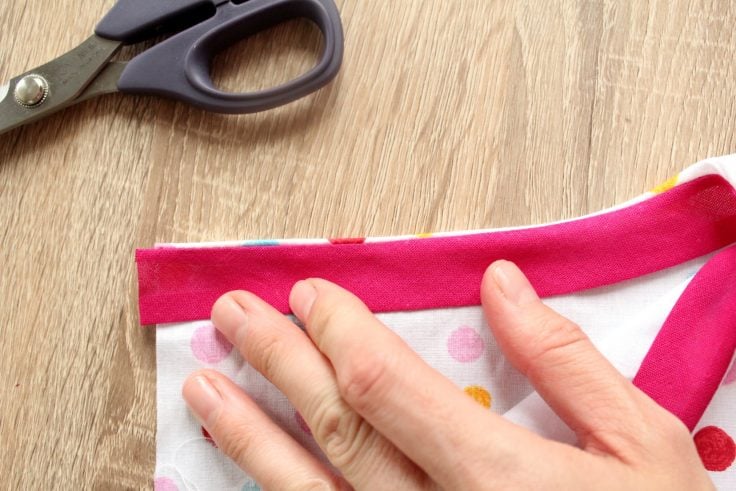
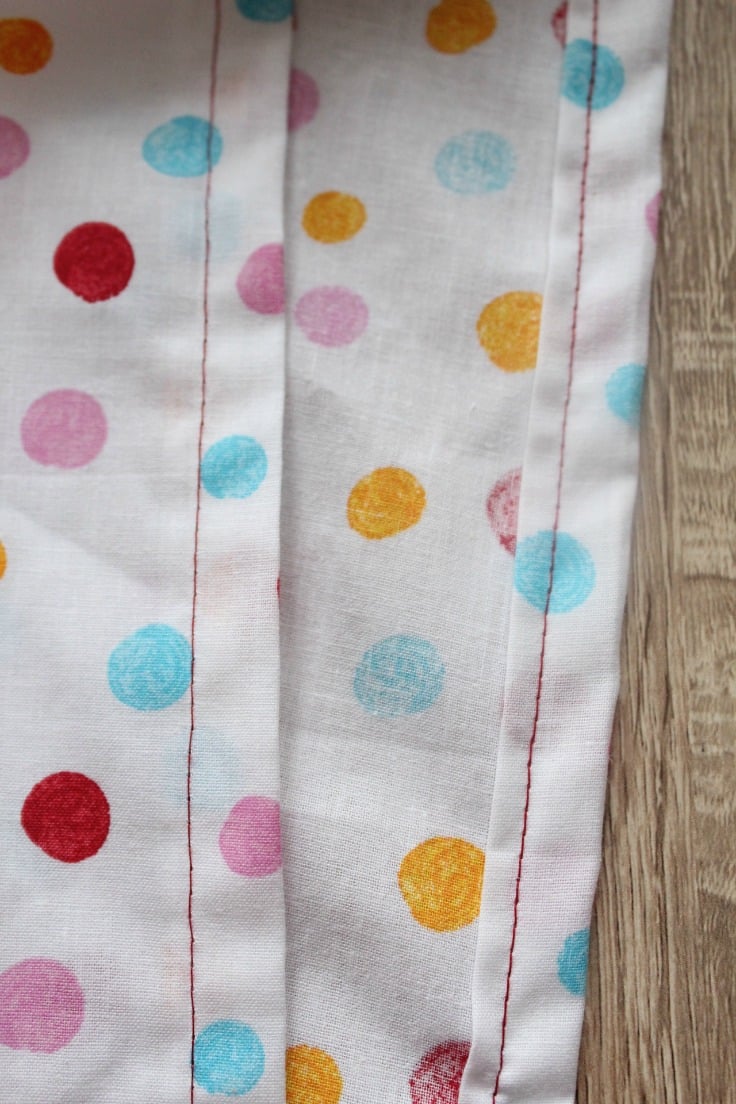
- Hem the bottom of the dress. Fold under the fabric 1/4″ twice and top stitch. I folded under once, ironed the fold then I folded and ironed again before stitching.
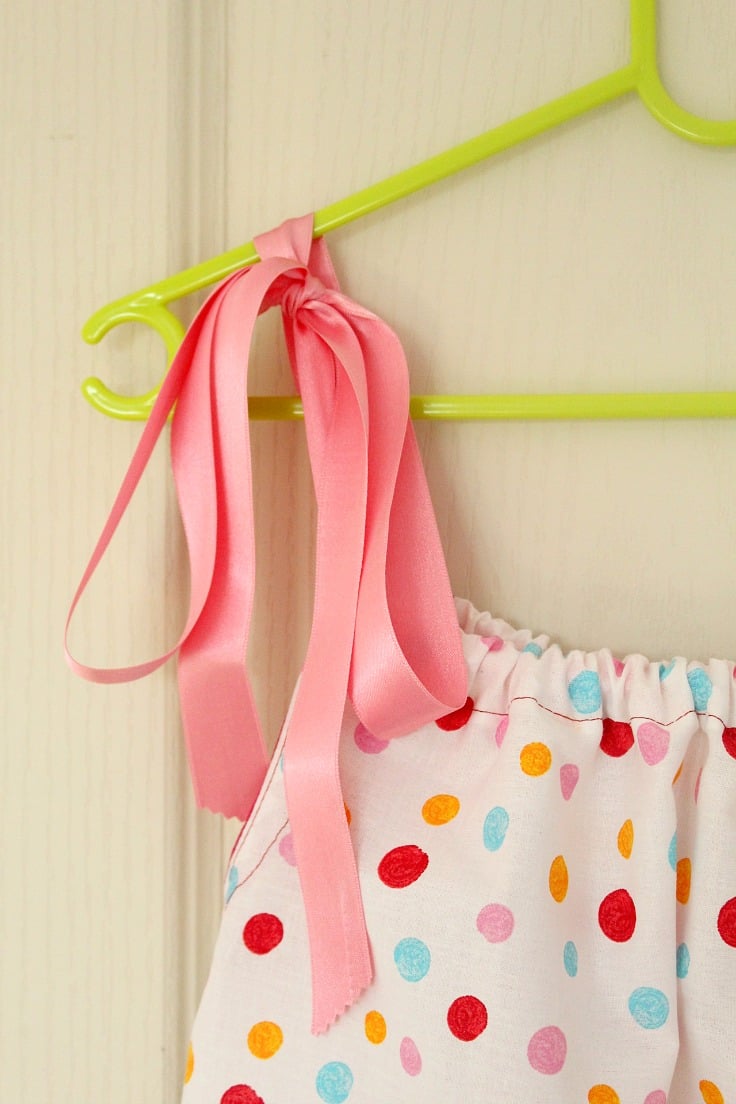
- Stitch a decorative ribbon over the hem or leave it as is. I found the dress too plain and looking too “handmade” without the ribbon so I opted to add ribbon over the hem. I also used ribbon as tie too instead of the fabric tie I made initially because…too handmade!

Note: If you sew with satin ribbon, make sure your pins are thin and sharp as satin damages pretty easily. Use a short stitch length and hold the fabric taut as you feed it through the machine to prevent seam puckering. Also when ironing, do it on the wrong side of the dress as ironing directly on satin can make it glaze.
- Thread the ribbon through the casing using a safety pin. I cut along a diagonal line at the ends with my pinking sheers. I made a fabric tie first, as mentioned. but I didn’t like the look so I replaced it with the ribbon.
To make a tie instead
- If you’d rater make the tie, cut a strip in the desired width by 4″. Hem the edges of the tie by folding under twice, as narrowly as possible. Then finish the ends similarly.
- And your beautiful pillowcase dress is done! Enjoy!
Now that you realized how easy beginner sewing projects for kids are, what will you be making next? Of course after finishing your own pillowcase dress!
Most Popular Sewing Articles:
- How to hem a curve
- Laminating cotton fabric at home
- DIY corded bag handles
- Flutter sleeve dress pattern

Article may contain Amazon & affiliate links. As an Amazon Associate I earn from qualifying purchases at no additional cost to you.

Great tutorial. What was the finished length on the 4t. I struggle with knowing how dresses fit because my granddaughters do not live here. I’ve made a couple and they are so cute. I just want to know if I have a finished length correct for a 2 and 4.
Thank you
Janie
j’aimerais avoir le patron de cette robe merci
Hello Petro! Me and my daughter accidentally saw this and she absolutely love the dress you make. Now we’re on our way to do this and I really thank you for the pattern and the size chart!
hello I saw on line regarding pillowcase dresses for an org. is that correct.?
I have looked at SO many tutorials for making a pillowcase dress. Yours is the best! I needed clarification for the armhole finishing, and your pictures are wonderful! THANK YOU!!
Thanks for your lovely comment, Debra! I’m happy you found my tuturial easy & informative!
excellent tutorial thank you!!!the measures given are with seam margins?
Hi Eirini! Thanks for your lovely comment! The measurements include a 1/2″ allowance.
Hi! Petro, I would like to make this dress for my 2 year old Granddaughter and her baby doll. I was wondering how wide the satin ribbon was that you have here? I love poka dots too, but I have a multi coloured chevron that I have for both my Granddaughter and her baby doll.
Thanks, Joan
Hi Joan. I believe the ribbon is about 1″ wide.
hi, what is the approximate length of the ribbon?
Hi Natasha. About 13 feet for the straps & the trim.
Yours is the most thorough tutorial I’ve seen on Pinterest yet. Thank you so much
Hi Joyce! Thank you so much! You made my day :)
Pls how the do you determine the width of the fabric..? Want to make it for my daughter who is 2… Wonderful tutorial.
Hi Sarah. Thanks for your interest in my tutorial. There are instructions in the tutorial, right above the materials, for making the pattern smaller or larger: “This pillowcase dress tutorial is for a size 4, as my daughter’s, but you can easily adjust it to larger or smaller sizes. Add or subtract a couple of inches to the length and width of the fabric, for each size up or down. For the armhole, add or subtract 1″ from the top and 1″ from the side when cutting down, for each size up or down.” Hope this helps.
Great tutorial, thank you for sharing .
Very pretty. Can’t go past polka dots.
Thank you Pam. Polka dots are my daughter’s favorites!