

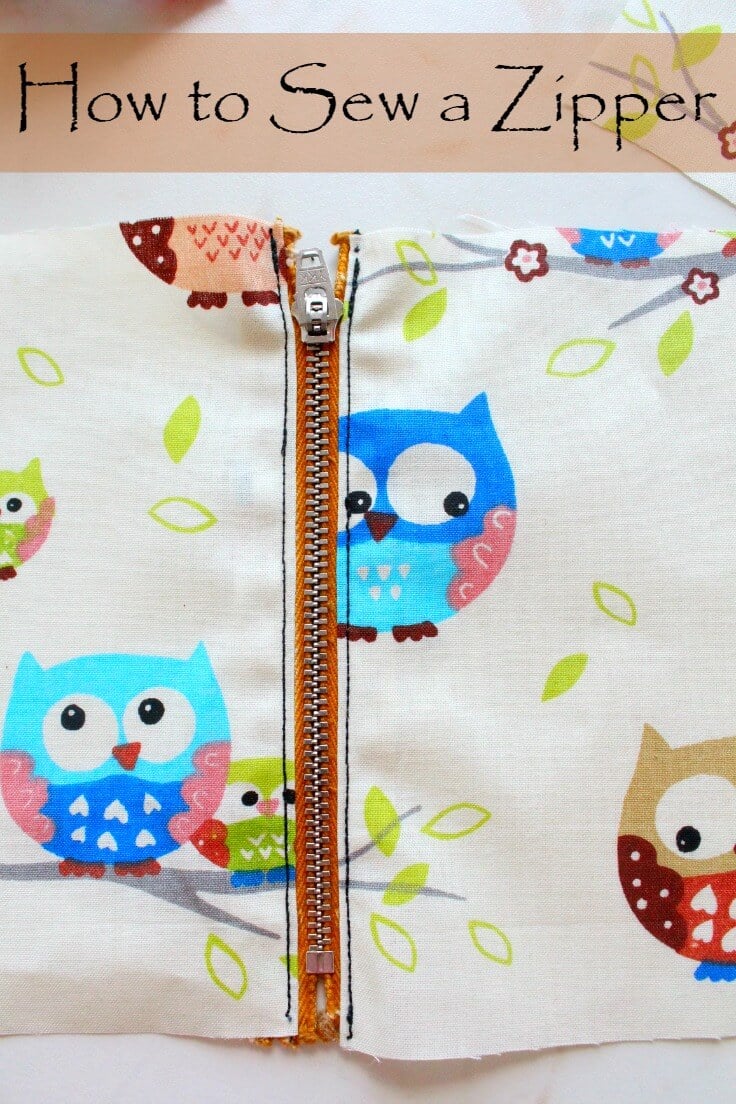
Simple easy way to sew a zipper
Learning how to sew a zipper is an essential skill for any sewing fan! It not only lets you create beautifully finished garments but also opens up endless possibilities for customizing clothes and accessories. This easy tutorial guides you through the step-by-step process to nail professional-level zipper sewing on any project, every time. Whether you’re working on a dress, pants, or a bag, mastering this technique will boost your sewing projects and give you the confidence to tackle more complex designs.
If you’ve been avoiding zippers, it’s time to put all your worries behind because today I’ll show you how to sew a zipper in just a few easy and quick steps! Installing a zipper has never been easier with this easy and simple tutorial!
In this article, I’ve crafted a step-by-step guide on sewing a zipper for a simple pouch. But the instructions can be easily adapted for various projects, such as bags, clutches, tote bags, pillowcases, dresses, and skirts.
I really like using zippers on my sewing projects, especially dresses and skirts. But for this type of garment you’ll need a concealed zipper method which is also super easy or an invisible zipper which is also quite easy once you get the hang of it.
How to sew a zipper
Materials:
- zipper
- matching thread (for the purpose of this tutorial I used contrasting)
- scissors
- sewing machine
- 2 fabric strips
- zipper foot
- pins
- iron and ironing board
Instructions:
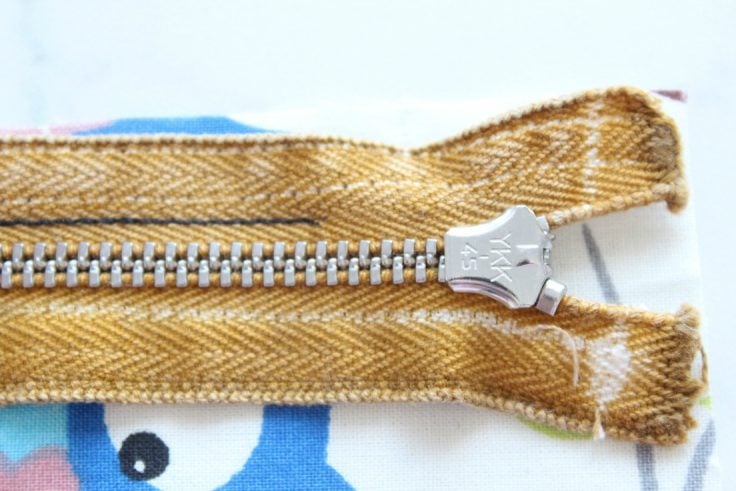
- First of all you really need a zipper foot, there’s no way you can go around it (believe me I tried lol). A zipper foot will allow the needle to go as close to the zipper as you need it, something a regular foot won’t be able to.
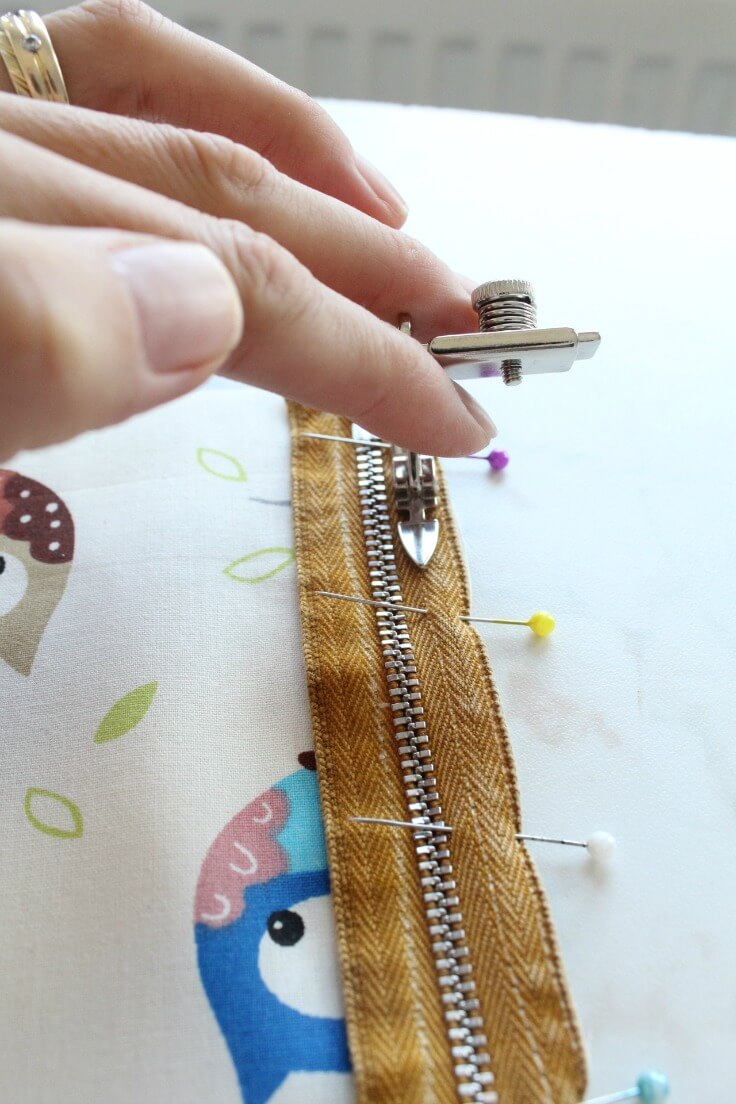
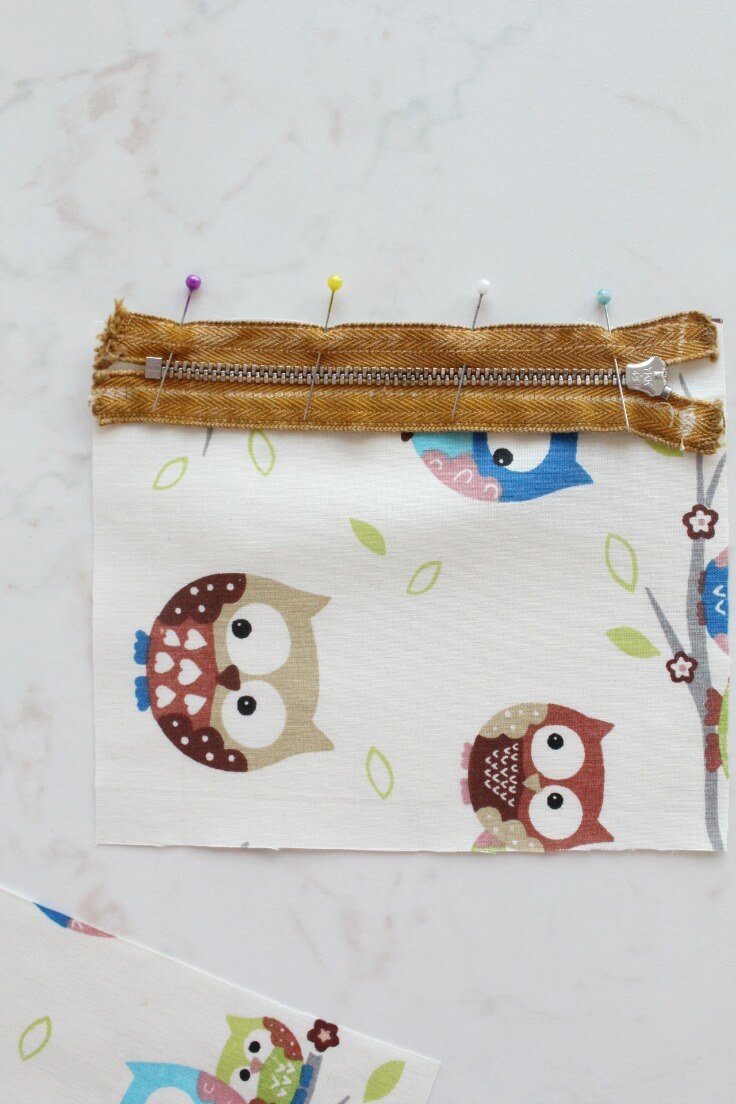
- Match up one side of the zipper with one strip of fabric, right sides facing and pin together.
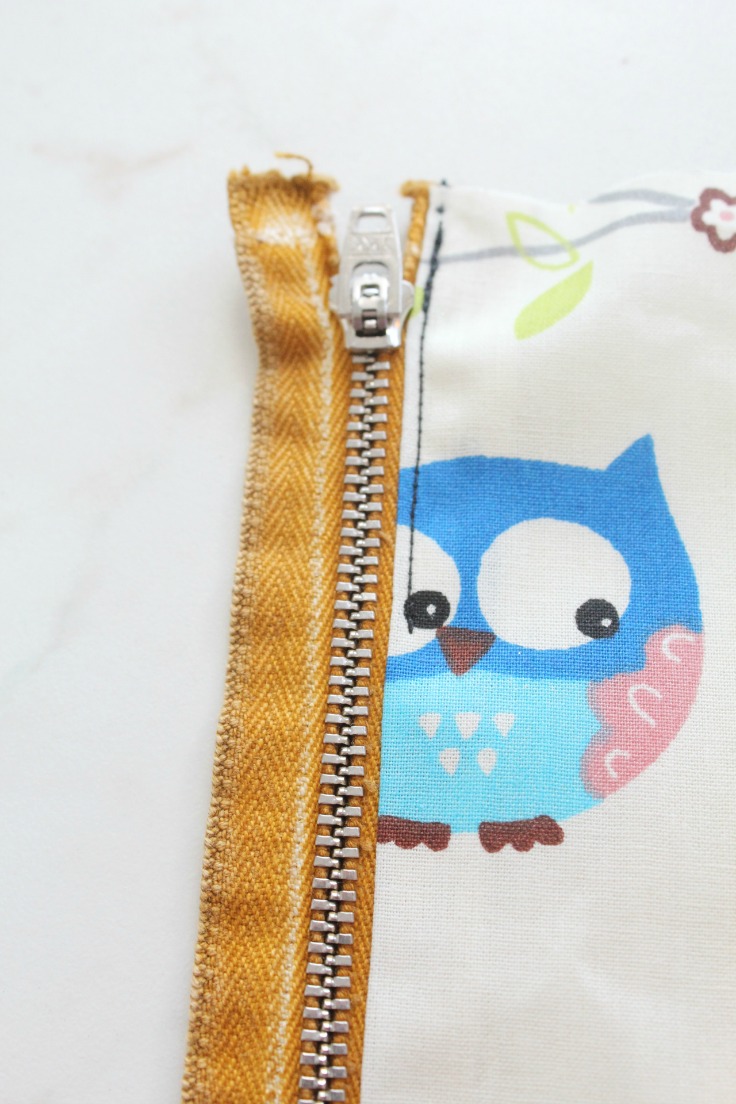
- Start sewing from the bottom up.

- When you get to the zipper pull, stop sewing, cut your thread, remove the fabric and the zipper, open up the zipper just a little, then resume sewing from where you stopped, sewing up to the top of the zipper.

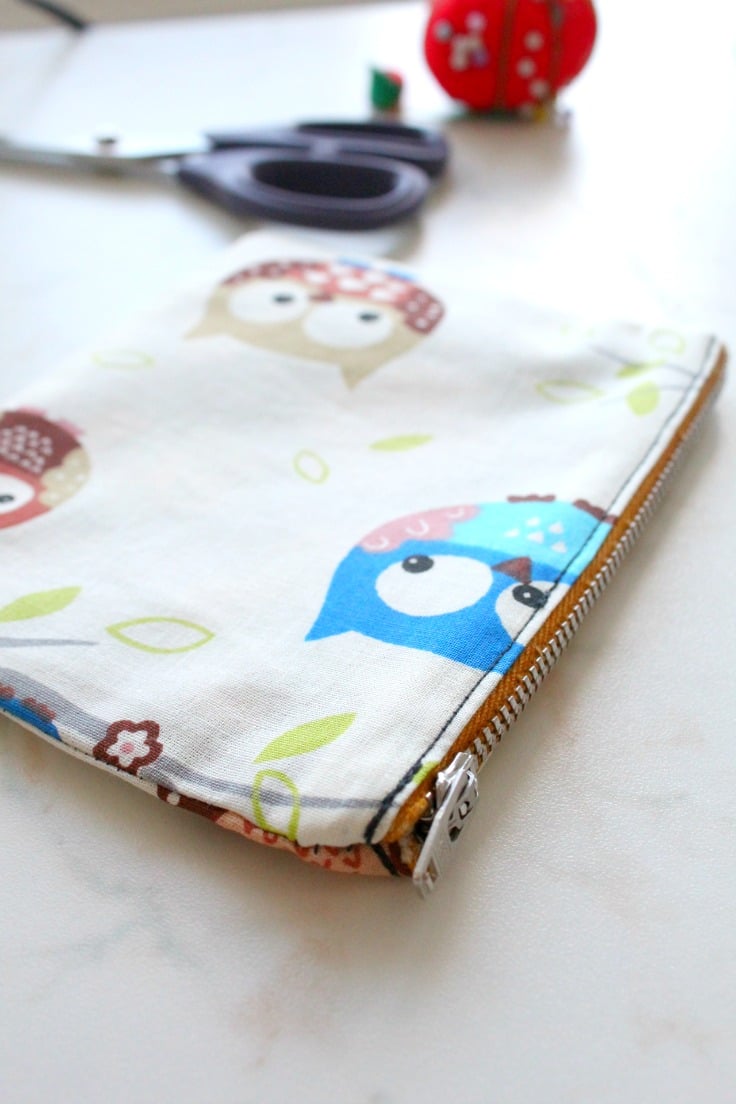
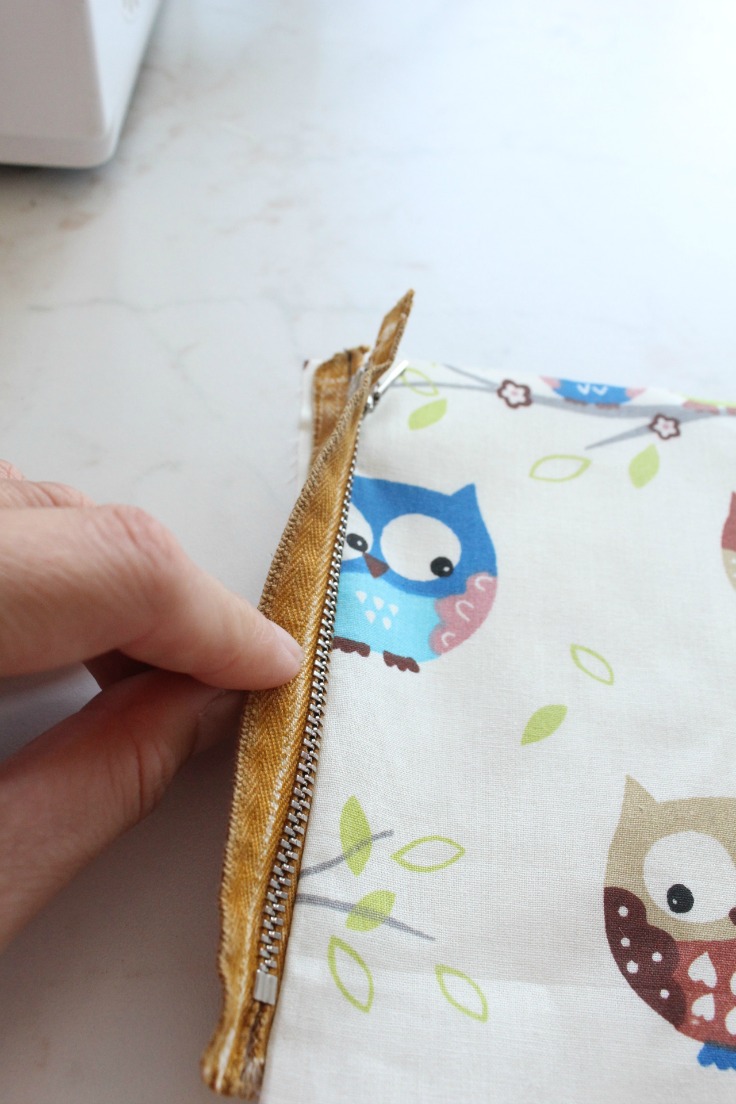
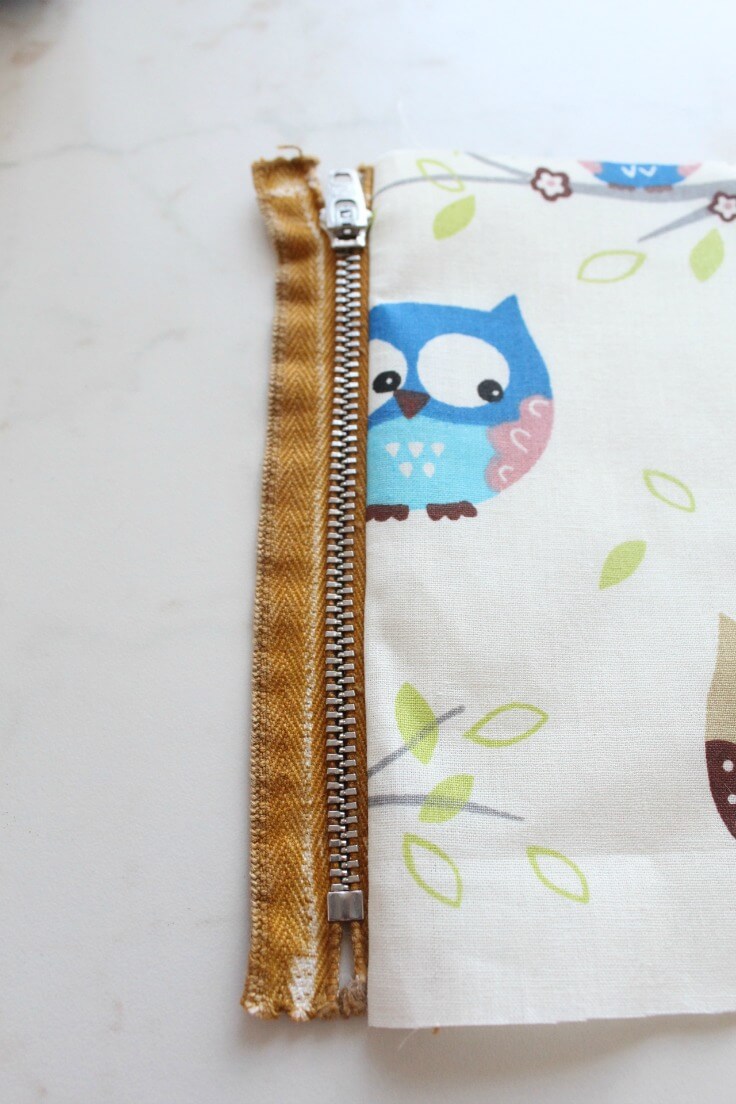
- If you’re making a pouch without lining, this is when you’ll want to flip your zipper over to the side, press then do a top stitch for decorative purposes. Open up the zipper, start sewing up to the zipper pull, stop, remove the fabric, close the zipper then resume sewing. (If you’re sewing a pouch with lining you will want to skip this step for now and you might wanna read the pouch tutorial once that’s up.)
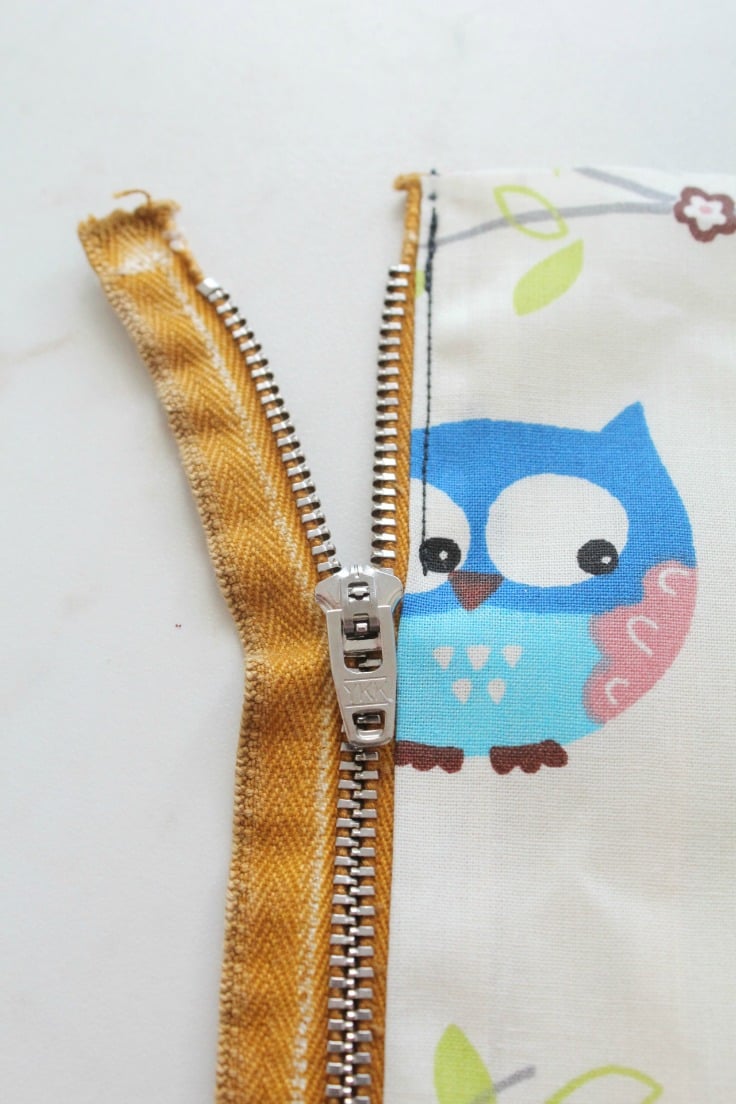
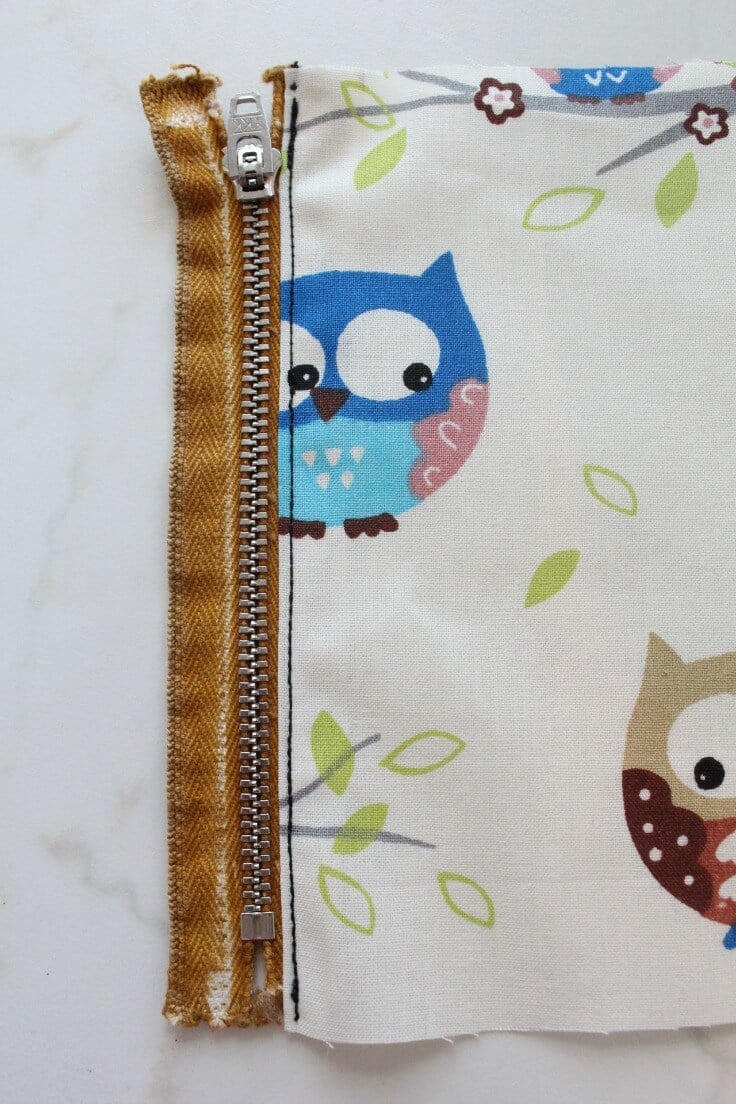
- Do the same steps for the other side of the zipper and the second fabric strip. (if you’re making a pouch all you have to do at this point is sew all the sides together, on the wrong side of the fabric, making sure you leave the zipper slightly open for turning purposes)
Tips for the best results
- Use a zipper that is the same length as the opening you want to close. If your zipper is too long, simply cut it to size using fabric scissors and make sure to secure the end with a few stitches.
- Always use a matching thread color for an invisible seam. However, if you love a contrasting look, go ahead and use whatever color you prefer!
- A longer stitch length (2.5 or 3) will give better results when sewing zippers.
- Take your time and sew slowly around the zipper pull to ensure a neat finish.
Creative ideas with zippers
As mentioned earlier, learning how to sew a zipper opens up endless possibilities for customization in your sewing projects. Here are a few creative ideas to get you started:
- Add a pop of color to your zippers by using contrasting thread or colorful zippers.
- Combine different zipper sizes and colors on clothing or bags for an edgy look.
- Use zippers as decorative elements, such as creating stripes on a dress or adding detail to the collar of a shirt.
- Experiment with zipper placement, like sewing them diagonally or in unexpected places on garments.
More sewing projects you will enjoy
- Lined zipper pouch tutorial
- How to sew a zipper into a skirt with lining
- Tips for sewing a round hem
- Laminating cotton fabric
- Flutter sleeve dress pattern
- DIY corded bag handles
- Tips for sewing with canvas fabric
- Cool bobbin storage ideas
- DIY hem gauge
- How to change presser foot pressure
- Adjusting bobbin tension
Frequently asked questions about sewing zippers
Are invisible zippers really invisible?
Invisible zippers are designed to blend in with the fabric and create a seamless finish.
Can I sew a zipper by hand?
Yes, you can sew a zipper by hand using a backstitch or slipstitch. However, it may take longer and be less secure compared to using a sewing machine.
Do I need special tools for installing zippers?
A zipper foot and iron are essential tools for sewing zippers.
Mastering how to sew a zipper is an essential skill for any sewing enthusiast. With just a few simple steps and some practice, you’ll be able to easily install zippers on all your sewing projects. Get creative with different colors, sizes, and placement of zippers. Happy sewing!
How to sew a zipper
Materials
- 2 fabric strips for learning and practicing purposes
- zipper
- matching thread
Tools
- scissors
- zipper foot
- Iron
- Ironing Board
Instructions
- Match up one side of the zipper with one strip of fabric, right sides facing and pin together.
- Start sewing from the bottom up.
- When you get to the zipper pull, stop sewing, cut your thread, remove the fabric and the zipper, open up the zipper just a little, then resume sewing from where you stopped, sewing up to the top of the zipper.
- If you're making a pouch without lining, this is when you'll want to flip your zipper over to the side, press then do a top stitch for decorative purposes. Open up the zipper, start sewing up to the zipper pull, stop, remove the fabric, close the zipper then resume sewing. (If you're sewing a pouch with lining you will want to skip this step for now and you might wanna read the pouch tutorial once that's up.)
- Do the same steps for the other side of the zipper and the second fabric strip. (if you're making a pouch all you have to do at this point is sew all the sides together, on the wrong side of the fabric, making sure you leave the zipper slightly open for turning purposes).
Article may contain Amazon & affiliate links. As an Amazon Associate I earn from qualifying purchases at no additional cost to you.
ABOUT PETRO
Hi, I’m Petro, author and founder of Easy Peasy Creative Ideas. Sewist, crafter, avid DIY-er, foodie, photographer, homemaker and mommy to one. I’m an expert at coming up with quick, clever sewing tips, recycling crafts and simple, easy recipes! You can find my ideas featured in reputable publications such as Country Living, Good House Keeping, Yahoo News, WikiHow, Shutterfly, Parade, Brit & Co and more. Thanks for stopping by and hope you’ll stay for a while, get to know me better and come back another time. Stick around for real fun projects! Read more…