

DIY Paper Flowers For Kids
If you want a fun, hands-on way to spark your kids’ creativity and boost their motor skills, introduce them to the joy of making paper flowers together – an exciting family activity that’s as colorful as it is memorable!
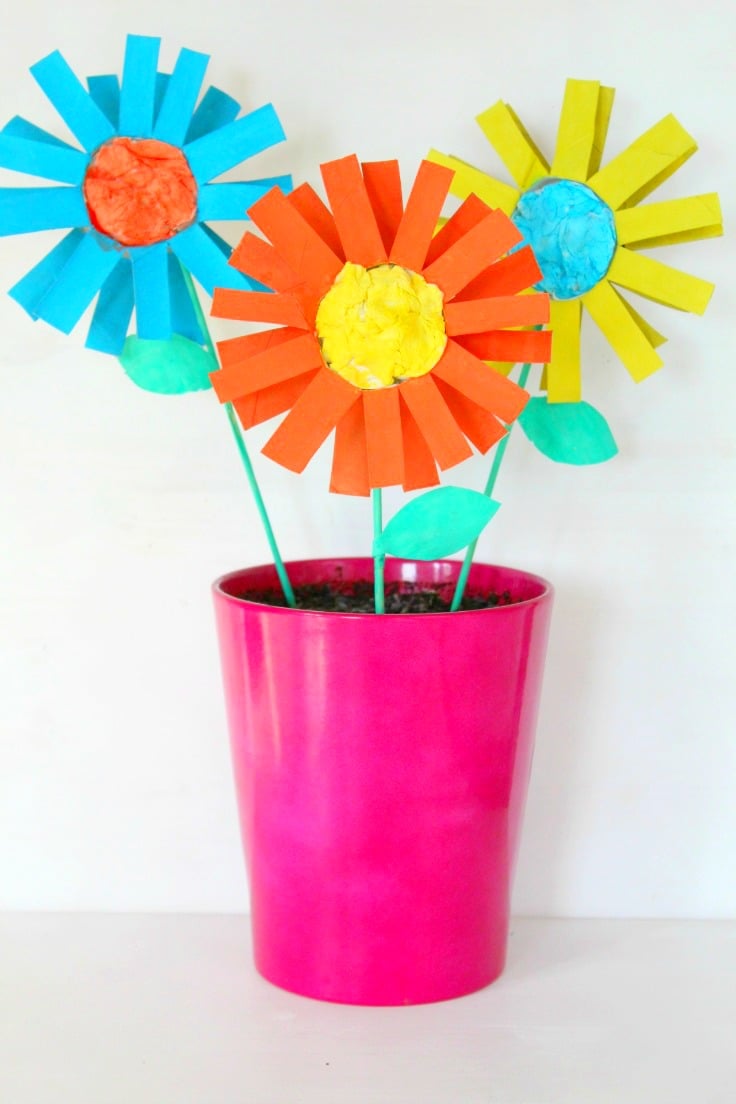
Have you ever wanted to create adorable easy paper flowers with your kids? This fun and easy project is perfect for spending quality time together and a great Mother’s Day activity! These DIY toilet paper flowers are not only charming and creative but also a relaxing activity for all ages. They’re an excellent way to introduce your little ones to crafting while creating something beautiful together. A simple, meaningful way to spark creativity and make cherished memories!
Below I’ll be showing you how to make paper flowers for kids in just a few simple and quick steps. This is a project you just can’t mess up! Except that there’ll be a lot of mess on the working surface, the floor and their clothes but who cares? You’ll be so thrilled with the results you won’t even notice the mess.
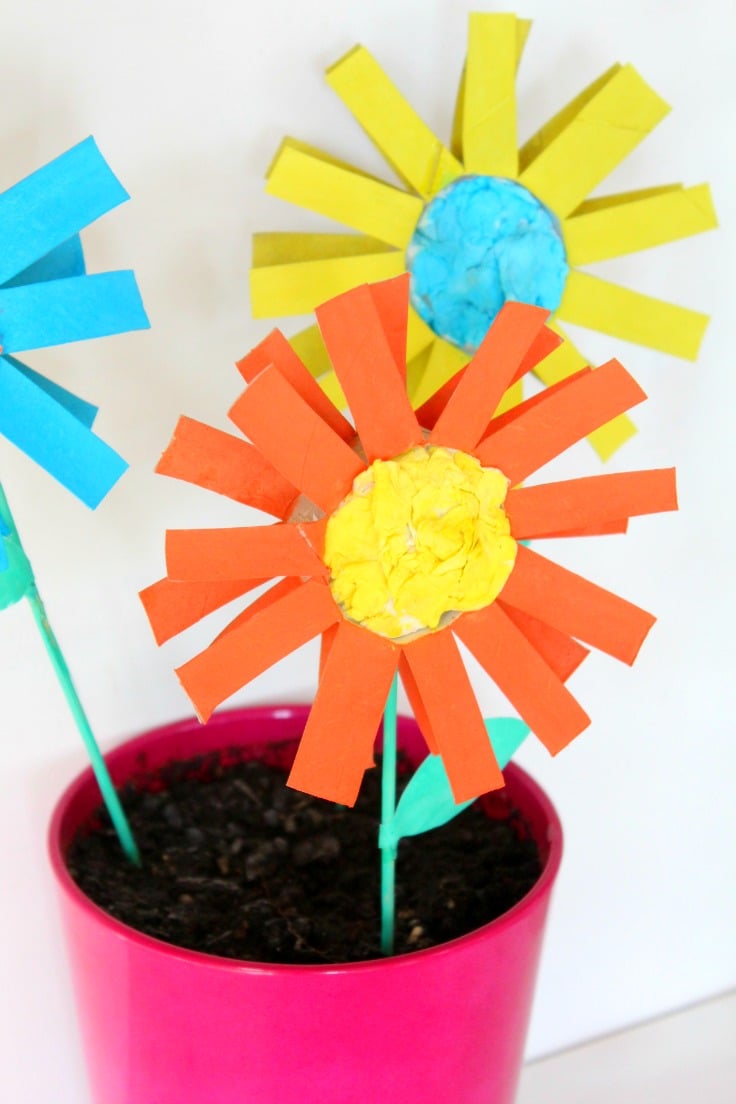
With these cute paper flowers for kids, they can make a lovely bouquet to decorate their room or give as gifts to family or their teacher. These DIY paper flowers for kids also make great party décor too! These easy paper flower are a great project that will keep kids busy and will brighten up your home, wherever you decide to place these cuties. I decided to put ours in the kitchen in the window so I could admire them all day long (because I obviously spend a lot of time there lol).
How to make easy paper flowers
Materials you’ll need:
- Toilet Paper Rolls – These will form the base structure for your project. Empty rolls are lightweight, versatile, and perfect for creating sturdy shapes or designs.
- Paint – Bring your project to life with vibrant colors. Choose a variety of paints depending on the theme or look you’re going for.
- Wooden Skewers – These are great for creating stems, supports, or decorative elements. Wooden skewers are sturdy and easy to work with.
- Green Card Stock (or Painted White Card Stock) – Perfect for leaves or other greenery in your project. If you don’t have green card stock, simply paint a white one green for the same effect.
- Glue – A strong adhesive is key for assembling all the pieces. Make sure your glue works on different materials like paper, cardboard, and wood.
- Tissue Paper or Toilet Paper – Great for adding texture or creating soft, lightweight elements like flowers or clouds. These materials are easy to manipulate and glue onto surfaces.
Equipment:
- Pencil – Essential for outlining shapes and designs before you start painting or cutting. A simple pencil ensures precision and lets you make adjustments easily.
- Ruler – Use this to measure and create straight lines for neat and accurate designs. It’s especially useful if your project requires symmetry.
- Paintbrush – A good-quality paintbrush ensures smooth and even application of paint. Have a few sizes handy for both large areas and detailed work.
- Scissors – An absolute must for cutting shapes, trimming edges, and modifying materials. Make sure they’re sharp enough for clean cuts.
Directions:
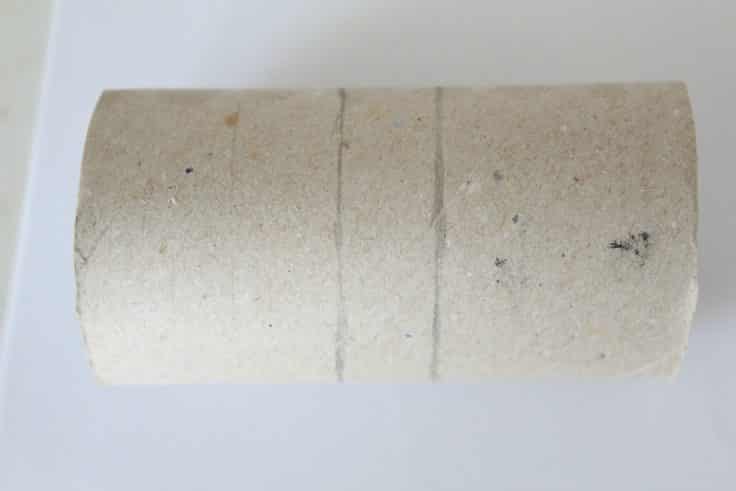
- Measure about 2″ from each end of the tube and draw a ring on each side.
- From each ring on one side, draw lines every 1/2″. Draw the lines on the other end starting in the middle of the lines from the first ring. I noticed the flowers look better if cut this way but only after I did the first flower so the snips in the photo below the next one are not correct.
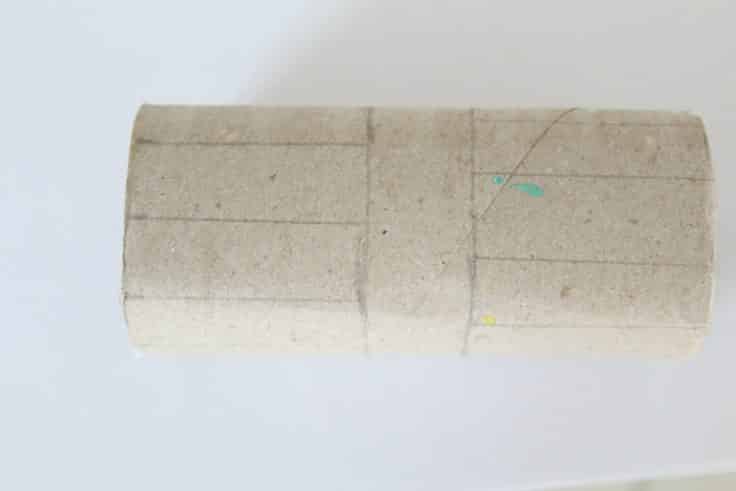
- Snip along each line to make petals.
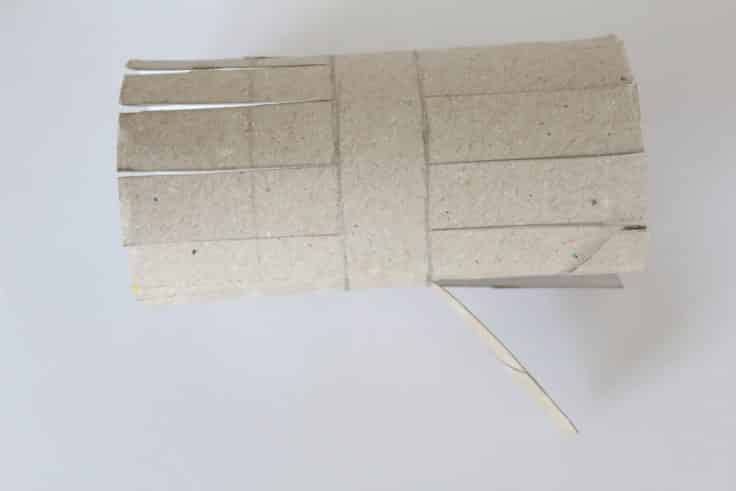
- Fold the petals back to create a flower.
- Paint the flowers and bamboo skewers and let dry.
- Cut out green leaves and glue to the skewers.
- Push the skewer through one end of the flower’s center until it touches the other end.
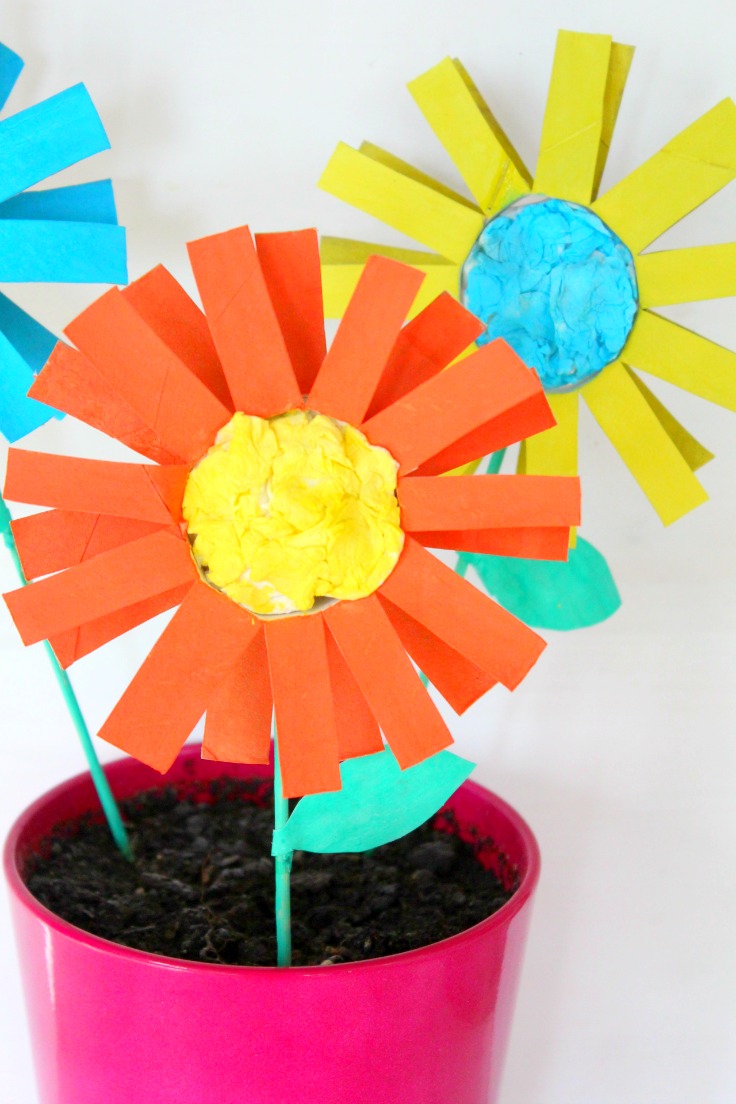
- Crumple some tissue paper or toilet paper and glue in the center. If you use toilet paper as we did you’ll need to paint that too.
Tips
- Use a variety of colors for the flowers to make them vibrant and visually appealing.
- Make sure the paint is completely dry before handling the flowers to avoid smudges.
- If you want to add extra detail, consider using markers or glitter to decorate the petals.
- Arrange the completed flowers in a vase or tie them together to create a bouquet.
- Experiment with different sizes and shapes of petals to create unique designs.
Craft variations
- Paper Flowers with Patterns: Instead of using plain paper, try using patterned paper or scrapbook paper to create your flowers. This adds an extra layer of complexity and charm to your designs without requiring additional decoration.
- Painted Edges: For a unique look, paint just the edges of the petals with metallic or bright colors. This subtle detail can make your flowers stand out.
- Layered Petals: Create dimension by layering smaller petals on top of larger ones. You can use different shades of the same color or mix and match complementary colors for a striking effect.
- Scented Flowers: Add fragrance to your flowers by lightly spraying them with perfume or essential oil. This is especially nice for bouquets or centerpieces.
More toilet paper roll crafts you’ll love
- Paper rolls pencil organizer
- DIY phone holder
- Mini gift boxes
- Halloween bat craft
- Hearts wall decor
- DIY Halloween spiders
- Honeycomb kid craft
- Cute Easter bunnies
- Handmade napkin ring
Frequently Asked Questions
Are toilet paper roll crafts safe for kids?
Yes, these crafts are generally safe for kids with adult supervision. Ensure that any sharp tools such as scissors are handled carefully and that non-toxic materials are used.
How can I make my crafts more sustainable?
To be more eco-friendly, try using only recyclable or biodegradable materials. Additionally, you can repurpose other household items, like wrapping paper or leftover fabric, to minimize waste.
Can these crafts be customized for different holidays?
Absolutely! Toilet paper roll crafts are perfect for holiday-themed projects. You can adjust the design and colors to match holidays like Christmas, Easter, or Halloween.
How do I store completed crafts?
To store crafts, place them in a box or container, keeping them in a cool, dry environment to avoid damage or wear. Labeling the container with the craft’s theme or holiday can make them easier to find later.
Easy paper flowers for kids
Materials
- Toilet Paper Rolls
- Paint
- Wooden Skewers
- Green Card Stock or Painted White Card Stock
- Glue
- Tissue Paper or Toilet Paper
Tools
- Pencil
- ruler
- scissors
Instructions
- Measure about 2" from each end of the tube and draw a ring on each side.
- From each ring on one side, draw lines every 1/2". Draw the lines on the other end starting in the middle of the lines from the first ring. I noticed the flowers look better if cut this way but only after I did the first flower so the snips in the photo below the next one are not correct.
- Snip along each line to make petals.
- Fold the petals back to create a flower.
- Paint the flowers and bamboo skewers and let dry.
- Cut out green leaves and glue to the skewers.
- Push the skewer through one end of the flower's center until it touches the other end.
- Crumple some tissue paper or toilet paper and glue in the center. If you use toilet paper as we did you'll need to paint that too.
More creative ideas you will enjoy
Article may contain Amazon & affiliate links. As an Amazon Associate I earn from qualifying purchases at no additional cost to you.
ABOUT PETRO
Hi, I’m Petro, author and founder of Easy Peasy Creative Ideas. Sewist, crafter, avid DIY-er, foodie, photographer, homemaker and mommy to one. I’m an expert at coming up with quick, clever sewing tips, recycling crafts and simple, easy recipes! You can find my ideas featured in reputable publications such as Country Living, Good House Keeping, Yahoo News, WikiHow, Shutterfly, Parade, Brit & Co and more. Thanks for stopping by and hope you’ll stay for a while, get to know me better and come back another time. Stick around for real fun projects! Read more…