

DIY fabric basket sewing tutorial
Fabric bins are something that you can never really have or make enough of! Learn how to make your own DIY fabric basket with this 30 minutes fabric bin tutorial!
DIY fabric basket
So you and I are on the same page, right? Why else would you read this DIY fabric basket tutorial if you didn’t think having countless storing bins is a necessity for every sewist? If you want to stay organized and have your sewing room clean all the time you must have tons of these!
I must admit I’m a neat freak and although to me it seems like my house (particularly my sewing room) is never clean or organized enough, people who get to know me a little better see me as an OCD freak! What they don’t know is that as a sewist you have no choice but being organized and having your stuff in the right place and handy at all times! Otherwise all your projects will end up in chaos, looking cheap, the time spent in the sewing room will at least double and you’re basically inefficient! Plus you’ll eventually end up hating going into your sewing room!
More beginners projects you will love:
- Fabric chicken weights
- Color block tote bag with burlap
- Fabric cone hanging basket
- DIY lavender sachets
- Easy fabric twine trivets
- DIY ironing board cover
- Mini fabric baskets
I’ve redesigned my sewing room to suit my needs (and you can see the steps I took here, hopefully they’ll inspire you to get more organized too). But since then, I realized I need to add more stuff to my sewing room decor, like this sewing machine mat with thread catcher that I use for my Brother machine, or this French braid mat for my oldest machine or this lovely little mug rug which I originally designed for my coffee mug but then realized how great it fits the cup where I keep my thread cones. They all help me keep my sewing room more organized and clean, make my sewing space looking a lot cuter and such a warm, friendly space!
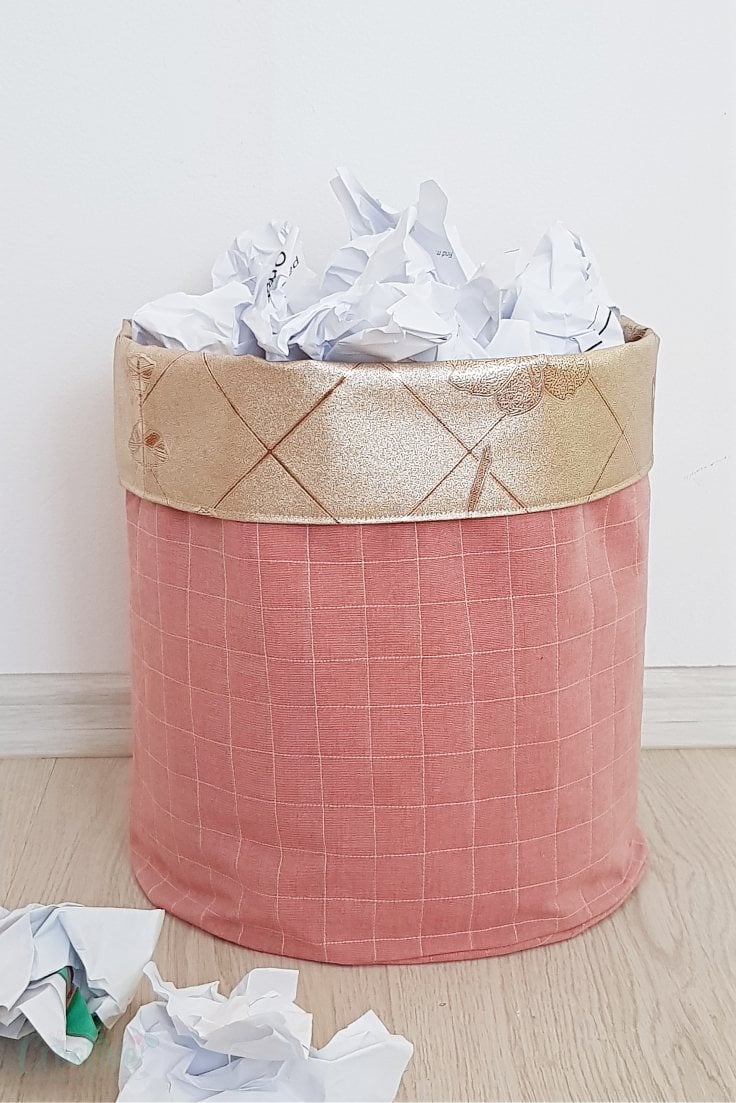
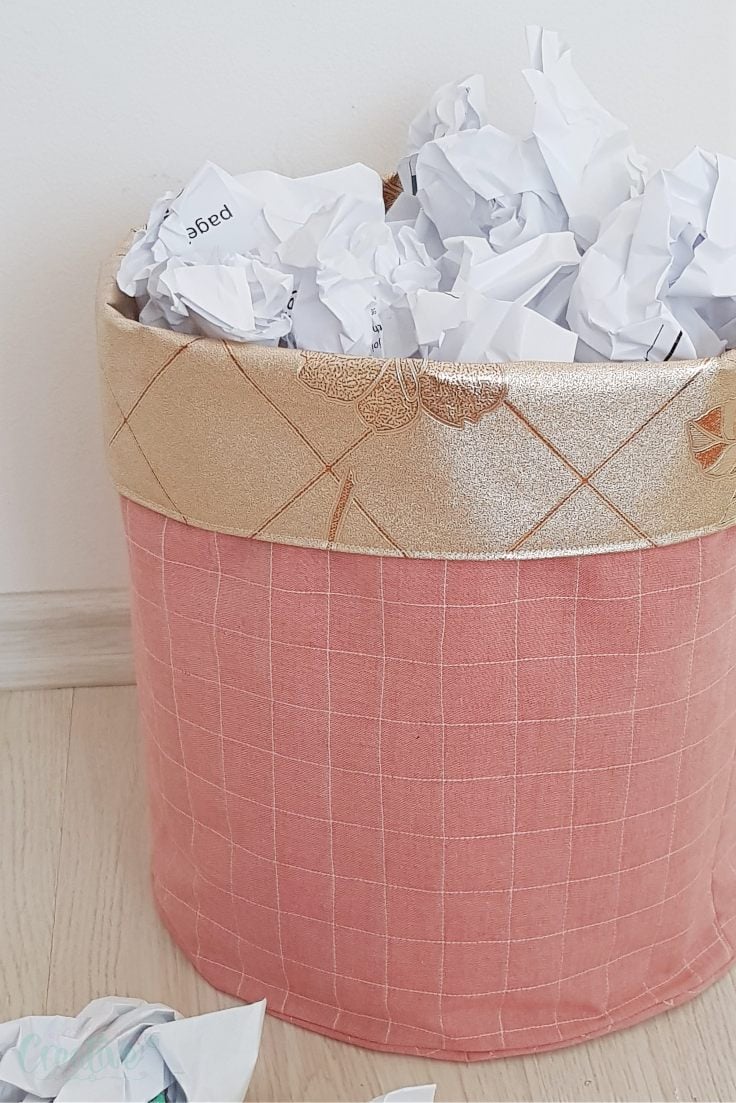
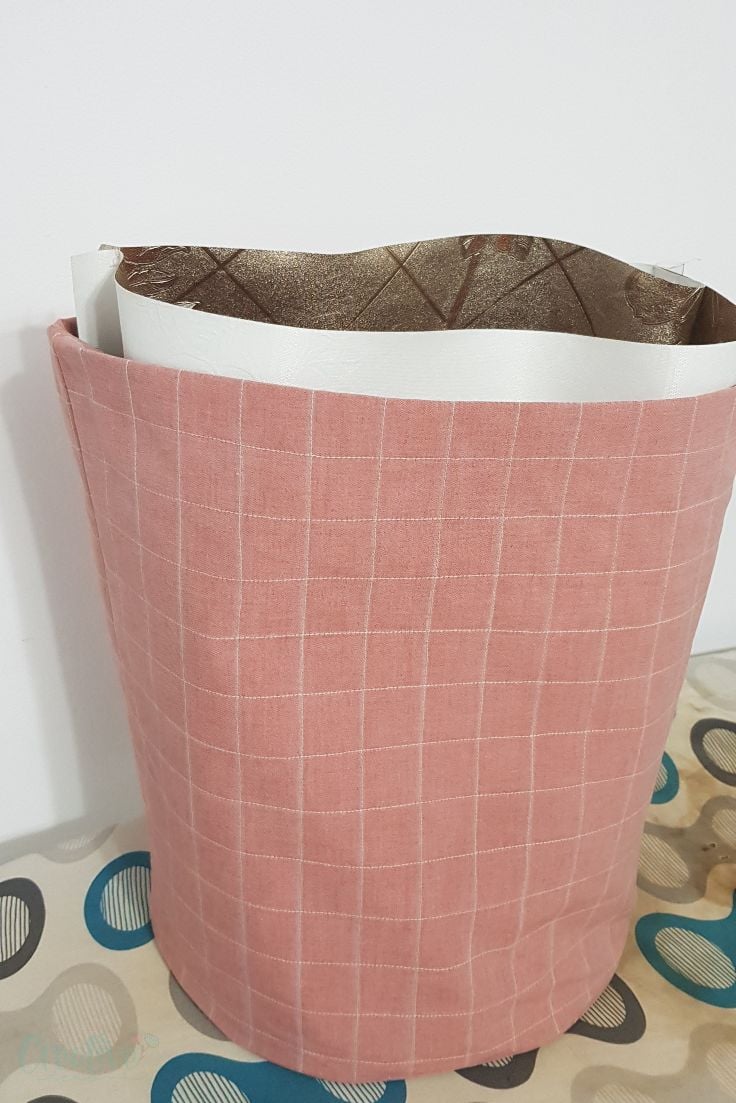
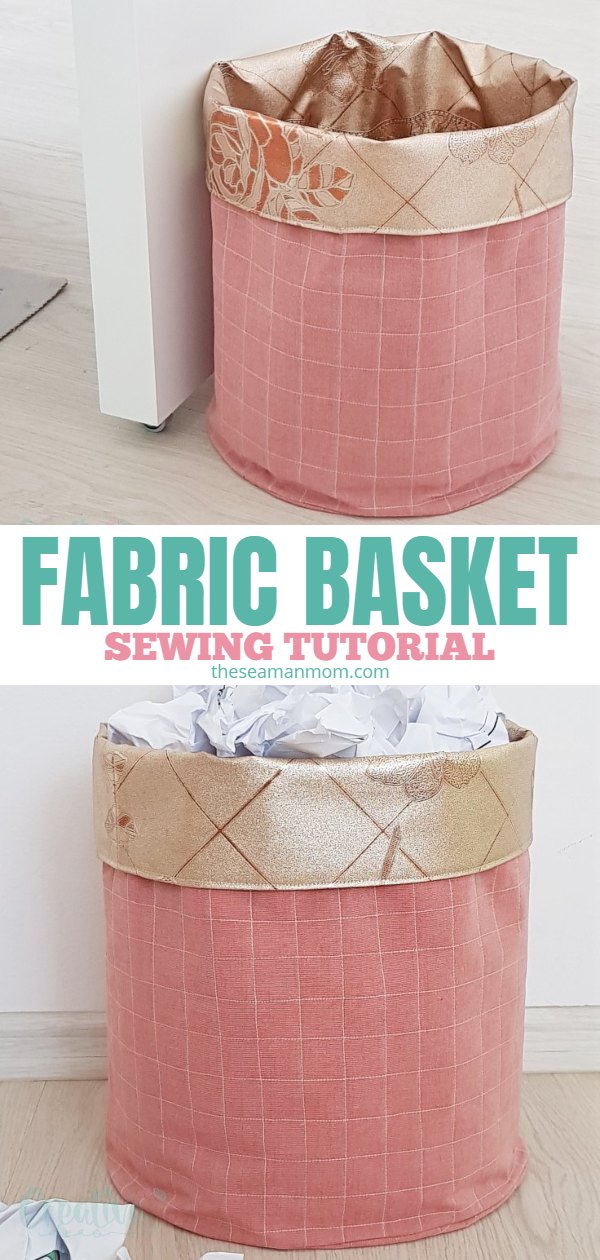
And now it was time to add something more to help me better manage the crap I end up making with every sewing project: a DIY fabric basket that I use as a trash bin! Because let’s face it! No matter how organized and clean we are, we still end up producing a lot of mess in the sewing room, mess that needs to be address right away before it piles up and becomes impossible to manage! And that’s the purpose of this handy dandy fabric basket that I keep right under my sewing table and fill with stuff I can’t throw in the little thread catcher I mentioned above, like fabric bits I can’t use in scrap projects, paper scraps, broken supplies and more.
What are the uses of fabric baskets?
While fabric baskets are super useful and so easy to sew, they’re not meant to be used as storage for heavy items. Here are a few items you can store in your fabric baskets and a couple of opportunities to use them in your home decor:
- Fabric or fabric scraps
- Sewing/craft tools & supplies
- Remote controls
- Toys
- Toilet paper rolls in the bathroom
- Keys, cording, phone chargers etc
- Use them as under the bed storage for lightweight items
- Office bin for paper
- To mask ugly plant pots
What kind of fabric works best for a fabric basket?
In order to serve their storage purpose with success, fabric baskets need to be sturdy so you have to use sturdy fabric such as canvas, jeans, home decor or upholstery fabrics.
If you don’t have any of these, you can make your thinner fabrics sturdier with any of the options below:
- Quilting your fabric. You can use scraps and create patchwork baskets or use one piece of fabric and quilting with free motion quilting.
- Adding heavy weight interfacing to both the outer basket and the lining.
- Use 2 layers of fabric and join them together with double sided interfacing.
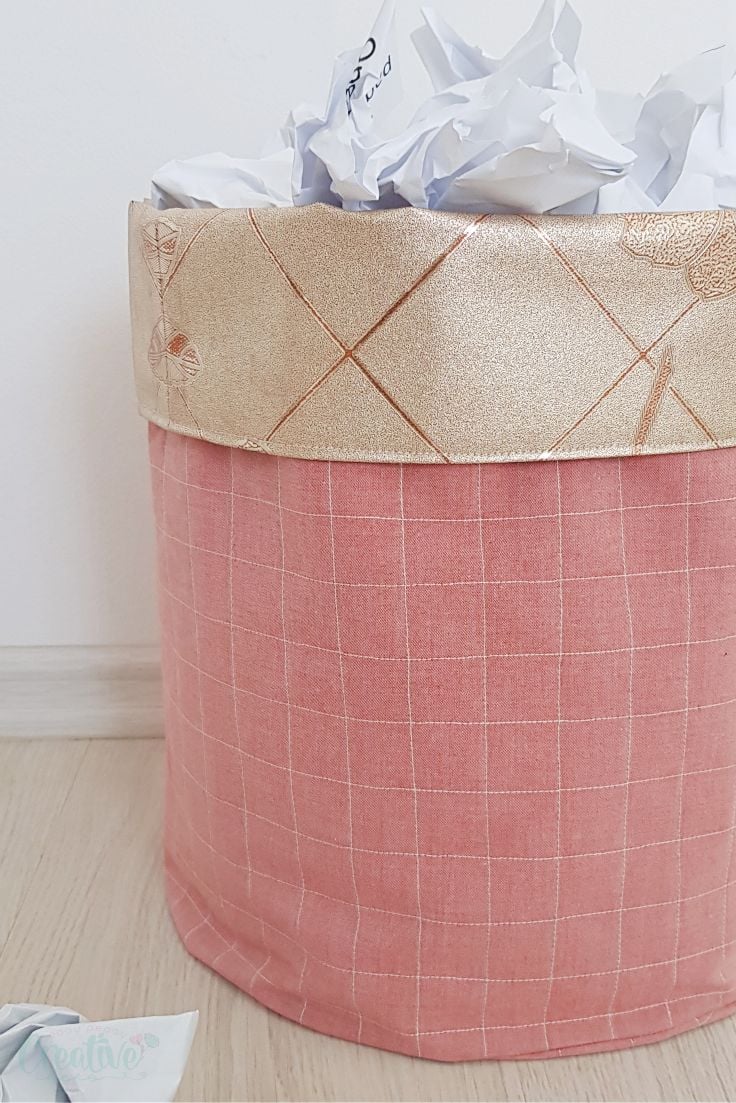
I used vinyl as lining for my bag so it’s not only sturdy but also easy to clean on the inside, in case I’ll accidentally throw something I’m not supposed to and would otherwise stain a regular fabric bin. If you’re using vinyl but never sewn with this fabric before, you might wanna read these tips first.
I didn’t make a fabric basket pattern because this project is crazy easy to figure out on your own. I’ll highlight the steps I took in the tutorial below and you can use these as guidelines to create your own DIY fabric basket to suit your needs and the space in your sewing room. Let’s see how to make a fabric basket in about 30 minutes!
Fabric basket tutorial
Materials:
- Canvas or home decor fabric
- Fusible fleece, bating or heavy weight interfacing (optional but necessary if your fabric is not sturdy enough)
- Vinyl for the lining
- Teflon foot
- Heavy duty thread
- Jeans needle
- Quilting clips
- sewing machine
- iron
Directions:
Cut the fabrics
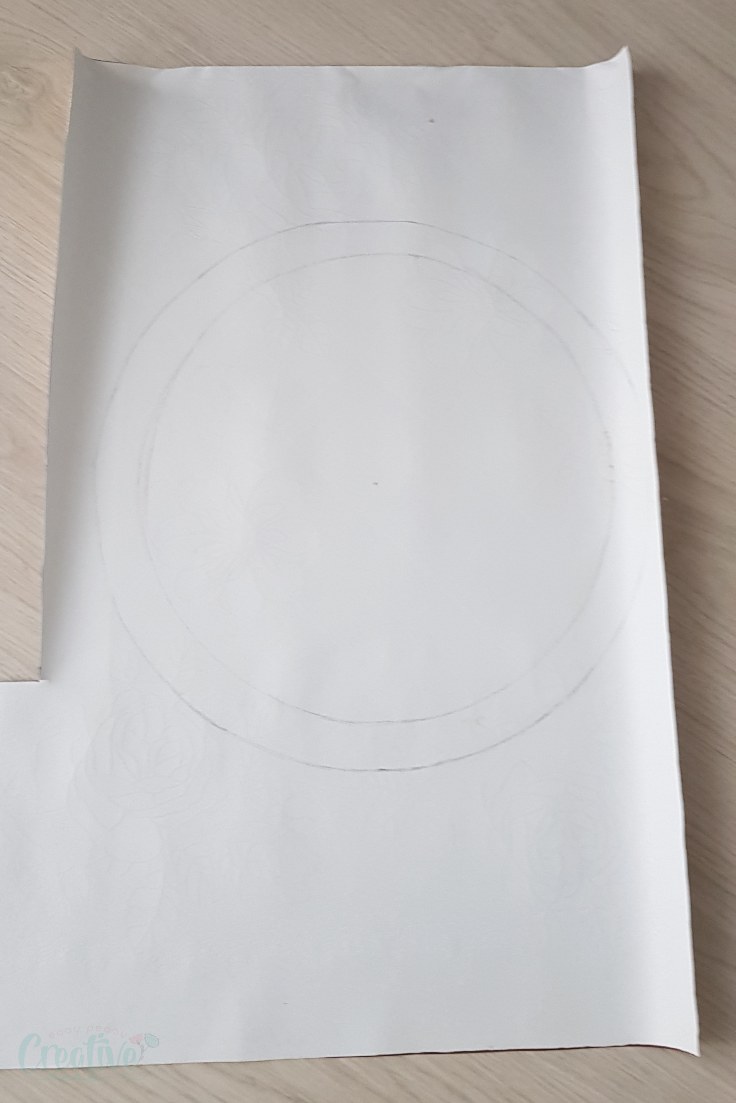
- Place vinyl wrong side up and trace a circle in the desired size. I cut mine with a 13″ diameter. Add 1″ seam allowance.
- Still working with the vinyl, cut a square that fits the circle measurements above. For example for my bin I cut a square of 36″ x 15″ where the 15″ side is the width of the square and would match the circle and the 36″ edge is the height of the square. The extra 2″ is for the seam allowances in my square.
Sew the vinyl bin
- Fold the square in half and cut.
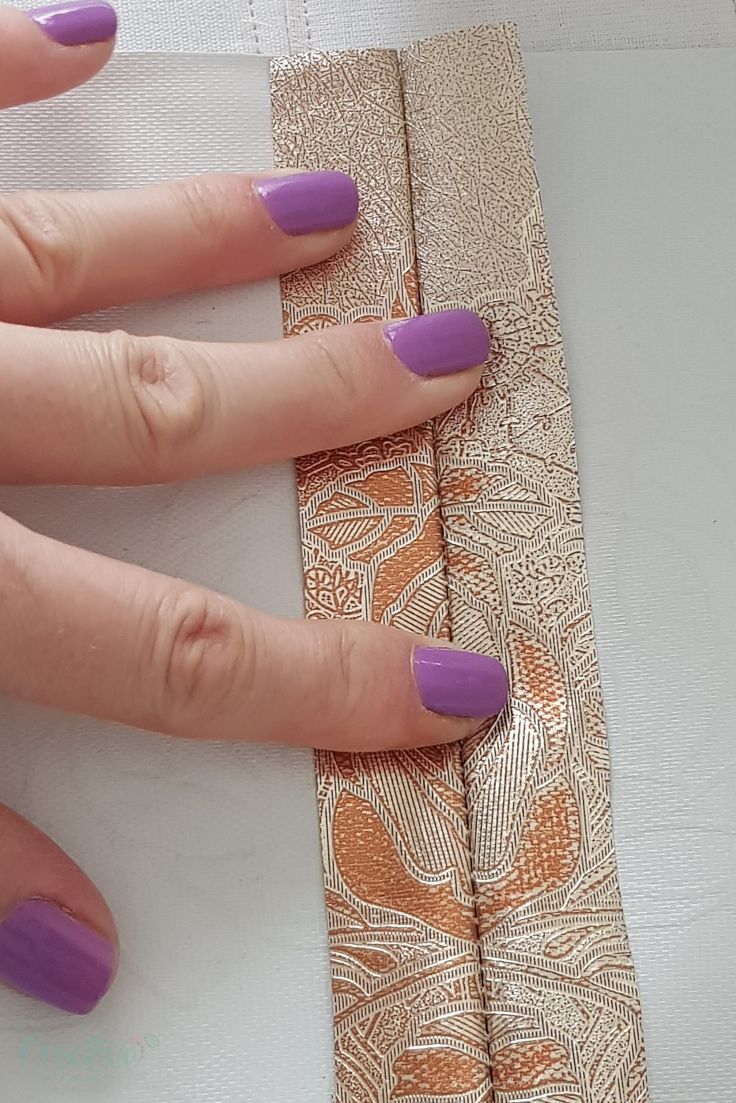
- Place the vinyl squares right side together and clip the sides.
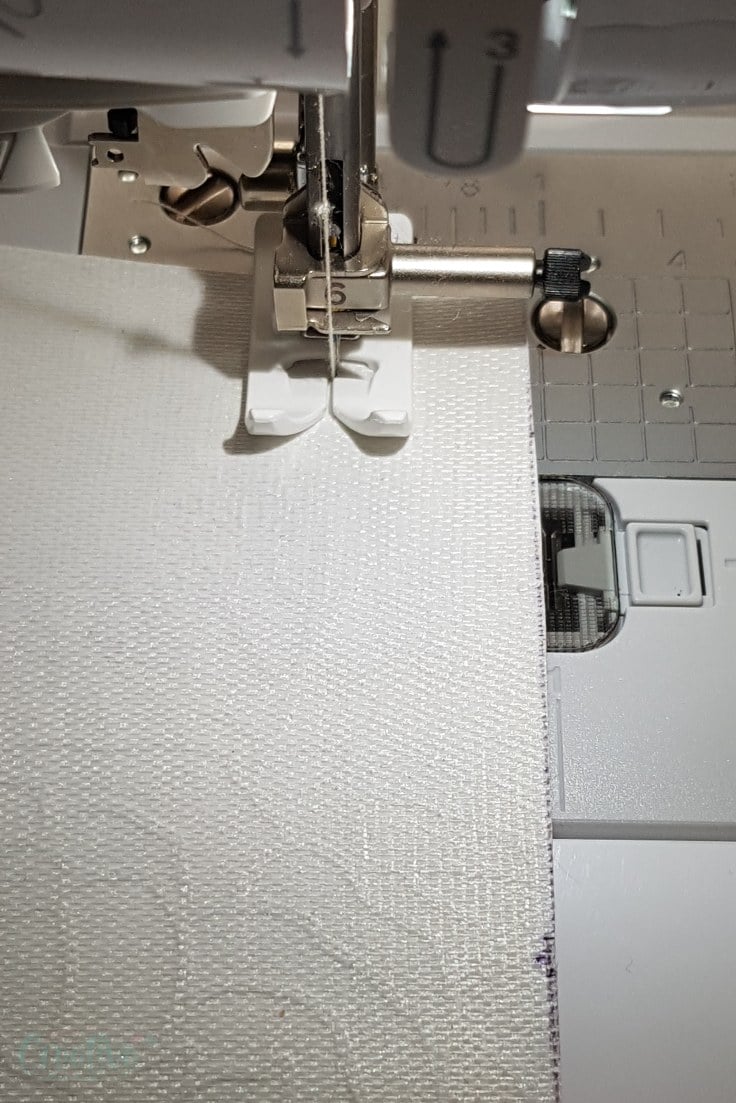
- Sew with 1″ allowance, using a teflon foot and appropriate thread.
- Your square should now look like a tube.
- Press the seams open with your fingers (do not use an iron, the vinyl will melt).
- Clip the tube to the circle. Your circle will look a little bunched up and it might help if you cut notches. But I wouldn’t recommend as this will weaken the vinyl fabric in the area surrounding the seams.
- Sew using 1″ allowance.
- Do not turn the bag right side out but instead move to the next step.
Sew the fabric bin
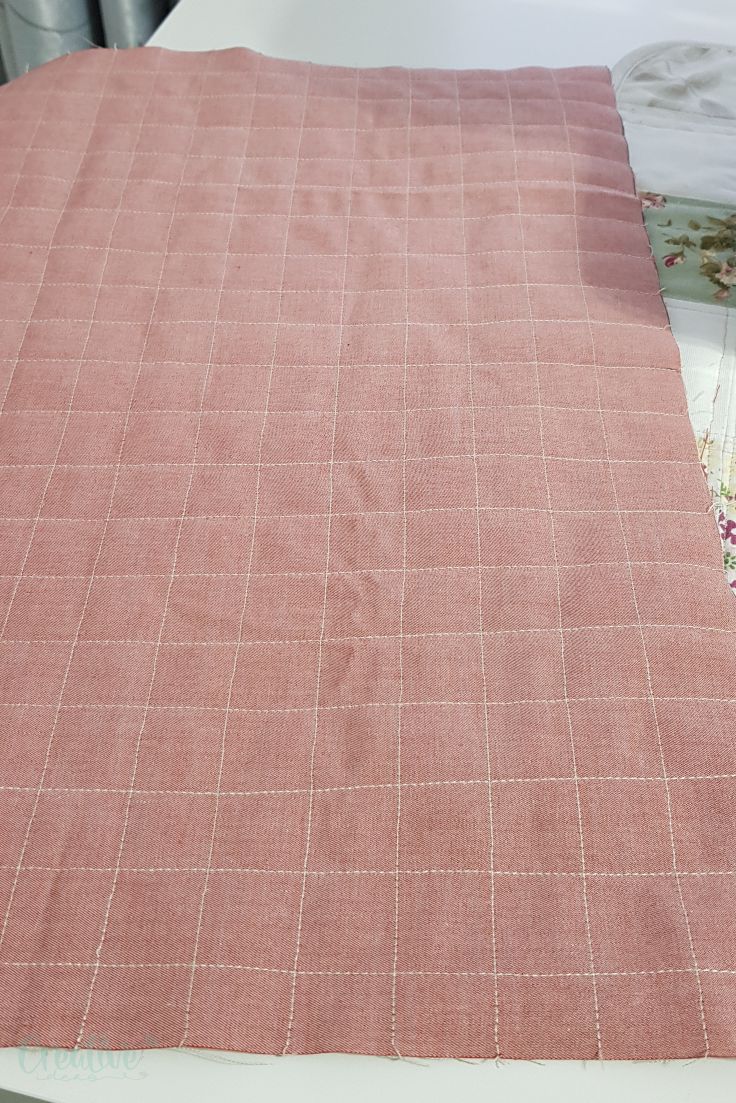
- Take the canvas fabric and apply fusible fleece or interfacing to the wrong side.
- Sew 1″ squares onto the entire surface of the fabric.
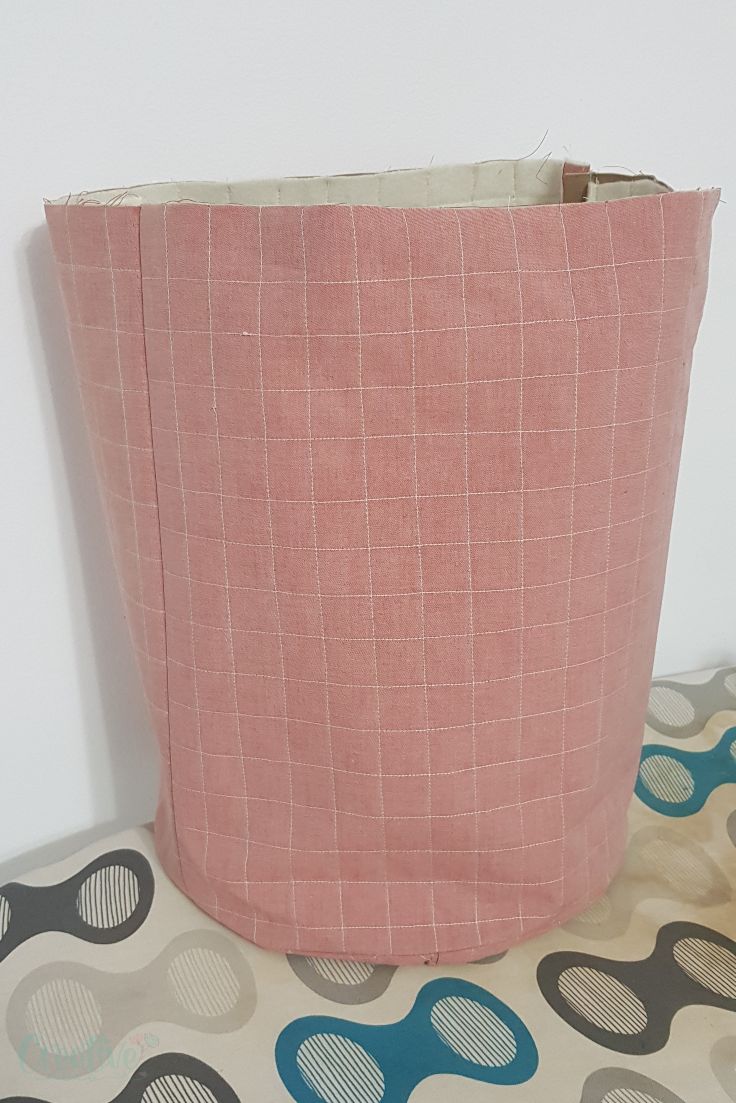
- Repeat the steps for the vinyl bag to make the outer bag.
- Clip notches into the round seam allowance (the bottom) then turn the bag right side out.
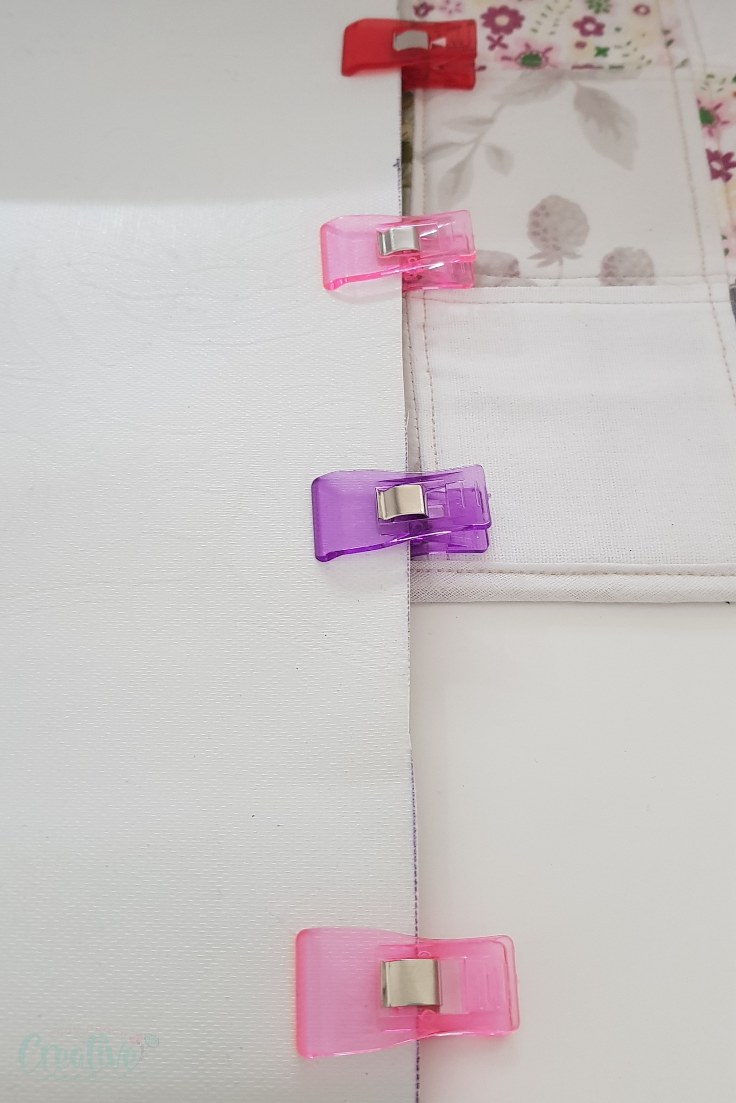
Sew both bins together
- Press 1″ of the top of the bag inside, using the iron on steam.
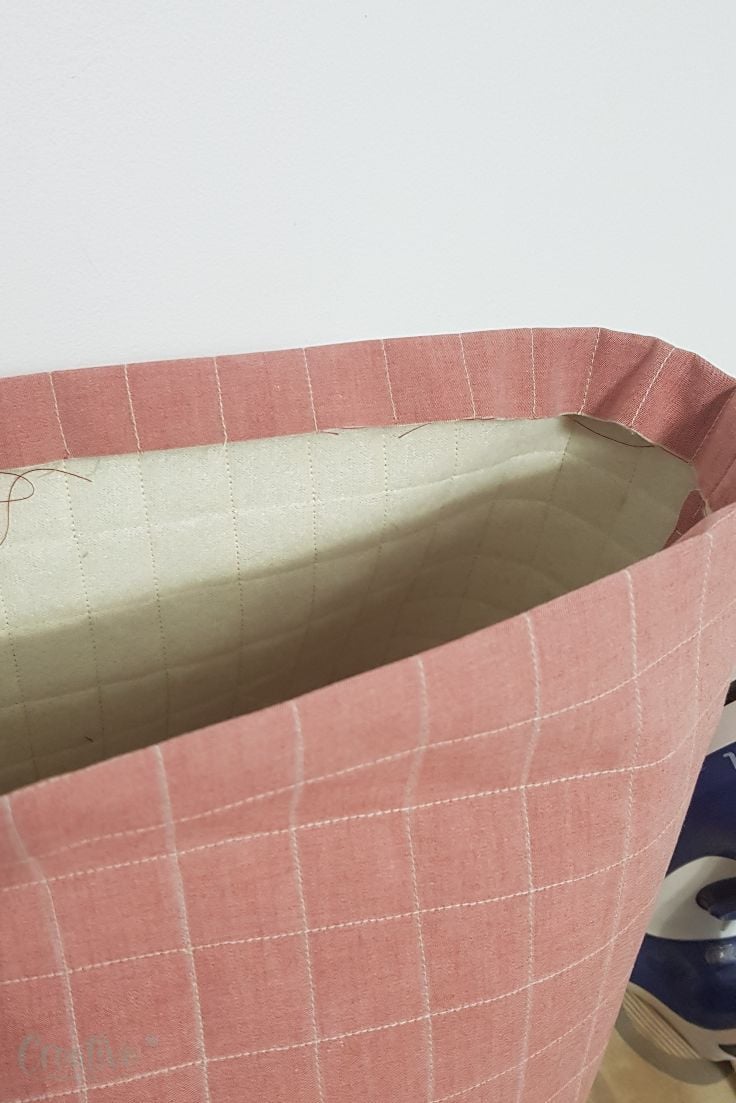
- Repeat for the vinyl bag but use your fingers instead of the iron and press the top outside.
- With the vinyl bag wrong side out and fabric bag right side out, insert the vinyl bag into the fabric bag and clip the tops together.
- Match the side seams.
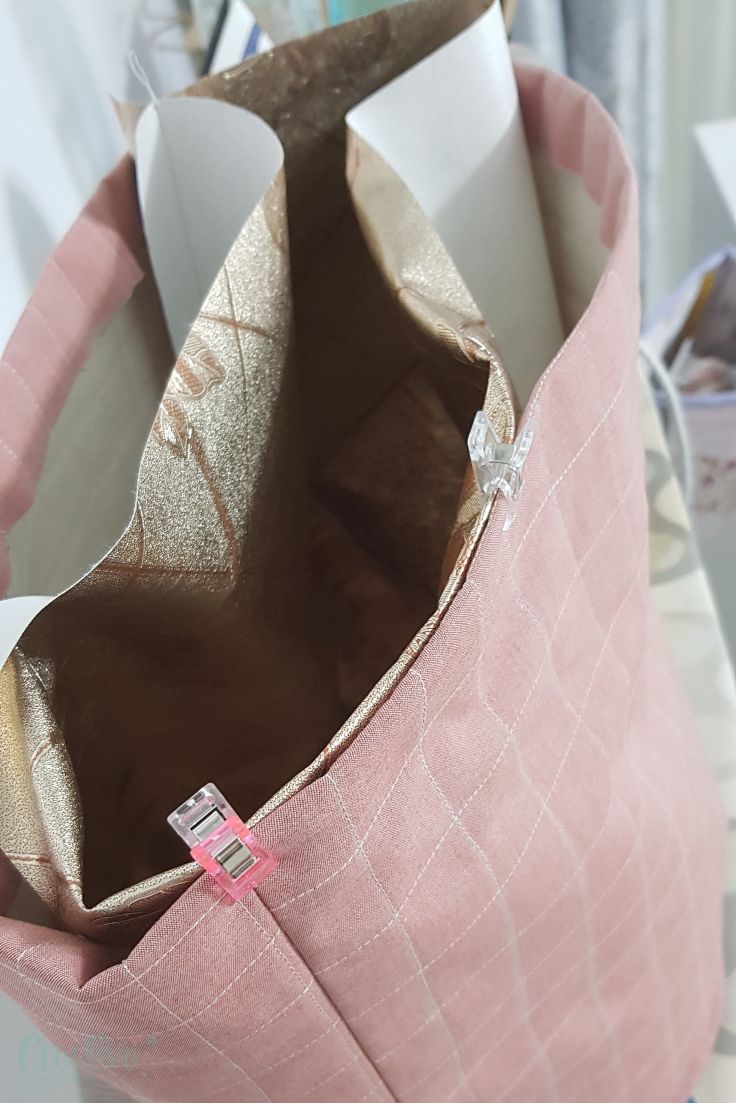
- Edge stitch the bags.
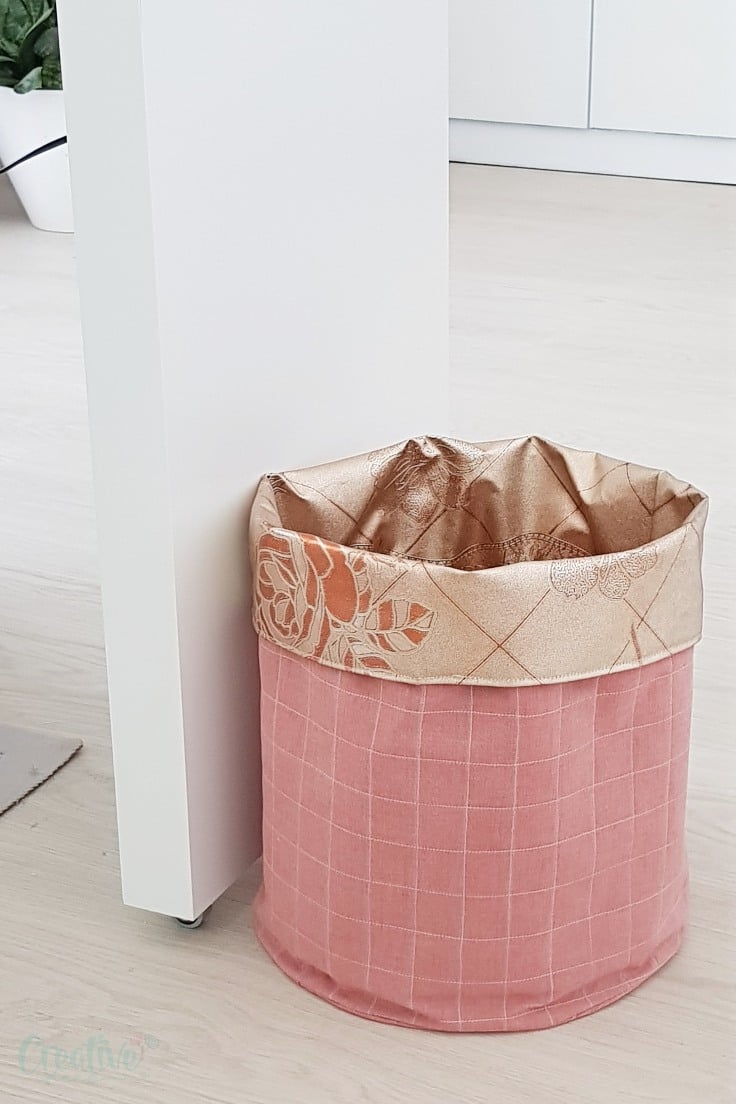
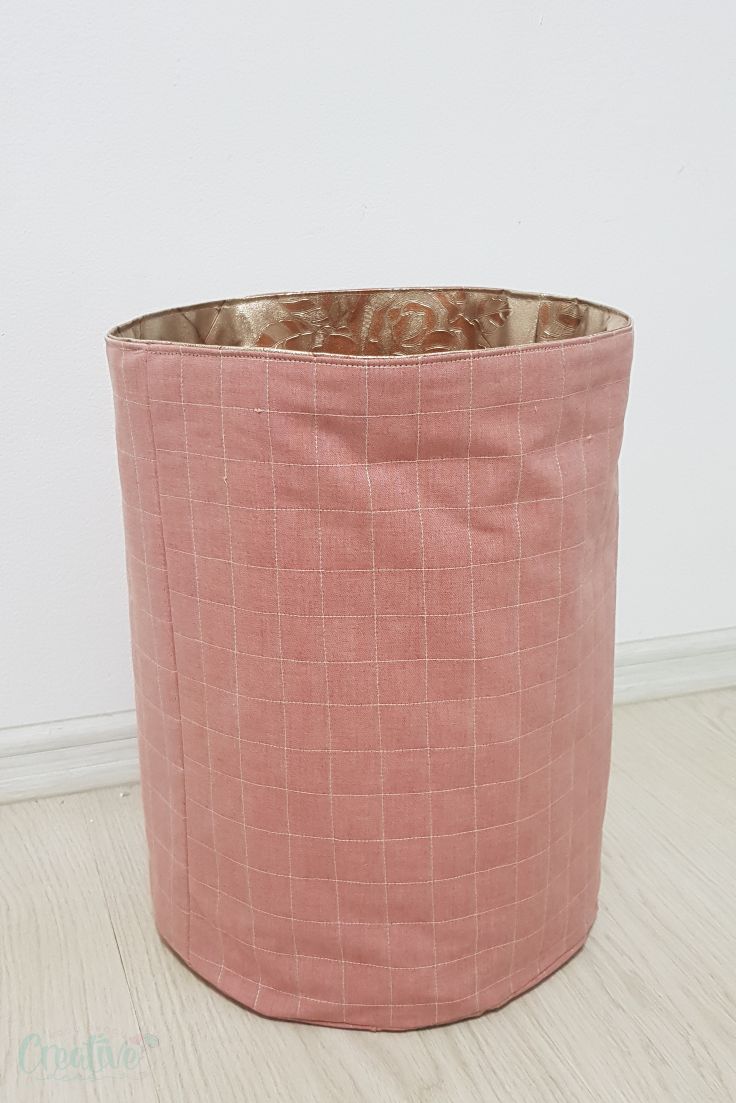
- At this point you can either fold the top of the bin and get a shorter basket
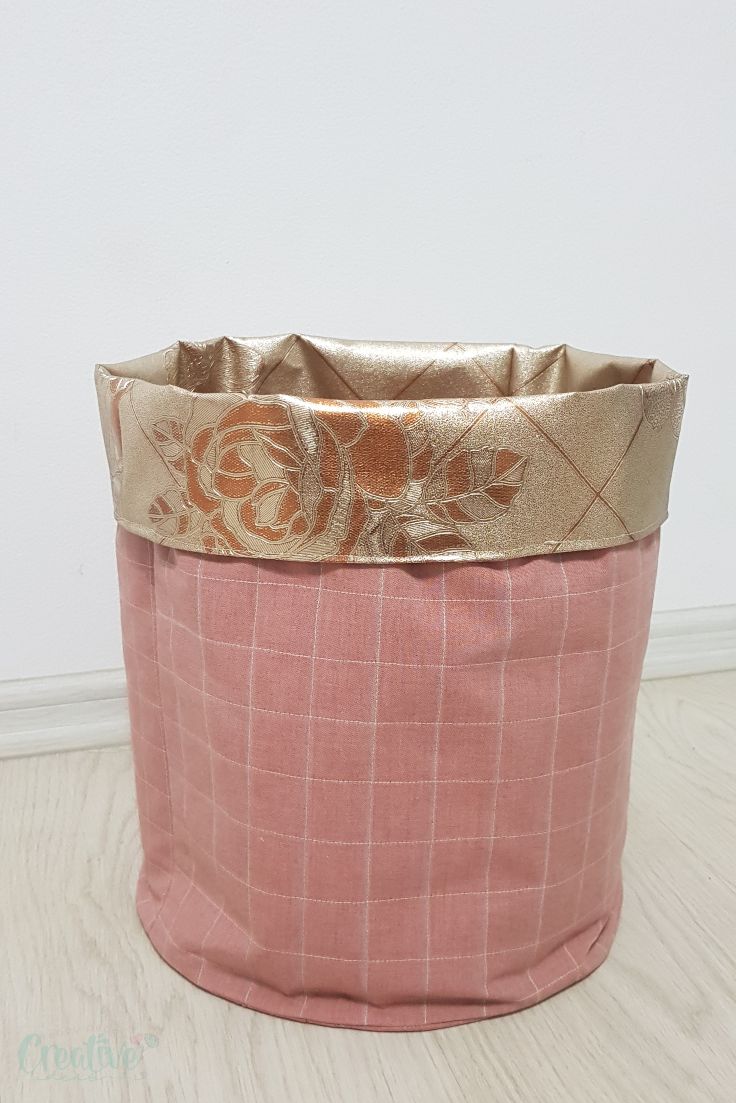
or or keep it as is for a taller basket.
I hope you enjoyed this tutorial and decided to create your own DIY fabric basket! Please let me know your thoughts on this tutorial in the comments below and don’t forget to rate it. Thanks!
Pin to save for later
Most popular sewing projects:
Article may contain Amazon & affiliate links. As an Amazon Associate I earn from qualifying purchases at no additional cost to you.

This is so much better than the hideous plastic can I am staring at right now. Thank you!
…wishing you warmth and feelings of peace… hot chocolate, too!