

How to sew a pumpkin pincushion
Make yourself a cute storage space for your pins and needles with this quick tutorial for a DIY pin cushion shaped like a pumpkin! In addition to being super practical and easy to sew, this trio pumpkin pincushion would also make a great home décor for fall.
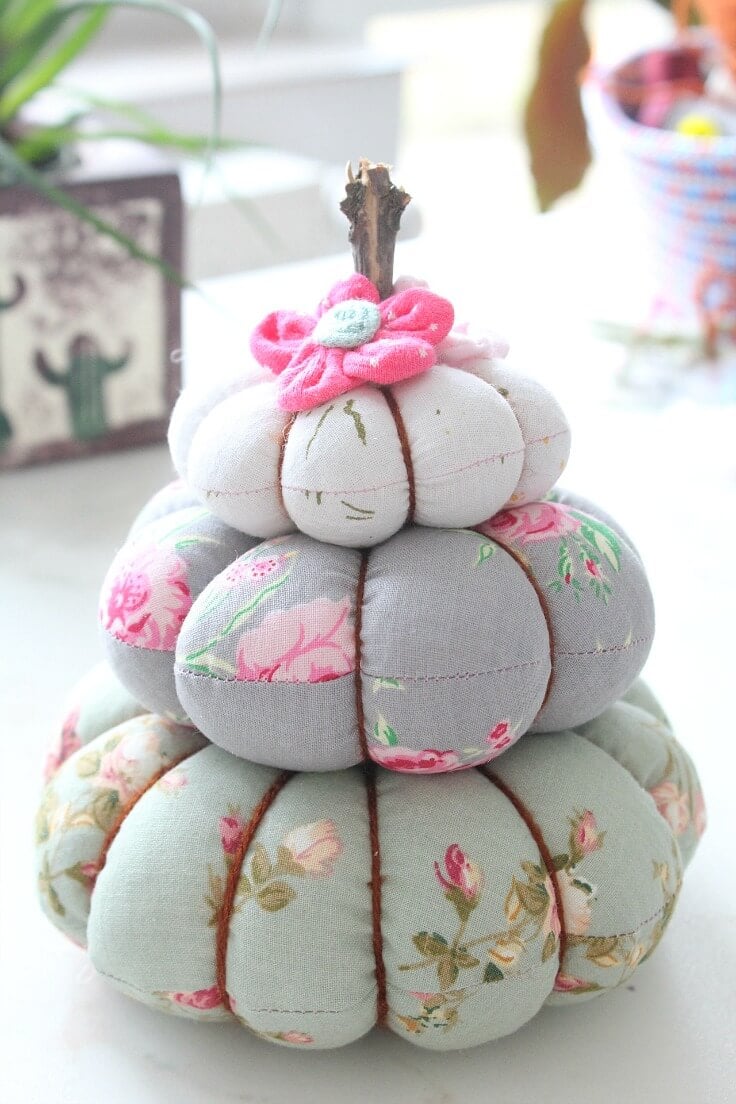
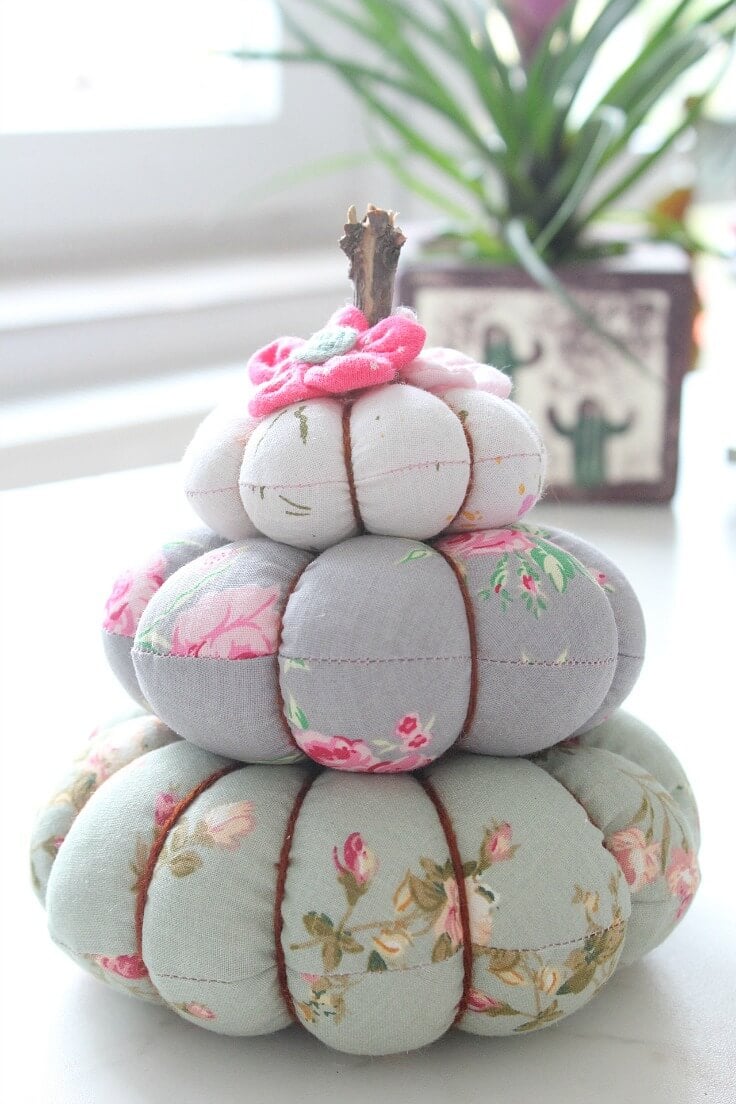
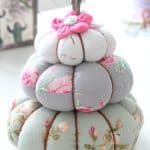
I’m in total love with this super cute DIY pin cushion! I wanted to make this trio pumpkin pincushion pattern so I can have a large pincushion available for my pins and needles. I have tons of those and I like to keep them handy, all in one place!
But I totally see all kinds of other uses for these adorable pincushion ideas like adorable home décor in fall or you could use them as door stops when filled with rice. This pumpkin pincushion would look adorable on a table top or mantel for the fall season and could also make a great gift. Fill them with lavender or scented fillings and they’ll make a great room or closet deodorizer!
I love this pincushion so much, I’m practically addicted to it! I keep it close by at all times and it’s filled with all kinds of pins (small, large, thin and thick). Although I own a gazillion pincushions (most of them I made myself), this one is by far my most favorite because it’s so practical, it can hold a ton of pins and is as cute as a button!
My pumpkin patch will be so happy (check out my other pumpkin tutorials here). Just imagine these sitting in the middle of your table at Thanksgiving! Ah-mazing! Everyone will be in awe!
How to make a DIY pin cushion in a pumpkin shape
Materials you need:
- Cardboard
- Compass
- 3 x coordinating fabrics
- sewing machine
- matching thread
- scissors
- ruler
- yarn
- pinking shears
- iron
- polyfill
- Large needle
- Small stick
- 2 fabric flowers
- Hot glue gun and hot glue stick
Step-by-step instructions
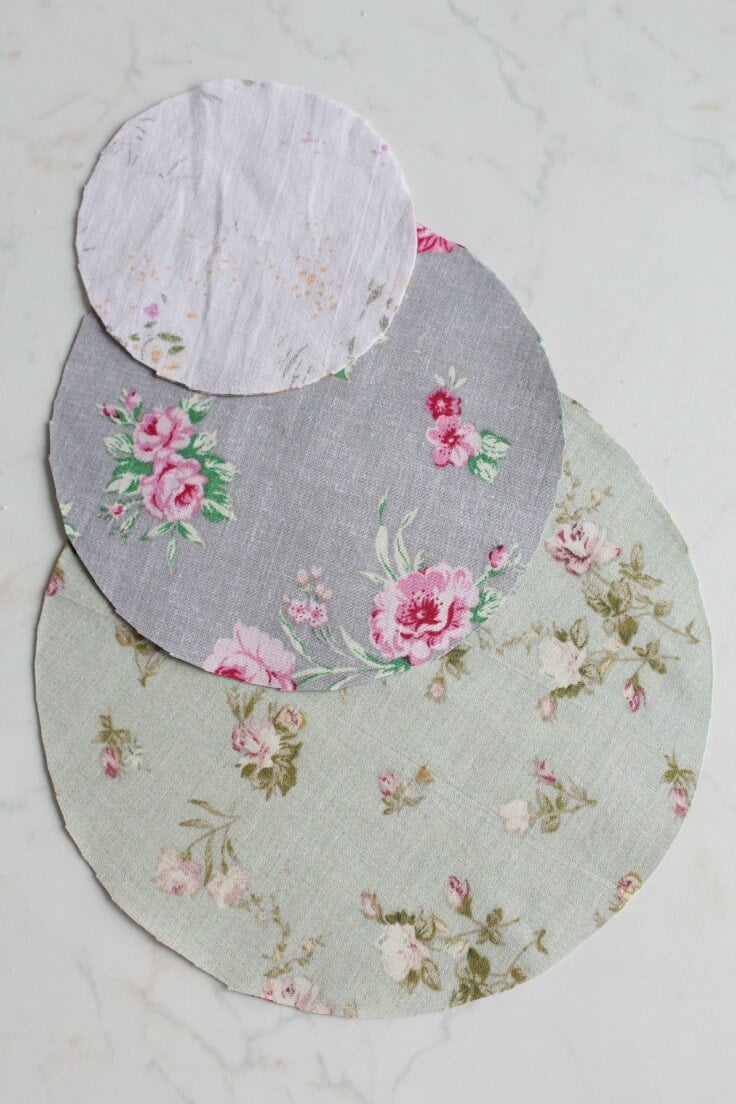
- Make 3 cardboard circle templates using your compass. My circles had diameters of 4″, 6″ and 8″
- Fold each of your fabrics in half, right sides together and trace around each circle then cut out.
- Sew around each circle, leaving a small opening for turning right side out and stuffing.
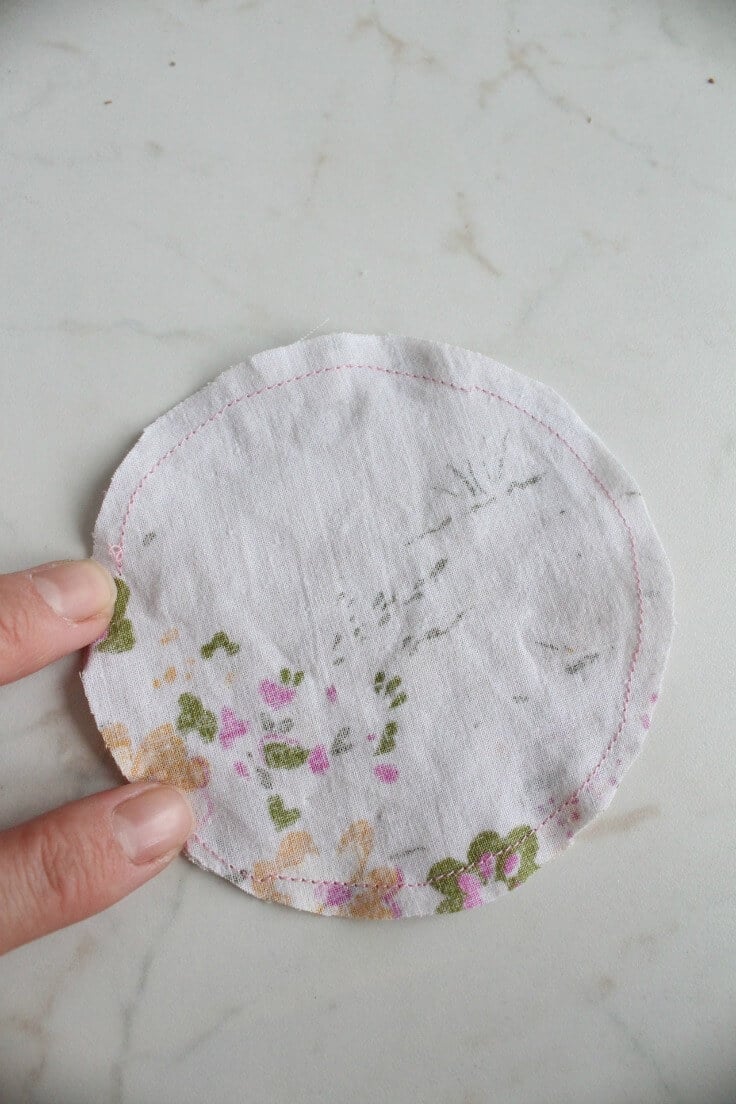
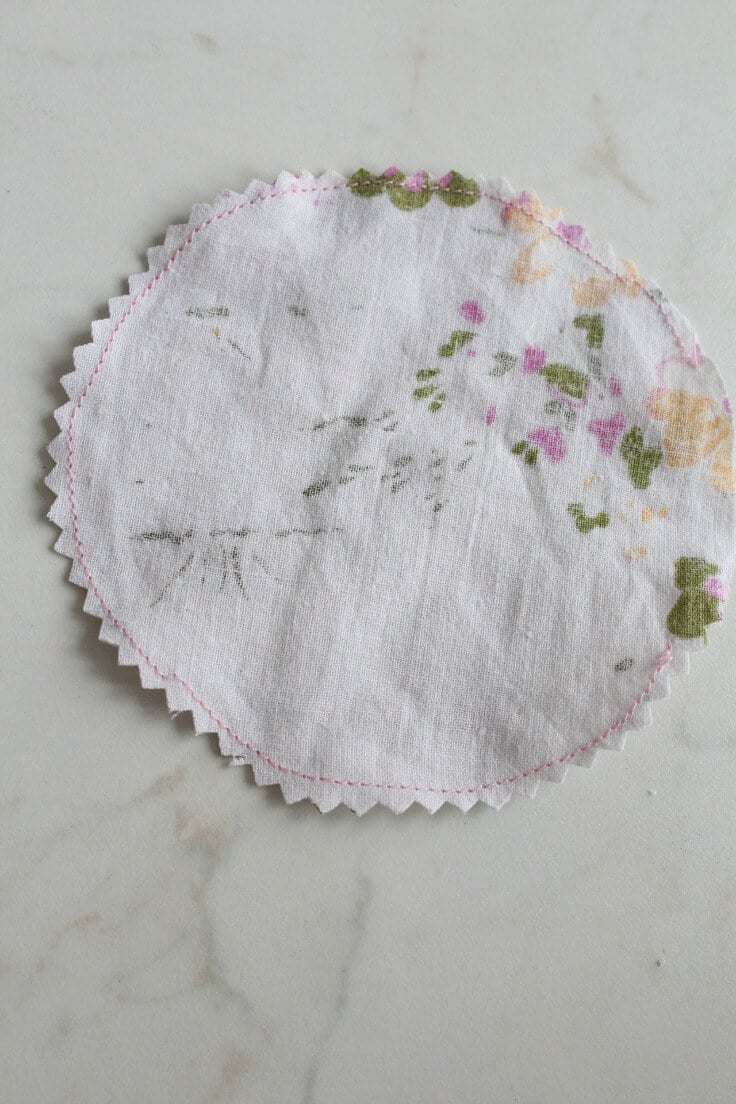
- Trim fabric excess with your pinking shears, making sure you don’t cut through the seam and turn circle right side out. Press.
- Stuff each pumpkin with fiberfill until you have a round-ish ball.
- Close the opening using a ladder stitch.
- With a large needle threaded with yarn, insert needle in the center of the ball from top to bottom.
- Take thread around the outside and insert in the same spot again. Pull tight to make a dent.
- Continue making the same stitch until you have divided the ball in four equal parts, then divide each quarter once or twice more (depends on how many sections you want your pumpkins to have and how big your pumpkin is. For my small one I divided only once, for the large one I divided twice more).
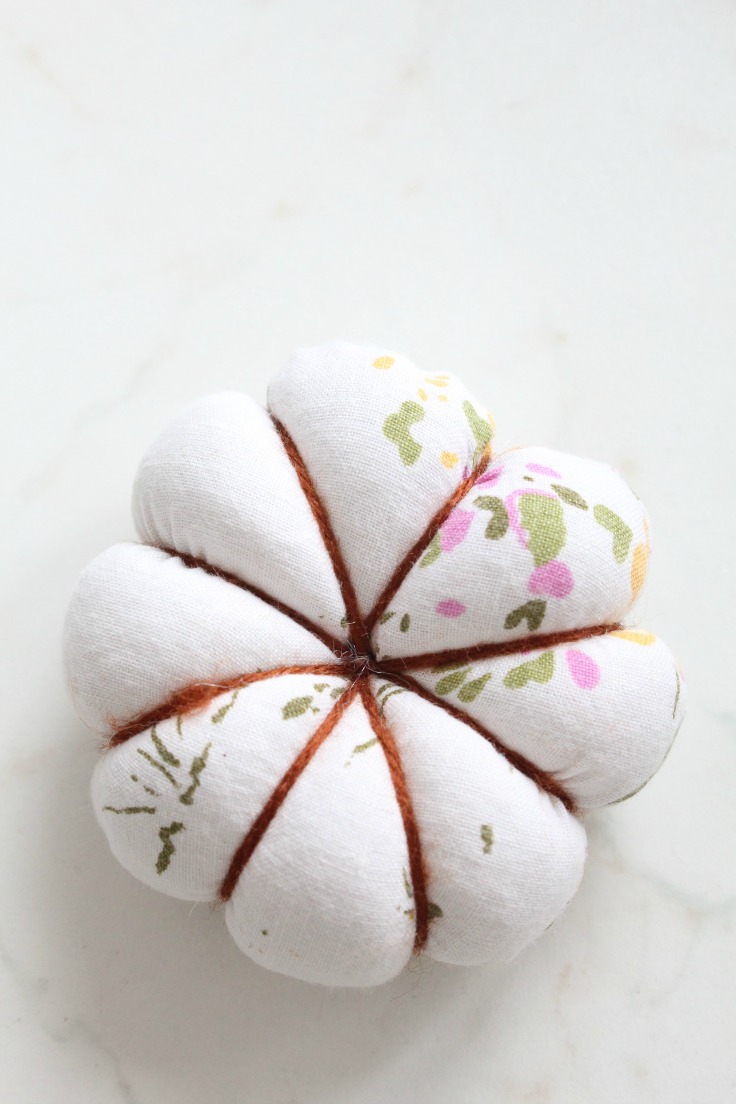
- Secure the last stitch with a knot.
- Attach all pumpkins together with the needle inserted through the center of each pumpkin.
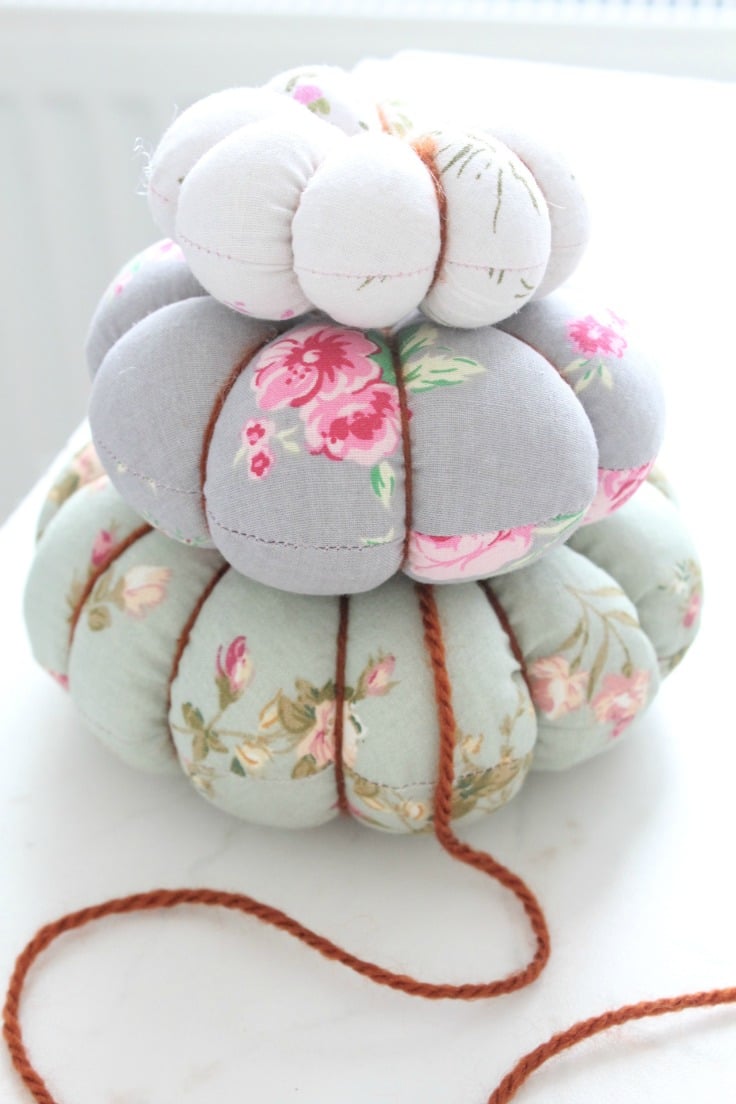
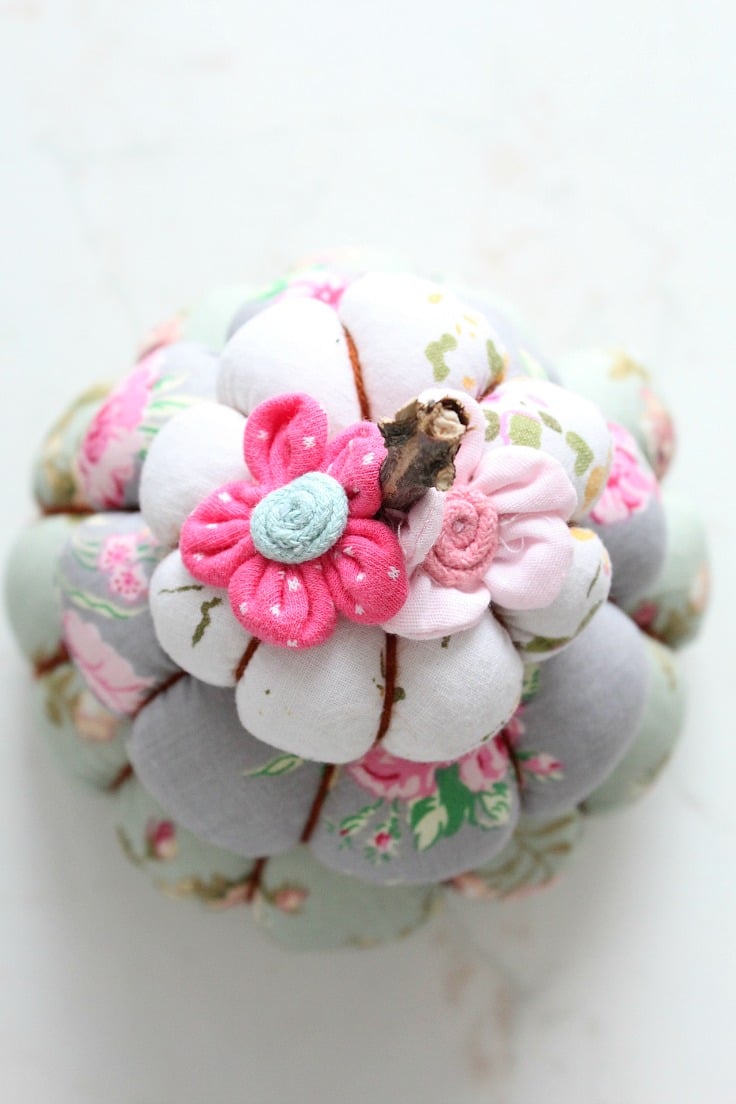
- Attach the stick to the top using your hot glue gun.
- Embellish with fabric flowers using your hot glue gun again.
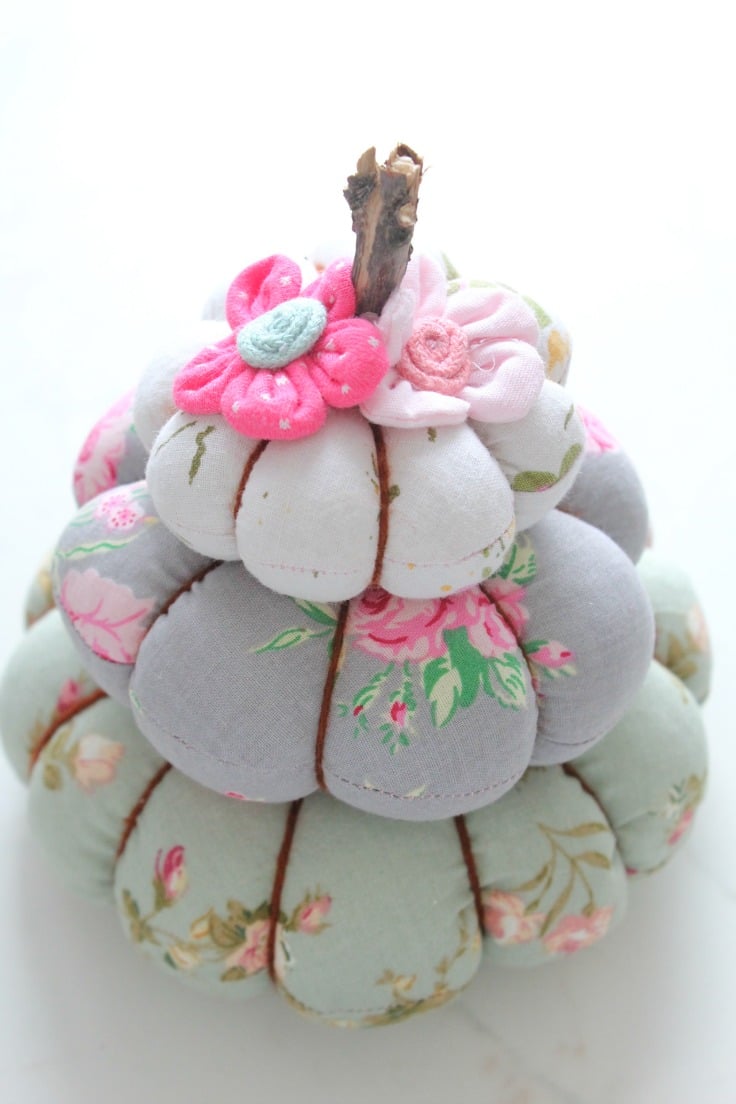
- And your pumpkin pincushion is done! So cute, right?
Similar ideas you will love:
- Inverse applique fabric coasters
- Triangle fabric weights tutorial
- Adorable chicken pattern weights
- Half square triangle patchwork pincushion
Frequently asked questions
What is the best thing to fill a pincushion with?
While poly-fill is the most popular filling used for pincushions there are also other alternatives if you don’t have poly-fill on hand such as:
- Quilting batting (second most popular option)
- Cushion filling from old cushions you have at home and no longer in use.
- Fabric scraps – just cut those scraps into even tinier scraps before filling the pincushion.
- Rice – this is a good alternative if you want a heavier, more stable pincushion. I do find it harder to use though as the pins are no going through as easier as with poly-fill or other similar fillings. Plus the sharp ends might bend if caught in one of the rice grains.
- Ground walnut shells
- Craft beads made from plastic or silicone
Can needles be sharpened using a pin cushion?
Yes, you can easily sharpen your pins and needles while storing if your choice of filling for the pincushion is steel wool! This type of filling keeps the pins sharp and in good condition every time you insert one into the pincushion, so it will extend the life of your pins and needles.
More beginner sewing ideas you’ll enjoy:
Cute and easy, this DIY pin cushion is quick to sew and a great beginners project! Also a good scrap buster! They look fabulous individually too but I think they’re pretty breathtaking when stacked up in a little tower. And since it’s a trio, you’ll have plenty of space for all those pins laying on your sewing table. So sweet!
If you liked this tutorial please let me know in the comments section below! Happy sewing!
DIY pin cushion in a pumpkin shape
Materials
- Cardboard
- Compass
- 3 x coordinating fabrics
- matching thread
- yarn
- polyfill
- 2 fabric flowers
Tools
- scissors
- ruler
- Iron
- Large needle
- Small stick
- hot glue stick
Instructions
- Make 3 cardboard circle templates using your compass. My circles had diameters of 4", 6" and 8"
- Fold each of your fabrics in half, right sides together and trace around each circle then cut out.
- Sew around each circle, leaving a small opening for turning right side out and stuffing.
- Trim fabric excess with your pinking shears, making sure you don't cut through the seam and turn circle right side out. Press.
- Stuff each pumpkin with fiberfill until you have a round-ish ball.
- Close the opening using a ladder stitch.
- With a large needle threaded with yarn, insert needle in the center of the ball from top to bottom.
- Take thread around the outside and insert in the same spot again. Pull tight to make a dent.
- Continue making the same stitch until you have divided the ball in four equal parts, then divide each quarter once or twice more (depends on how many sections you want your pumpkins to have and how big your pumpkin is. For my small one I divided only once, for the large one I divided twice more).
- Secure the last stitch with a knot.
- Attach all pumpkins together with the needle inserted through the center of each pumpkin.
- Attach the stick to the top using your hot glue gun.
- Embellish with fabric flowers using your hot glue gun again.
Most popular sewing projects:
- Tips for sewing a round hem
- Corded bag handles
- Flutter sleeve dress pattern
- How to laminate cotton fabric


Article may contain Amazon & affiliate links. As an Amazon Associate I earn from qualifying purchases at no additional cost to you.
ABOUT PETRO
Hi, I’m Petro, author and founder of Easy Peasy Creative Ideas. Sewist, crafter, avid DIY-er, foodie, photographer, homemaker and mommy to one. I’m an expert at coming up with quick, clever sewing tips, recycling crafts and simple, easy recipes! You can find my ideas featured in reputable publications such as Country Living, Good House Keeping, Yahoo News, WikiHow, Shutterfly, Parade, Brit & Co and more. Thanks for stopping by and hope you’ll stay for a while, get to know me better and come back another time. Stick around for real fun projects! Read more…