

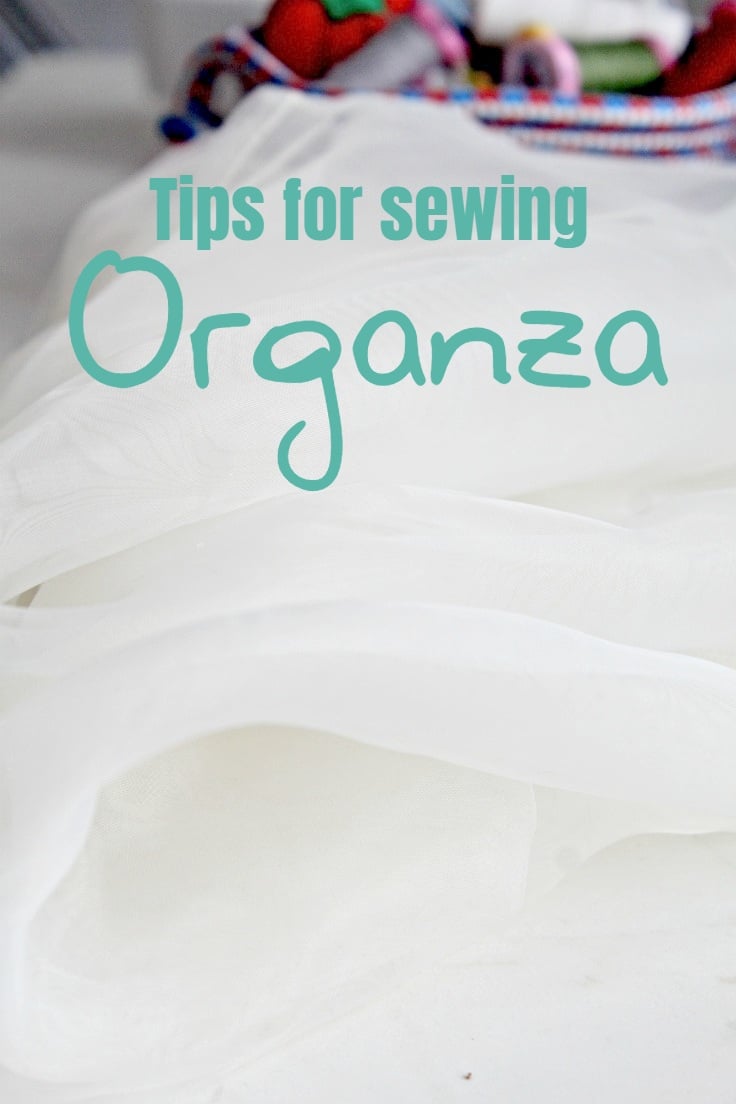
Sewing organza fabric easy tips & tricks
Sewing organza, such a stunningly beautiful and delicate fabric, can really take your sewing projects to the next level. While it might seem a bit scary at first to tackle such a fine material, just a few simple tips can make the whole process a lot easier. If you take a little time to get to know organza and follow these guidelines, you’ll be surprised at how quickly you become a pro at sewing with it.
While sewing organza can be quite challenging, requiring extra care throughout the entire process, I adore sheer fabrics like organza, which is perfect for holiday projects. It can be used to create stunning, flowing curtains or to fashion exquisite garments like wedding or prom dresses. Sewing it may seem daunting at first, especially if you’re not experienced in working with sheer fabrics. But fear not! Follow these tips for sewing with organza and you’ll soon conquer your fears and be able to create beautiful projects for yourself or your home with all kinds of sheer fabrics.
I know I did and I even managed to make my own curtains and window treatments which was a huge projects (I have sooo many windows!!). I wanted full curtains which meant a lot of material and sewing was involved. Before this, I used organza in a pretty simple project for my windows, because I needed a little practice before moving forward with larger and more difficult projects. My house had no curtains at that point and I wanted to make them myself. These tips for sewing organza proved to be very helpful and while the project took me some time to finish, I was pretty pleased with the results.
I think organza was the best match for this particular project since it’s sheer, has a lot of body and not much drape. And if you’re ready to take on a new adventure, here’s how to sew organza for the best results every time!
Tips and instructions for sewing organza
Materials you’ll need
- organza fabric
- pressing iron
- flannel fabric
- microtex sewing machine needle
- cotton thread
- sewing machine
- fine pins
- non slip ruler
- fabric weights
- sharp scissors
- tape – optional
Step by step instructions
Preparing the organza fabric
Just like with any other fabric, preparation is key when sewing organza.
- There’s no need to pre-wash organza as it will soften it. Unless of course you need it soft or to remove dust. If you need to wash the fabric before you start sewing as organza usually shrinks quite a bit. I would recommend using the delicate cycle on your washing machine and drying it on low heat or line drying to avoid any further shrinkage.
- Do press organza if needed. Adjust the pressing iron temperature accordingly. I used the lowest setting for my pressing iron. Use a dry iron for pressing instead of steam, I find steam a real trouble maker when it comes to organza and other sheer fabrics. Also using a damp ironing cloth is quite useful, especially if your fabric has difficult wrinkles.
Cutting organza
When cutting organza, it is important to use sharp shears and cut cleanly without dragging the fabric. If you must use pins, use very fine, sharp pins and place them close together. You can also try using small pieces of masking tape or sewing clips to hold the organza in place while cutting. Since it’s quite difficult to get a clean cut on sheer, slippery fabrics such as organza, use these tips for keeping the fabric still while cutting.
Keeping the fabric from slipping
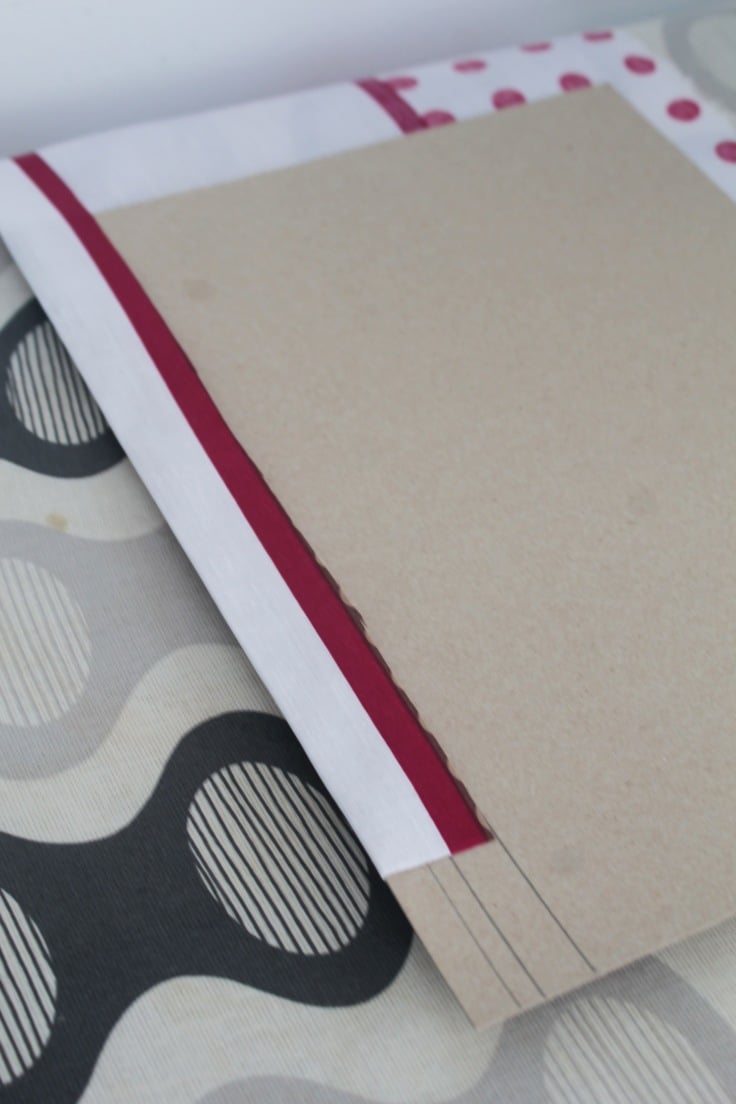
- Using a large, straight surface, place your organza fabric over a large piece of flannel fabric, muslin or a blanket before pressing (I was so lucky that my mom made me some bed sheets out of flannel for winter time! perfect size for my current needs).
- Lay it out straight and square up with this method and press using the method above. If unsure, place a piece of cotton cloth on top of your fabric before pressing.
- Then place a long non slippery ruler as close to the area where you’ll do the cut but leaving enough space to cut without having to pull the fabric. Place lots of fabric or pattern weights over the ruler then measure and mark with a fabric marker (make sure it’s a good quality one and that it comes off easily). You can also tape the opposite side of the organza to the working surface before cutting to make it even more stable and less slippery. Cut using very sharp sheers since any drag will distort the fabric.
Tips for pinning organza
Pinning the fabric won’t get you too far and can also damage the fabric but if you must use pins throughout your sewing project, use very fine, sharp pins and place them closer together.
Also here’s a little pinning trick that is valid for all sheer fabrics but particularly useful for organza which is probably the most difficult to measure, cut and sew: add small pieces of scrap fabric or paper to the spots where you need to add the pins. This way the pins will stay put.
Sewing with organza
Seam pucker is a nightmare and organza is particularly prone to it. Make sure you avoid it at all cost as it will ruin your organza garment. To avoid seam pucker try these tips:
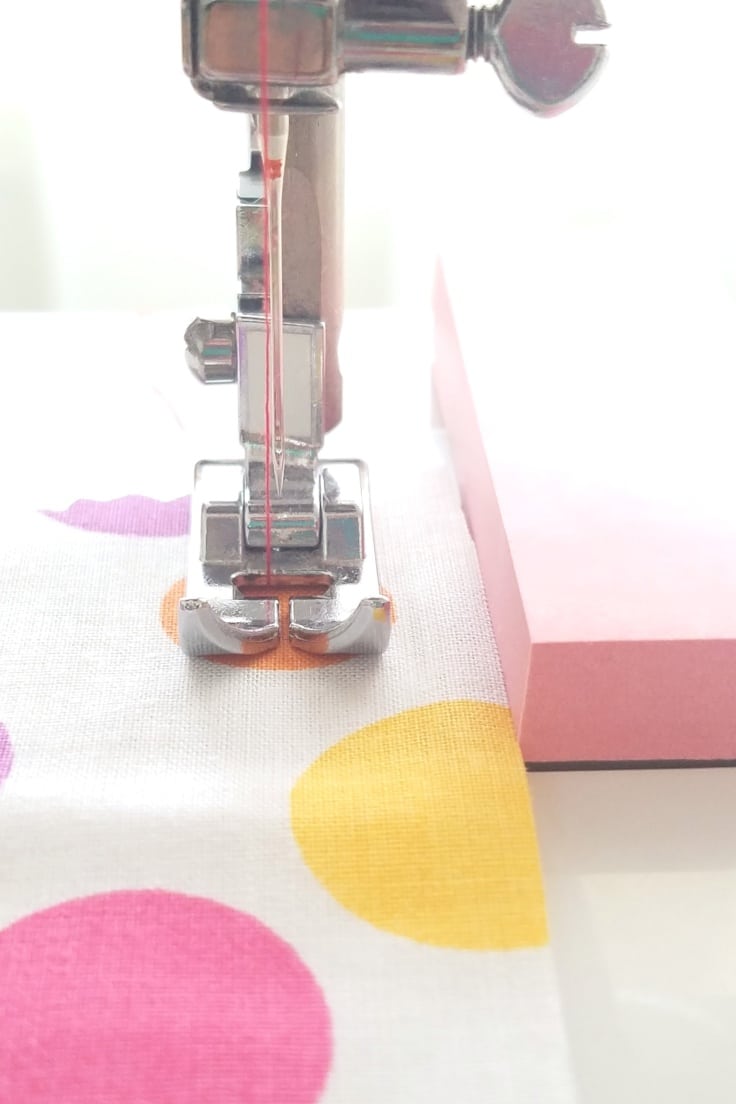
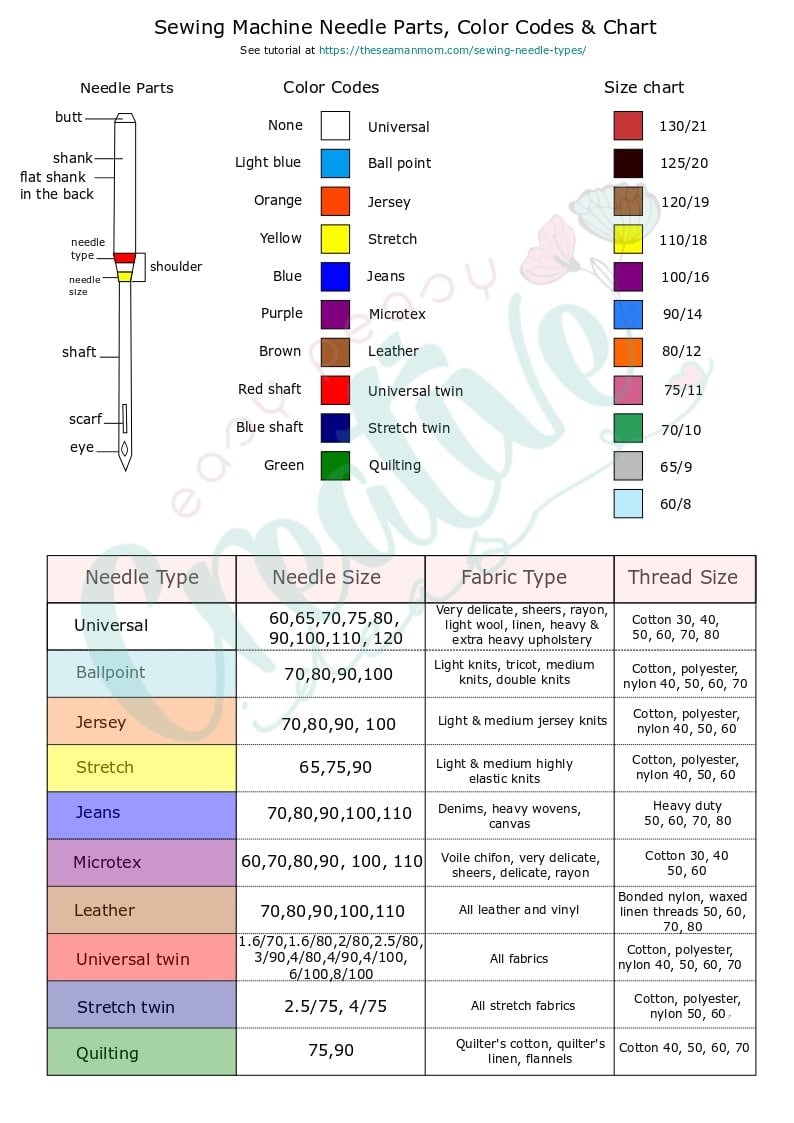
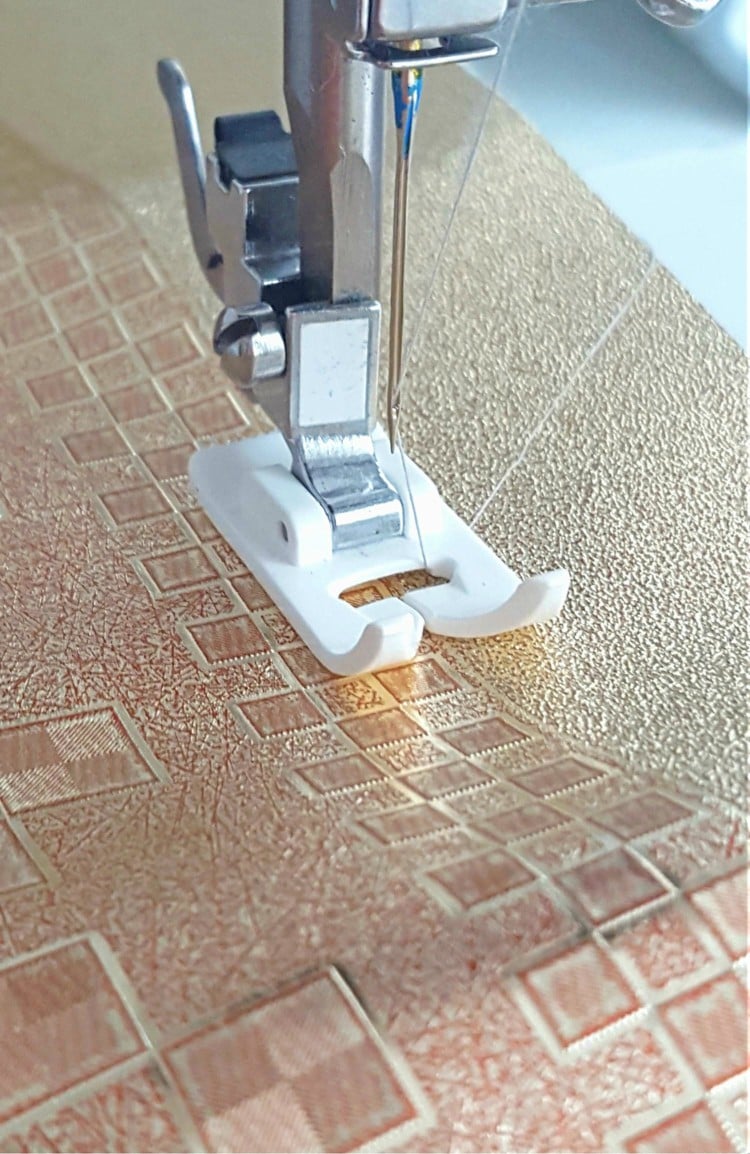
- Sewing organza requires a very sharp, small size needle (a 70/10 Microtex needle would normally do the trick but if you can still hear the needle pushing through the fabric, switch to an even smaller needle).
- Use regular weight cotton thread.
- Adjust presser foot tension as indicated in this tutorial.
- Use a straight stitch setting, smaller than you would normally use in a regular project.
- Before staring a larger project, test on a piece of fabric that all your settings, needle and thread are correct for your project.
- Organza might pucker while sewing so a good idea would be to hold the fabric in front and behind the presser foot while sewing. It makes sewing a little harder so sew slow.
- Do not backstitch as it will show and also distort the fabric; sheer fabrics get caught in the feed dogs easily when a backstitch is used. A piece of tissue paper placed at the start and end of a seam is helpful for preventing puckering.
How to finish organza edge (hems and seams)
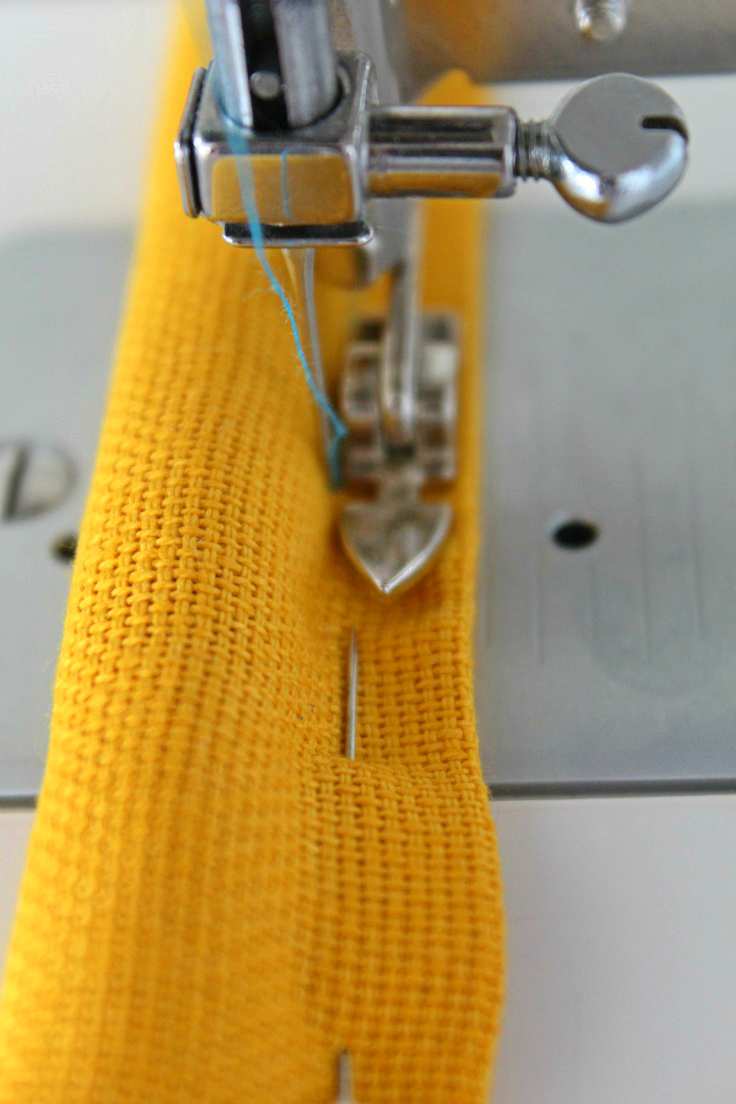
- To finish hems and seams in organza, make them as narrow and tidy as possible. A narrow hem is great, using either a serger, my preferred method here or a rolled hem. Hand stitching the hem is also a possibility but it will take a very long time for larger projects.
- A nice method for finishing seams is sewing a straight stitch seam, and then a narrow zig zag seam right next to it. Finish by trimming the fabric as close to the zig zag stitch as possible, using care not to cut through the stitch.
- Another great way to finish seams is a French seam.
- Do the hem as a last step after allowing the project to hang for a few hours; this helps the fabric to stretch out and ensures an even hem.
- If you need to add some seam stiffness, use thin interfacing to the edge of the seam before sewing.
Bonus tip
If you find your organza fabric a little too slippery and hard to handle, spray it first with some hair spray to stiffen it. Allow the spray to dry before handling the fabric again. The hair spray will help the fabric stay put while cutting and sewing and also it a great help when sewing the hem.
And it’s so easy to wash when the project is done. Just soak it in warm water and air dry in a shaded spot, avoiding the direct sun light as it might affect the color.
The best needle to use with organza
I experimented with a few types of needles and at one point I even tried a universal needle but with no success. The best needle to use when sewing organza is a sharp needle size 80/12. If you are working with a very light organza fabric, you might want to use a size 70/10 or even 60/8 needle. I’ve had amazing experiences with the microtex needles from Schmetz.
The best thread to use with organza
You want to use a very fine thread. The best type of thread to use when sewing organza is a fine polyester or silk thread. I personally like using polyester thread because it’s stronger than silk and can be used in both the needle and bobbin. It’s also less likely to break and is less expensive than silk thread.
Types of stitches that work best with organza
There are a few different types of stitches that work well with organza. The straight stitch, the zigzag stitch and the overcast stitch are all good options. I found that decorative or other fancy stitches tend to be too harsh for this delicate fabric.
You also need special needles for this kind of fabric, such as a microtex or hemstitch needle. It’s important not to pull the fabric while sewing or it will break.
The best tension you should use for organza
When sewing with organza, the tension should be set at a lower number than you would sew normally. If the tension is set too high, the fabric will pucker and become distorted.
The best sewing machine for sewing organza
Different machines have different capabilities, but in general, you want a machine that can sew at a slow speed and has a good zigzag stitch. You also want a machine that can handle delicate fabrics without damaging them.
I found that some of the best machines for sewing organza are the SINGER Quantum 9960, the Janome Memory Craft 9850, and the Brother Innovis NS1750D. I’m sure there are others too but these are my favorite for this fabric.
How to seal organza edges
If you want to seal the edges of your organza fabric before sewing, you can use a product called Fray Check from Dritz. This is a liquid that can be applied to the fabric to prevent it from fraying.
You can also use a product called hemming tape. This is a double-sided adhesive tape that can be used to seal the edges of the fabric. This will keep the fibers in place while you finish sewing your project. In this article you’ll learn everything you need to know about hem tape and how to use it.
How to hem organza without sewing
You can use the hemming tape and Fray Check liquid for finishing the hem without sewing. Seal the raw edges first, using Fray Check, then fold the hemline in twice, then apply the hemming tape.
How to hem organza with a serger
If you are looking for a hem that is lightweight, durable and stretchy then the overlock stitch on your serger is ideal. This type of stitch will work well with most fabrics, but it’s perfect for organza because it allows the fabric to stretch without compromising the strength. However you need to reinforce the hem before you stitch it otherwise the hem will break.
- First, apply hemming tape across the hemline to reinforce it, then fold the fabric under at the hemline and pin in place.
- Next, with the fabric still folded under, sew close to the edge of the fabric. You can use a basting stitch, just to keep the hem in place while going through the next step.
- Finally, use an overcast stitch on your serger to finish the edge of the hem, catching the fold. Keep it inside the reinforced part of the hemline.
- Next, remove any excess fabric as close to the serged hem as possible.
Q&A you might find useful
What is organza fabric?
Let’s start with the basics, what is organza? Just in case you don’t know, organza is a sheer fabric made from silk or polyester. It has a lot of body and not much drape which means it will hold its shape pretty well. It’s often used for wedding dresses, prom dresses, bridal veils, evening wear, sheer curtains, for event decoration or home décor pieces.
Organza is a very glamorous and elegant fabric, preferred by fashion designers when creating decadent silhouettes, for its shiny appearance and the way it flows and moves.
What is the difference between chiffon and organza?
This is a great question as organza and chiffon fabrics are often confused. Both organza and chiffon are sheer and have a lot of body but they are different in many ways. The main difference between organza and chiffon is the fabric’s hand.
Organza has a crisp hand while chiffon is soft and fluid. Chiffon is also more delicate than organza and can be made from silk, nylon or polyester.
Chiffon has more drape than organza which makes it perfect for flowing garments.
Another difference is that organza is often used as an overlay while chiffon can be used as an underlay too.
What is the difference between organza and tulle?
While they are both synthetic fabrics, they are quite different. Tulle is also sheer but it’s much softer than organza and has a lot more drape.
The thread count in organza is much higher which makes it a little stiffer. As for the weave, organza is a plain weave fabric while tulle is netted weave. This makes tulle more delicate than organza and can tear easily if not handled carefully.
Tulle is often used for tutus, veils or as an underlay for bridal gowns or formal skirts and dresses.
How many types of organza are there?
There are a few different types of organza fabric, typically available in several different fibers with most common being silk, nylon and polyester. Silk organza is the softest type of fabric of the genus, with high breathability, and has a beautiful sheen. It’s also the most expensive organza you can find. Nylon or polyester offer a crisper hand. Mine was nylon which was just great for what I needed and wanted in my curtains.
There are also matte and shimmery types and some are embellished with design motifs making organza perfect to use in formal wear. No matter your choice, these simple tricks for sewing organza will get you through your project successfully!
What is crystal organza?
Crystal organza, also known as twinkle organza is a sheer, lightweight fabric with a slightly crisp hand, and has an all over sparkle or crystal feel and texture. The weft threads are twisted while the warp has smooth yarns which gives it a subtle sparkling effect. It is often used for special occasion garments, stage costumes and interior decorating.
What is mirror organza?
Mirror organza is a lightweight, sheer organza fabric with an all over glittery or metallic sheen to it that gives the fabric a reflective surface. It’s often used as a decorative fabric for wall treatments, event decoration, wedding backdrops, table runners, or other special occasion accessories and decorations.
What types of fabrics work well with organza?
Organza can be paired with a variety of different fabrics, such as cotton, silk fabric, rayon or satin which can be used as base materials in garments. Organza is great to use as an overlay for these fabrics, perfect for making glamorous garments and accessories such as wedding dresses and bridal veils.
Do satin and organza look good if combined?
Satin is often considered a type of silk but they are quite different. By comparison, satin is considered low-quality as it’s made of synthetic materials while silk has natural fibers. Regardless of this, satin and organza is a great combination as they complement each other very well. Both fabrics are often used in formal garments and can make a great combo for wedding gowns, bridesmaids dresses, evening gowns or any other formal occasion.
Is it hard to sew organza?
While it is not the easiest fabric to sew because it frays very easily, organza is very pretty when used to make bridal veils and dresses. When sewing with some types of very thin organza you need to start by basting the seam or reinforce it with some type of thin interfacing like hem tape, in order to stabilize the fabric.
As a beginner, start with some simple designs and projects such as drapes until you get comfortable with sewing this fabric. An intricate design can only add up to your frustrations. And make sure you practice a lot before moving onto an actual project.
Can organza be ironed?
While organza is a delicate fabric, it can be ironed on a low setting. It’s best to use a press cloth to protect the organza from the iron. You should not use an iron directly on organza. The heat will cause the fabric to melt and become distorted. You can also use a steamer to press the fabric.
I like to use dry heat set to a low level and use a cloth on top of the fabric. I also press using an up and down motion rather than back and forth motion, to avoid distorting the fibers. You don’t need to apply much pressure with the iron, especially if you’re using a damp cloth on top.
Can organza be washed?
Organza is a delicate fabric and should be hand washed in cool water with a mild detergent. You can also dry clean organza. Air dry organza instead of using a drying machine.
Can organza be dyed?
Organza can be dyed, but it’s best to have it done professionally. You can also buy organza that has been pre-dyed. If you decide to do it at home, make sure to use a dye that is made for delicate fabrics.
You should also test the dye on a scrap piece of organza before you start, to make sure that it’s the color you want.
Storing organza fabric
For the best storage, organza should be rolled rather than folded and the roll should be placed in an upward position. This will help to prevent creases and wrinkles in the fabric. You can also store organza in a cotton bag to protect it from dust and dirt.
Organza is a delicate and beautiful fabric that can be used for a variety of sewing projects. With a little bit of careful planning and the right tools, you can successfully sew with organza fabric!
More sewing tips you’ll enjoy:

- Two cool bobbin storage ideas
- DIY hem gauge
- Adjusting bobbin tension on sewing machines
- DIY seam guide
- Sewing needle types & size chart
- How to hem lightweight fabrics
- Sewing vinyl tips & tricks
- Tips for sewing canvas fabric on a home sewing machine
If you found these tips both useful and informative, please let me know your thoughts in the comments section below. Your support means the world to me, and I am truly grateful for it.
Stay tuned for more updates as I continue to share my knowledge and insights with you. To ensure that you don’t miss out on any upcoming tips or tutorials, please make sure to subscribe to my newsletter. Happy sewing!

Sewing organza with a home sewing machine
Materials
- organza fabric
- flannel fabric
- cotton thread
Tools
- microtex sewing machine needle
- fine pins
- non slip ruler
- fabric weights
- pressing iron
- hemming tape optional
Instructions
Preparations
- There's no need to pre-wash organza as it will soften it. Unless of course you need it soft or to remove dust. If you need to wash the fabric before you start sewing as organza usually shrinks quite a bit. I would recommend using the delicate cycle on your washing machine and drying it on low heat or line drying to avoid any further shrinkage.
- Do press organza if needed. Adjust the pressing iron temperature accordingly. I used the lowest setting for my pressing iron. Use a dry iron for pressing instead of steam, I find steam a real trouble maker when it comes to organza and other sheer fabrics. Also using a damp ironing cloth is quite useful, especially if your fabric has difficult wrinkles.
Cutting organza fabric
- When cutting organza, it is important to use sharp shears and cut cleanly without dragging the fabric. If you must use pins, use very fine, sharp pins and place them close together. You can also try using small pieces of masking tape or sewing clips to hold the organza in place while cutting. Since it's quite difficult to get a clean cut on sheer, slippery fabrics such as organza, use these tips for keeping the fabric still while cutting.
- Using a large, straight surface, place your organza fabric over a large piece of flannel fabric, muslin or a blanket before pressing (I was so lucky that my mom made me some bed sheets out of flannel for winter time! perfect size for my current needs). Lay it out straight and square up with this method and press using the method above. If unsure, place a piece of cotton cloth on top of your fabric before pressing. Then place a long non slippery ruler as close to the area where you'll do the cut but leaving enough space to cut without having to pull the fabric. Place lots of fabric or pattern weights over the ruler then measure and mark with a fabric marker (make sure it's a good quality one and that it comes off easily). You can also tape the opposite side of the organza to the working surface before cutting to make it even more stable and less slippery. Cut using very sharp sheers since any drag will distort the fabric.
- Pinning the fabric won't get you too far and can also damage the fabric but if you must use pins throughout your sewing project, use very fine, sharp pins and place them closer together. Also here's a little pinning trick that is valid for all sheer fabrics but particularly useful for organza which is probably the most difficult to measure, cut and sew: add small pieces of scrap fabric or paper to the spots where you need to add the pins. This way the pins will stay put.
Tips for sewing organza
- Sewing organza requires a very sharp, small size needle (a 70/10 Microtex needle would normally do the trick but if you can still hear the needle pushing through the fabric, switch to an even smaller needle).
- Use regular weight cotton thread.
- Adjust presser foot tension as indicated in this tutorial.
- Use a straight stitch setting, smaller than you would normally use in a regular project.
- Before staring a larger project, test on a piece of fabric that all your settings, needle and thread are correct for your project.
- Organza might pucker while sewing so a good idea would be to hold the fabric in front and behind the presser foot while sewing. It makes sewing a little harder so sew slow.
- Do not backstitch as it will show and also distort the fabric; sheer fabrics get caught in the feed dogs easily when a backstitch is used. A piece of tissue paper placed at the start and end of a seam is helpful for preventing puckering.
How to finish seams and hems
- To finish hems and seams in organza, make them as narrow and tidy as possible. A narrow hem is great, using either a serger, my preferred method here or a rolled hem. Hand stitching the hem is also a possibility but it will take a very long time for larger projects.
- A nice method for finishing seams is sewing a straight stitch seam, and then a narrow zig zag seam right next to it. Finish by trimming the fabric as close to the zig zag stitch as possible, using care not to cut through the stitch.
- Another great way to finish seams is a French seam.
- Do the hem as a last step after allowing the project to hang for a few hours; this helps the fabric to stretch out and ensures an even hem.
- If you need to add some seam stiffness, use thin interfacing to the edge of the seam before sewing.
Most popular sewing projects


Article may contain Amazon & affiliate links. As an Amazon Associate I earn from qualifying purchases at no additional cost to you.

Hello Petro.
Thank you for the tips here on sewing organza. I’m in the middle of my first project with this kind of fabric.
You talk about using hemming tape. I’m a bit confused as to what exactly you mean. Are you talking about the heat fusible kind?
Would you mind giving specific details please? I would appreciate it so much.
Thank you
I’m glad I’ve found this post!
I was wondering how to sew my organza curtains without ruining such a nice fabric… It went just great!
thank you for sharing
Thanks so much for your lovely feedback!