Genius bobbin storage ideas
Looking for inspiring ideas for thread and bobbin storage? Storing and organizing your spools and bobbins doesn’t have to cost you a thing when you make these bobbin storage ideas yourself!
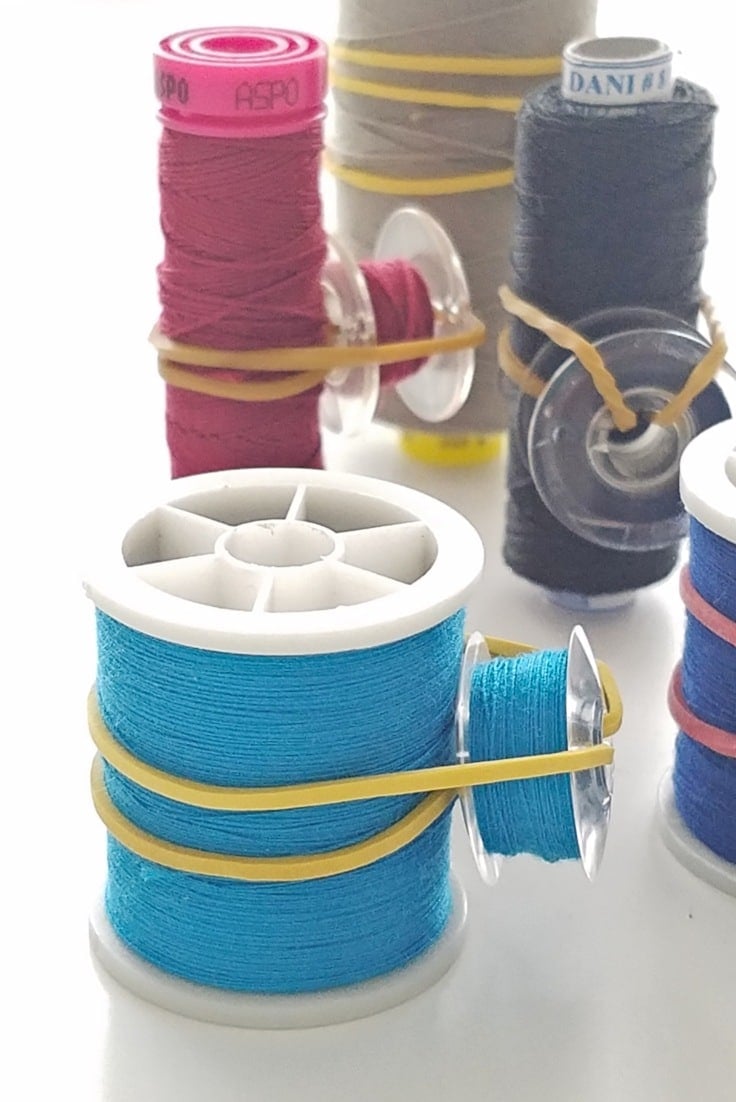
Hey guys! Today’s tutorial is gonna be real quick! I just wanted to show you my bobbin storage solutions in case you’re dealing with a case of messy sewing room. Trying to keep all those crazy spools and bobbins in check but they keep ending up all tangled messy and hard to use? These bobbin storage tips are real live savers!
This blog post has been converted to an optional PDF that’s optimized for printing. Find it here. The blog post below is totally free to read! The Optimized for Printing PDF download for $2 is totally optional.
I started sewing a few years back and I’ve had troubles keeping my notions and supplies in order since day 1! Their number keeps growing with every project, so it’s a continuous challenge. With so many tools, fabrics, threads and things to work with, finding what you need in a short time can get complicated.
Frugal sewers would use the same bobbins, again and again, winding over an already-wound bobbin, and not keep tens of half-wound bobbins around the whole room. Who knows if we don’t need the same color again for a smaller project someday? (never mind we add so many layers, that sometimes we even forget what colors we have, or that the color we need is the last one on the bobbin). For those of us who like to move fast but stay neat and organized, this is not an option. We want to find the right one quickly!
Want more quick sewing tips?
- Make your own hem gauge
- How to adjust bobbin tension
- How to adjust presser foot pressure
- DIY seam guide
- Proper seam ripped use
- DIY spaghetti straps
- How to match stripes
- How to sew sharp corners
- Sewing room organization
- Sewing needle pincushion organizer
- Easiest way to sew a zipper
- How to sew perfect mitered corners
For those of you that are really patient, I heard of some quilters that only use two bobbins for a whole quilt. They are not using thread frugally, but keep one bobbin in the winder, and the other in the machine. When the one in the machine is finished, they just switch places. I think that is a fantastic idea and I’ve recently started using this tip with great success!
I’m a freak when it comes to keeping my house tidy but I had to relax a bit regarding my sewing room. It was just too much to handle, I had no choice! It’s been a learning curve but I think I finally got the hang of it and my sewing room looks much better than before. These bobbin organizer ideas contributed greatly!
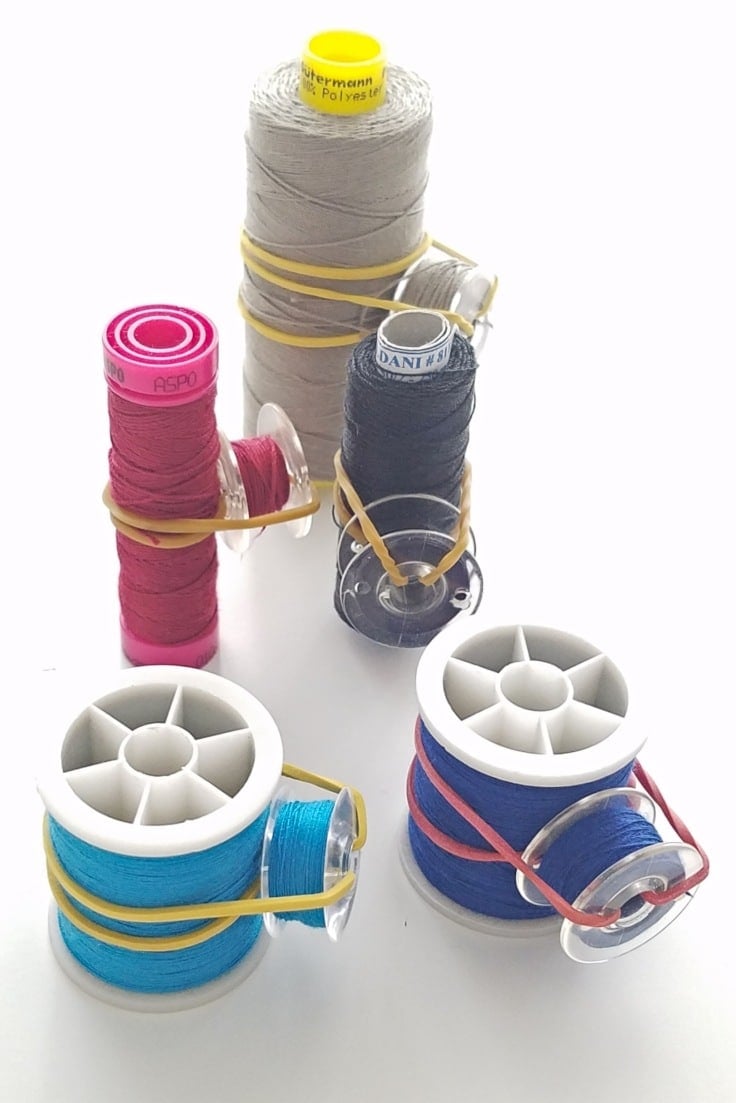
Of course, there are specialized bobbin storage towers, bobbin doughnuts or other dedicated solutions, but you have to go shopping or ordering them online, thus spend more money on them. My DIY bobbin holder solutions in this tutorial are always at hand and cost (almost) nothing.
Most popular sewing projects:
- Girls flutter sleeve dress Pattern
- How To Laminate Fabric At Home
- How to make corded handles for bags
- Easy Peasy Tips On How To Hem A Curve
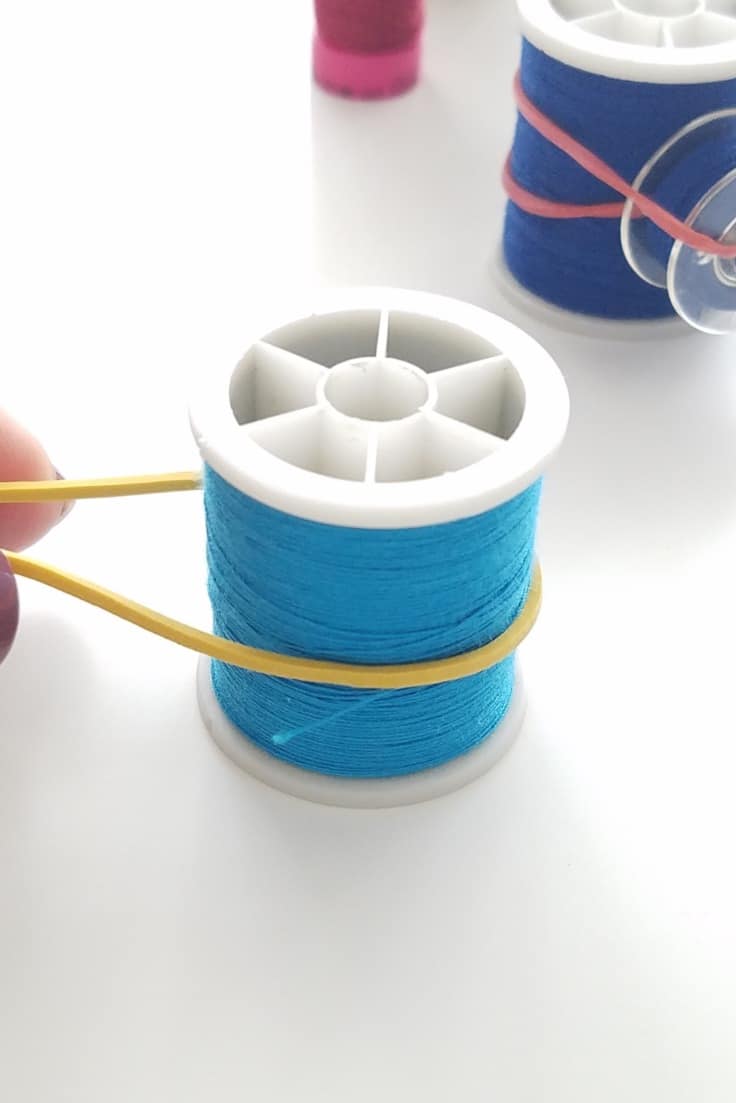
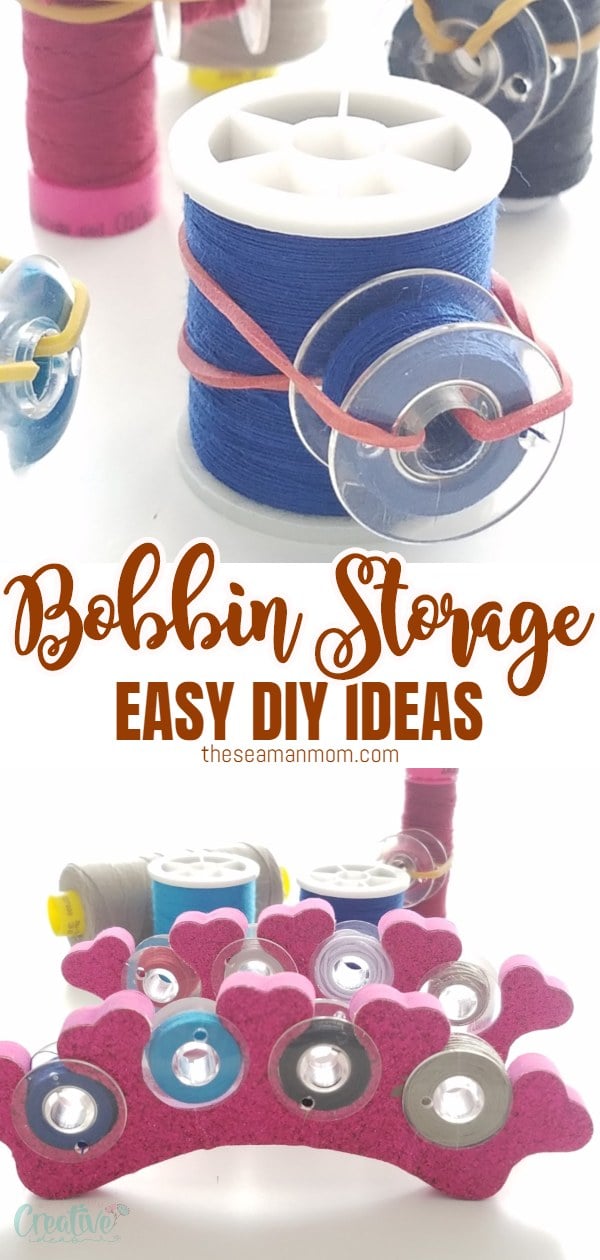
When it comes to bobbin storage I have two main handy solutions. If I know I’ll be sewing with the same thread colors for a while, I prepare those spools, I wind the bobbins, sometimes multiple bobbins per spool if the project is big and attach the bobbins to the spool as seen in the photo above. This works great for thread and bobbin storage! I’ll highlight the exact steps in the step by step description below.
Most times though I simply use a toe separator to store my bobbins, so this is my second solution. Honestly I prefer this option, to me it not only looks better but the bobbins are tightly stored so the thread never unwinds. The toe separators are cheap and if you find some with glitter as mine, they’ll add a nice dose of cuteness to your sewing room.
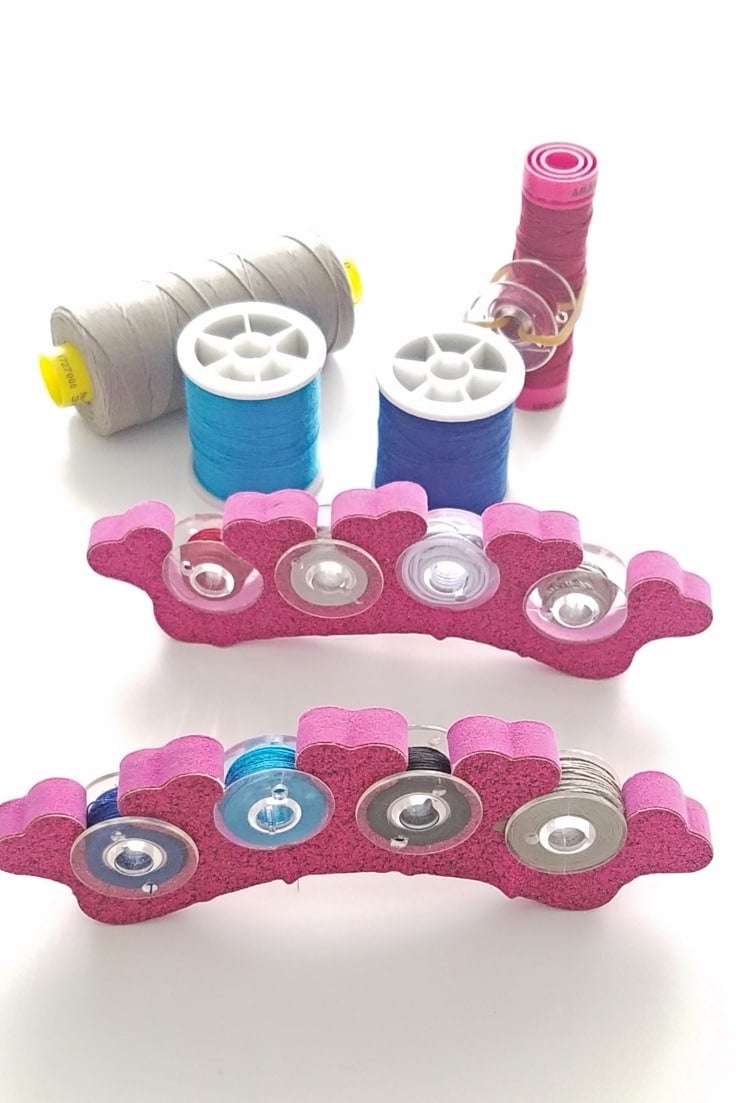
How to keep bobbin thread from unraveling
In addition to the toe separator idea which is great at keeping the thread ends under control, I have a couple of “tricks” to keep my bobbins from unraveling when not in use.
- I spray a little hair spray on my fingers and smooth out the thread ends in the bobbin. Once they’re all tamed, I spray a little more hair spray directly onto the thread ends then I allow the spray to dry before storing the bobbins.
- I get a plastic or rubber tube (a large straw would work too) and cut a bit of the end. Then I cut this piece in half, height-wise and insert the halves into the bobbin as stoppers for the thread ends.
What is a good sewing thread spool storage
There are several ways you can keep spools organized. My favorite method is keeping the stool stored into cups or plastic containers that are sturdy and roomy enough to hold a spool. For example, pill storage boxes, tackle boxes and ice cube trays make great storage spaced for spools and bobbins. I like to keep my spools organized like this in a drawer under my sewing desk because when I need to use the spools I just grab the container from the drawer, place it behind my sewing machine, thread my machine and start sewing. Makes it so convenient and the spools and the tread are always organized and tidy.
I keep all the treads and spools in a little cabinet I bought from Ikea. I store the cabinet right under my sewing table so they’re always easy to reach, making my life so much easier and my sewing projects a little faster. Here’s how I do the bobbin storage number one. It may seem silly but someone has to teach silliness too lol
Other ways of storing spools and bobbins
- Metal bobbins rest just well on a magnet band on the wall, though this won’t work for plastic ones;
- Embroidery hoops and some wood sticks or nails would make a quick bobbin rack;
- Also, large metal or plastic rings do just well for storing bobbins, but the thread would still unravel if you don’t stick it in place;
- Clear jewelry organizers with pockets can hang on the inside of your closet to save space;
- To prevent unraveling, old hair ties are great helpers. We all have some extras that we don’t use. If not, those from the dollar store do just great;
- DIY thread racks are another handy way to keep your bobbins organized, but it does take some time to make one yourself. You can always buy one if you like to keep them like this. A quicker way would be using a pegboard.
My favorite storage solutions are the ones that keep the spool with a matching bobbin so that I don’t need to search for or thread a new bobbin every time.
Bobbin storage ideas
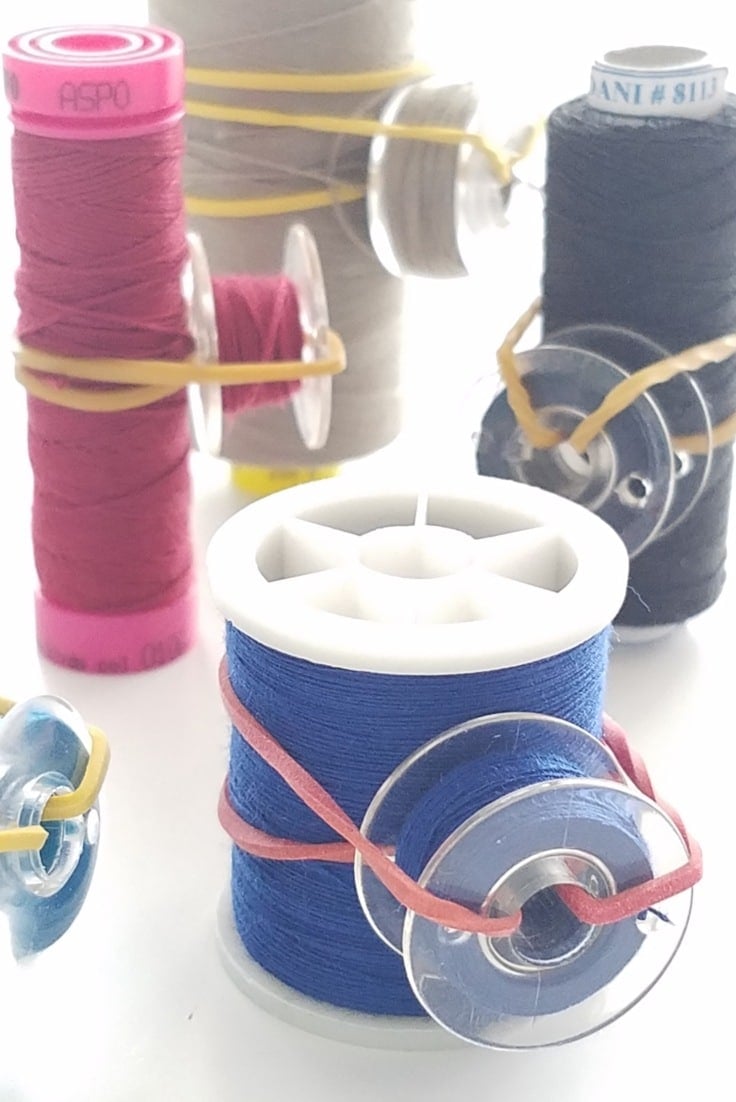
Materials:
- spools of thread
- corresponding bobbins
- elastic bands
How to store bobbins?
- Pull the elastic band over the spool of thread.
- Insert the opposite end into the bobbin until the end reaches the other end of the bobbin.
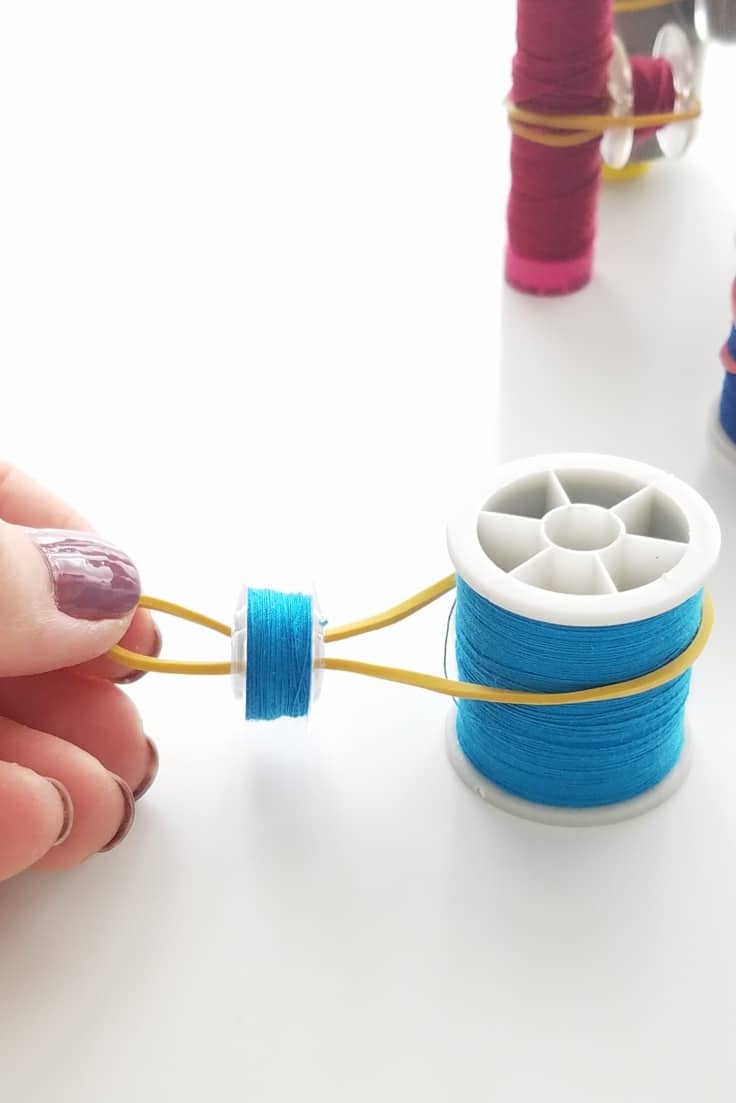
- Grab this end and pull it over the spool as you did in the first step.
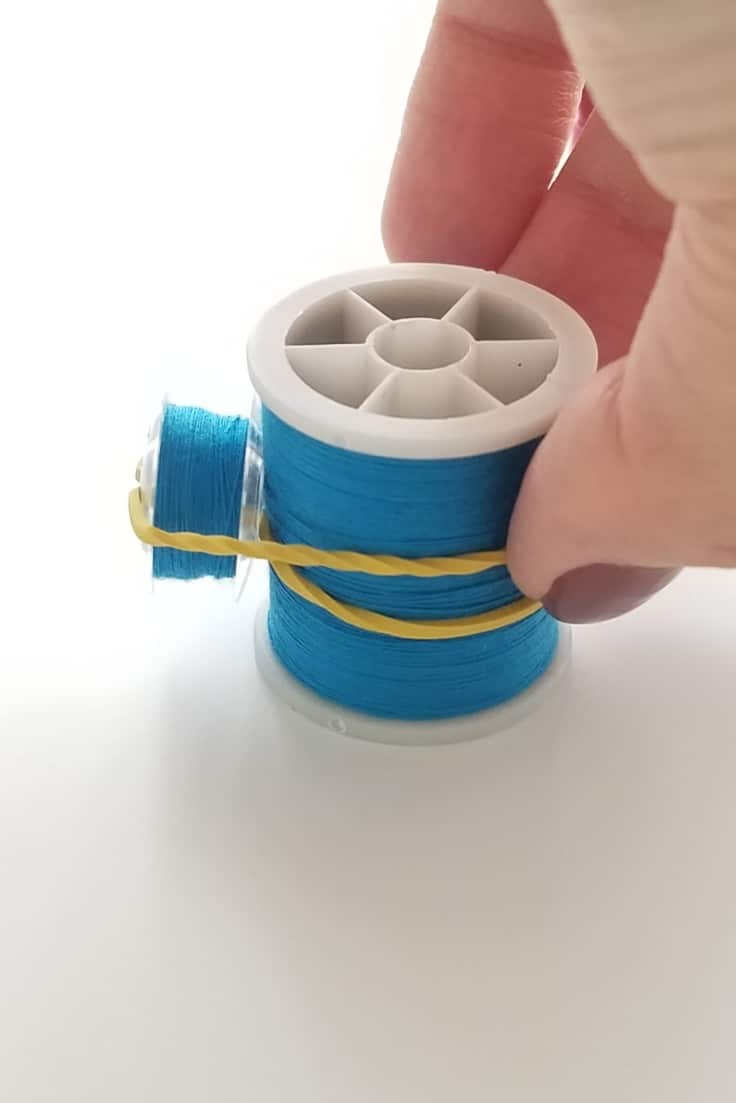
- A little tip you might have missed above: to prevent the thread from unwinding on both the spool and the bobbin I spray the ends of the thread with hair spray. Then I move the elastic so that it covers the thread end on the spool to make it even more secure.
- And that’s pretty much it!
I find that this is the coolest DIY bobbin storage idea and an excellent solution to keep spools and corresponding threads together! And my go to way of keeping my spools and bobbins organized by color!
If you liked these tips, please let me know in the comments below! And also, what is your favorite way of storing spools and bobbins, and why?
Pin to save for later
Article may contain Amazon & affiliate links. As an Amazon Associate I earn from qualifying purchases at no additional cost to you.


ABOUT PETRO
Hi, I’m Petro, author and founder of Easy Peasy Creative Ideas. Sewist, crafter, avid DIY-er, foodie, photographer, homemaker and mommy to one. I’m an expert at coming up with quick, clever sewing tips, recycling crafts and simple, easy recipes! You can find my ideas featured in reputable publications such as Country Living, Good House Keeping, Yahoo News, WikiHow, Shutterfly, Parade, Brit & Co and more. Thanks for stopping by and hope you’ll stay for a while, get to know me better and come back another time. Stick around for real fun projects! Read more…